Setting up Tracking Emails
By default, when your customer area is created, tracking emails are disabled.
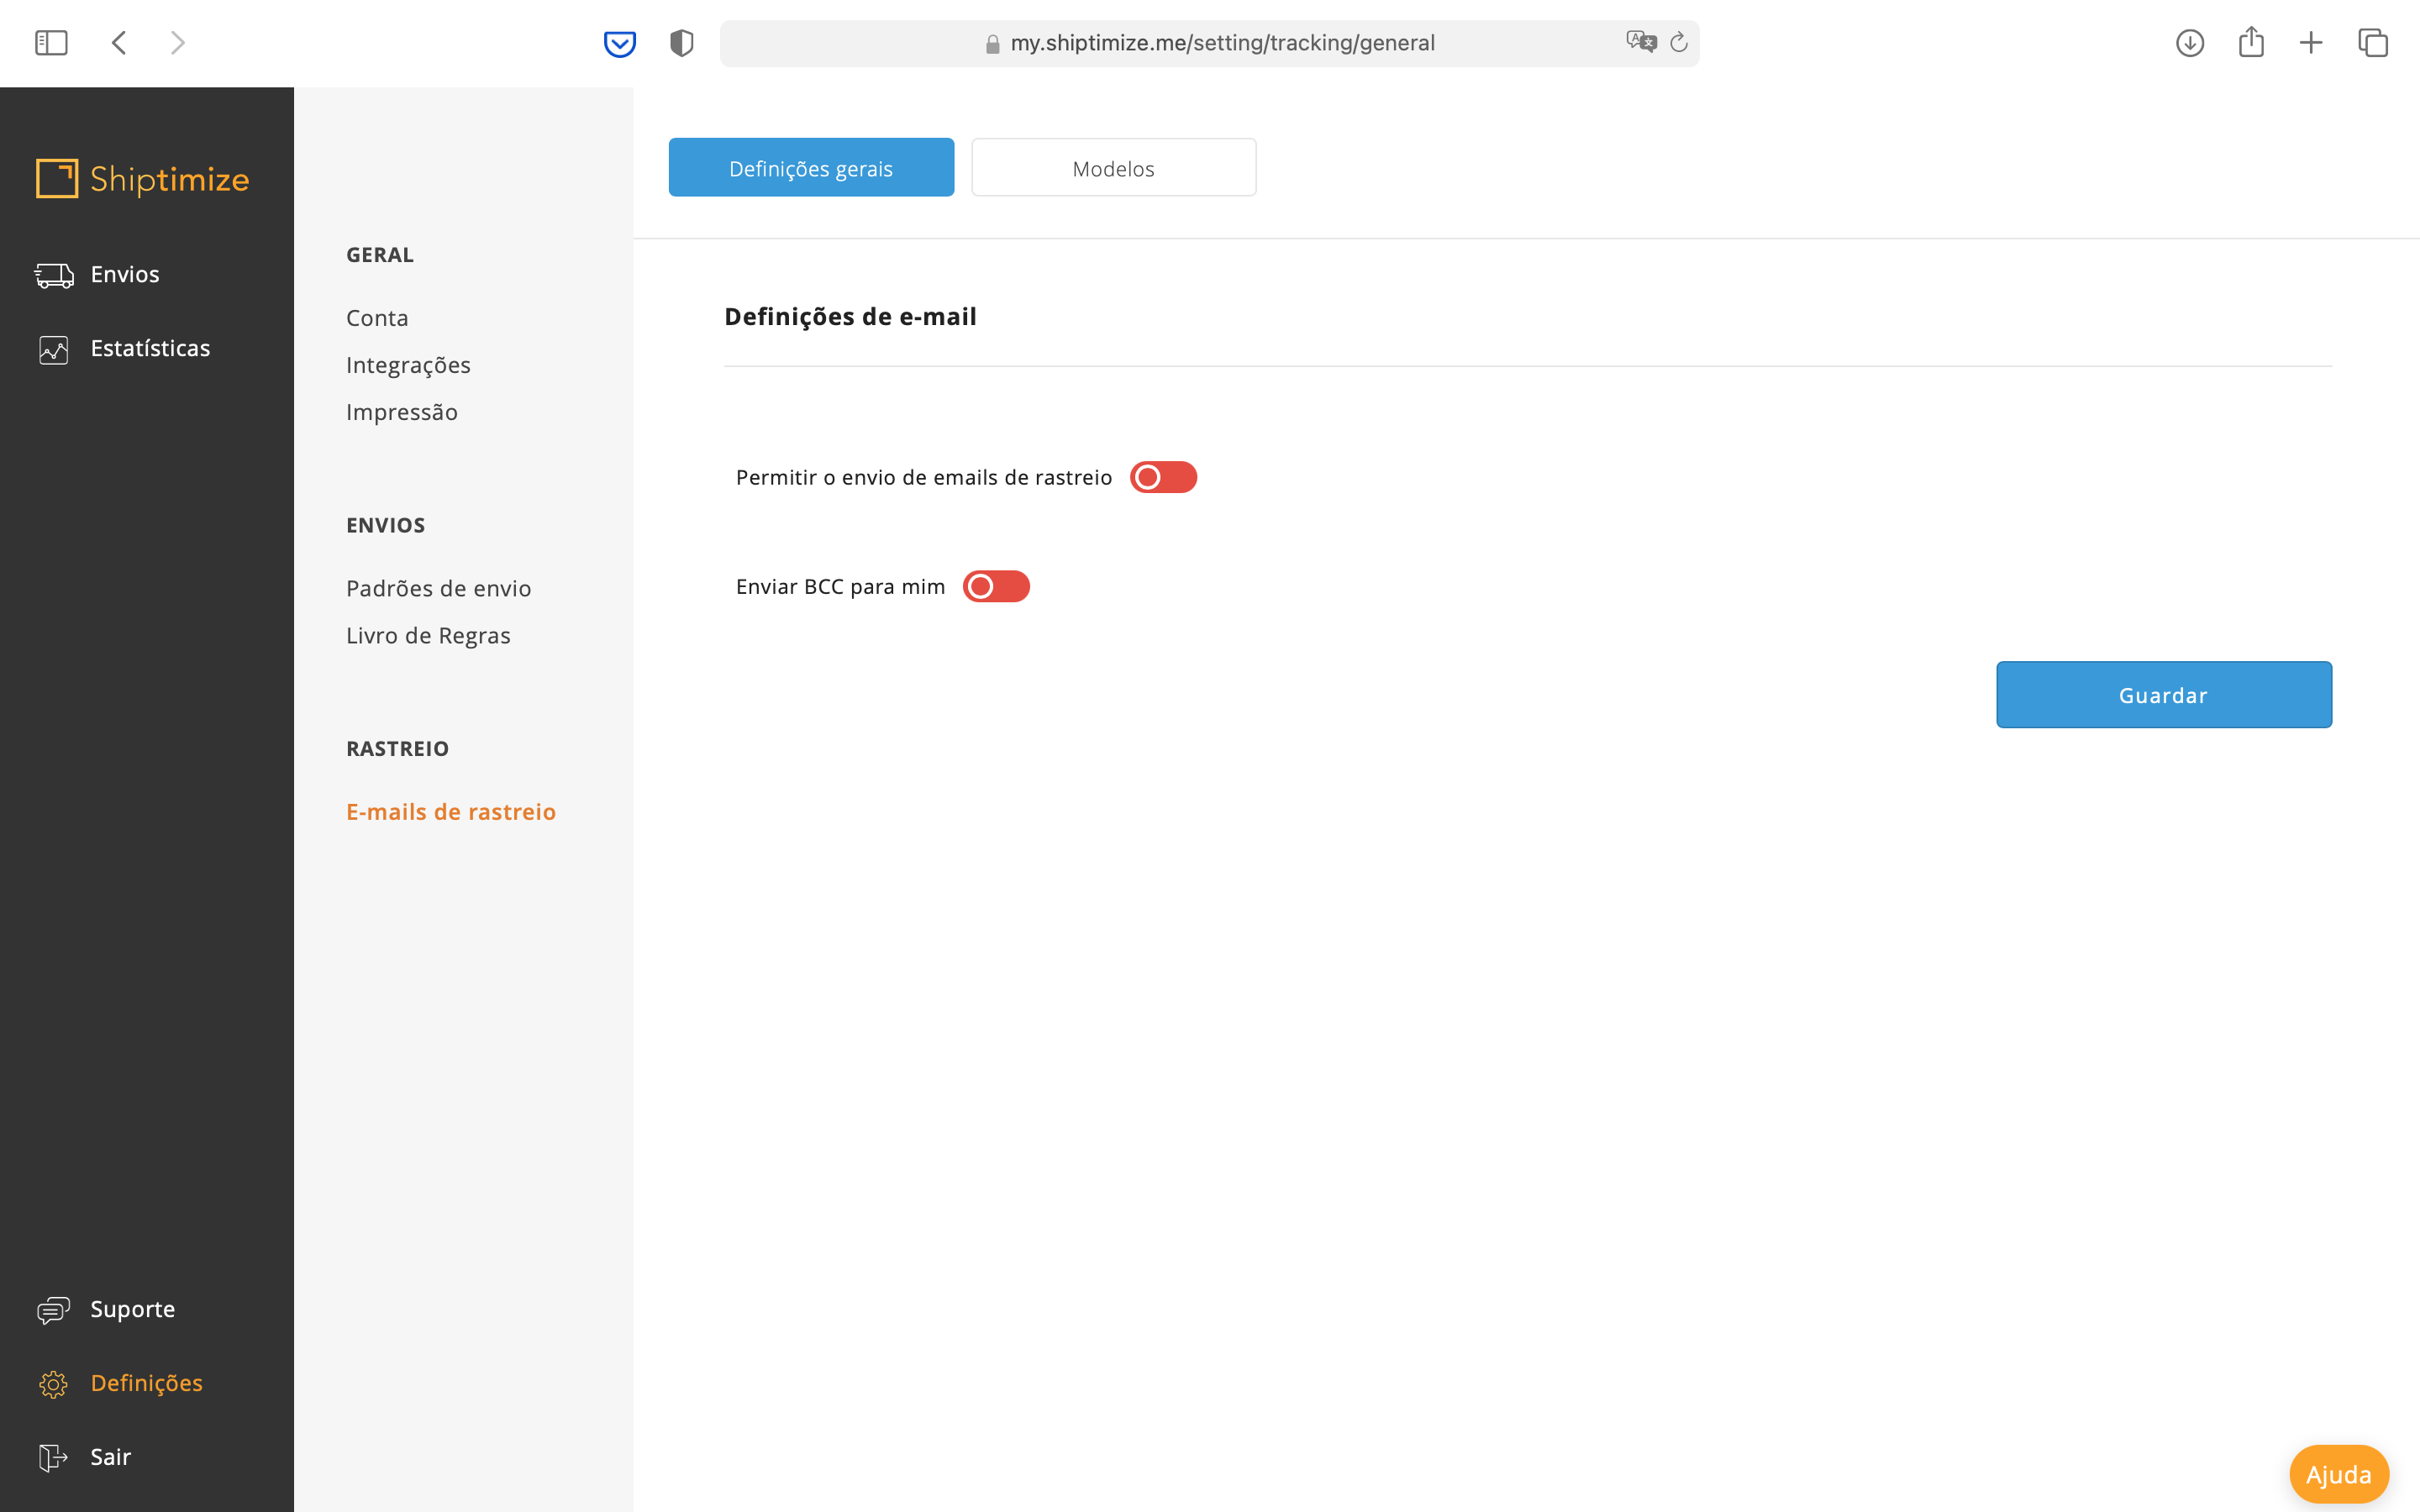
To configure tracking emails you should go to Settings > Track&Trace Emails > General Settings. The tracking emails are sent to the recipient’s email address with the delivery information.
You can select if you want the emails to be sent to your customers and also if you want to receive them on your user email. After selecting or deselecting the desired options, click Save to save the new data.
Templates
Afterwards you must click on Templates to configure the email to be sent.
There are two moments in which the email can be sent to your customers: When the shipping declaration occurs, i.e. when you print the shipping label, or when the collection of the object by the carrier occurs.
You can choose to send the email in one of these moments or in both, by selecting the desired option and clicking on Active template according to your preference.
You should click on the active template in the languages you want to use either when shipments are declared to the carrier or when there is acceptance by the carrier. After clicking on each of the models you wish to have active you should click on save to save the new settings.
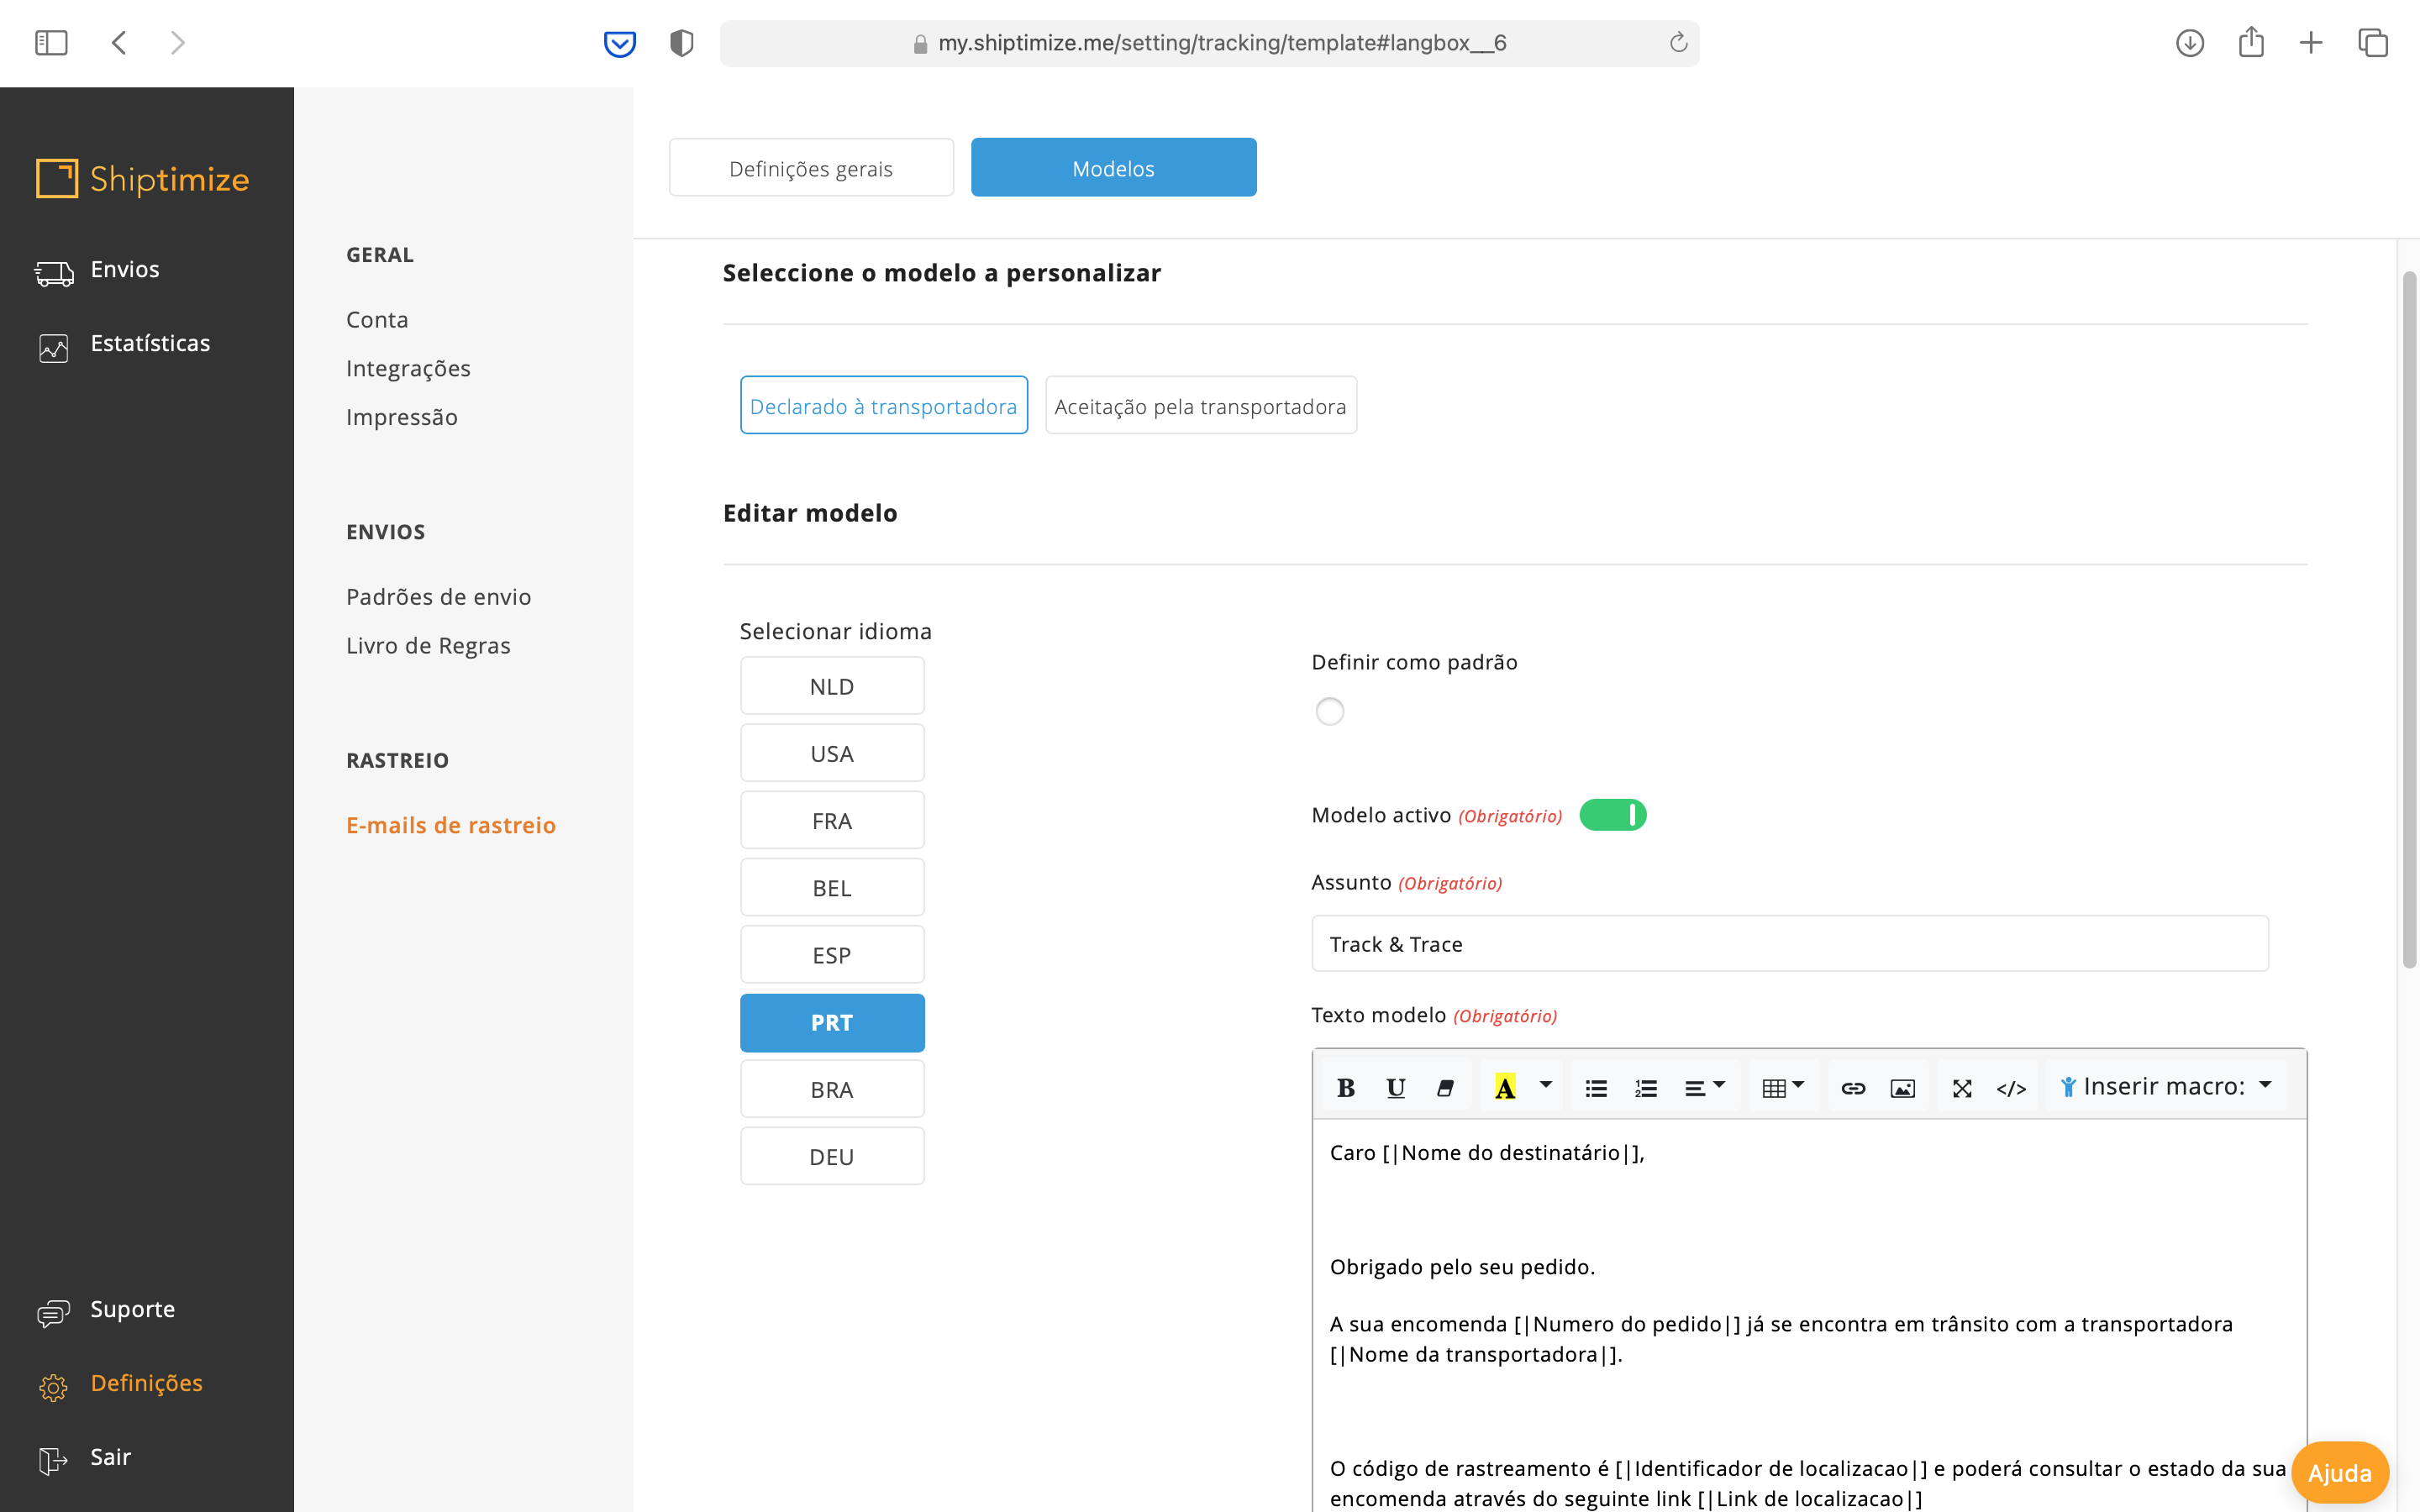
You can make one of the emails in a certain language as the one that will be sent in the case of sending to countries where there is no email defined. To do this you should click Set as Default. After making the selection of the default email should click save to save the new settings.
Filling in the email
To configure the email to be sent you should add a Subject to your email according to your preference. After adding a subject you should click save to save the new settings.
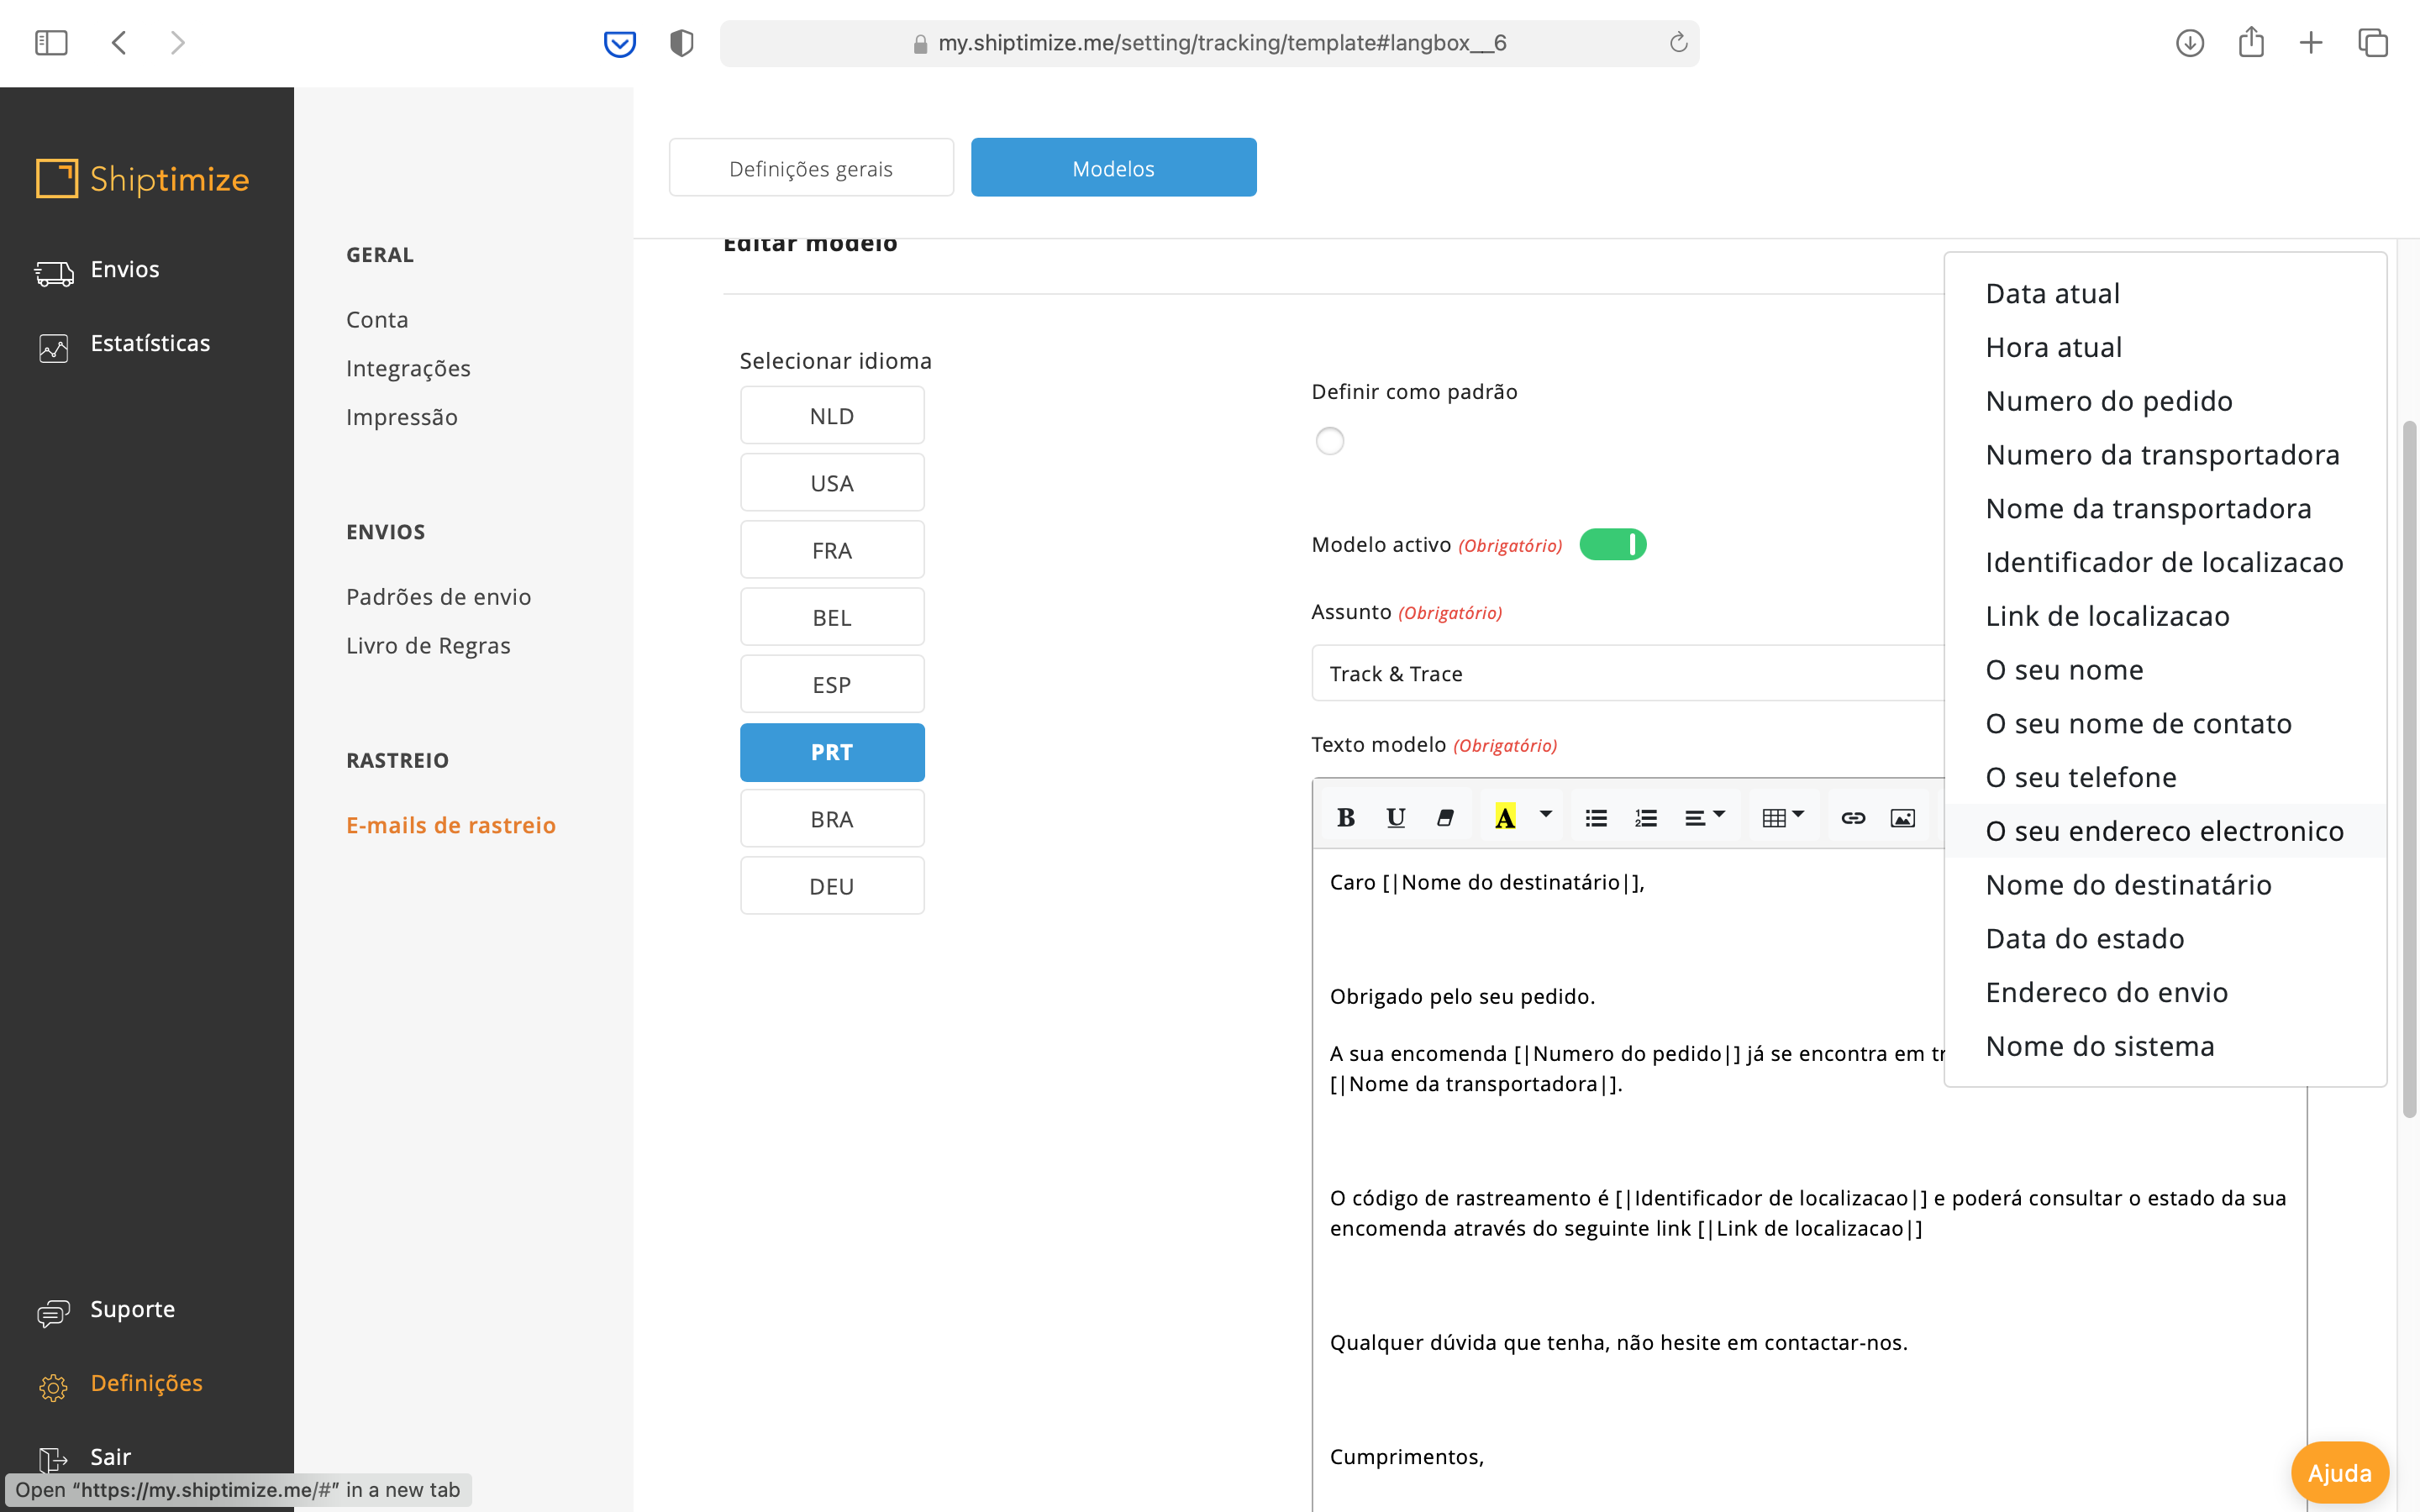
Macros
To configure the text of your tracking email you should use the Macros provided so that each email includes information about the shipment in question.
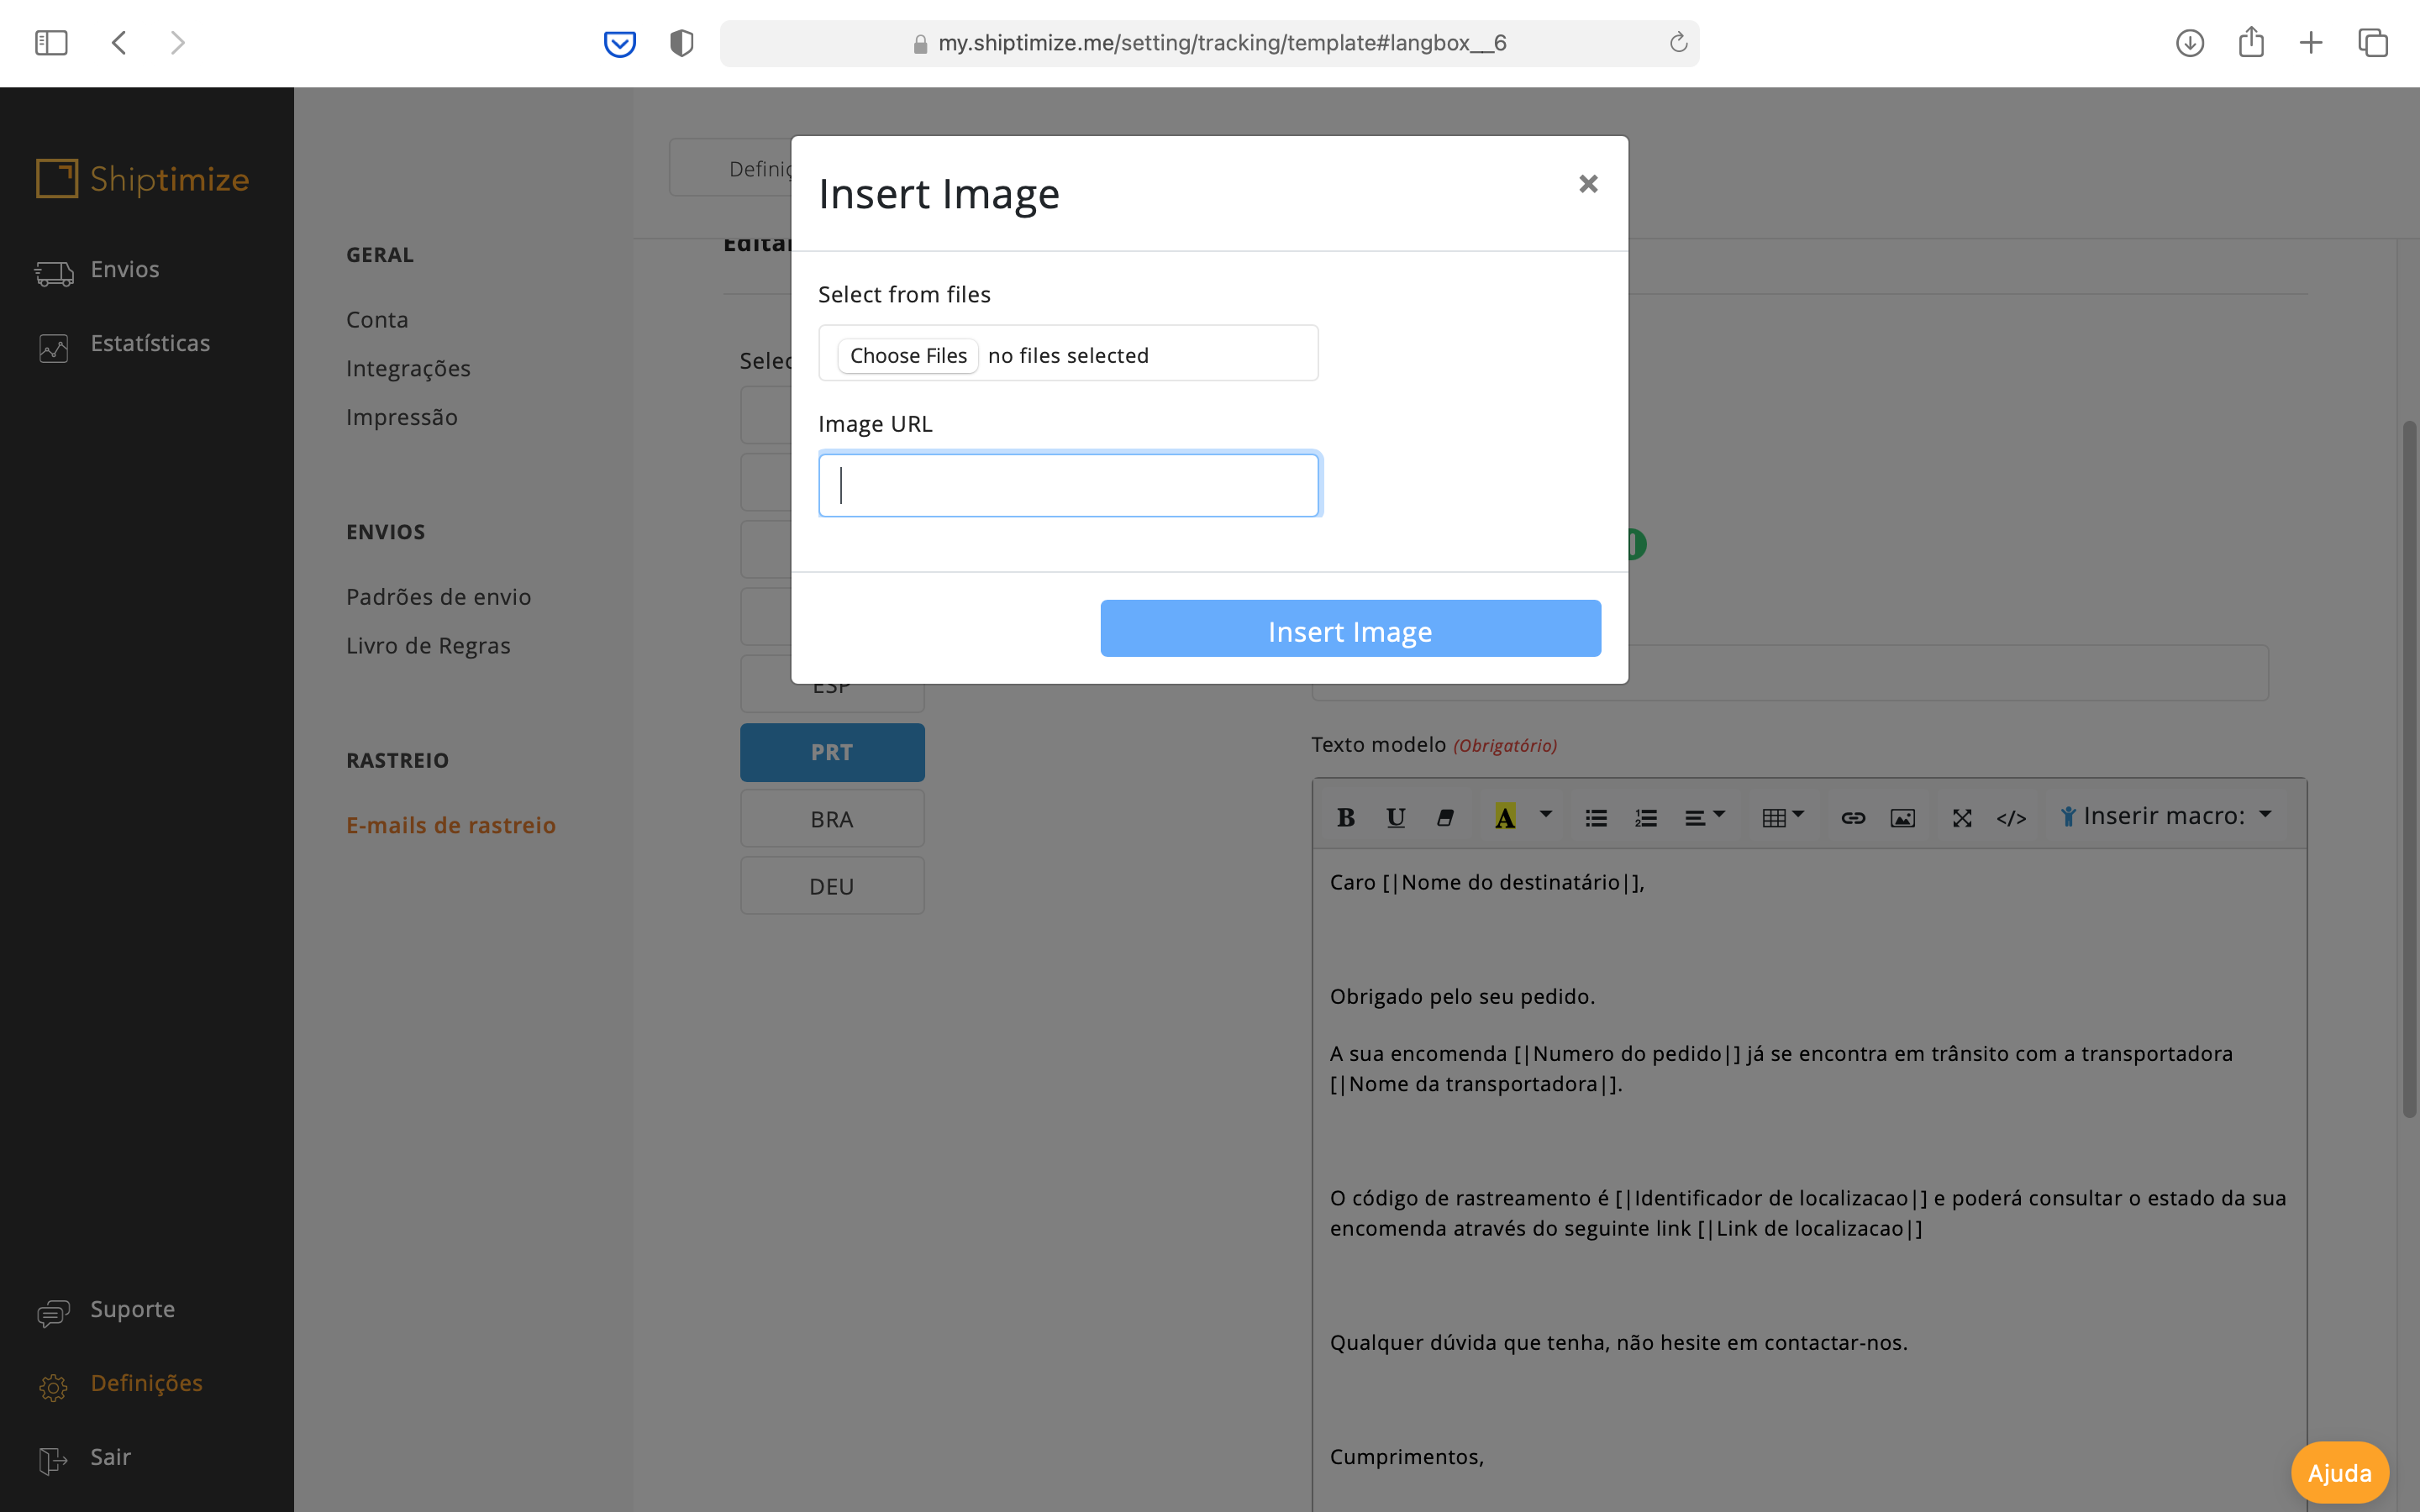
Logo
You can include your logo or other images if you wish by clicking on the image icon and selecting the desired file. Please note that the size of the image you can attach is limited so try to use as few images as possible.
Shop URL
You can also include links to your shop or others that you think relevant by clicking on the hyperlink icon and indicating the desired URL. After writing the desired email should click Save to save the email.
Note: You must repeat the same process for all the languages you have activated.