Create shipments via CSV
To create a shipment by uploading a CSV file you must go to the menu Shipments > Upload.
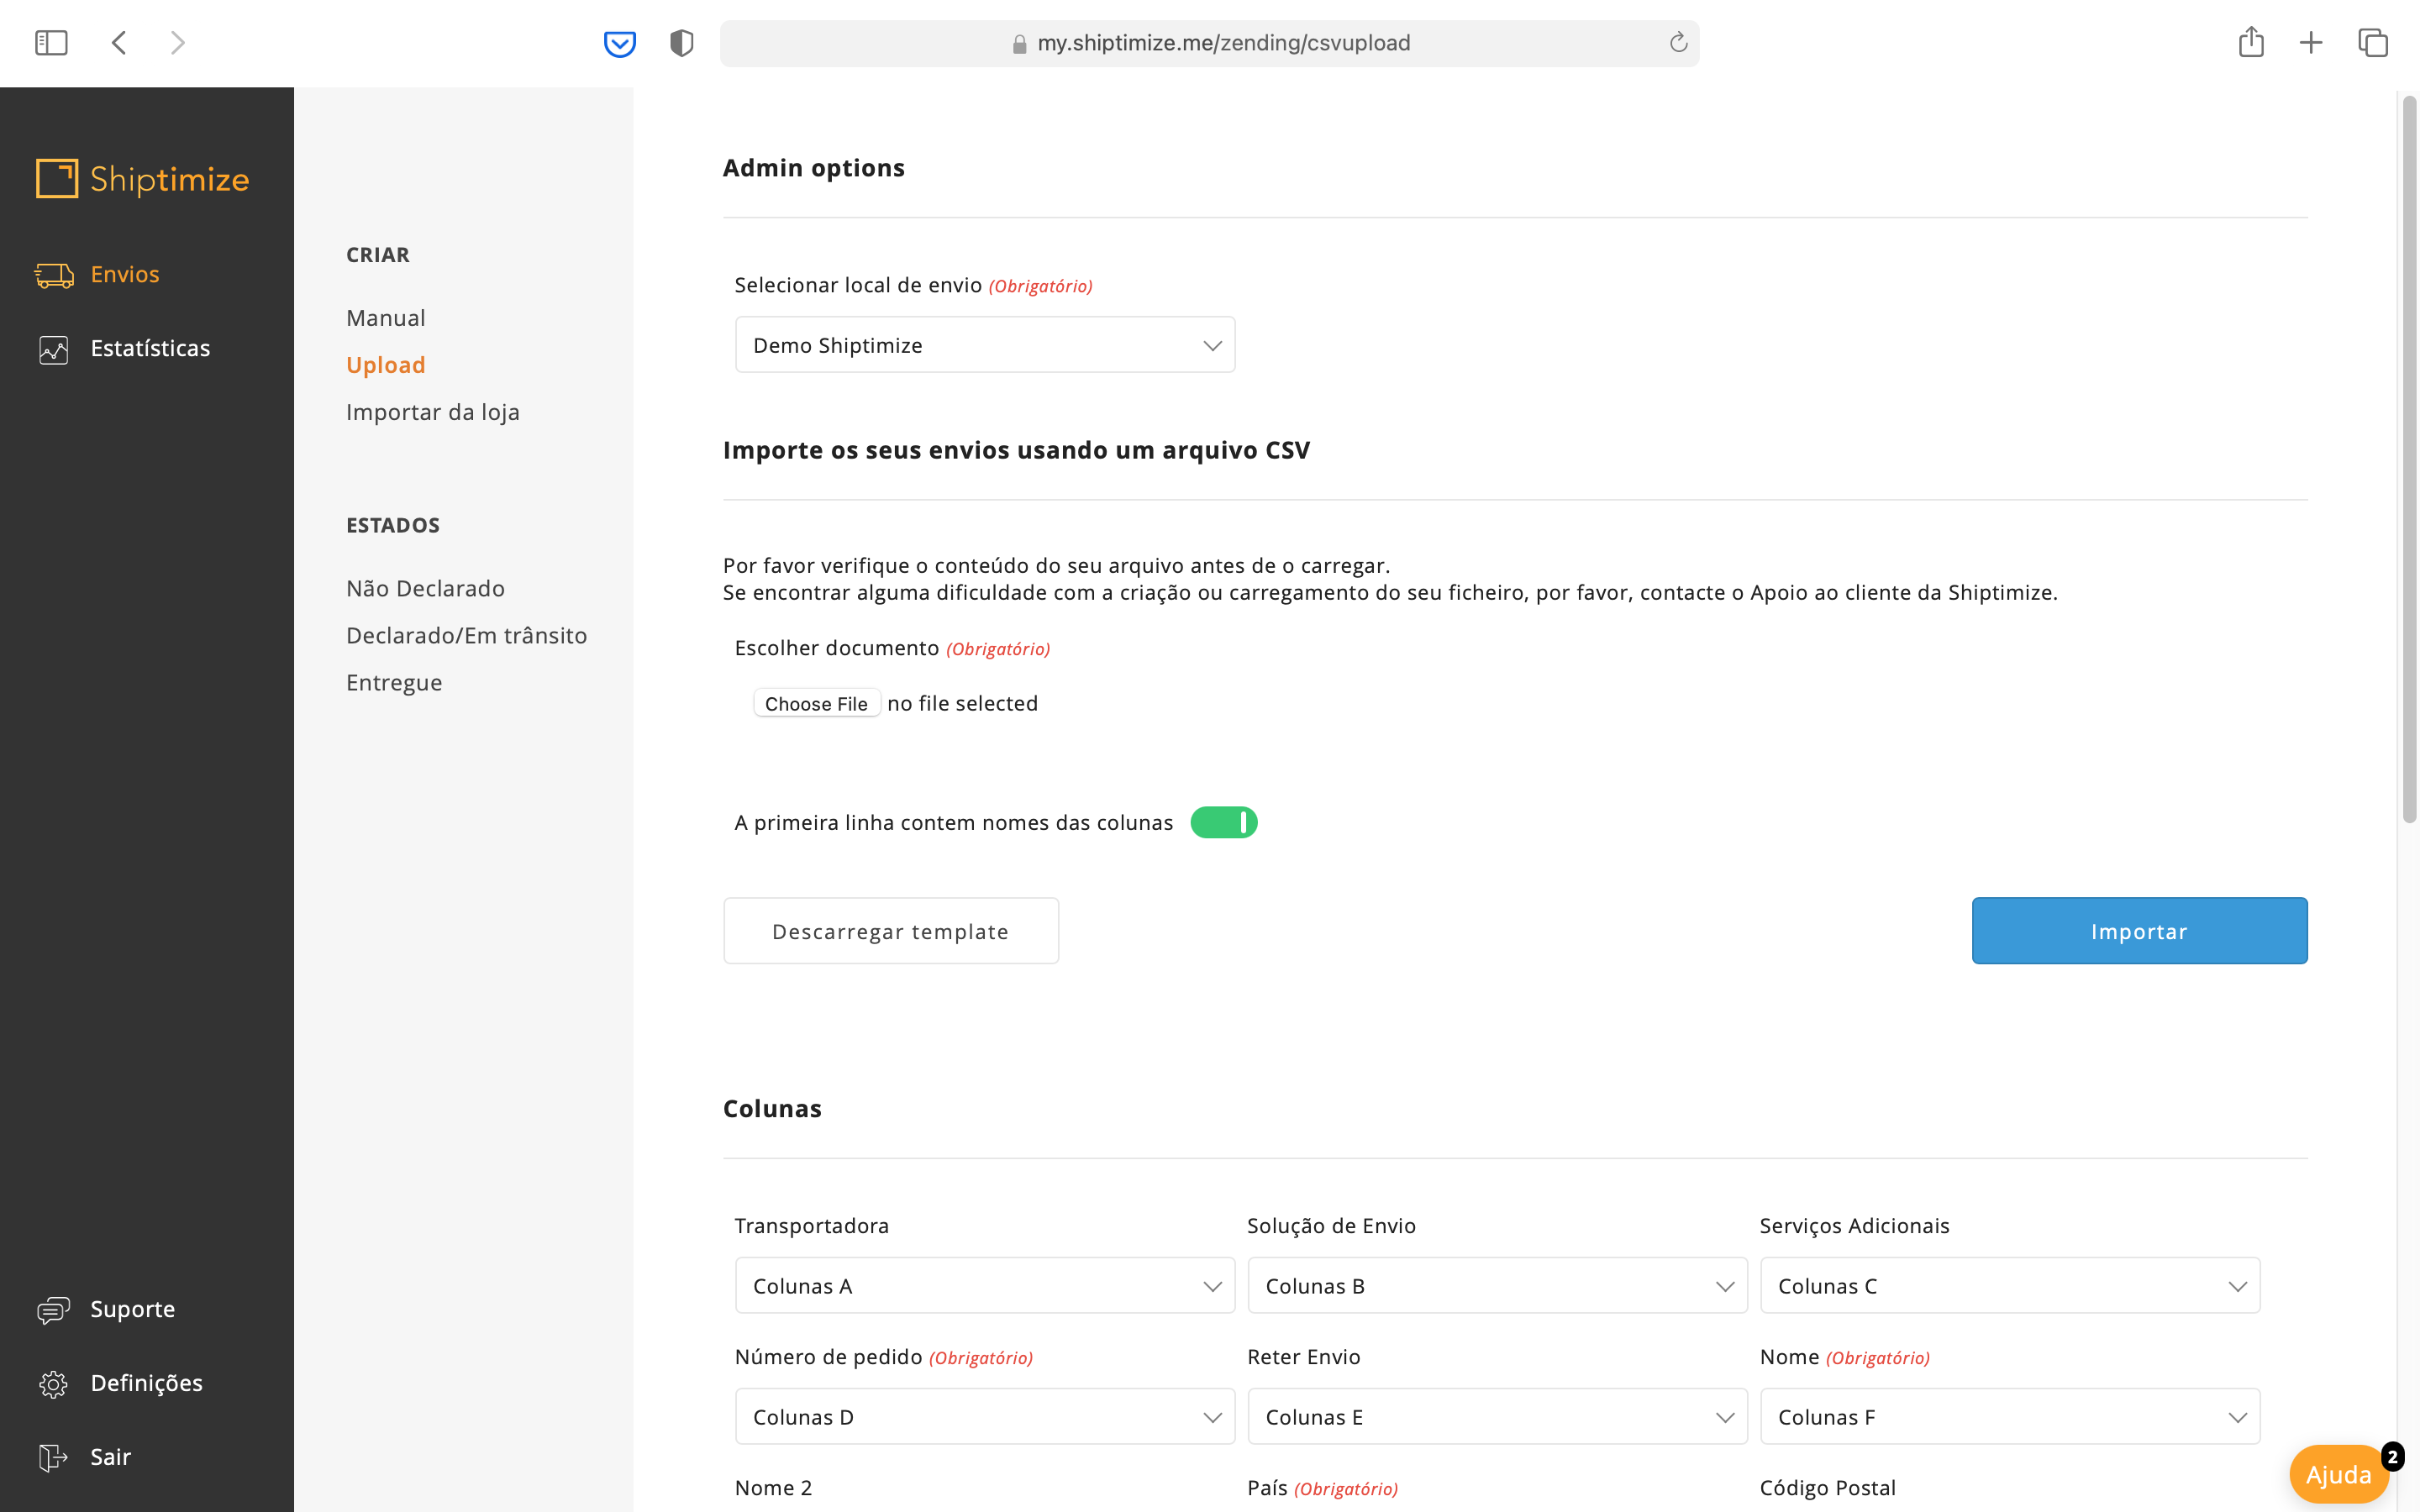
Columns
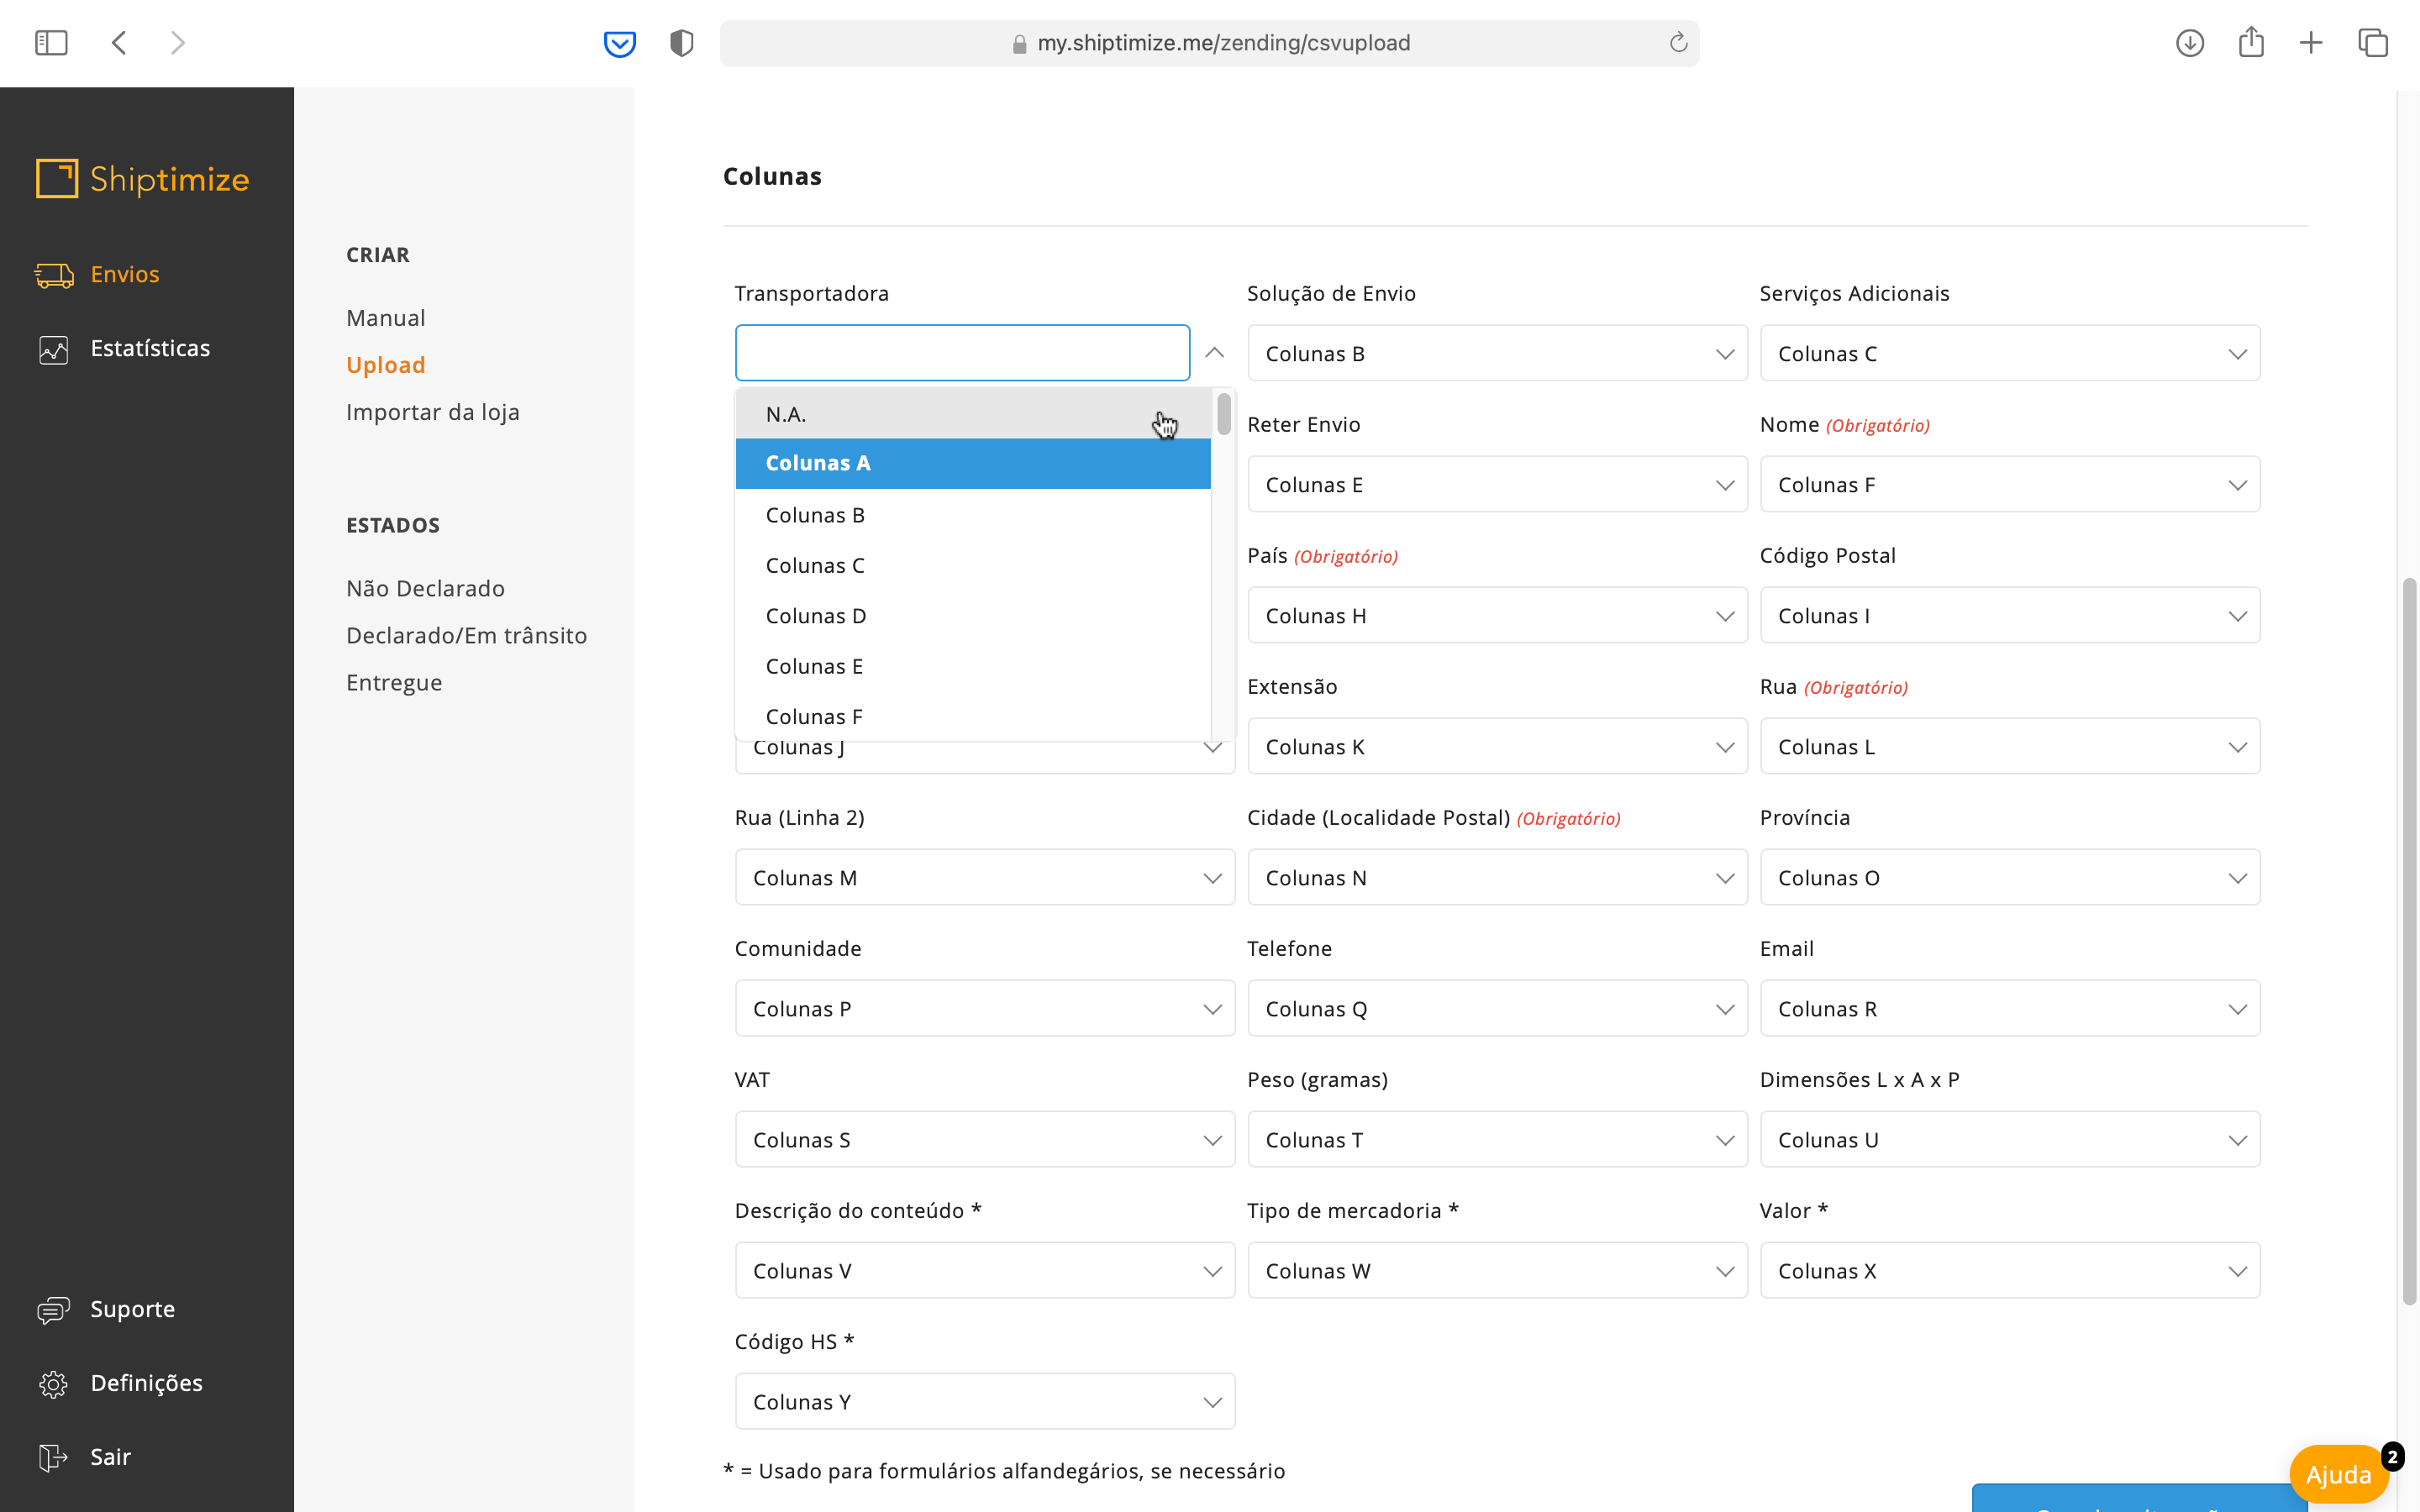
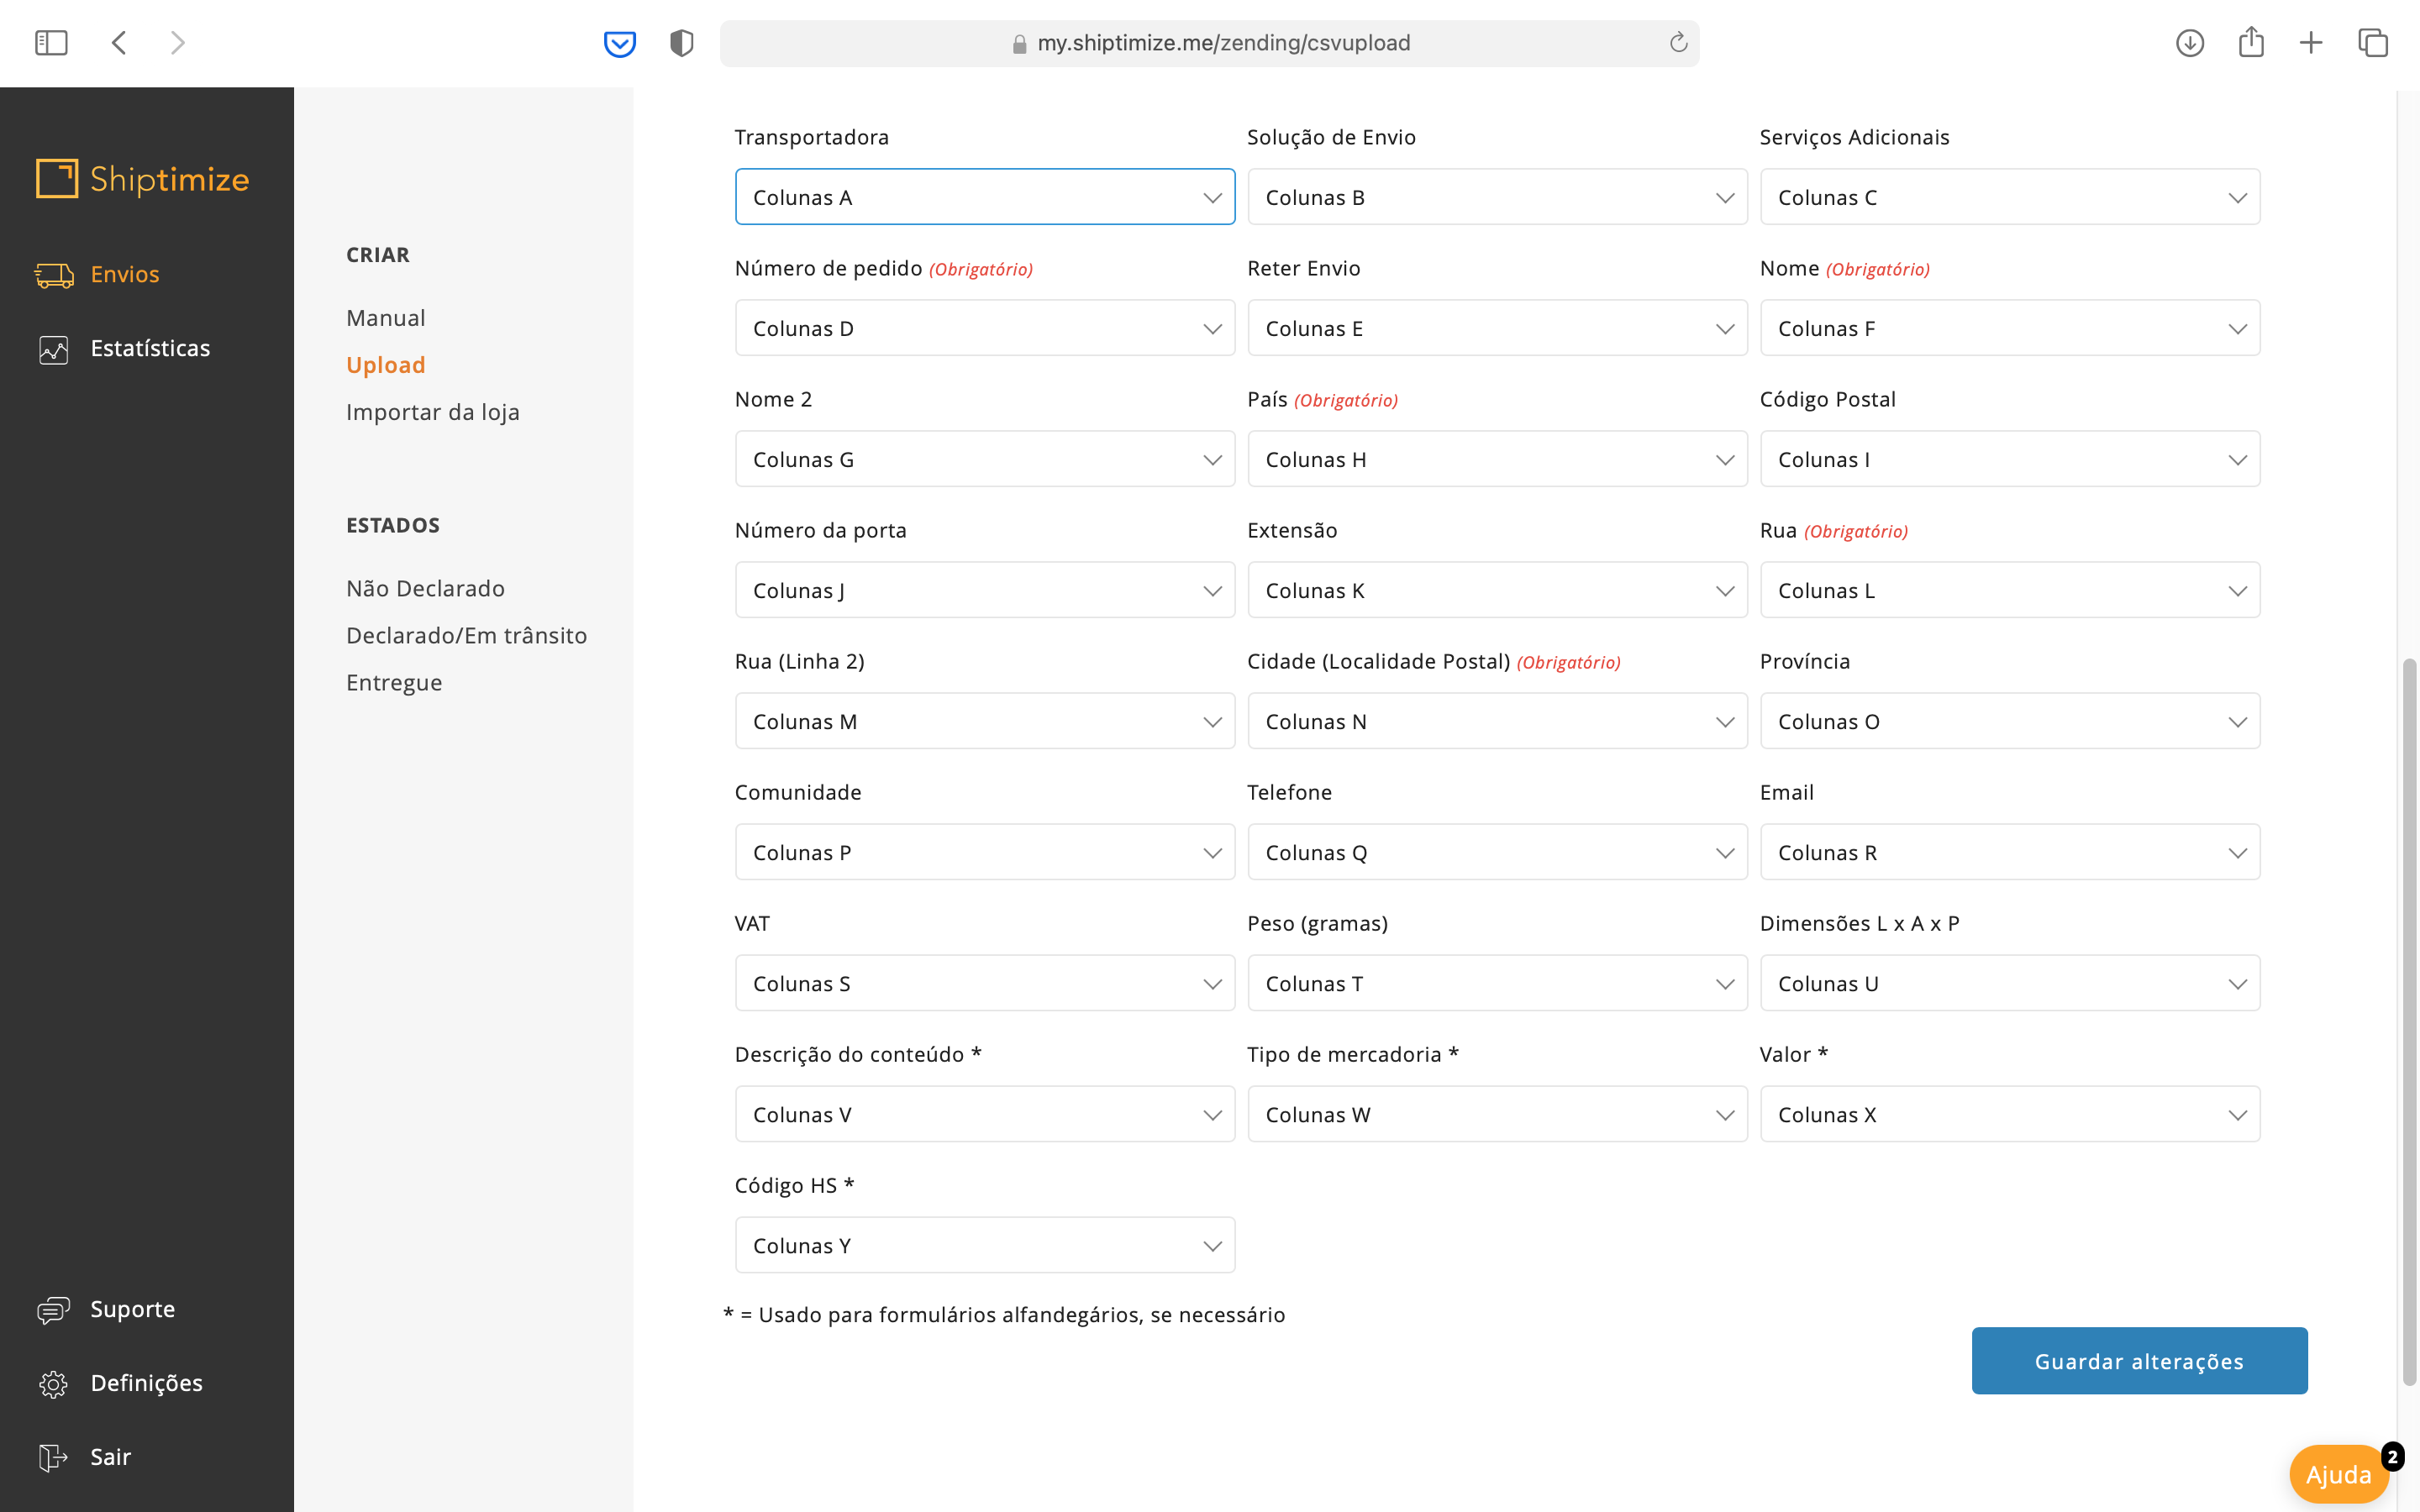
The first step is to configure the content of each column in your table. This configuration will depend on the dispatches you normally send. To configure the information that is contained in each column, you must choose for each field the column that corresponds to it in your file.
If the field is not used, you must select N.A.
When you have finished configuring each of the fields shown you should click Save Changes to save your configurations.
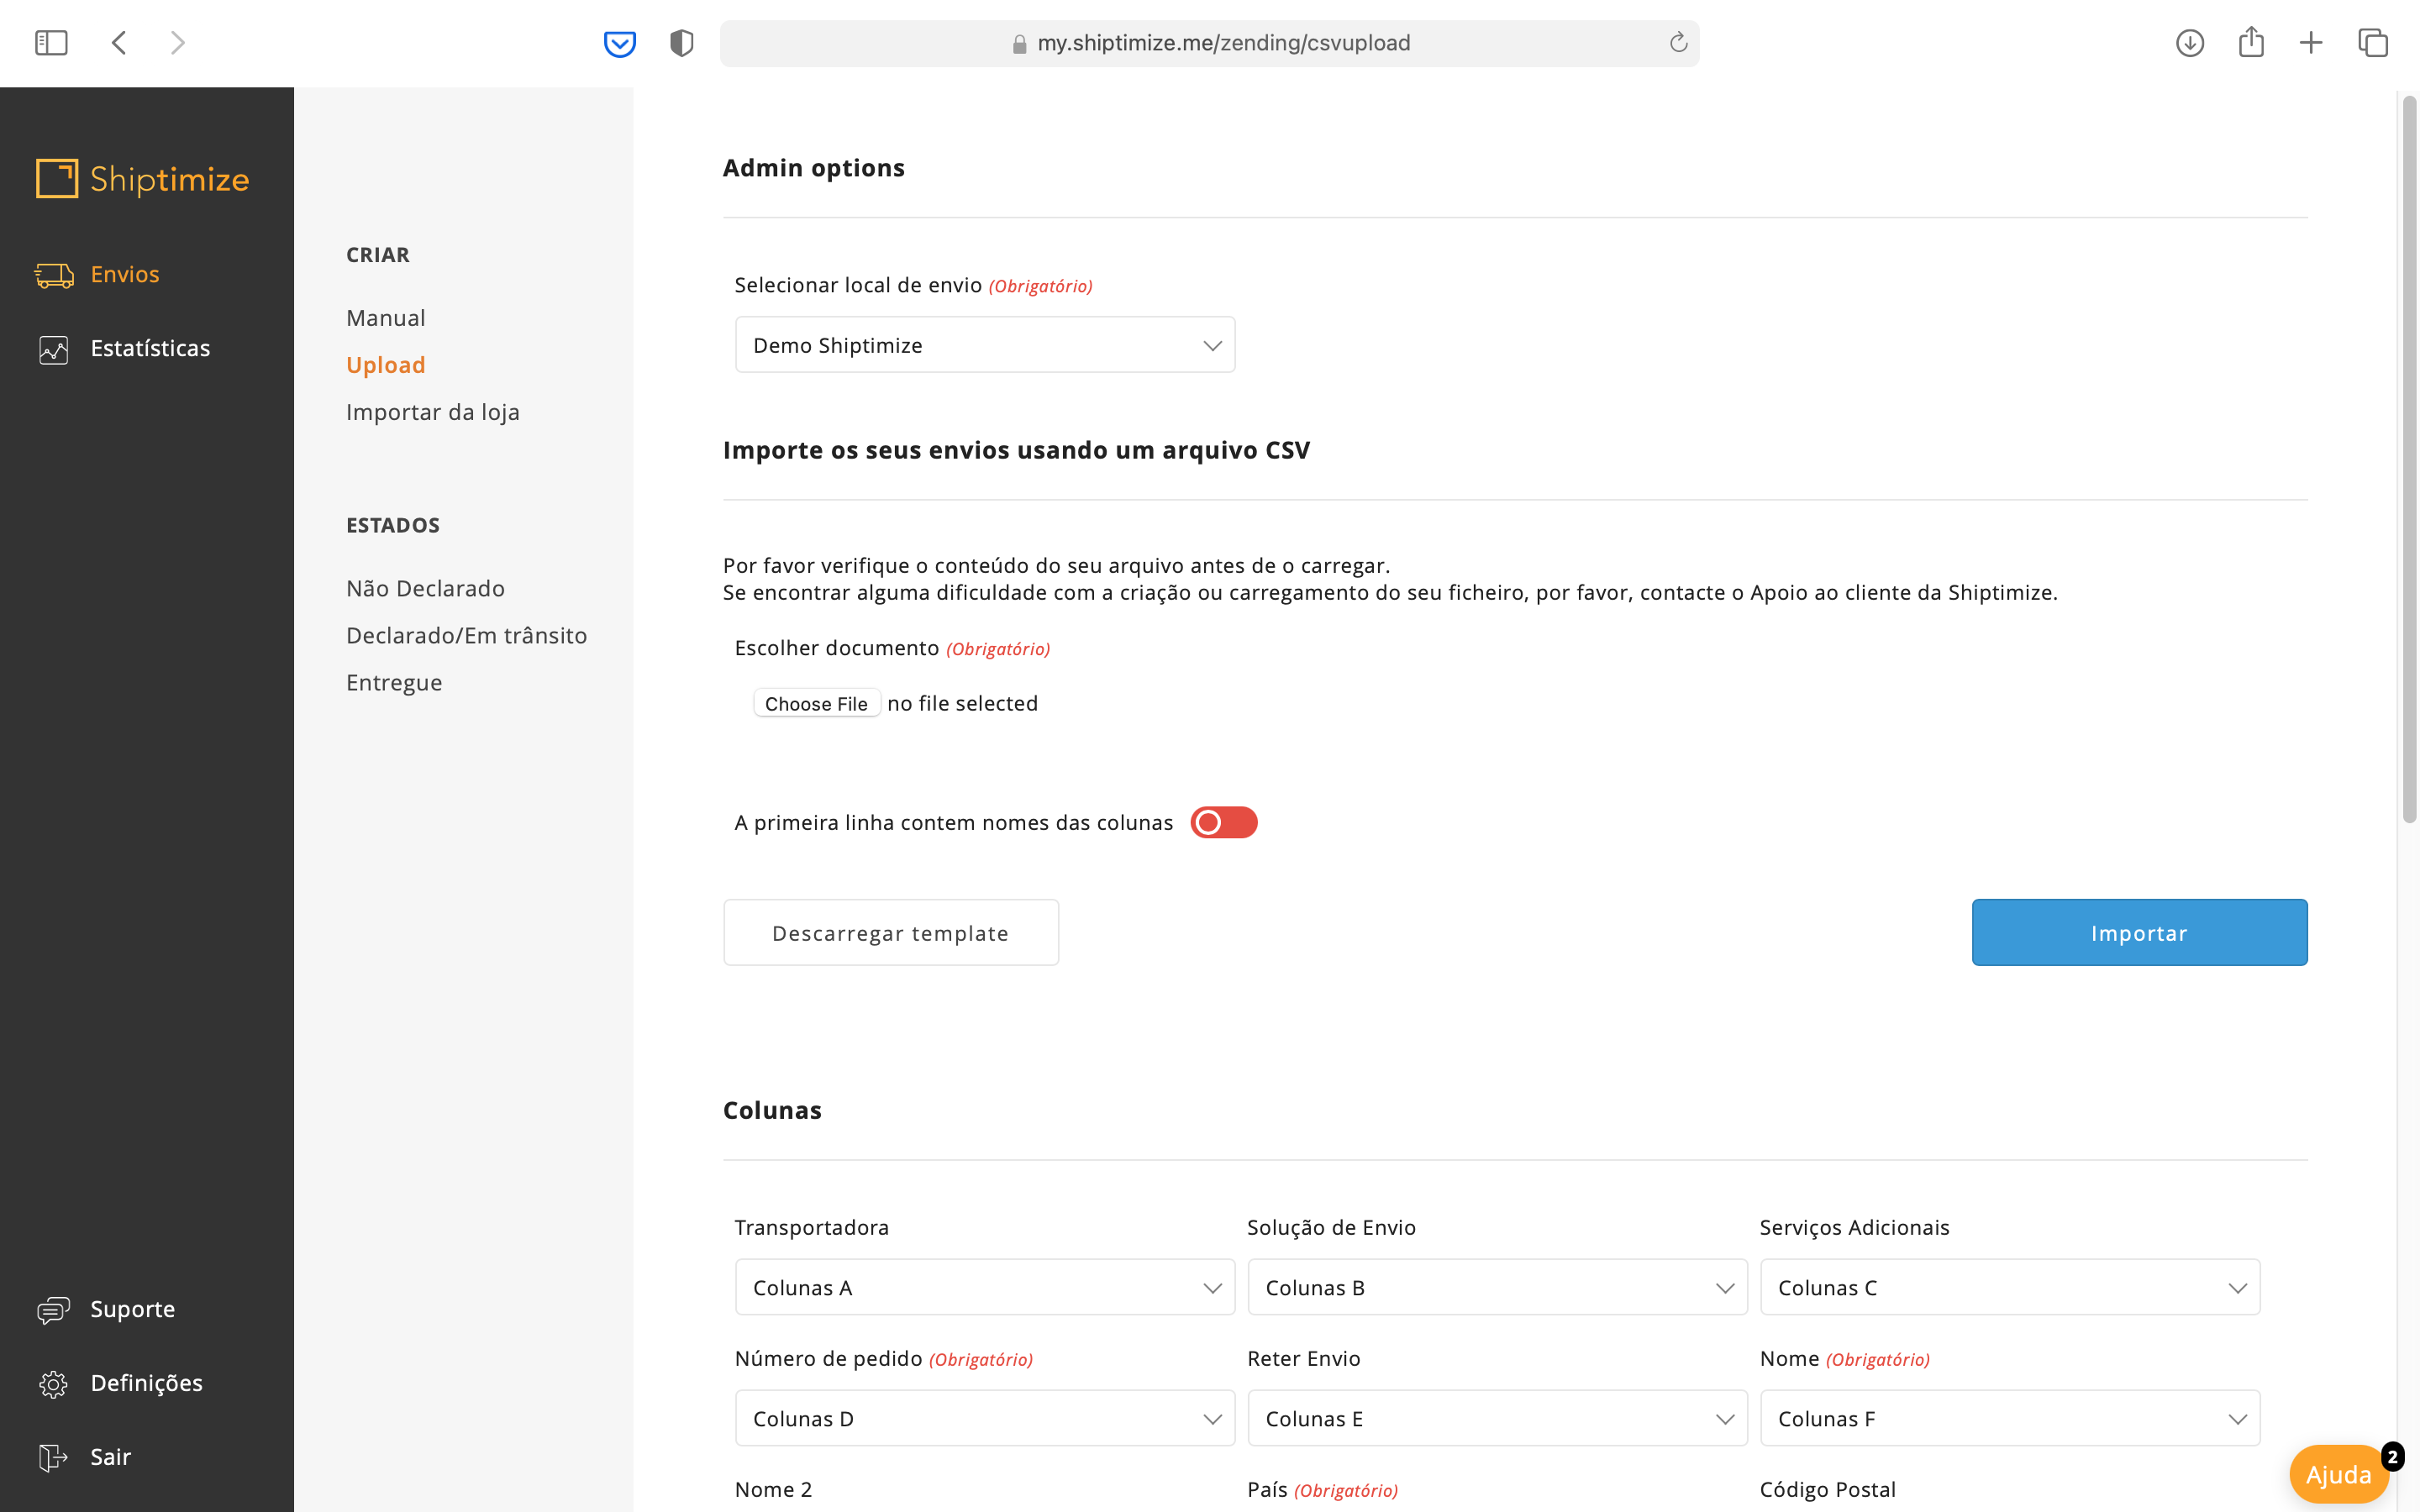
Importing a .csv file
In the second step you should save your file in a CSV format and upload it to our platform by clicking on choose file. After choosing the file you must select the option that best fits your file in terms of header.
By default, your client area is configured for files whose first line is the table header.
Finally you must click on Import.
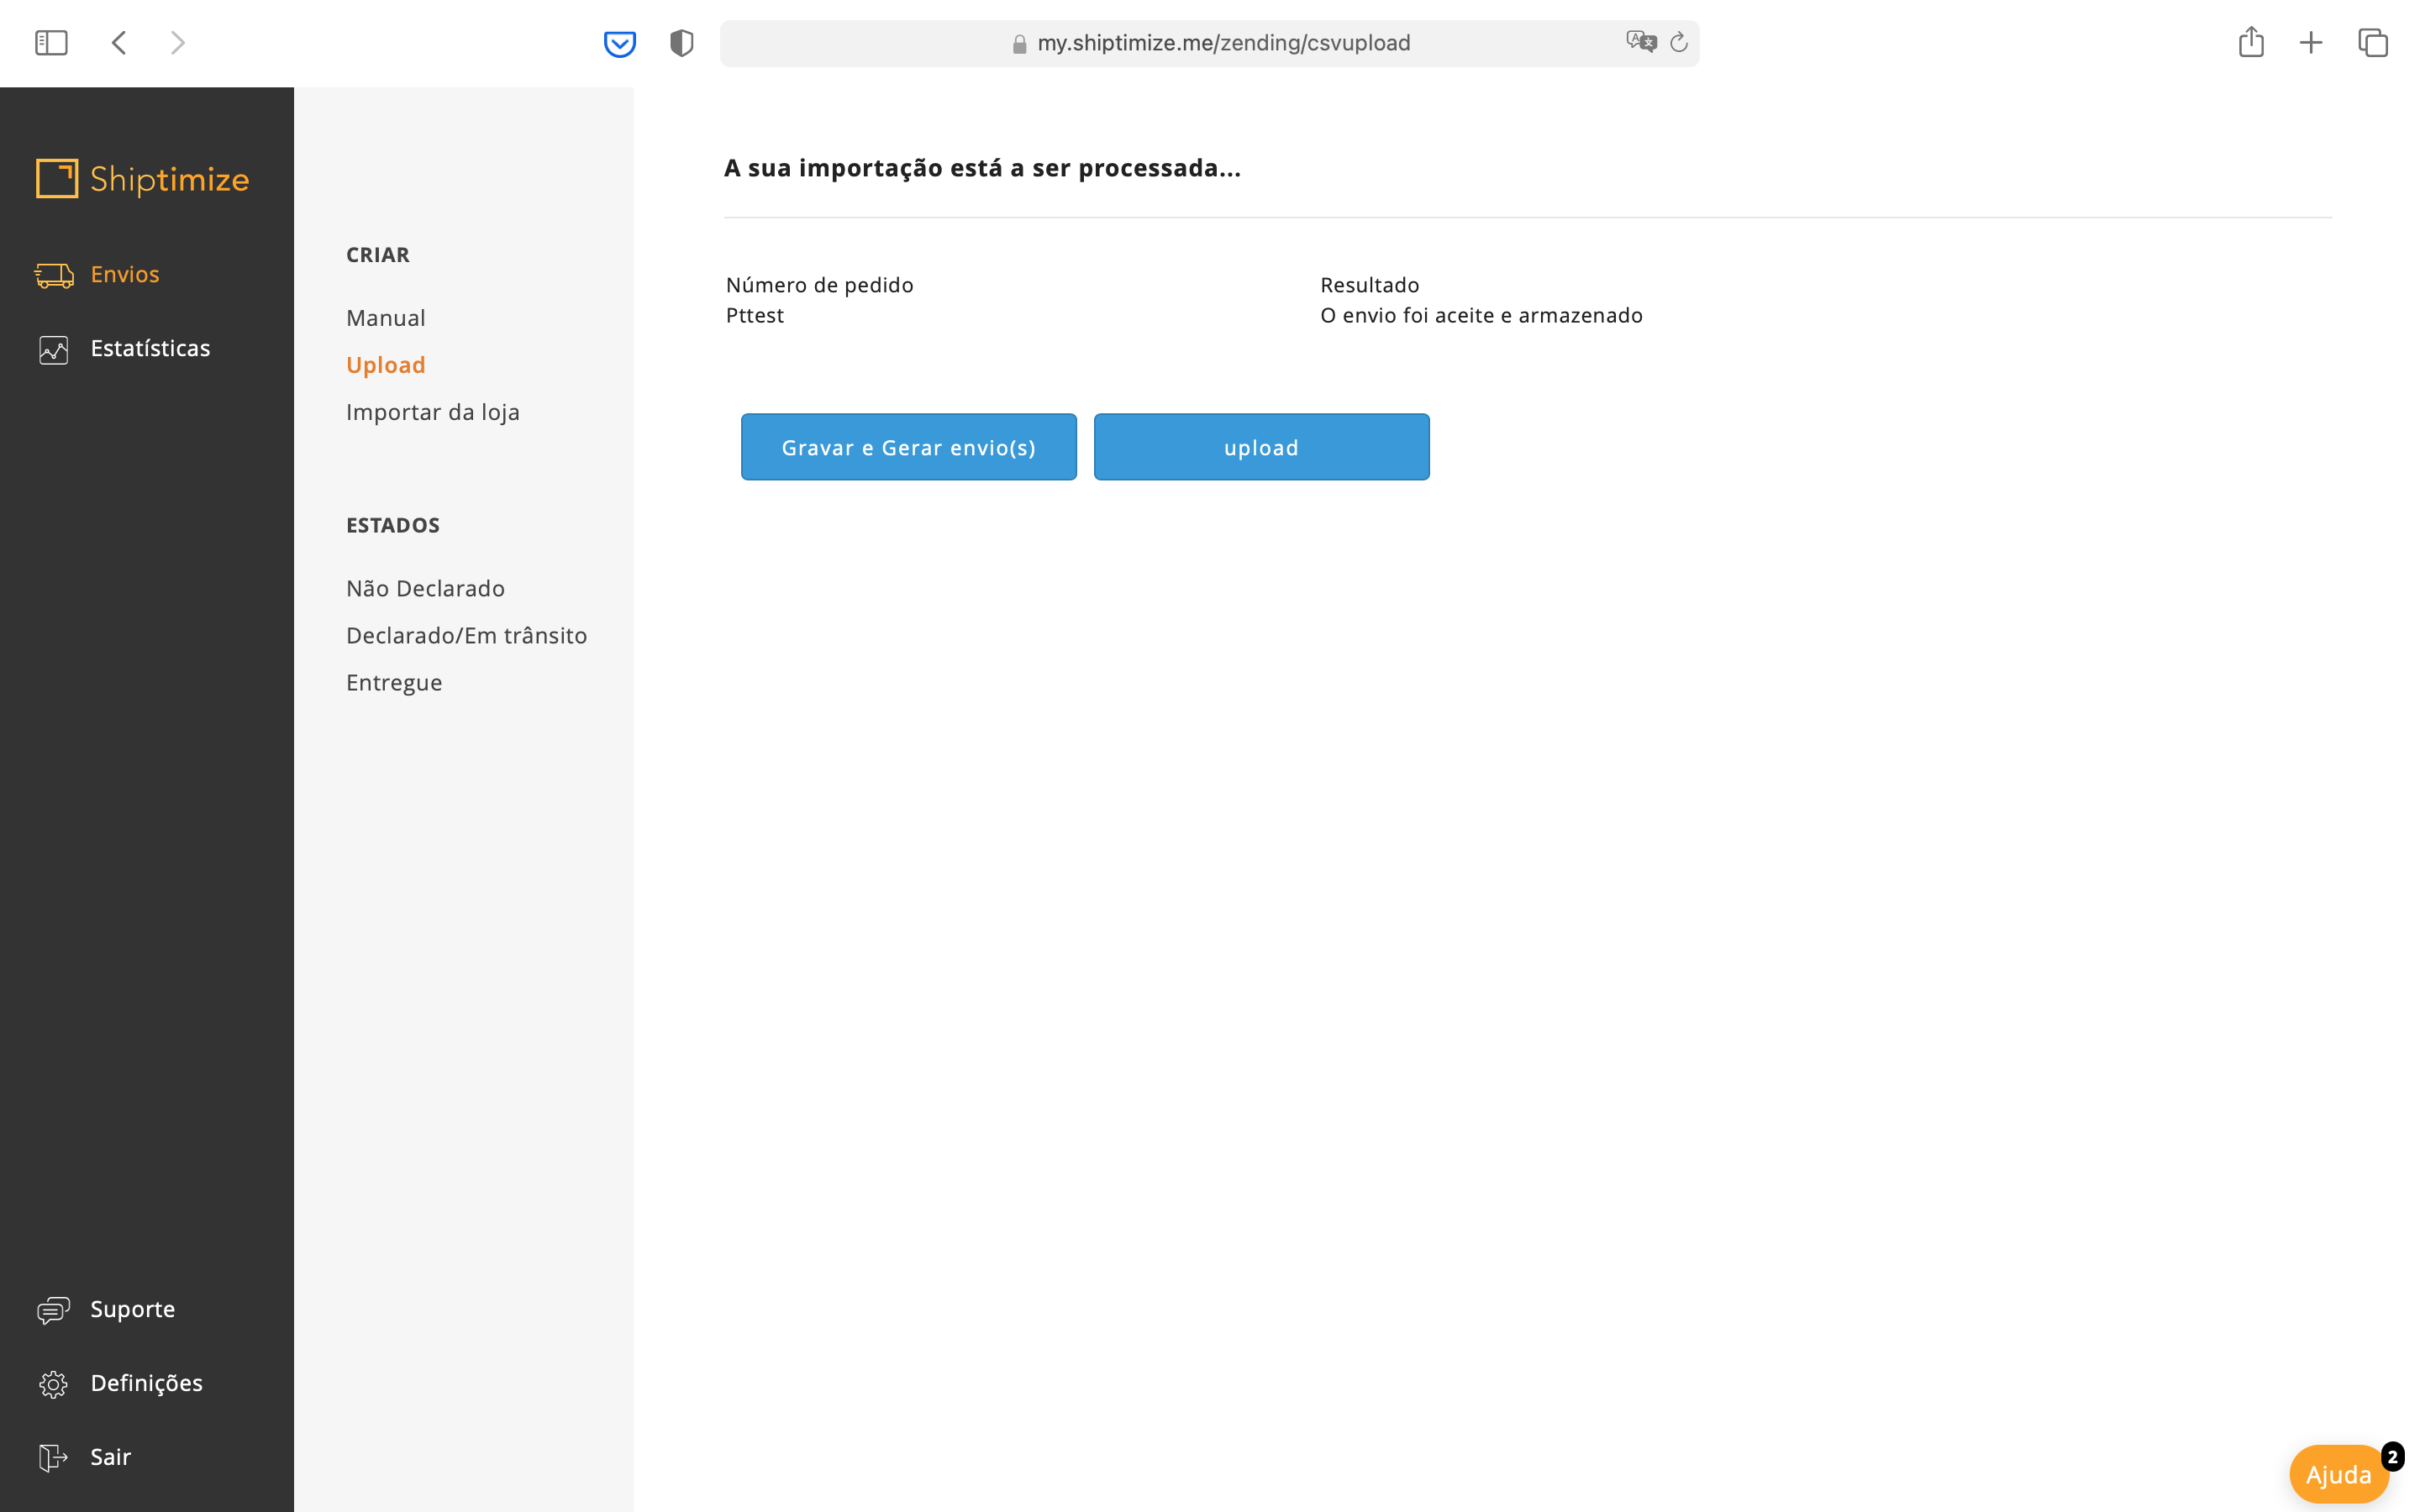
When you click on import the system will perform a check between the selected fields and the existing columns in your file. If there are any incompatibilities, the system will generate a list of errors for each delivery and these deliveries will be excluded from the import.
At this point you can go back to correct the errors found and upload the file again by clicking Back or you can go forward by clicking Save and only those items without errors will be created.
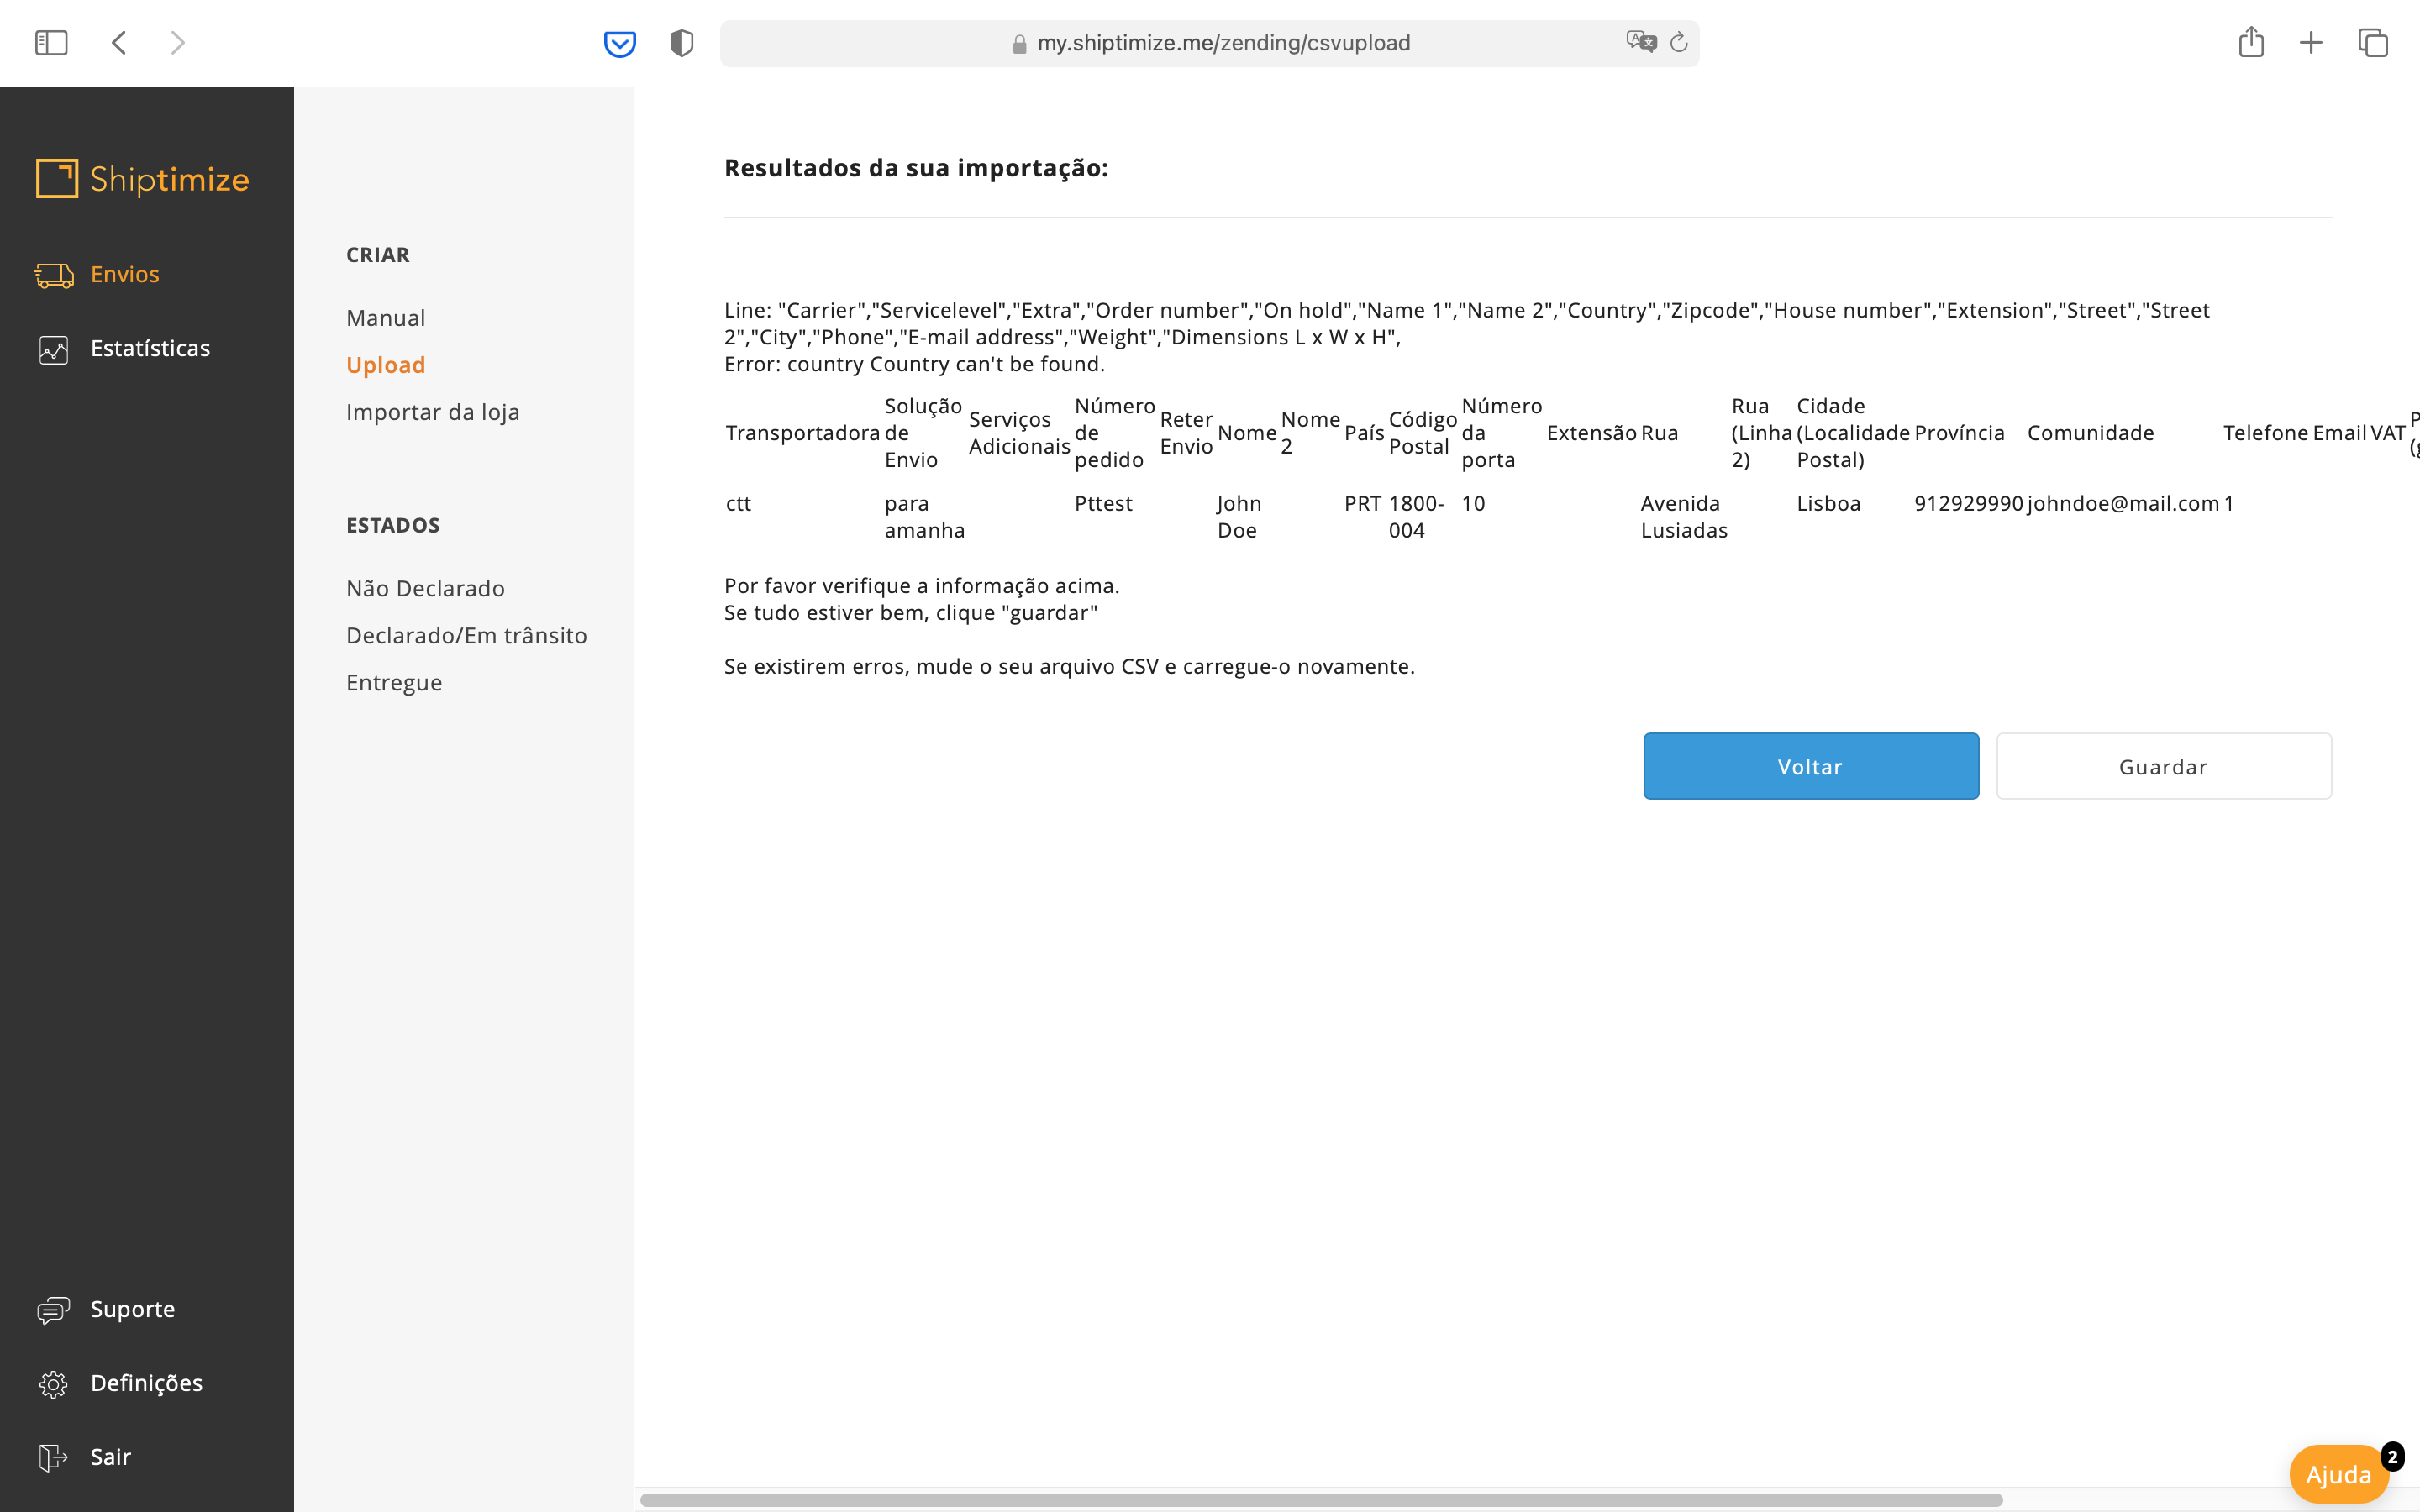
When you click on Save the list of shipments that will be created will appear. You can click on Upload to return to the previous menu and perform a new upload of a new file or click on End of day in order to actually create the shipments and move on to the declaration of the shipment with printing of the shipment label and collection appointment.