Woocommerce quick guide
Installation
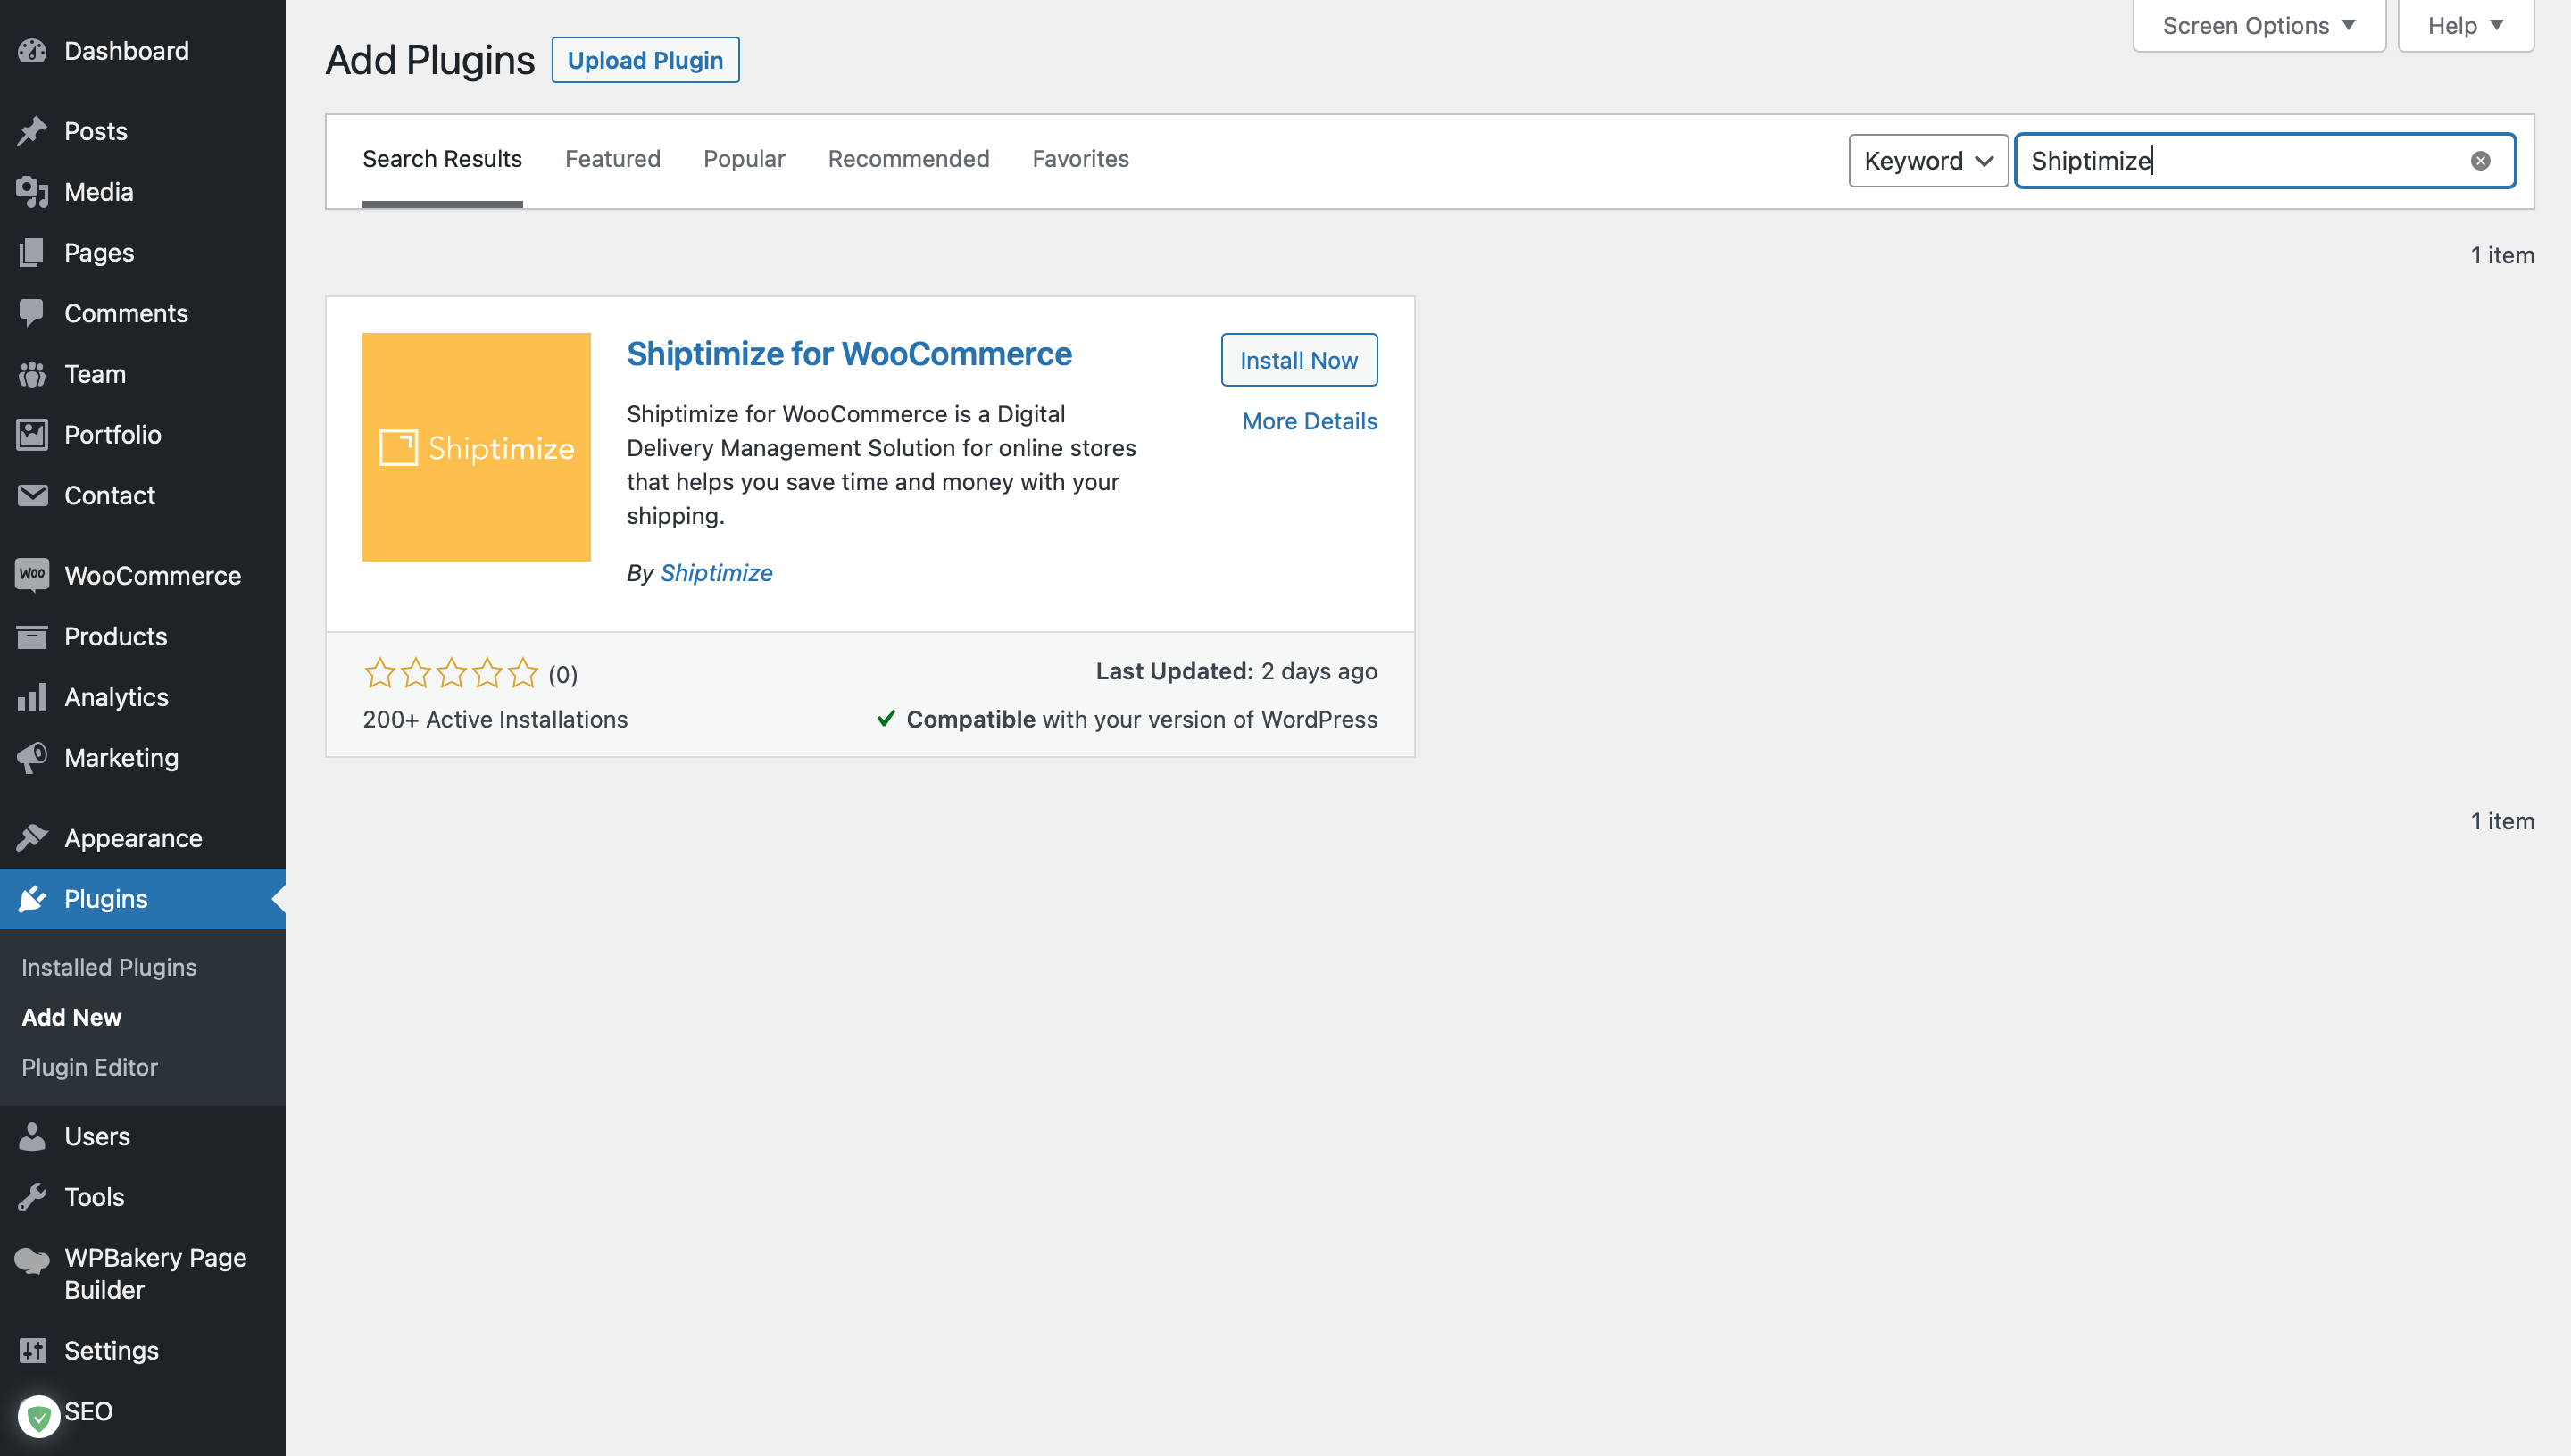
- Go to Plugins section and “Add new”
- Search for Shiptimize
- Click the “Install Now” button
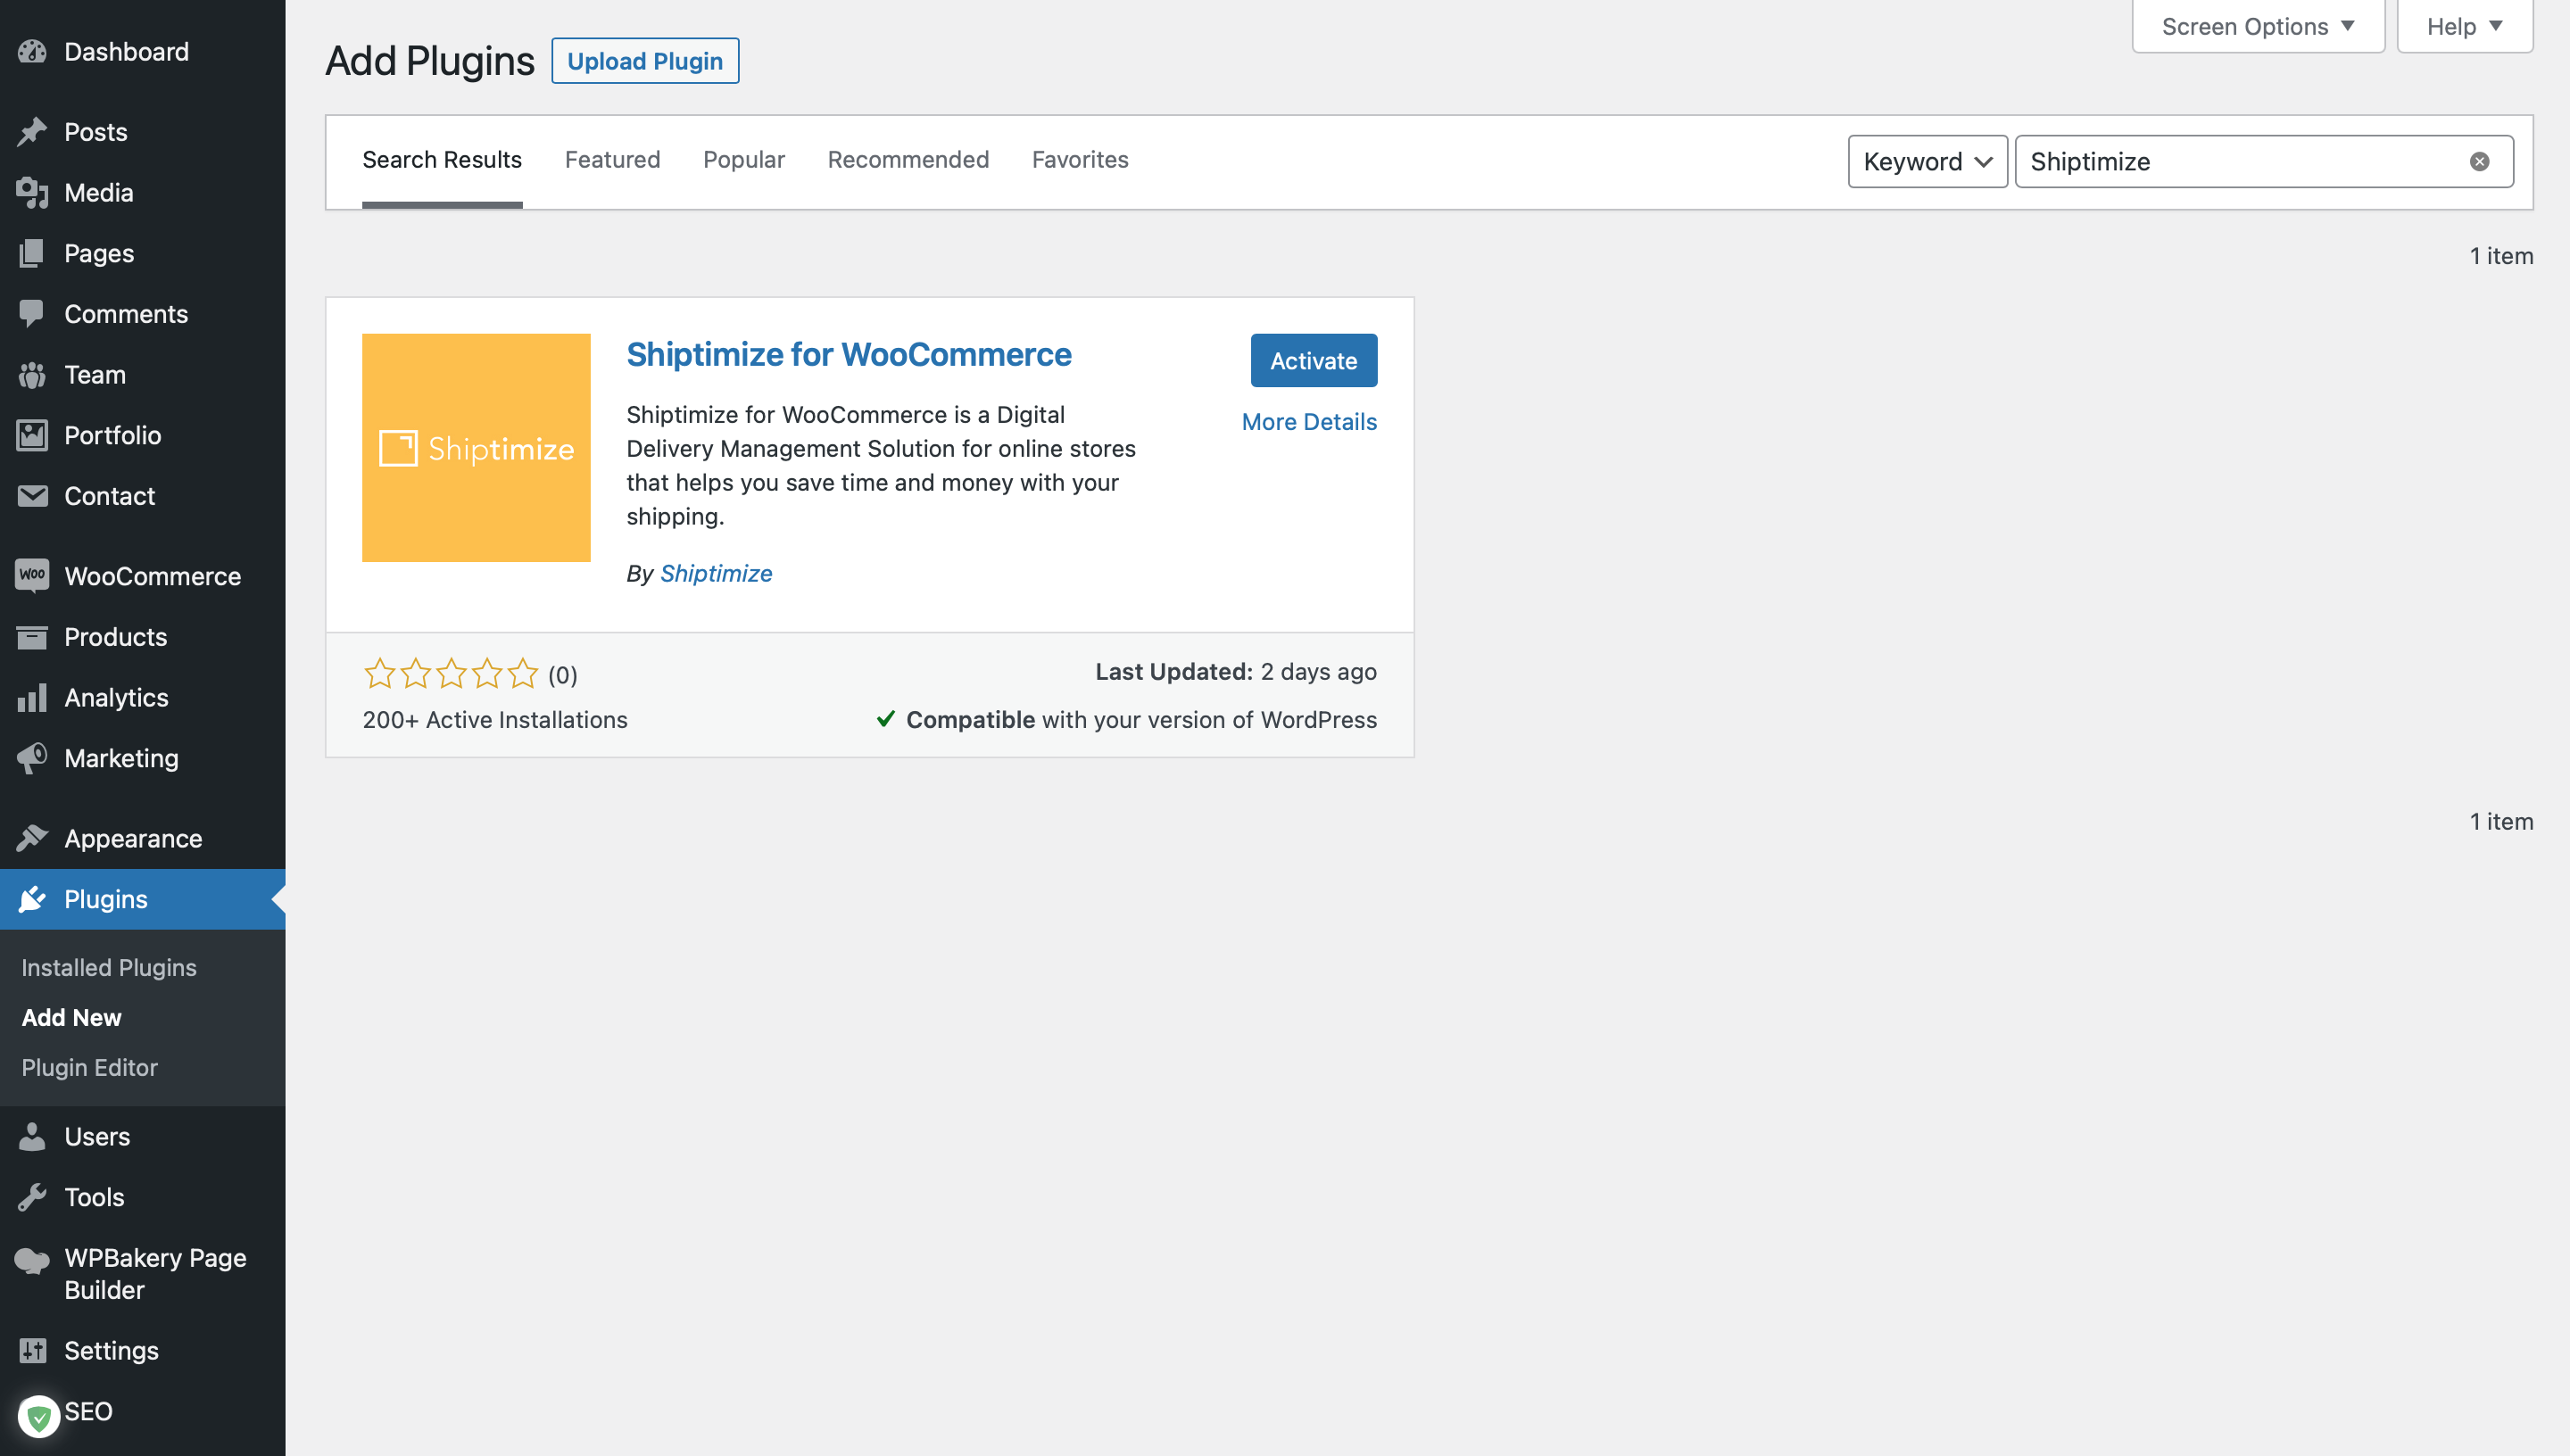
- Click on the “Activate Plugin” button
Configuration
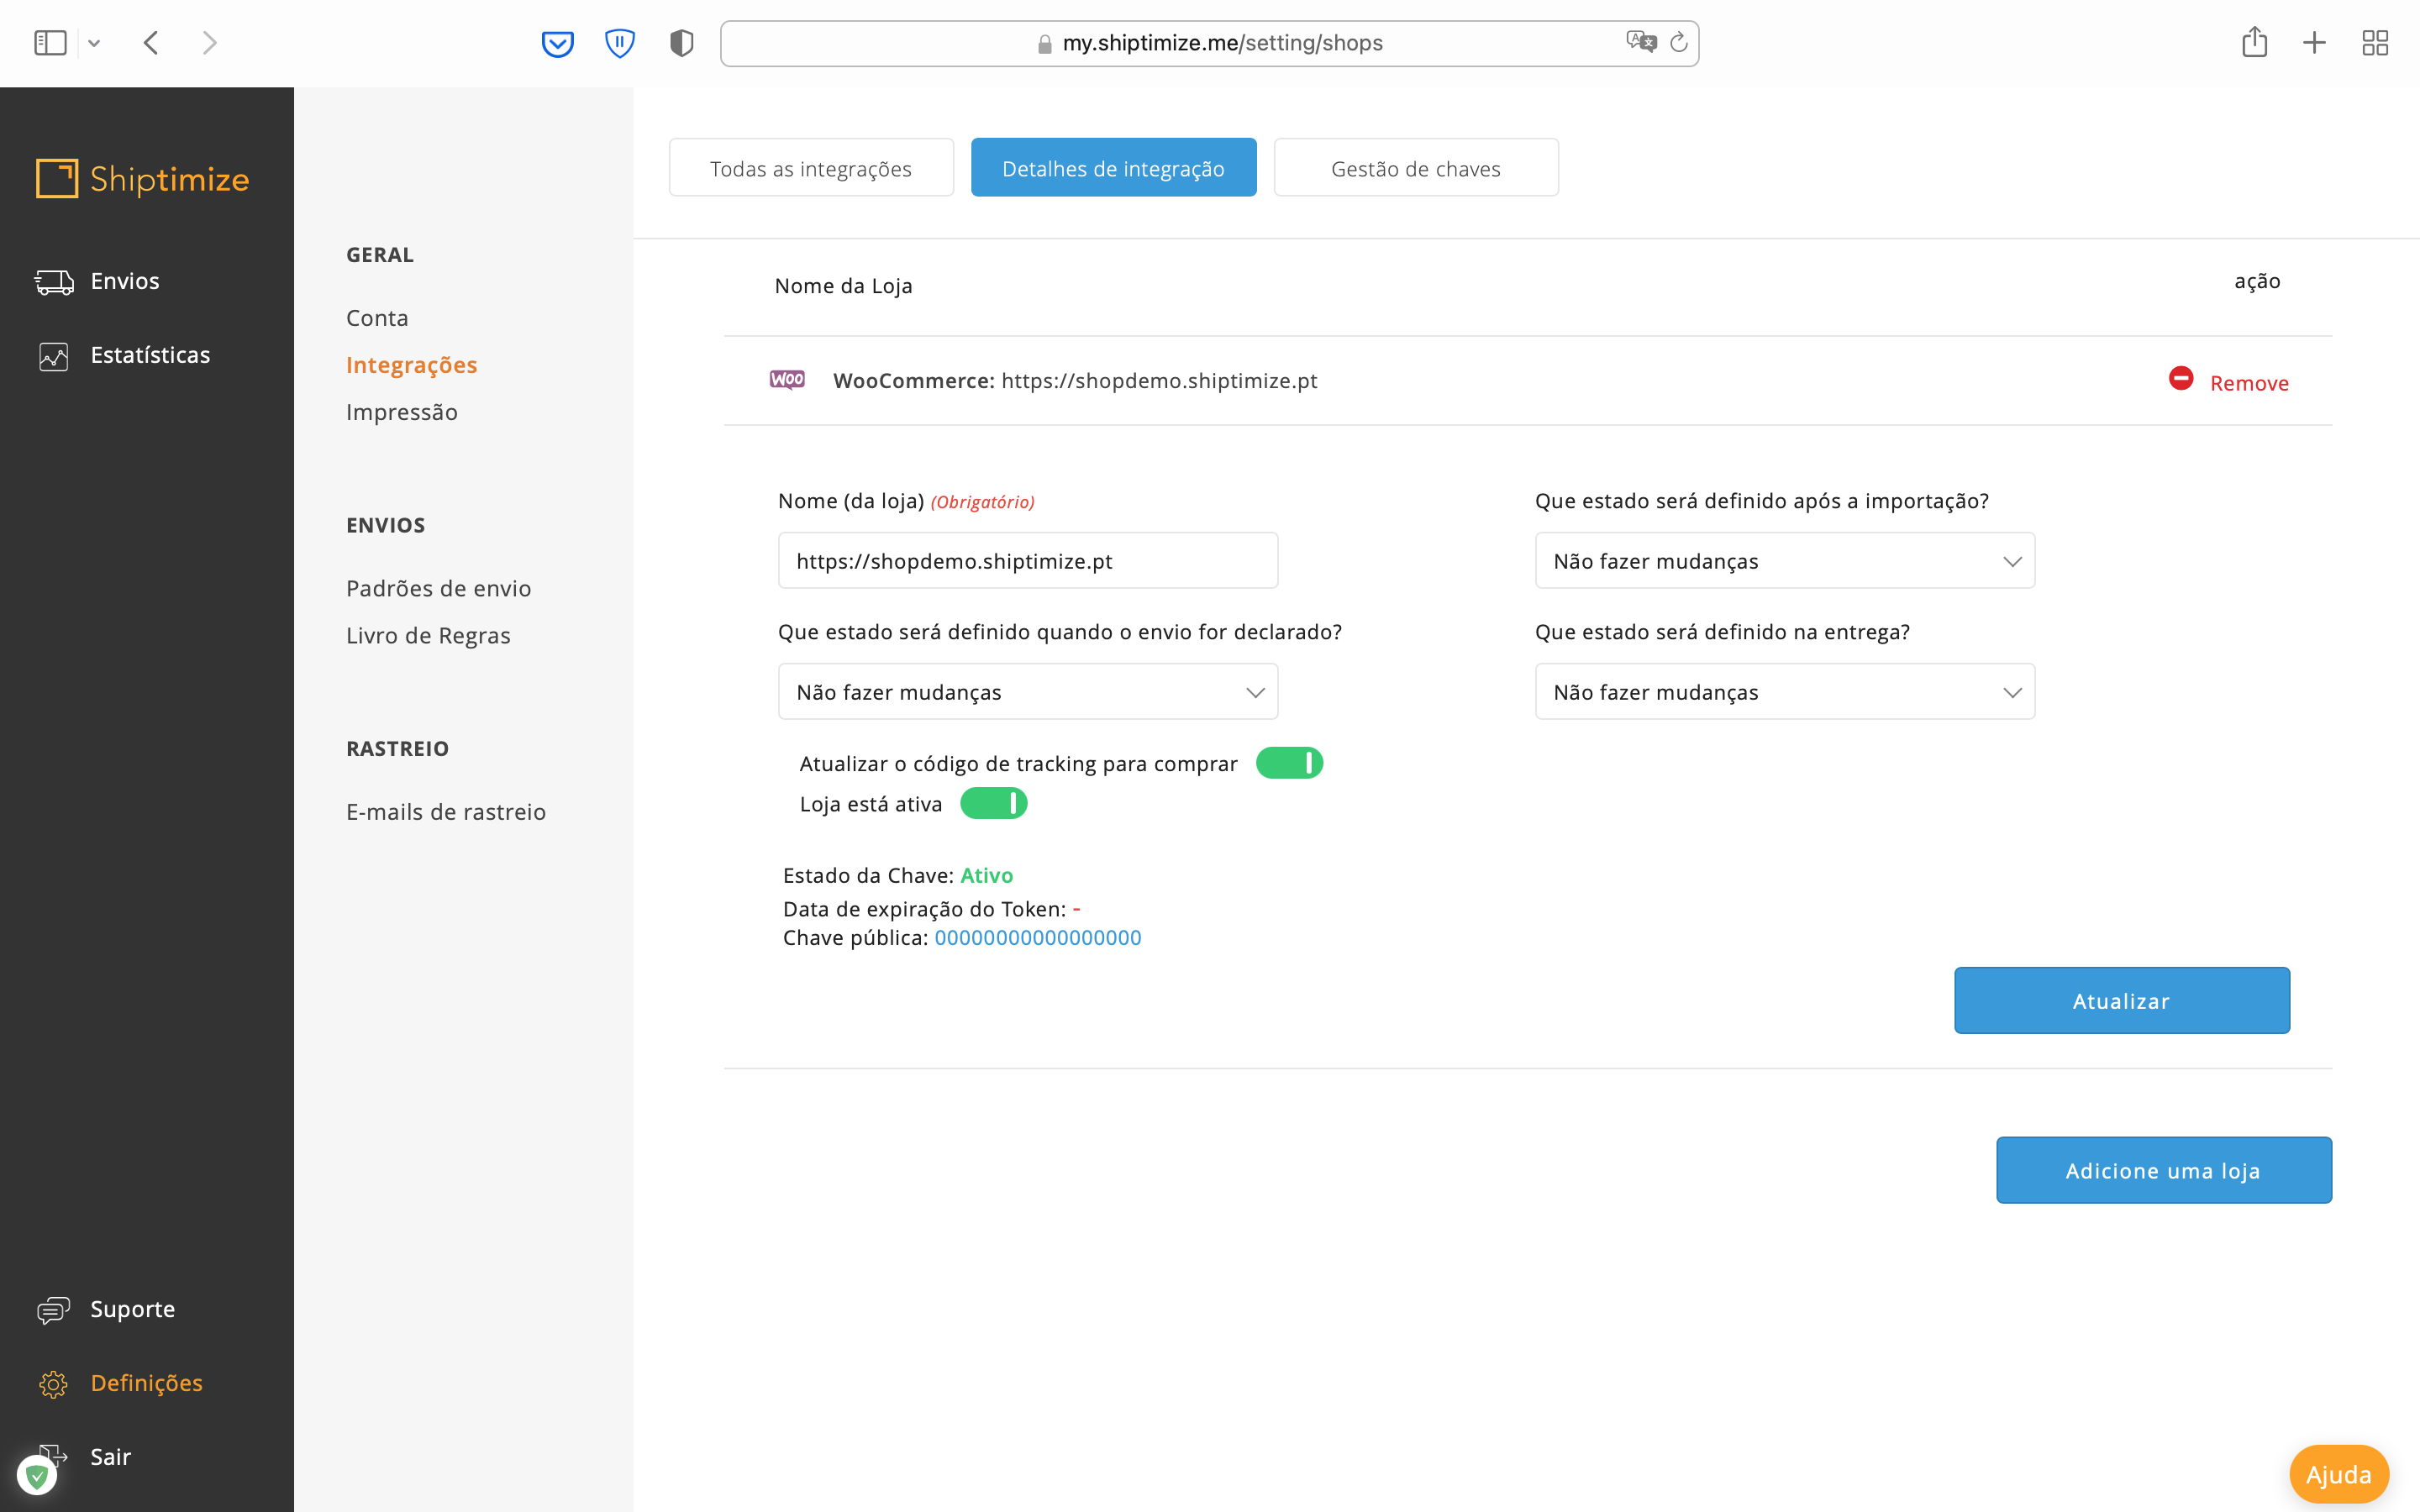
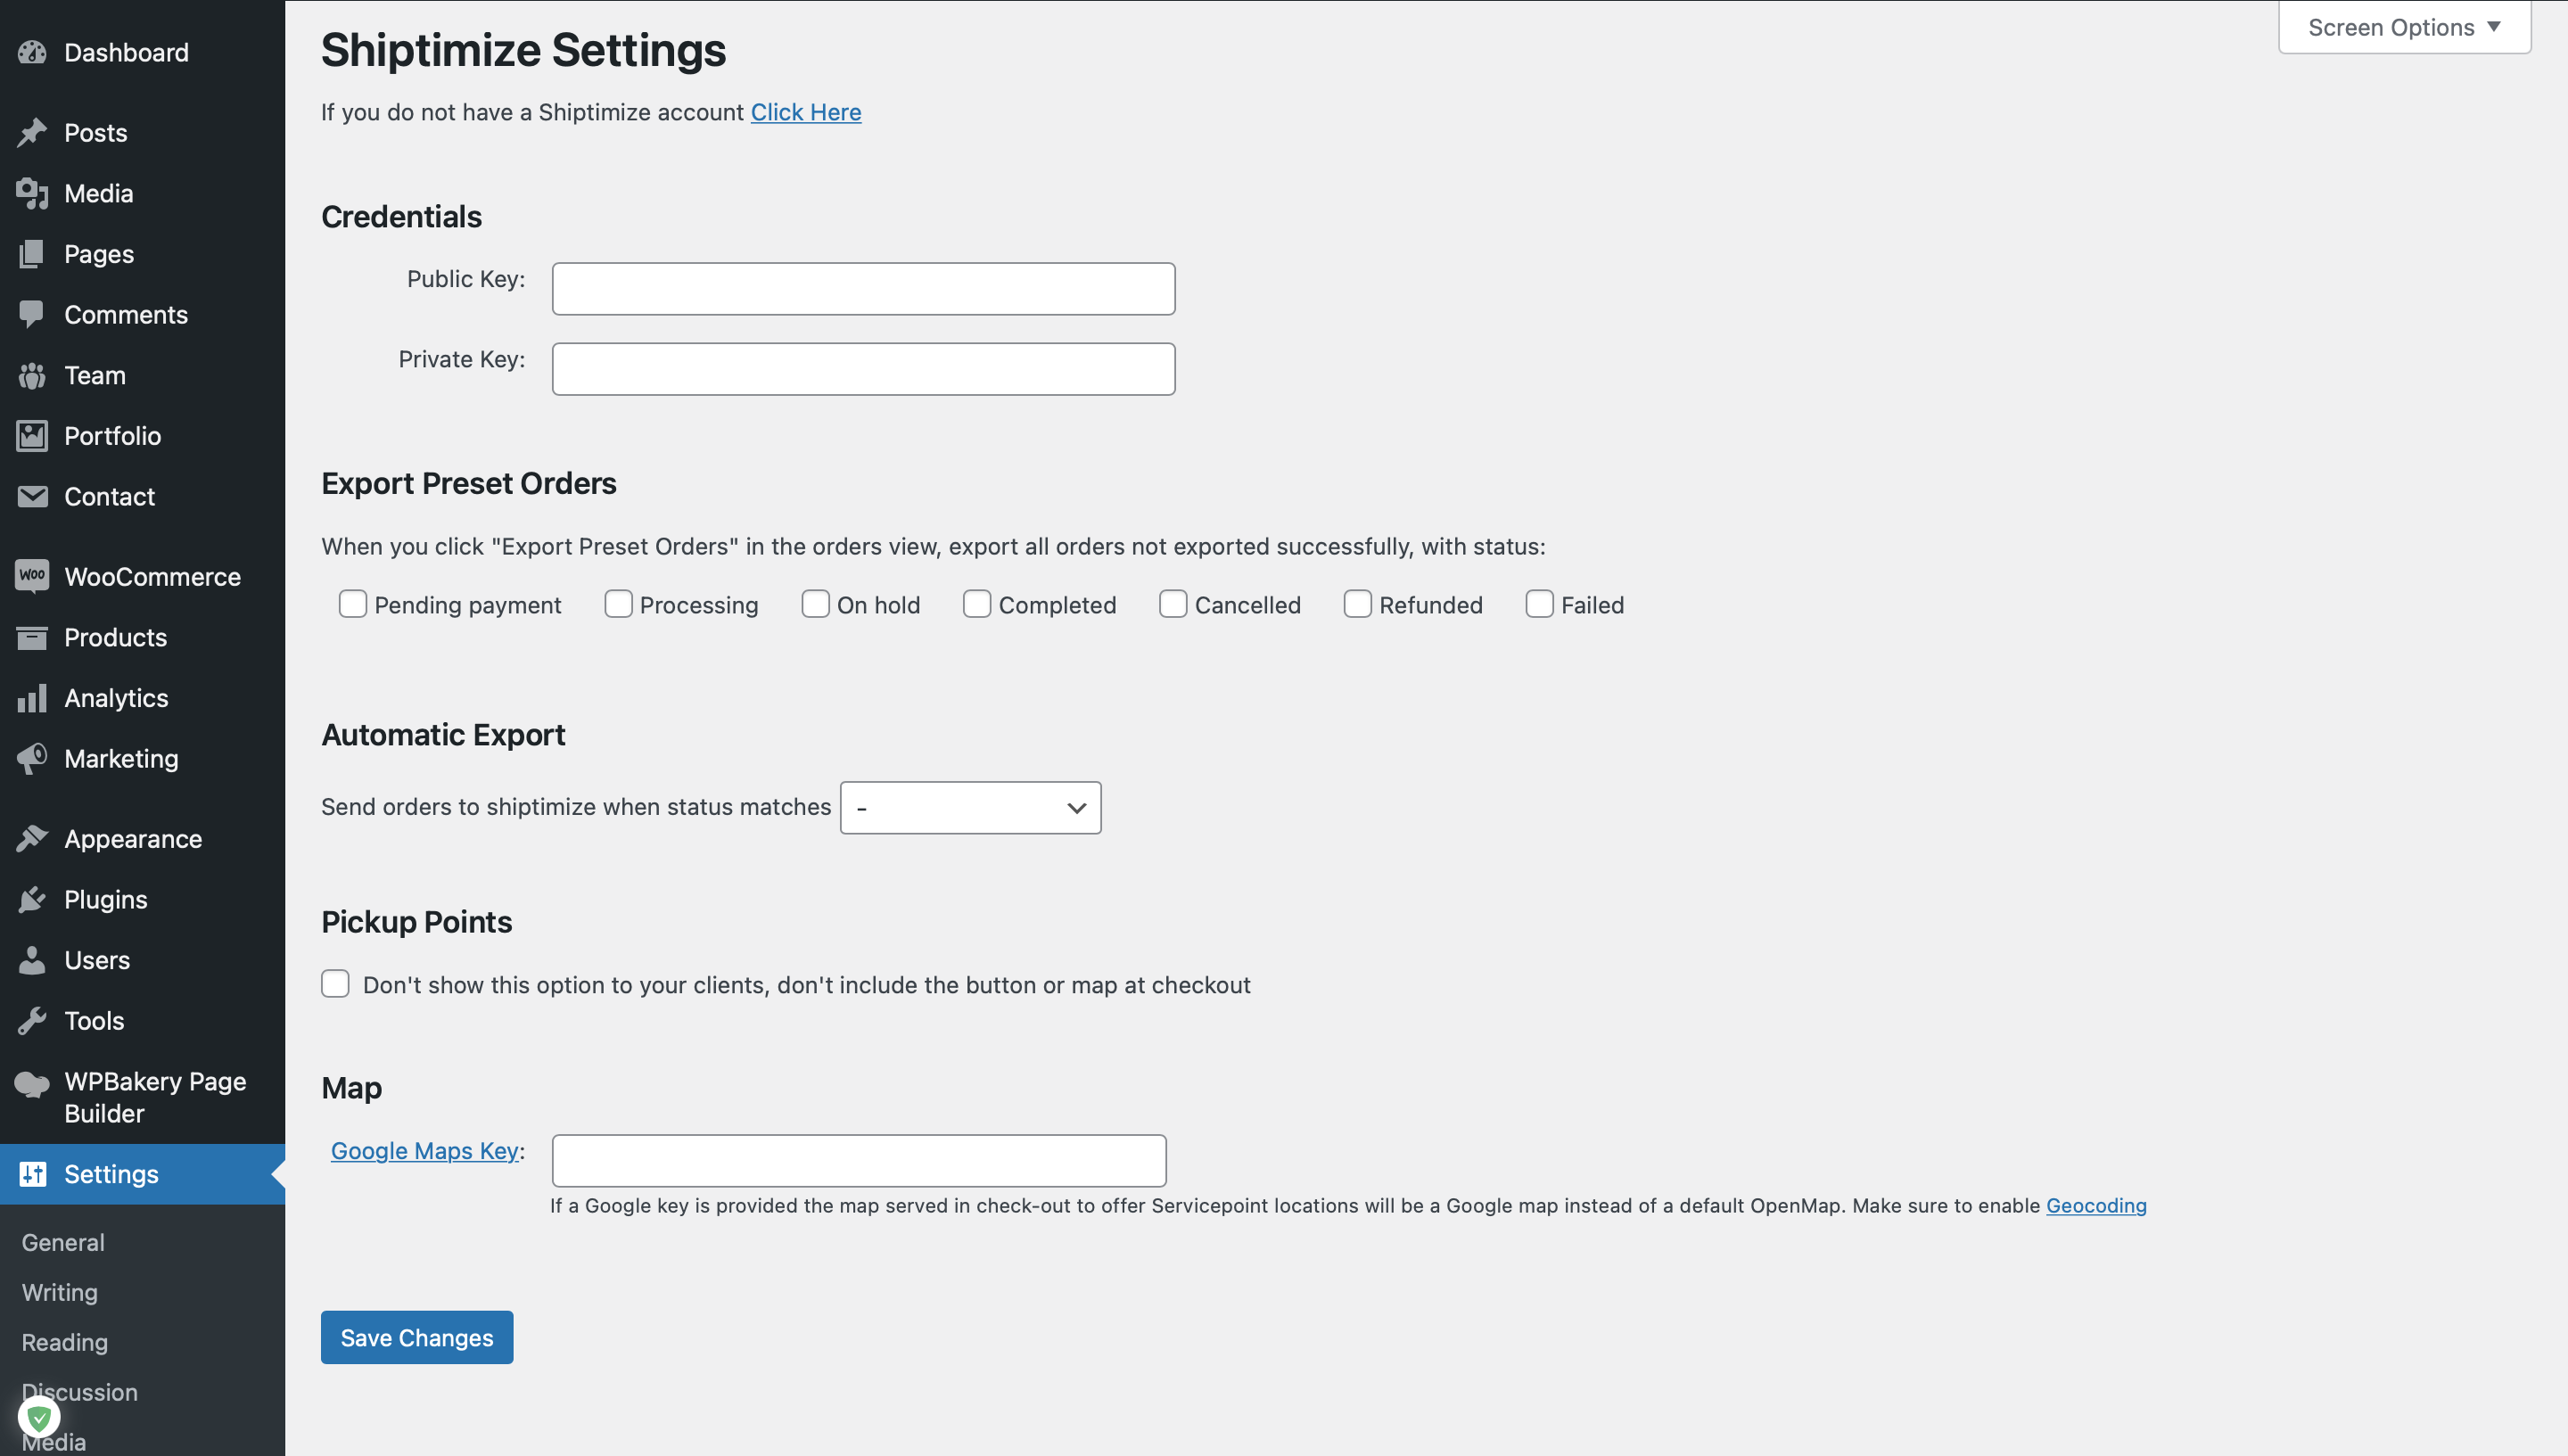
Once the Shiptimize plugin is activated, the plugin settings will be available via “Settings” > “Shiptimize settings.
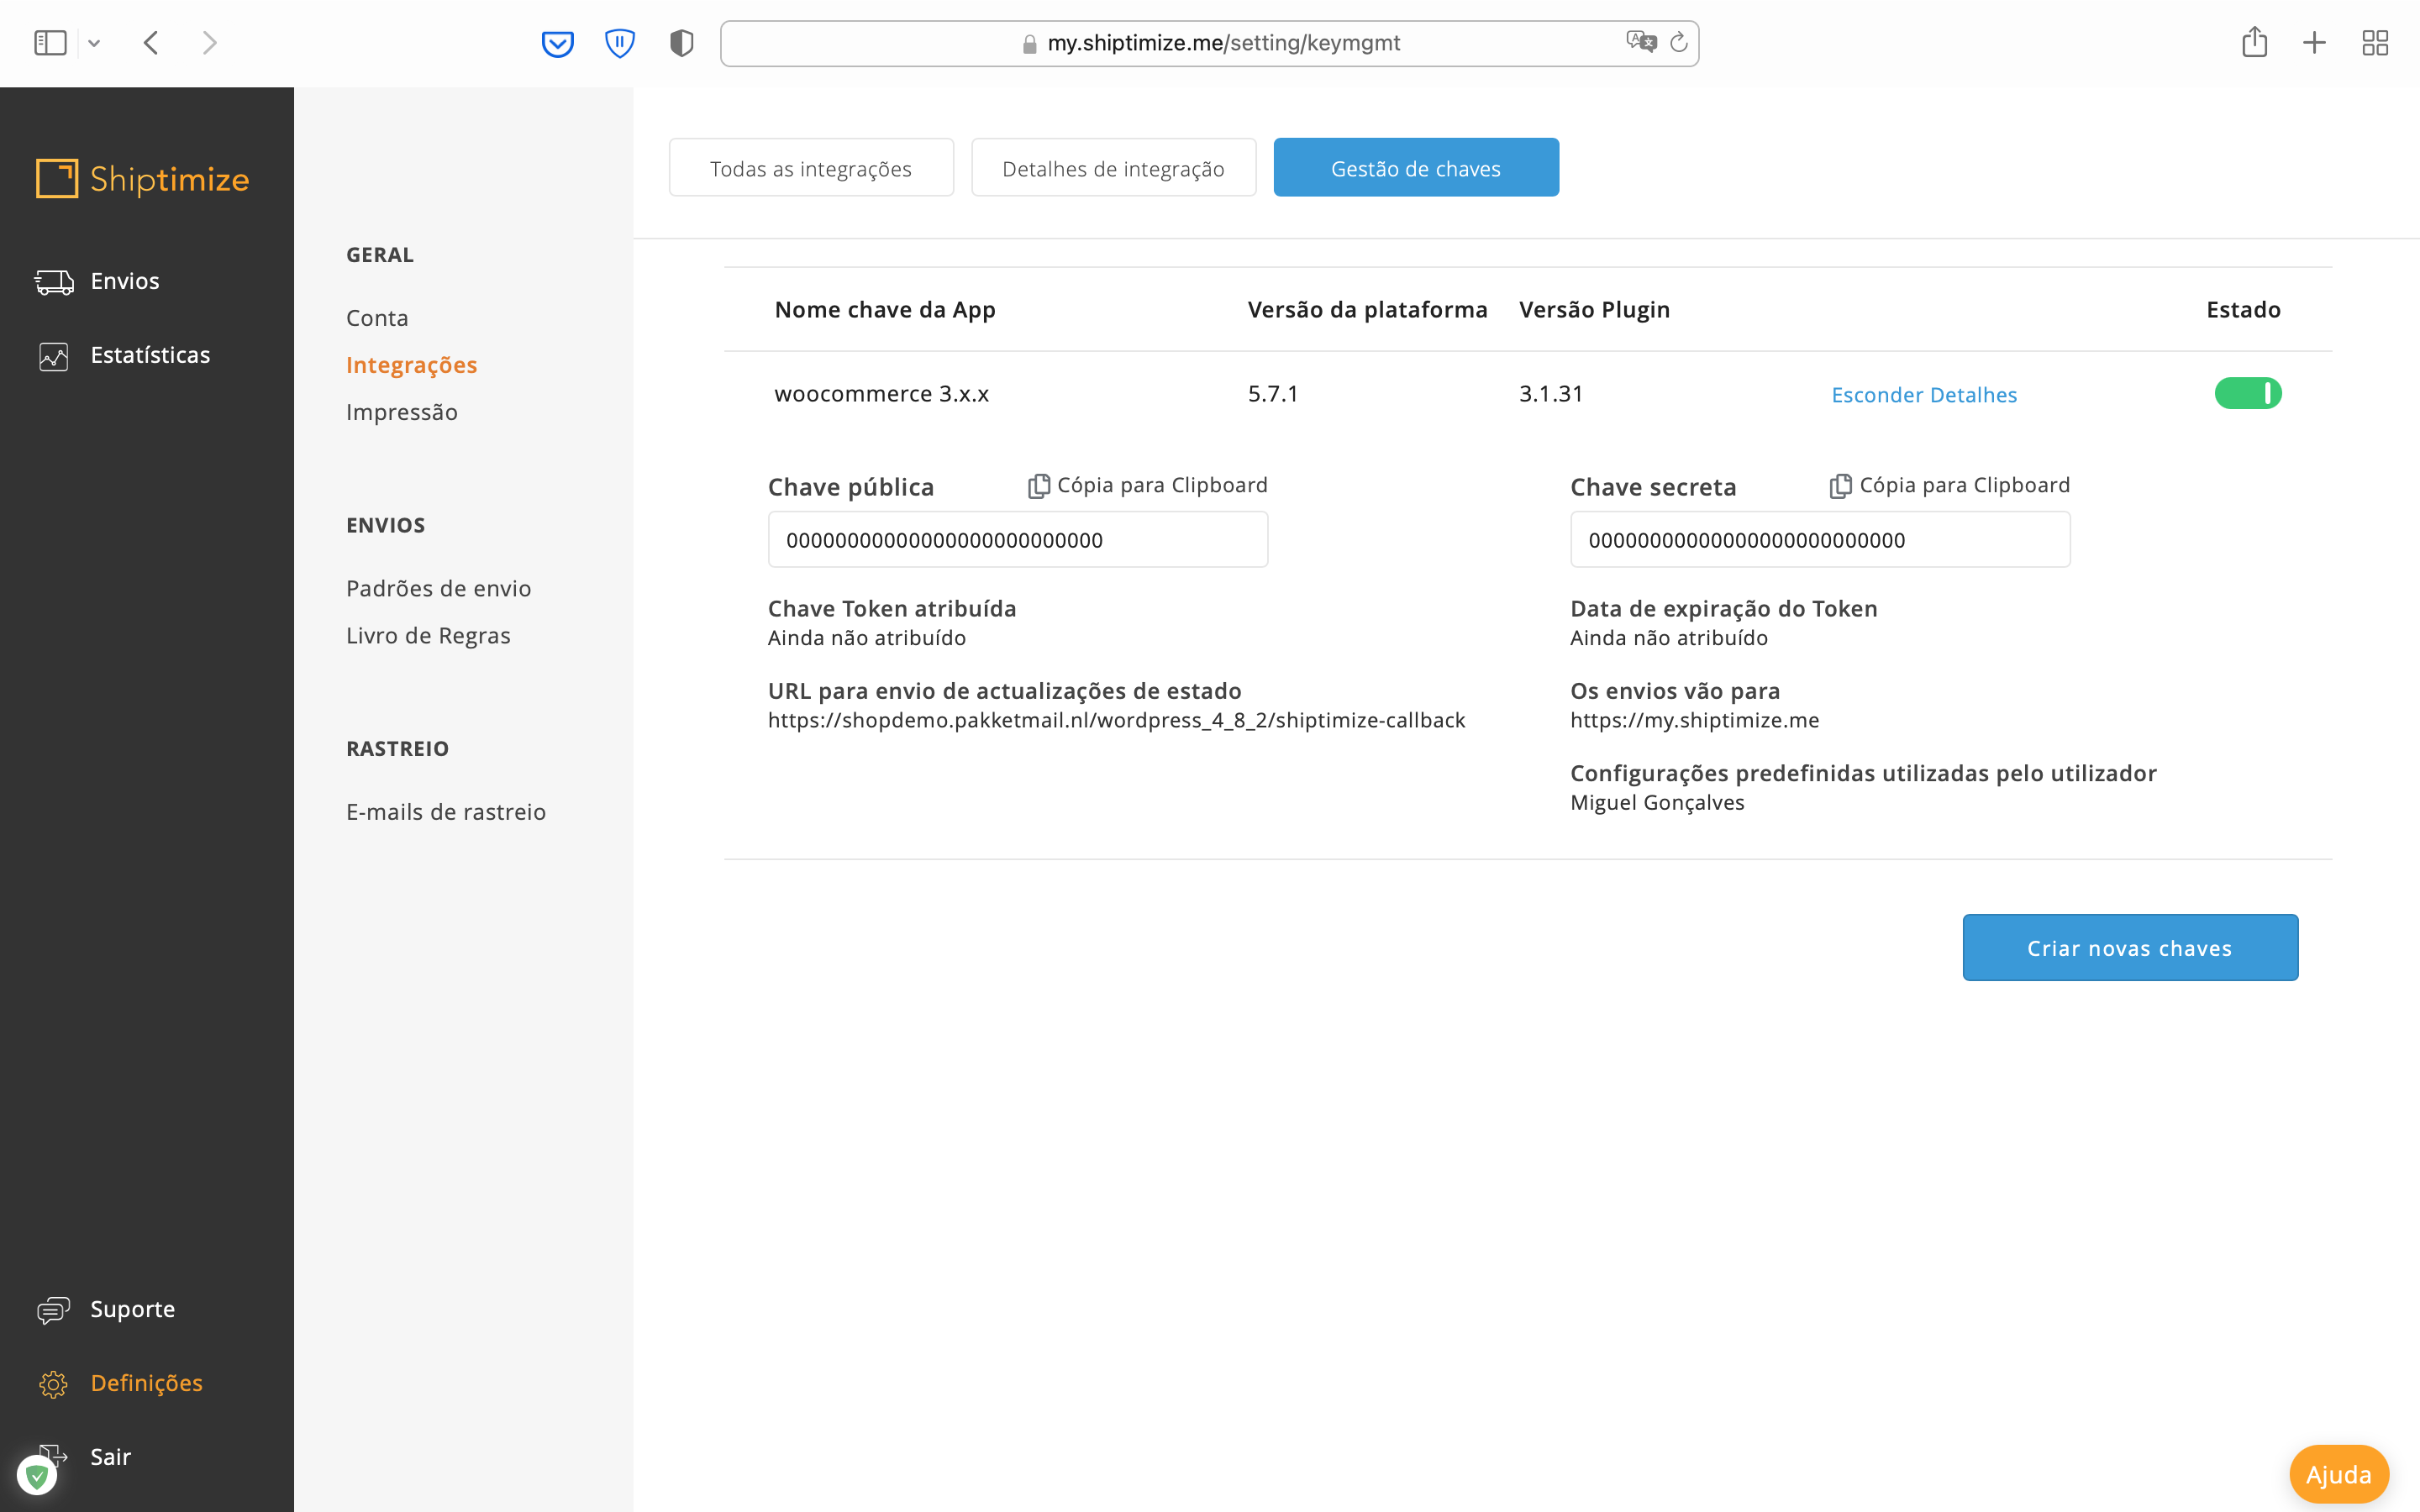
You will need to get your keys from the Shiptimize application under Settings > Integrations > Key management if you already have an associated account and copy and paste the public key and the private key.
After entering your credentials it is advisable to activate the option “In process” in Export predefined orders and click on Save the changes.
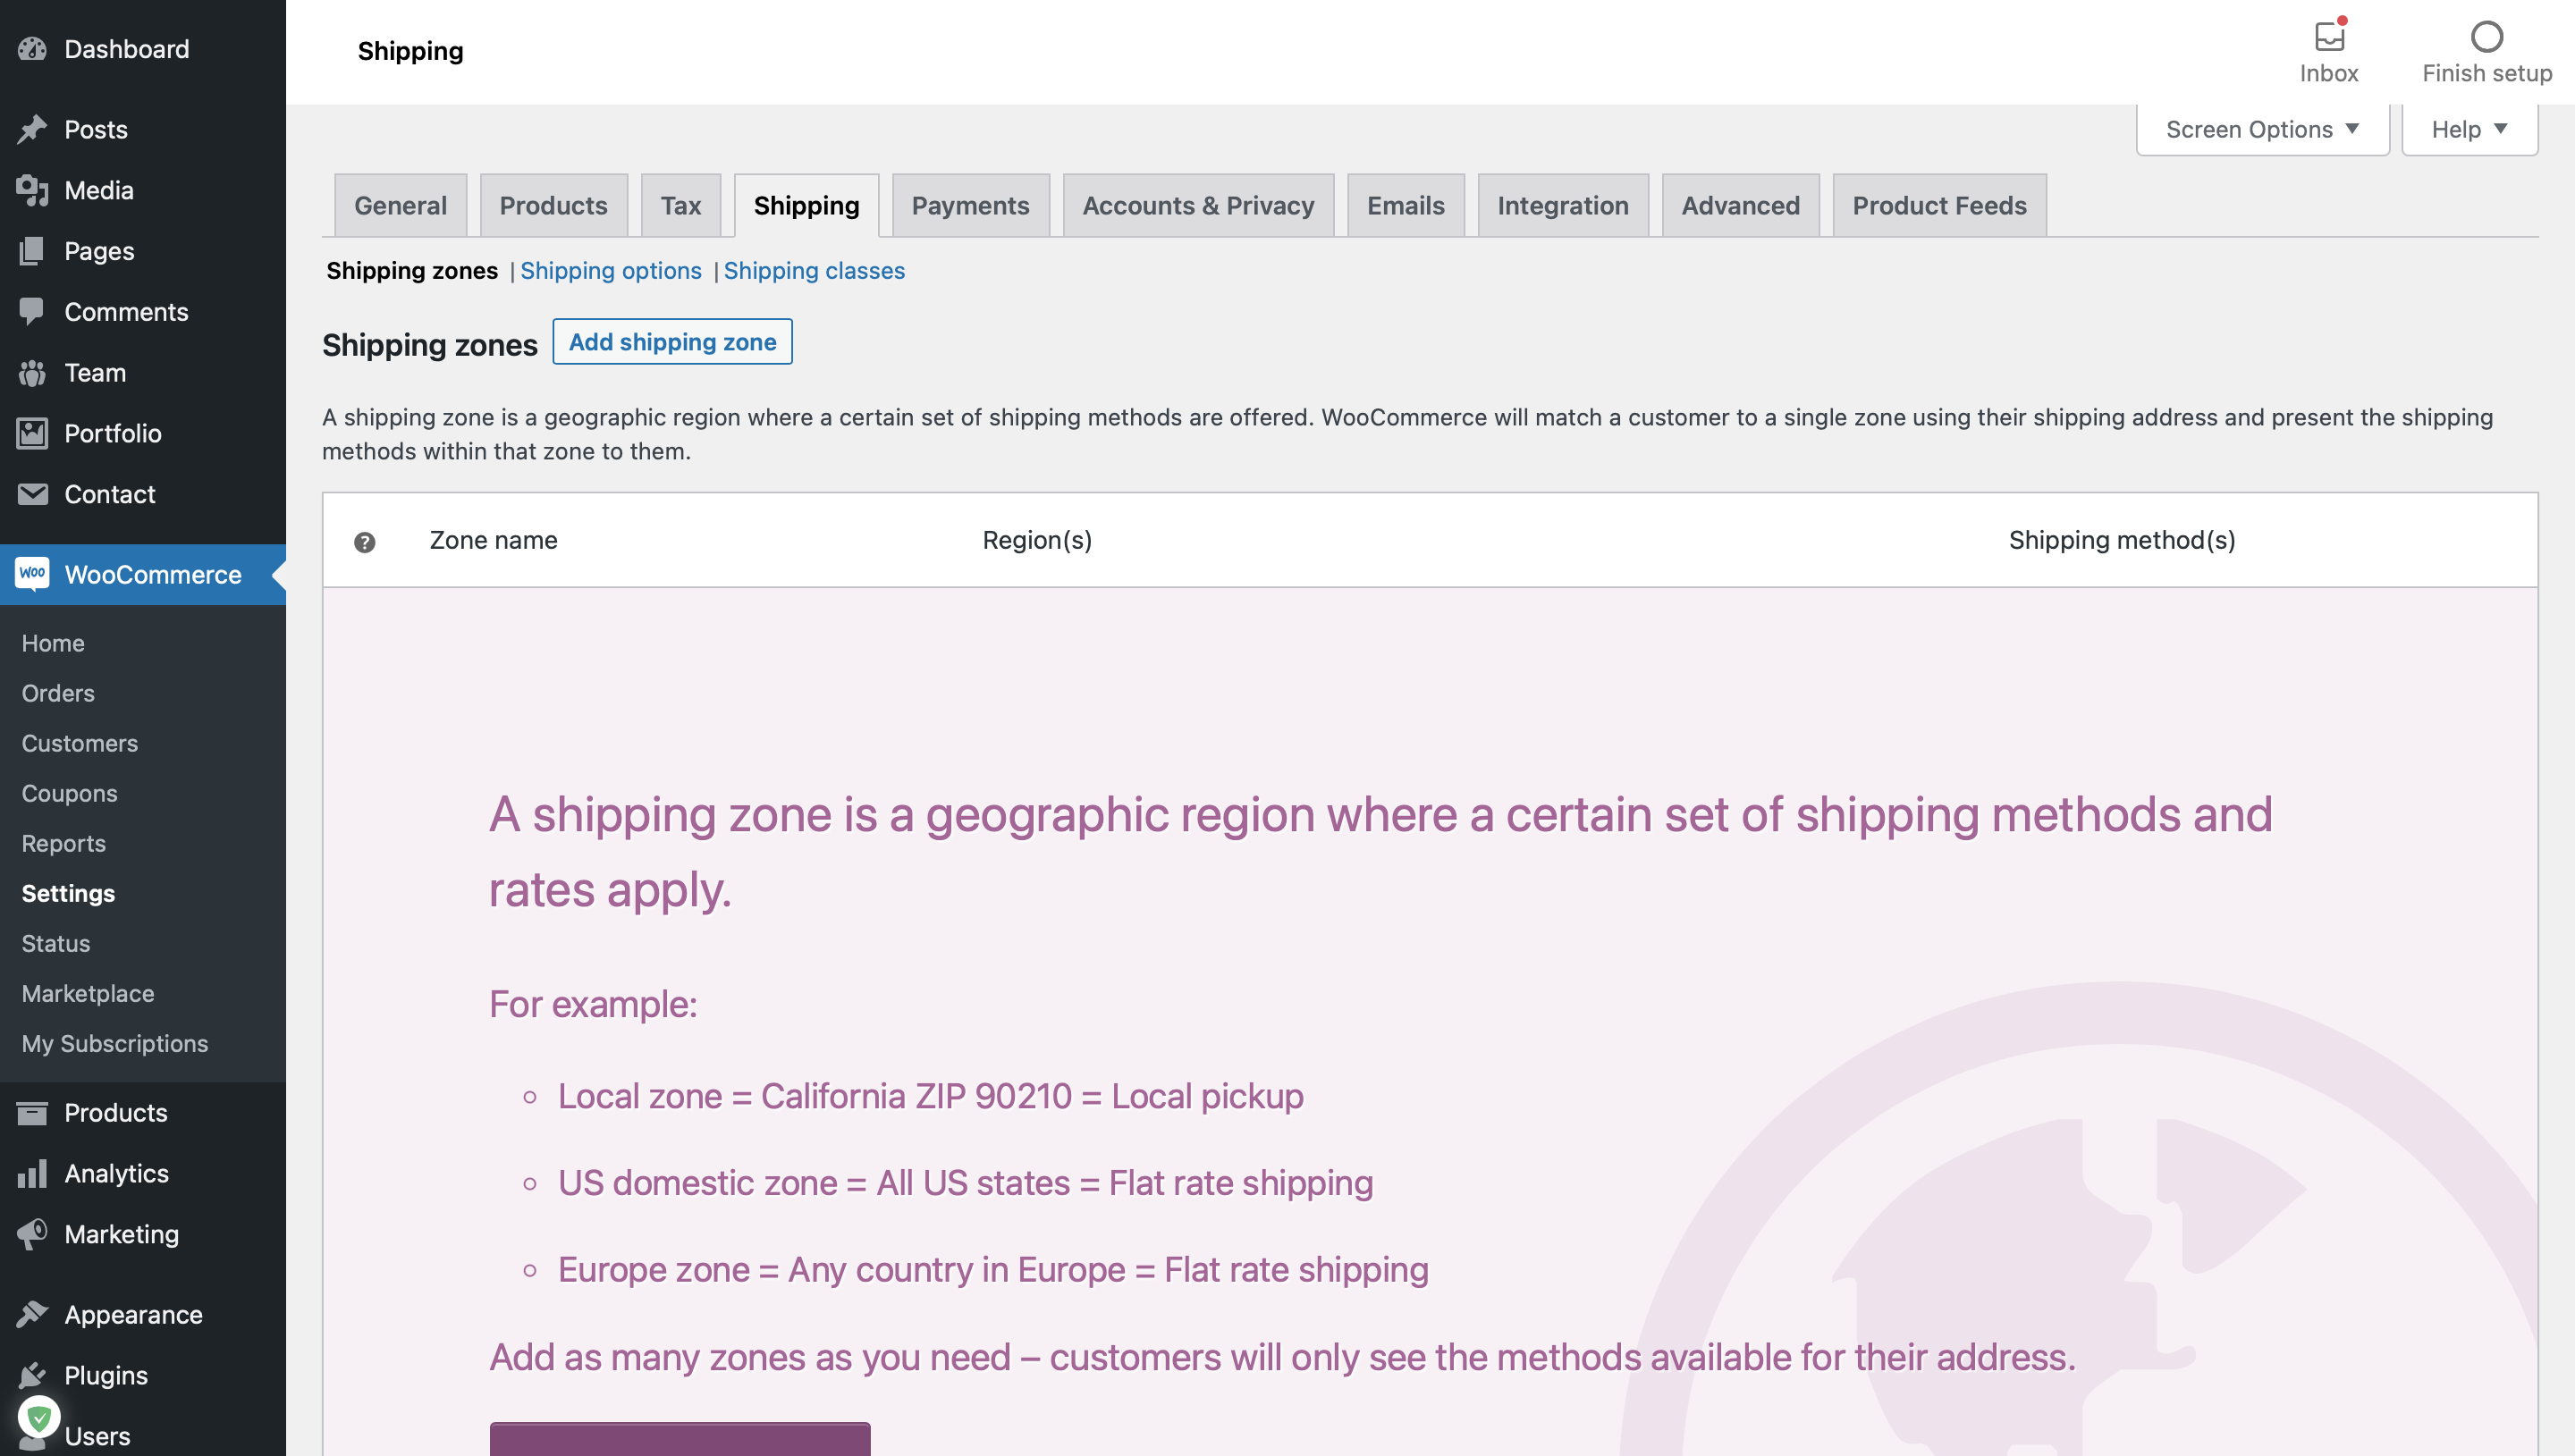
Next you should go to Woocommerce settings under Woocommerce > Settings > Shipping and edit or add a shipping zone.
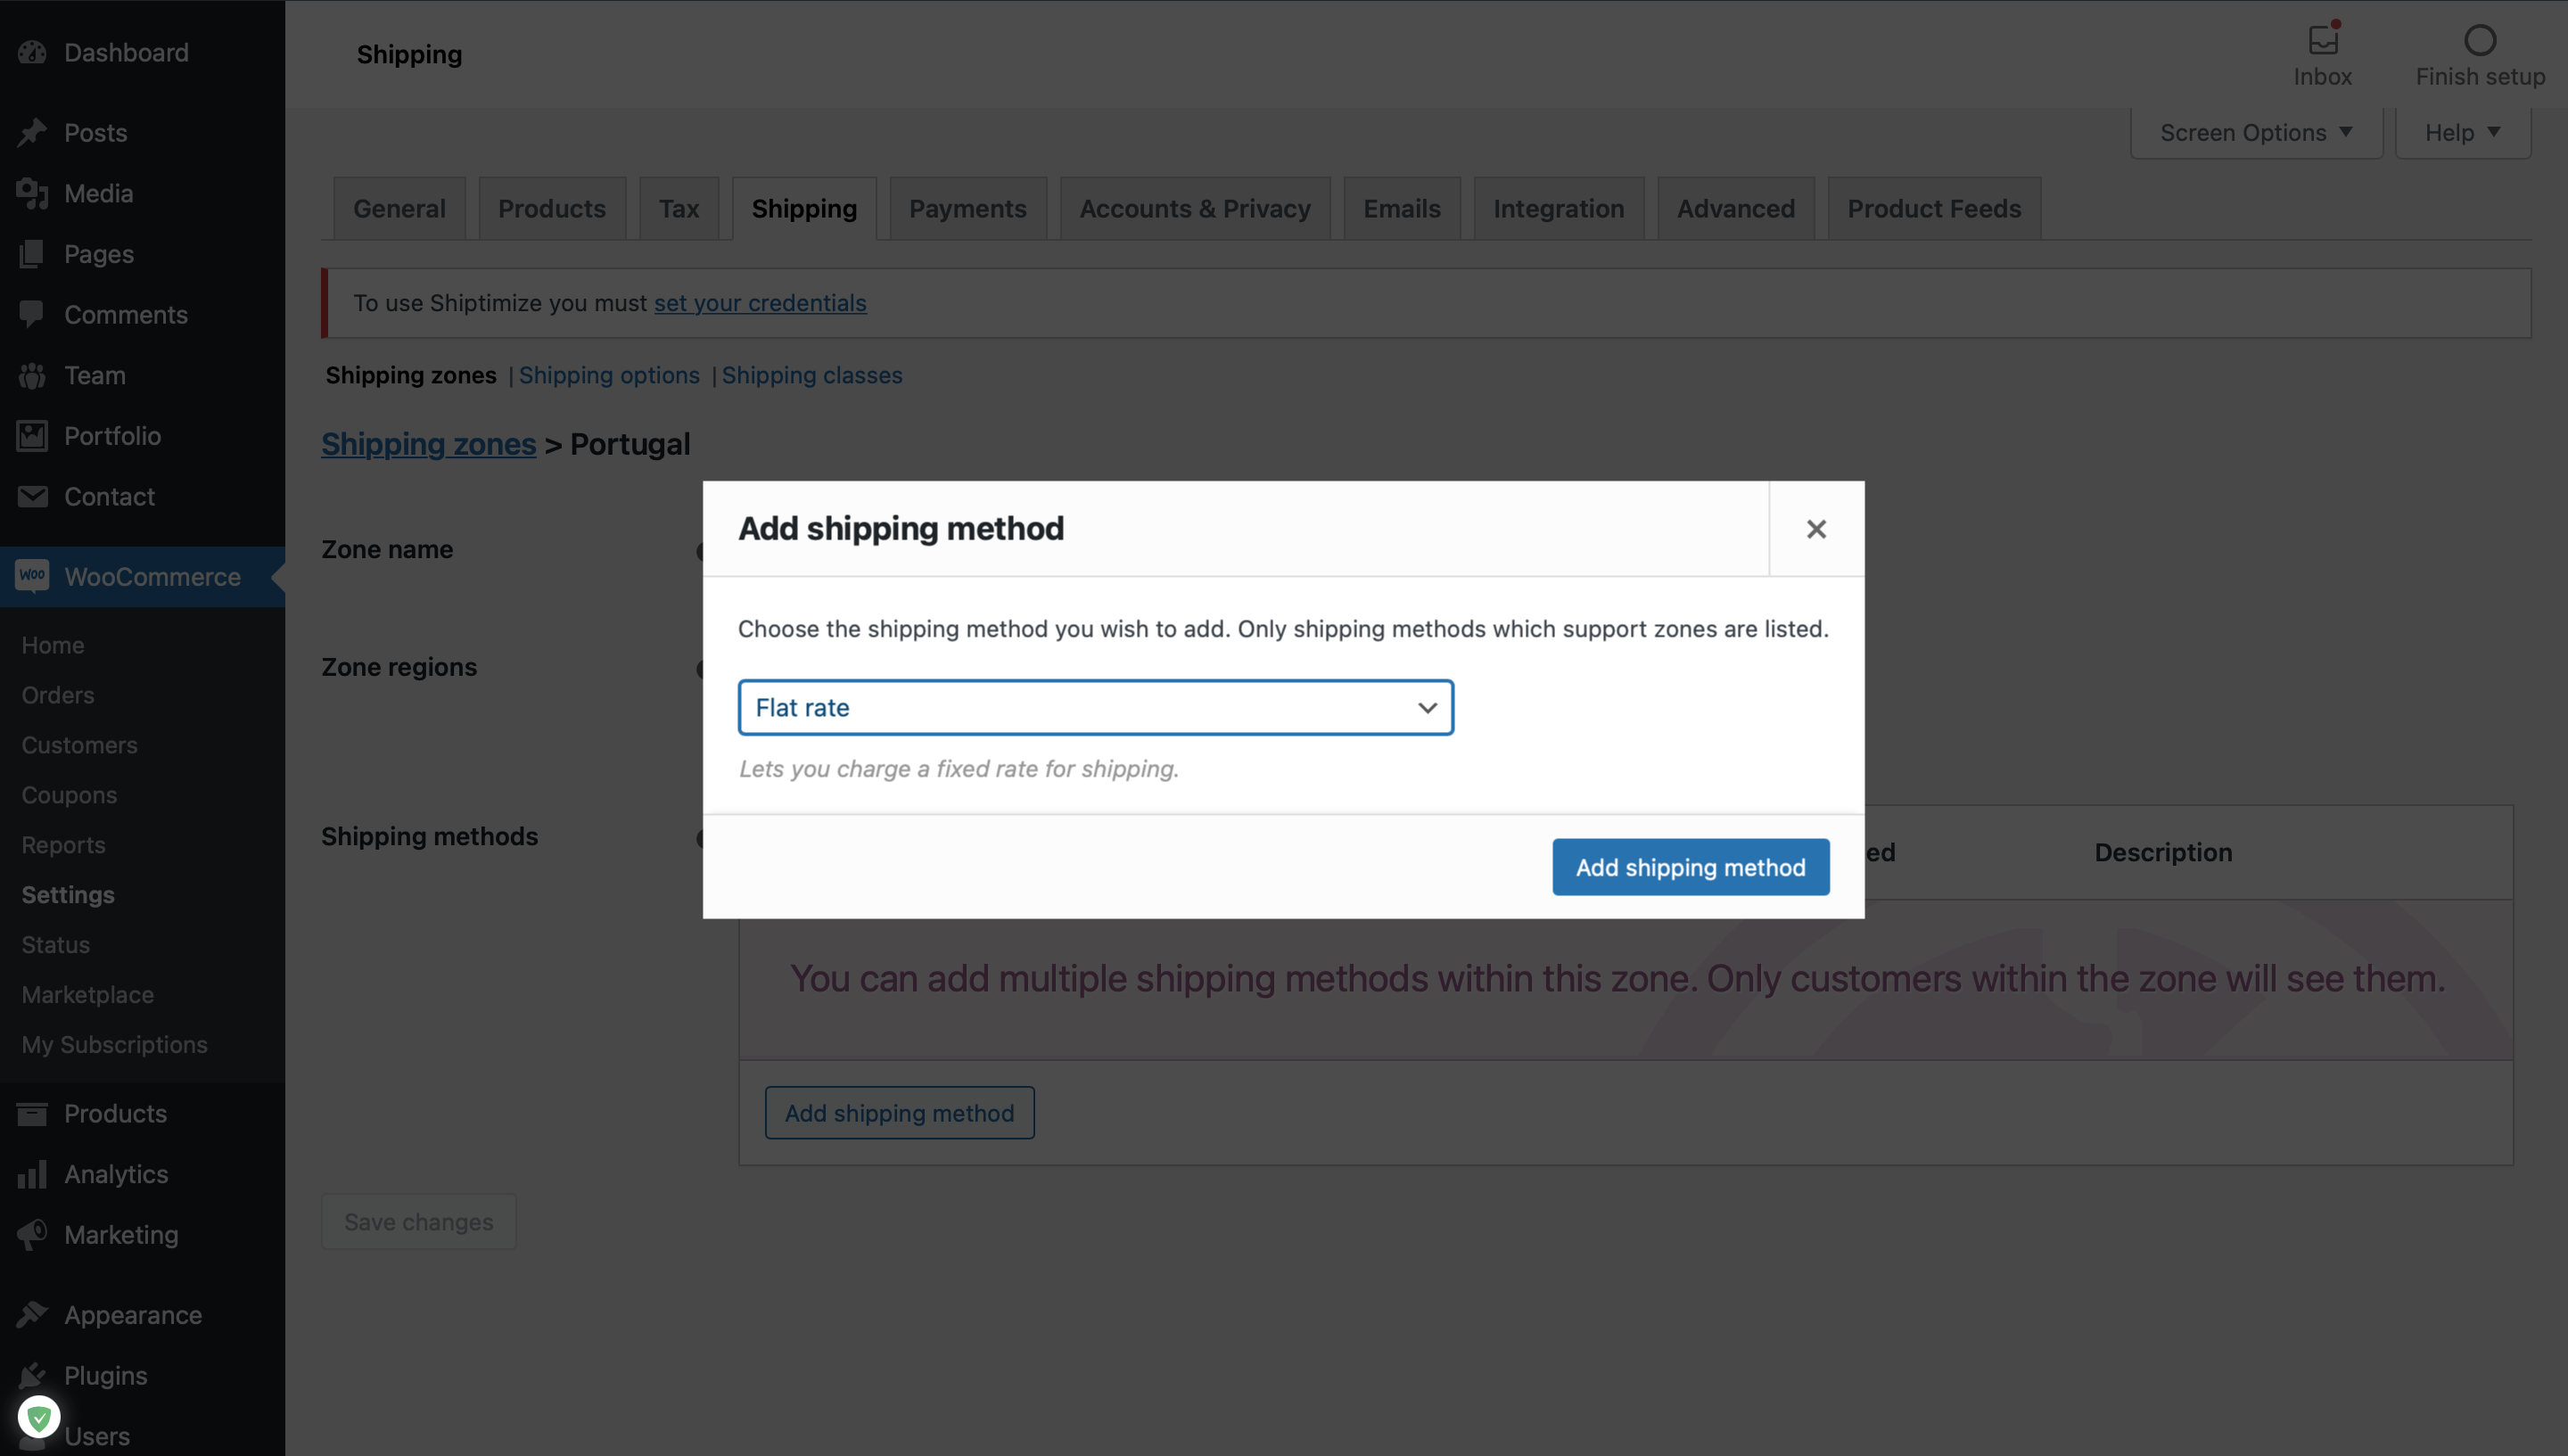
By clicking on add shipping method, the carriers for your contract will be available there.
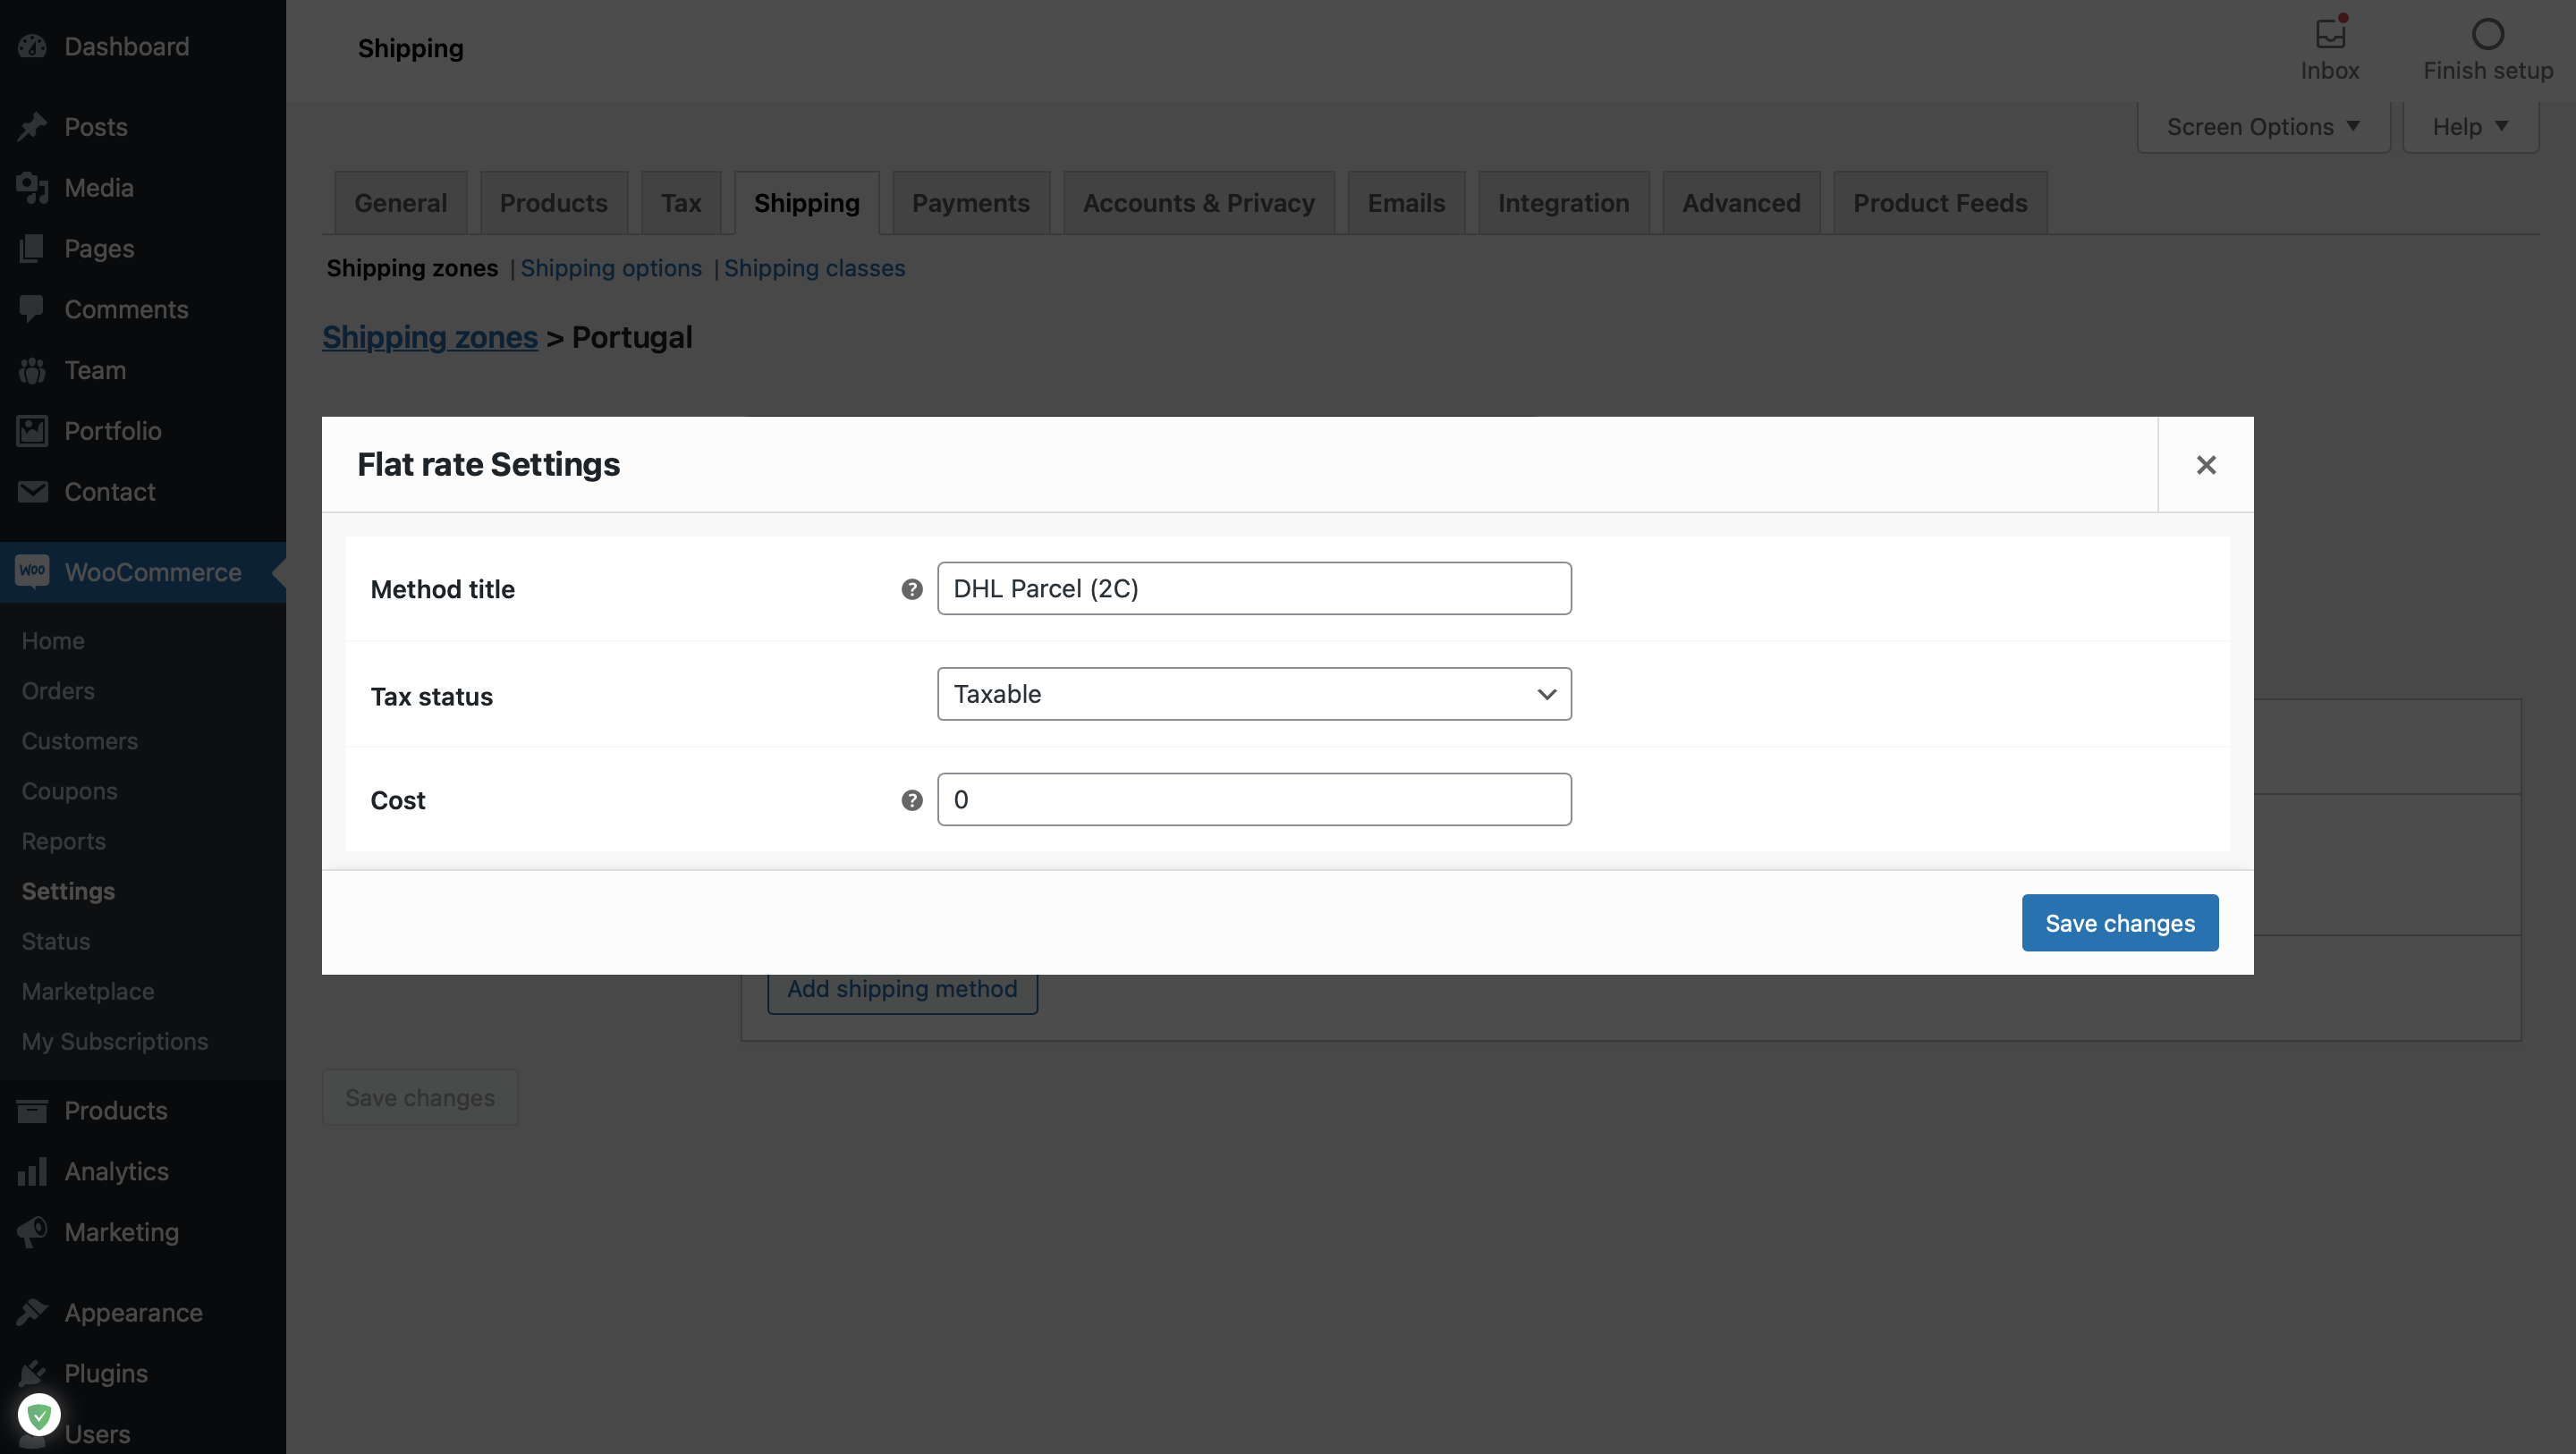
Once the carrier is added, move the mouse over it and select “Edit”.
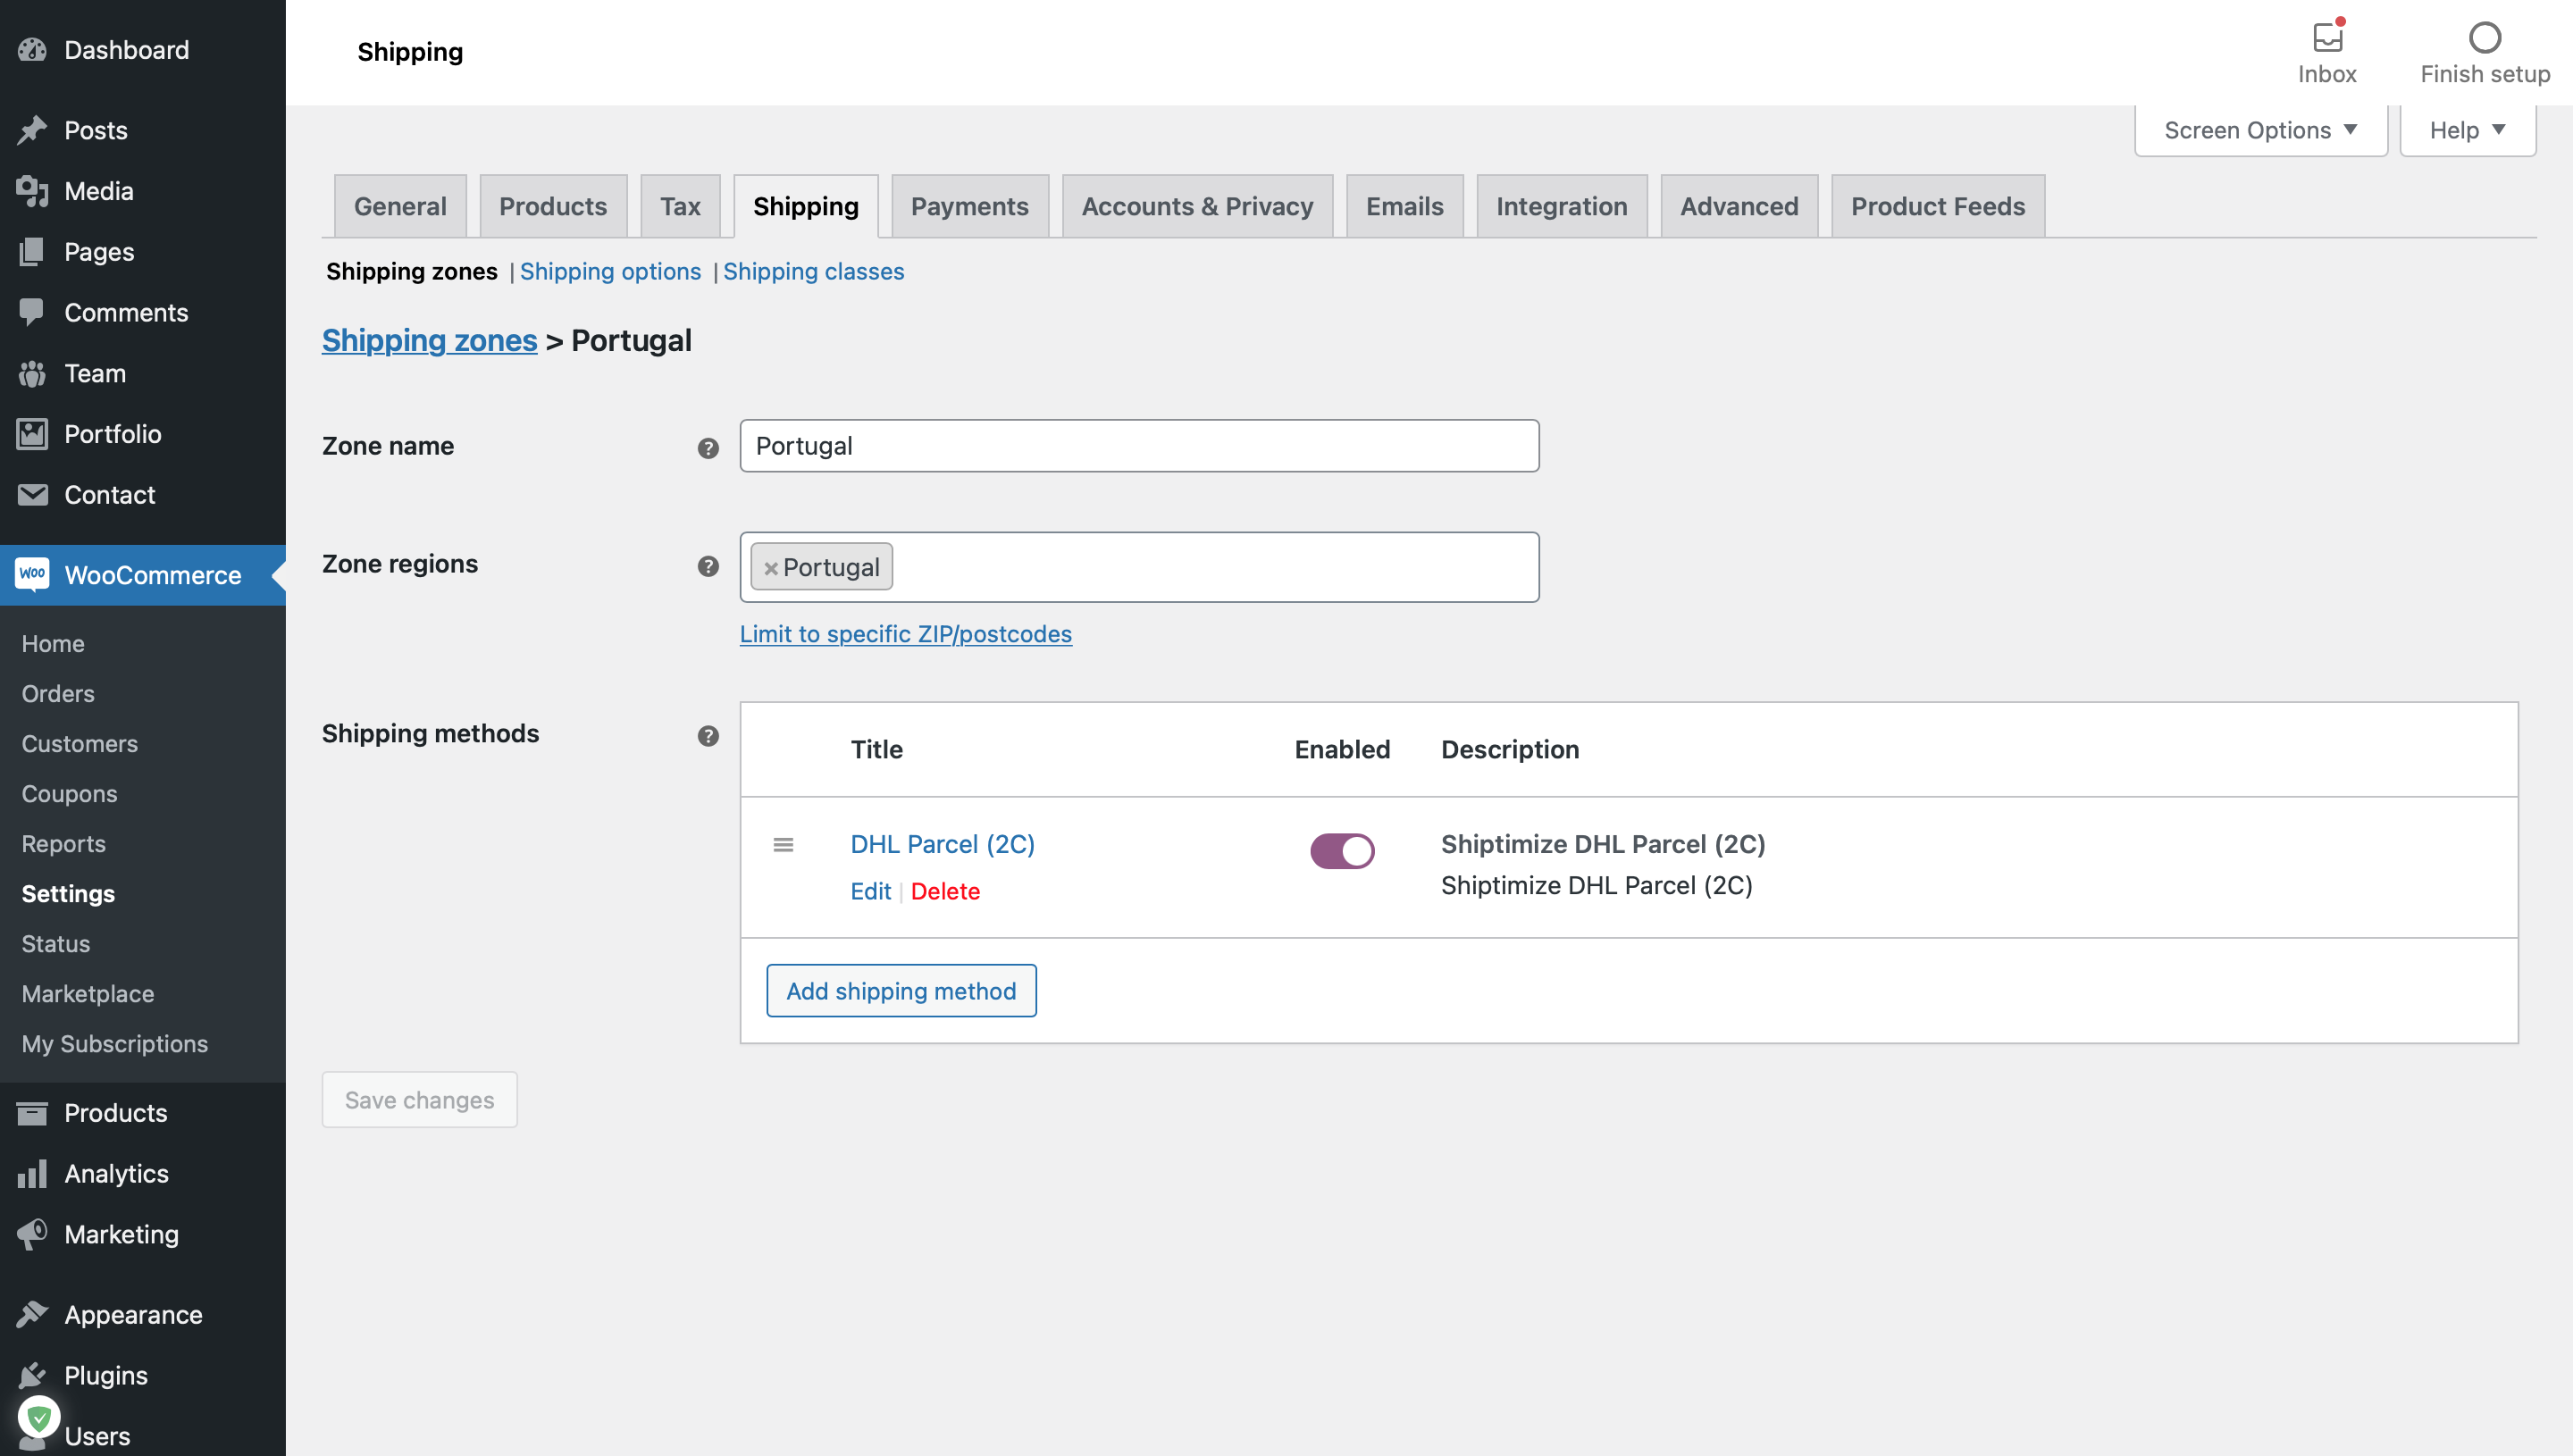
Then set the appropriate value for this carrier in the Cost zone and click Save Changes.
Pick-up points
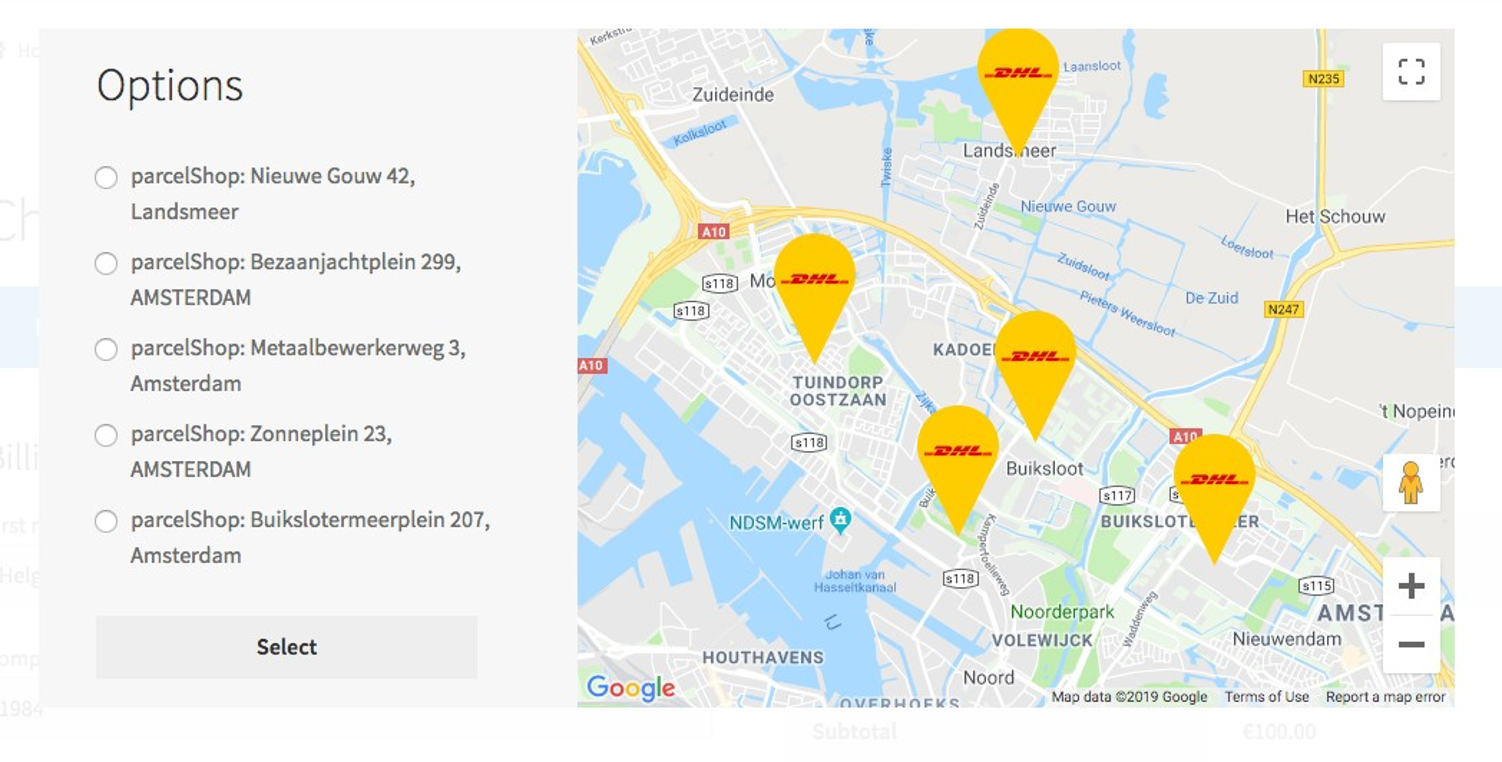
If the carrier provides a “Pickup Service”, we will attach a button to the checkout that allows the user to select their preferred location.
If you have a google maps key, we will display a google map at checkout.
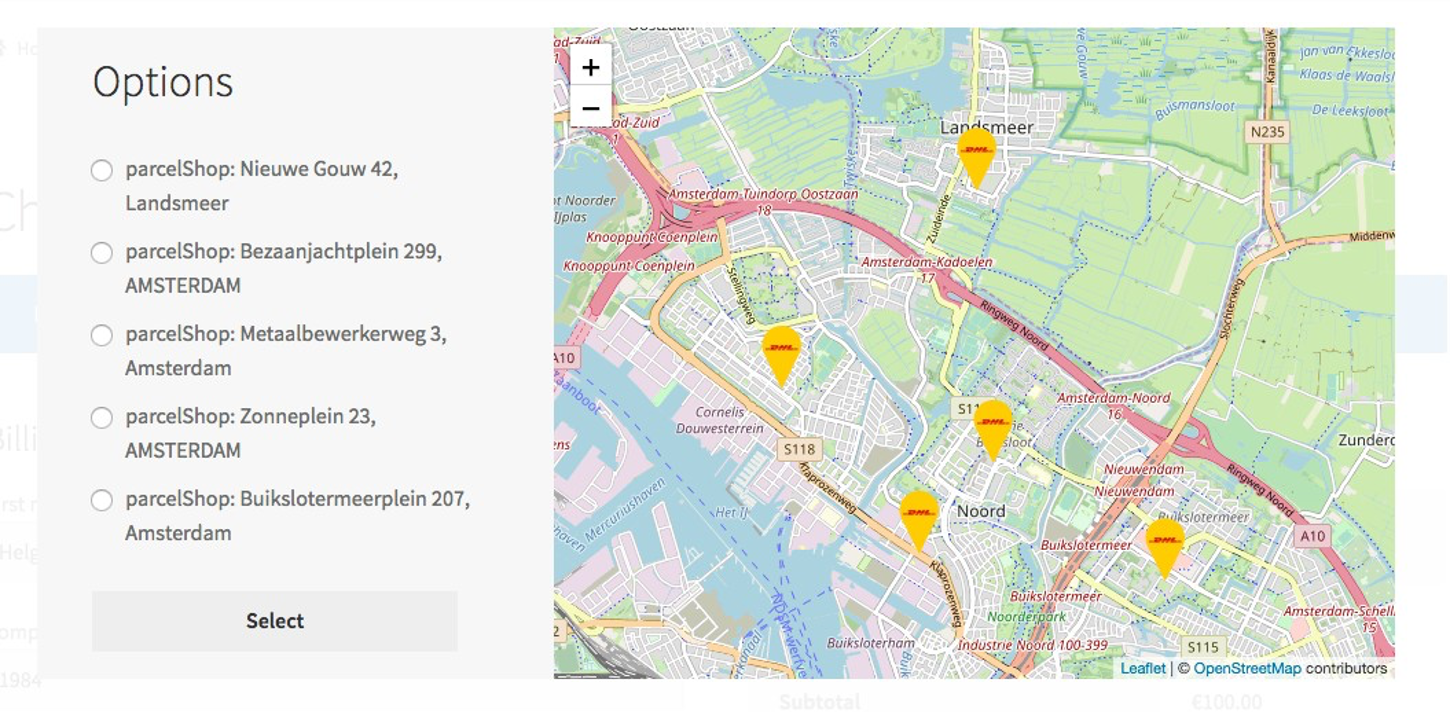
If a google maps key is not set, we will show an OpenStreetMap.
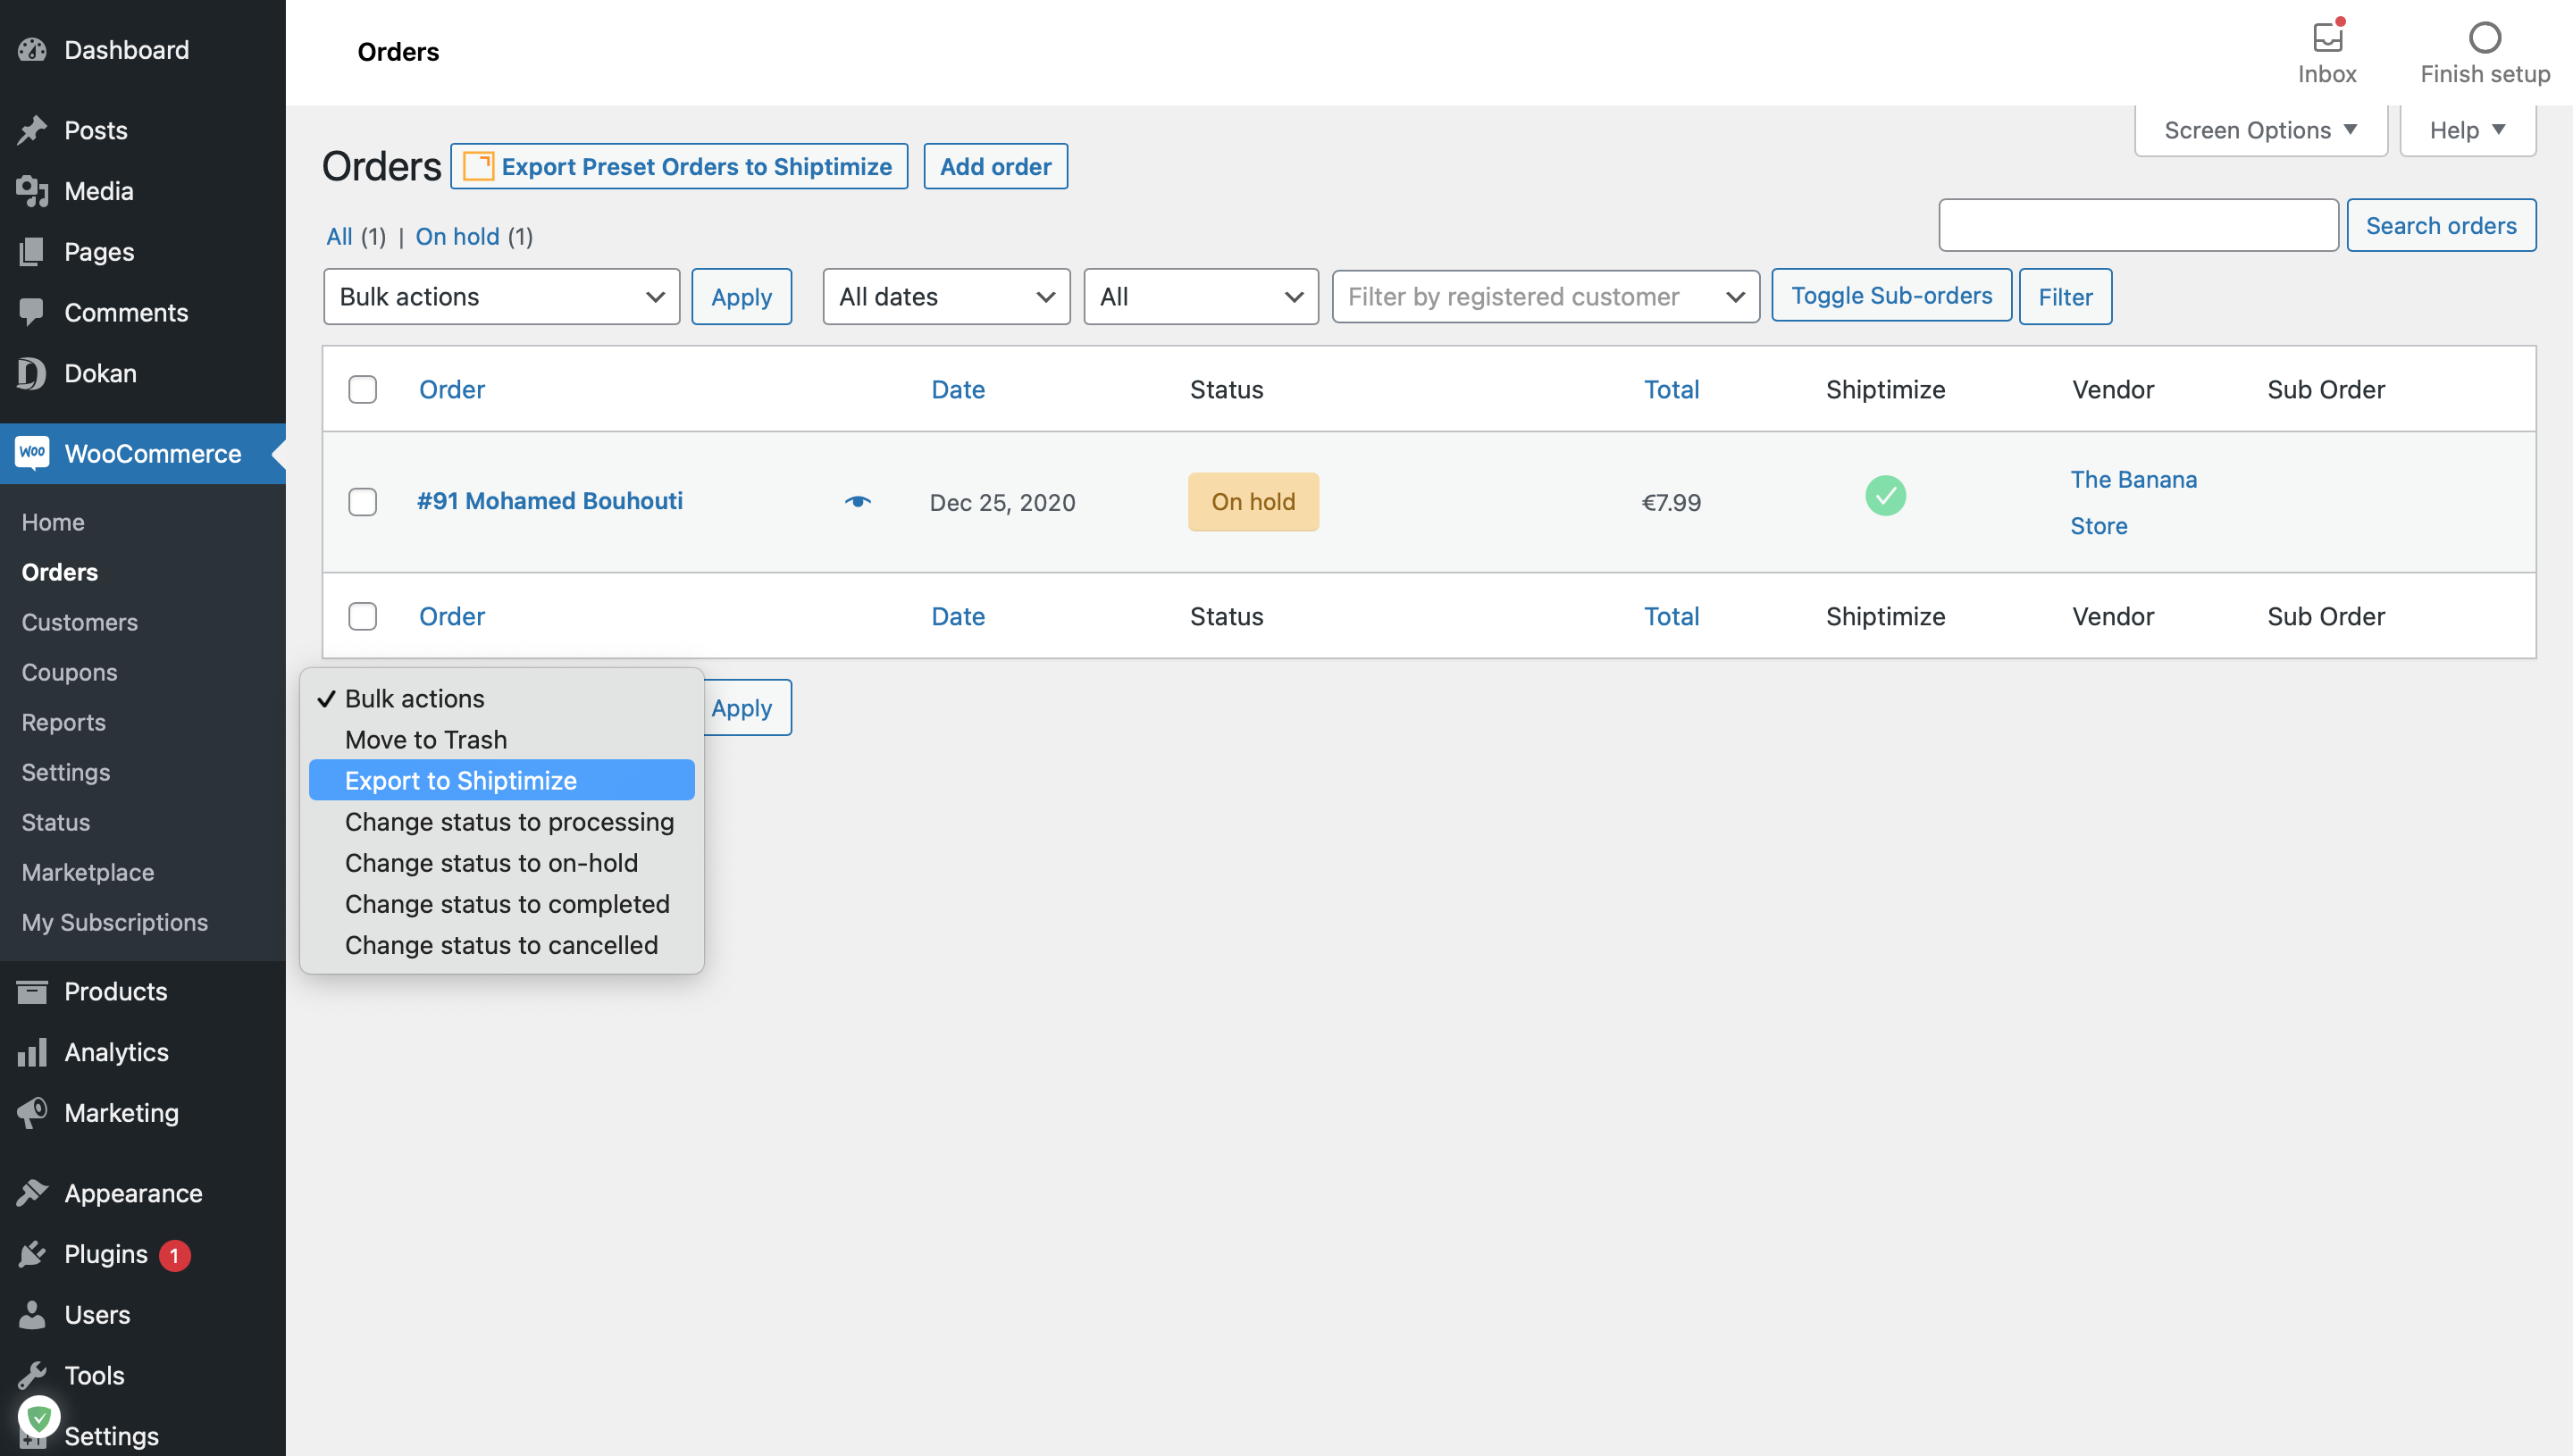
Order export
You have 2 options to export your orders to the Shiptimize platform:
- Export all orders – will export only orders that have not been exported before and have one of the statuses you have configured in “Export all” in the configuration.
- Export selected orders – Will send any selected order to the application, regardless of its status. This allows you to re-export orders if you delete them in the application. If you try to re-export an order that is already in the application, the application will reject it.
Carriers update in the plugin
If at any time you want to add more carriers to your contract. Ask your contact in Shiptimize or through Support to let you know when they are active in the app.
Then go to configuration and save the settings. Every time you do this, the plugin will ask the app what information is there and update the plugin cache.
Automatic Updates
When a tracking ID is available, it will be attached to the order. You can also configure automatic status updates when specific events occur.
In the Shiptimize application, you should go to: “Settings > Integrations > Integration Details”.
You can set a specific status for:
- After importation
- After the carrier accepts
- After delivery