Woocommerce full guide
To optimise the operation of the Shiptimize plugin you can use other plugins such as Weight base Shiping which allows you to split the shipping amounts by weight or shopping cart value and Portugal States (Districts) which allows you to easily configure the zones within Portugal, however it does not assign the shipping methods depending on the postcode but the district selected by the customer.
These plugins have been tested for compatibility with our plugin, however we are not responsible for their performance.
Before you start installing the Shiptimize plugin you should consider how your shipments will work. In a simplistic perspective, but fully functional, you will not need to perform all the steps described in this manual.
If you have any doubt in deciding which is the best strategy for the design of your shop’s shipping methods, please contact our support.
Before you start installing our plugin, you should install the two plugins mentioned above.
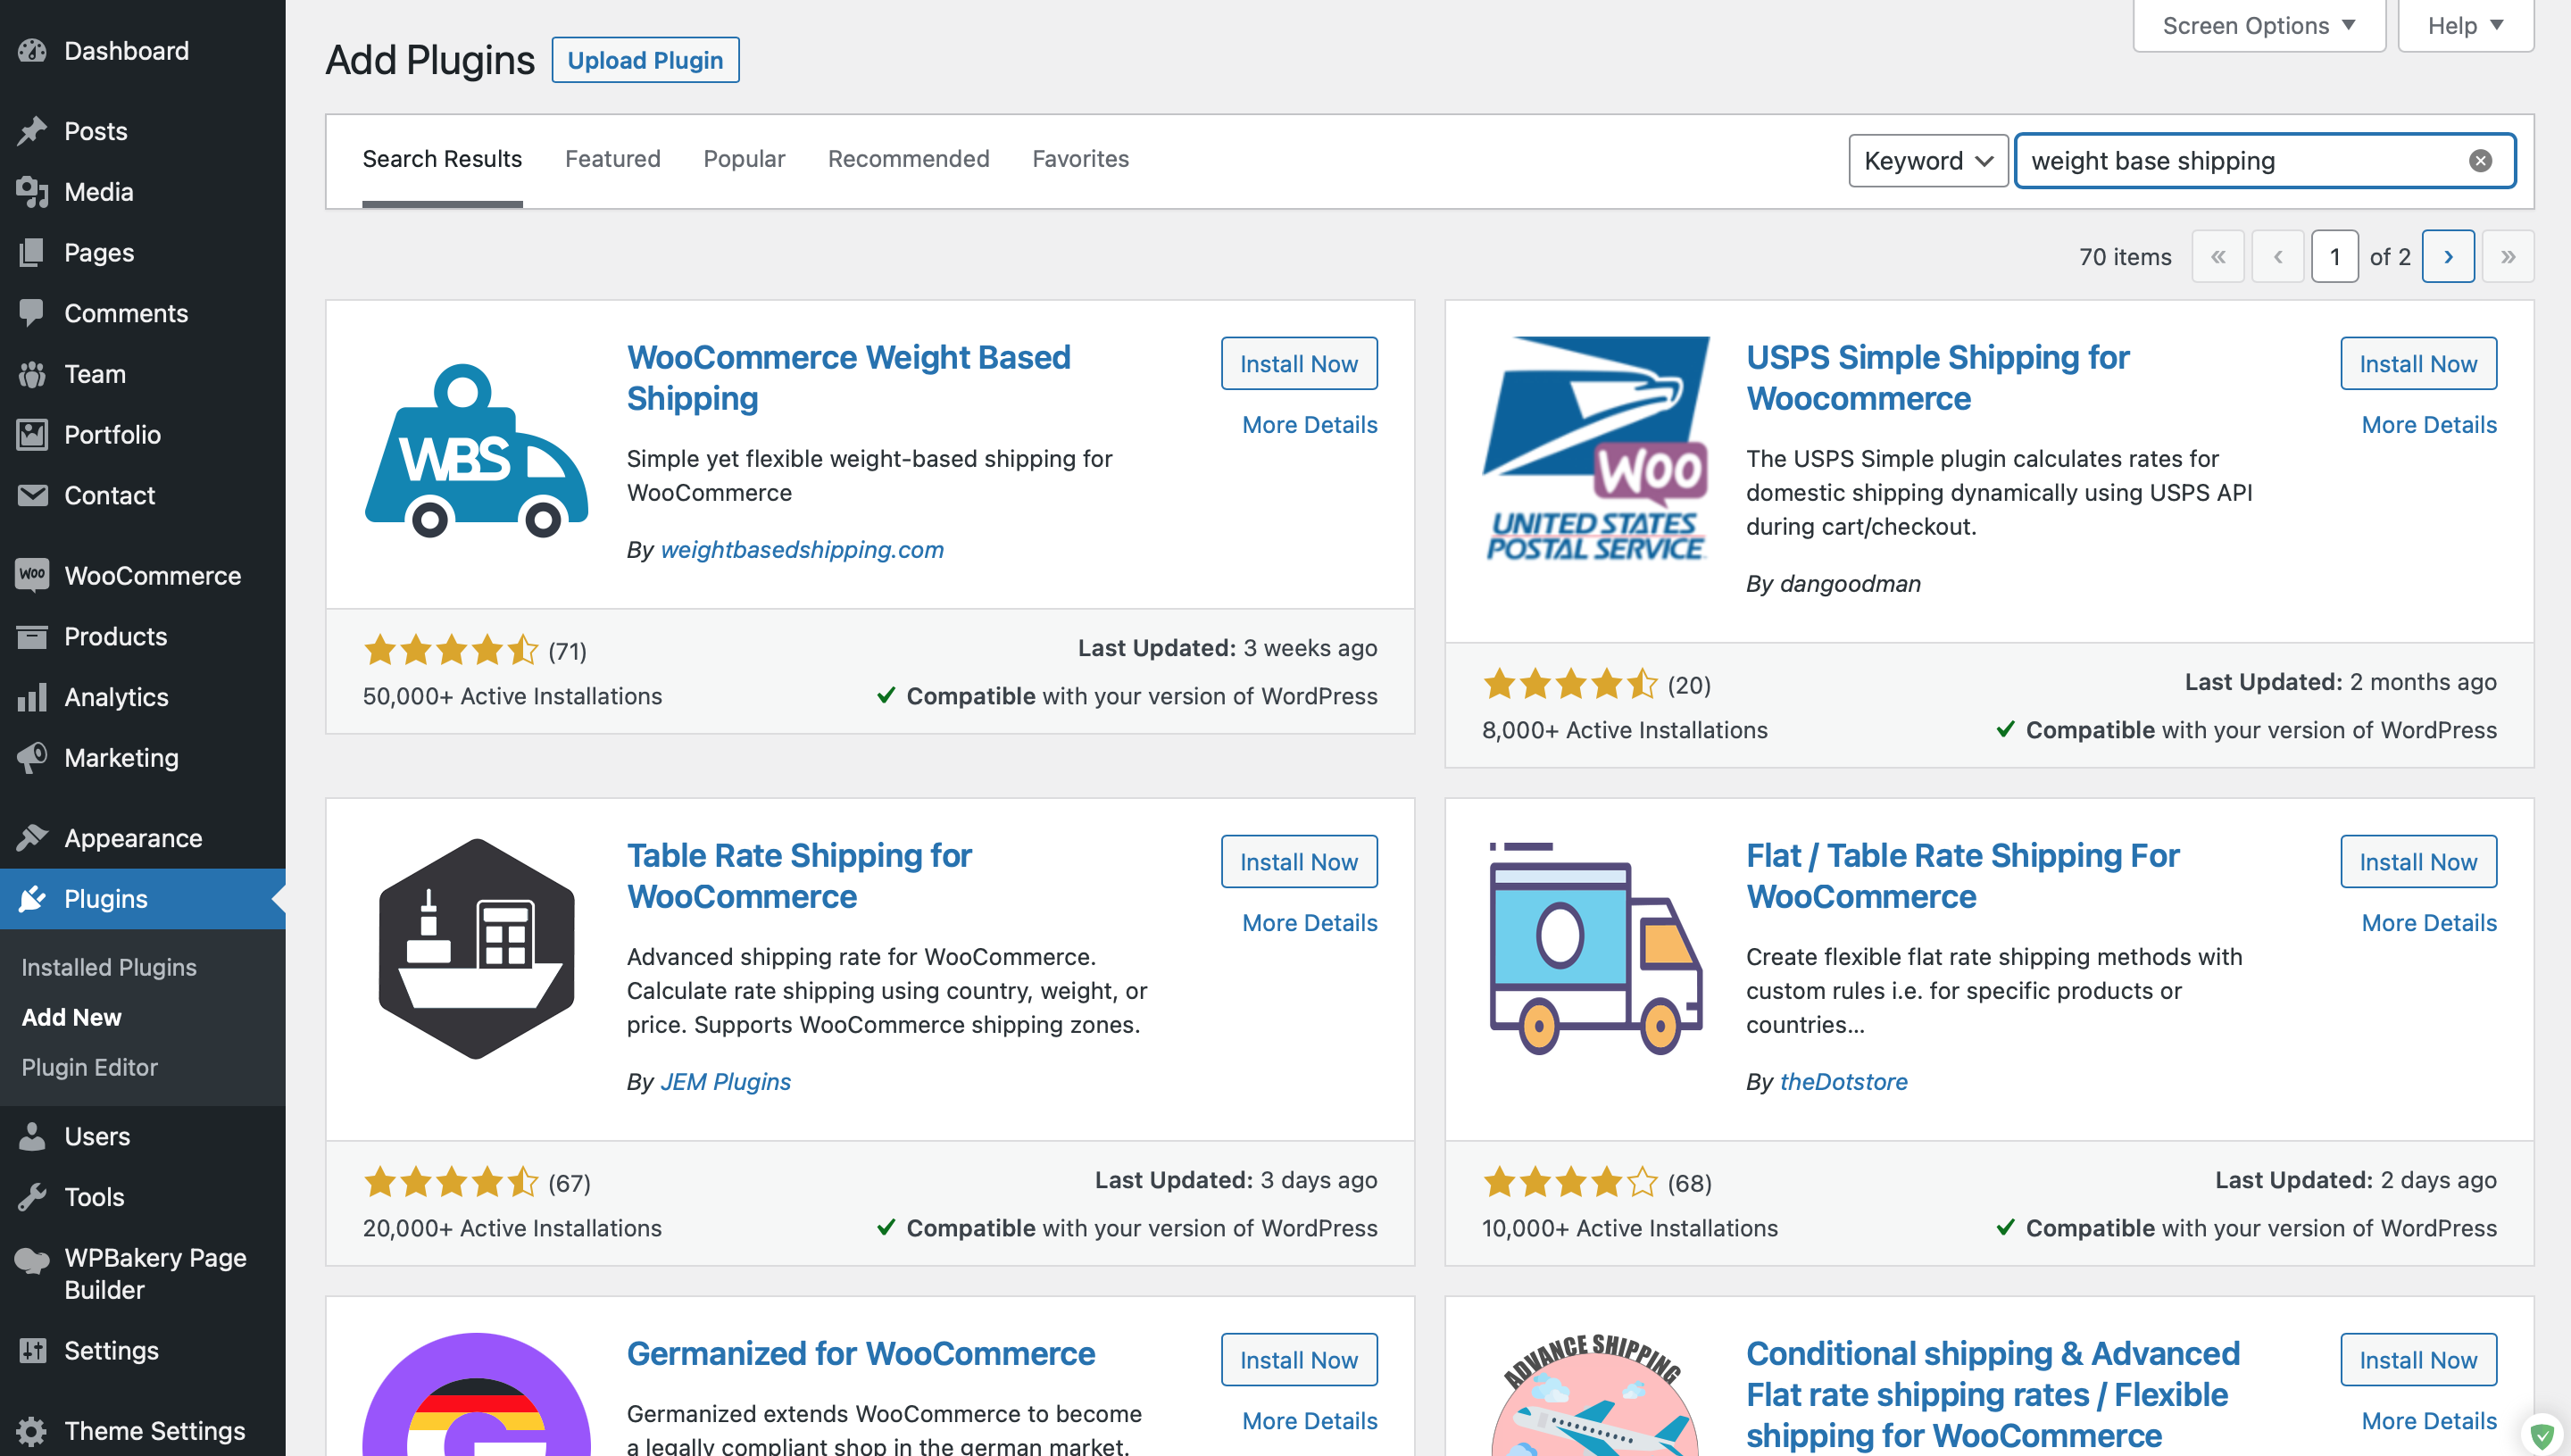
Weight based Shipping
Go to the back office of your online shop and go to Plugins and click Add New to add a new plugin.
Search in the search bar for the Weight Base Shipping plugin, click Install now and when the installation is complete click Activate.
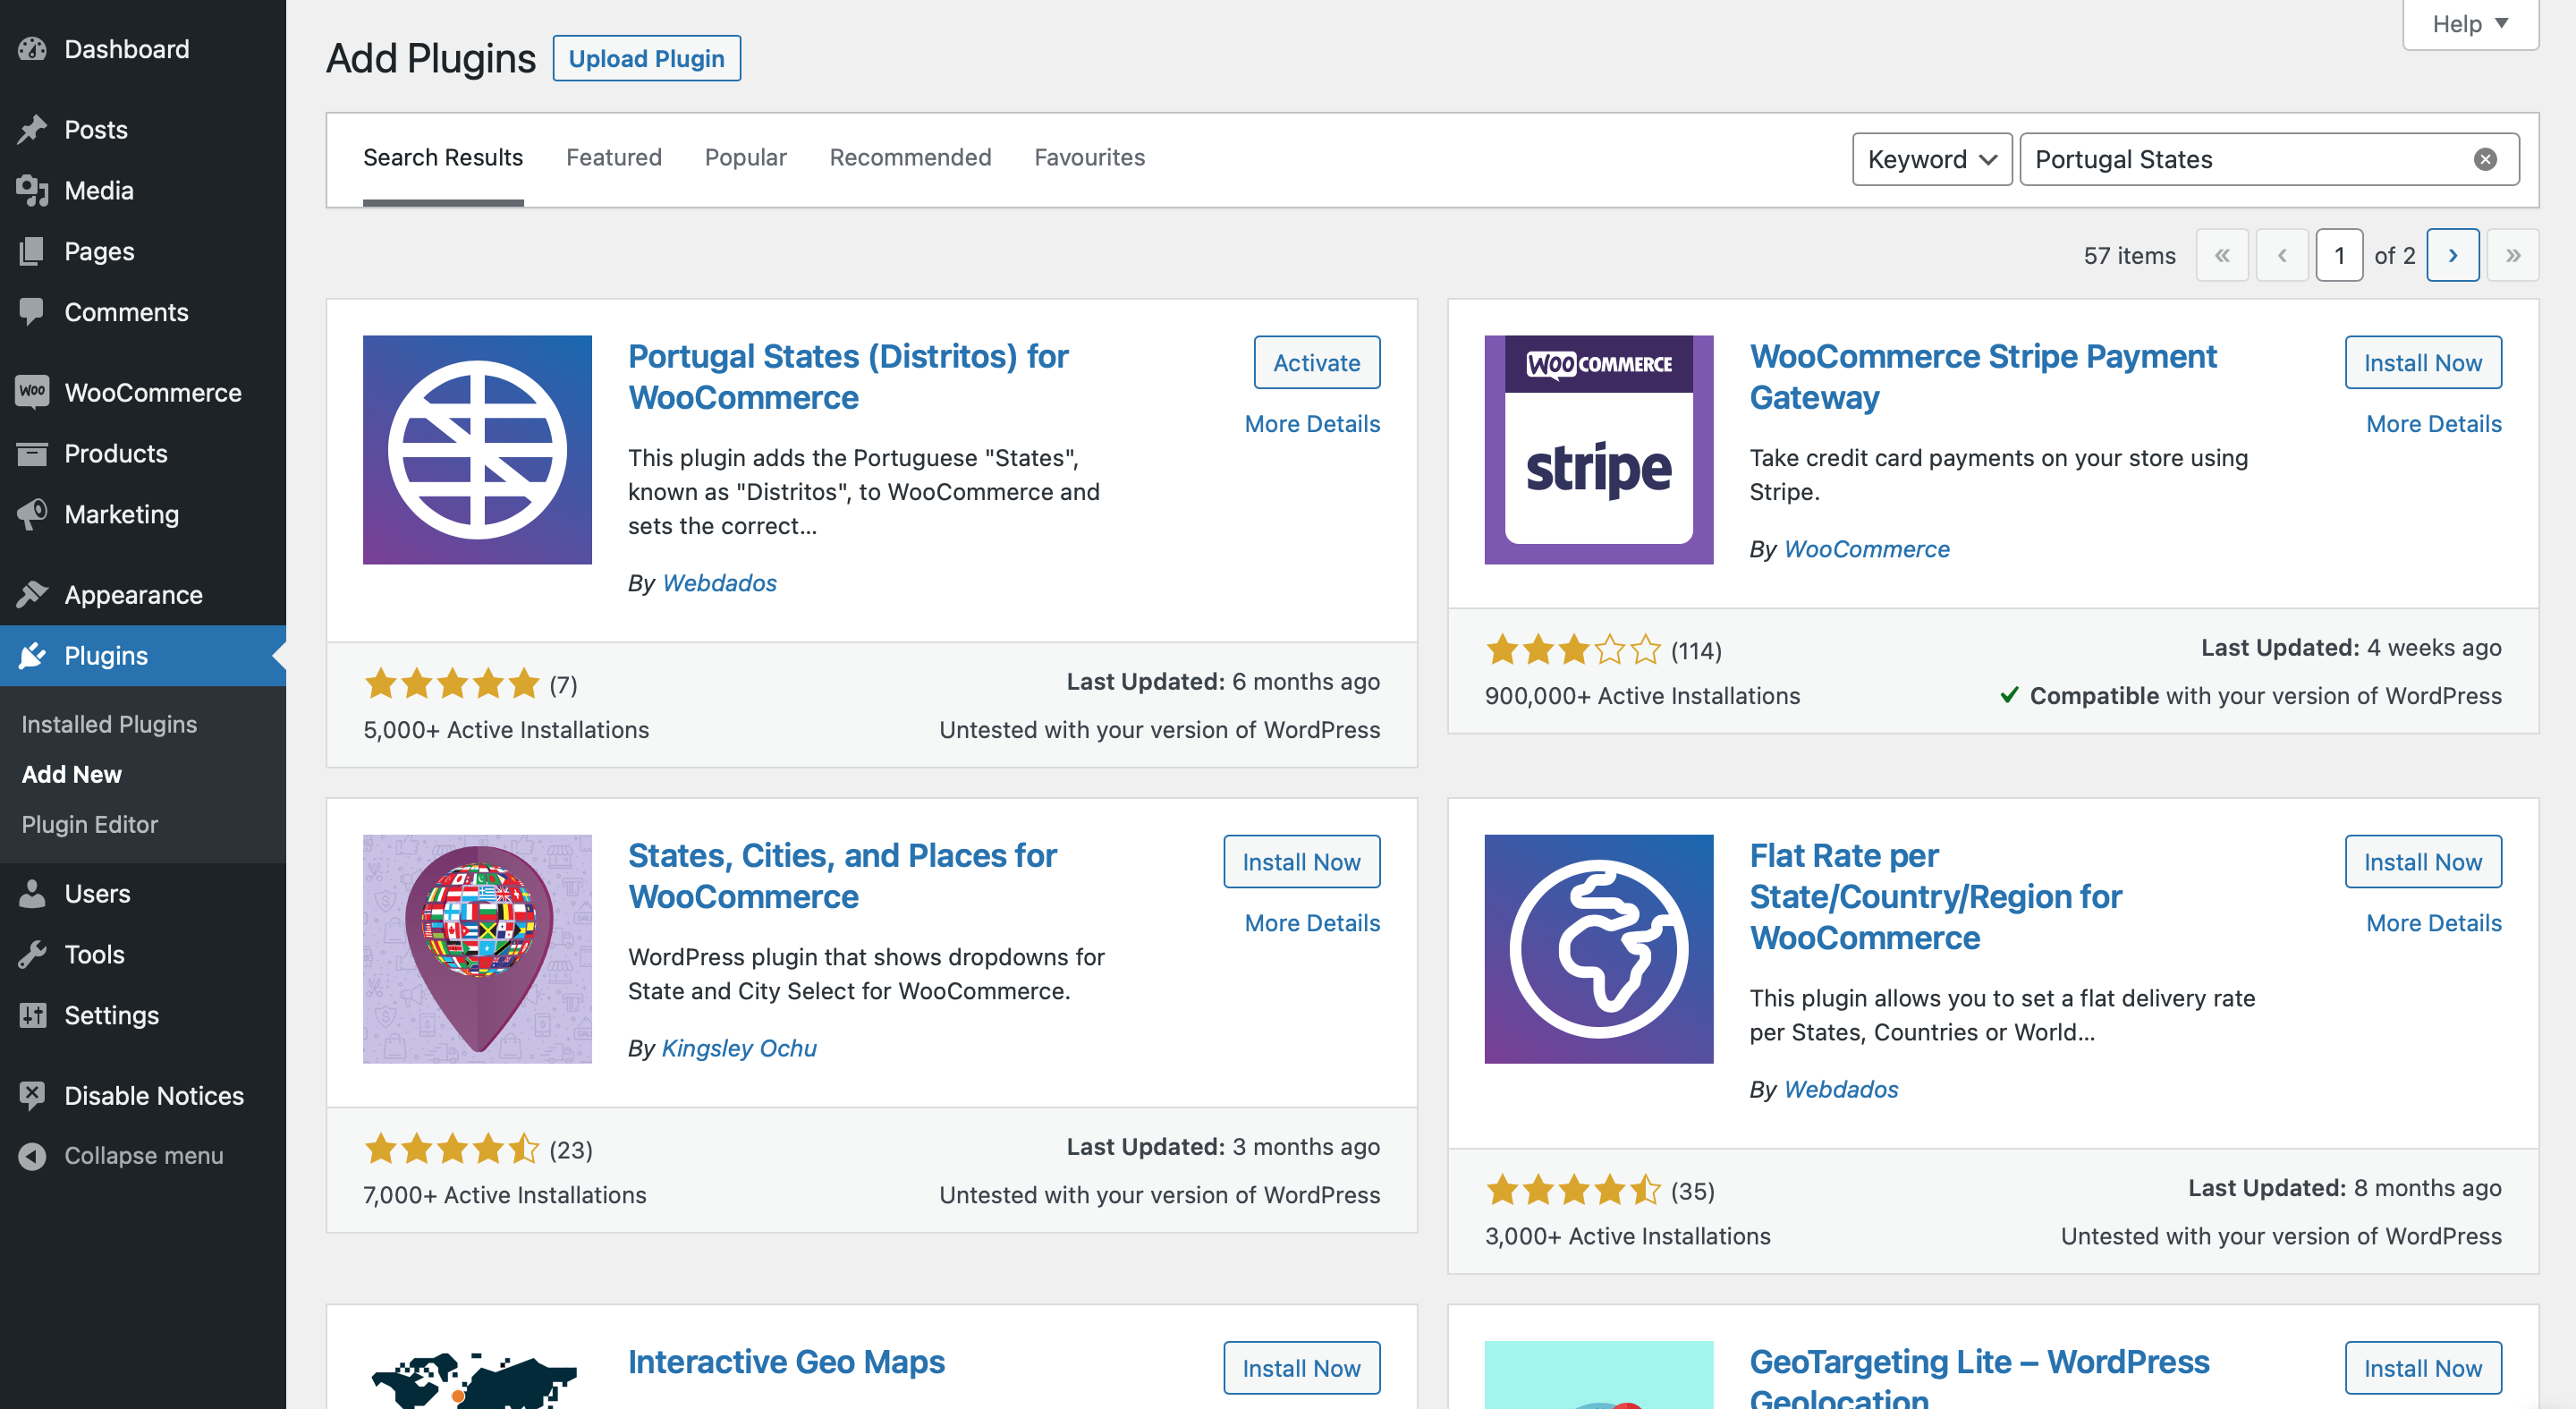
Portugal States (Distritos)
This plugin will quickly create the districts of Portugal however there is no validation of correspondence between the recipient’s postcode and the selected district. The shipping methods, and consequently the shipping costs, are assigned according to the district so they are dependent on the correctness of the customer’s choice. Despite its simplicity of use, Shiptimize recommends creating zones using postcodes and not using this plugin.
As above, in the back-office of your online shop go to plugins and click on Add new, searching for Portugal States (Distritos). You must click on Install now and when the installation is complete click on Activate.
Shiptimize
To install the Shiptimize plugin you should also go to Plugins and click Add new and search for Shiptimize. Once installed, you should activate the plugin.
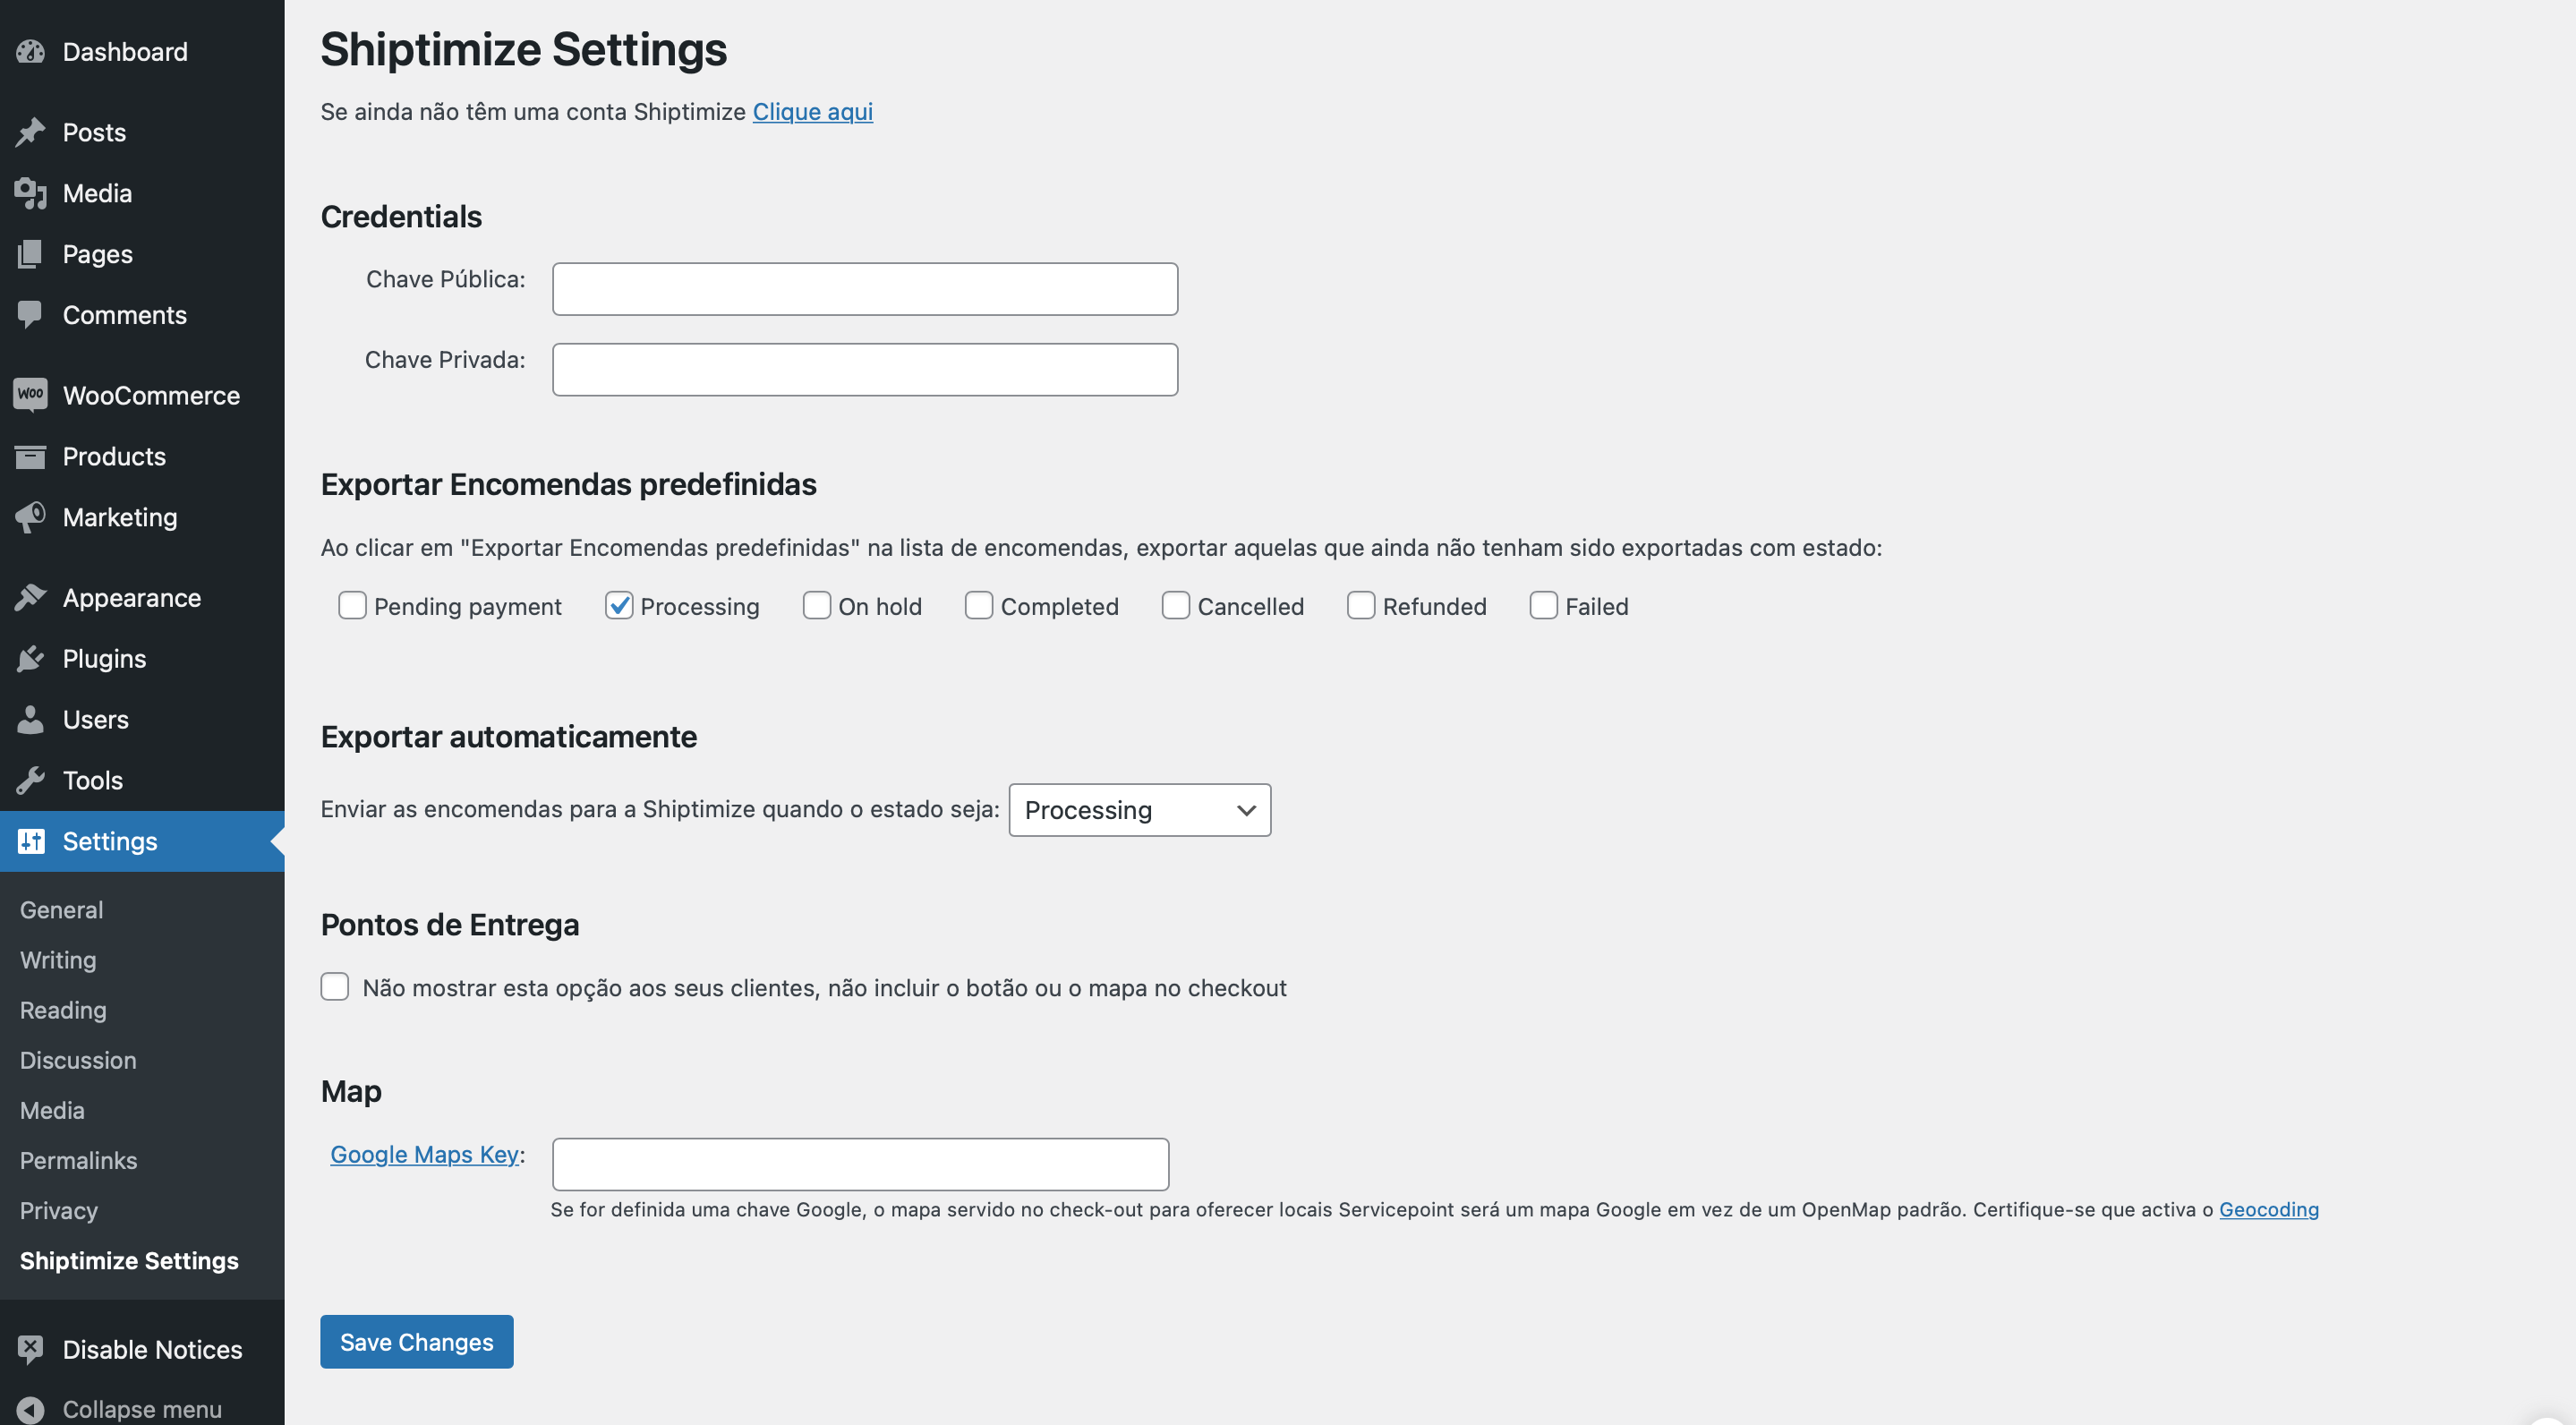
After activation you will be forwarded to the menu Settings > Shiptimize Settings
Access Keys
To generate the necessary access keys you must access your client area and click on the menu Settings > Integrations > Key Management.

You must click on Create new keys to generate the keys necessary for the integration and to make the keys active you must click on the status button so that it turns green.
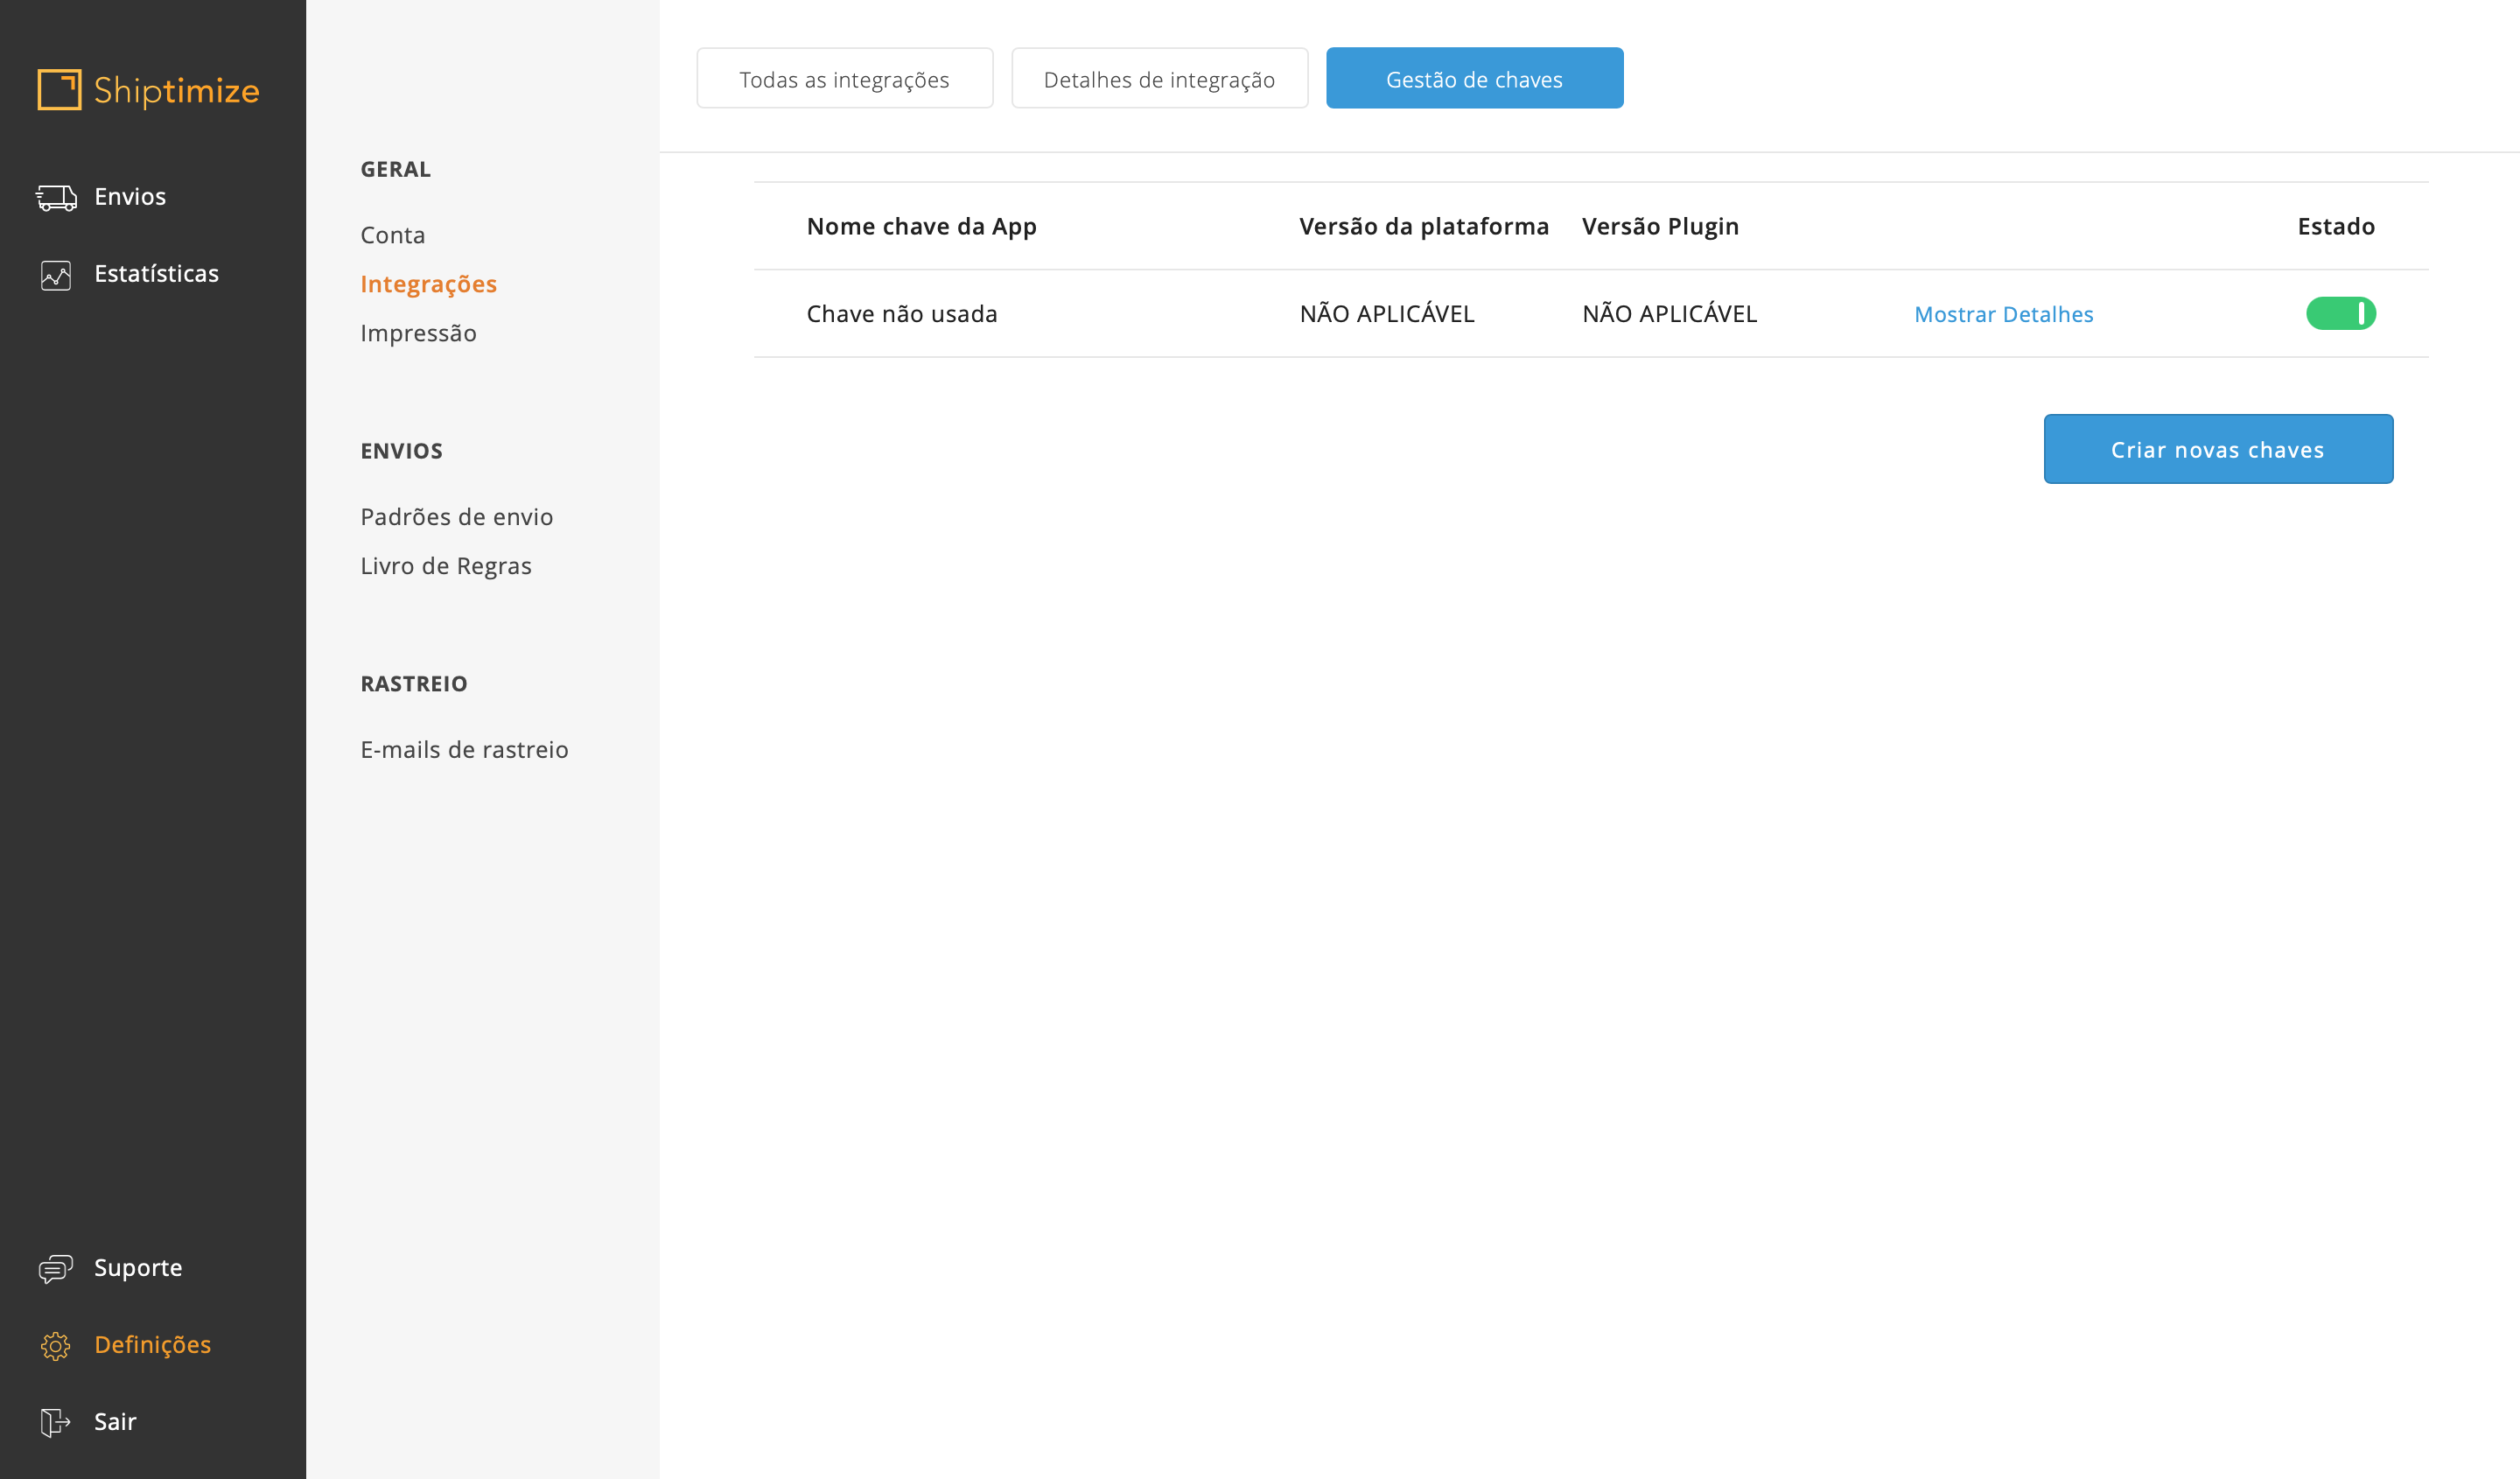
To get the keys you must click on Show details and copy the public and private key to the Shiptimize plugin in your online shop.
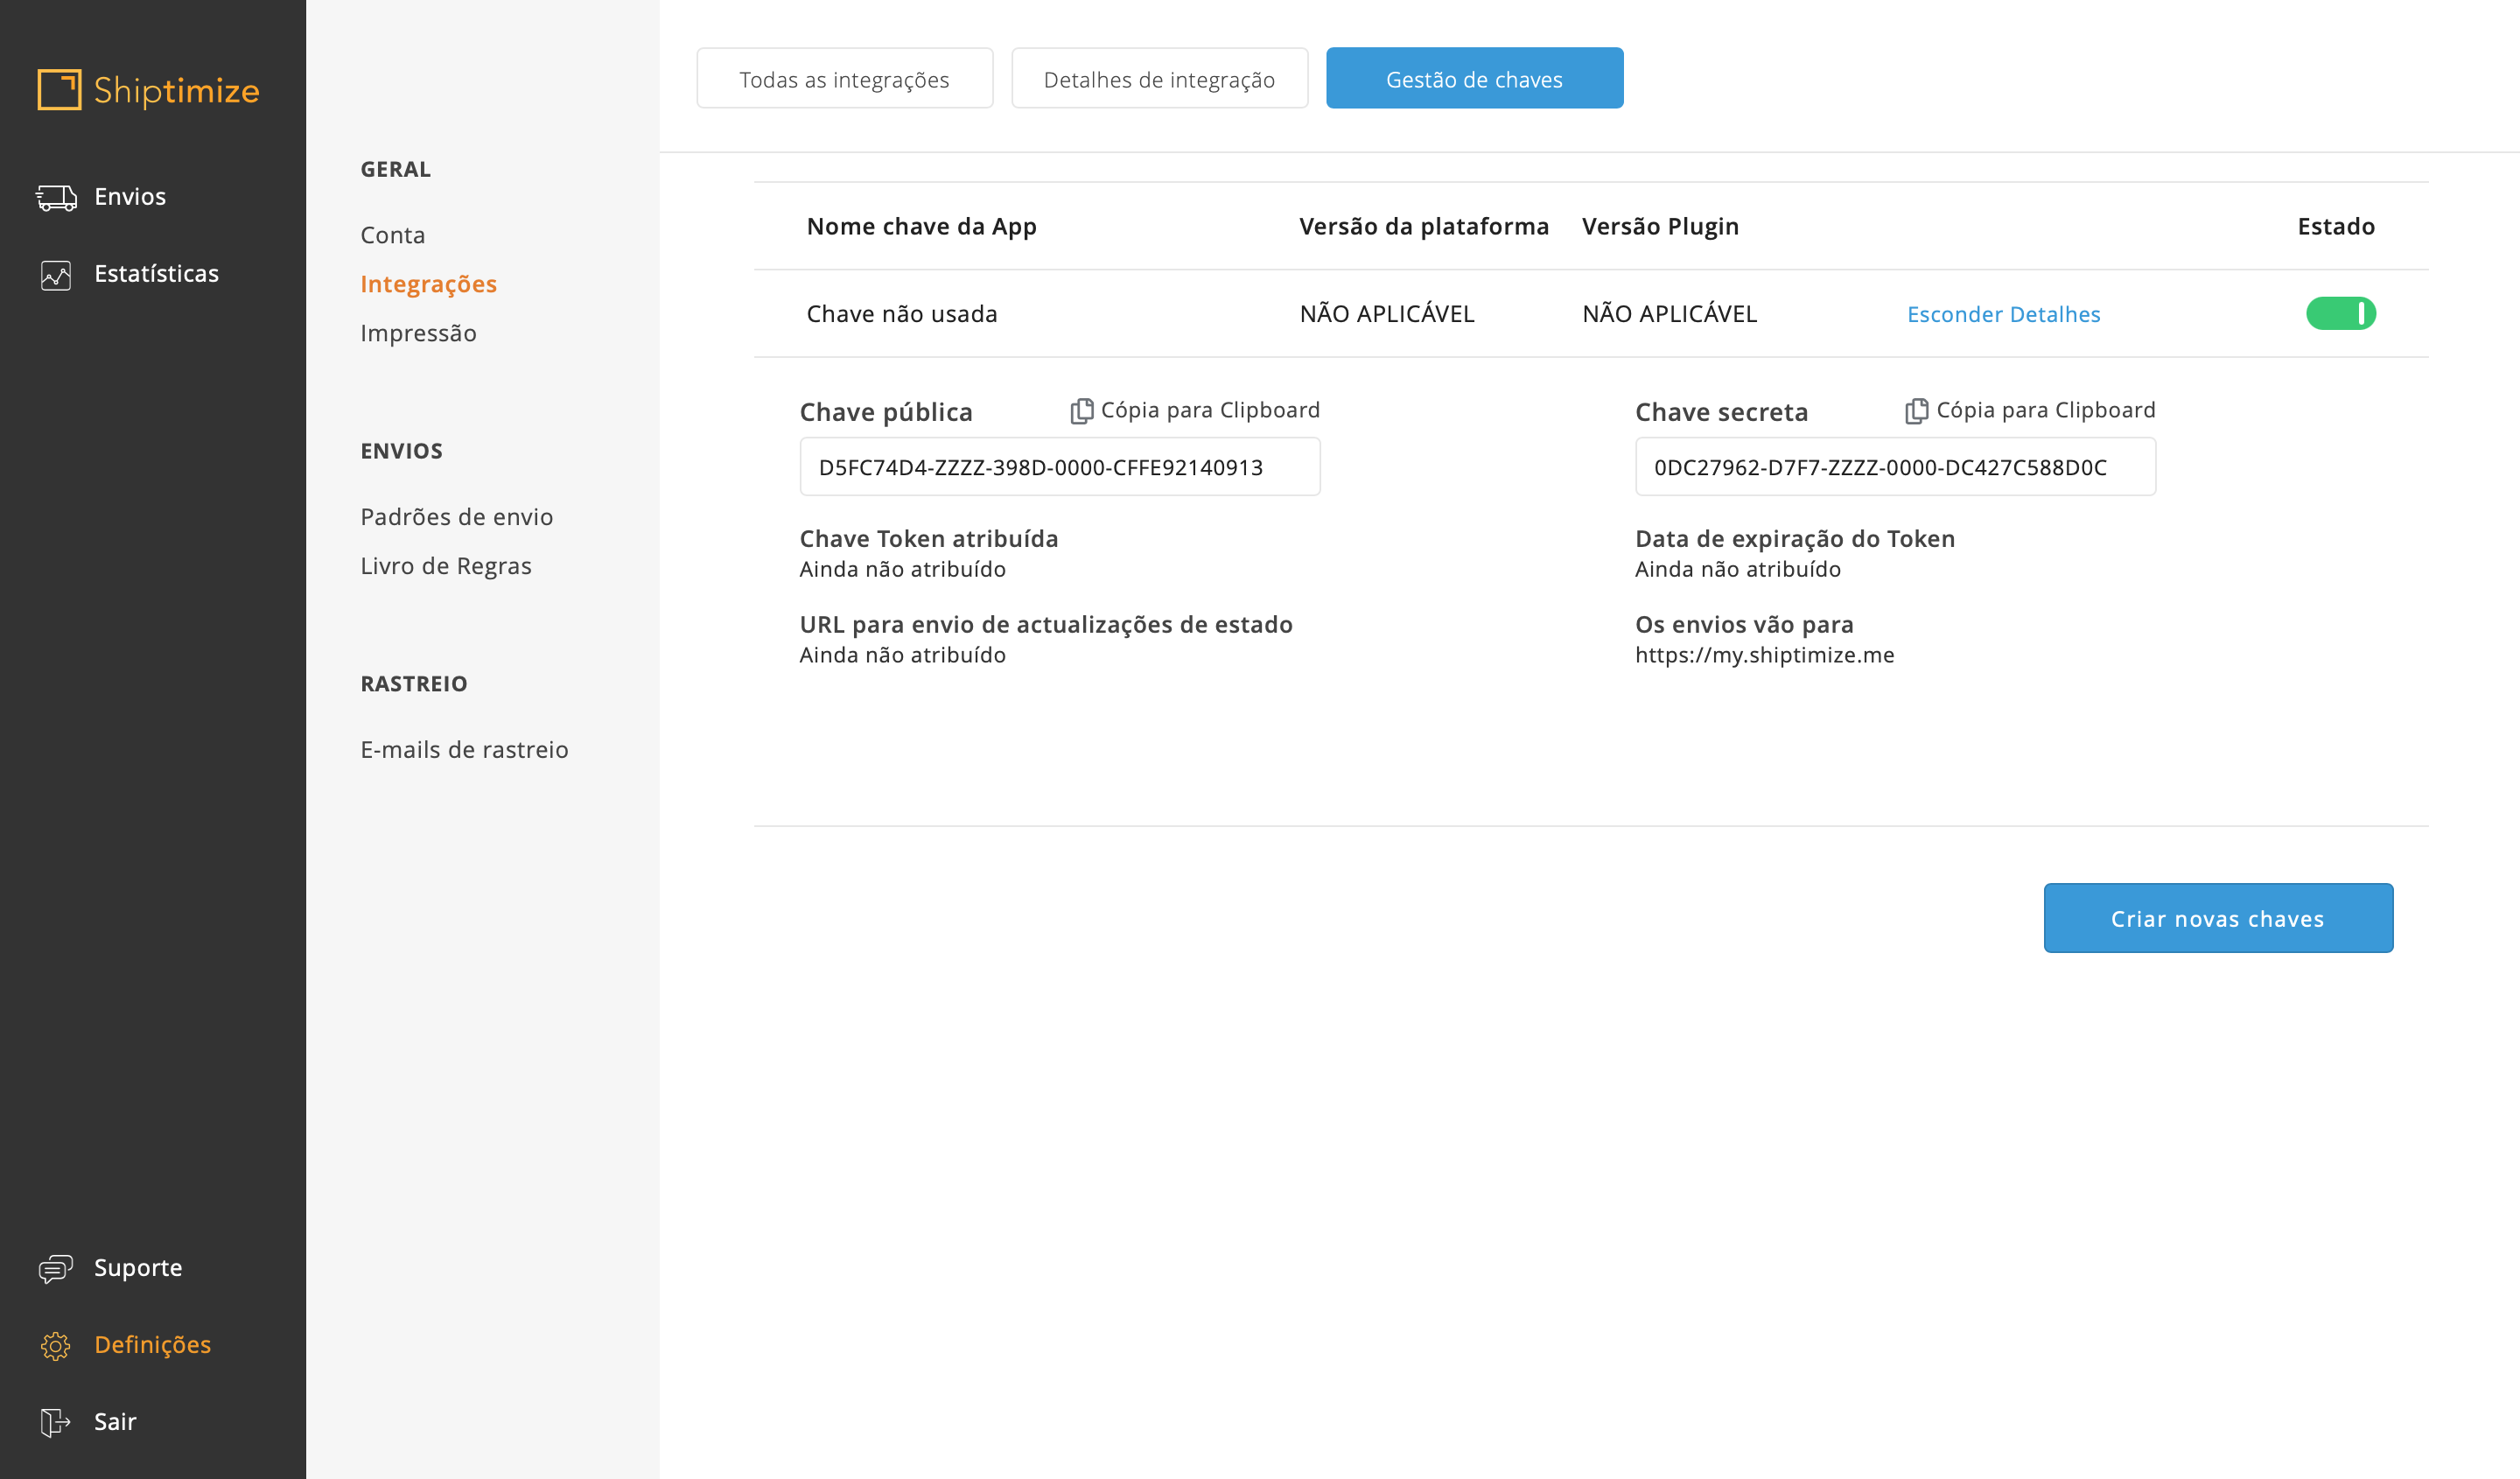
Once copied, you must then paste the Public Key and the Private Key for your online shop into the respective fields: Public Key and Private Key.
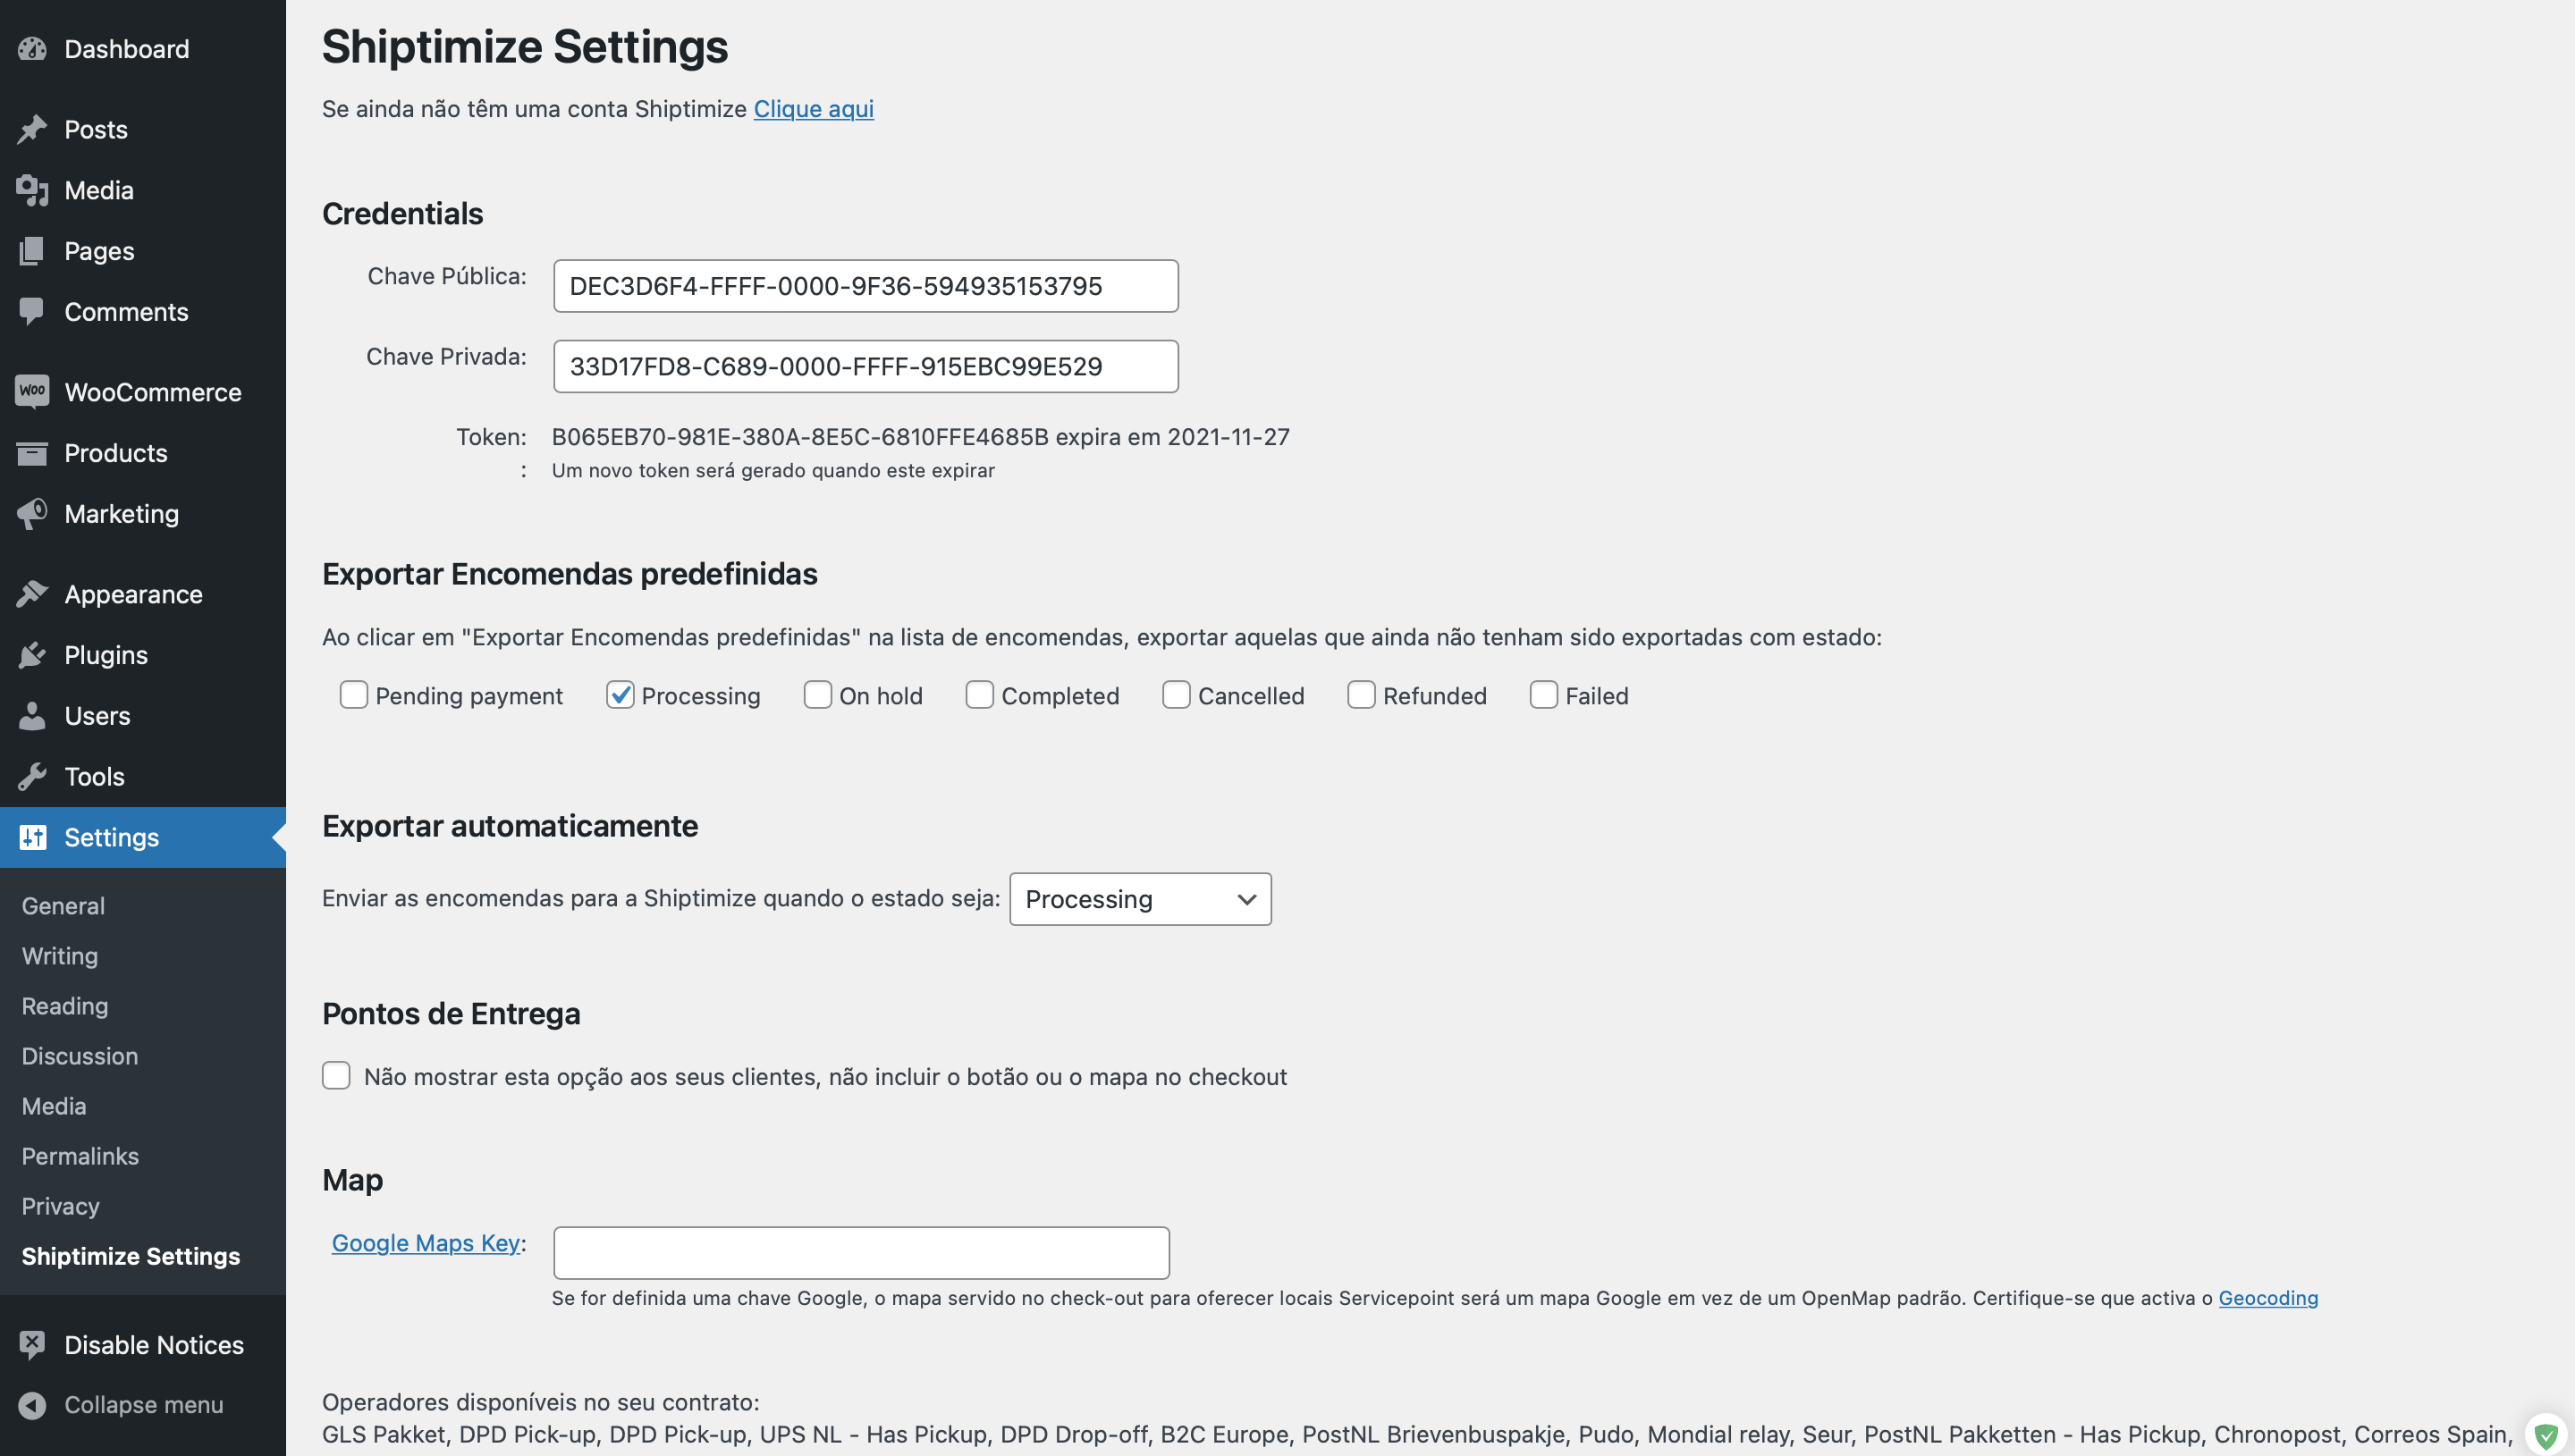
Plugin configuration
You must choose which status of your orders you want to export to the Shiptimize platform either through the export button (in this example we have chosen the status prossessing)….
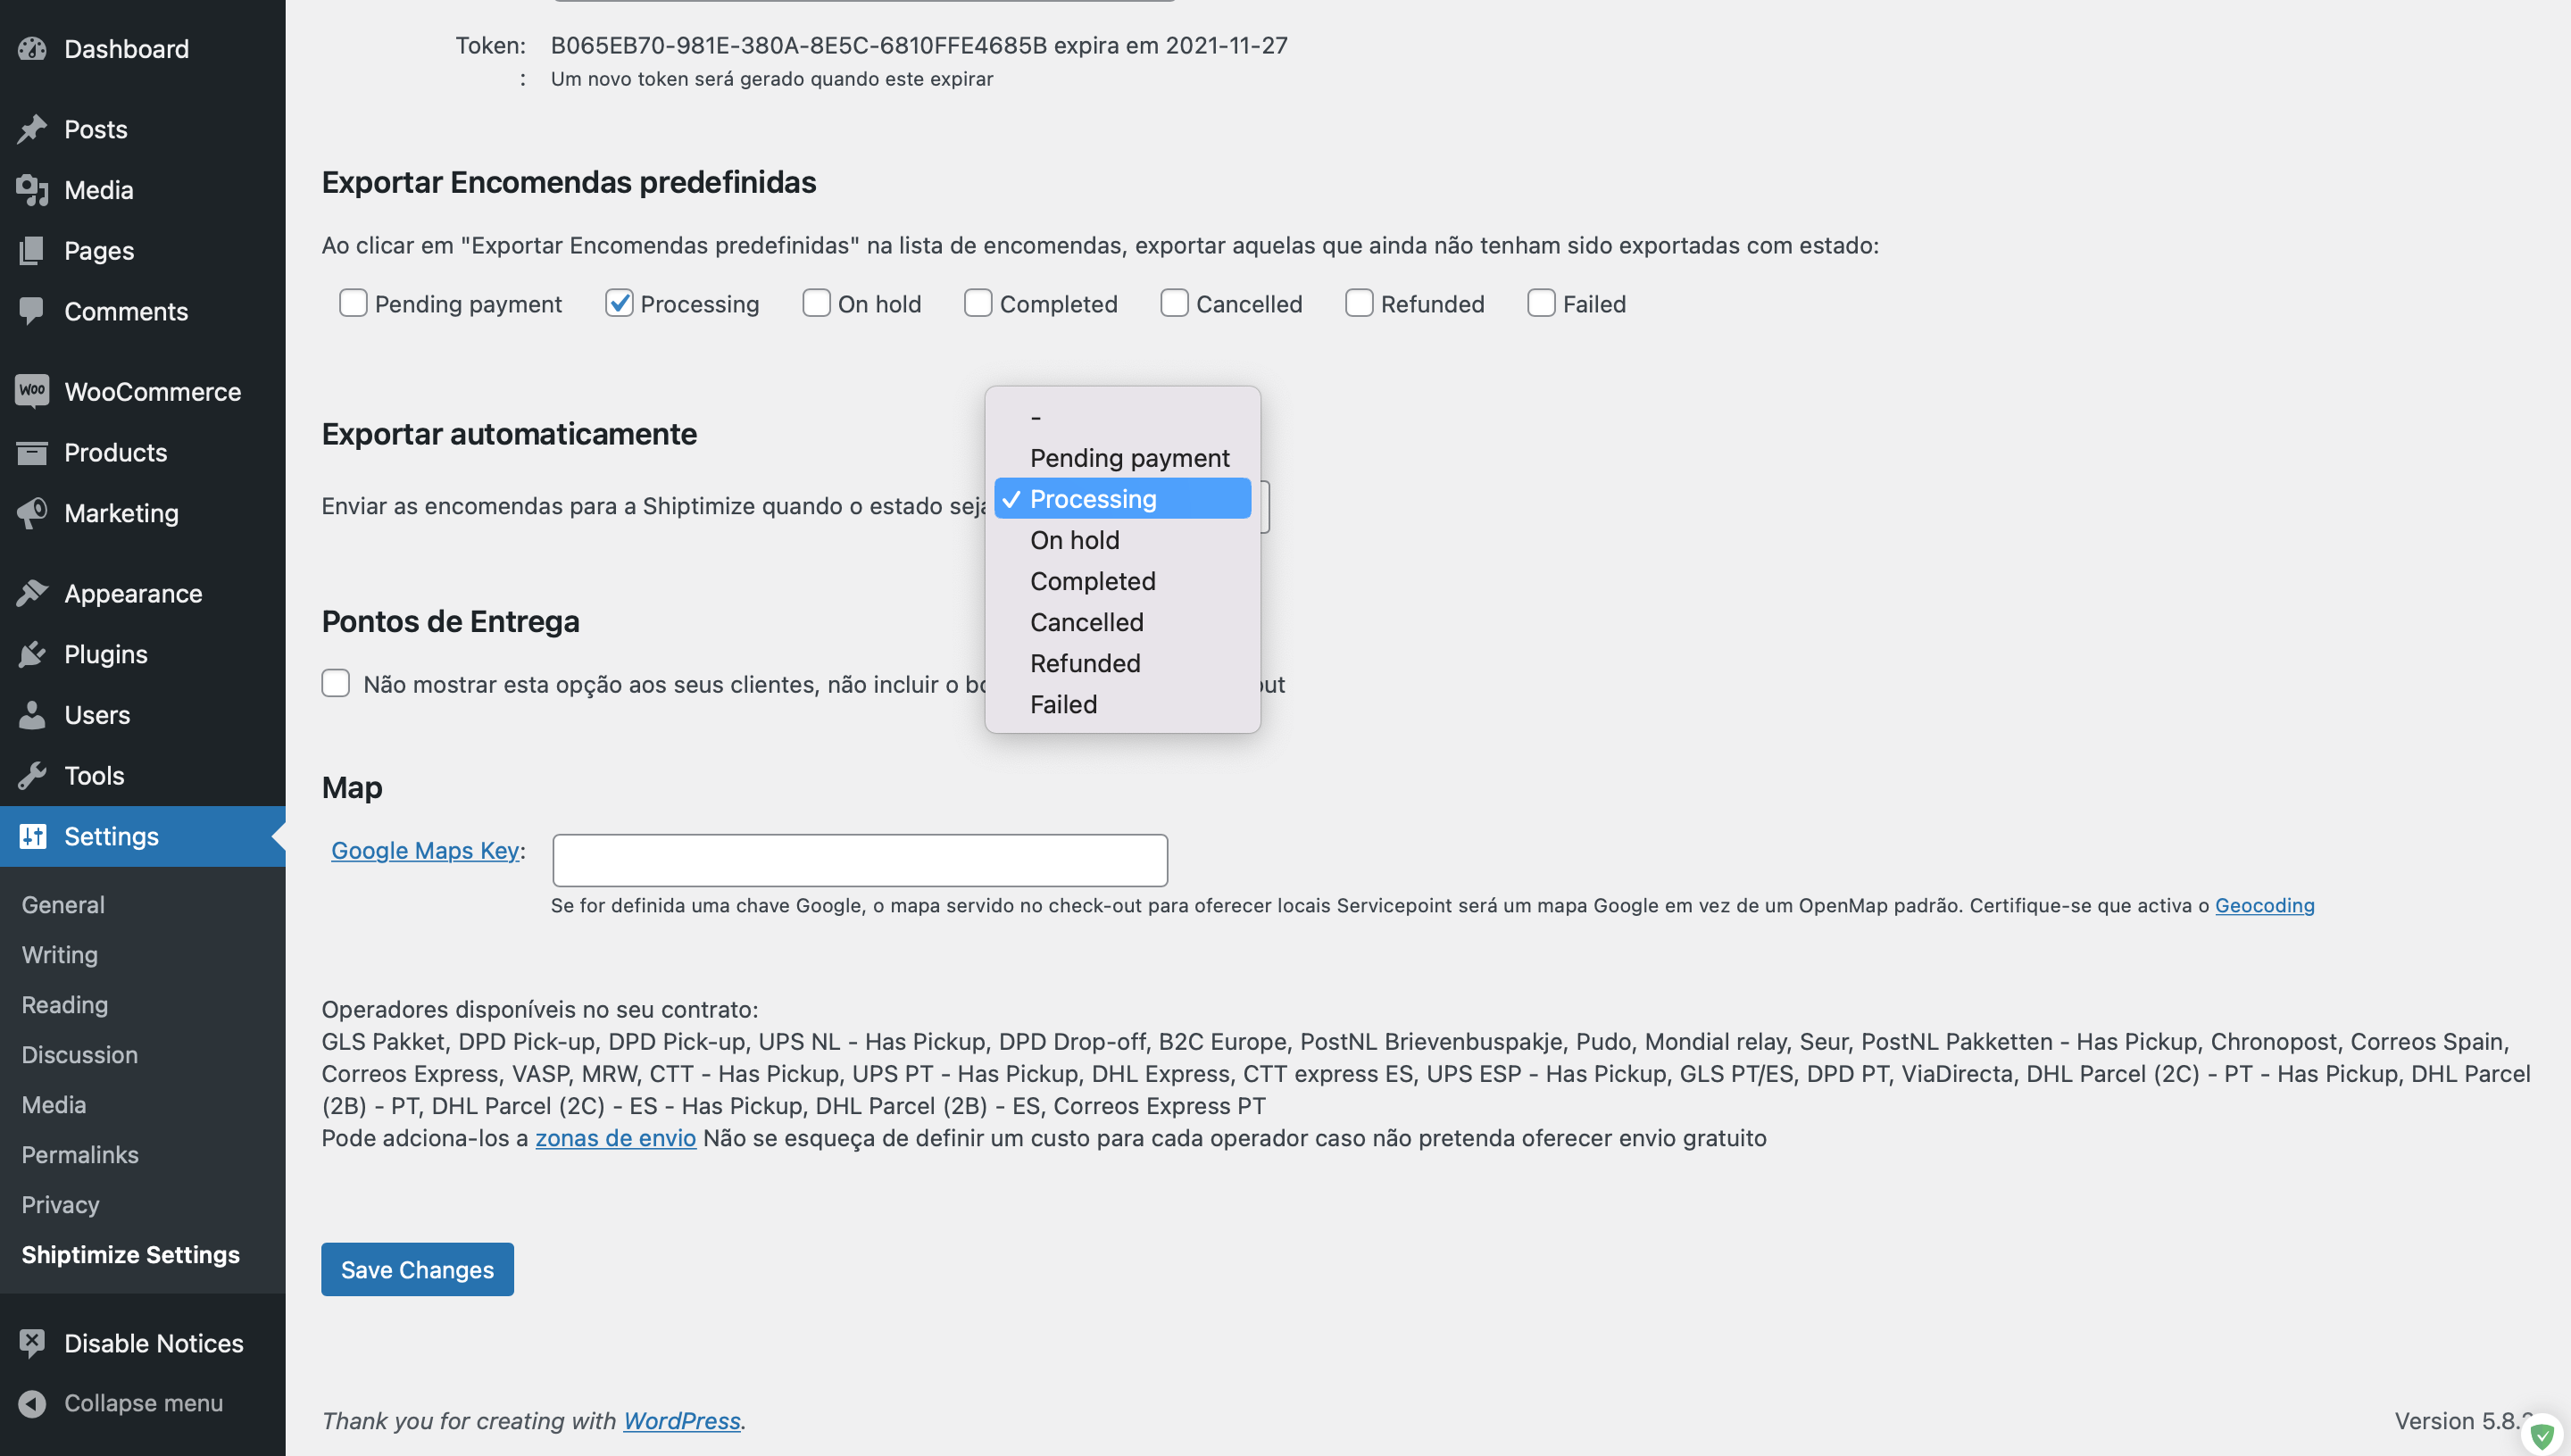
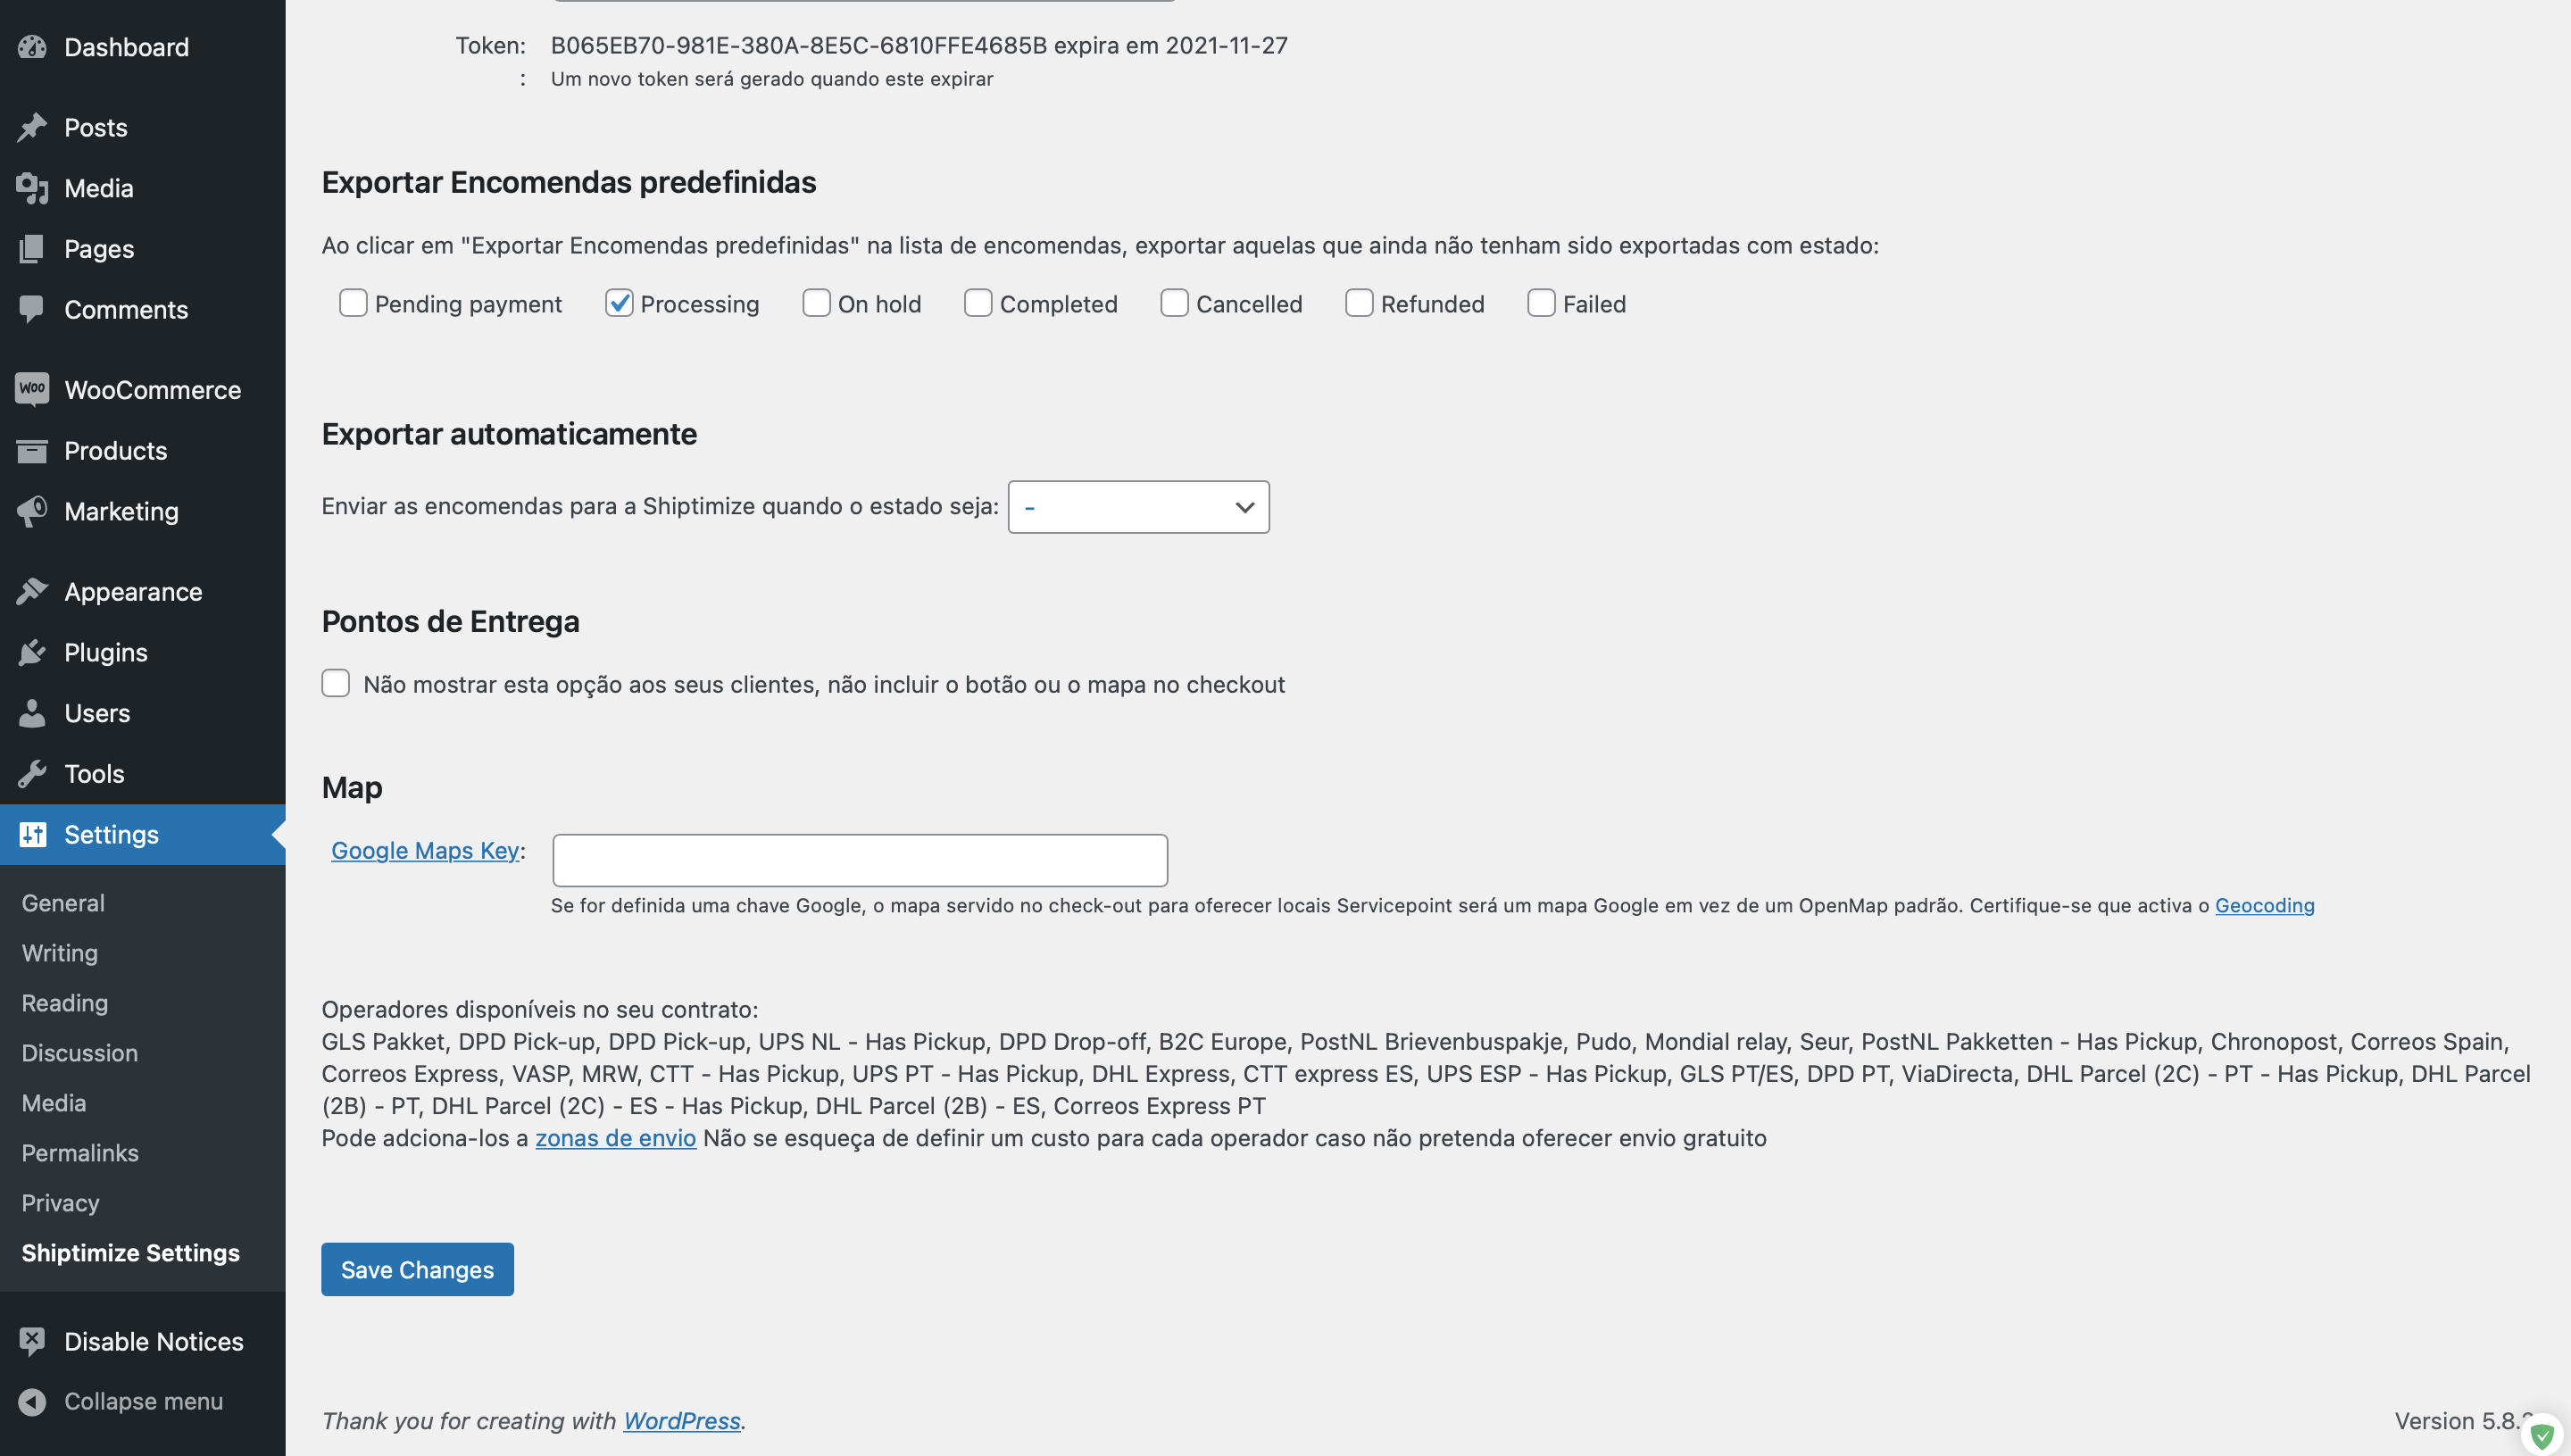
You can also select which status of your orders will be automatically transferred to the Shiptimize platform. If you do not want to export all your orders to the Shiptimize platform, for example because you offer your customers the collection from your premises, you should choose the “option -“ as in our example.
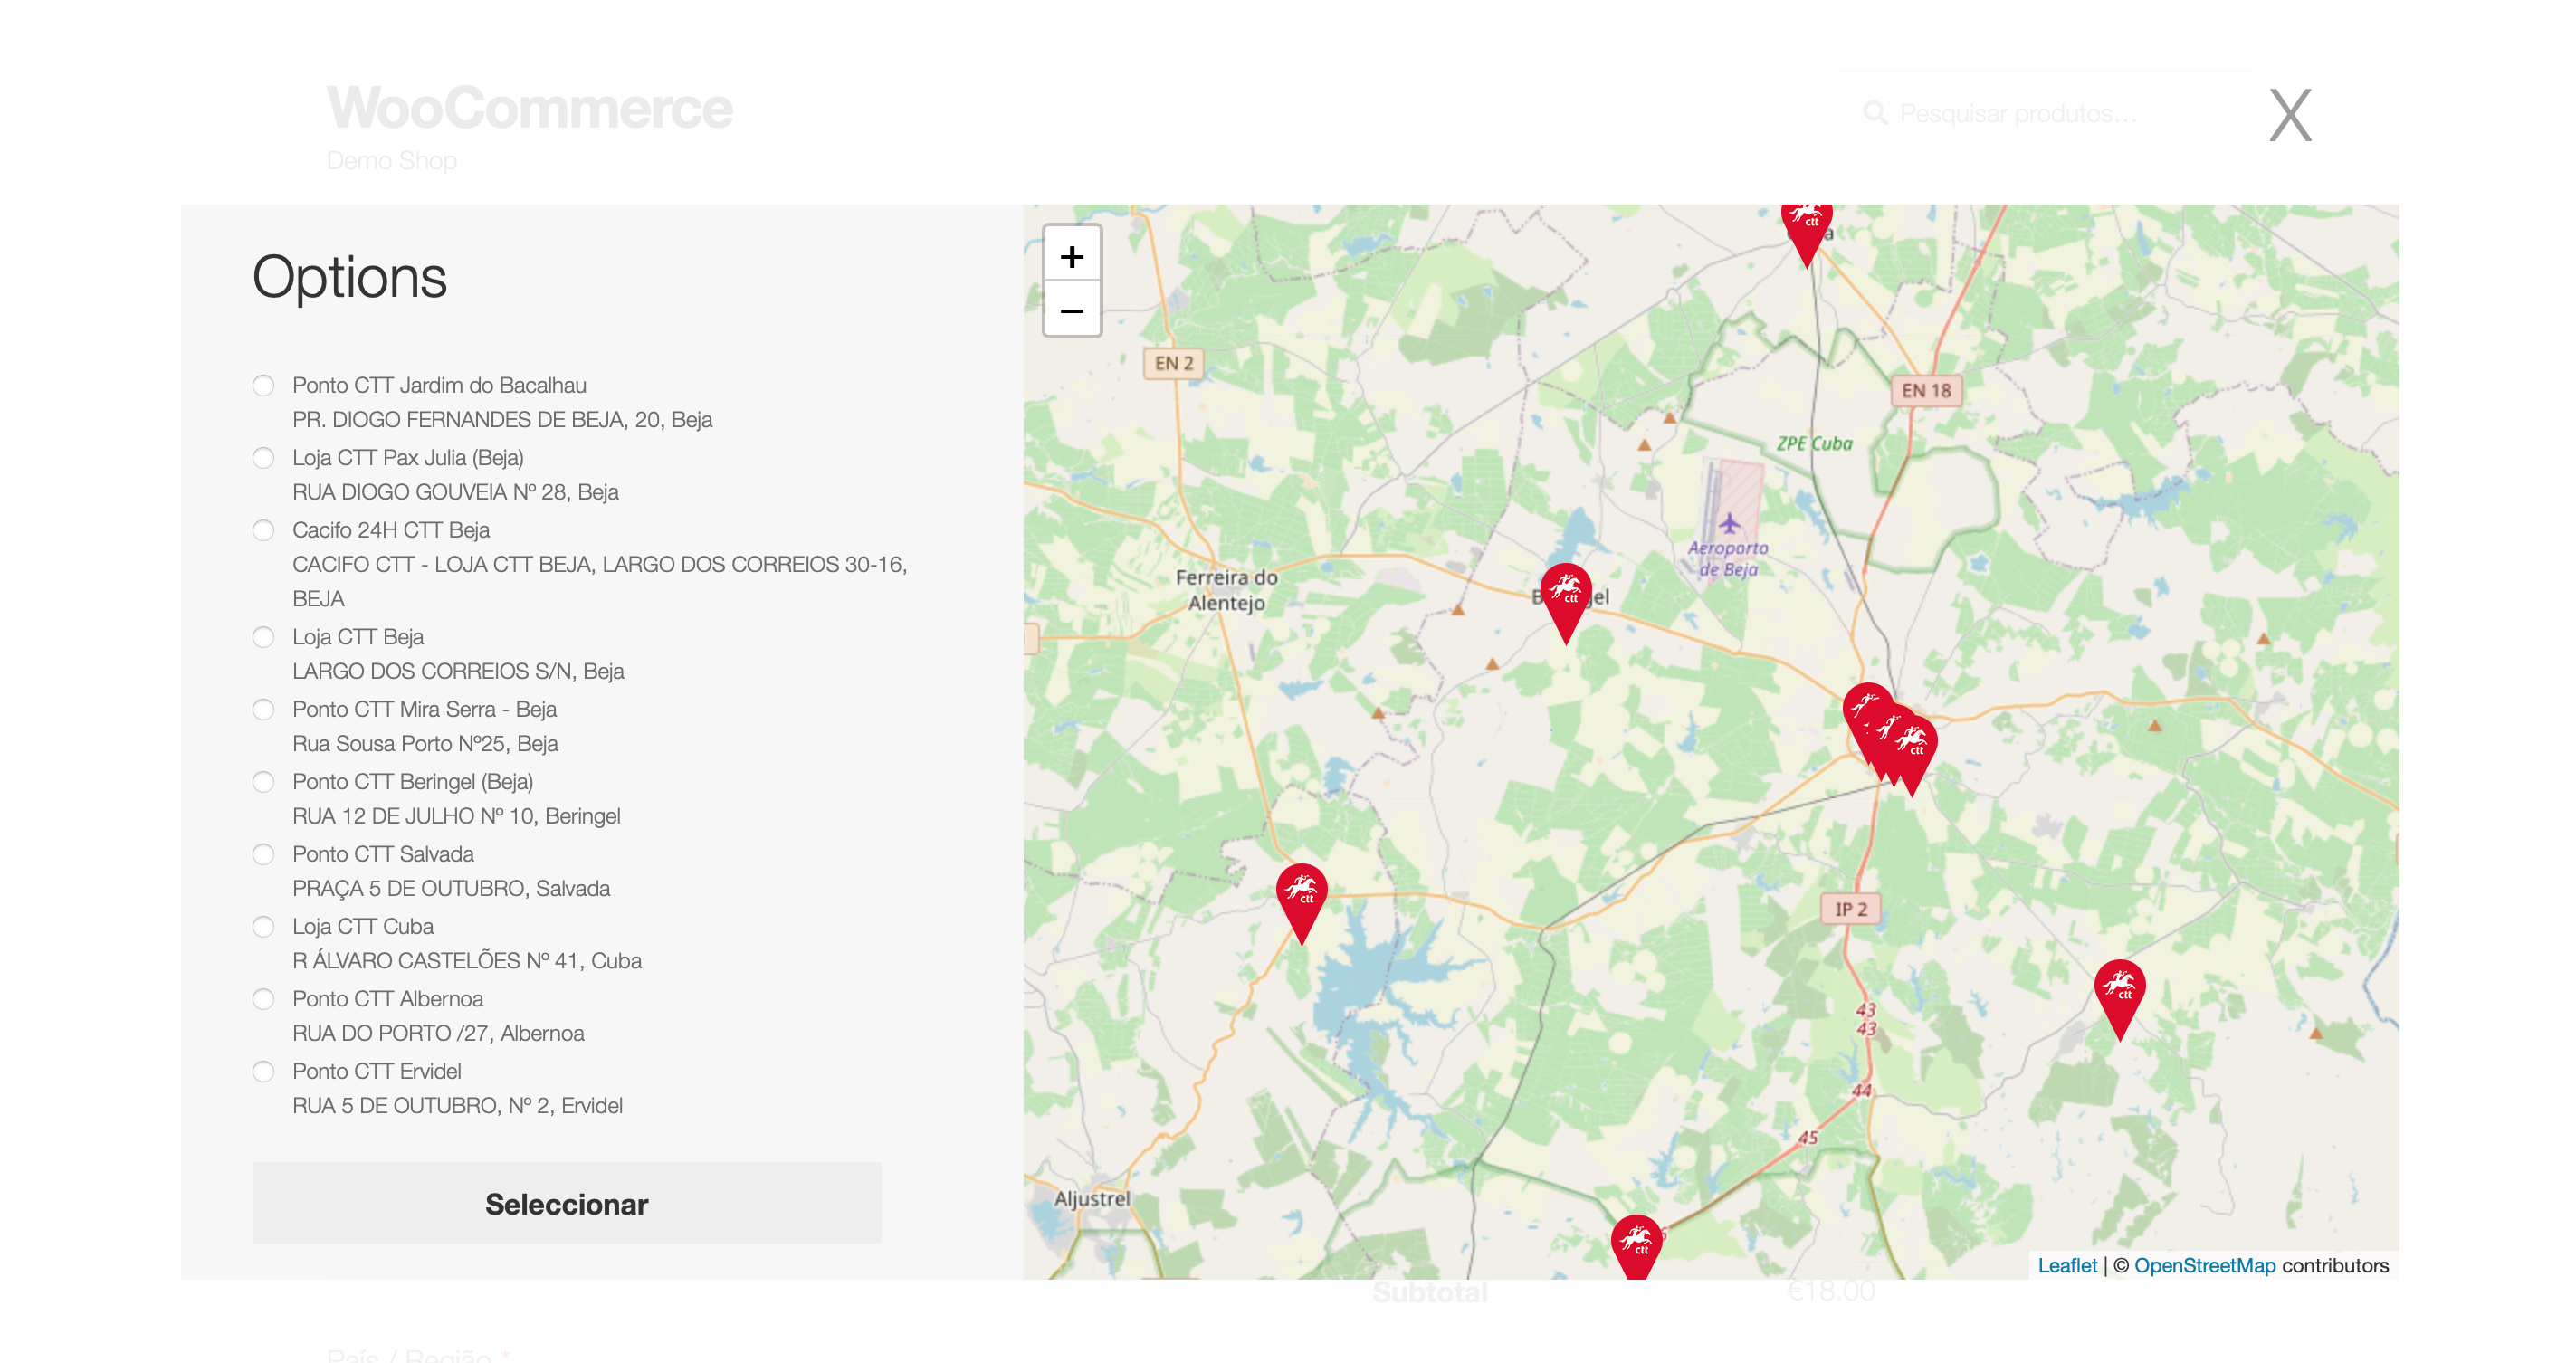
Pick-up points
If you wish to provide your customers with pick-up points (currently provided by CTT and UPS), simply leave the corresponding option unselected.

Map
If you have a Google maps key you can add it too. If you don’t fill in this field you will be shown the maps in OpenStreetMaps.
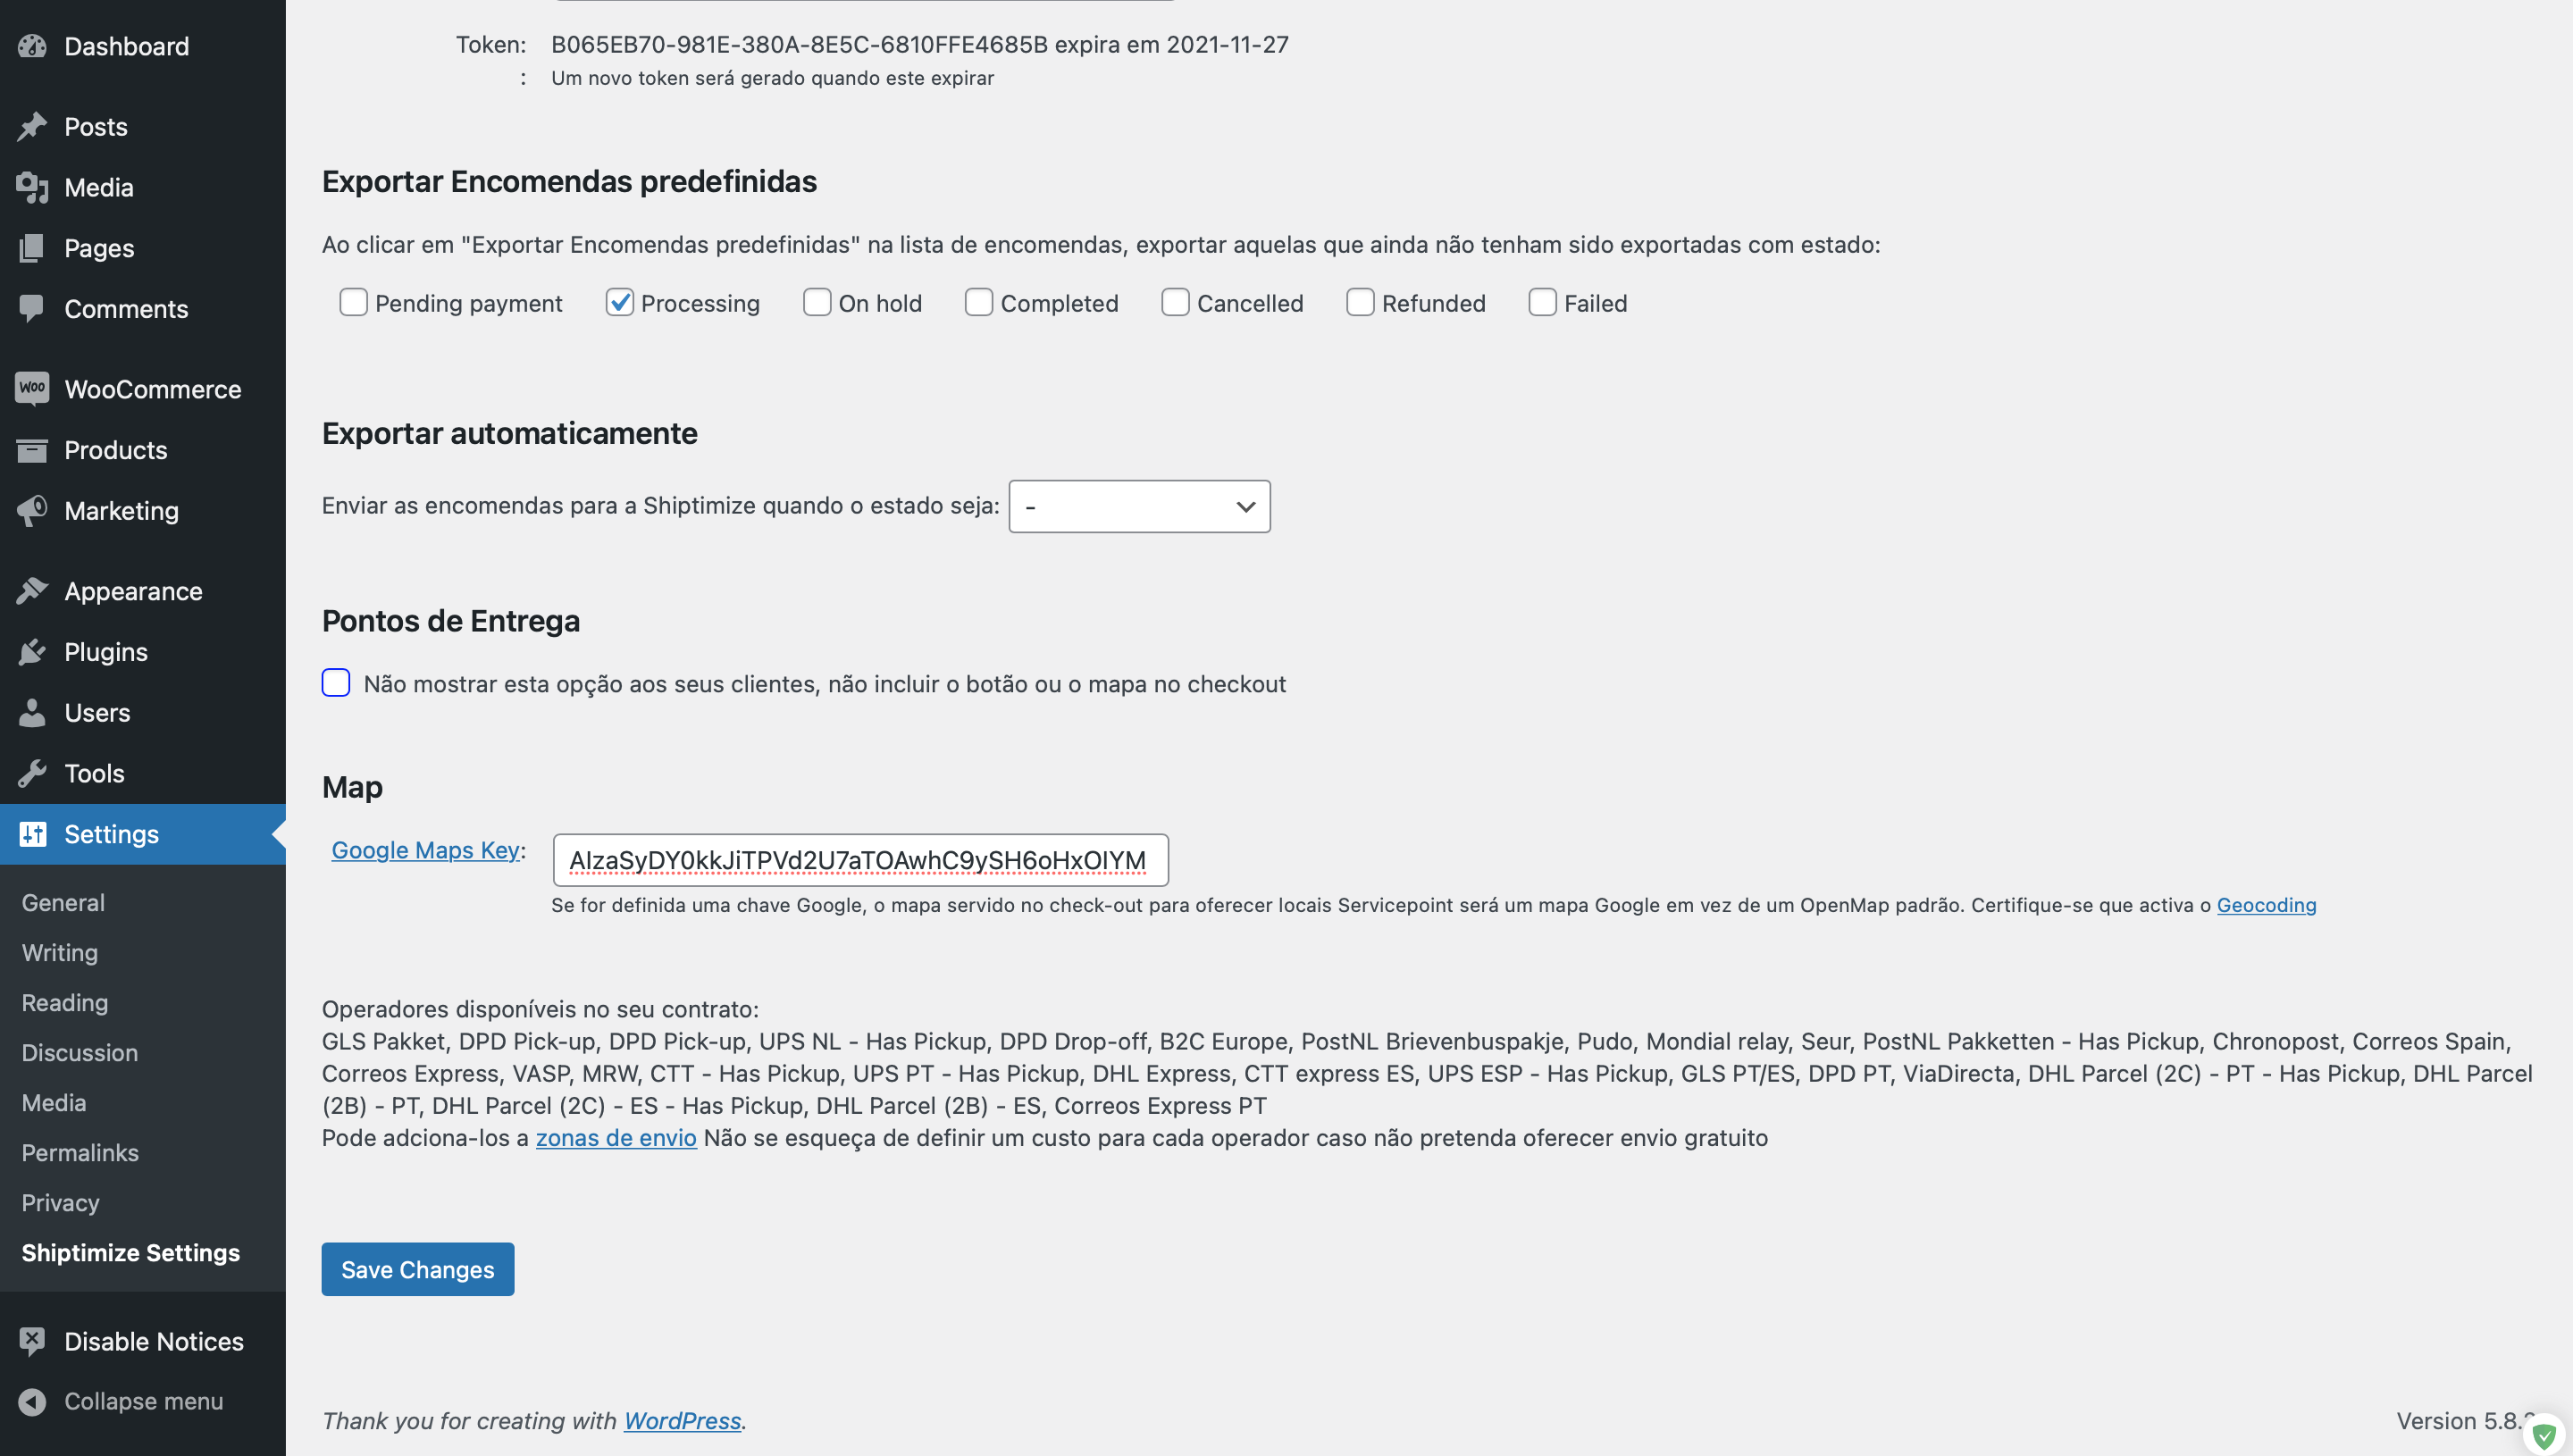
To finish configuring the plugin you should save your settings by clicking Save Changes.
If the settings have been saved successfully you will see the confirmation message at the top of the page and at the bottom of the page you will find which carriers are available in your customer area and which have delivery points.
Shiptimize configuration
On the Shiptimize platform, go to the menu Settings > Integrations > Integration details.
To change the shipping status in your shop by tracking the transit status of the item, select the desired options for the import, declaration and delivery of the shipment.

You can also choose whether you want our platform to automatically update the tracking code in your online shop so that it is available in your customer’s area in your online shop. By default, this option is already active.
When you have finished this configuration click on update.
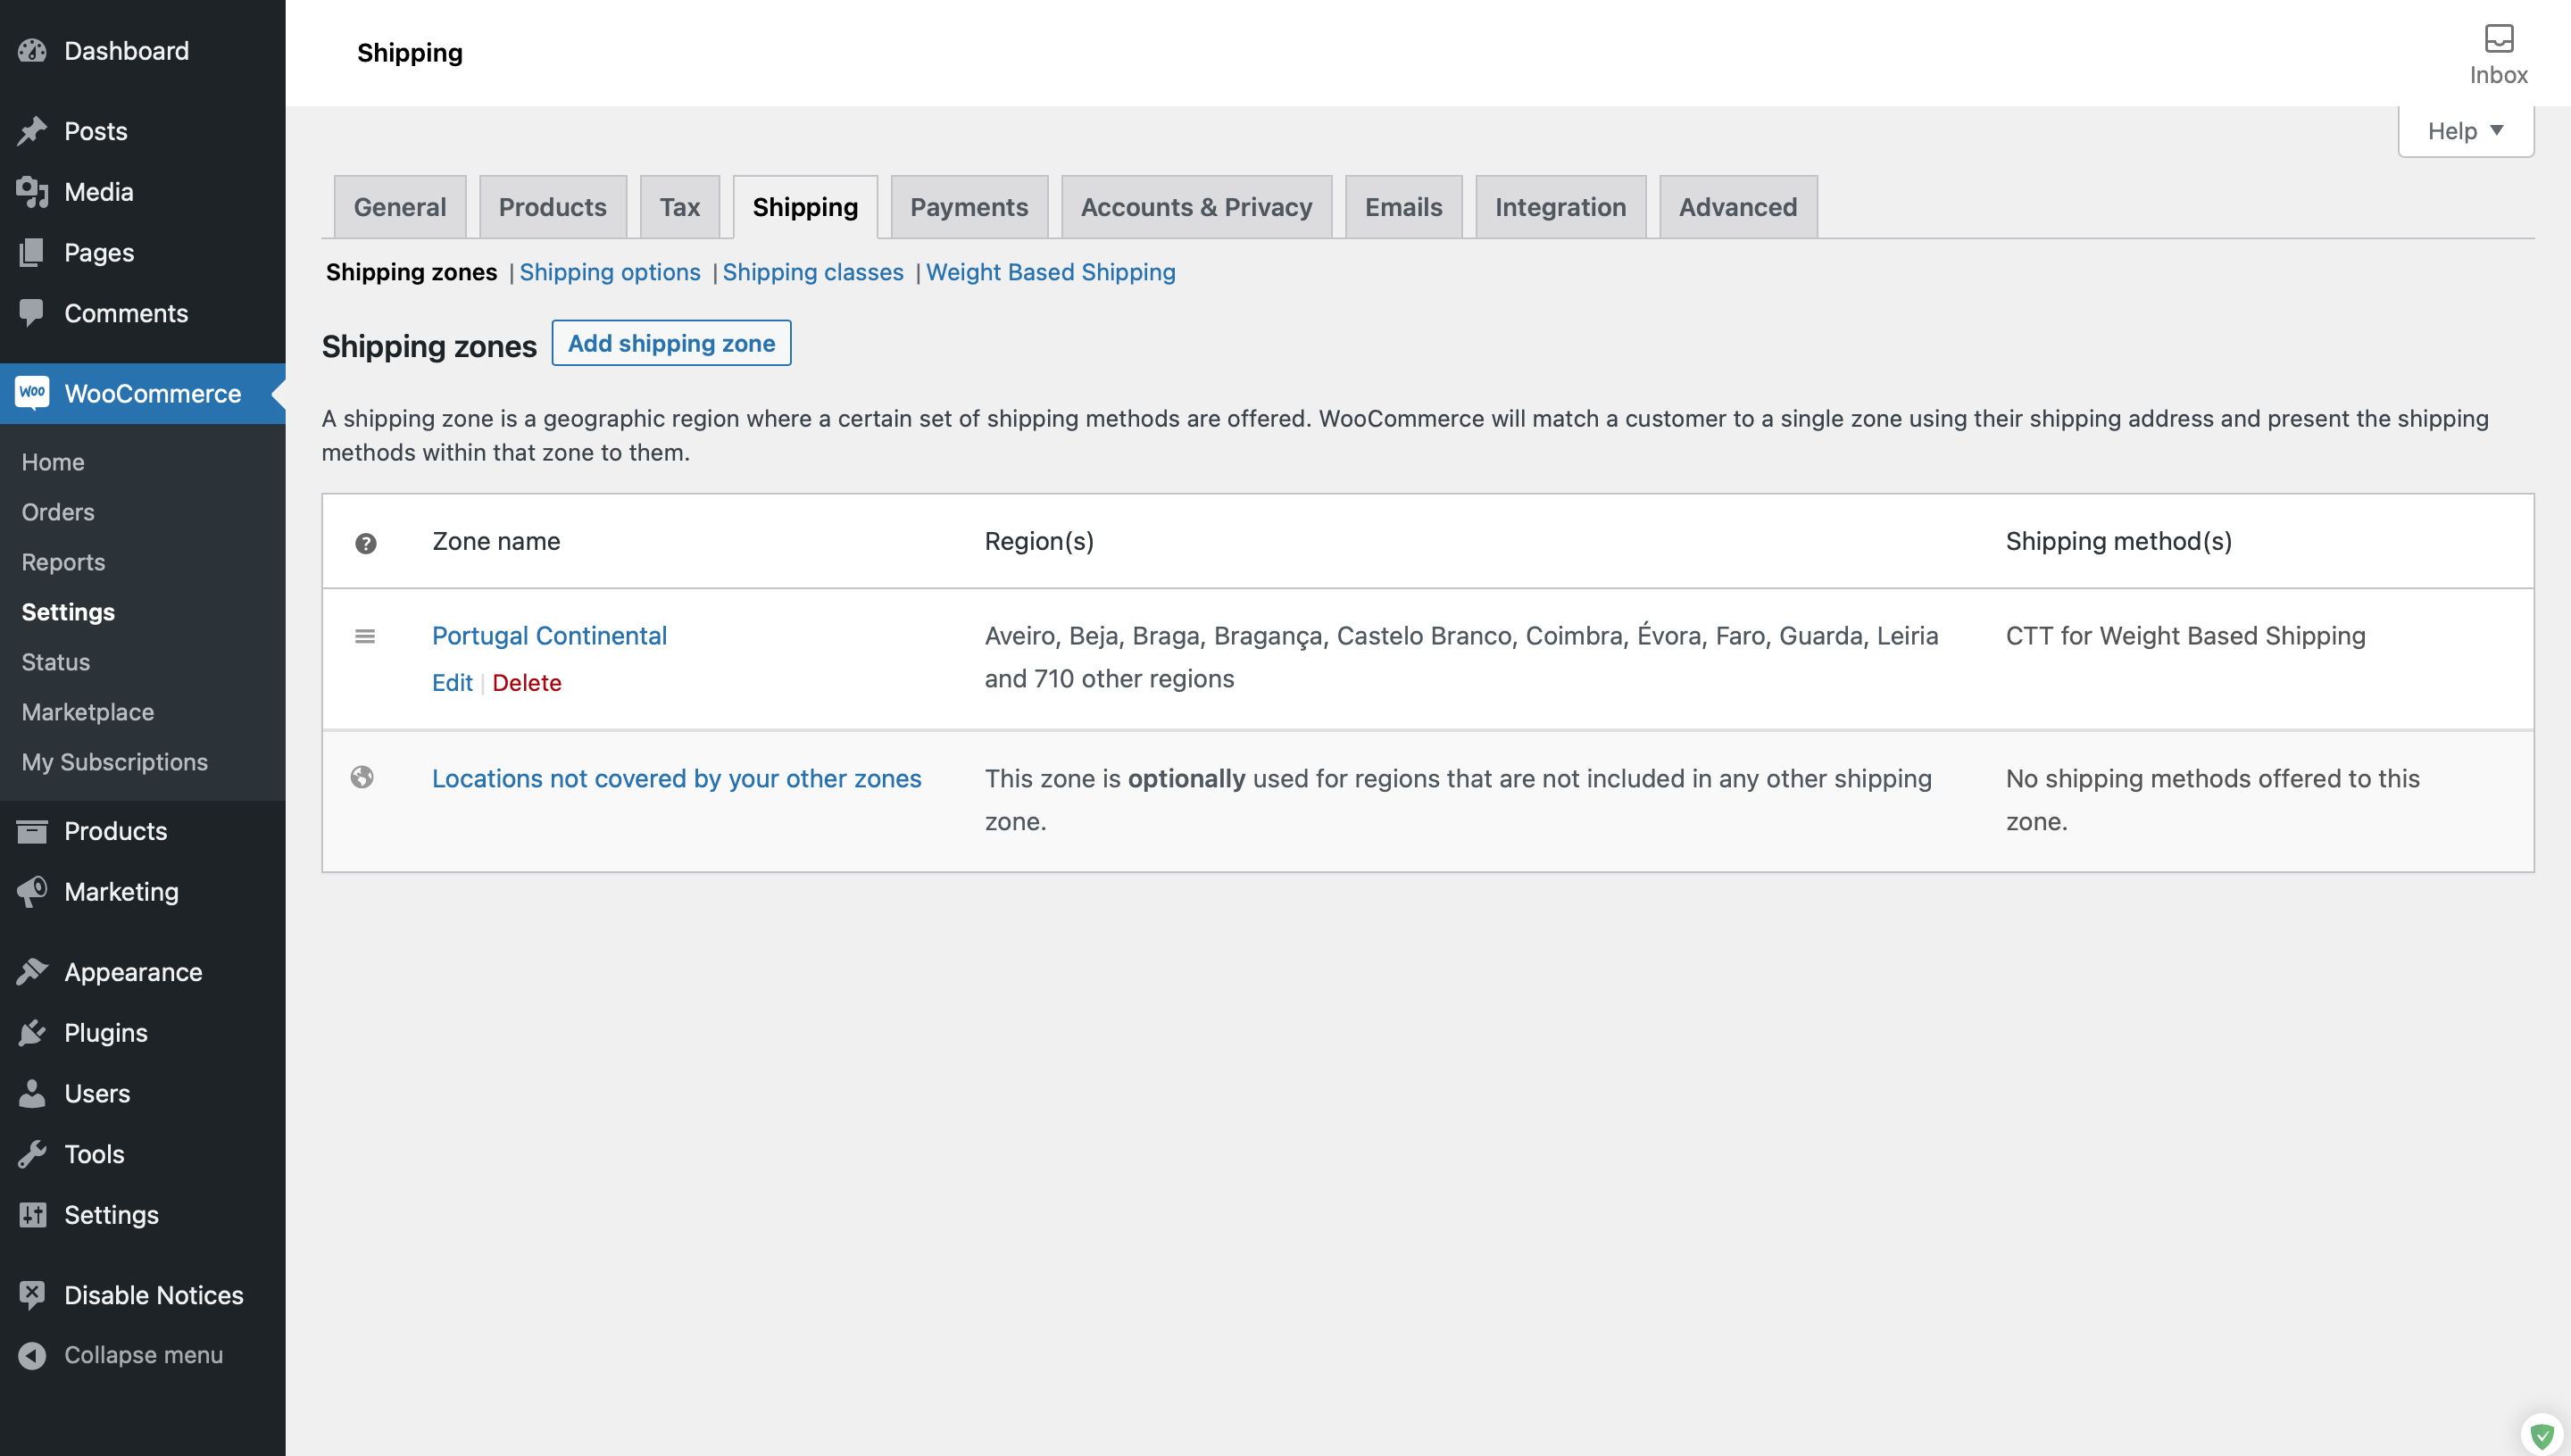
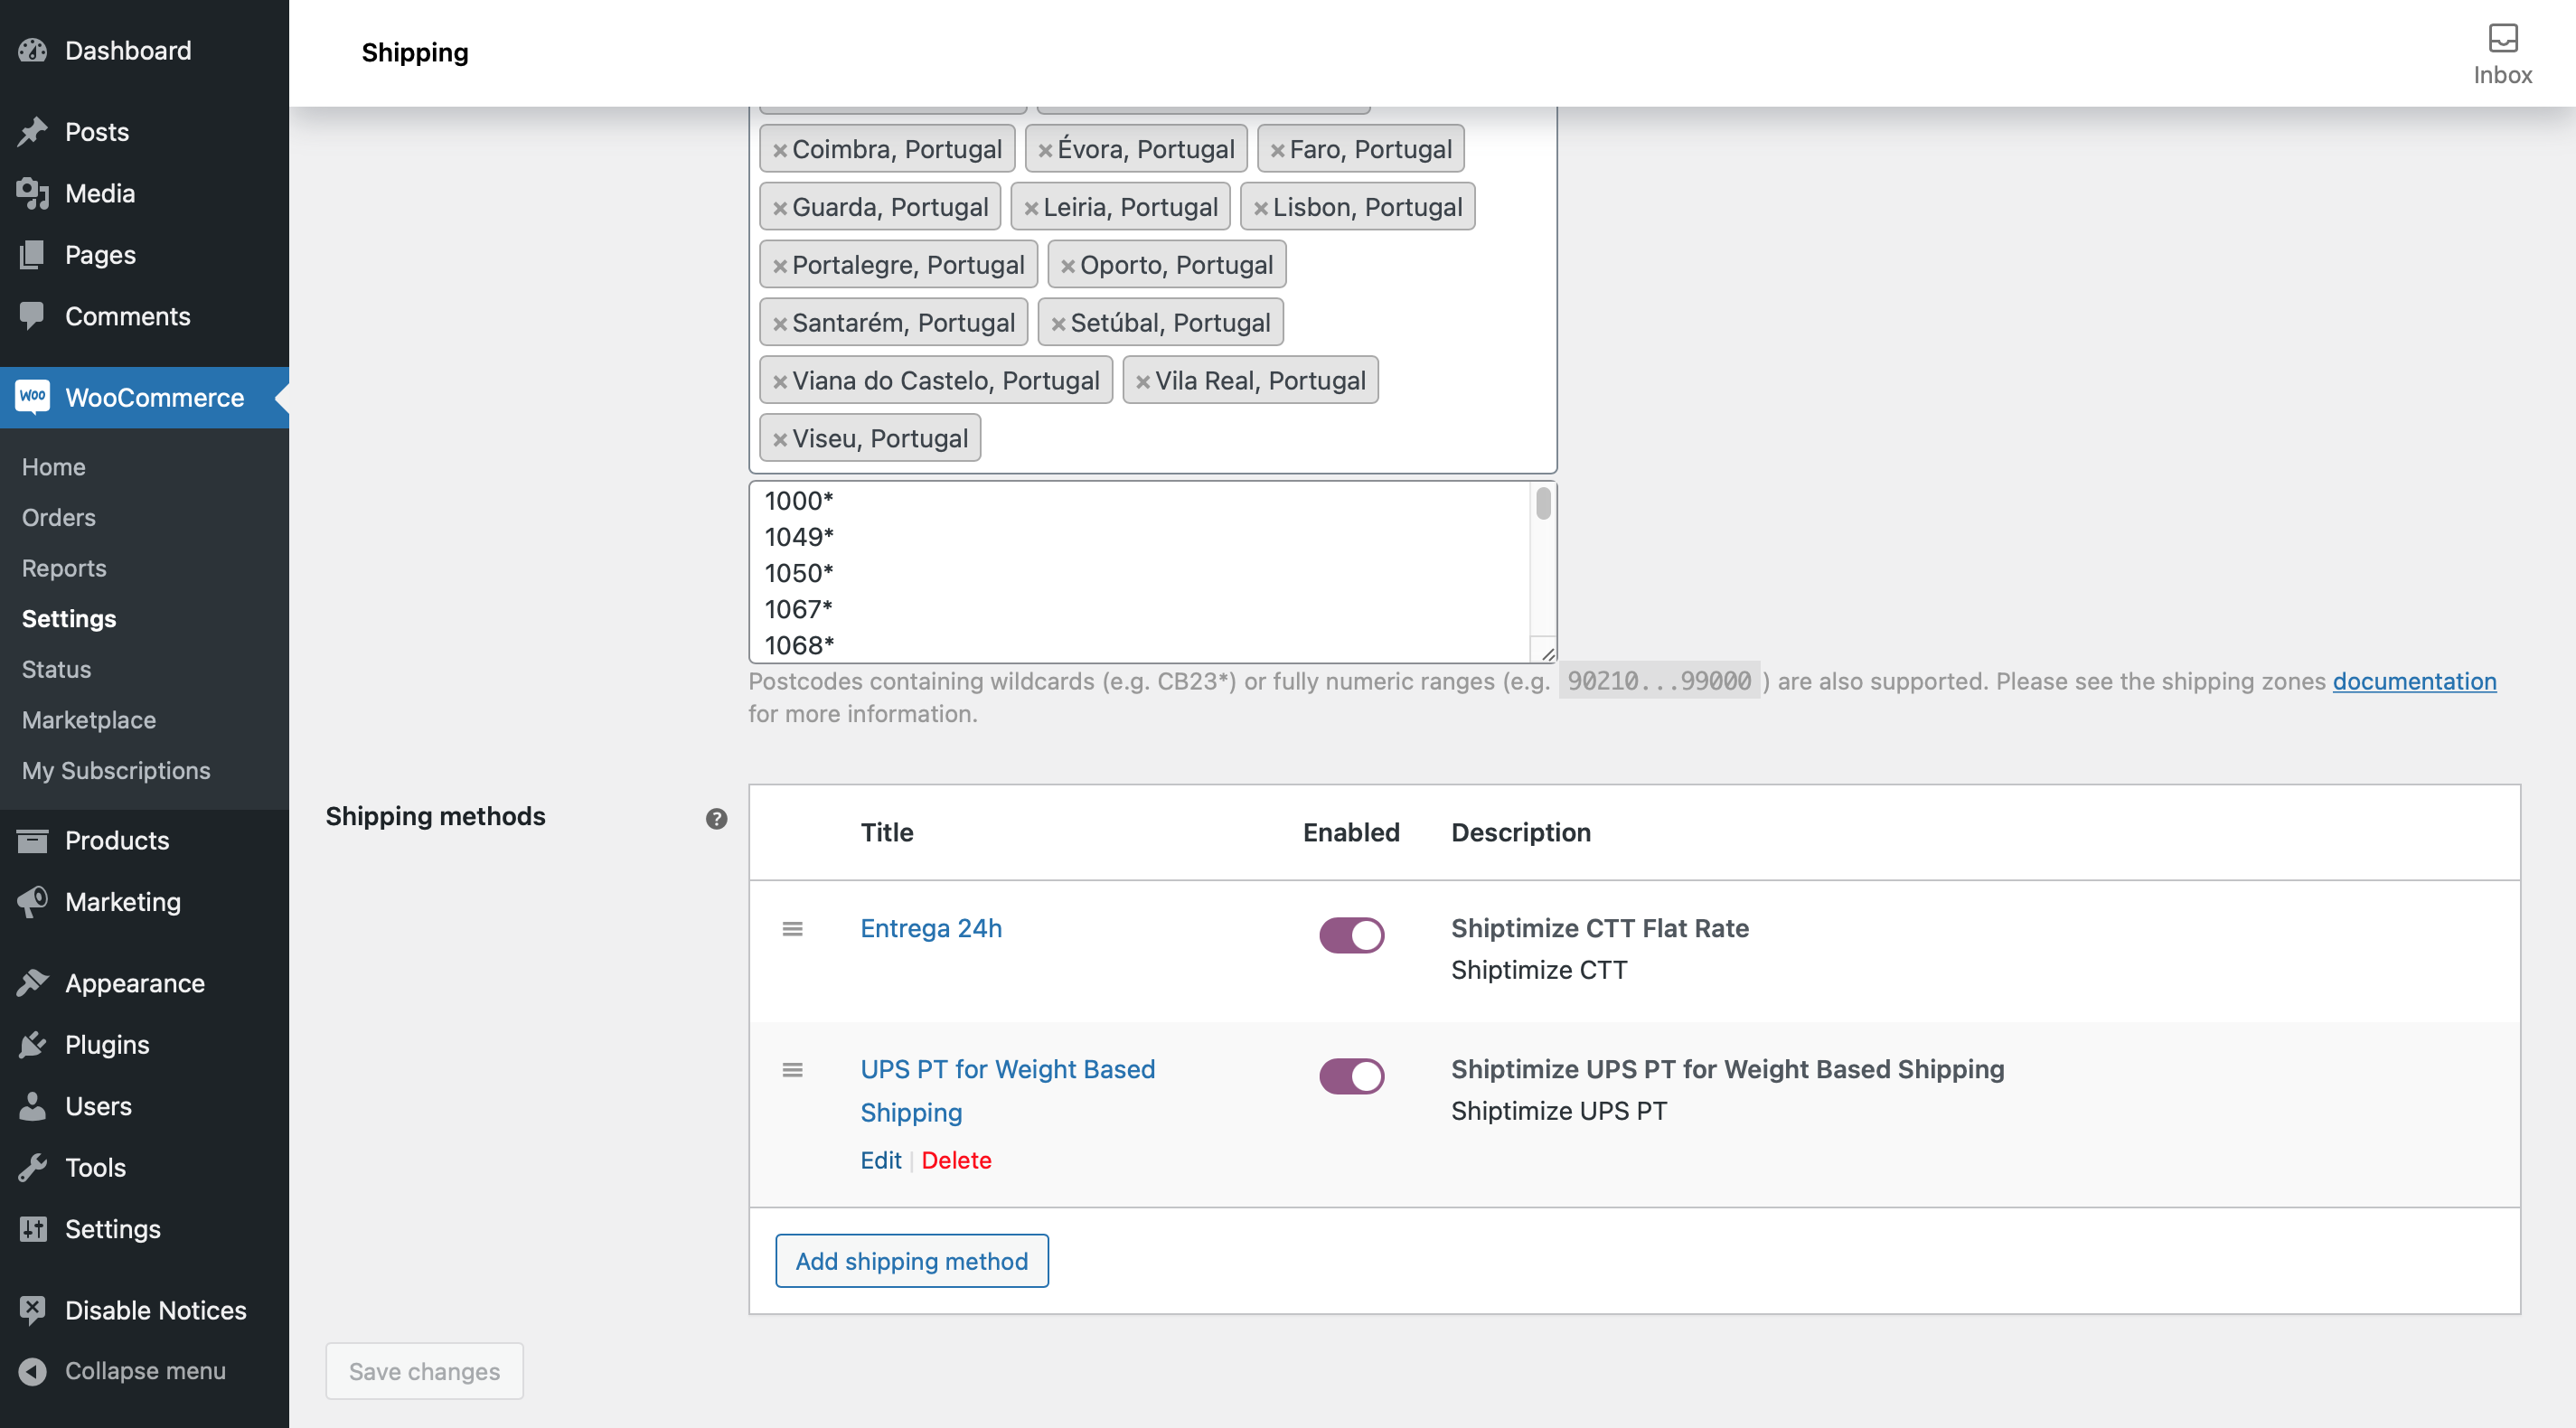
Adding Shipping Methods
To add the shipping methods provided by Shiptimize to your shipping zones you should go to Woocommerce and then Settings > Shipping
In the zone where you want to add the shipping method click Edit
Note: If you do not have shipping zones, please see how to add a shipping zone here
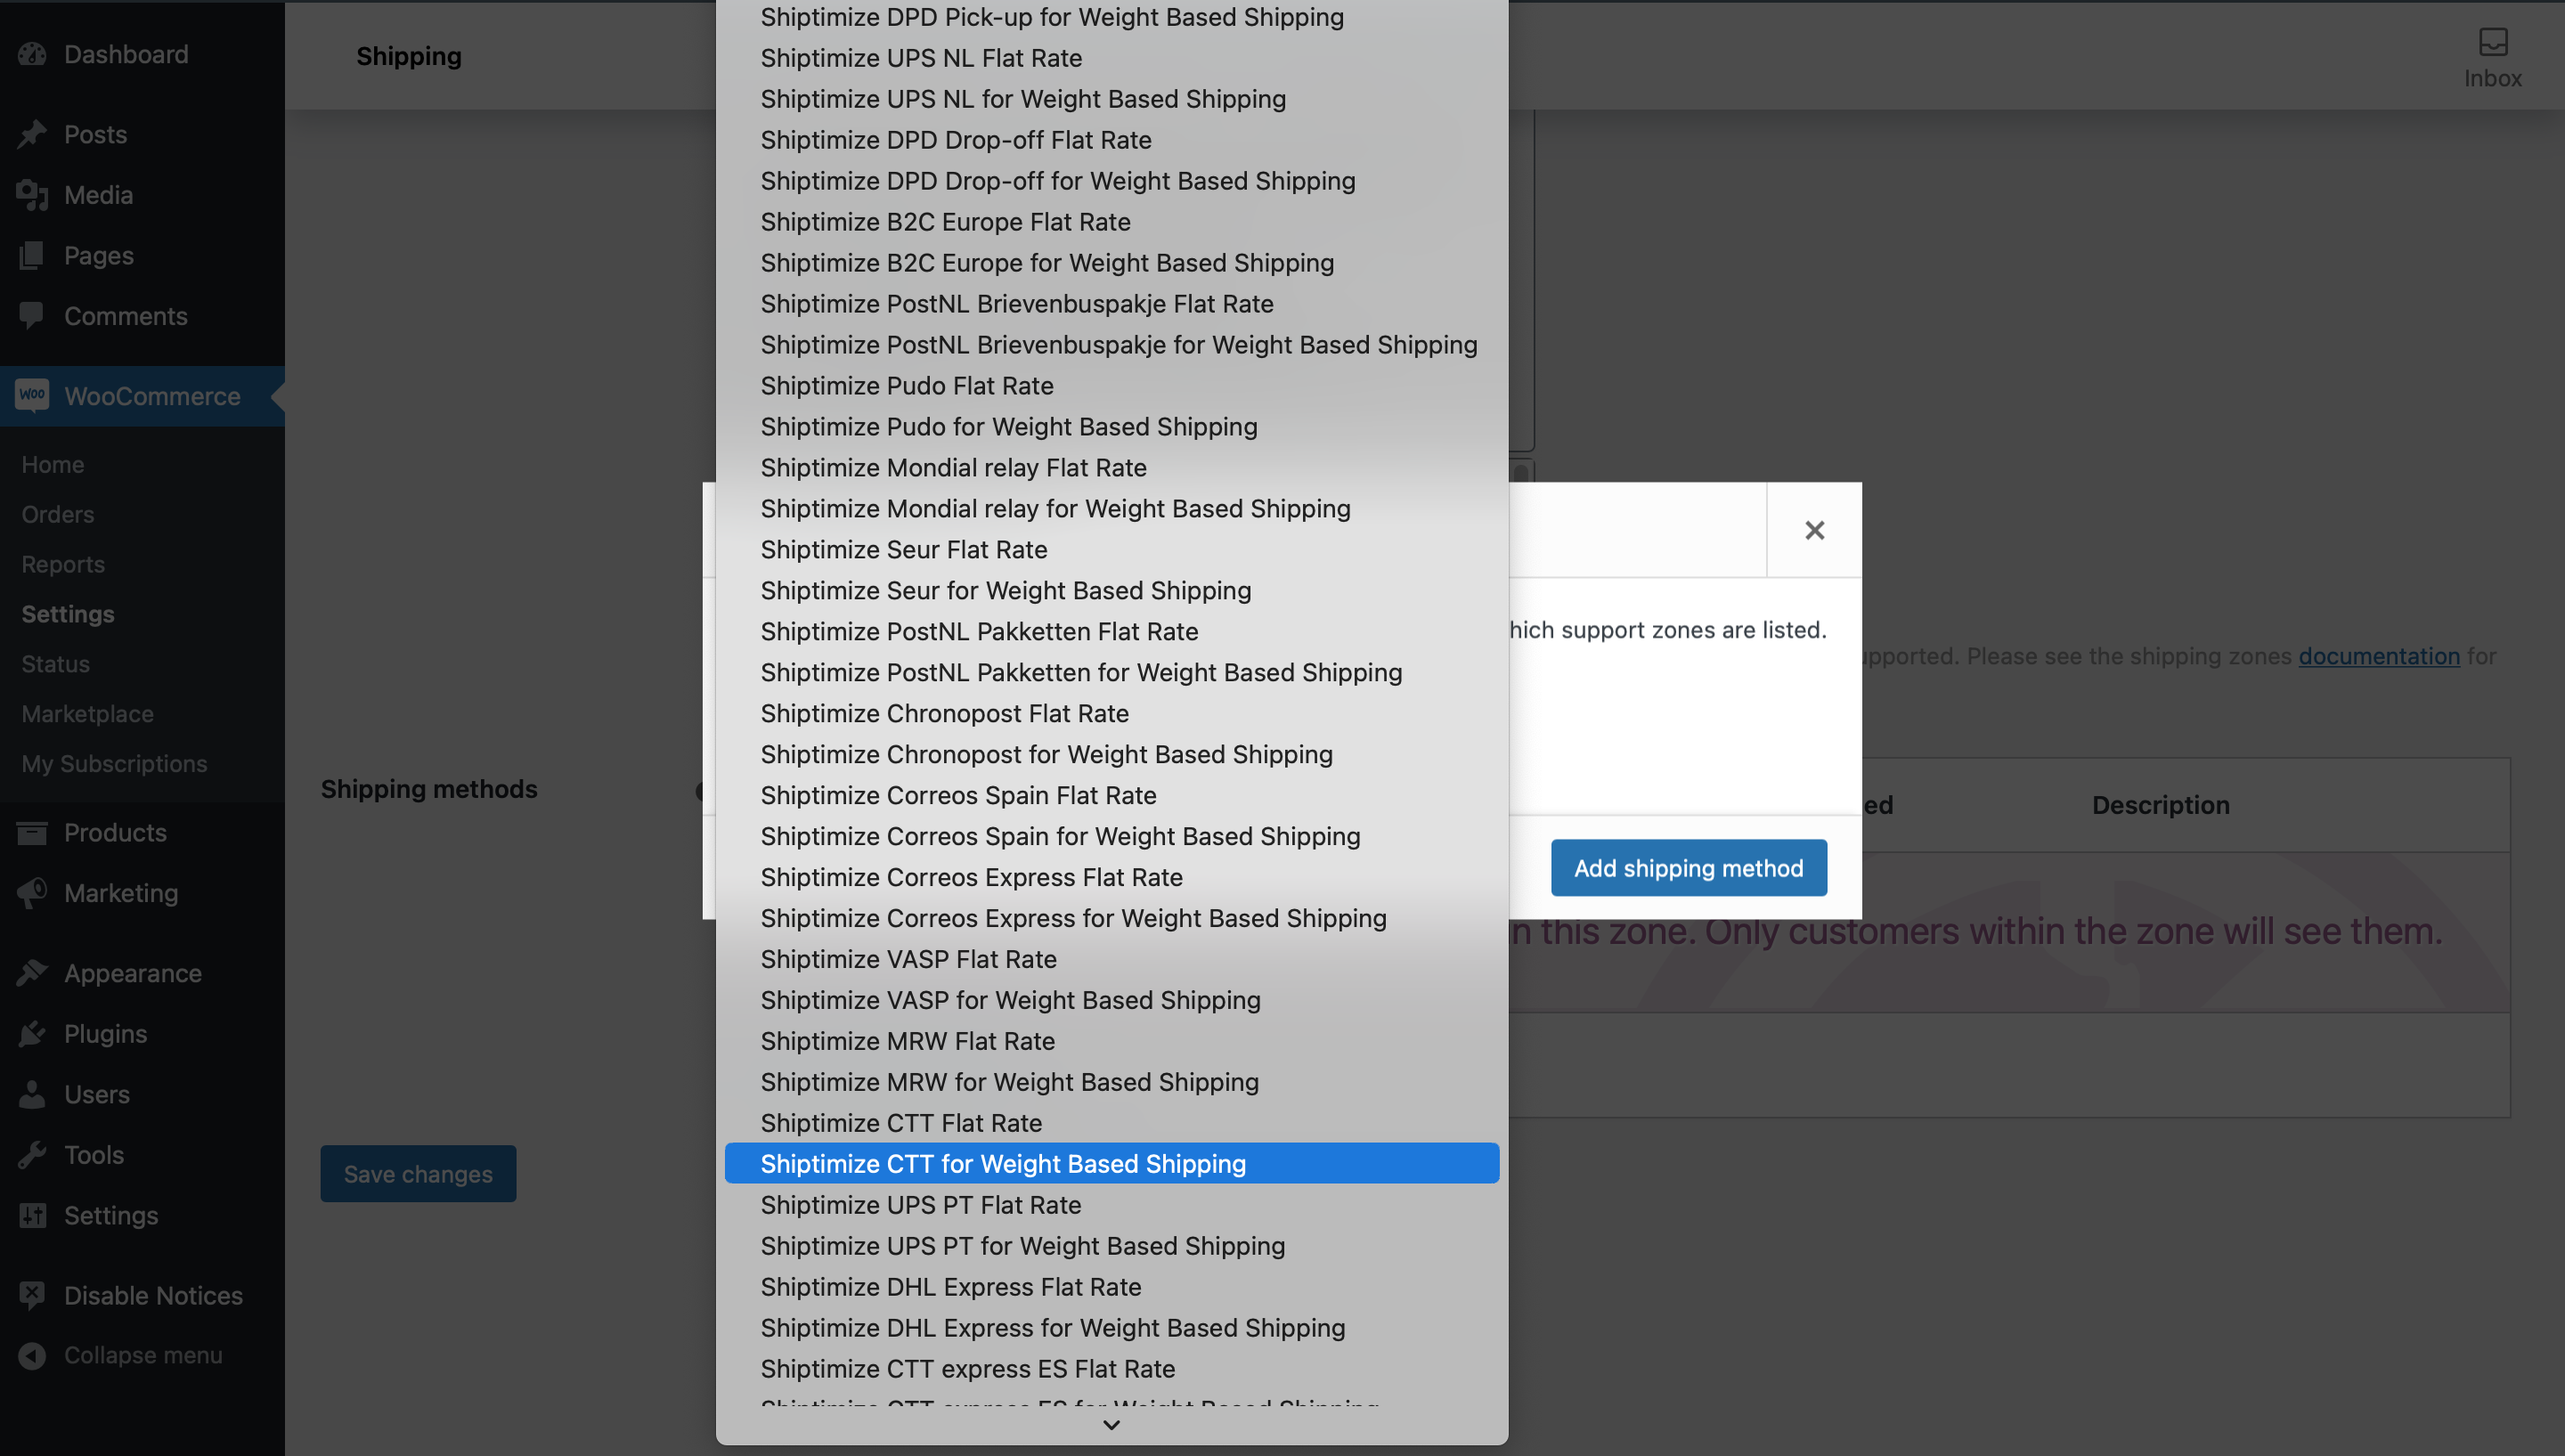
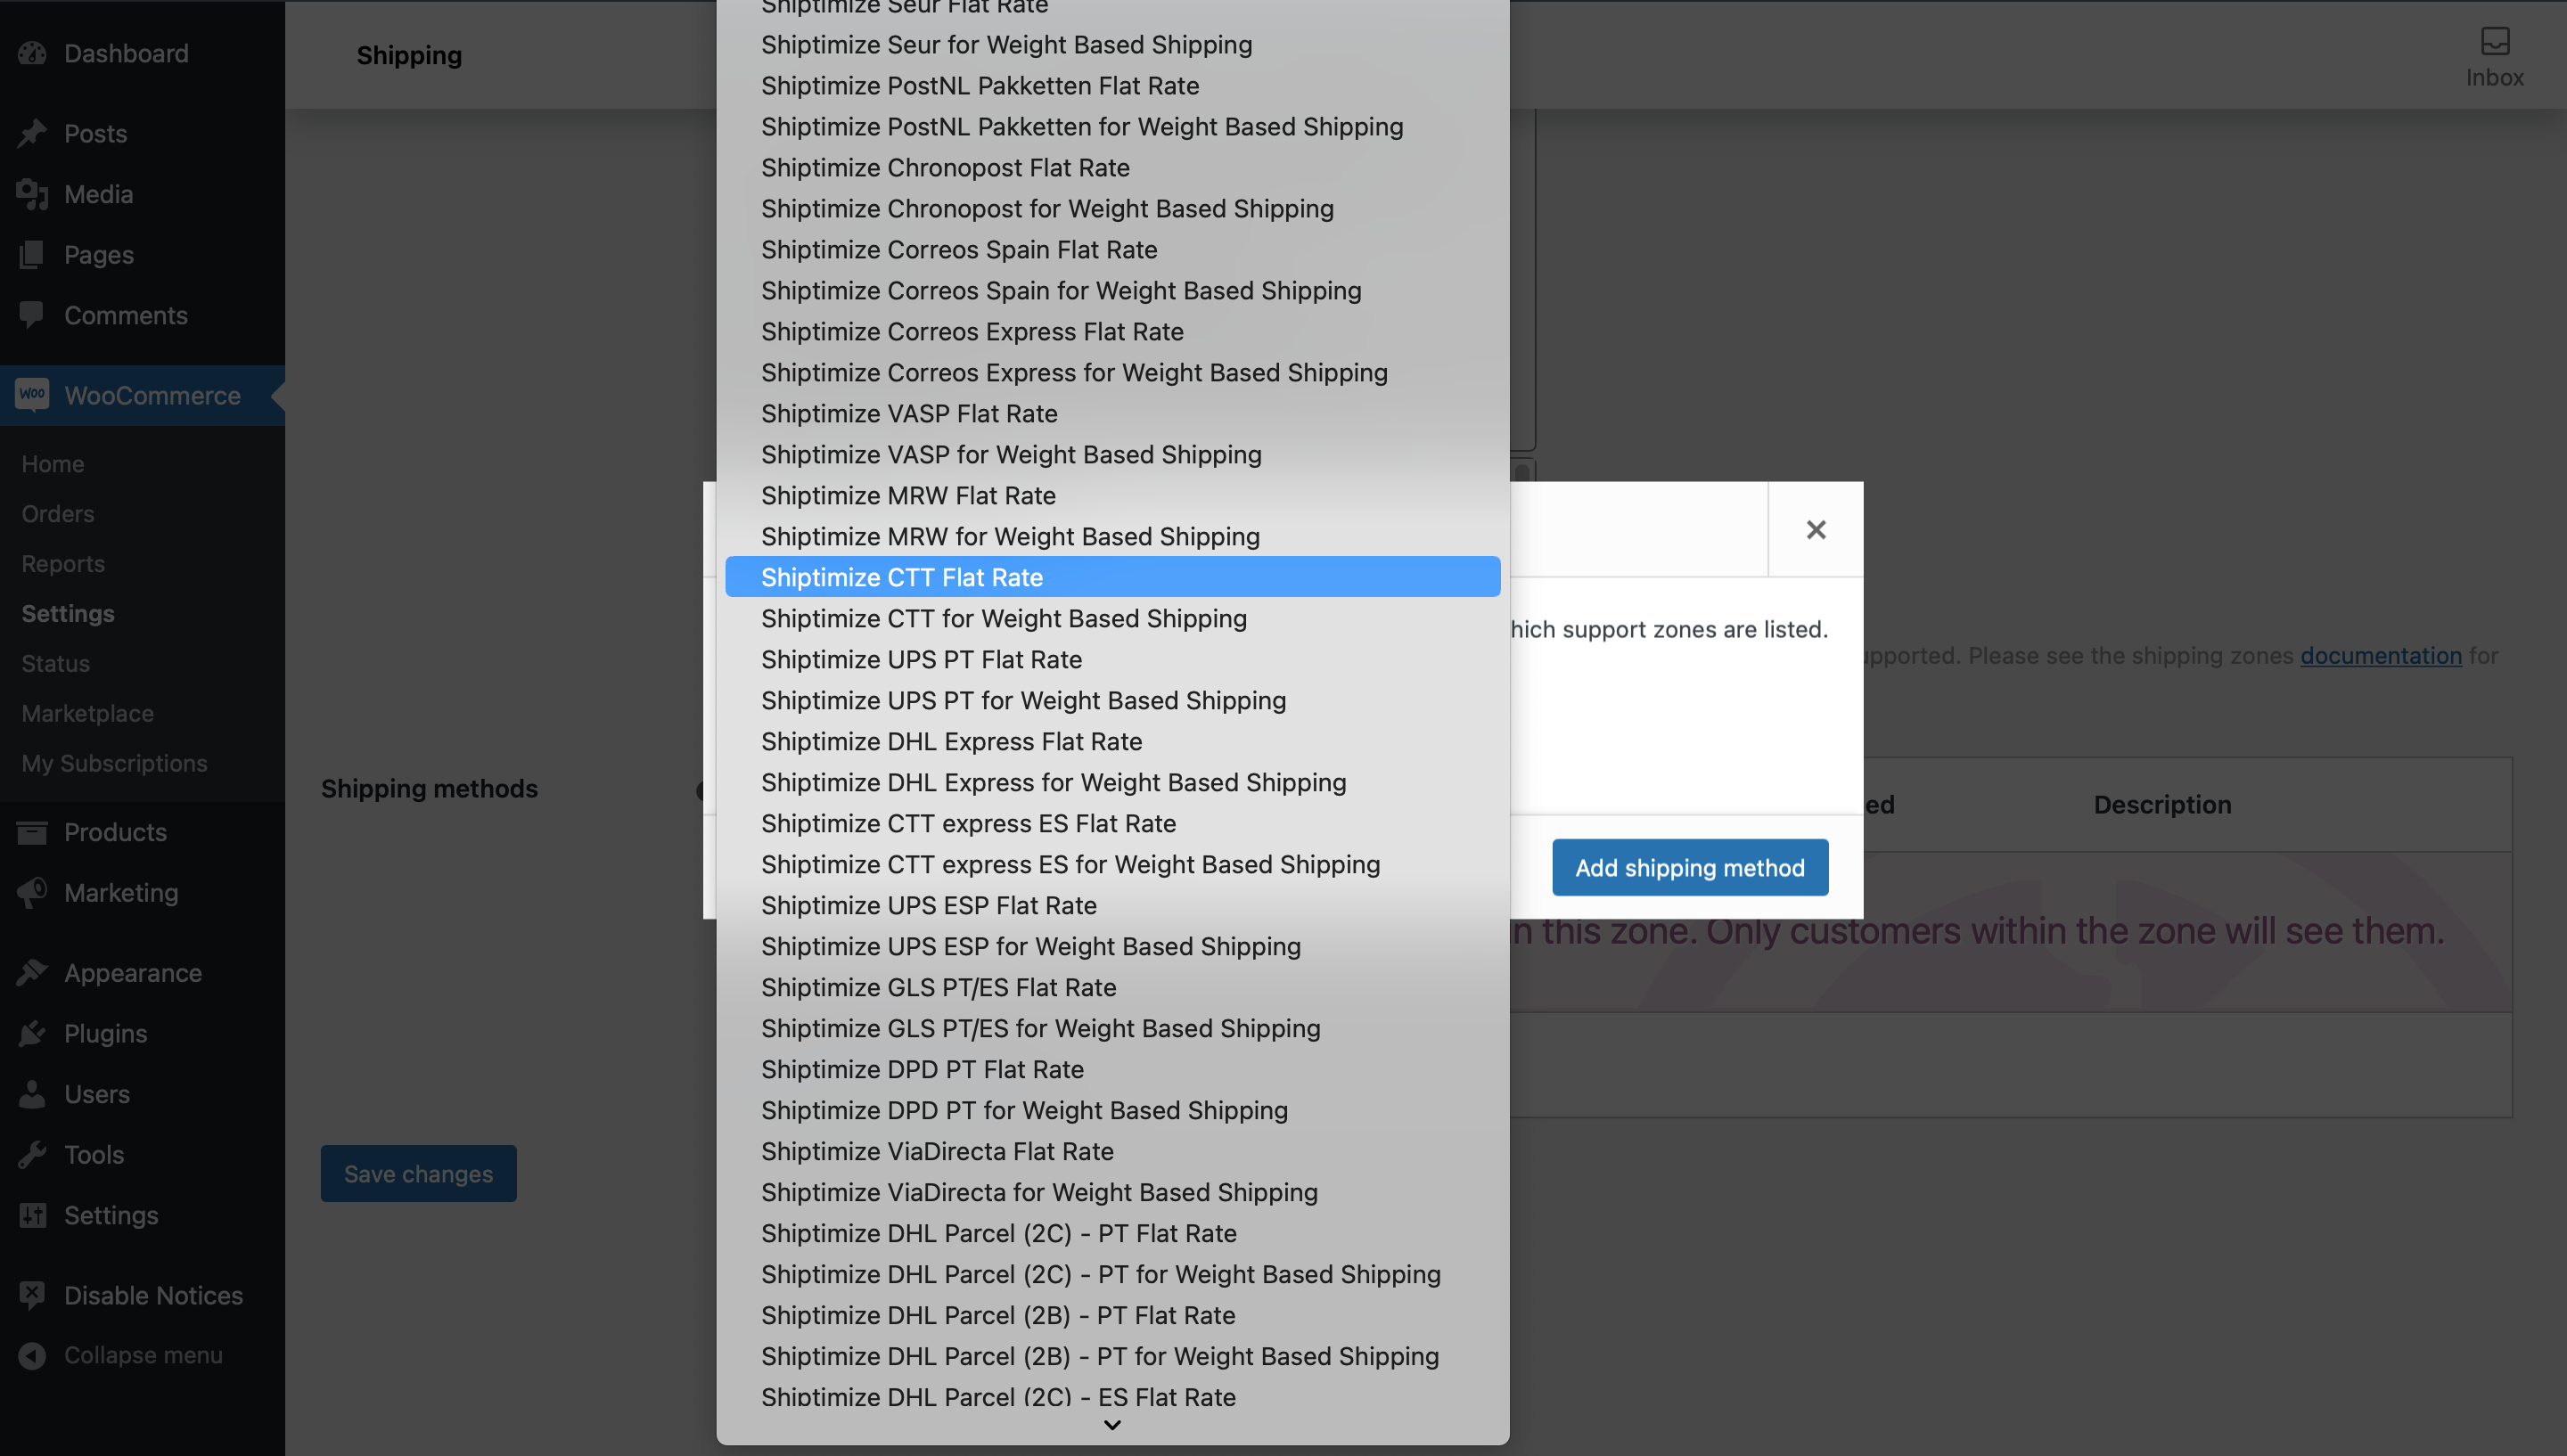
In the next menu you should click on Add Shipping method
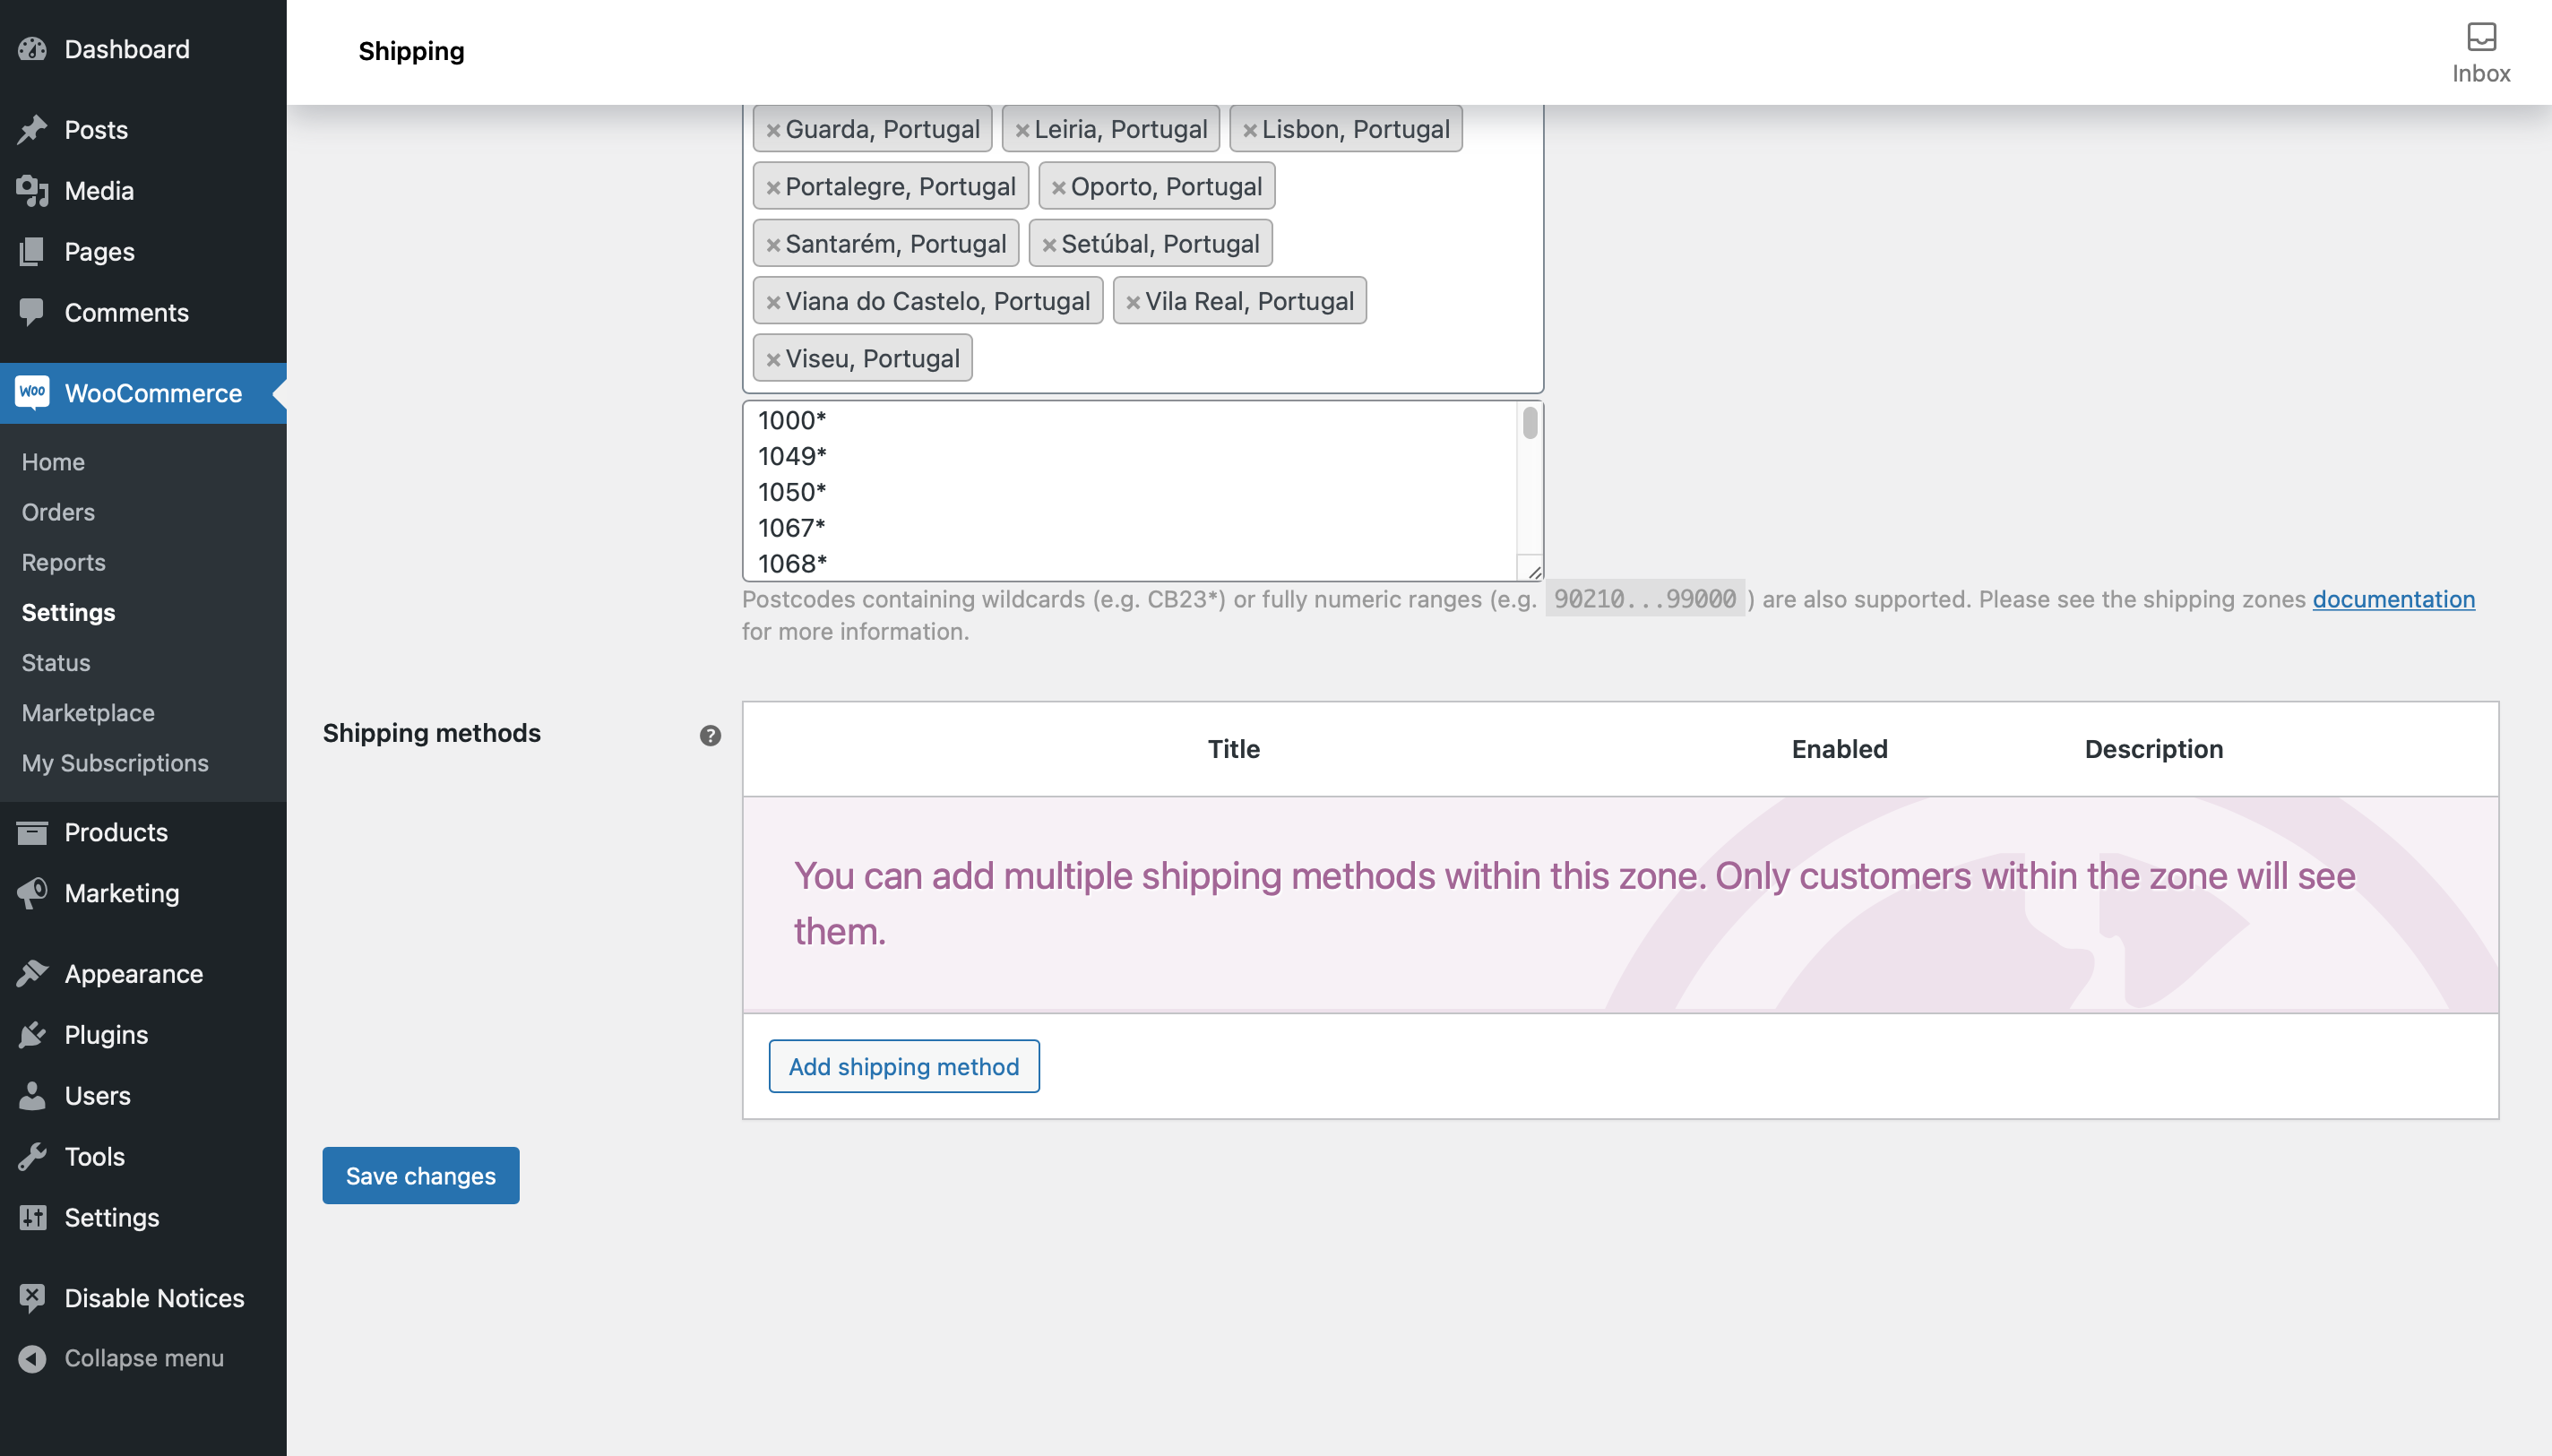
In the popup window that appears you will find all the shipping carriers available in your client area either with a single rate or with the possibility of fractioning by weight.
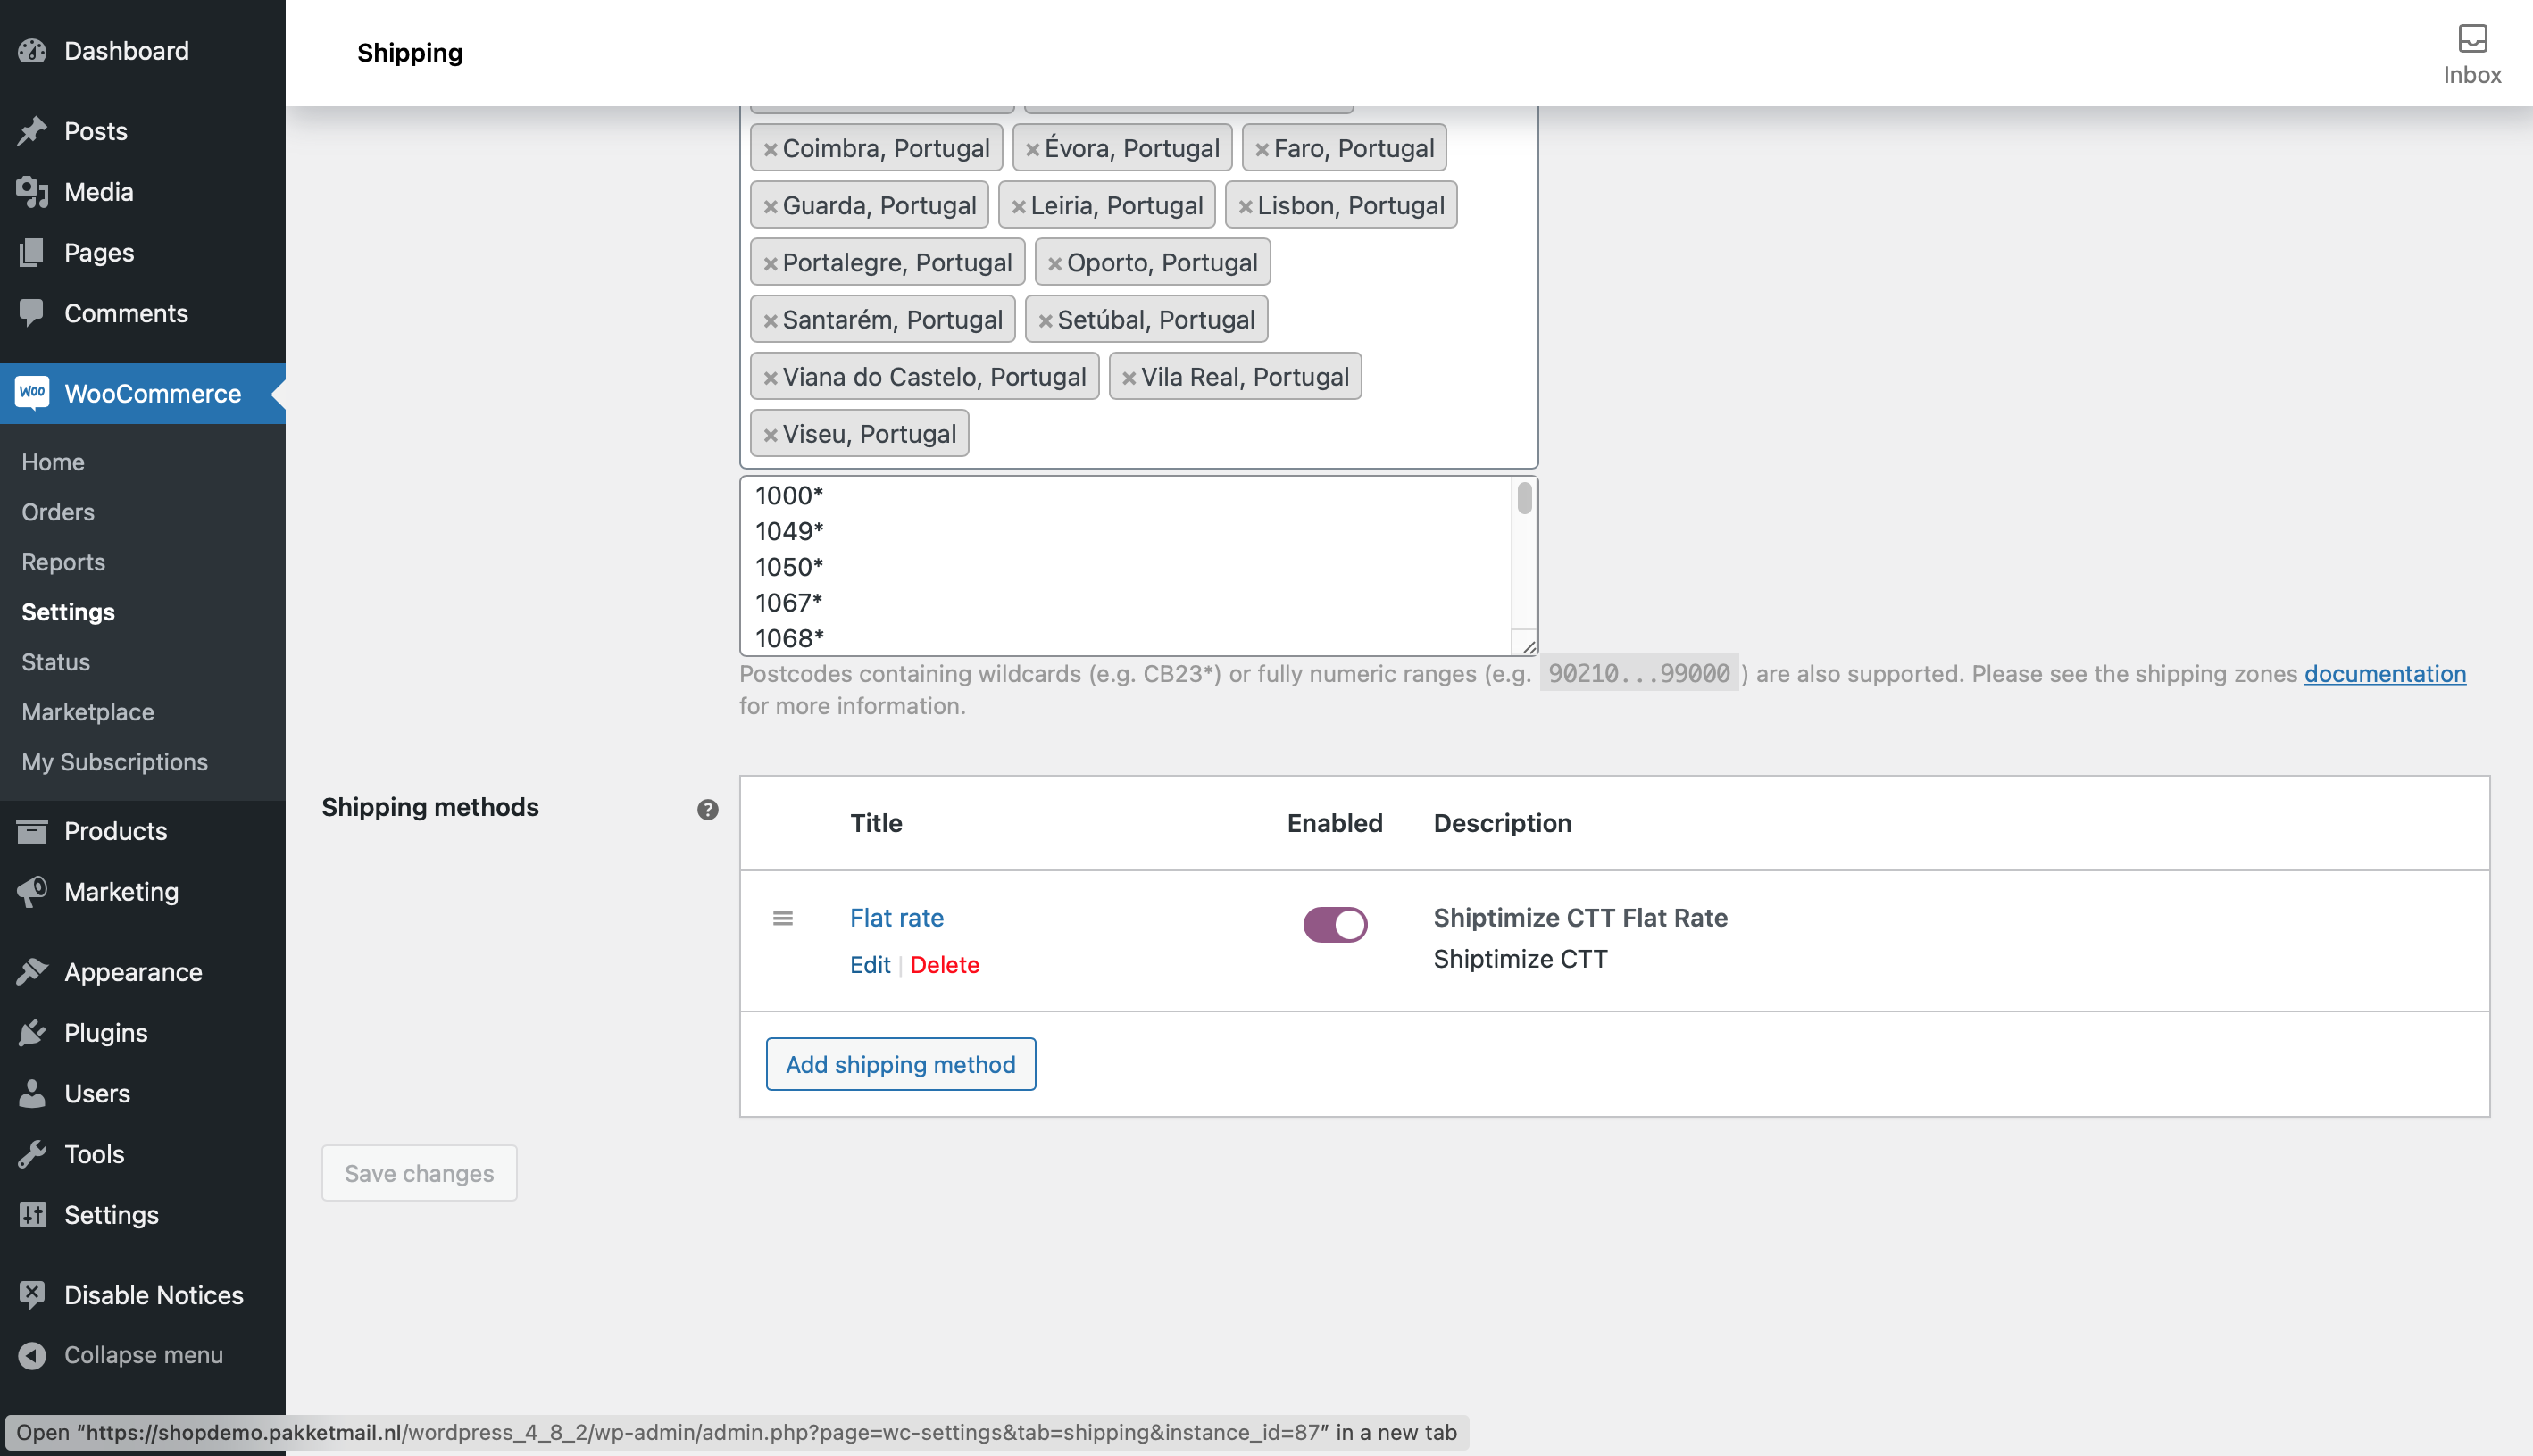
In this example we have selected CTT flat rate
To set the value of this shipment click on Edit
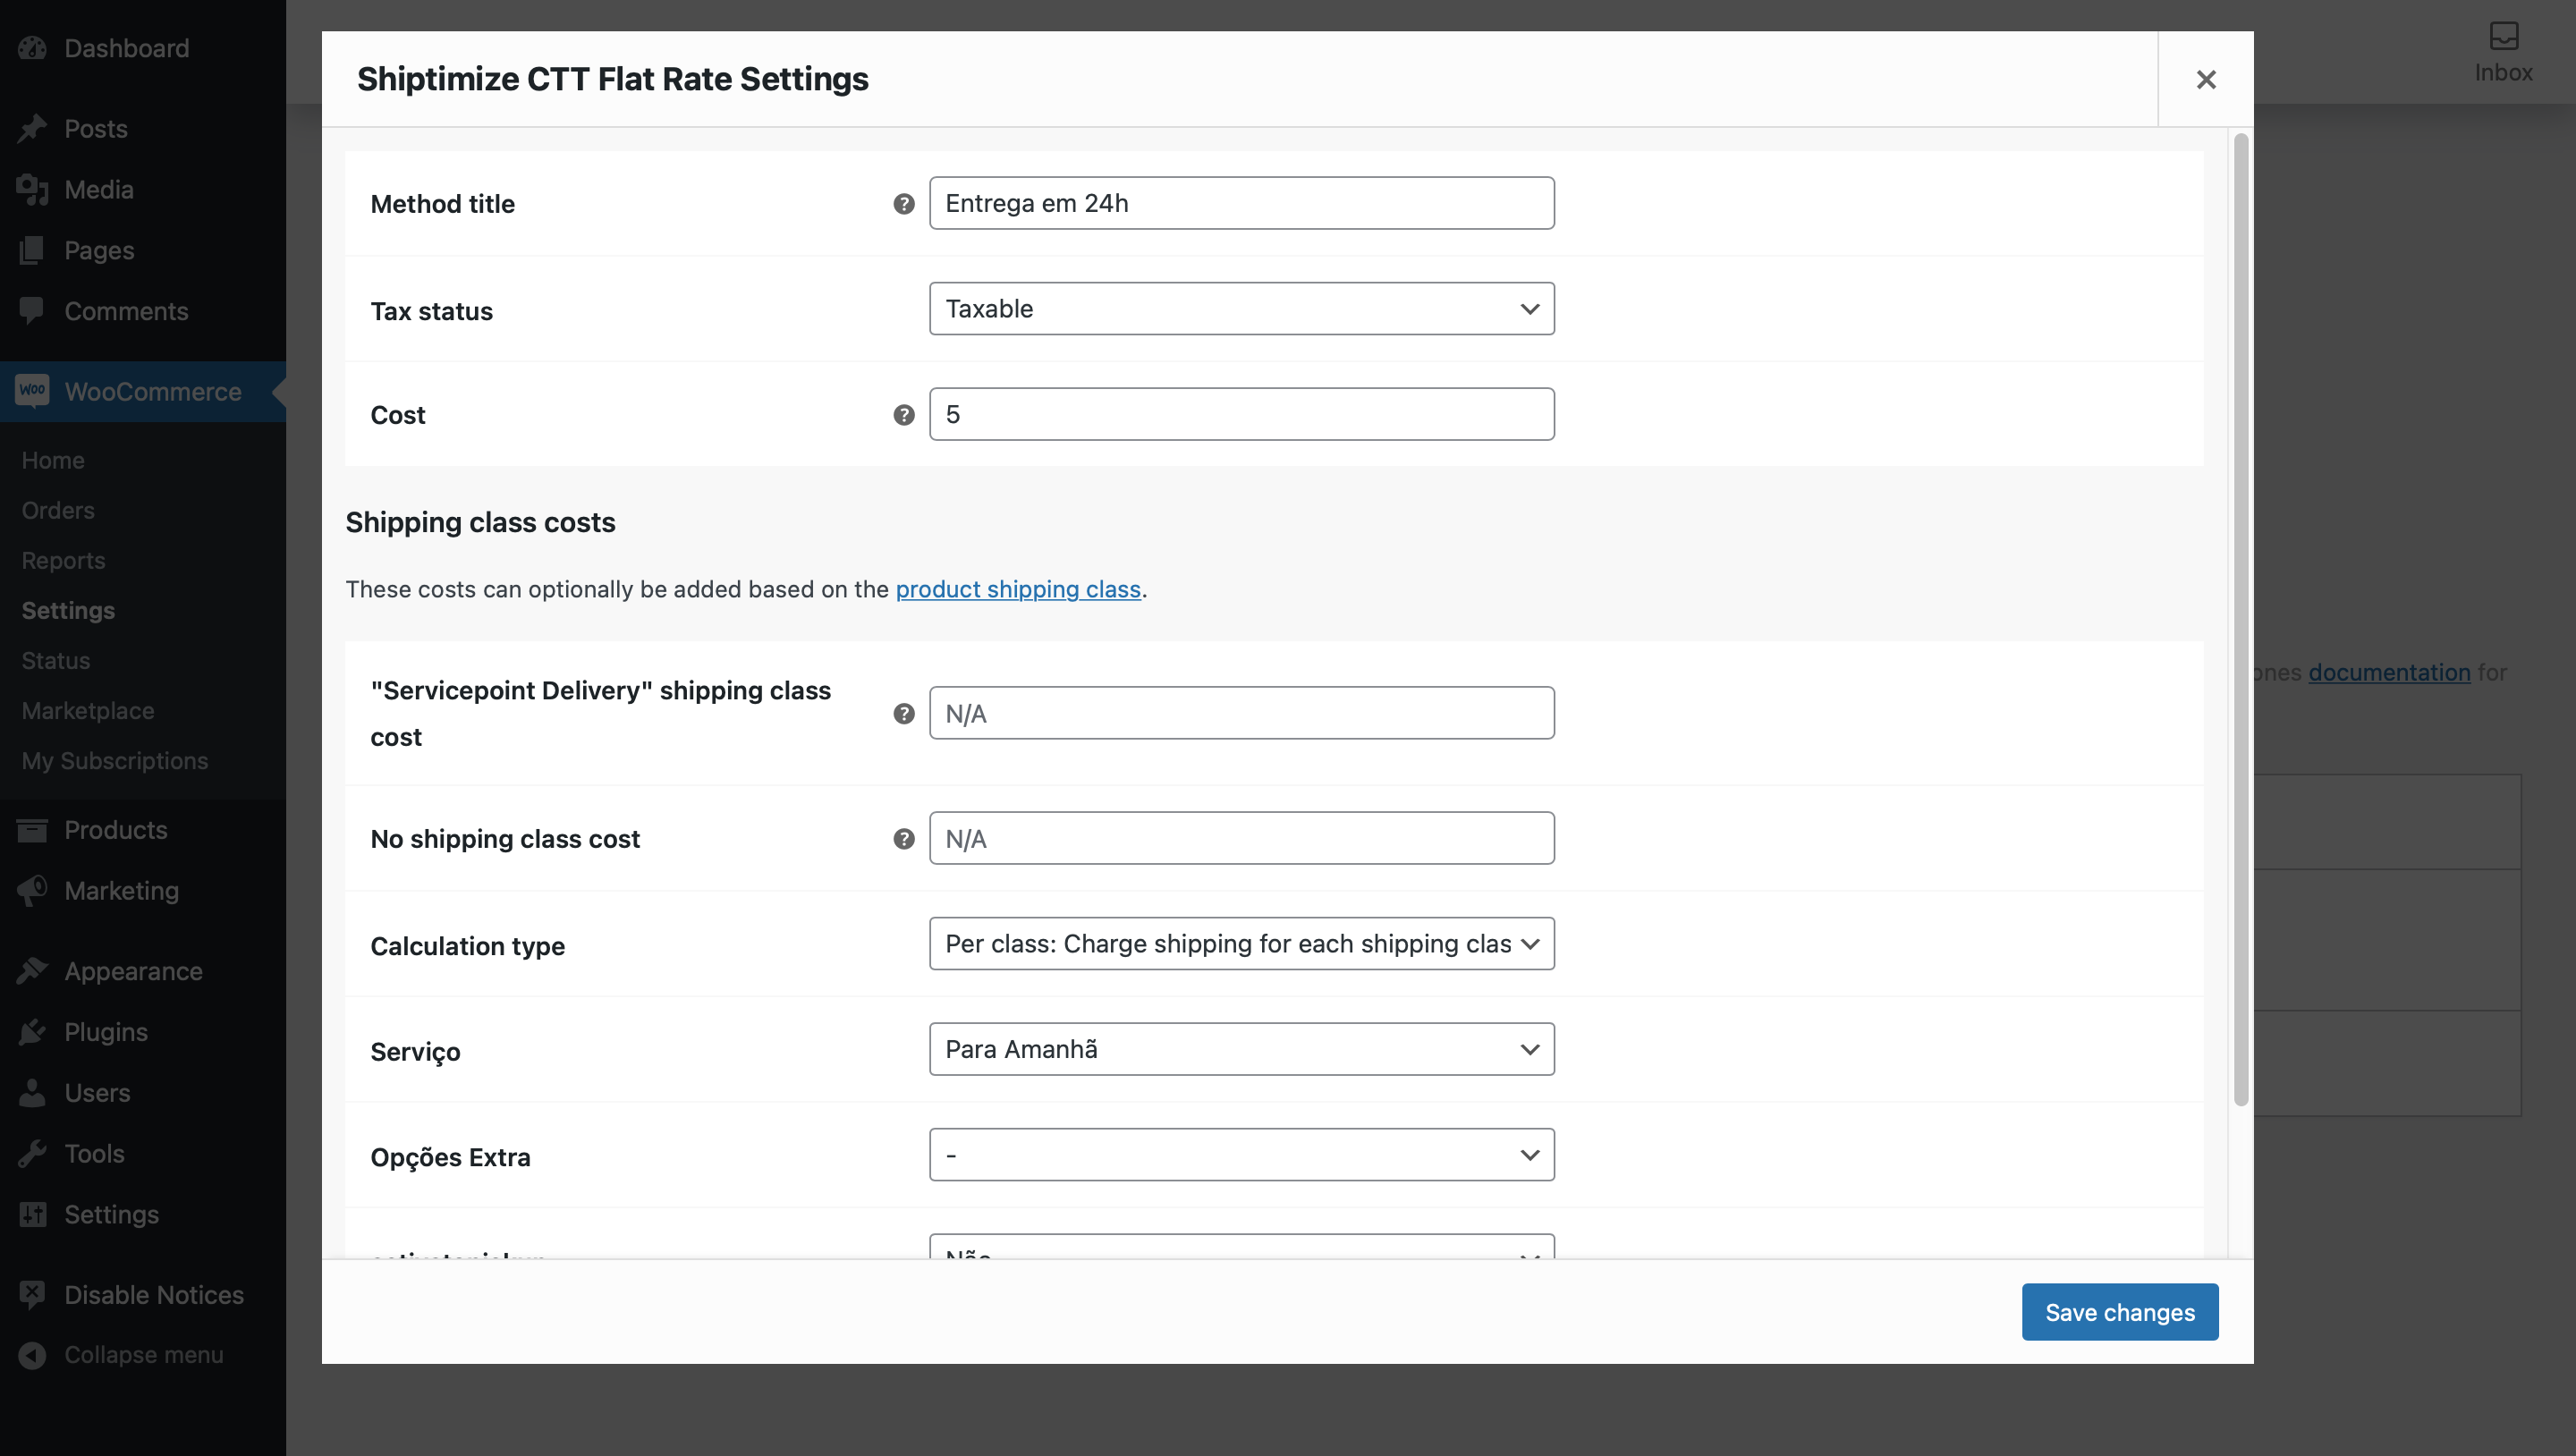
You must define the shipping method name that will appear on your shop’s checkout, the shipping amount and the level of service and/or extra options you want. Finally click Save Changes
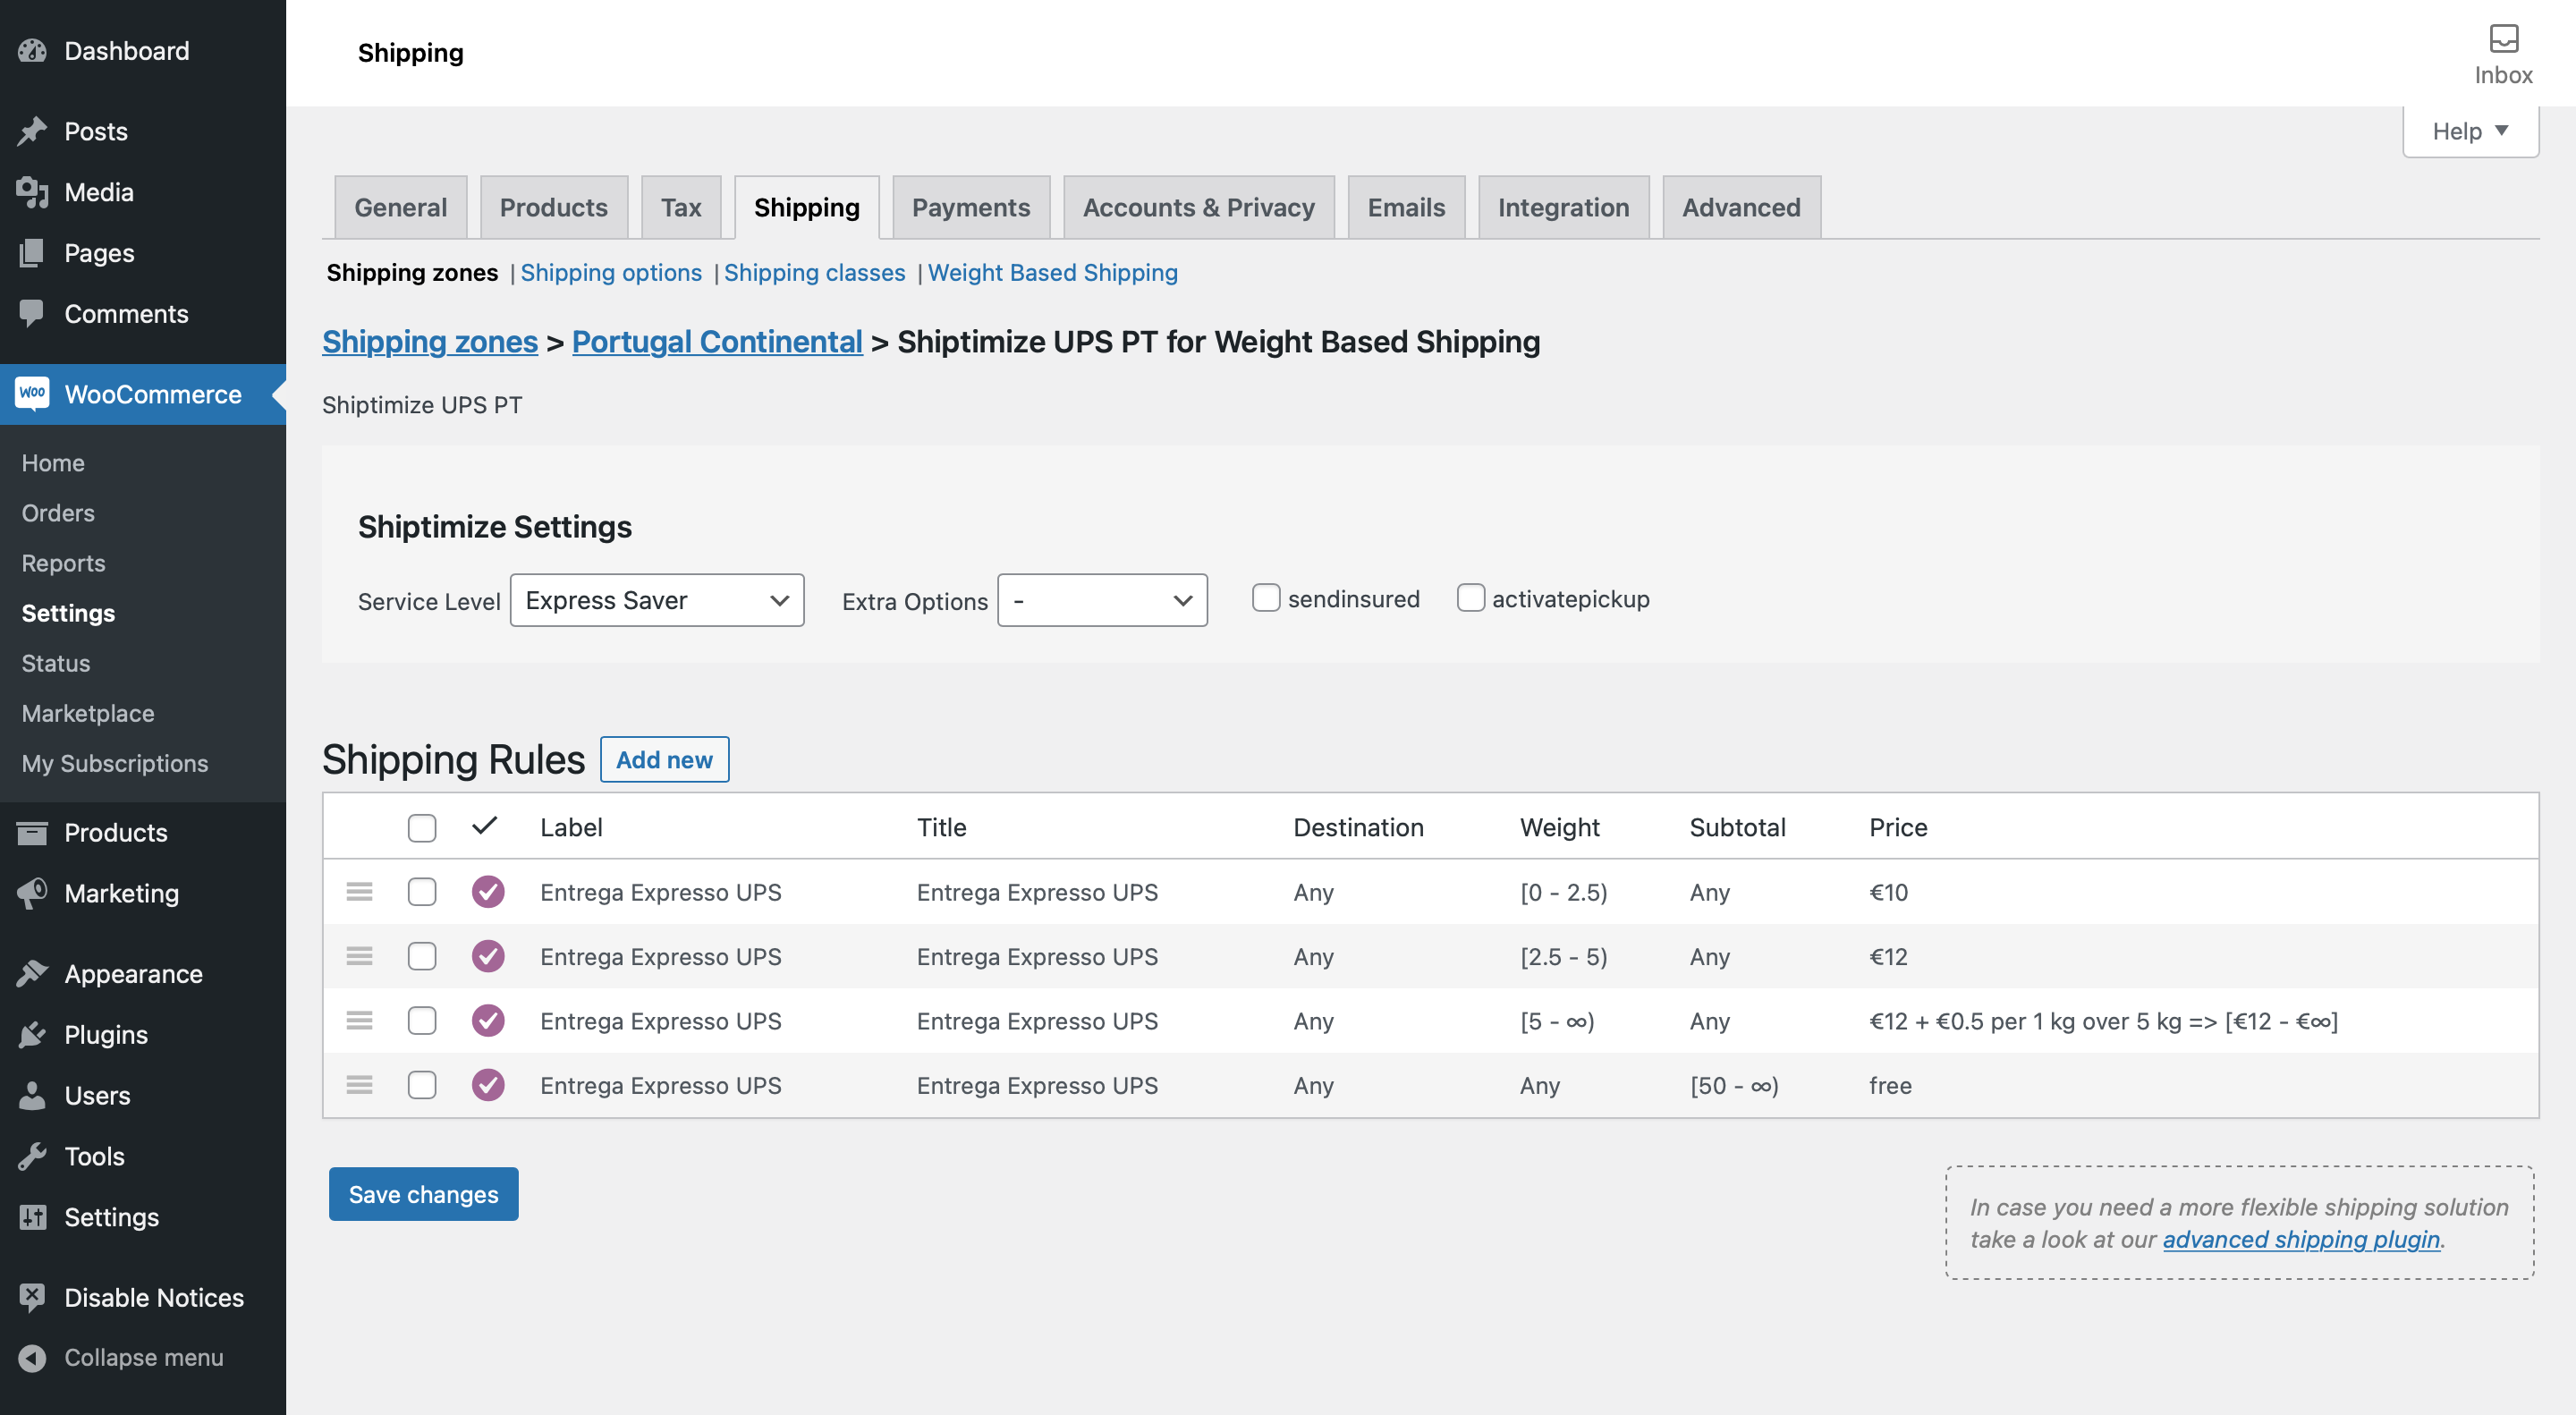
In another example we have chosen the option of weight based shipping with UPS:
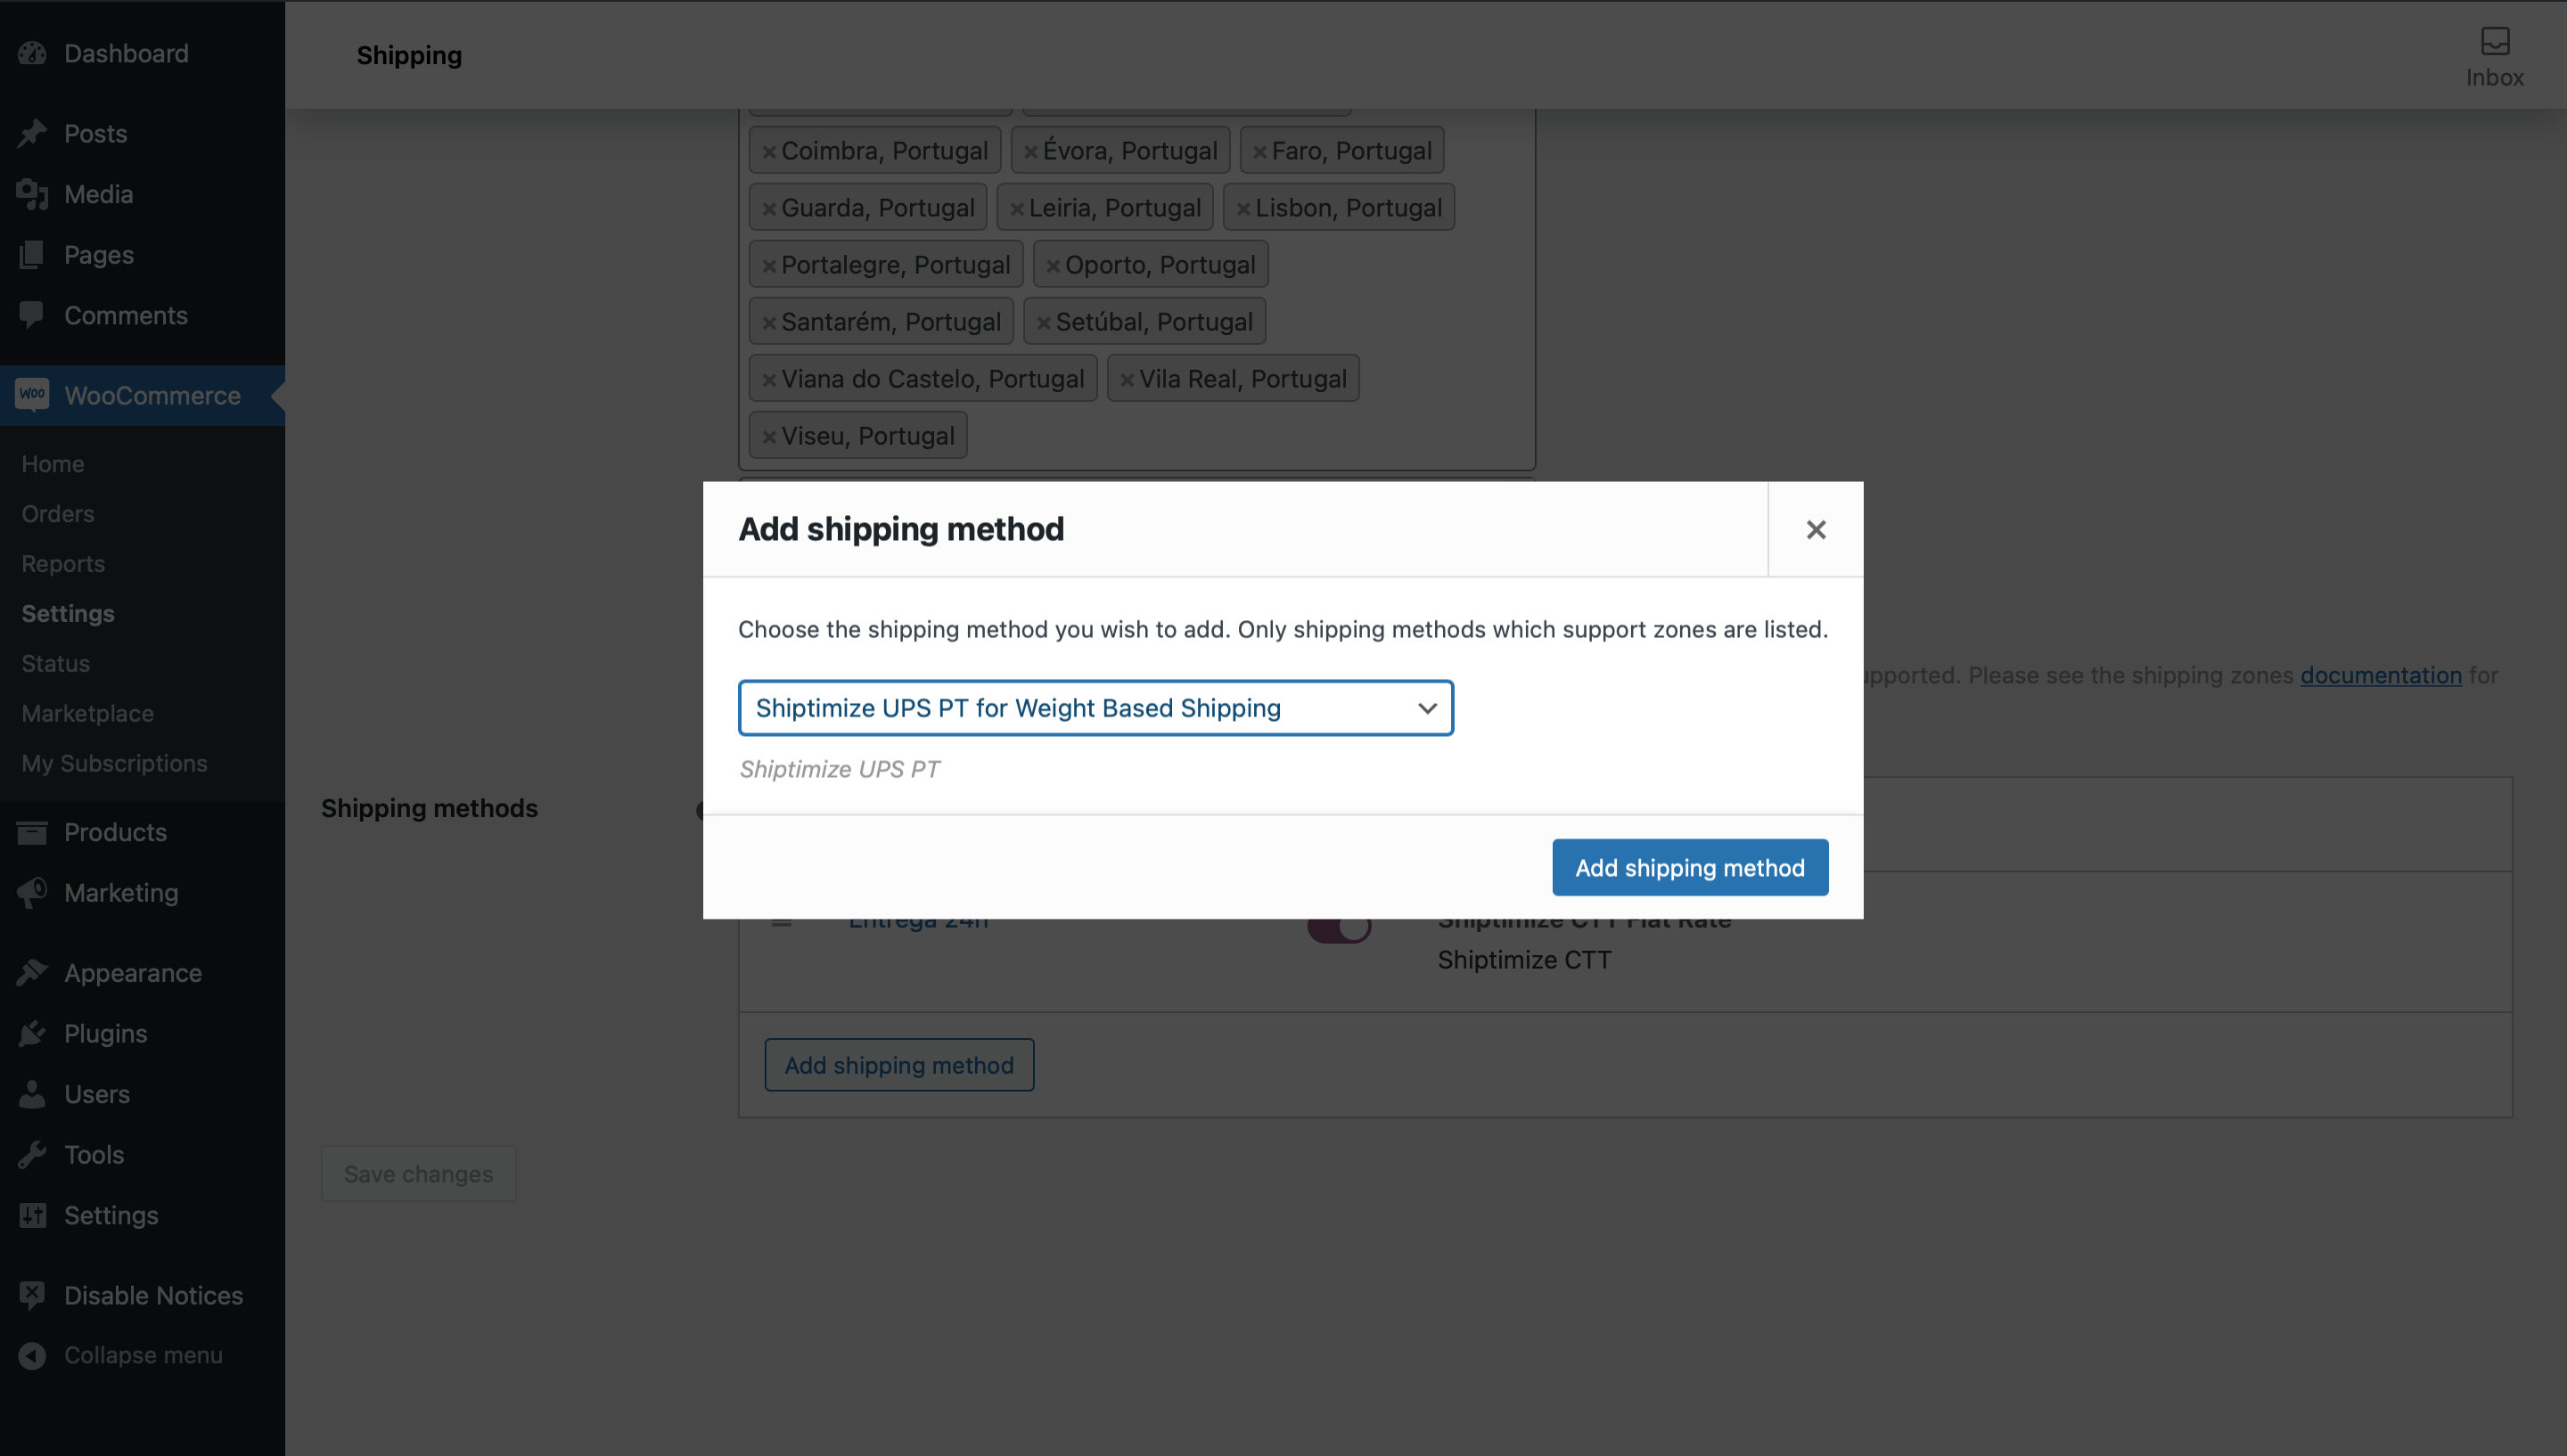
In the desired zone you must click on Add Shipping method
In the pop up you should click on the arrow to open the various options and choose the option Shiptimize UPS PT for Weight Base Shipping and click on Add shipping method
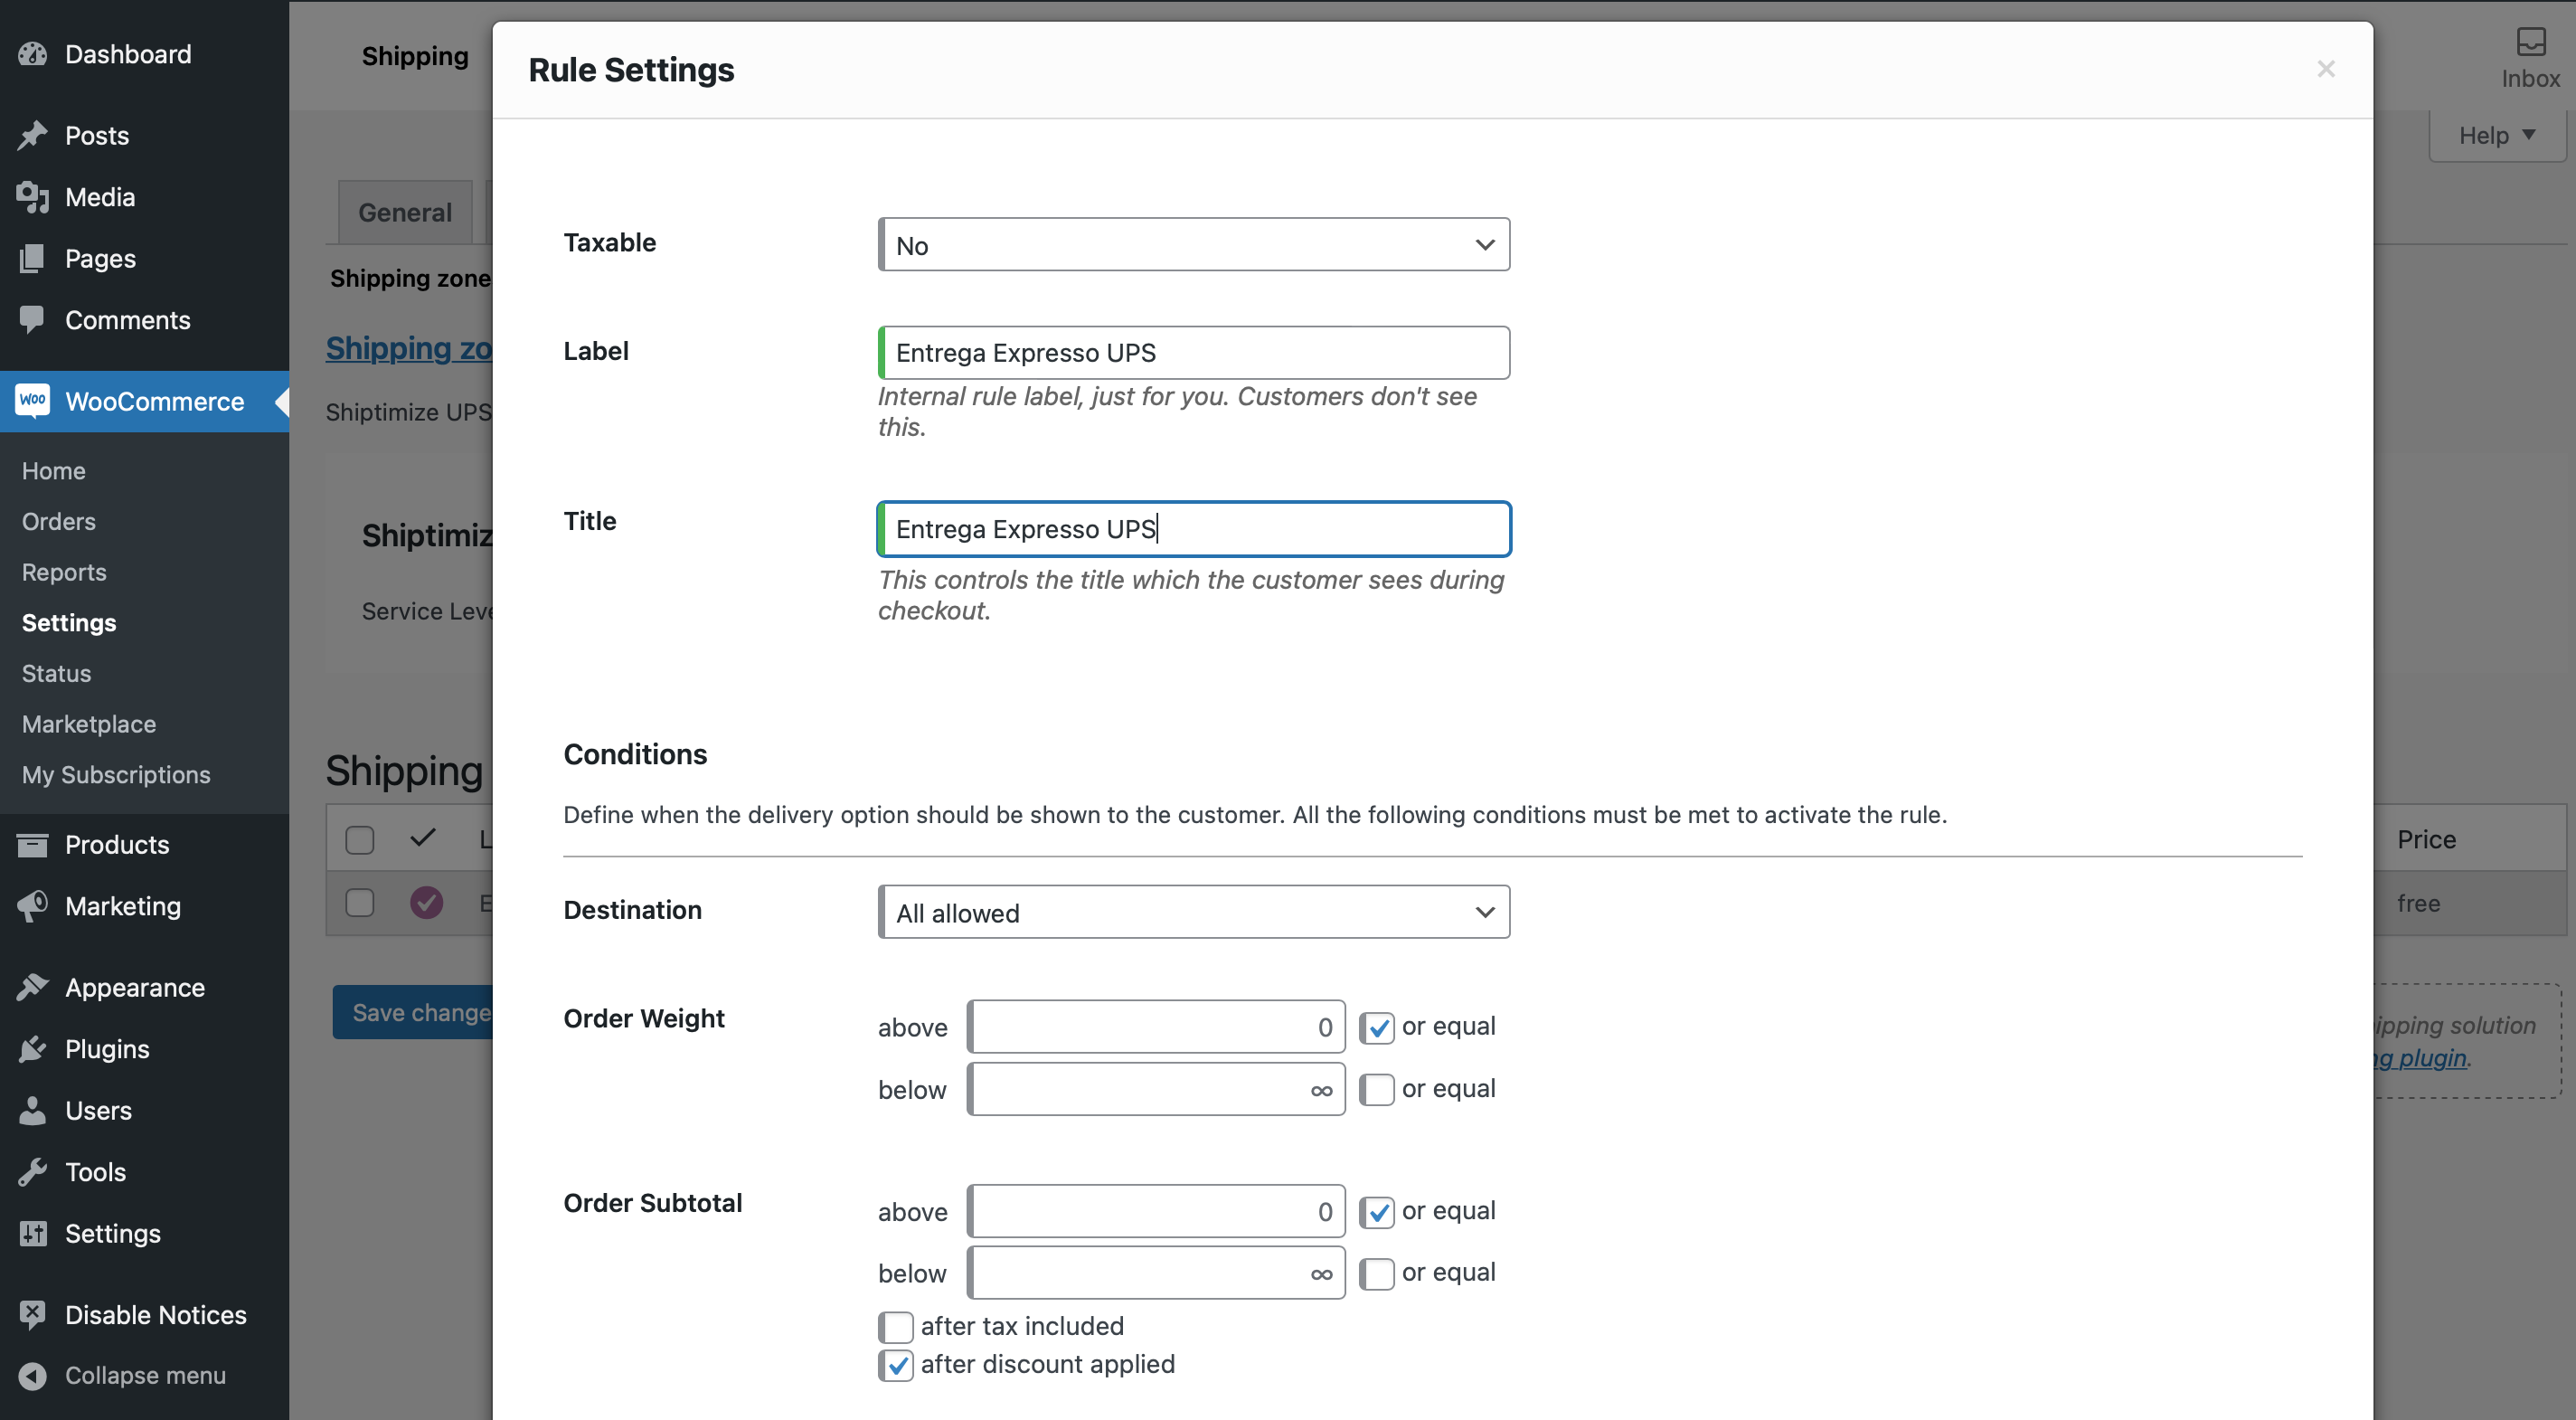
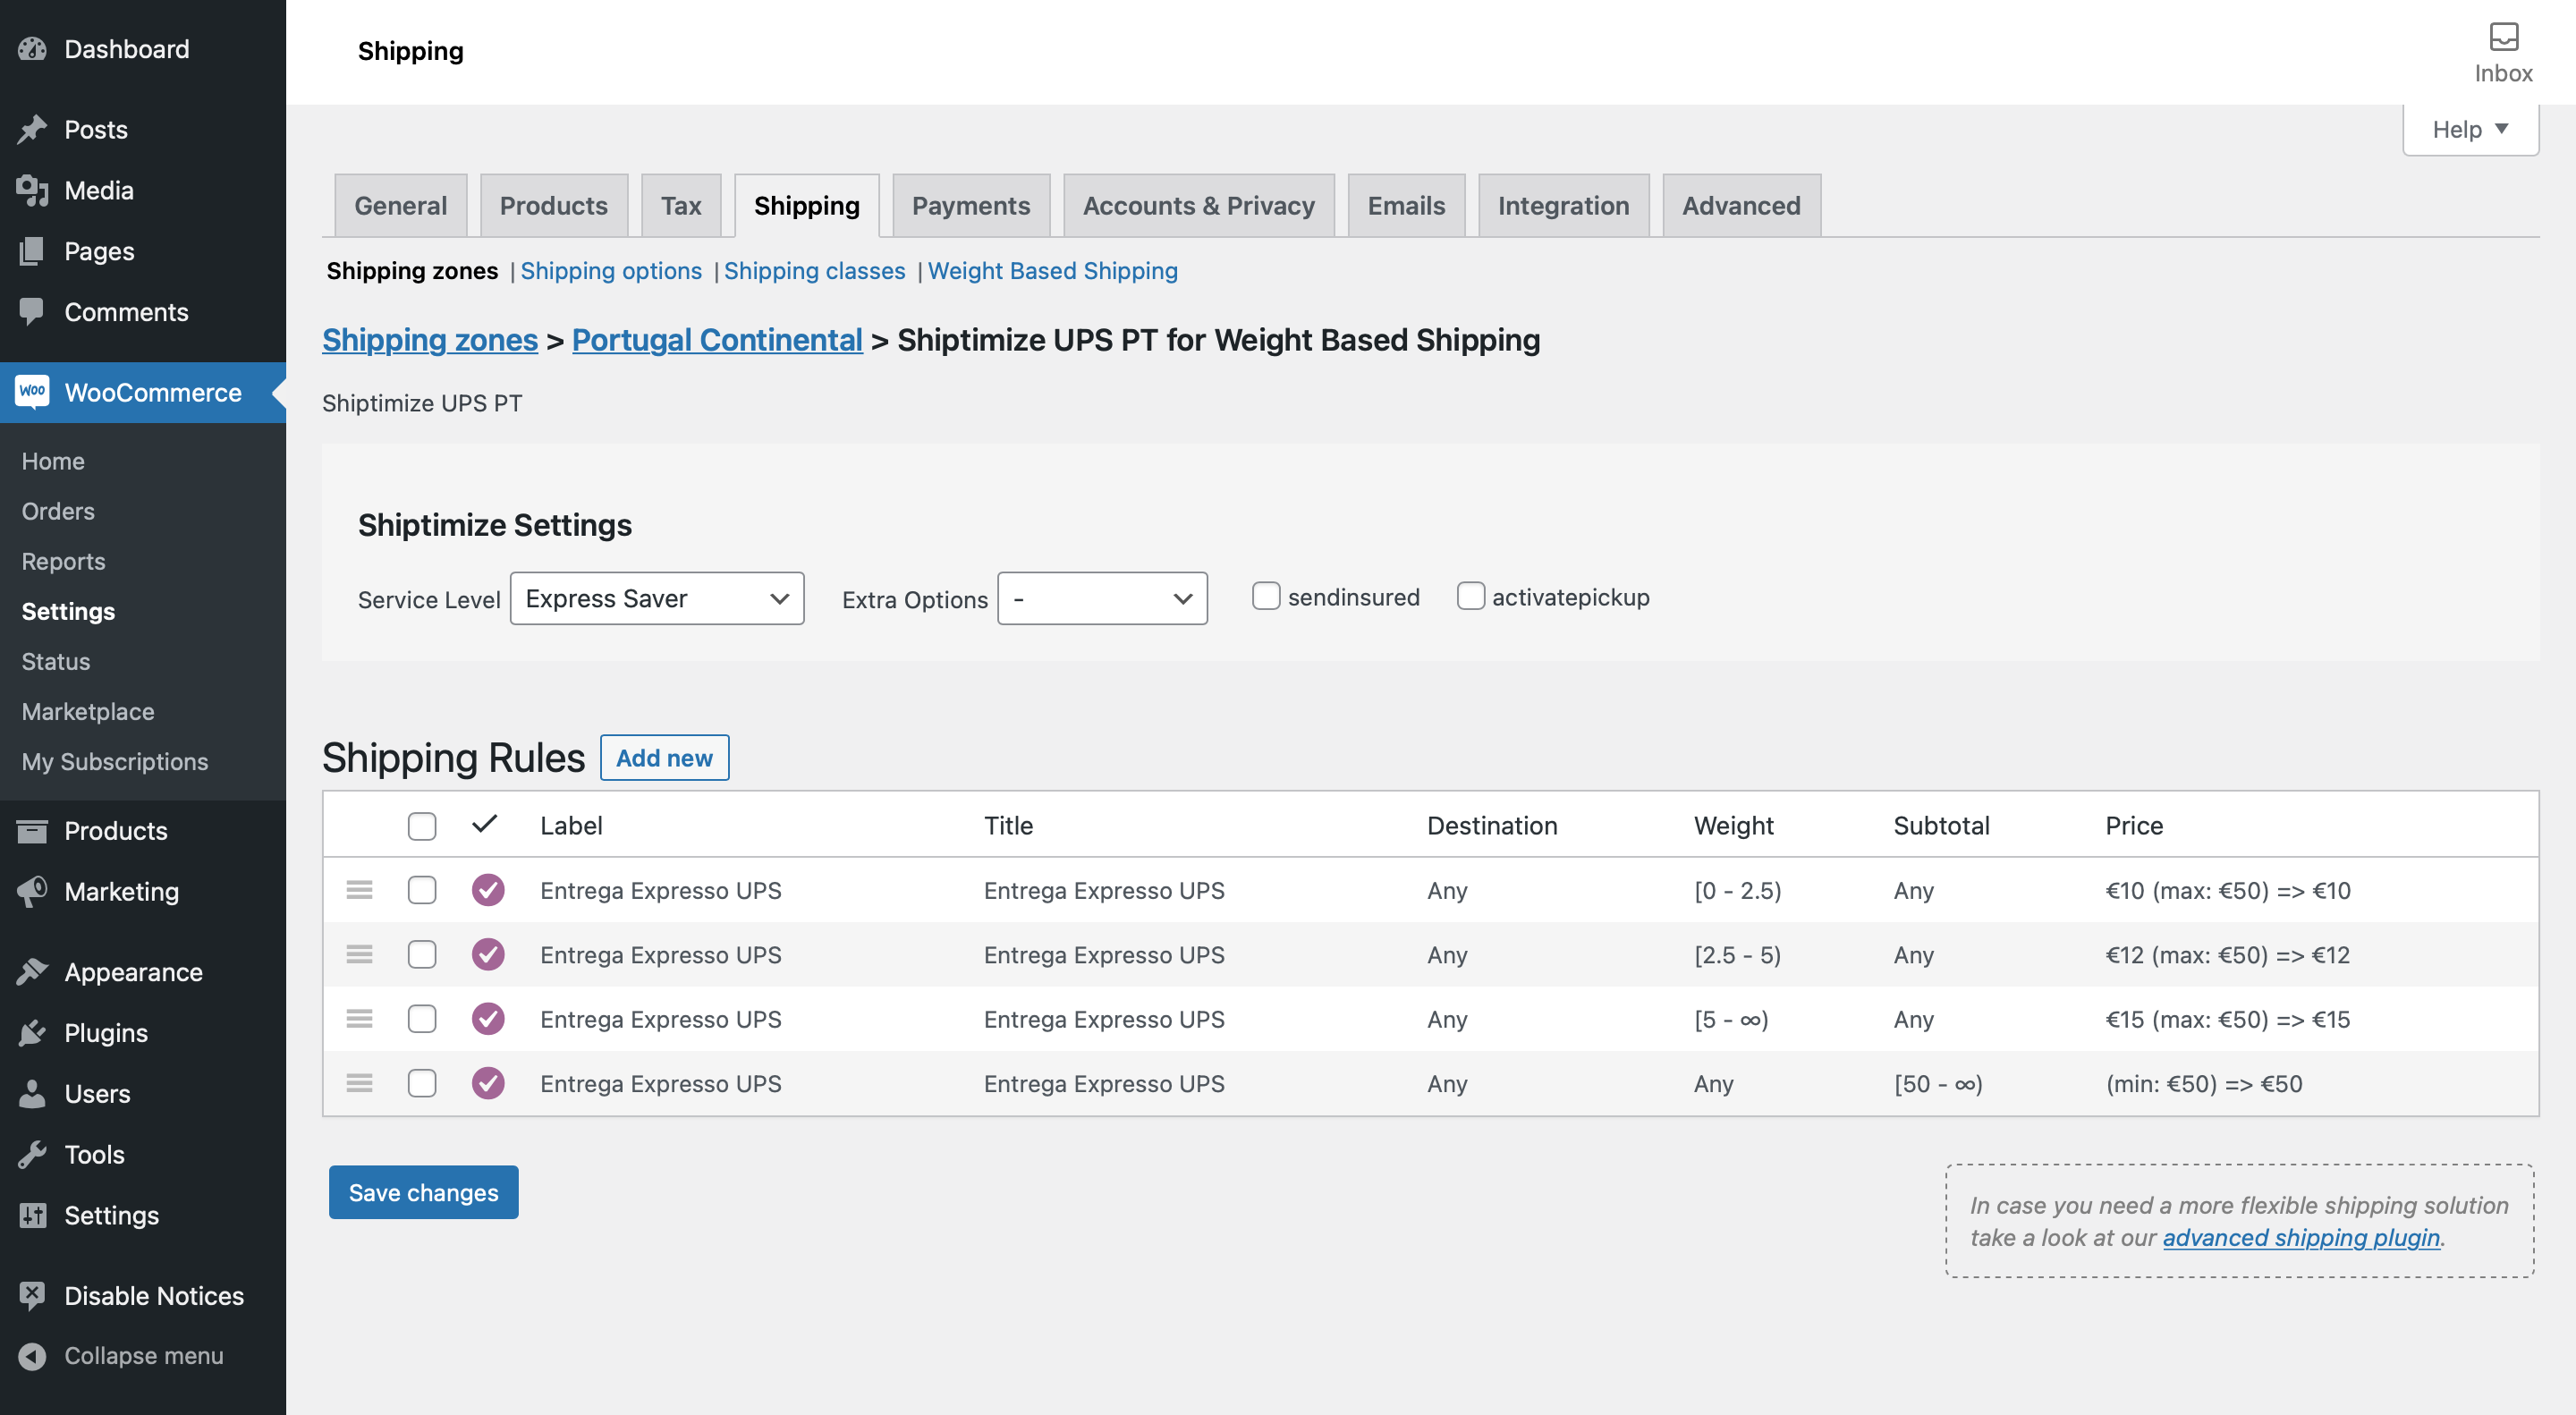
You should edit the shipping method to create the rules and give it the name you want by clicking edit. The edit and delete option appears when you hover the cursor over the method.
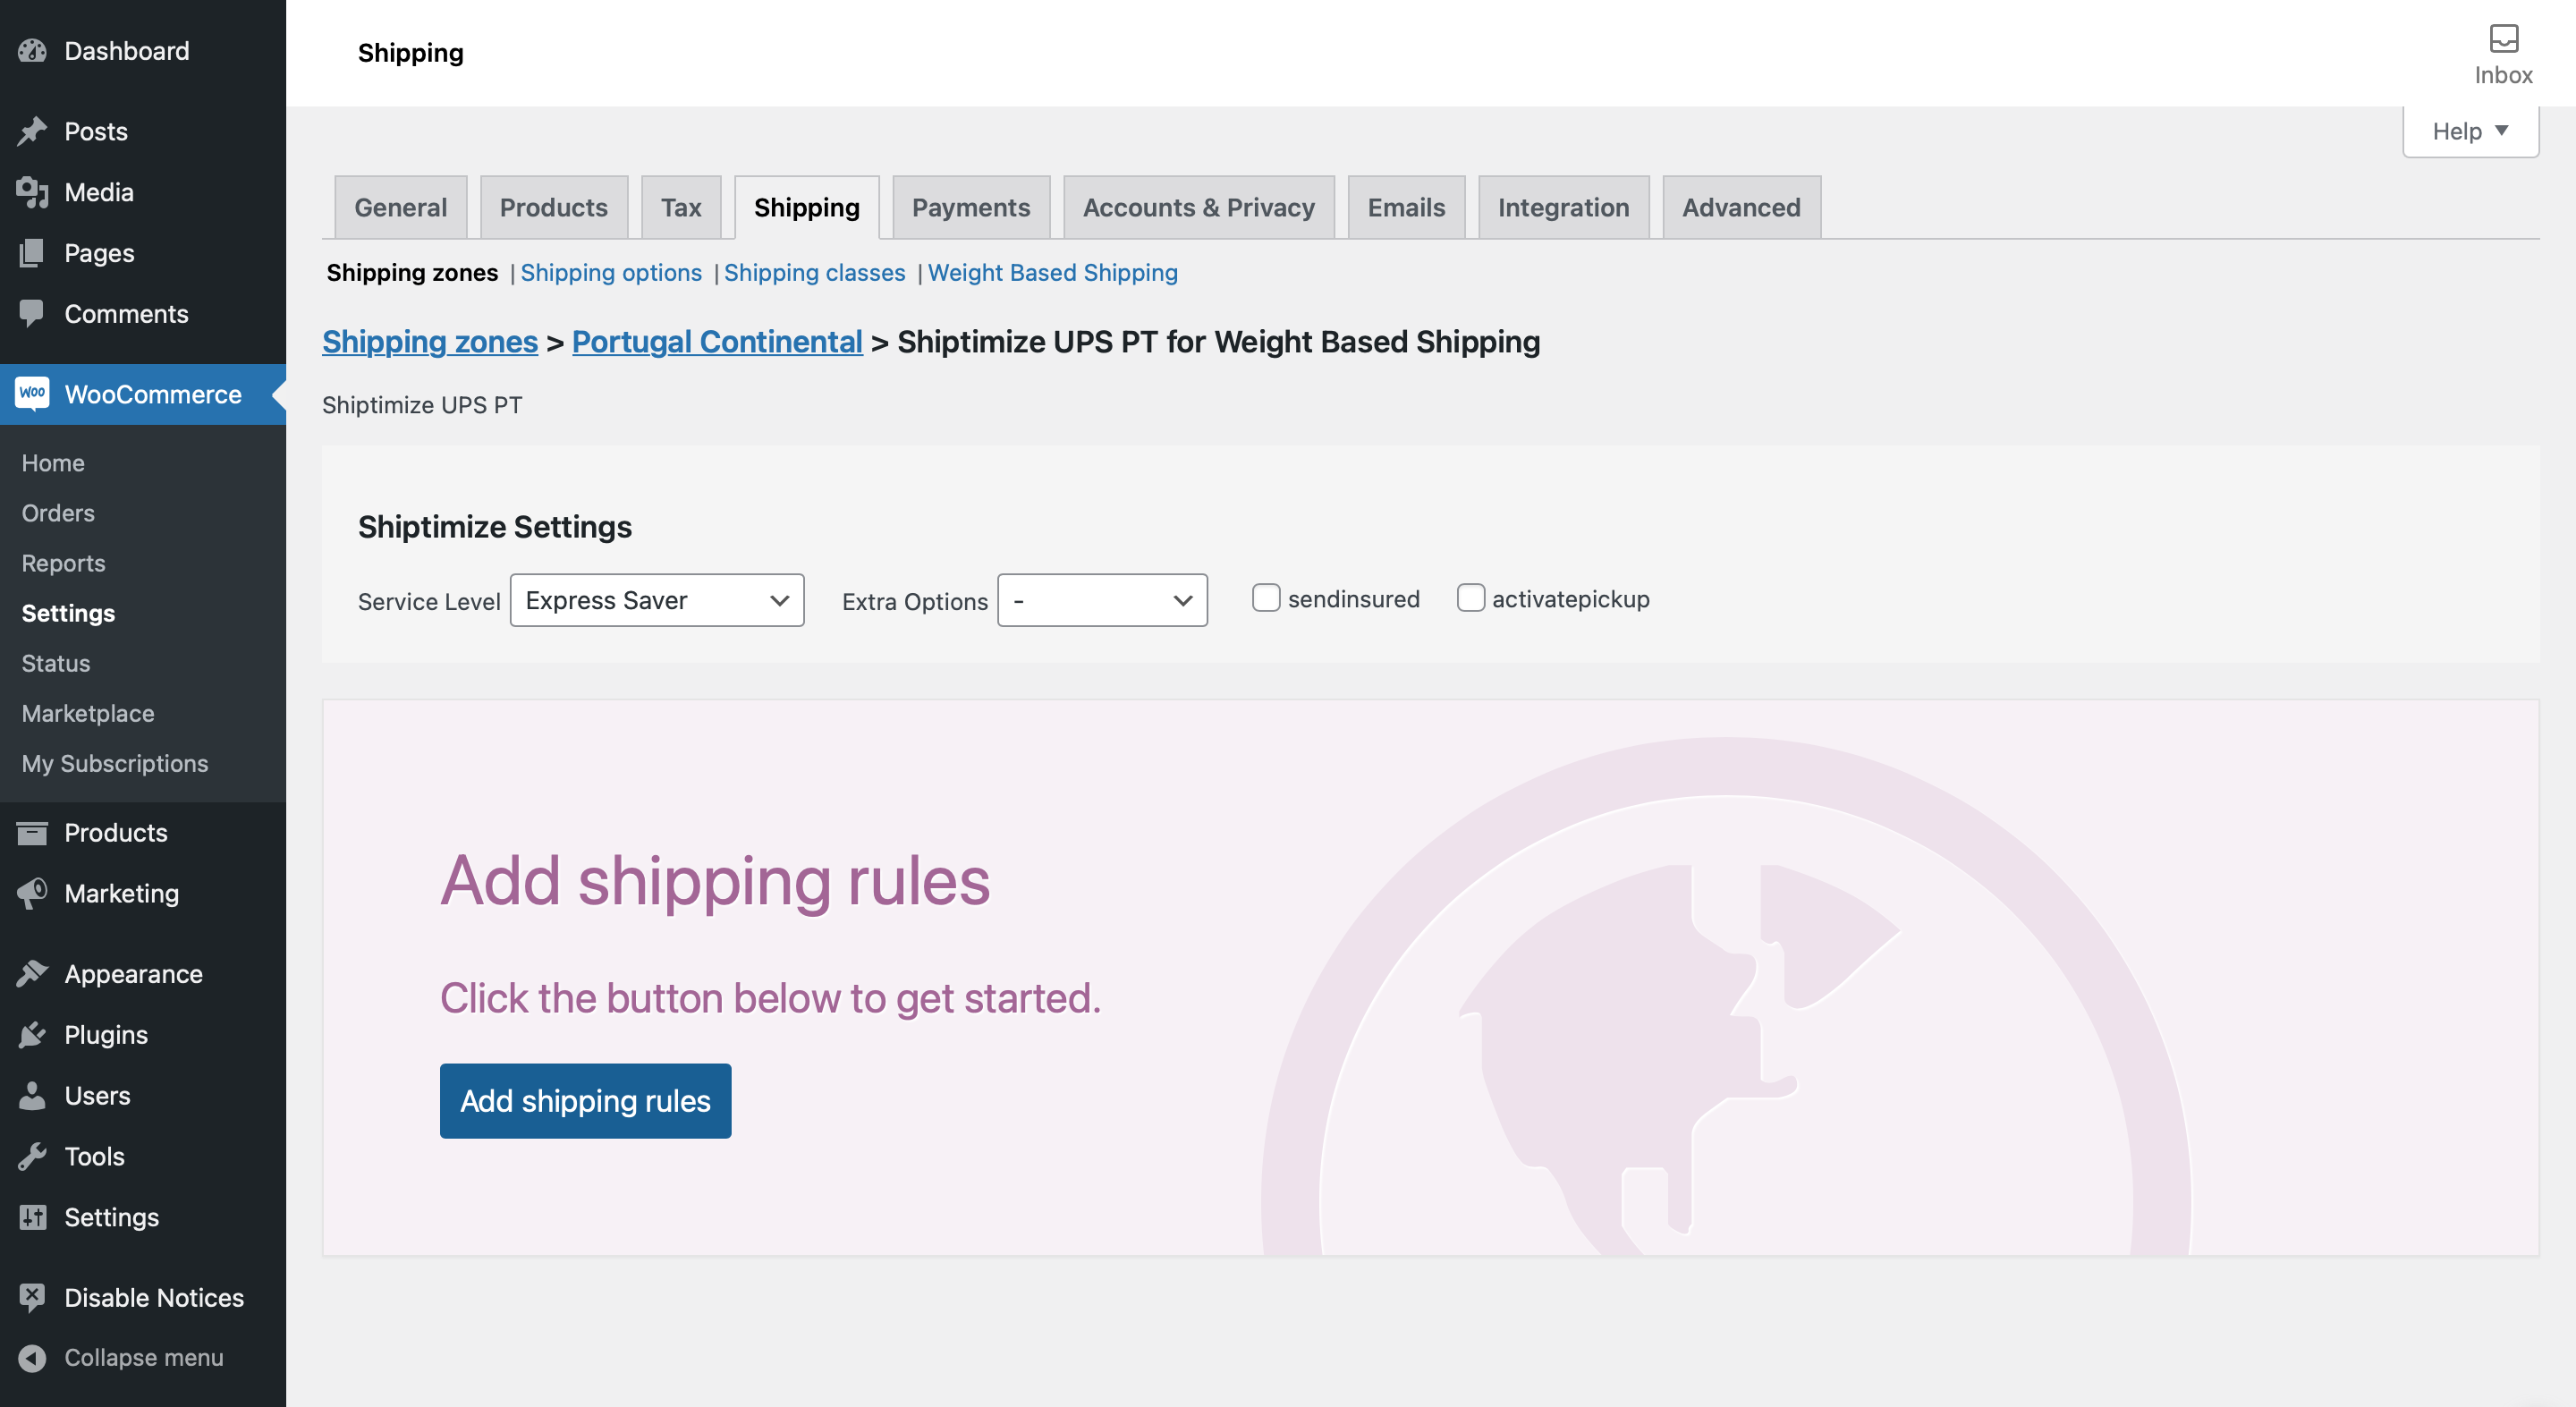
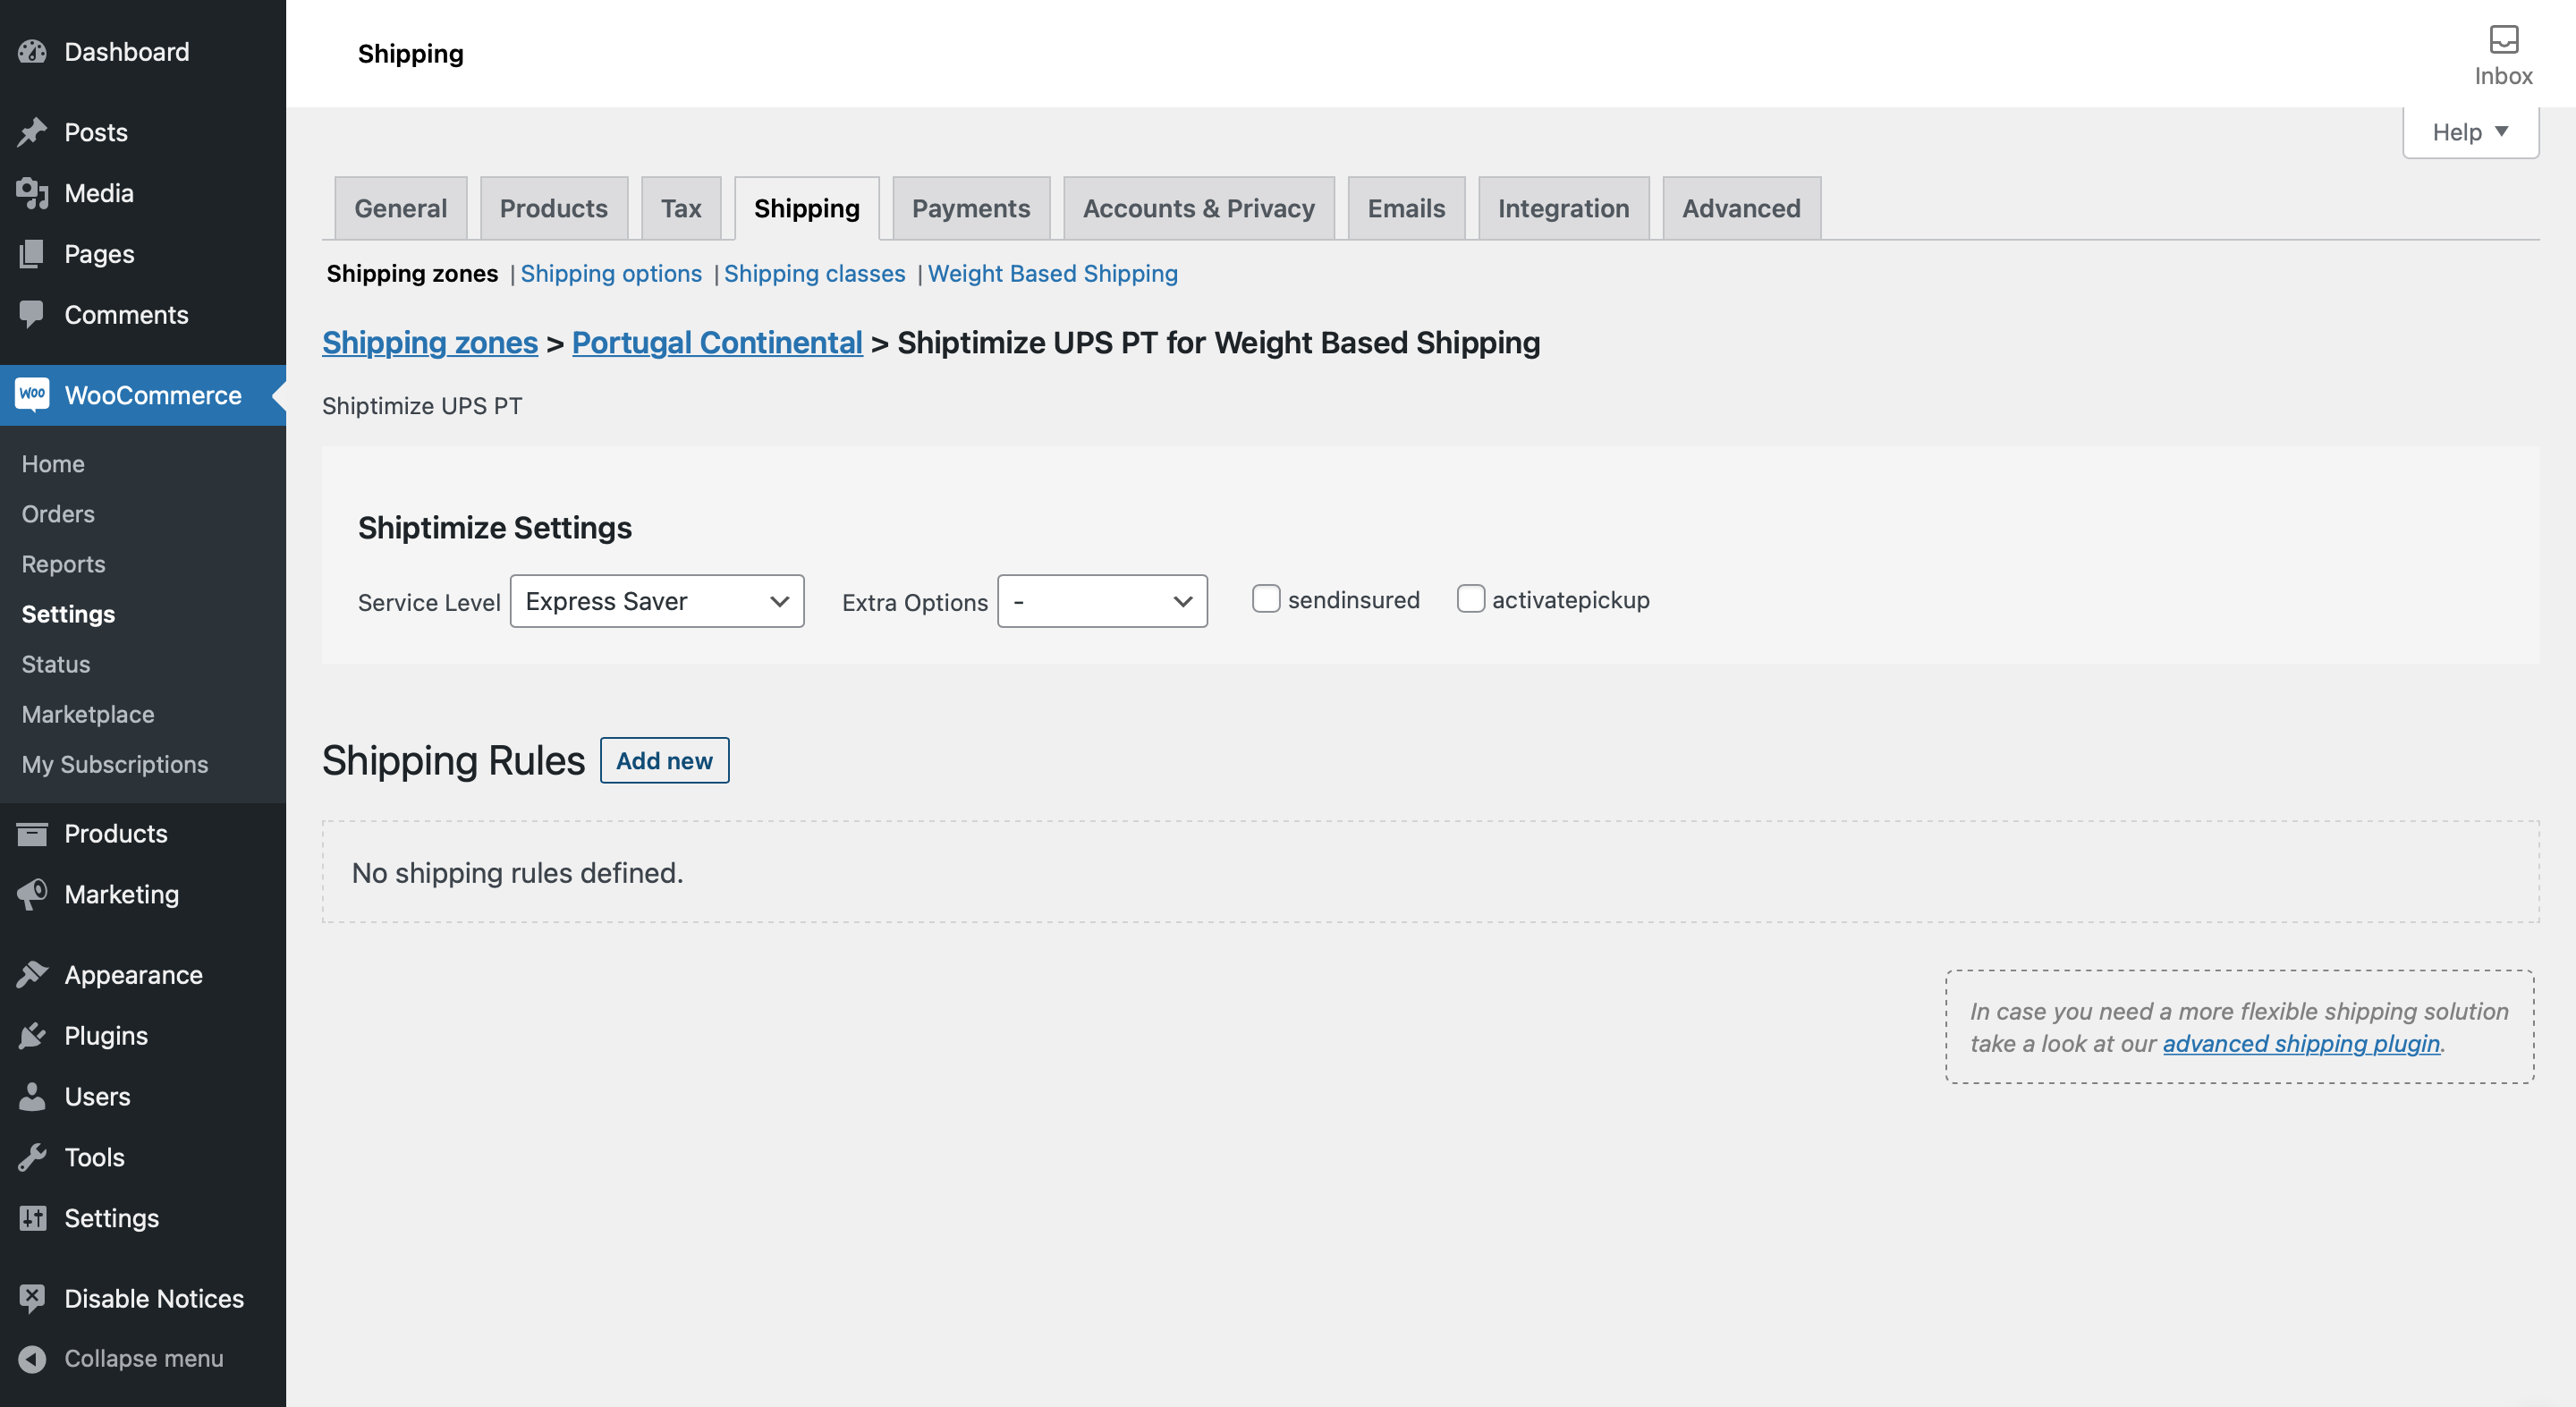
The first step is to choose the shipping service level and the extra options you want to use for this shipping method. In this example we have chosen the Express Saver service level and have not selected any extra options.
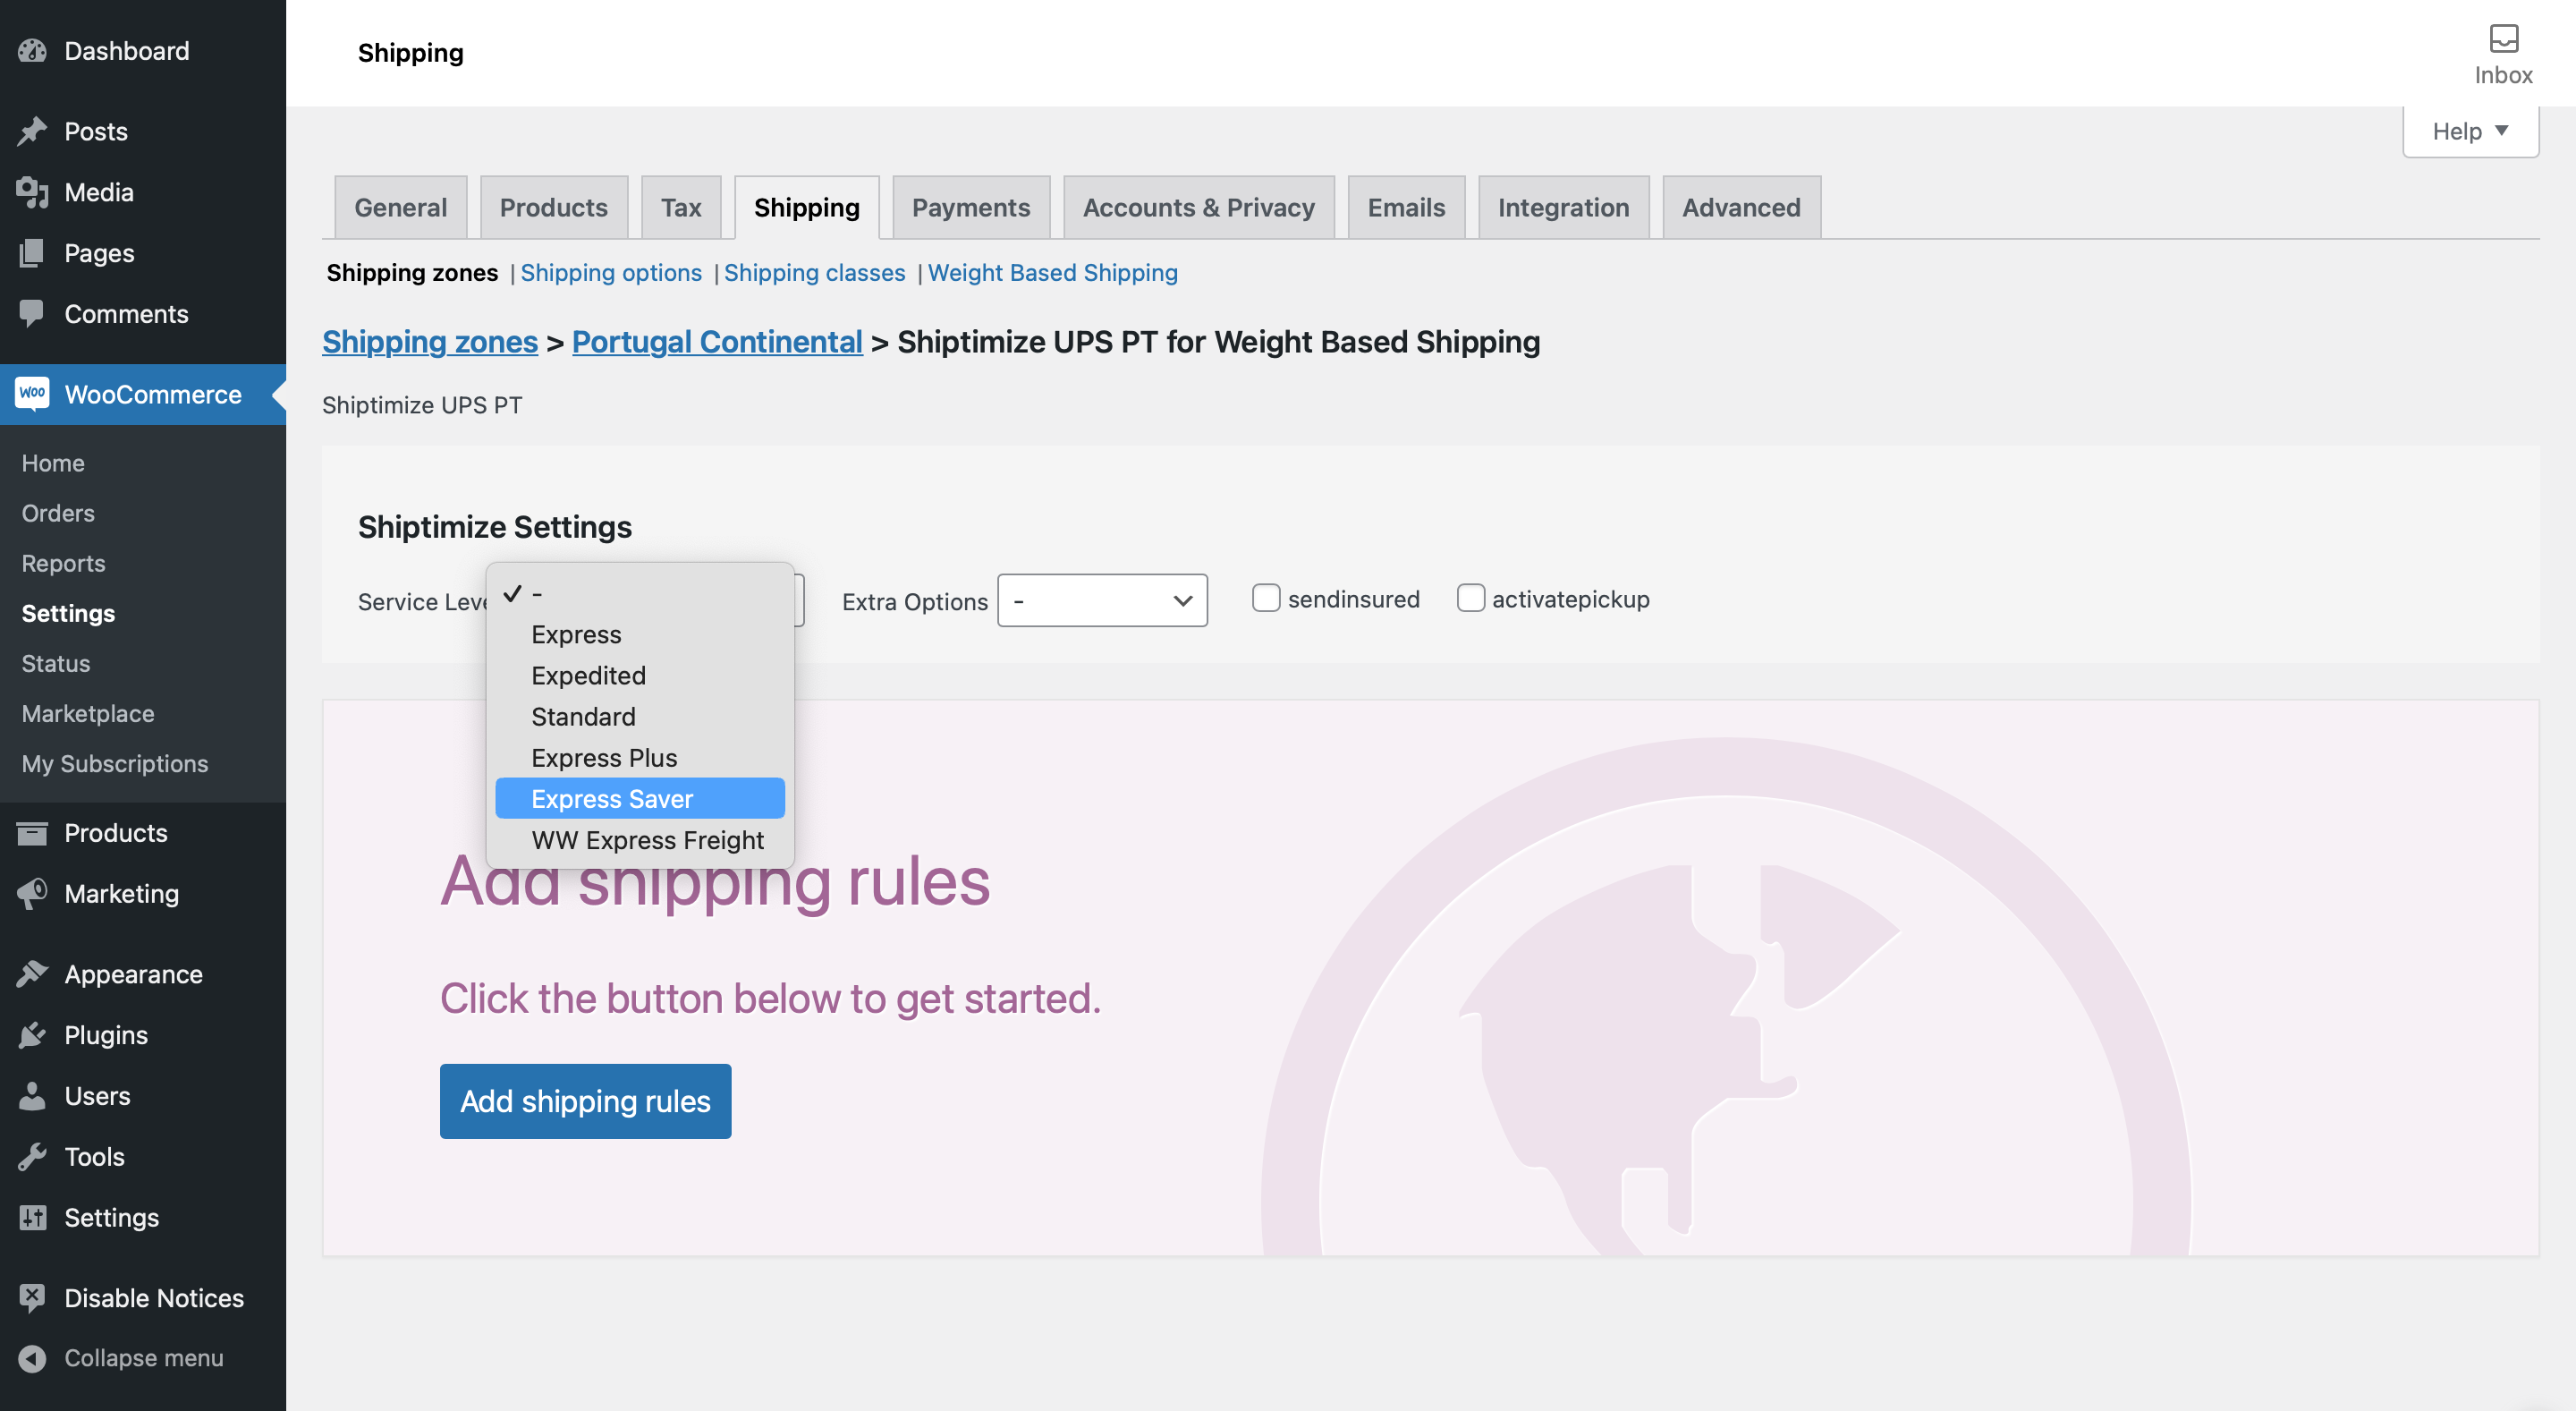
You should click Add Shipping Rules to add the rules for this shipping method.
You should click on Add new
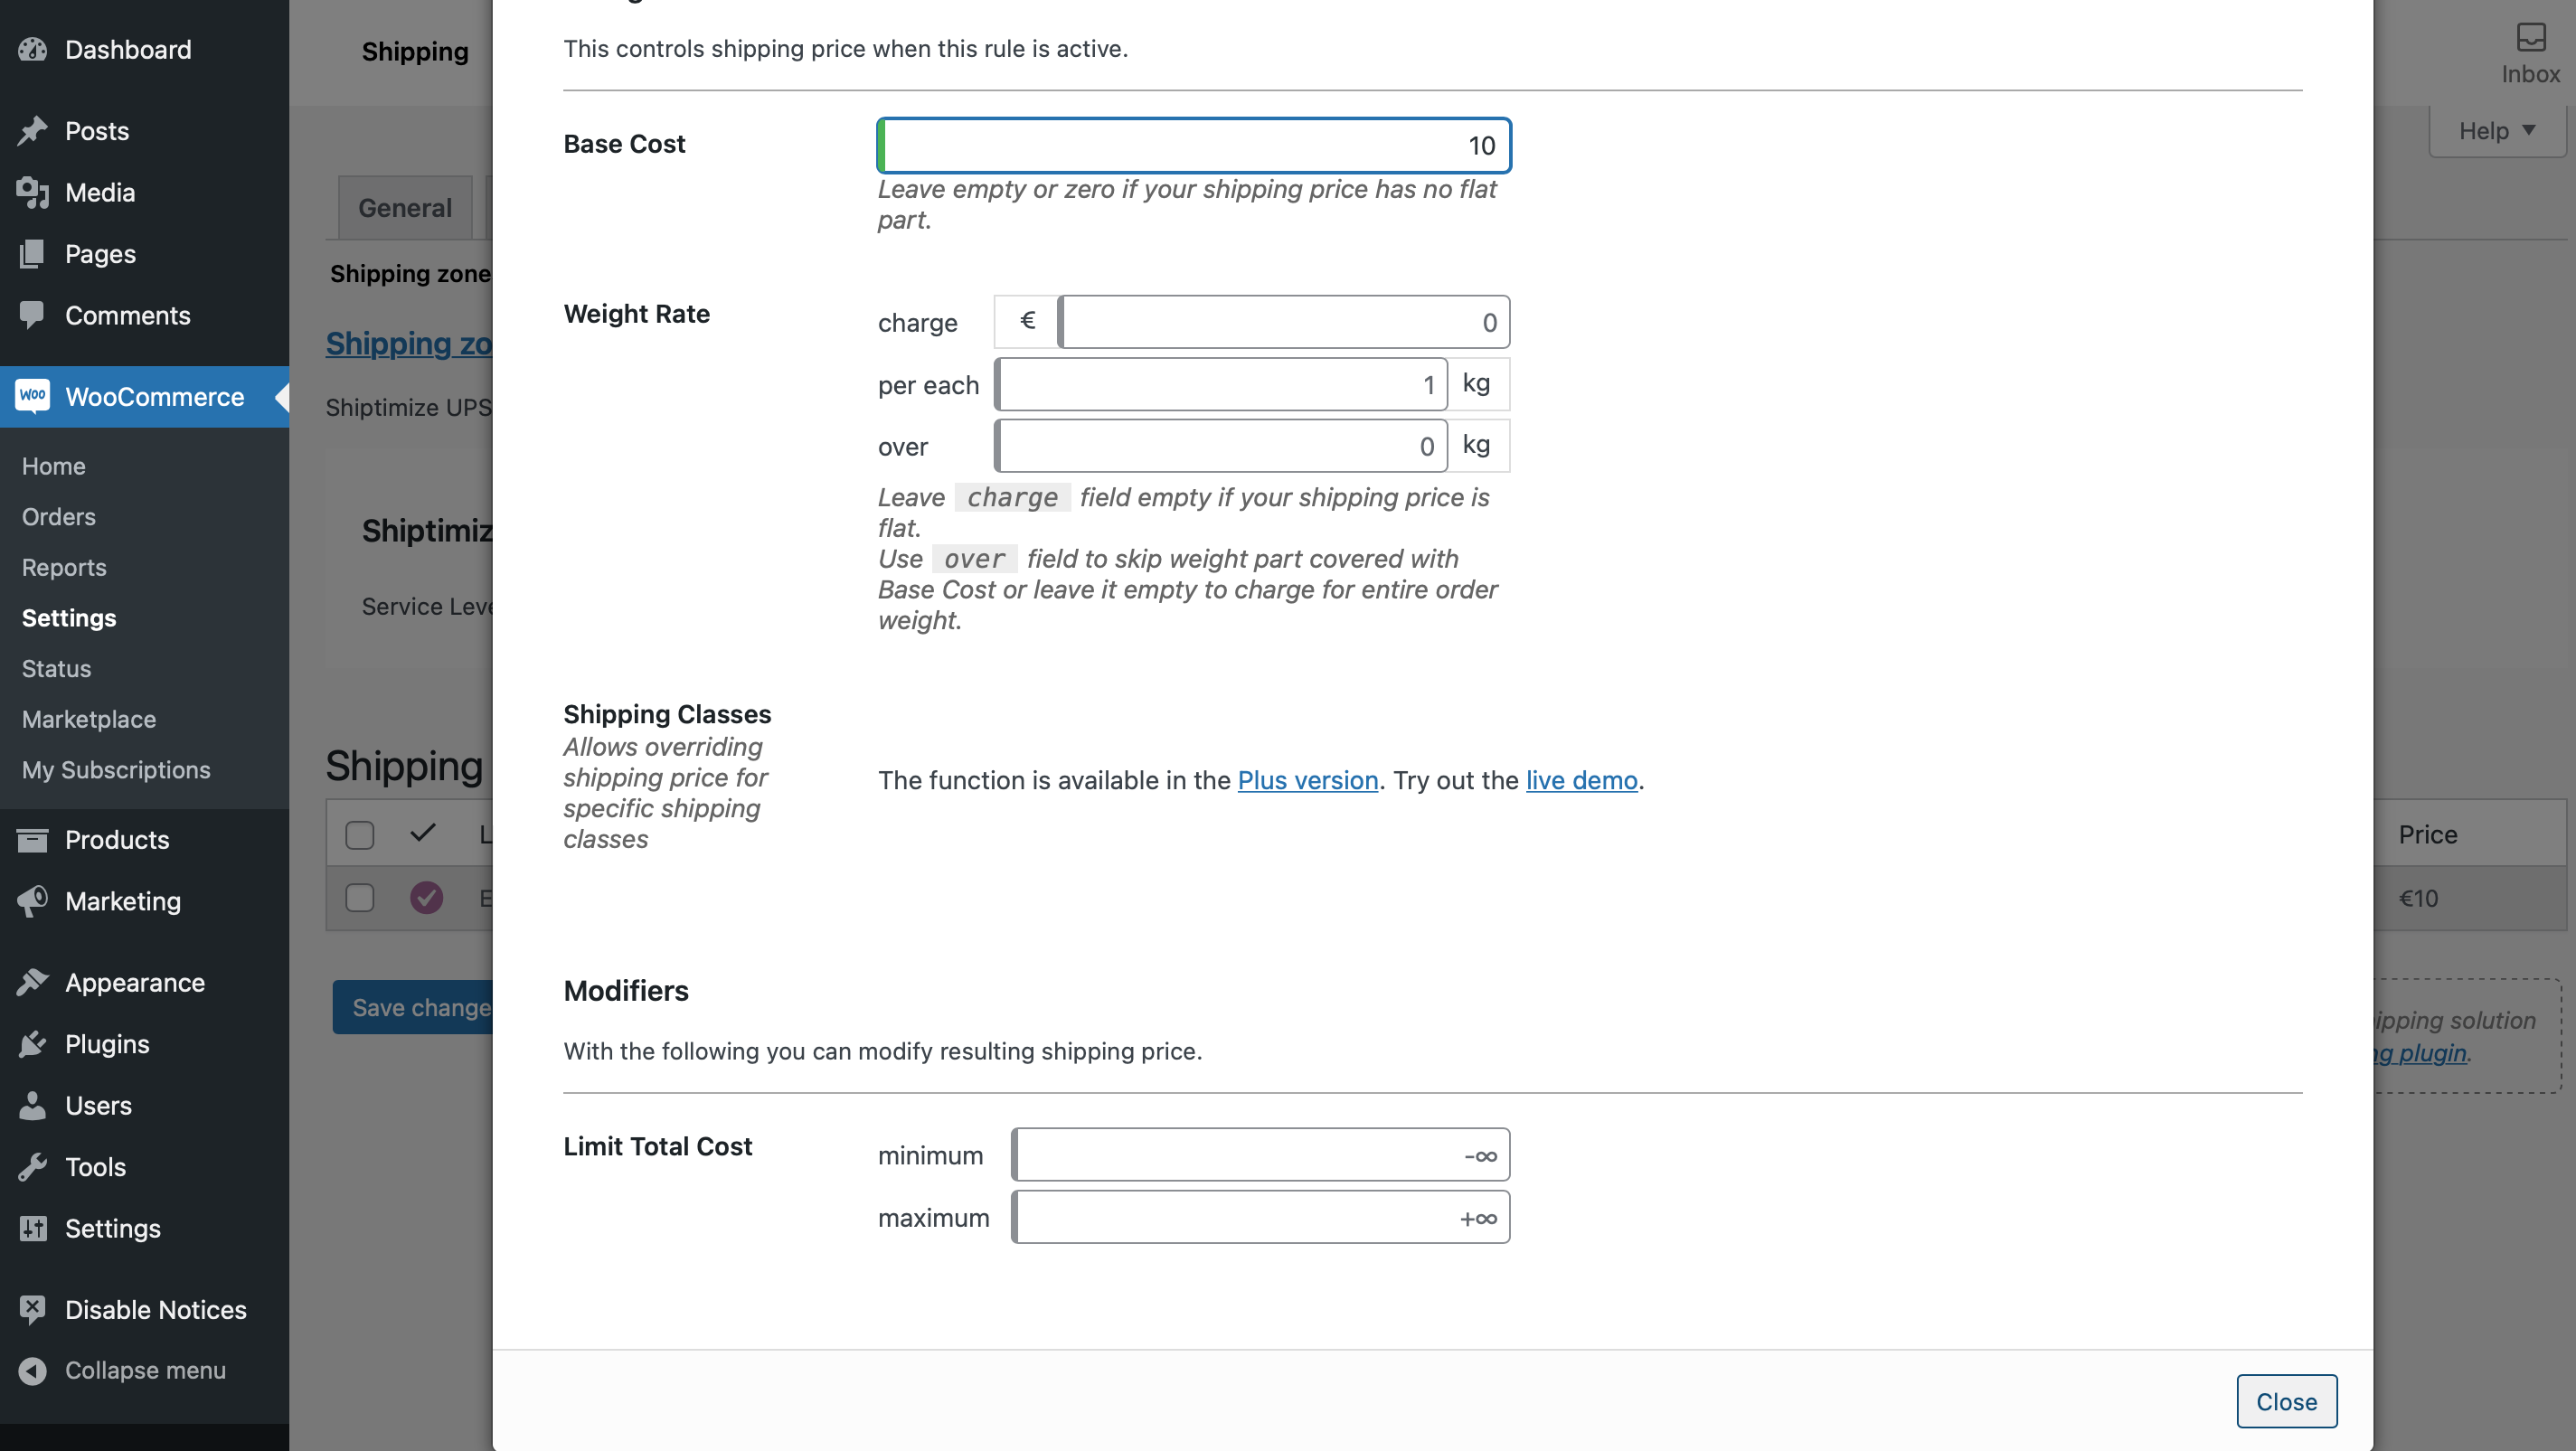
In the first field you must choose if you want the shipping values to suffer also with the addition of VAT or not. In this example we have decided not to because we already work with shipping prices including VAT.
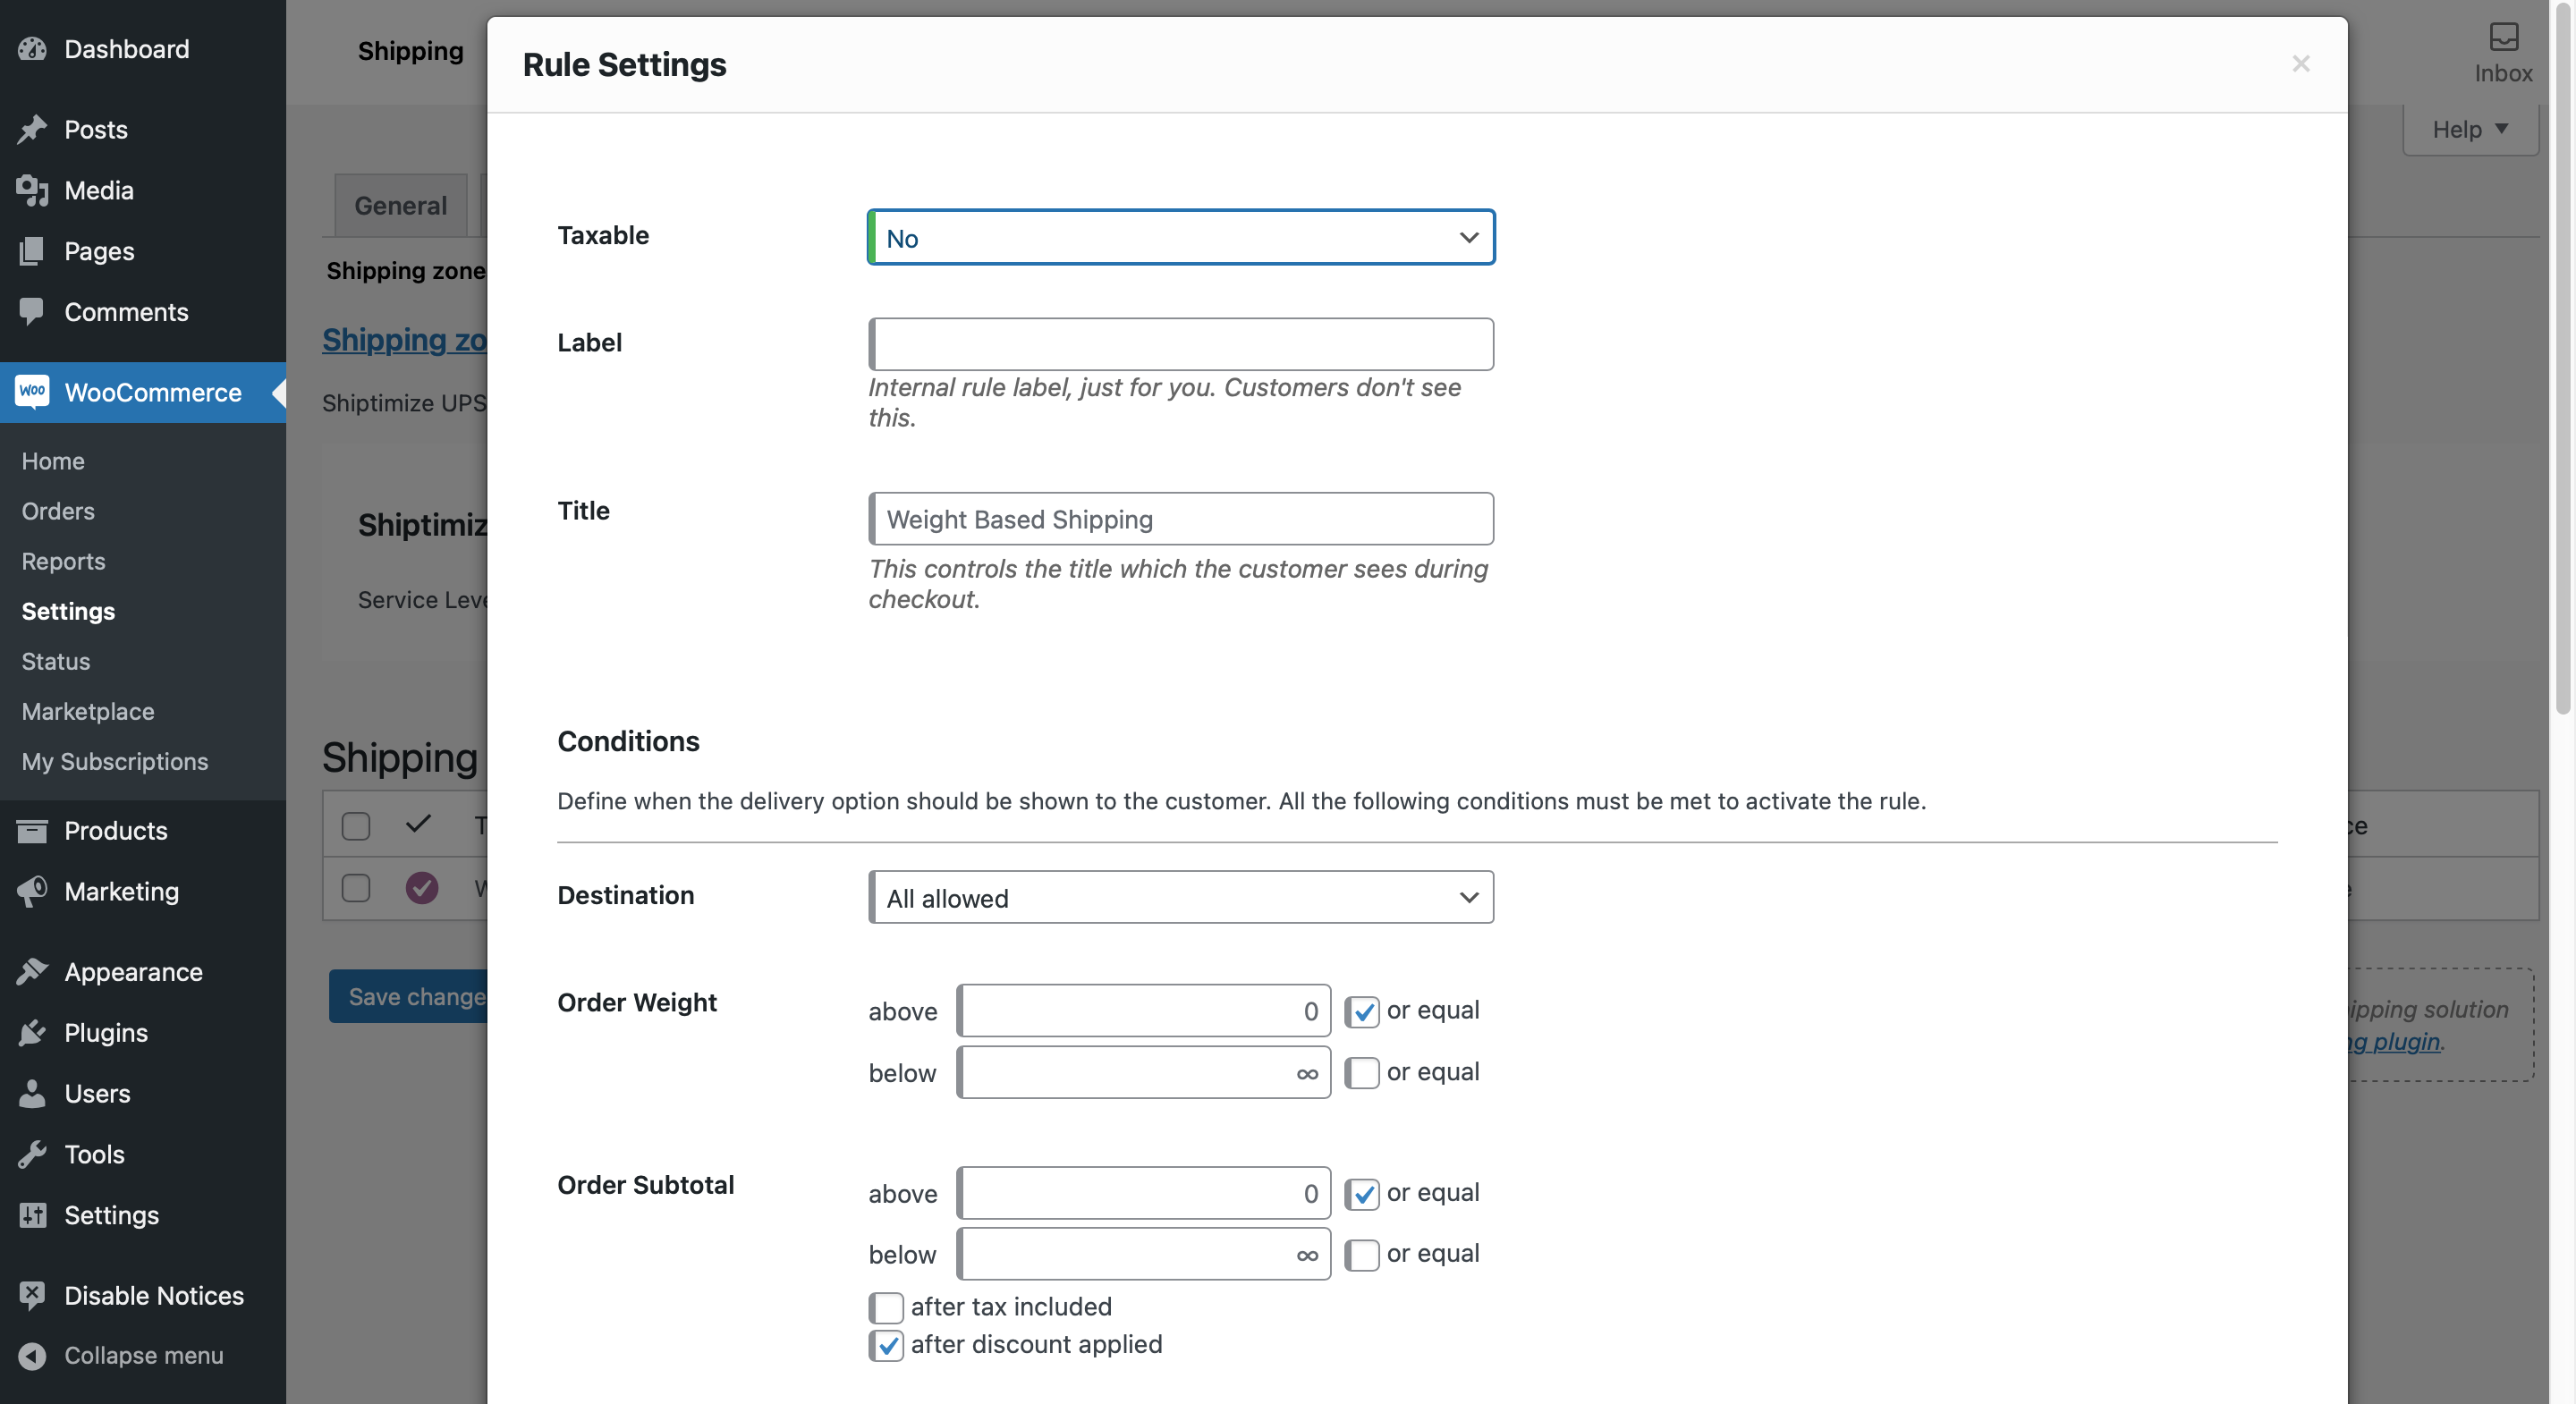
In the next fields you should define the name of the shipping method that will appear at checkout for your customer. In this example we have decided for the name “UPS Express Delivery”.
If the shipping method is based on the weight of the shopping cart you must fill the two fields corresponding to the Order weight Above and Below with the desired weight range. In this example we created a weight range between 0 and 2,5Kg
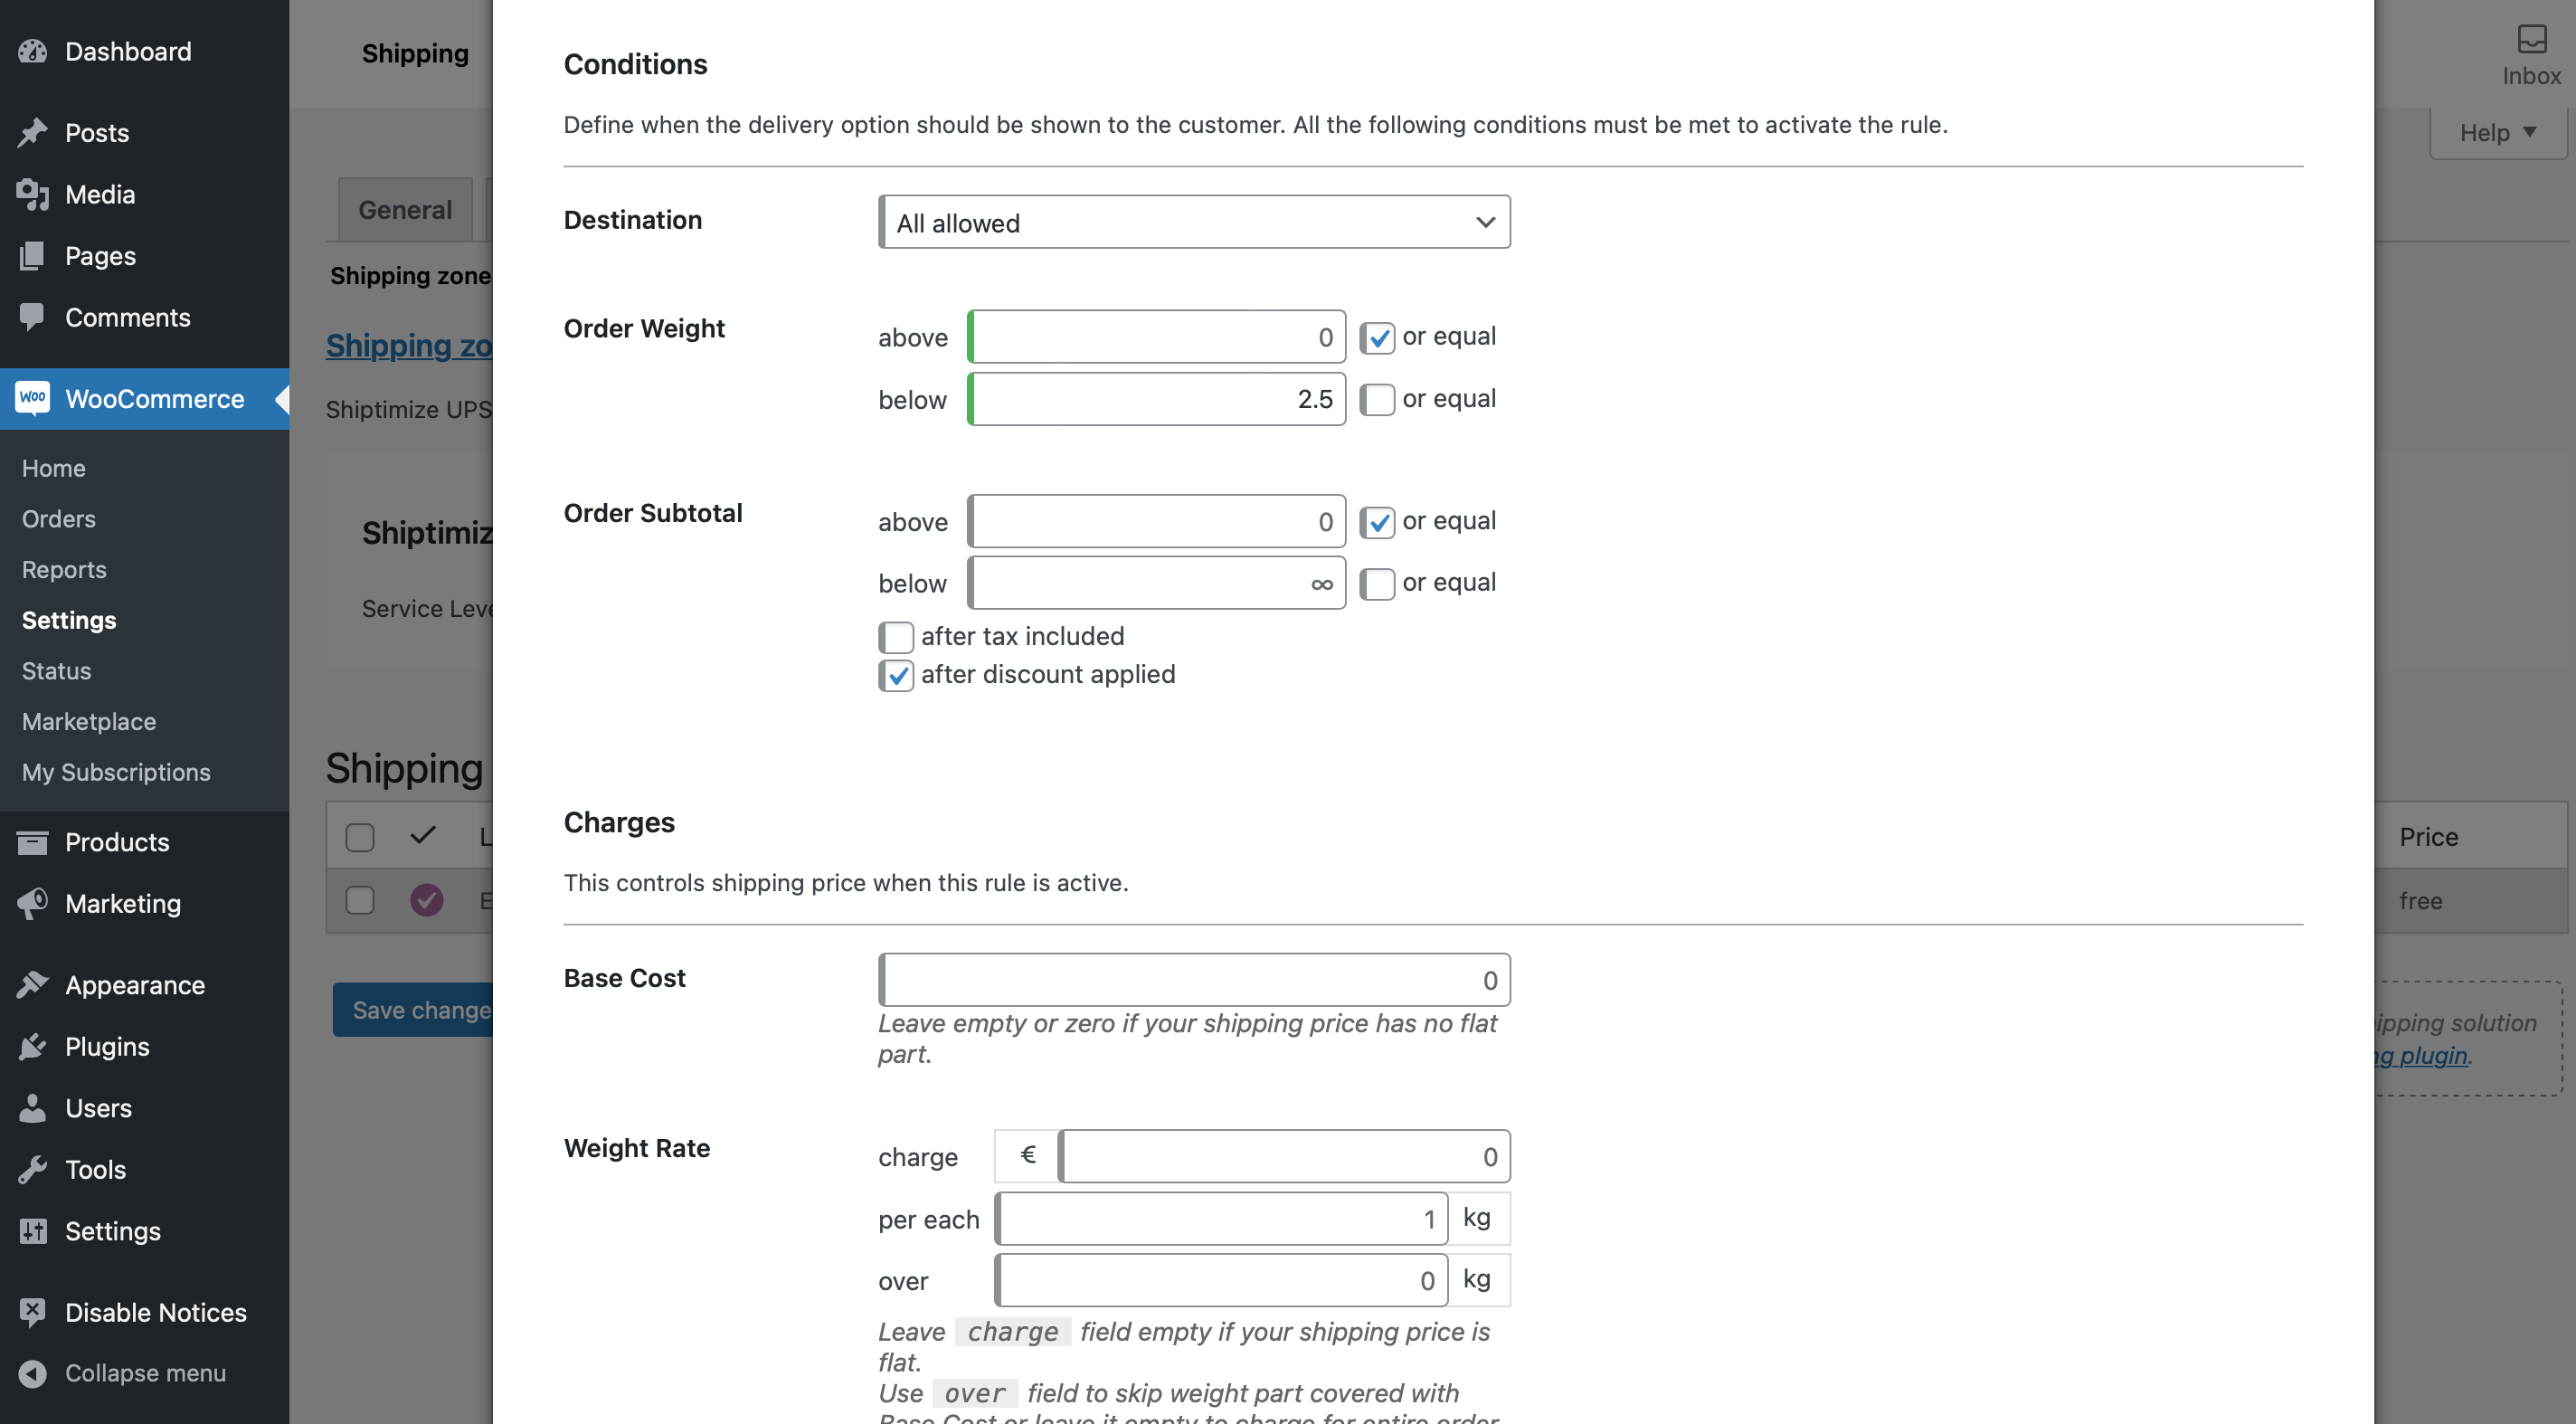
In the field Base Cost you must put the value of the shipment for the weight range created. In this example we use 10€.
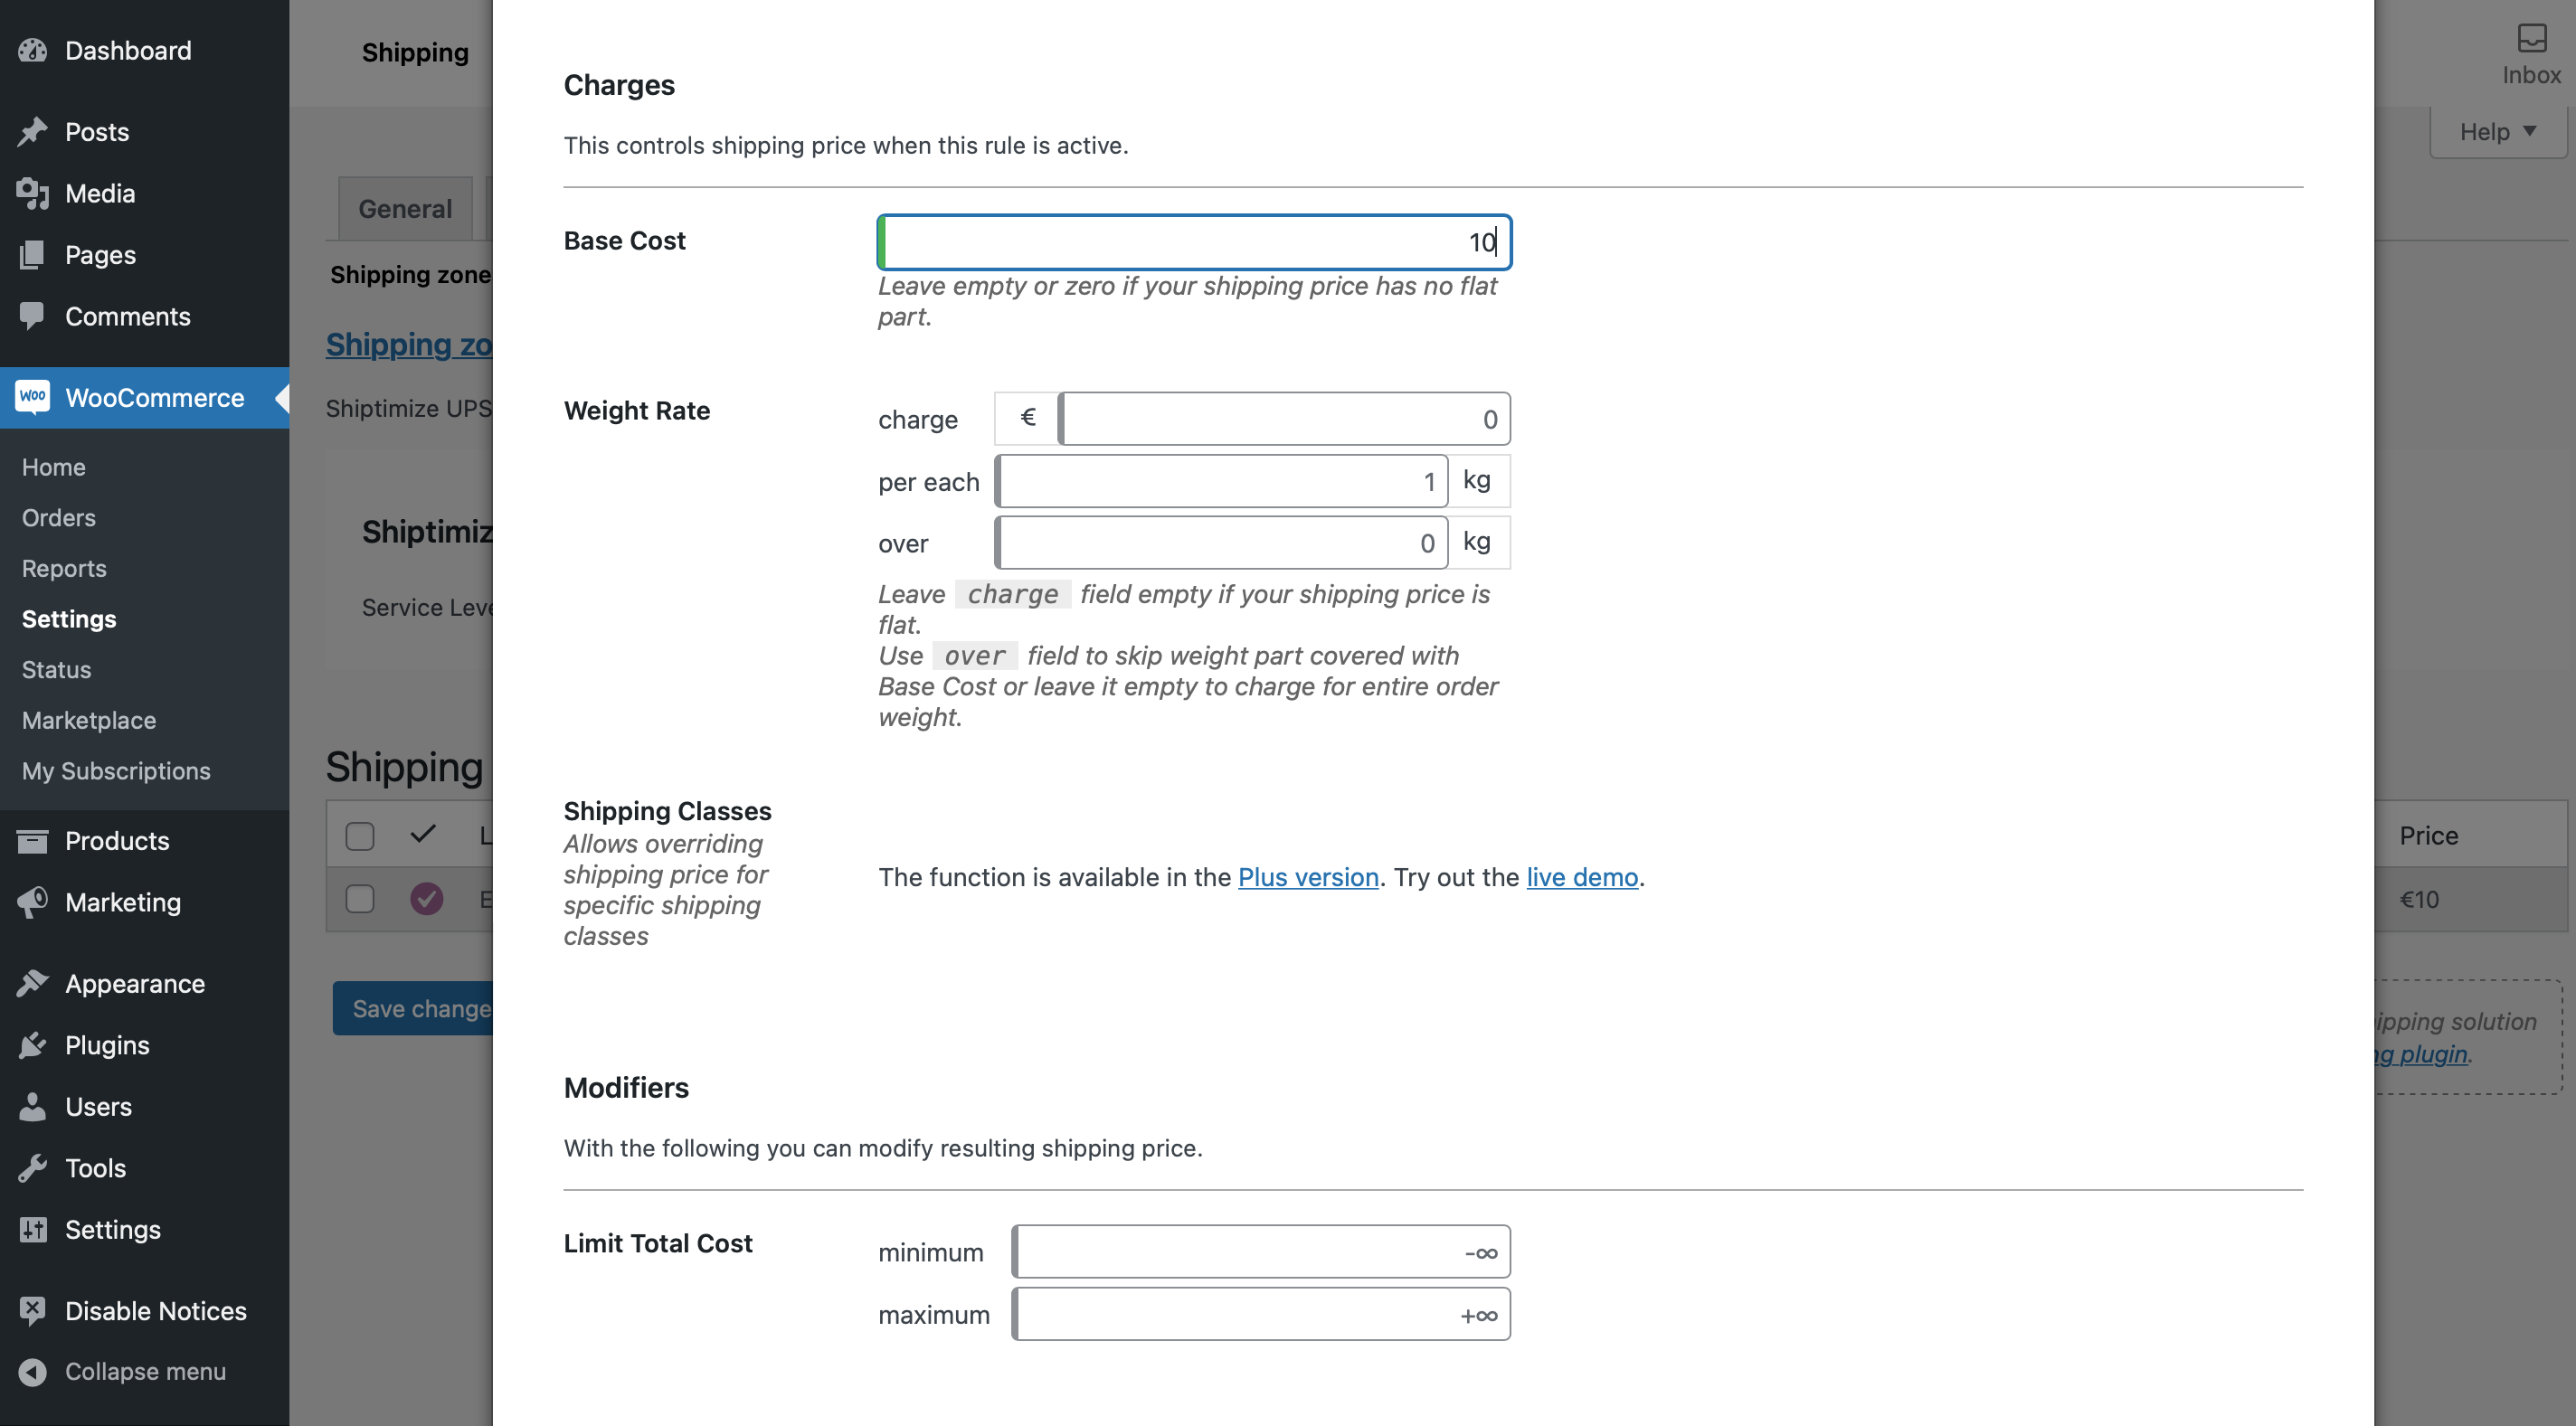
To finish you should click Close
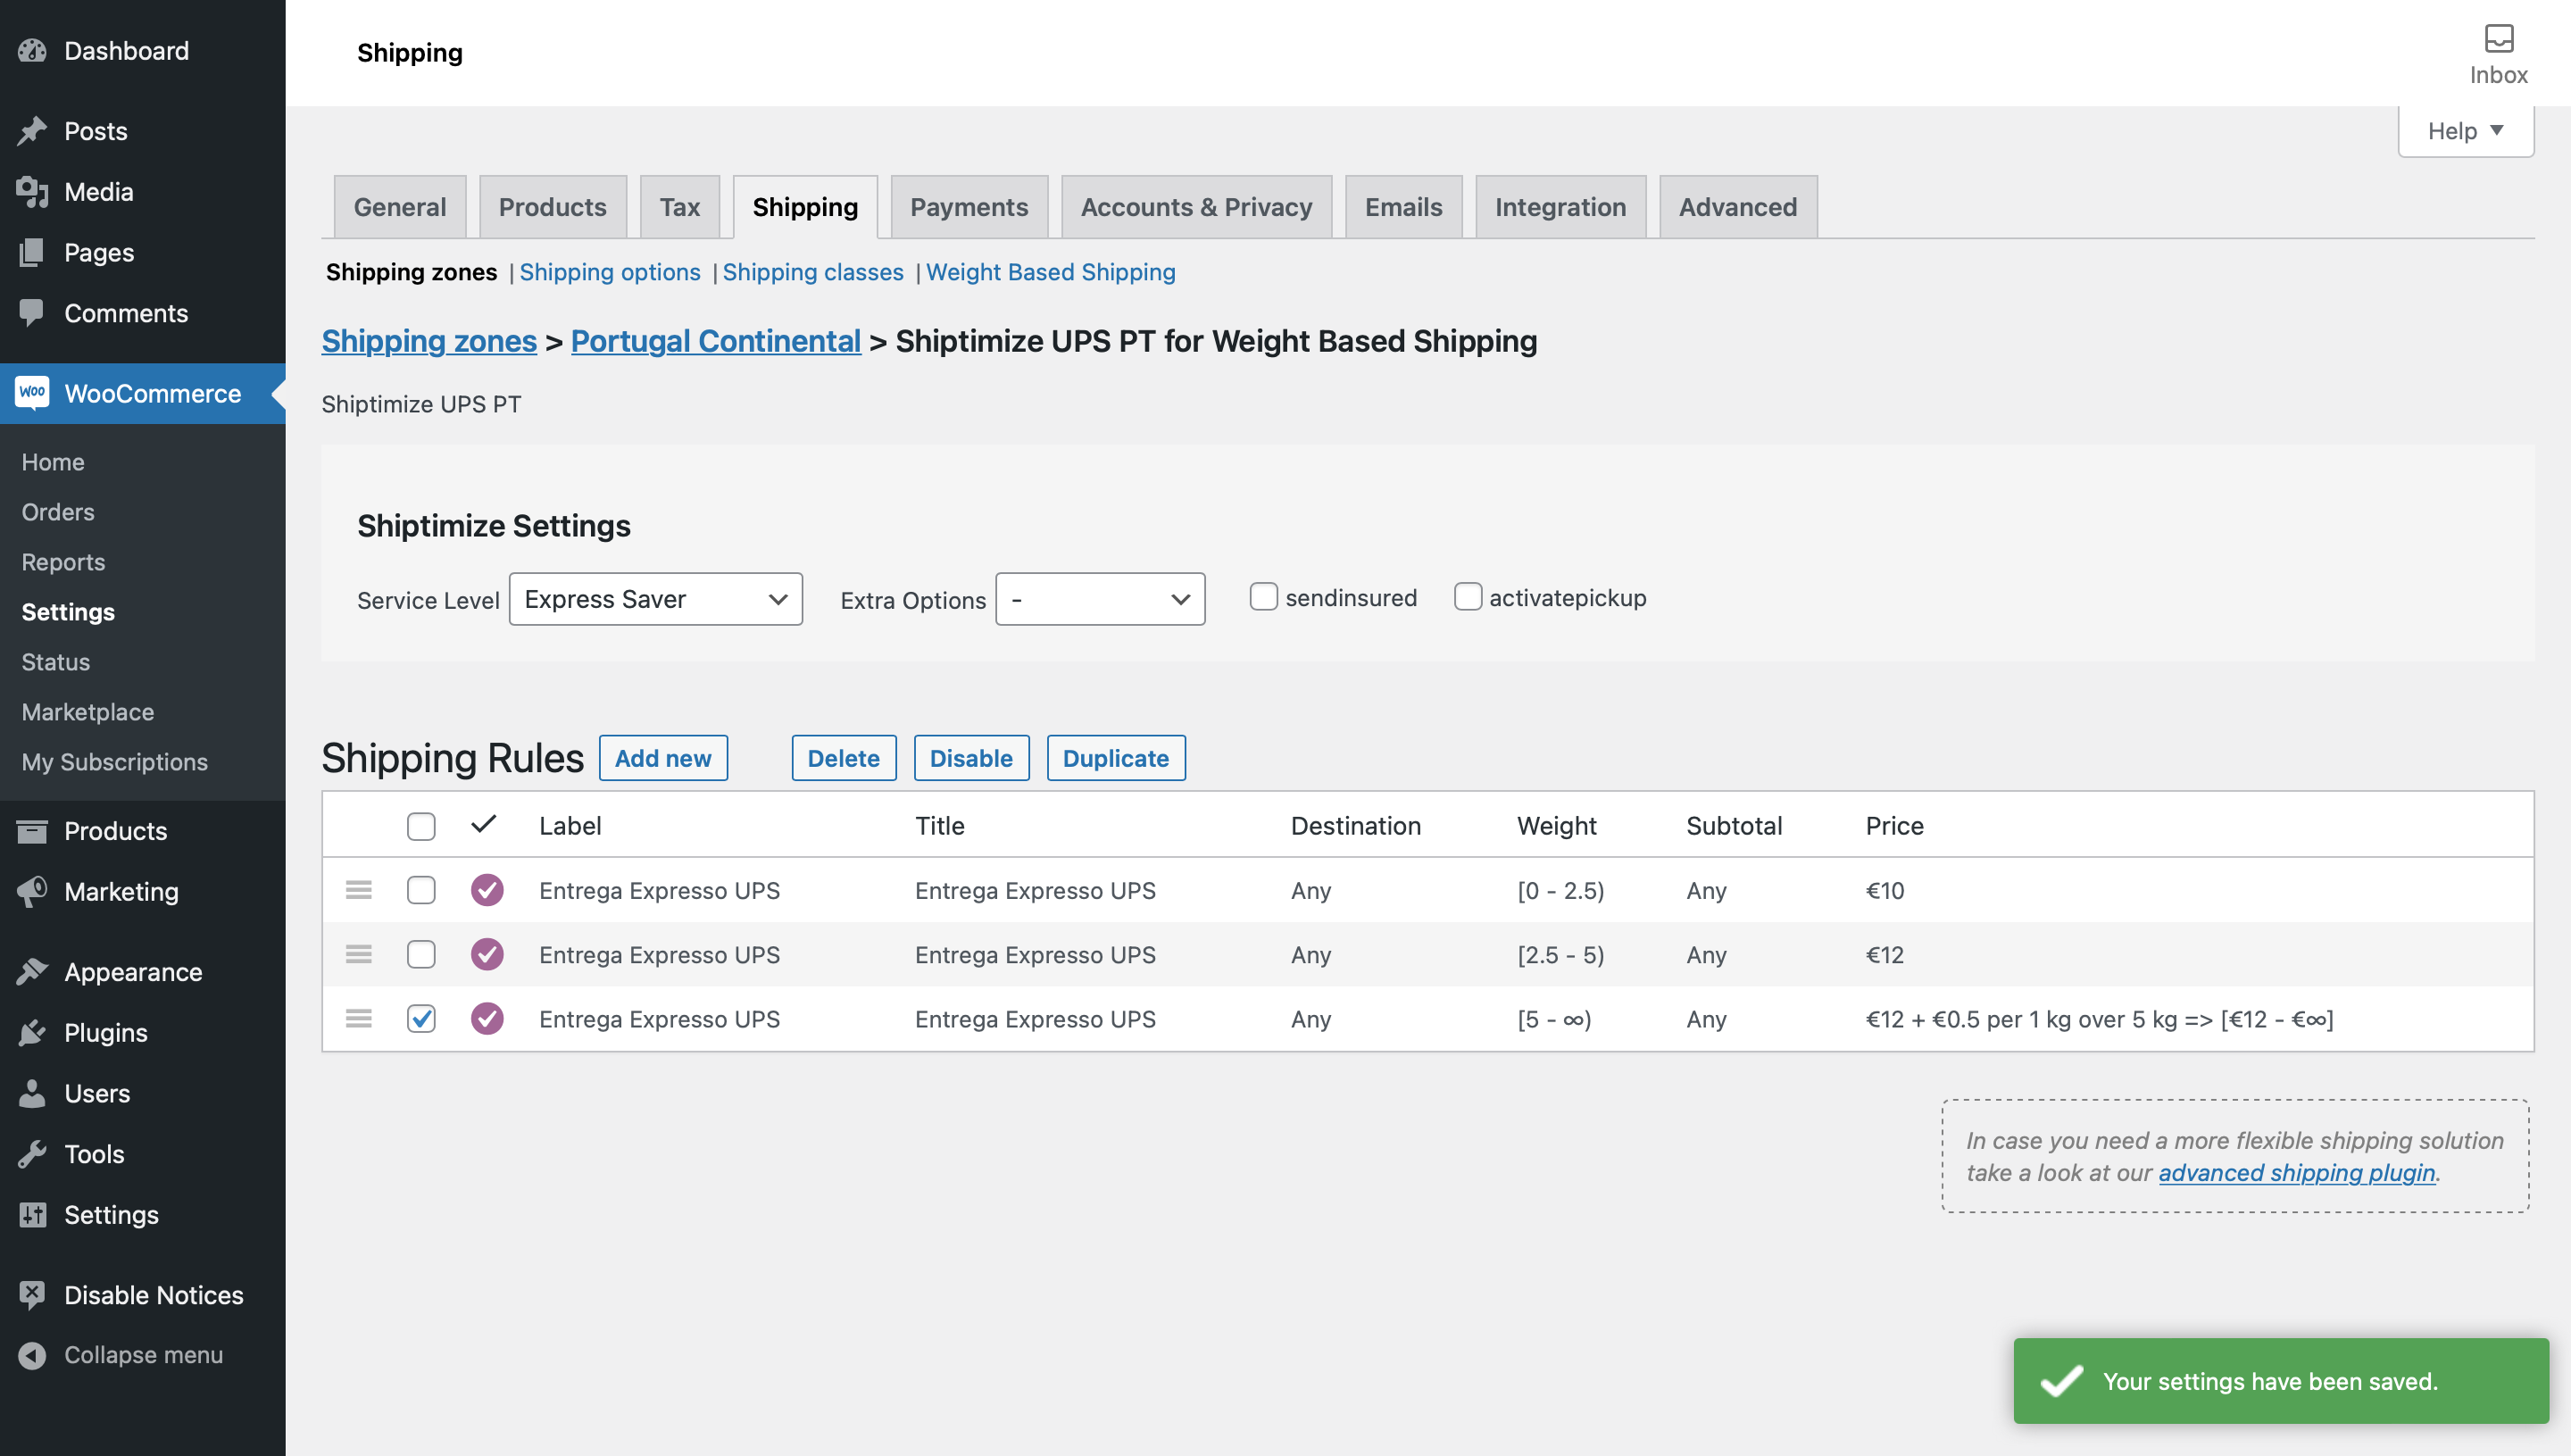
The rule will appear in the method rules menu. Here you can edit it by clicking on it.
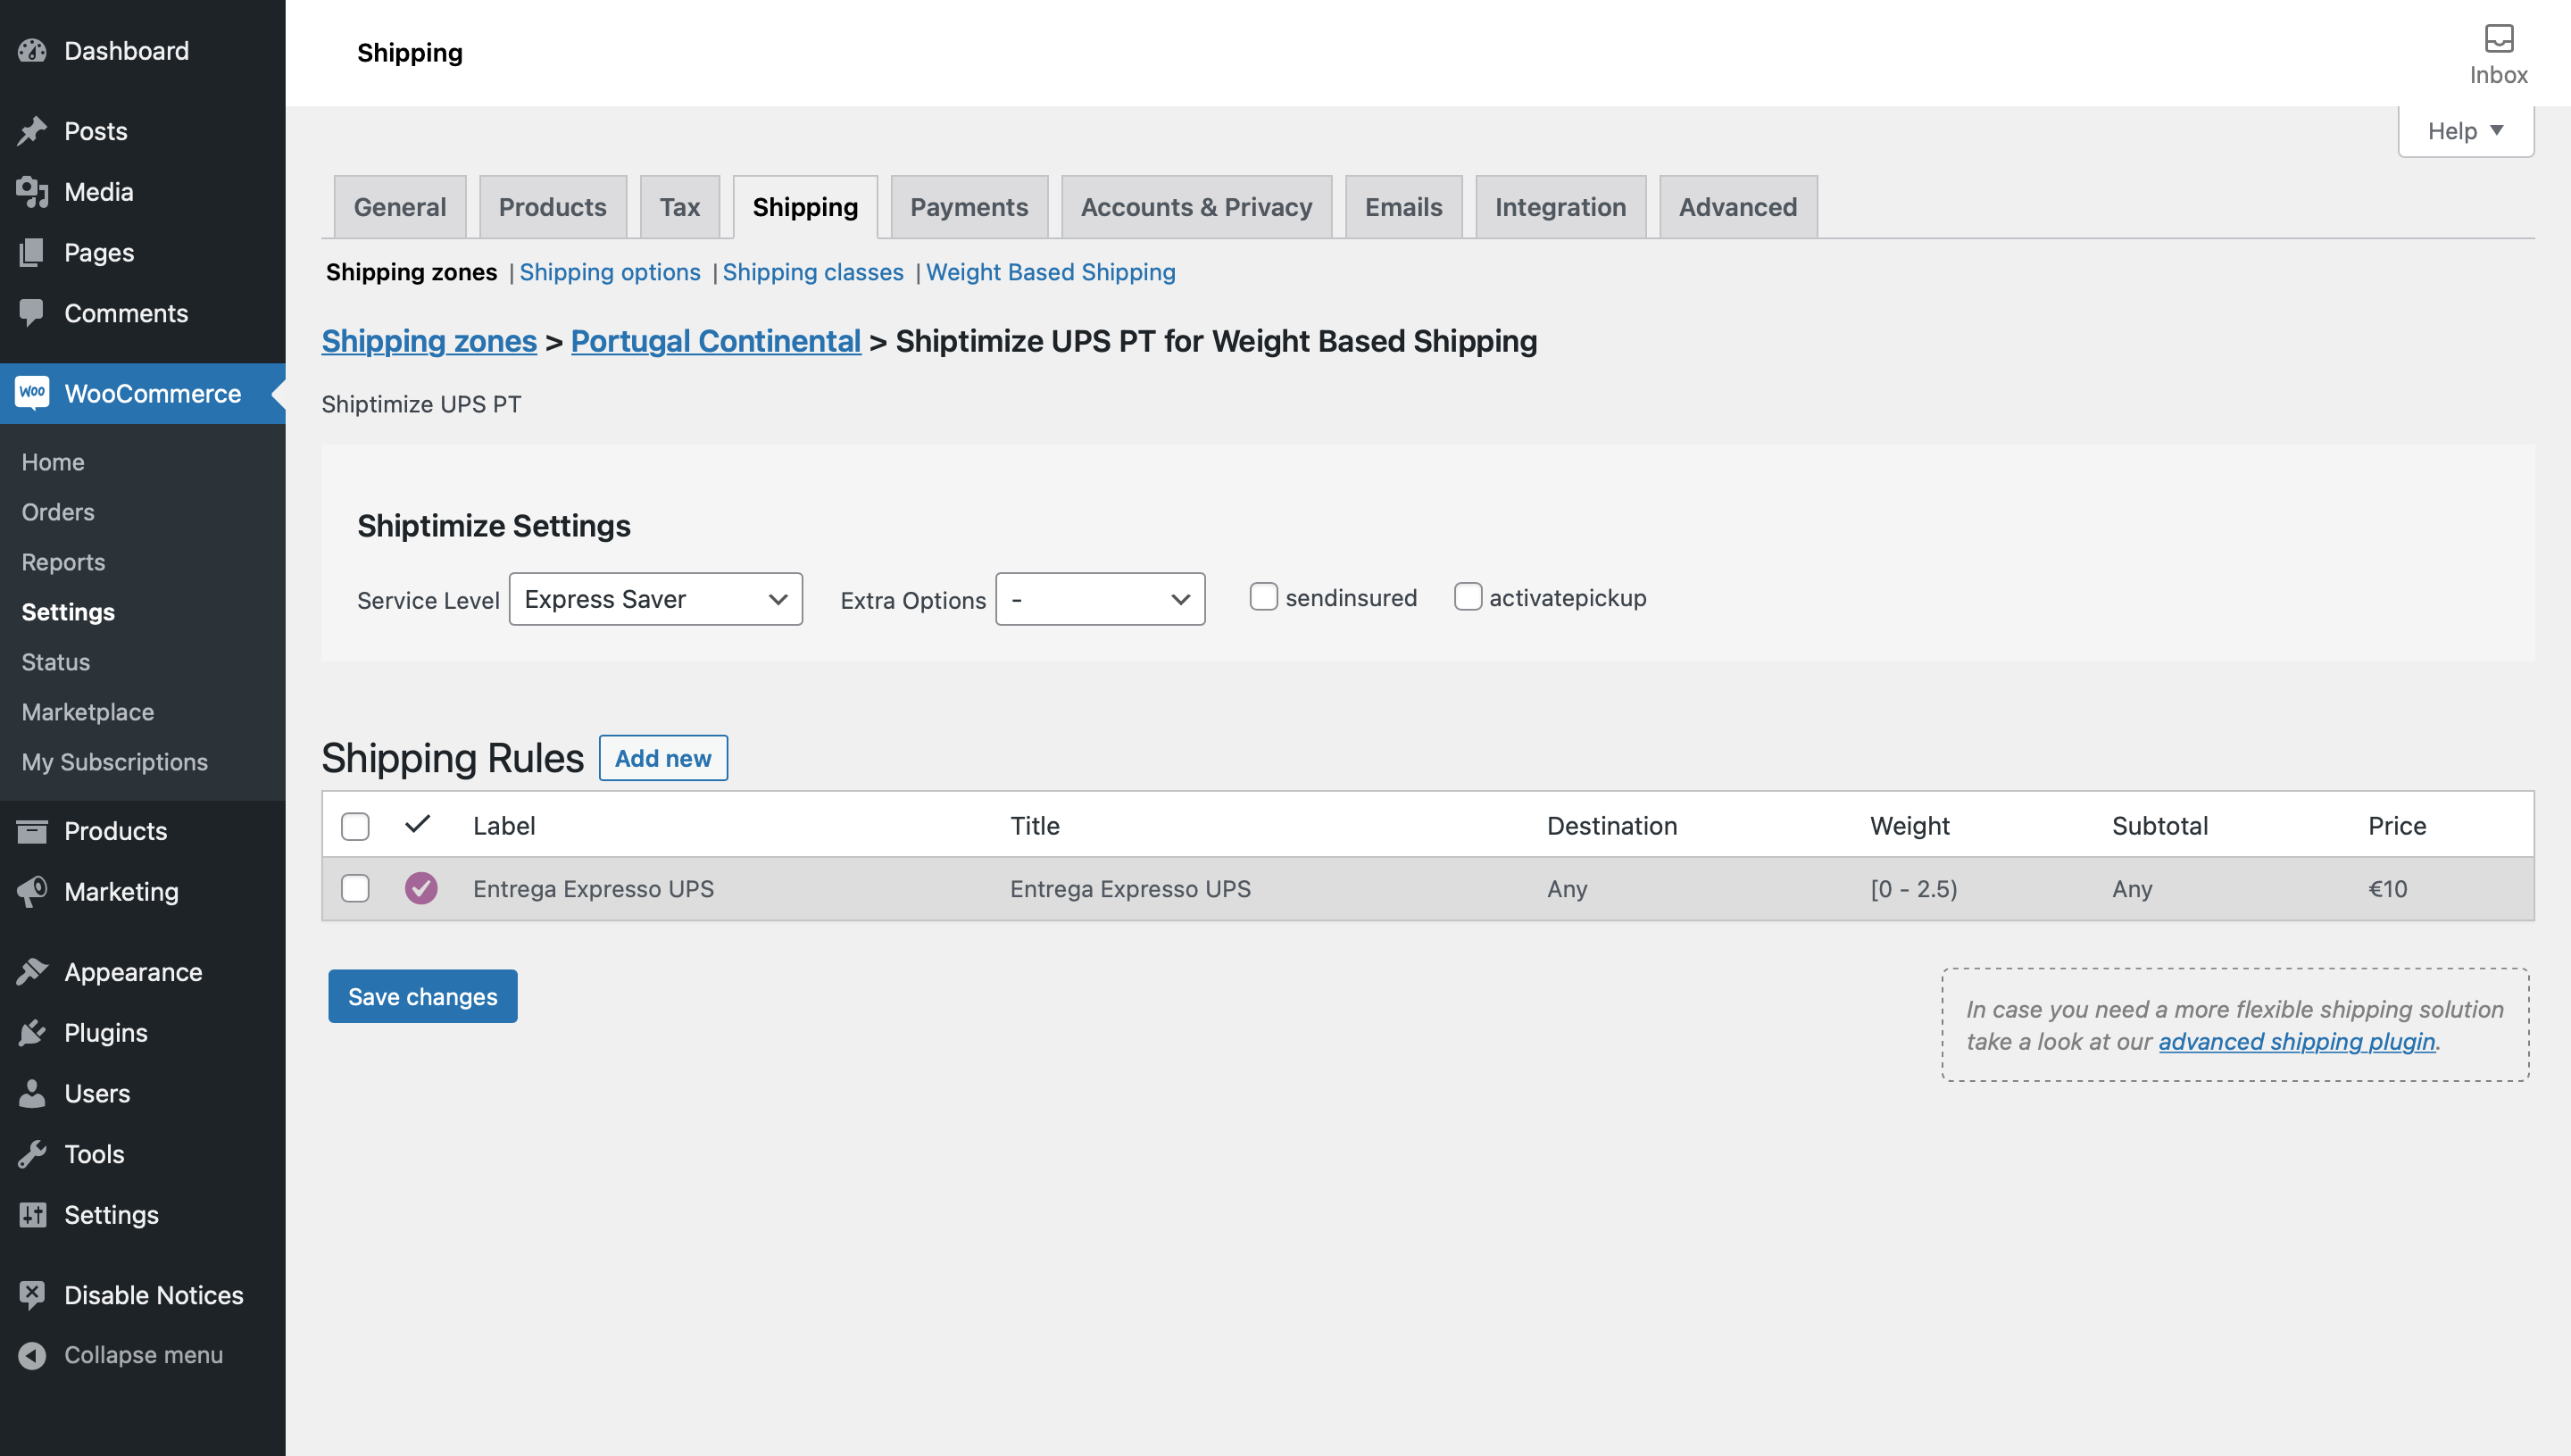
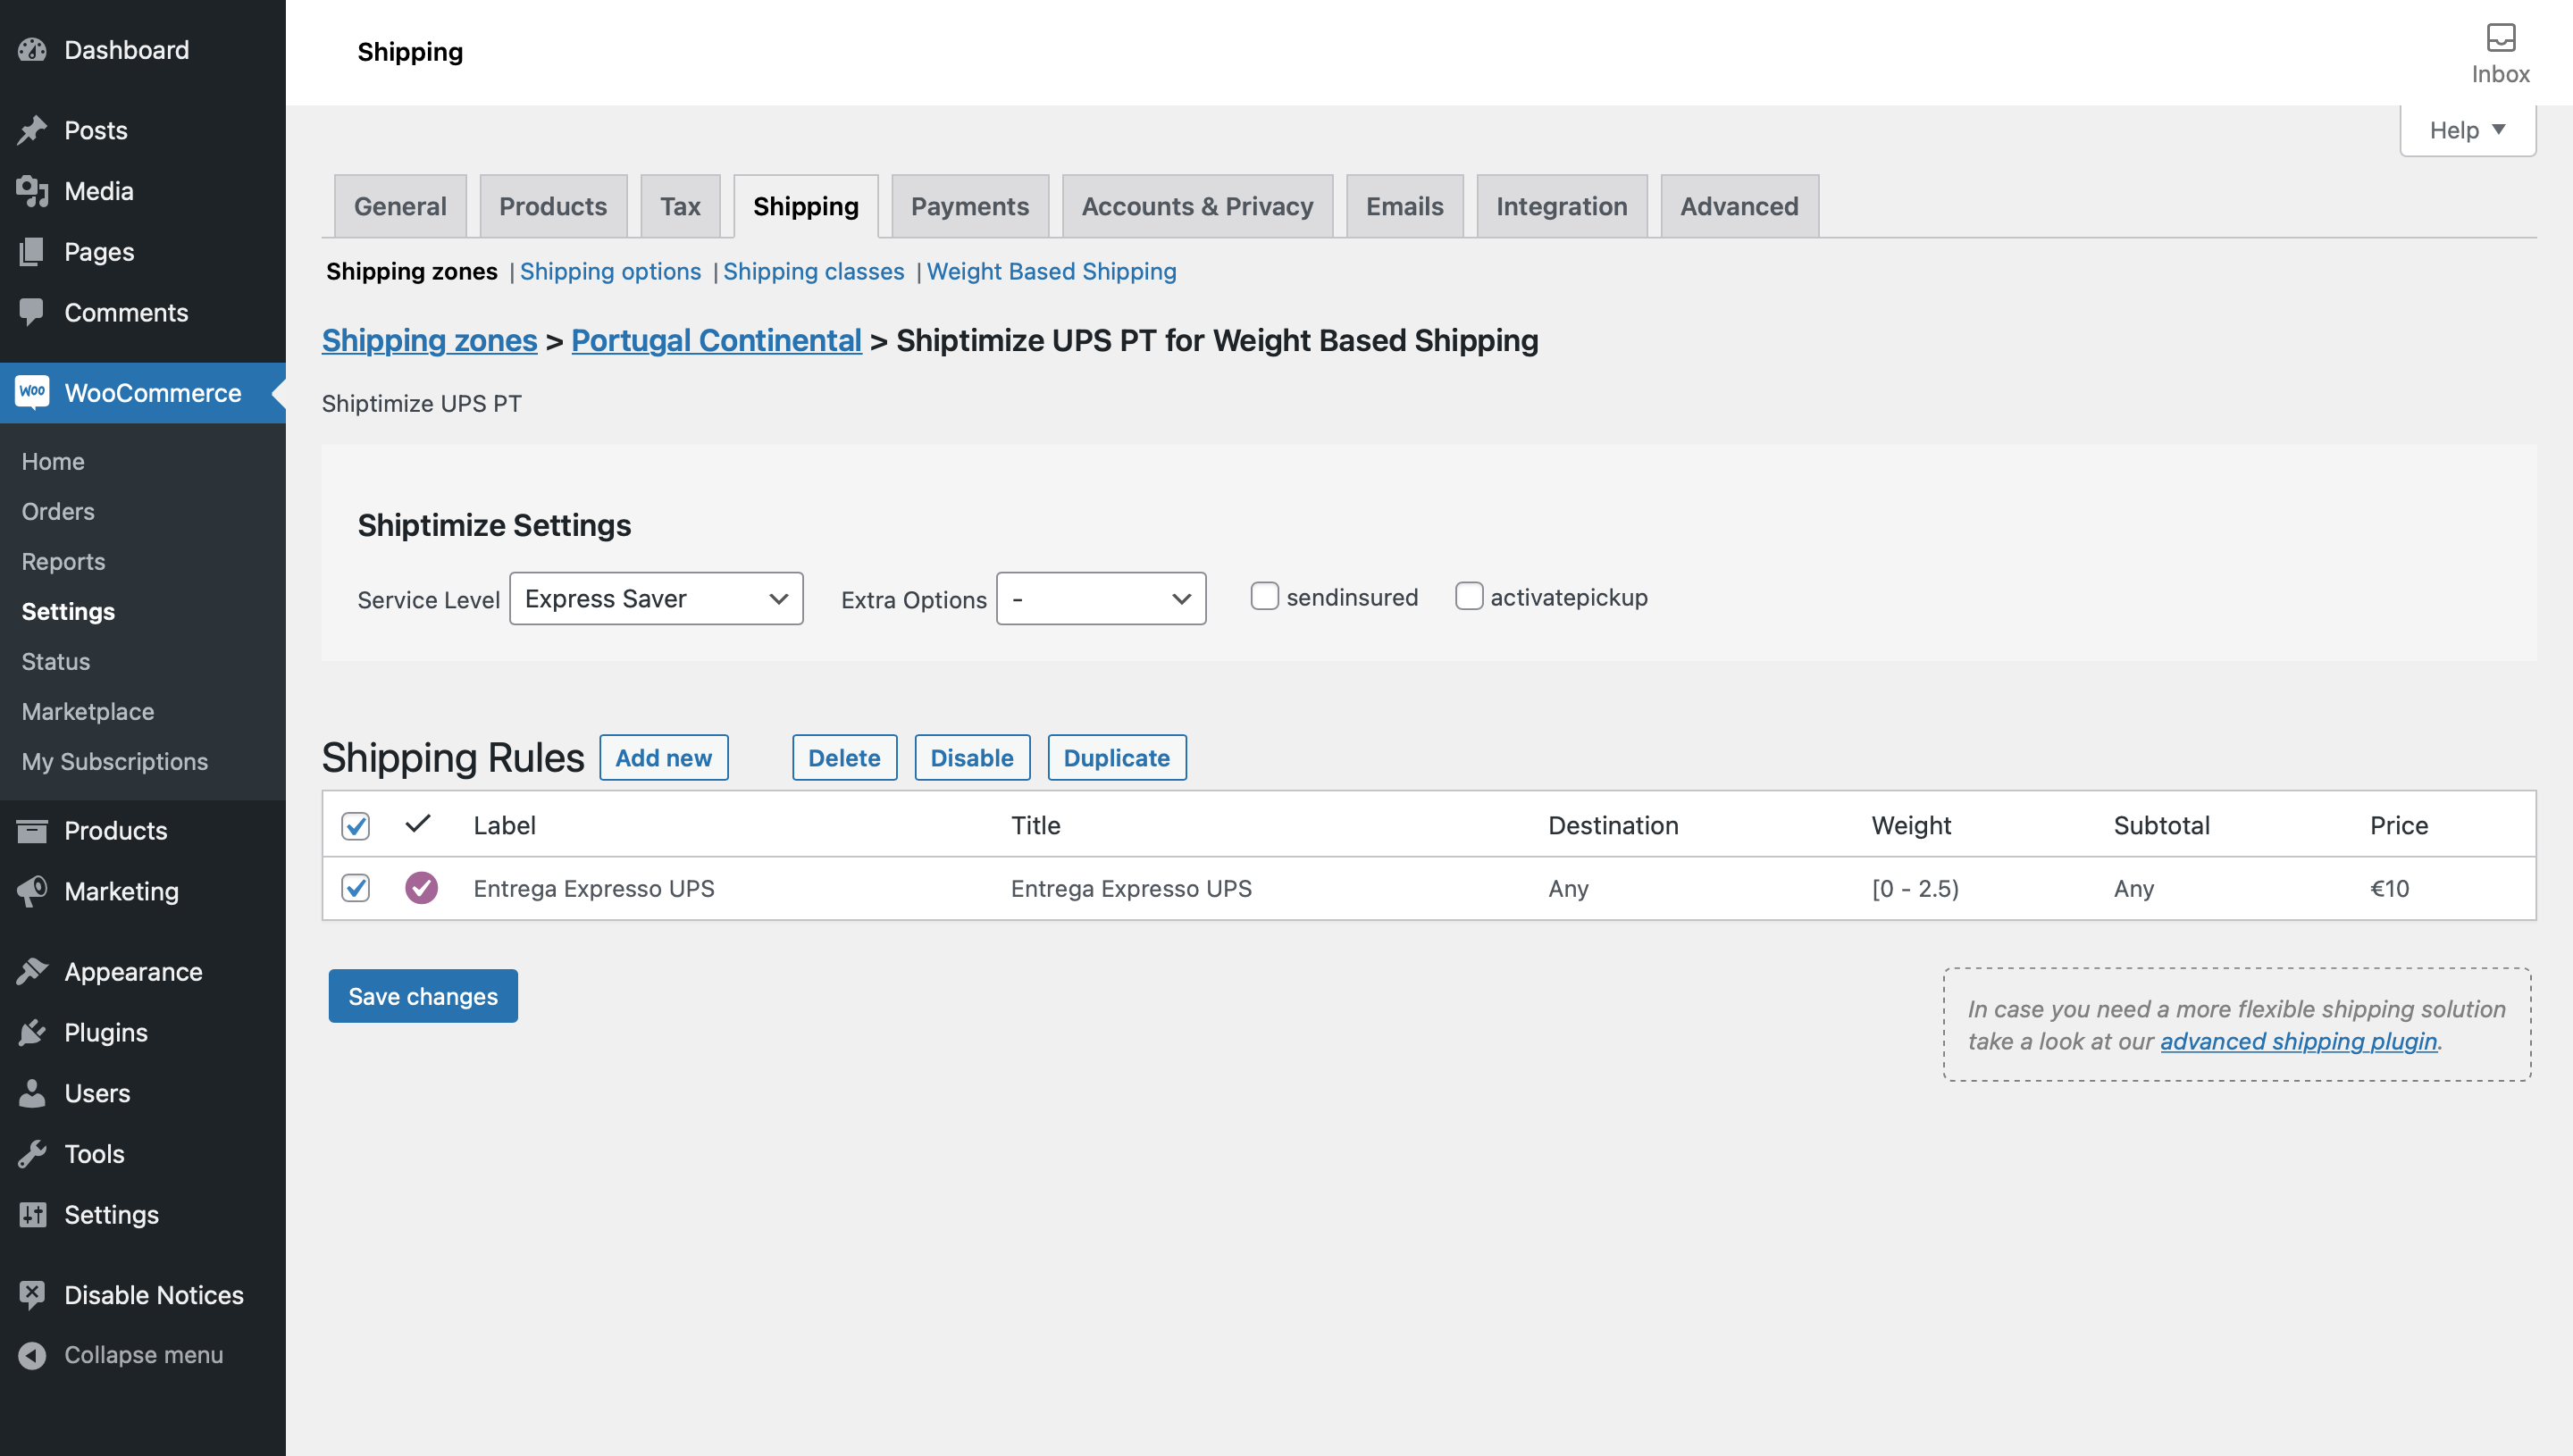
It also allows you to duplicate it, which is useful for creating the other intervals of this sending method. To do this, select the newly created rule and click Duplicate.
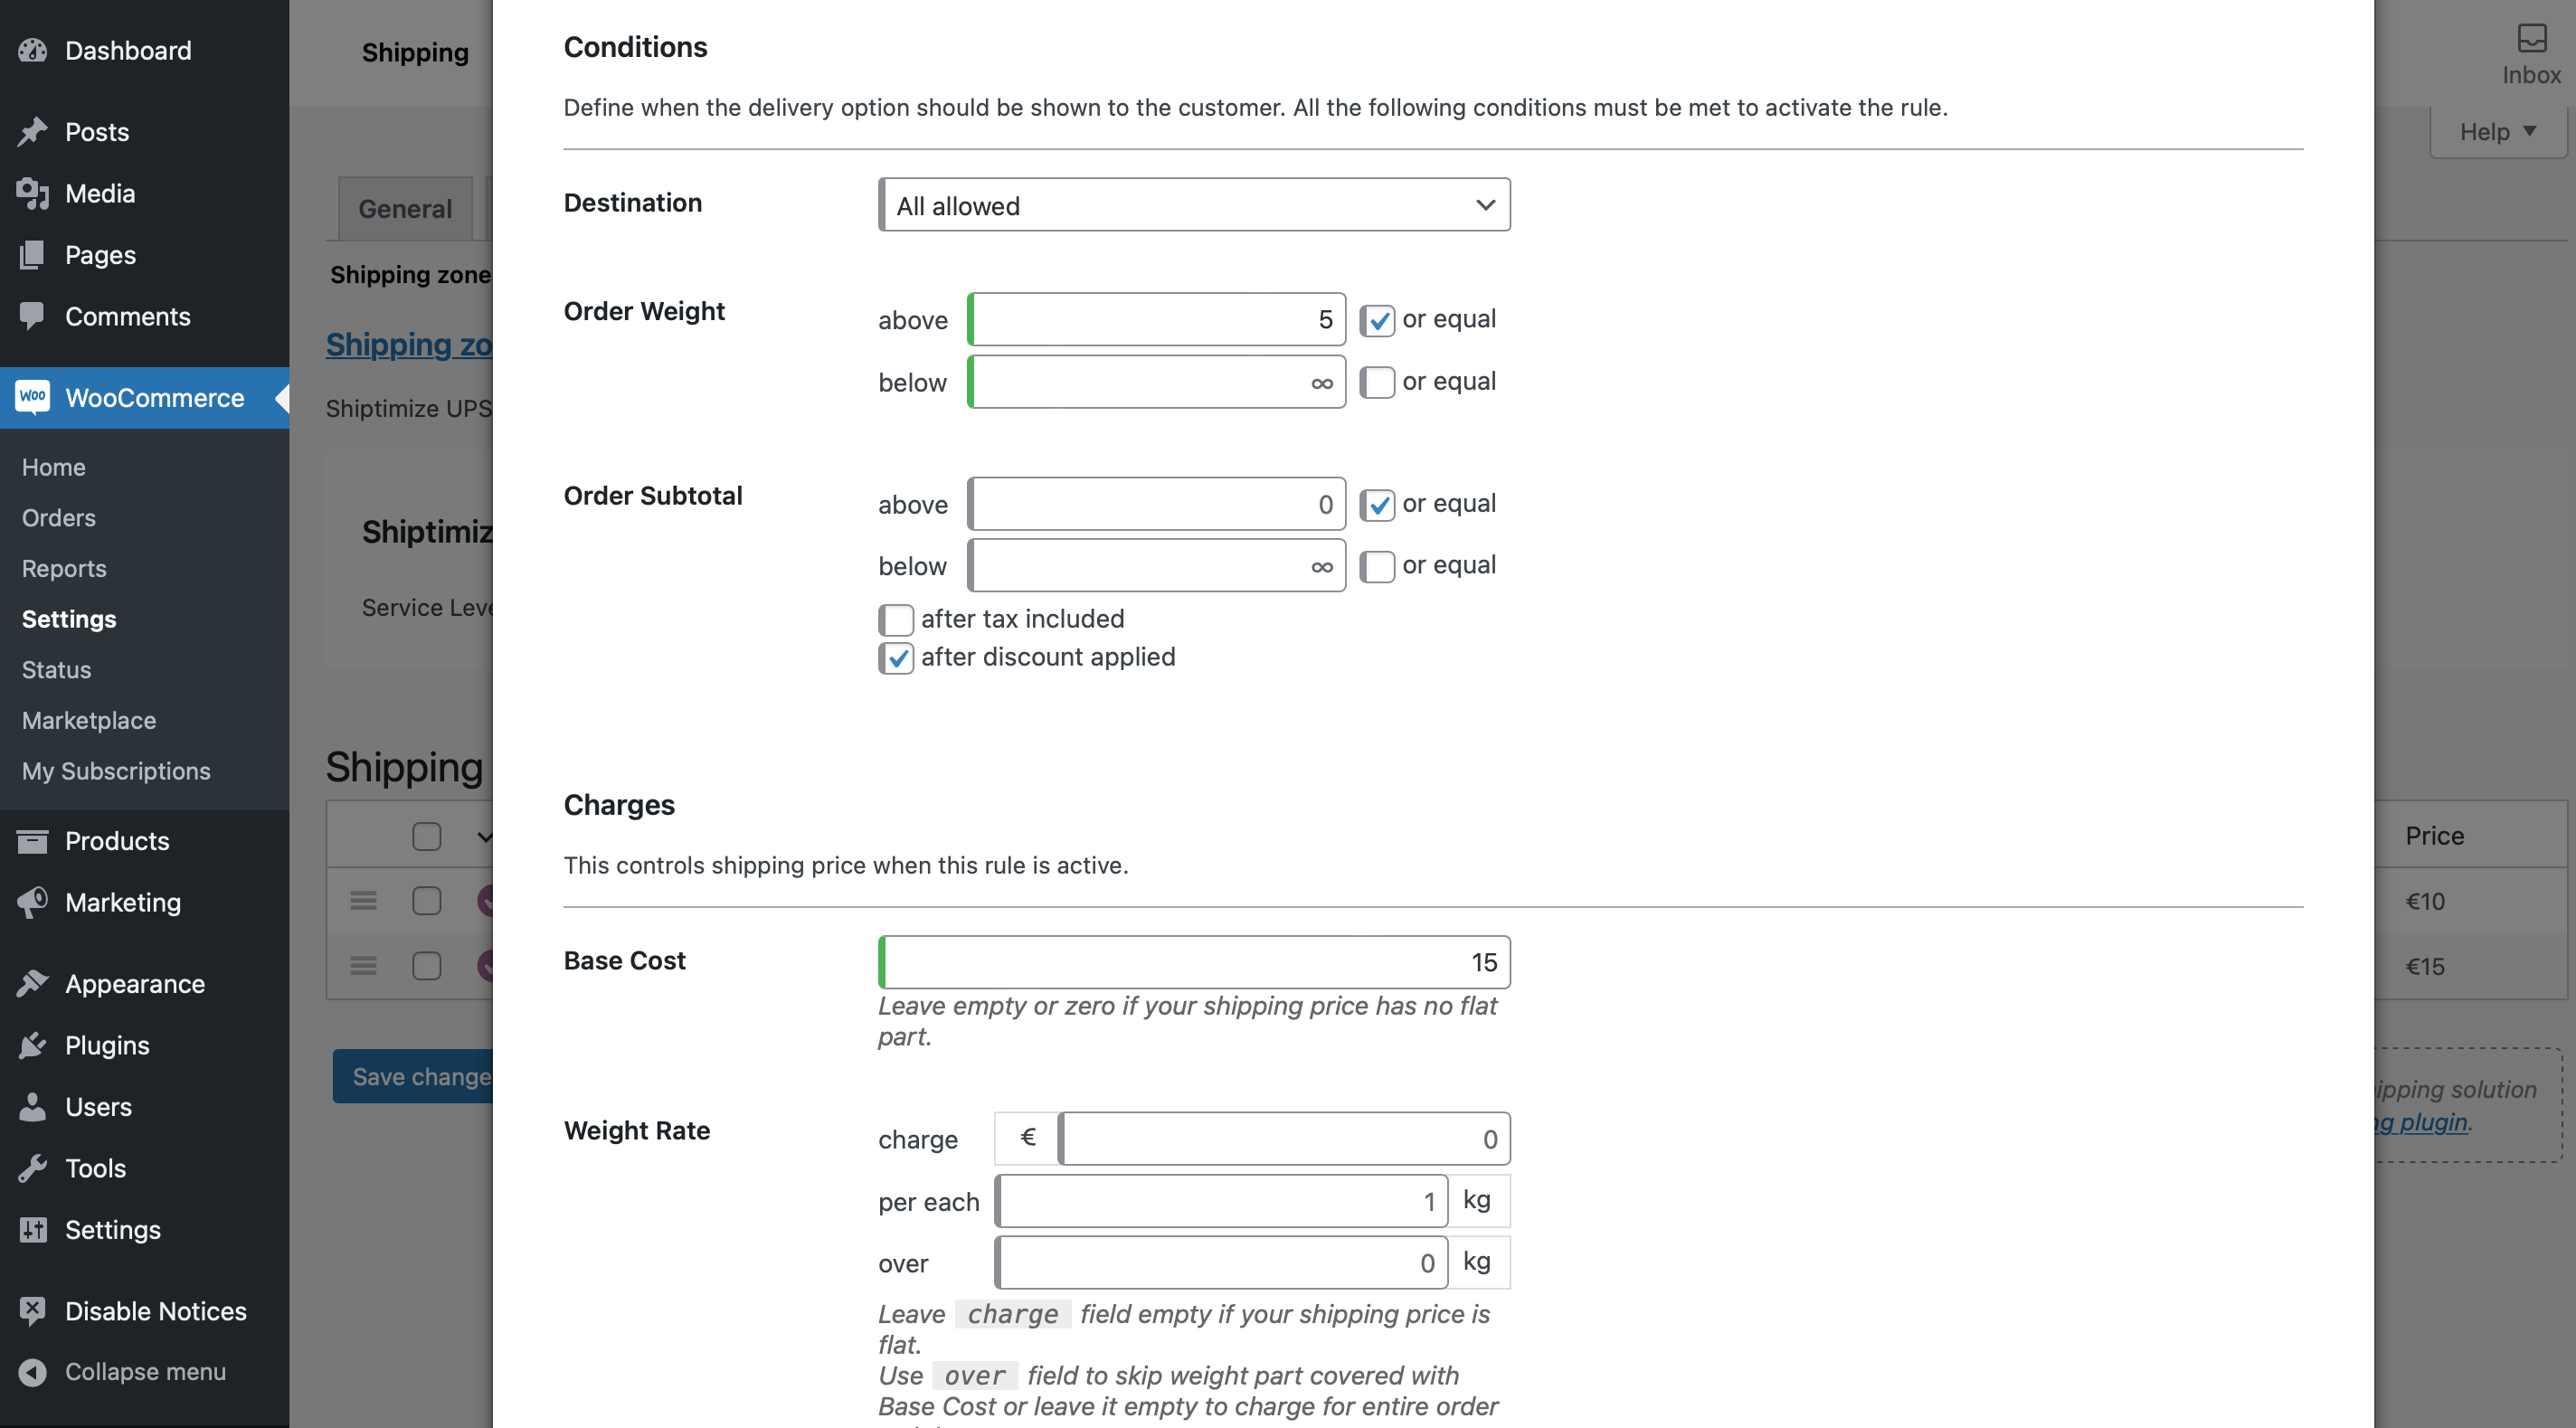
You should edit the new range that appears to change it to the desired one and give it the desired price. In this example we change it to the range 2.5 to 5 kg and assign the value of 12 euros to this range and to finish click Close

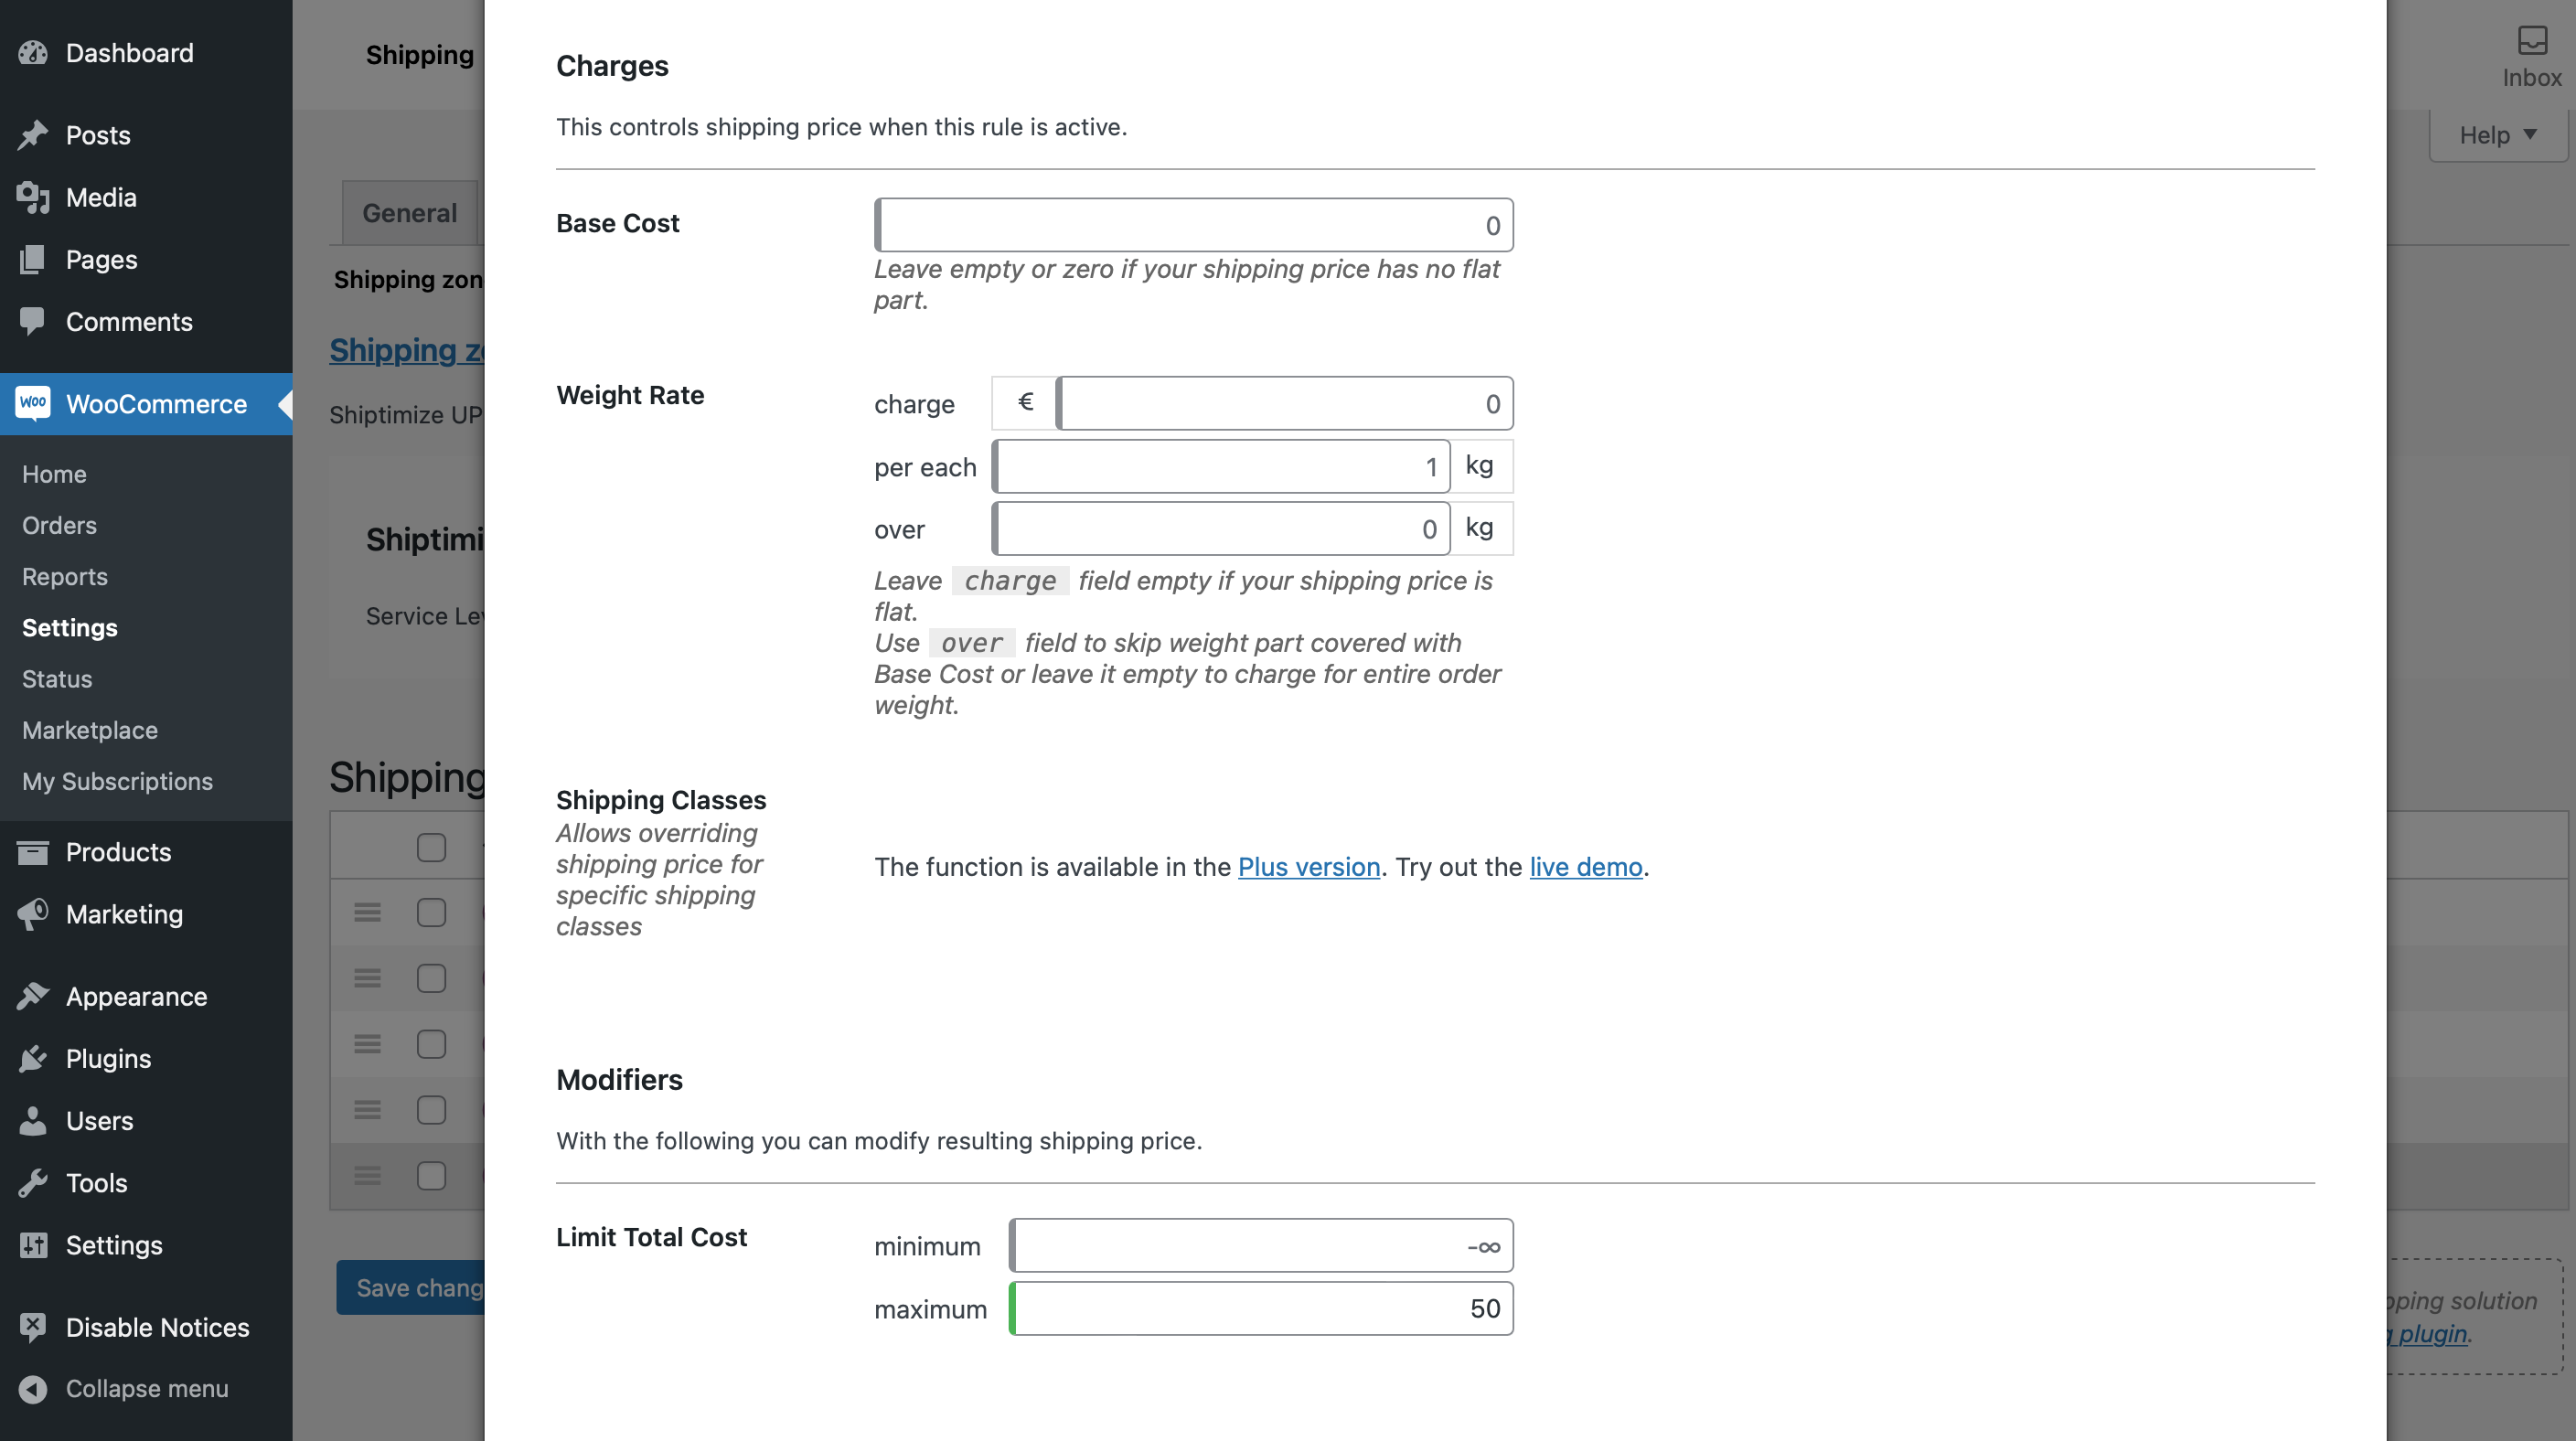
The last weight range of the rule can be configured with a fixed value independent of the weight in question as shown in the following example where we assume a value of 15€ for purchases over 5Kg
Alternatively you can create the last weight range with increasing price for each extra kg of weight in the shopping cart. In this example we decided that the value above 5Kg would be 12€ to which would be added 0.5€ for each kg.
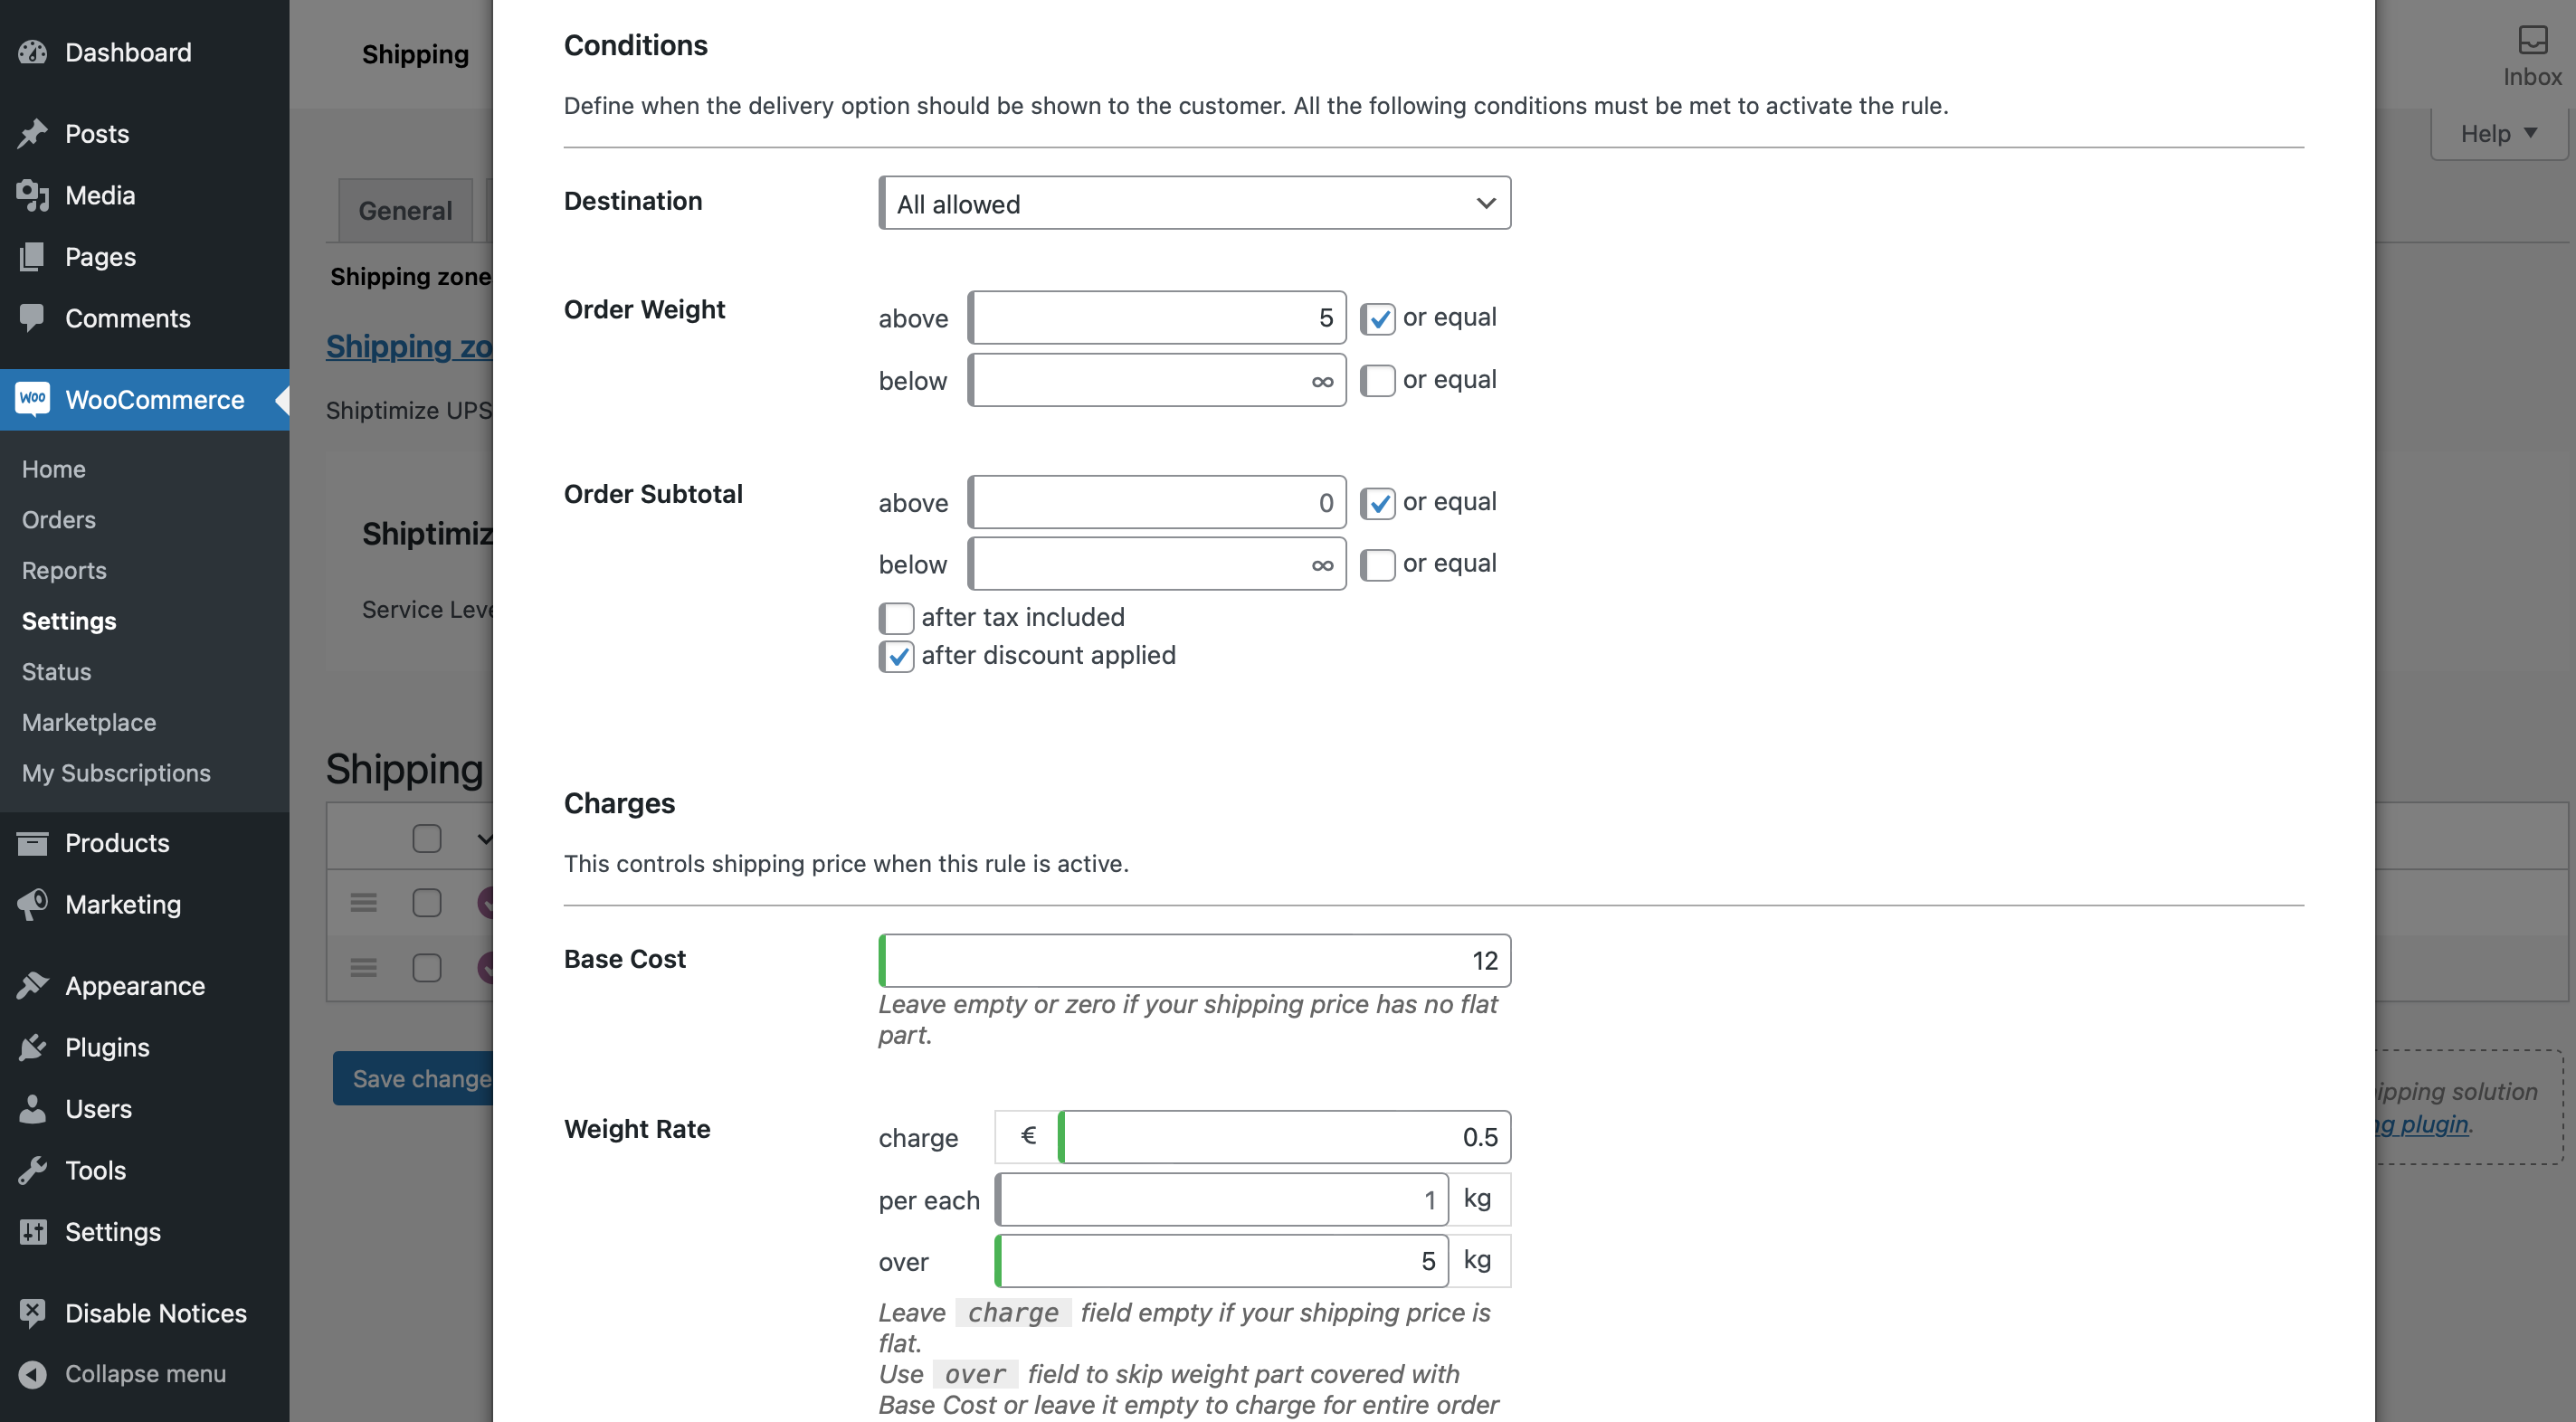
Finally, when all price ranges are created you should save the changes to this rule by clicking on Save changes. The message will appear in the green field Your Settings have been saved.
If you want to split the shipping value according to the shopping cart value, you should proceed in the same way as described in the previous example, but this time select the Shopping cart price to establish the intervals using the Order subtotal above and below fields. In the following example, we create a shipping range from 10€ to 50€…
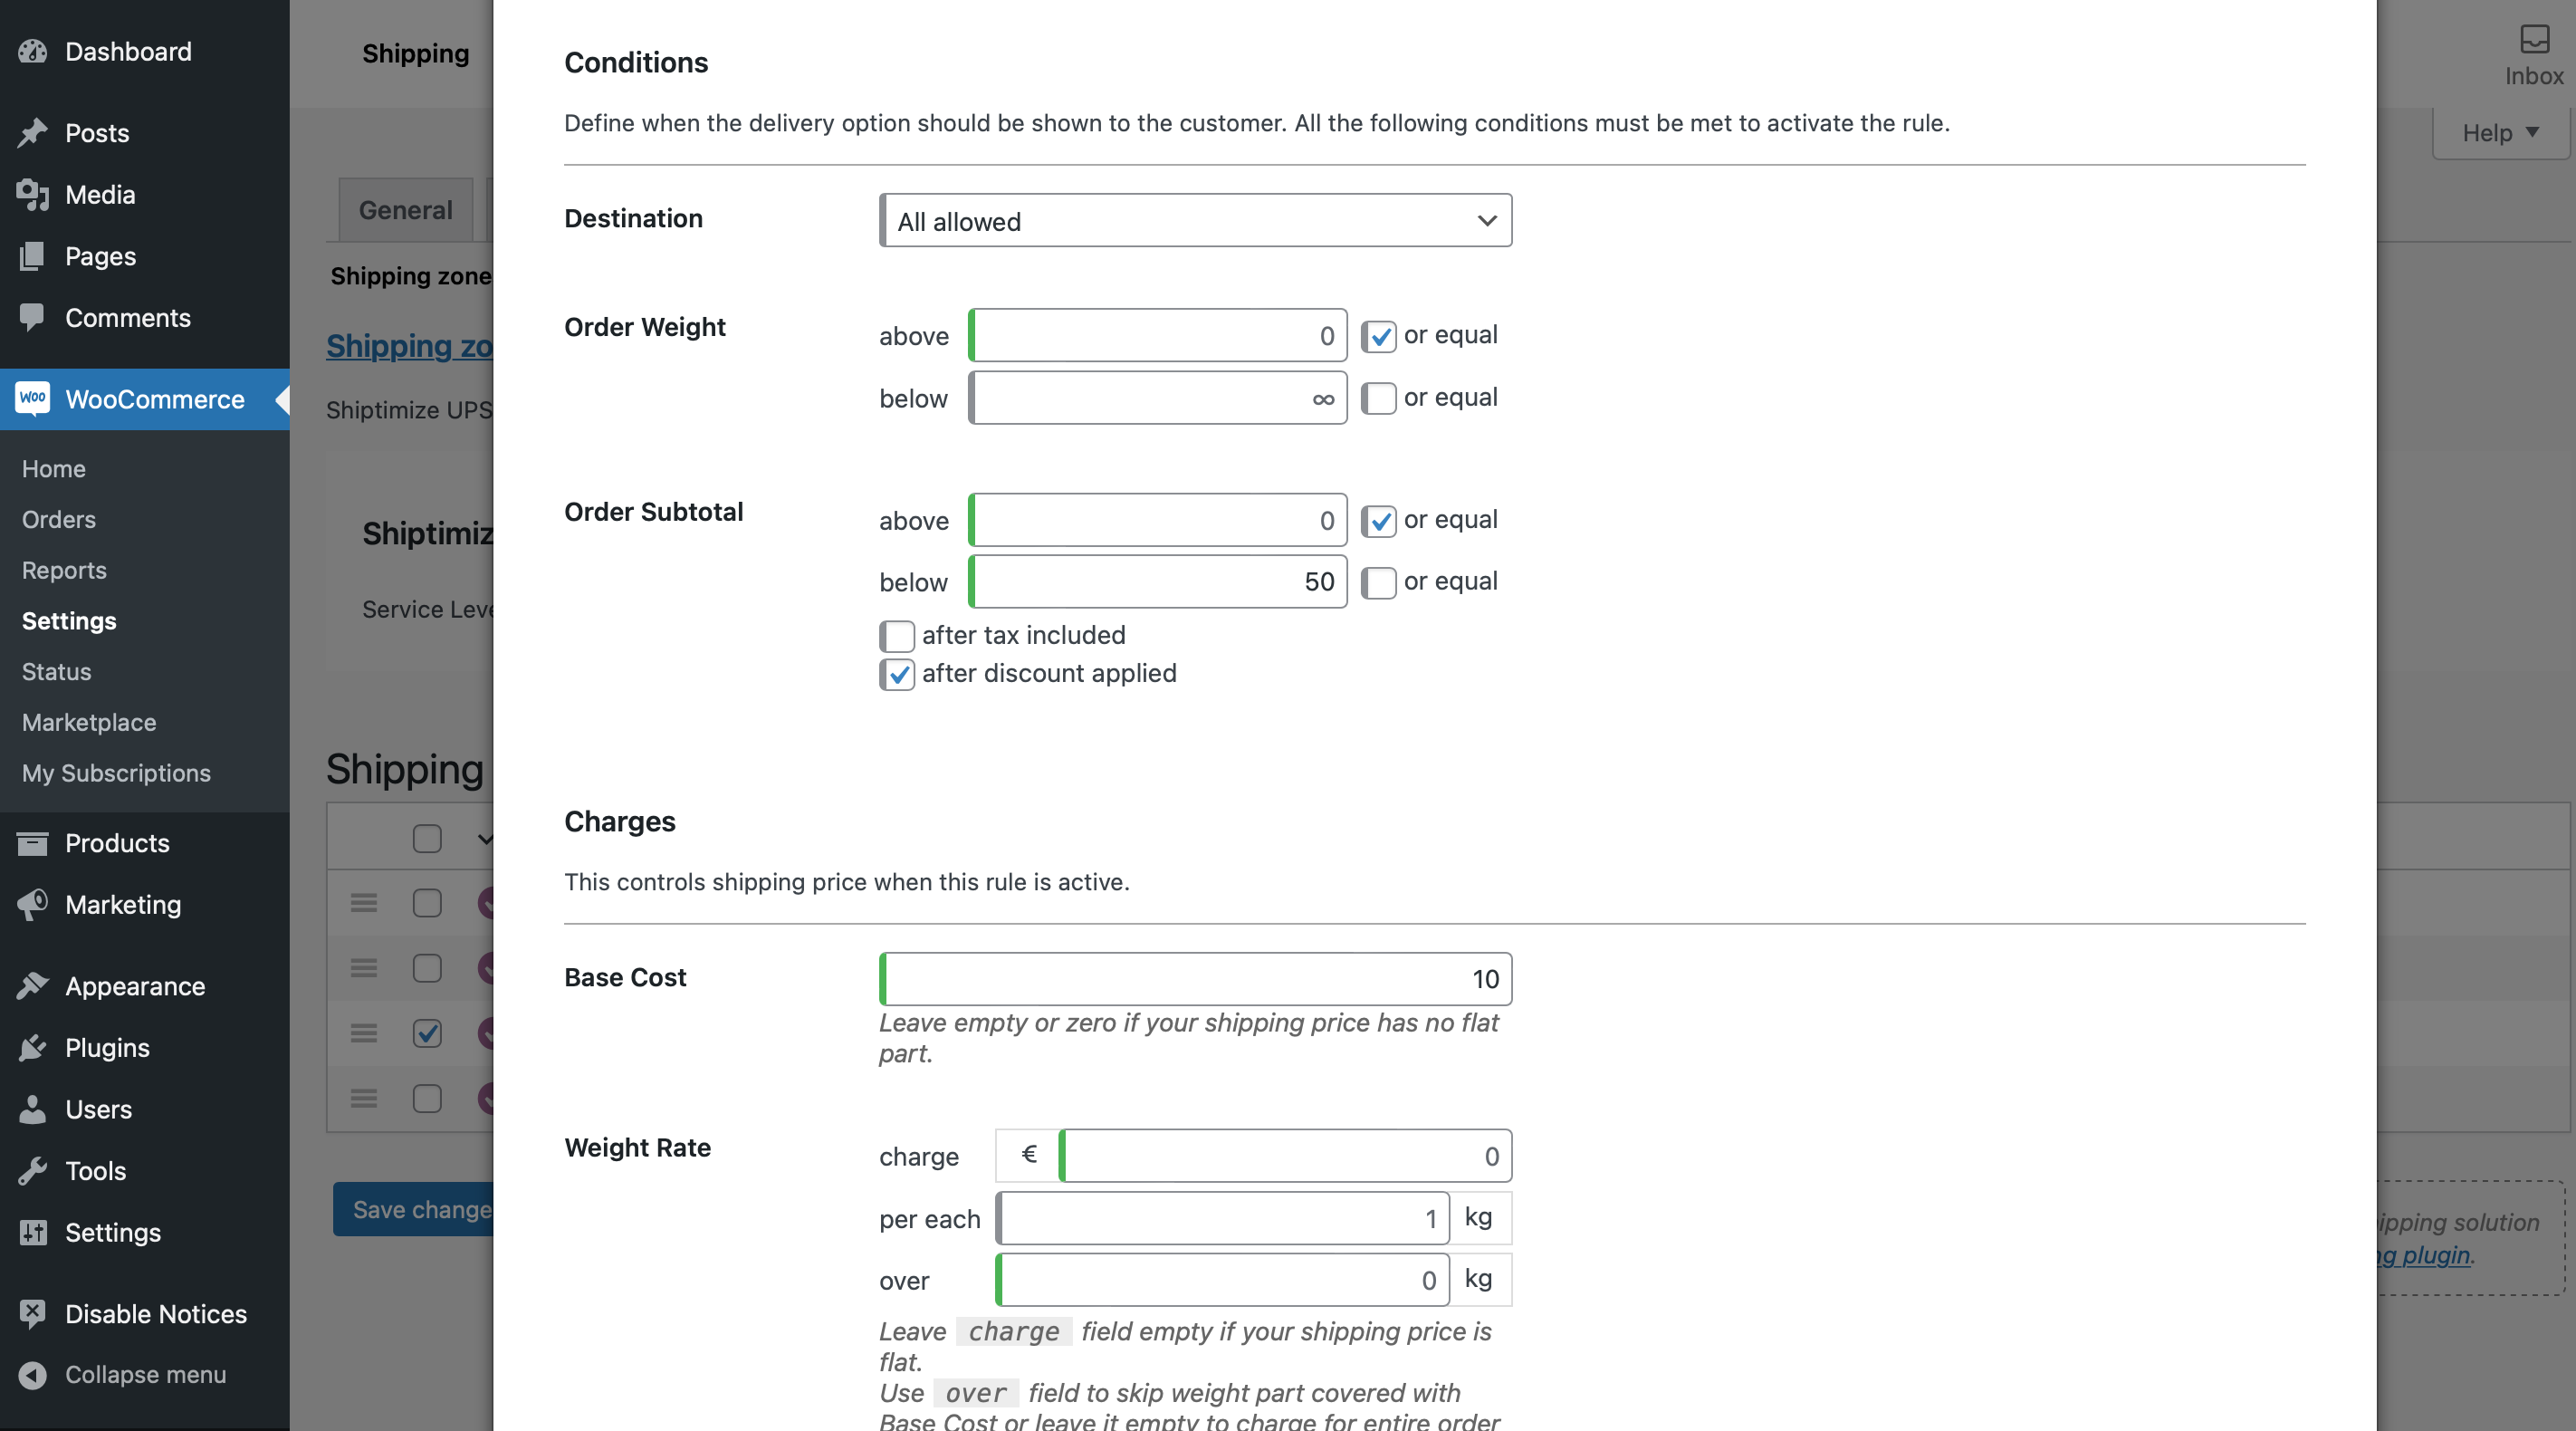
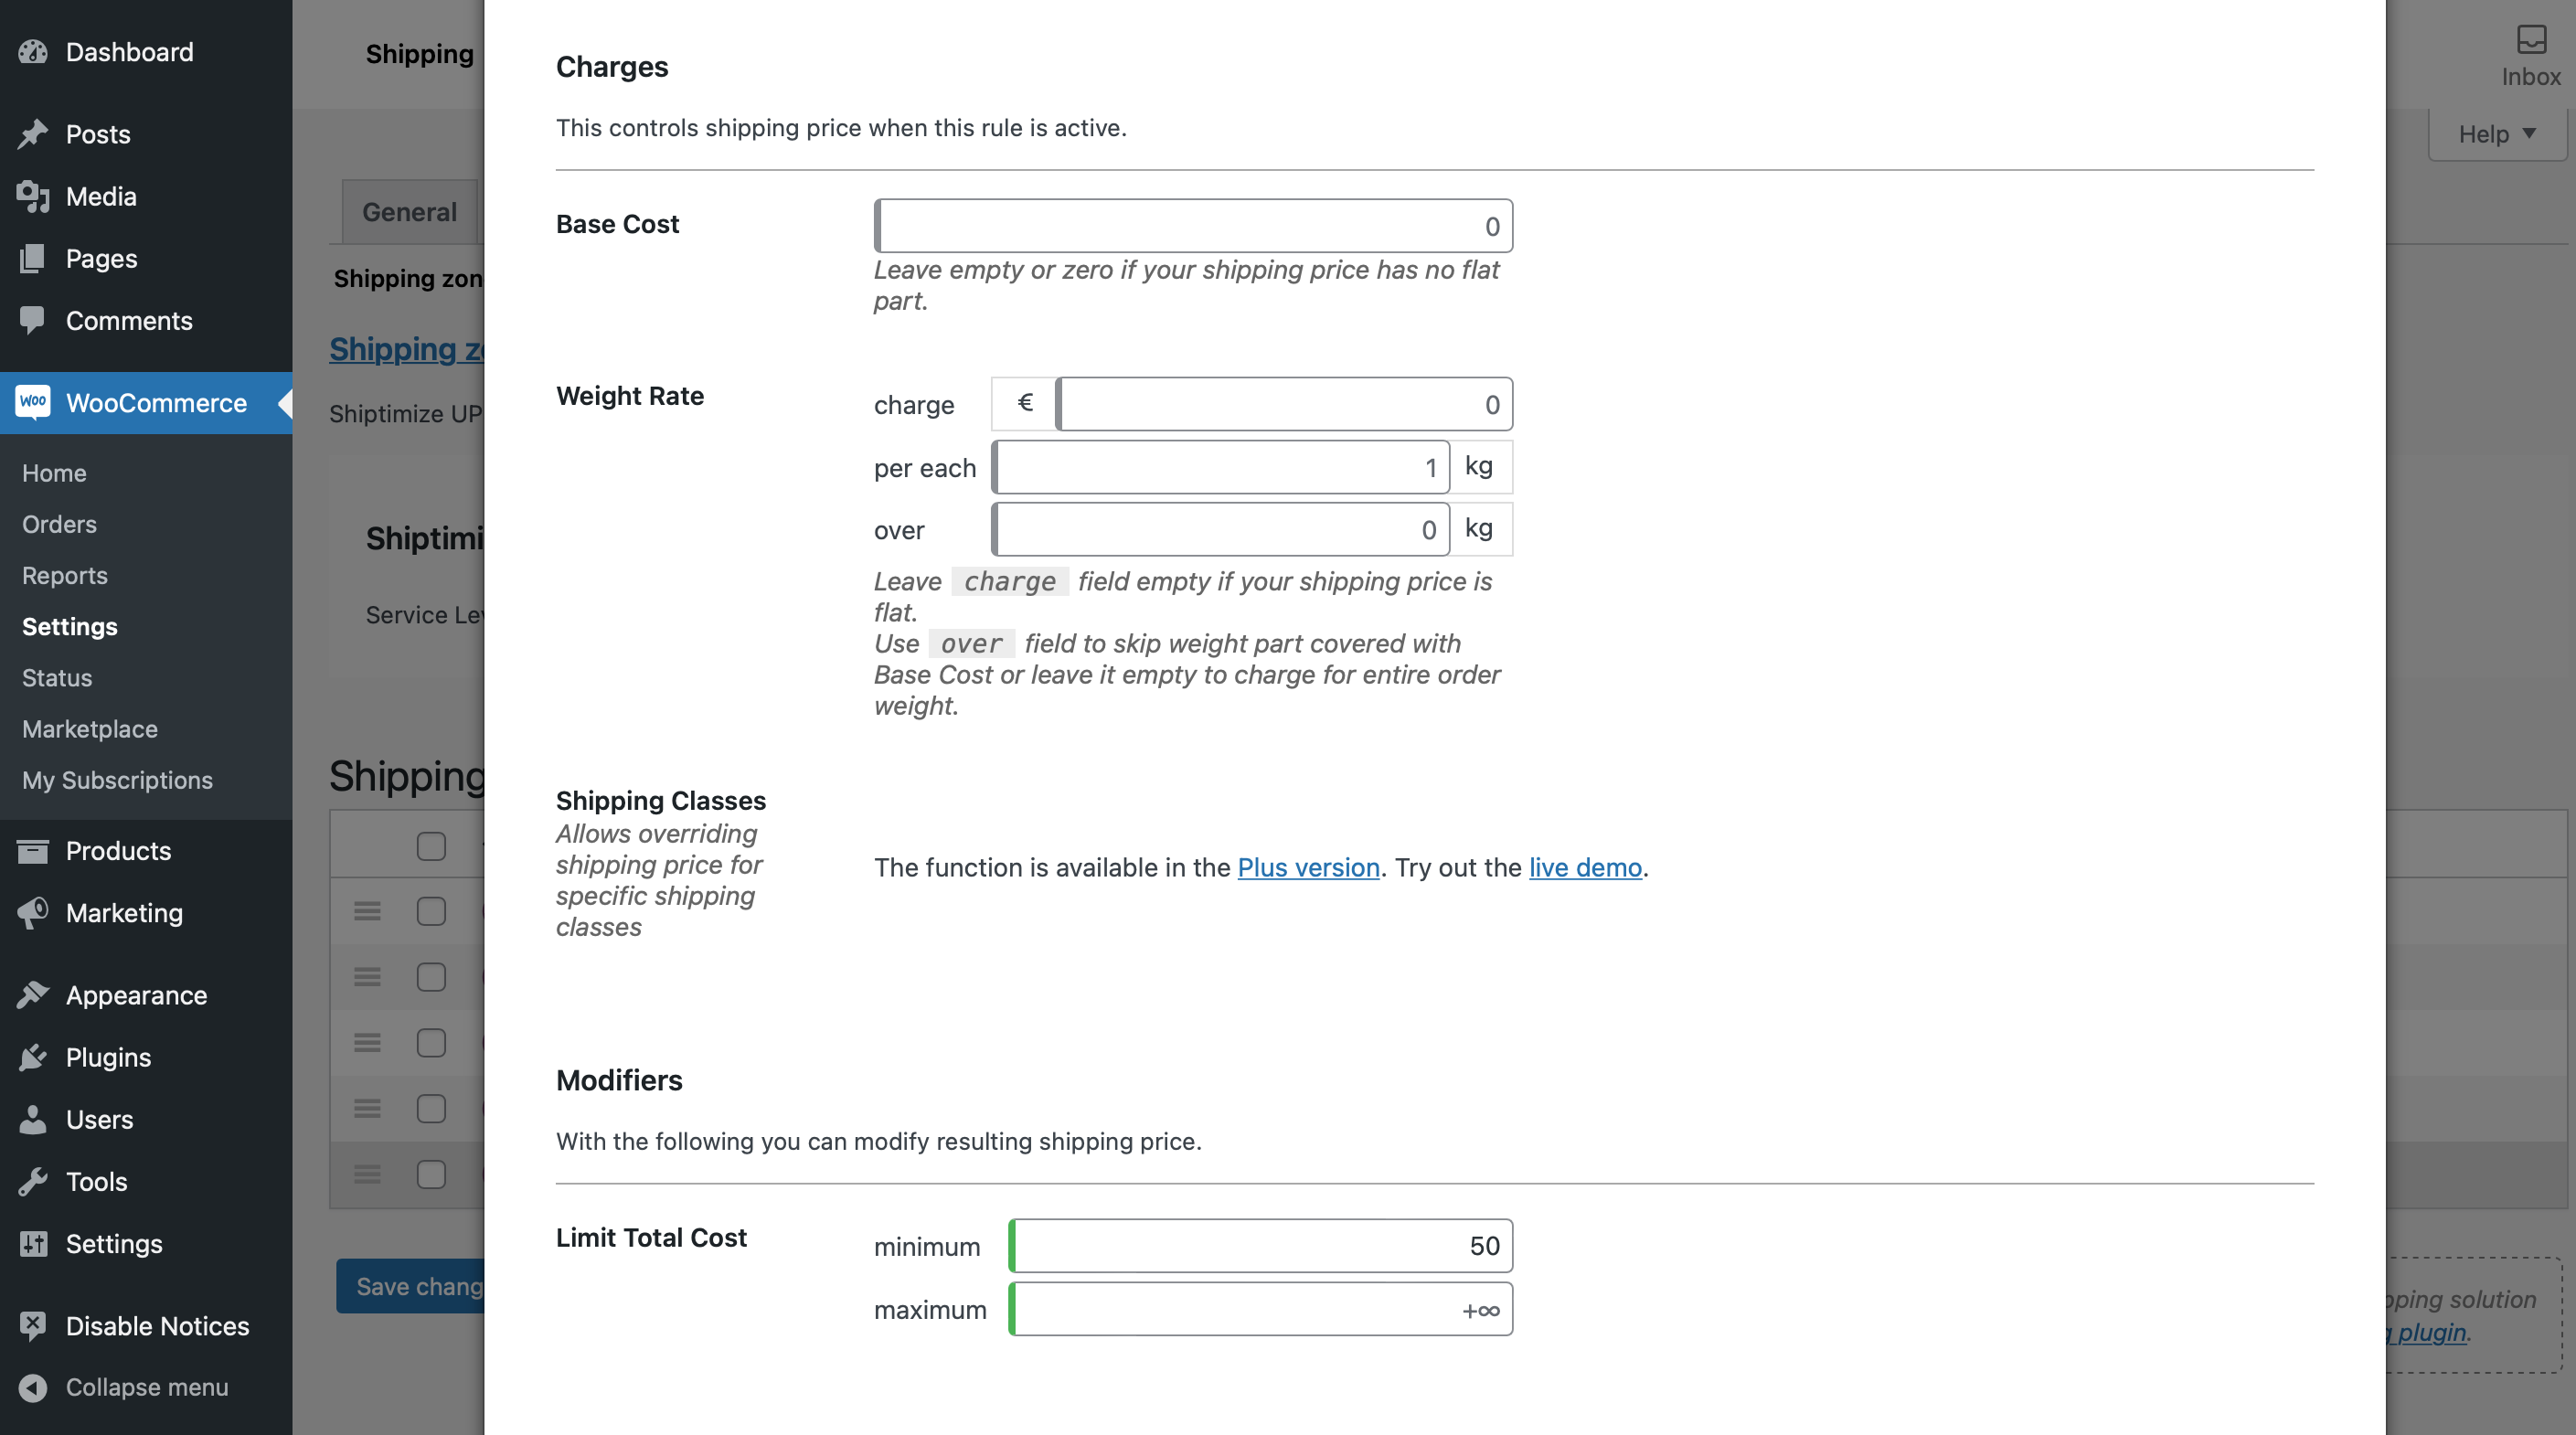
And free over 50€
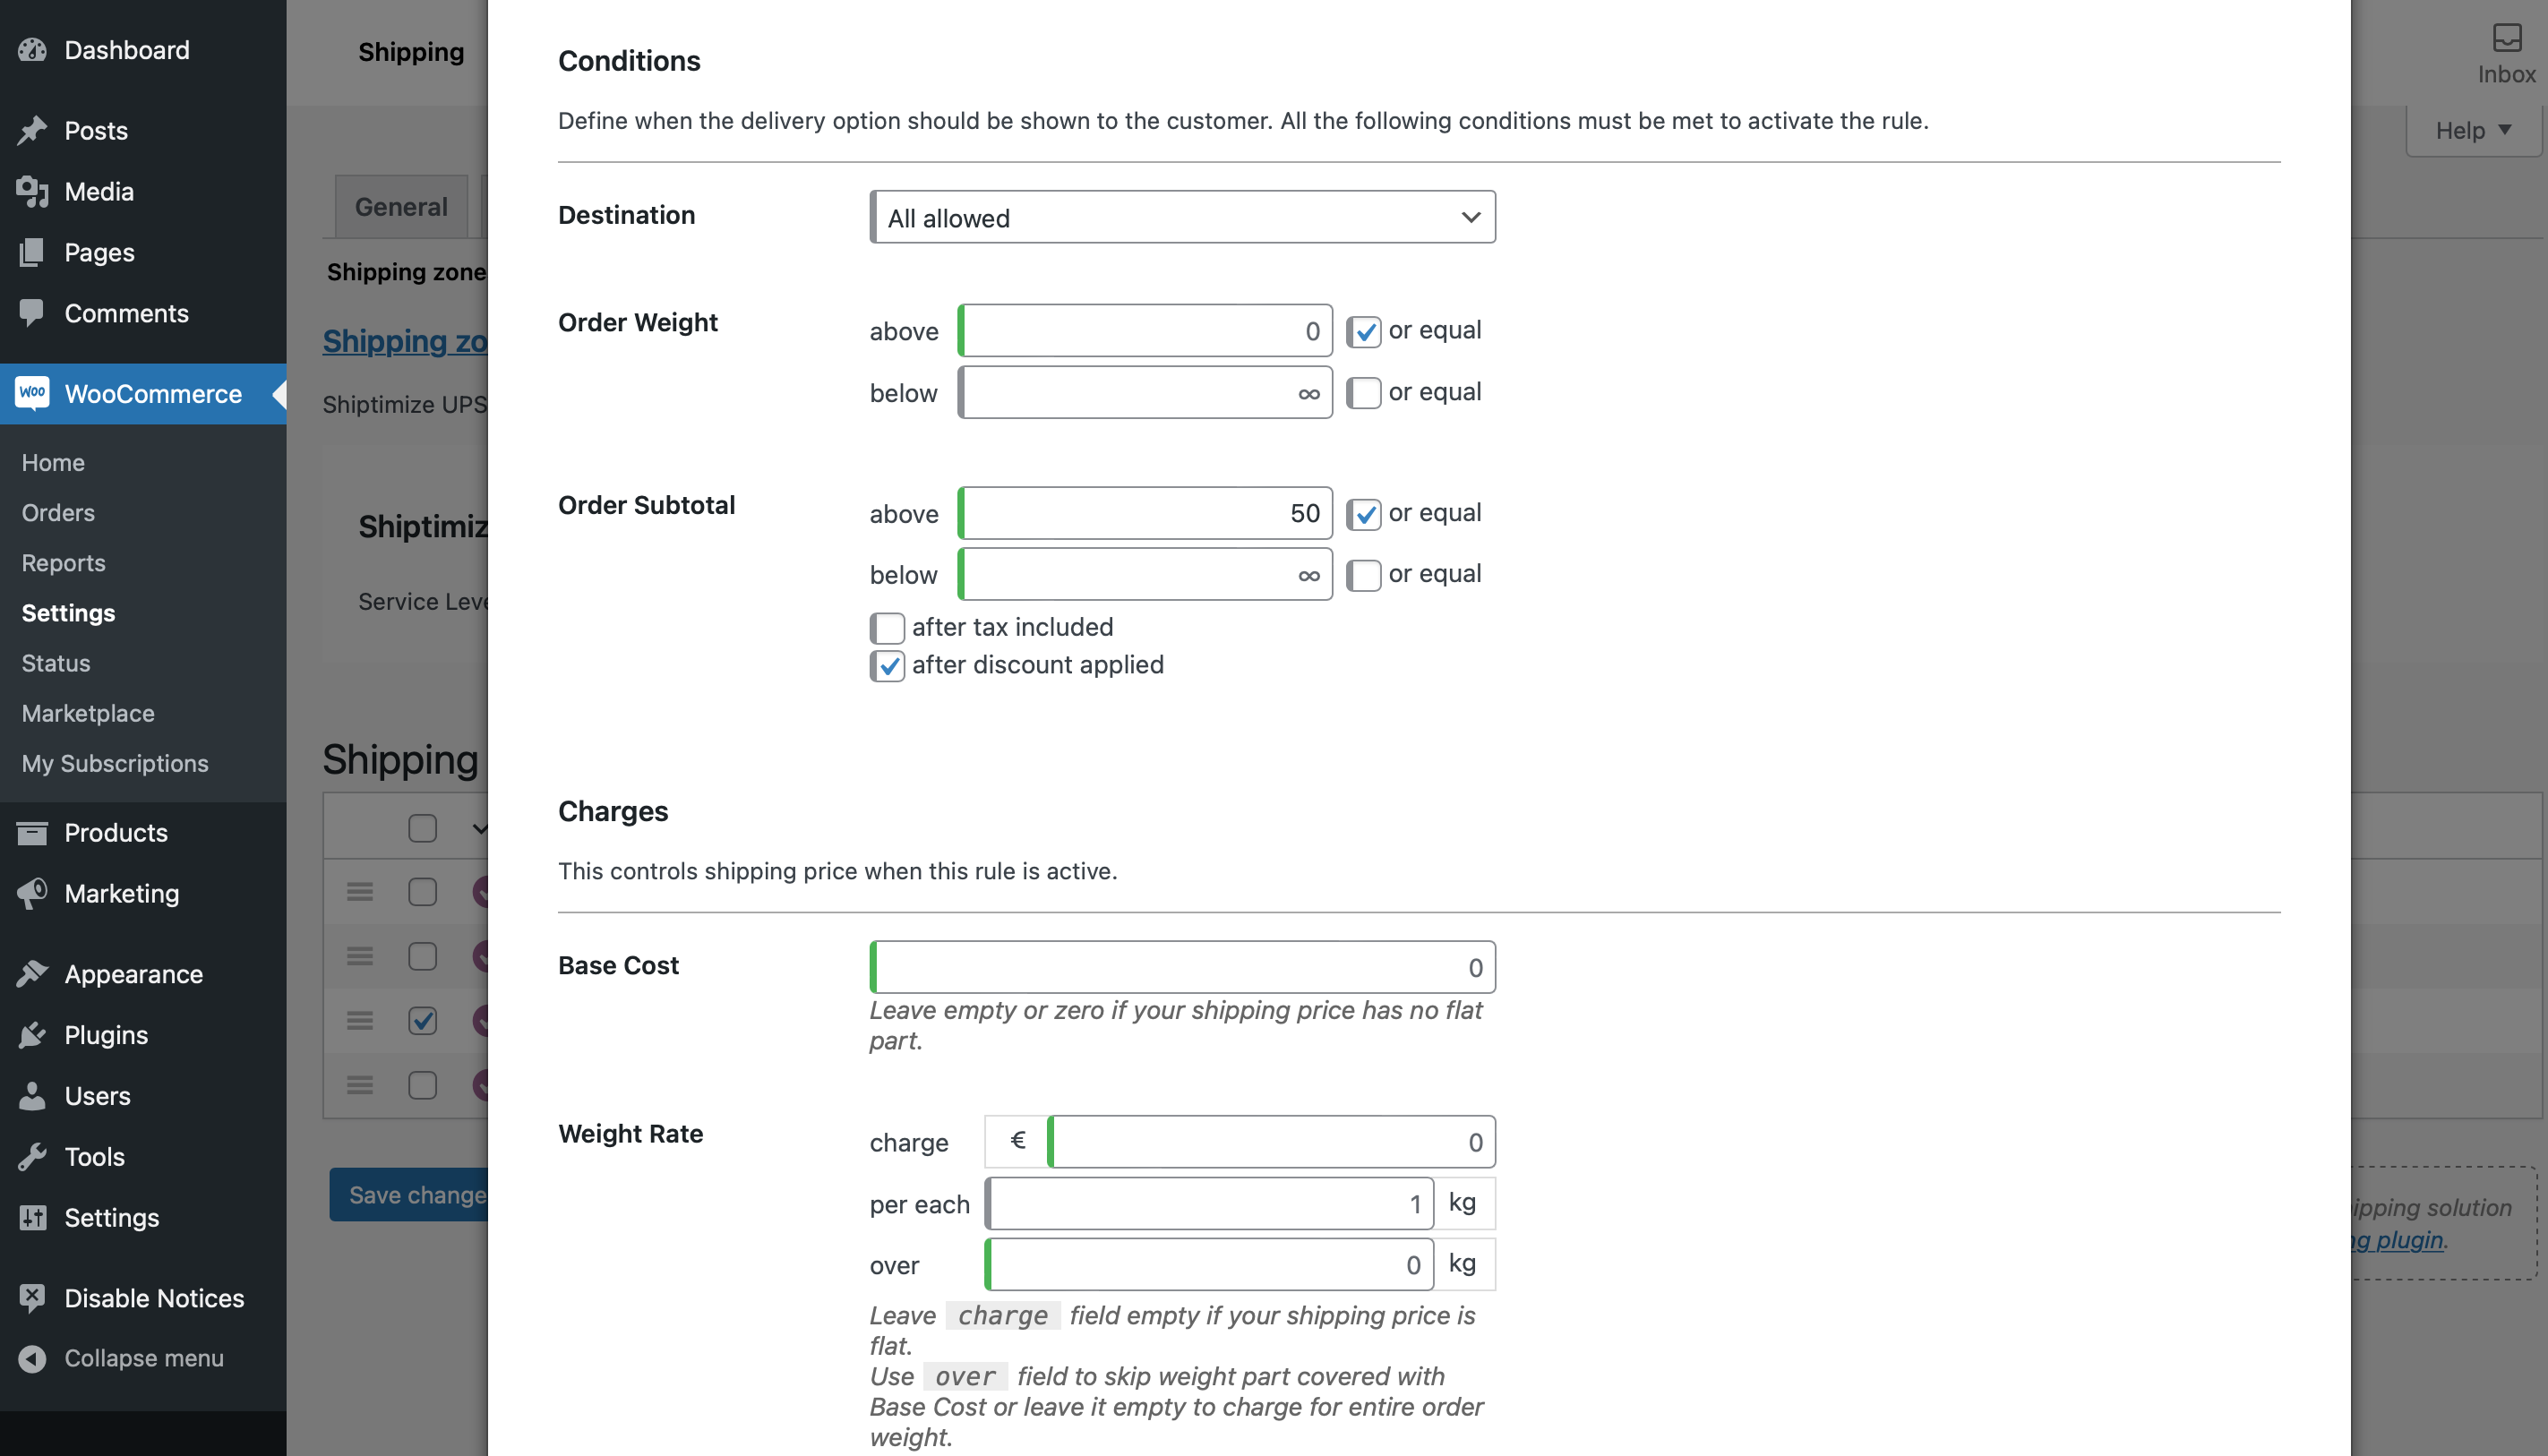
After creating the various intervals you should save the changes by clicking Save changes
In case you want to use both criteria simultaneously, for example, fractionate according to the weight of the shipment, but if the total value of the shopping cart exceeds 50€ the shipping costs are free you must put price limit in all rules created with weights. In the example we use the range of 0 to 2.5kg with the value of 10€…
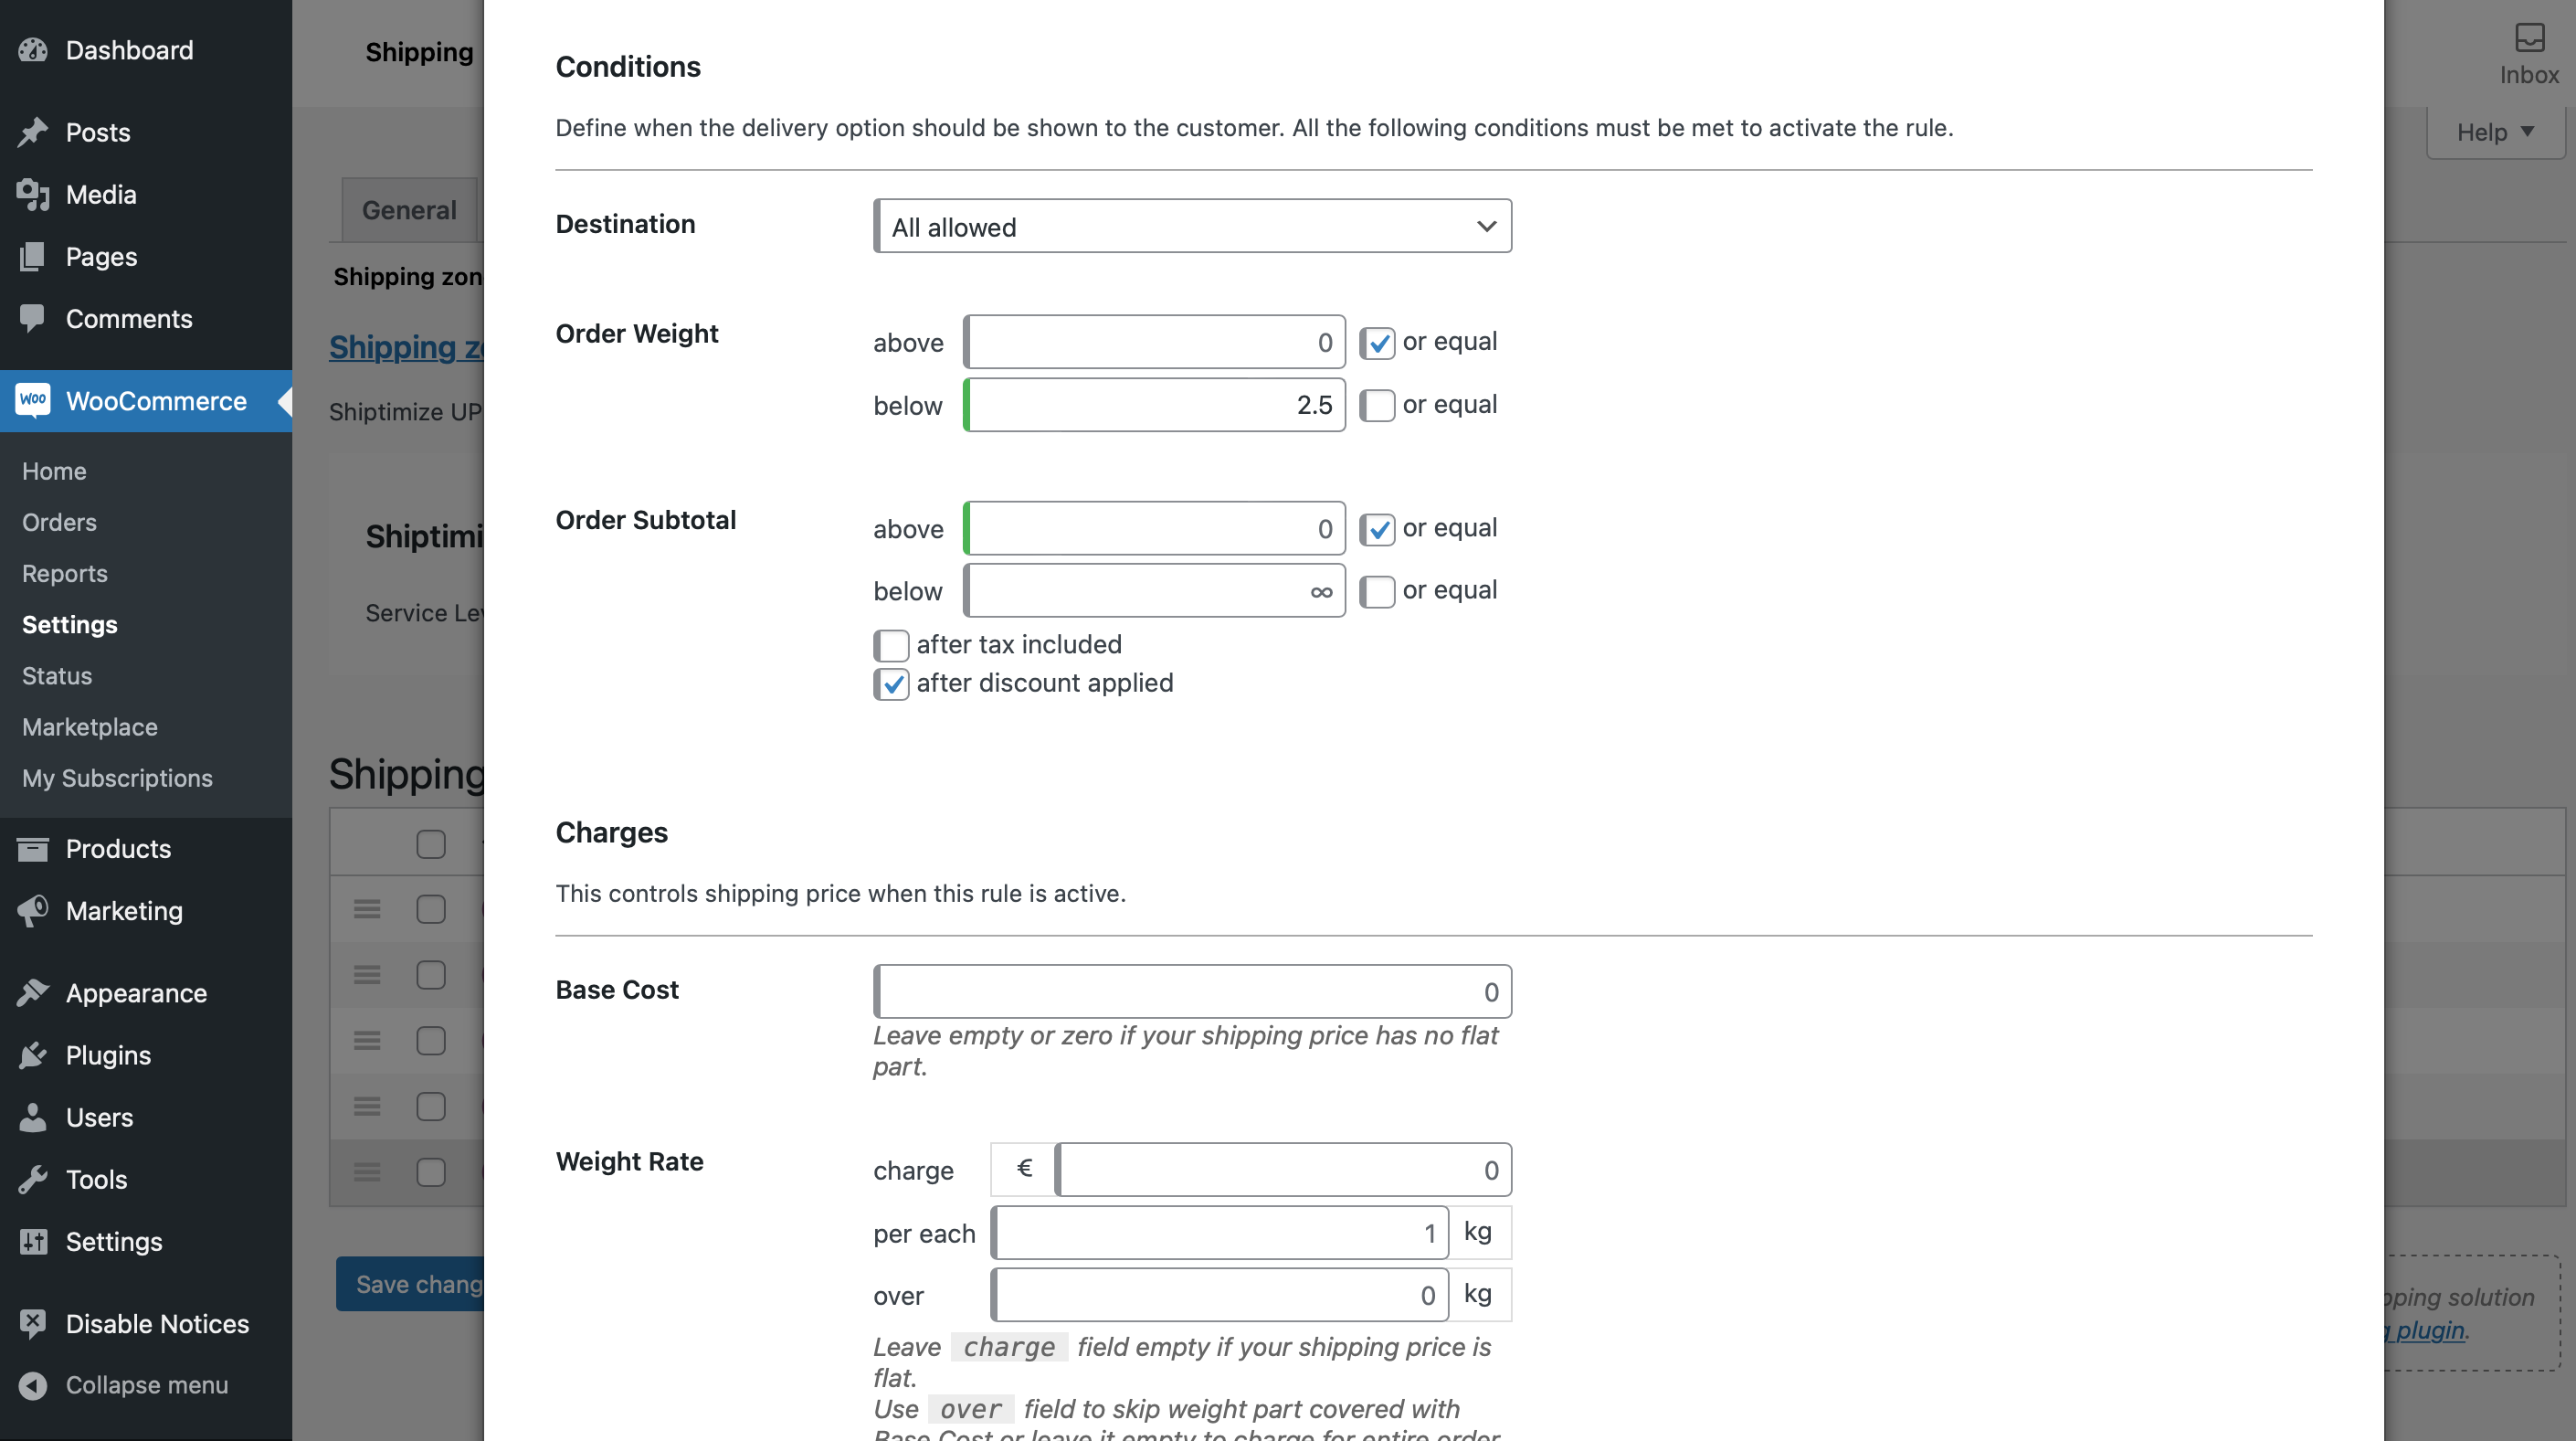
To add the application limit condition if the total value of the shopping cart is more than 50€ through the fields Limit Total Cost Minimum and Maximum
In addition to the weight ranges we have added a price range of over 50€ with a price equal to zero or free (0).

And limited to the range above 50€ of shopping cart total
The result of these intervals should be as shown in the example
The customer at the check-out of your shop will find the shipping method created:
In the address you will find the state/district selection and the name of the shipping method created and its value

The option to choose the pick-up point instead of the home address
How to export Woocommerce shipments
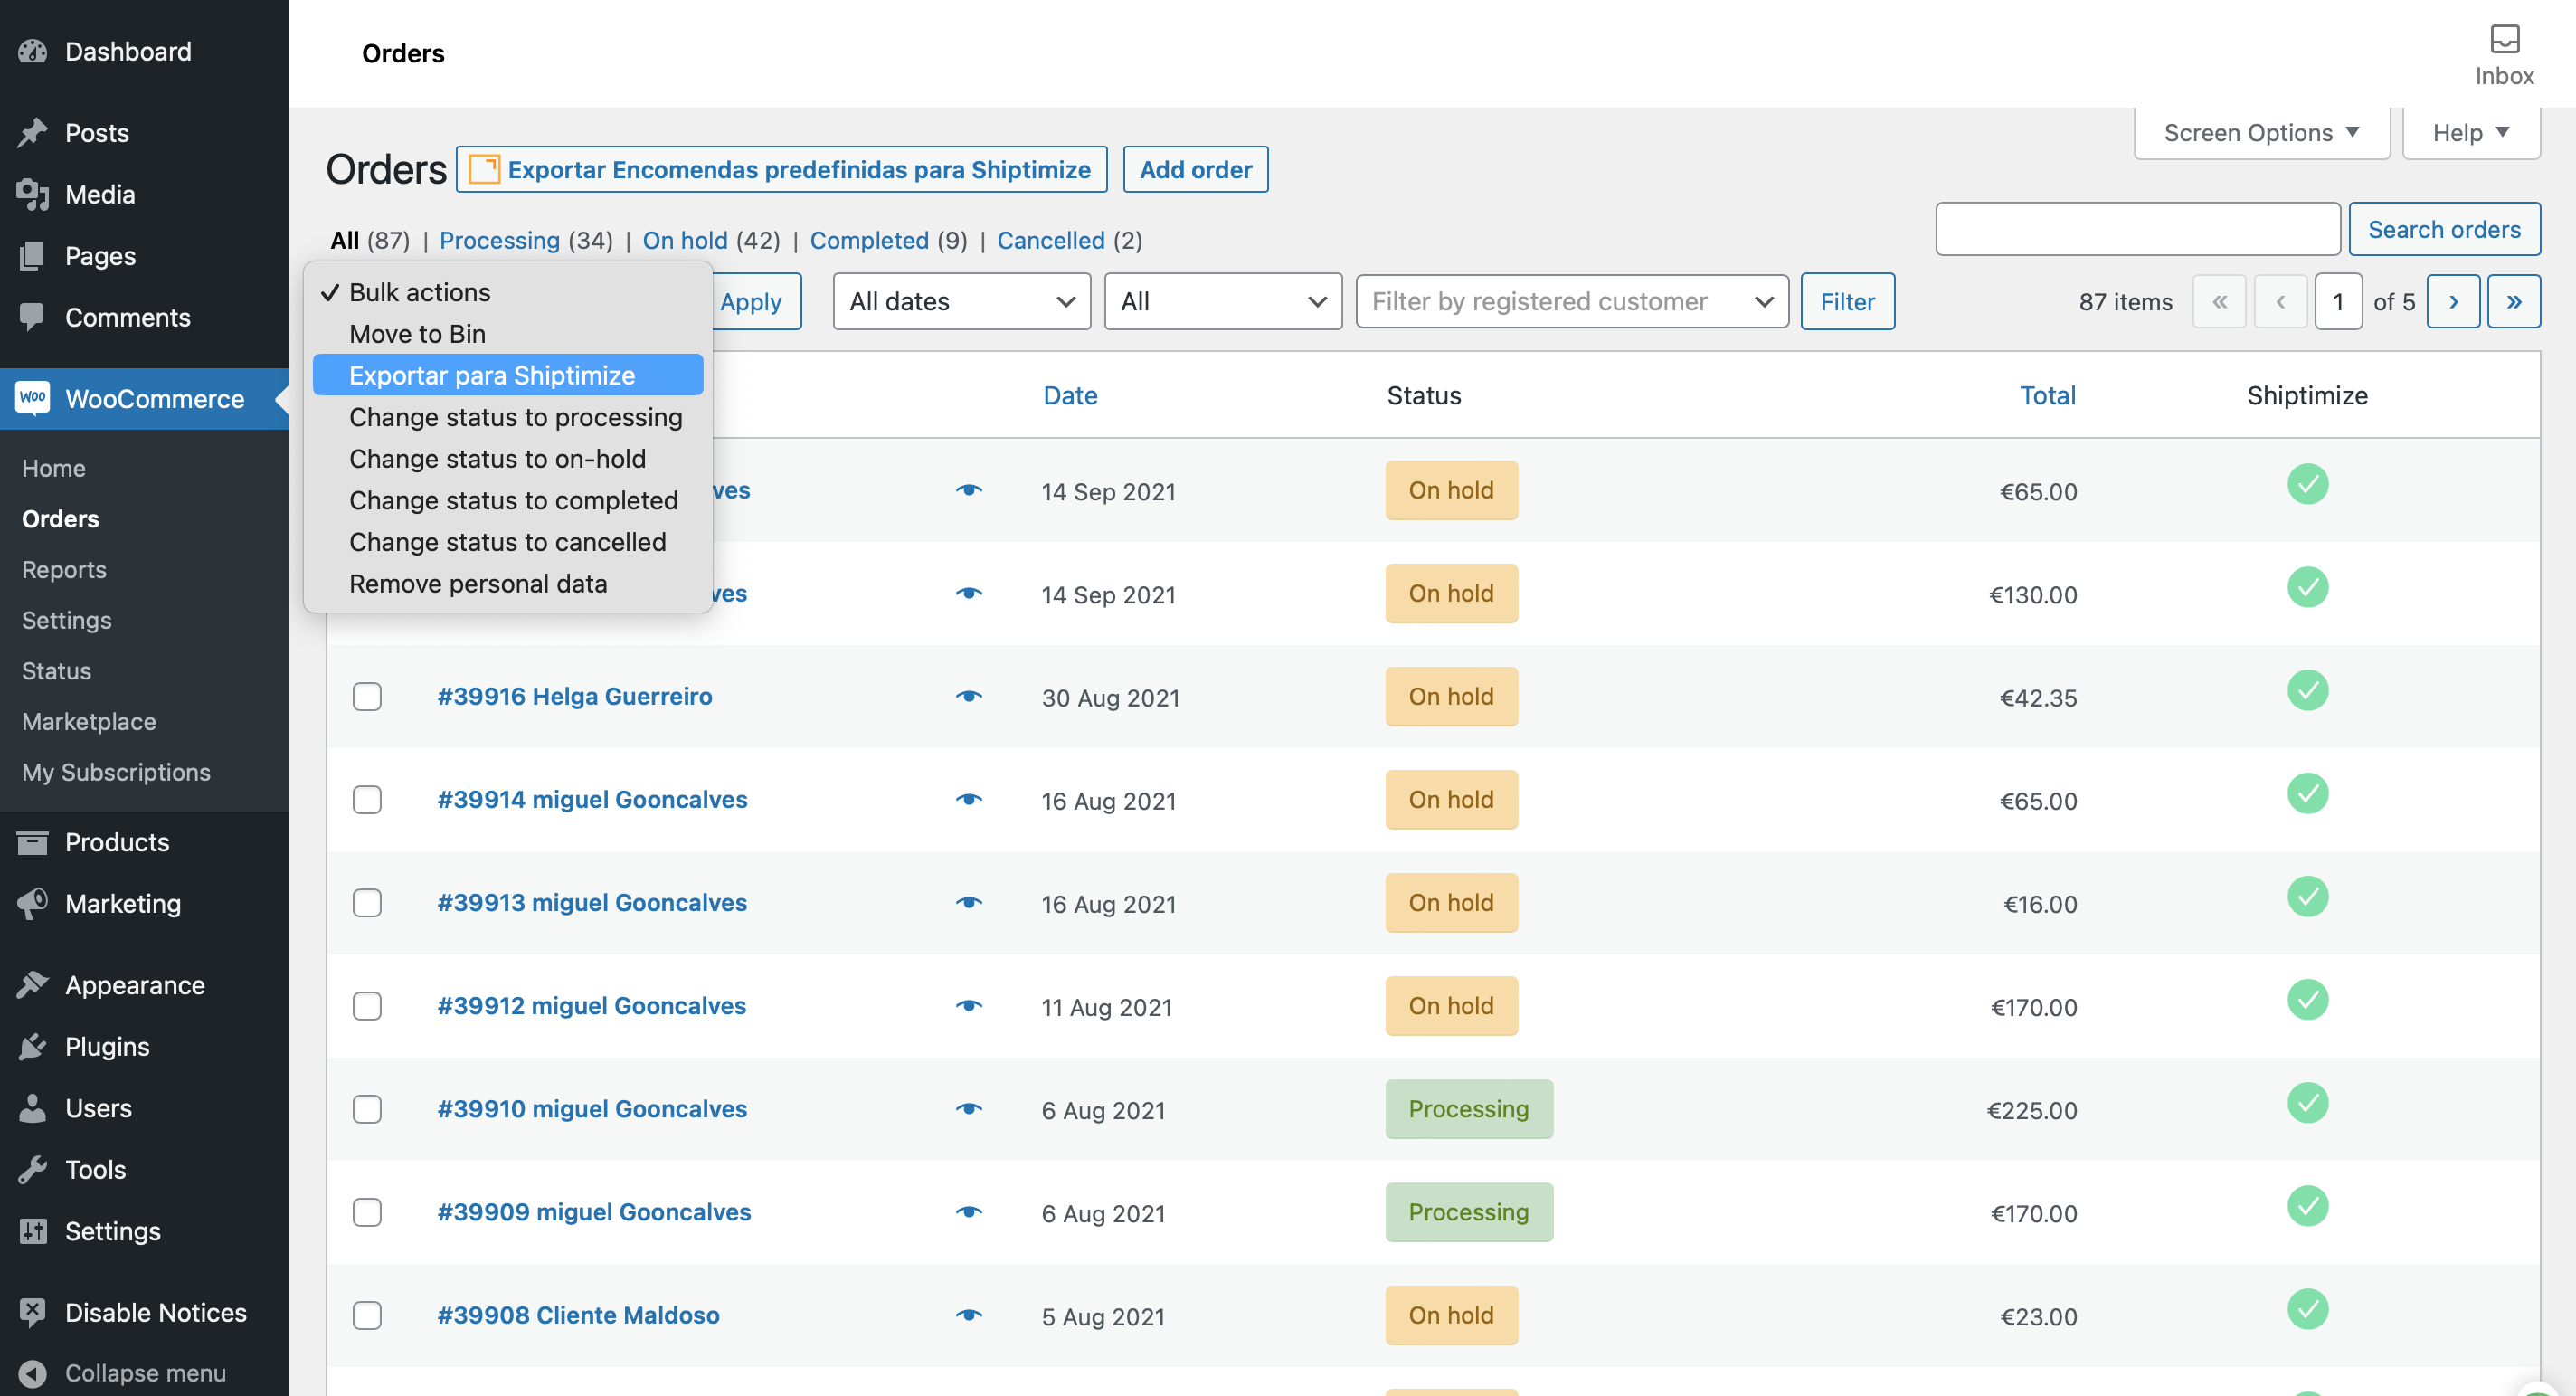
After installing the Shiptimize plugin in your Woocommerce shop you will find new items in your back ofice. Going to Orders, you will find the Shiptimize export button at the top of the page and on the right side the Shiptimize column, as well as the Export to Shiptimize option in the action button.
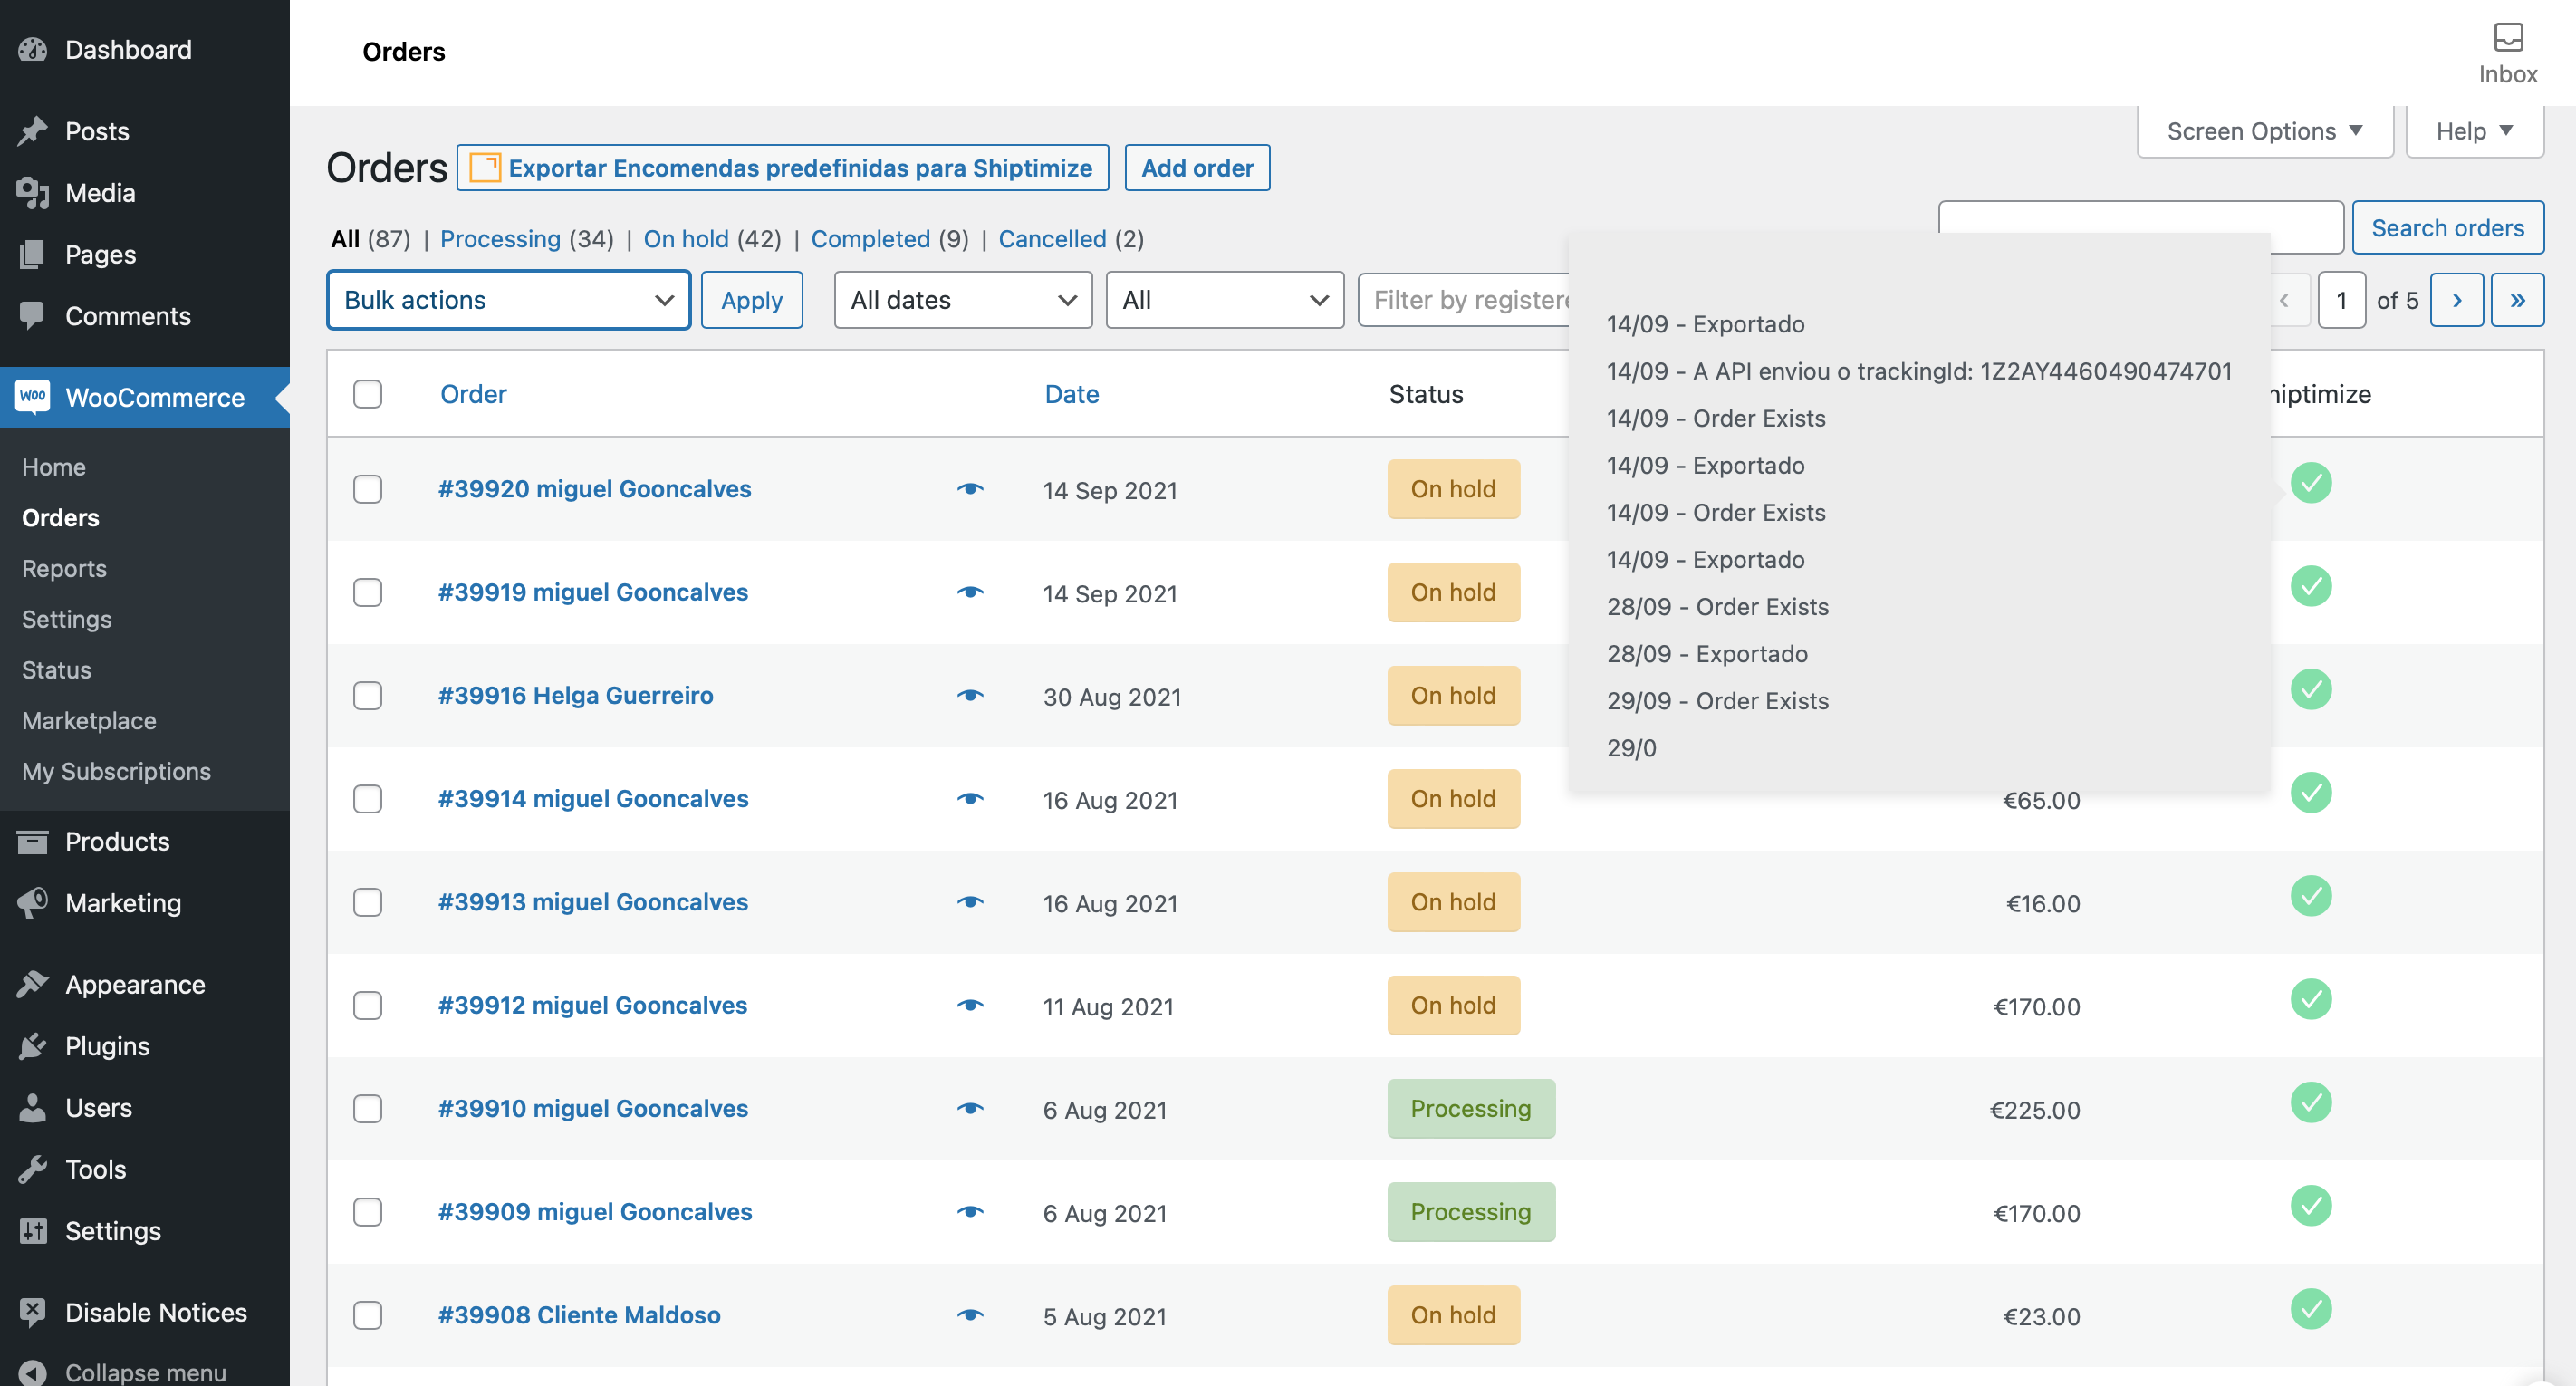
The Shiptimize column will show the shipping history and a coloured tick to indicate if there is a problem with the shipment, either at export or transit level.
To export shipments to the Shiptimize platform there are 3 options:
- Automatically: As soon as the shipment reaches the predefined state it is exported to the Shiptimize platform. No manual action is required for the export.
- Shiptimize Export Button: By clicking this button all shipments that are in the predefined state and have never been exported before will be sent to the Shiptimize platform. One Click is enough.
- Action button menu: After selecting the dispatches you wish to export to the platform, access the action button and click on export to Shiptimize. You can re-export the same shipment. Useful when there are shipments that you do not want to export to the Shiptimize platform such as with in-store pickup. You need more selection.
Exported shipments are available on the Shiptimize platform in the Shipping menu, Entered section.