Shopify quick guide
Note: Due to changes in the Shopify API, if you have a previous installation, you must delete it in Shopify and install the new plugin, placing the new keys and the associated token in the respective fields of Shiptimize.
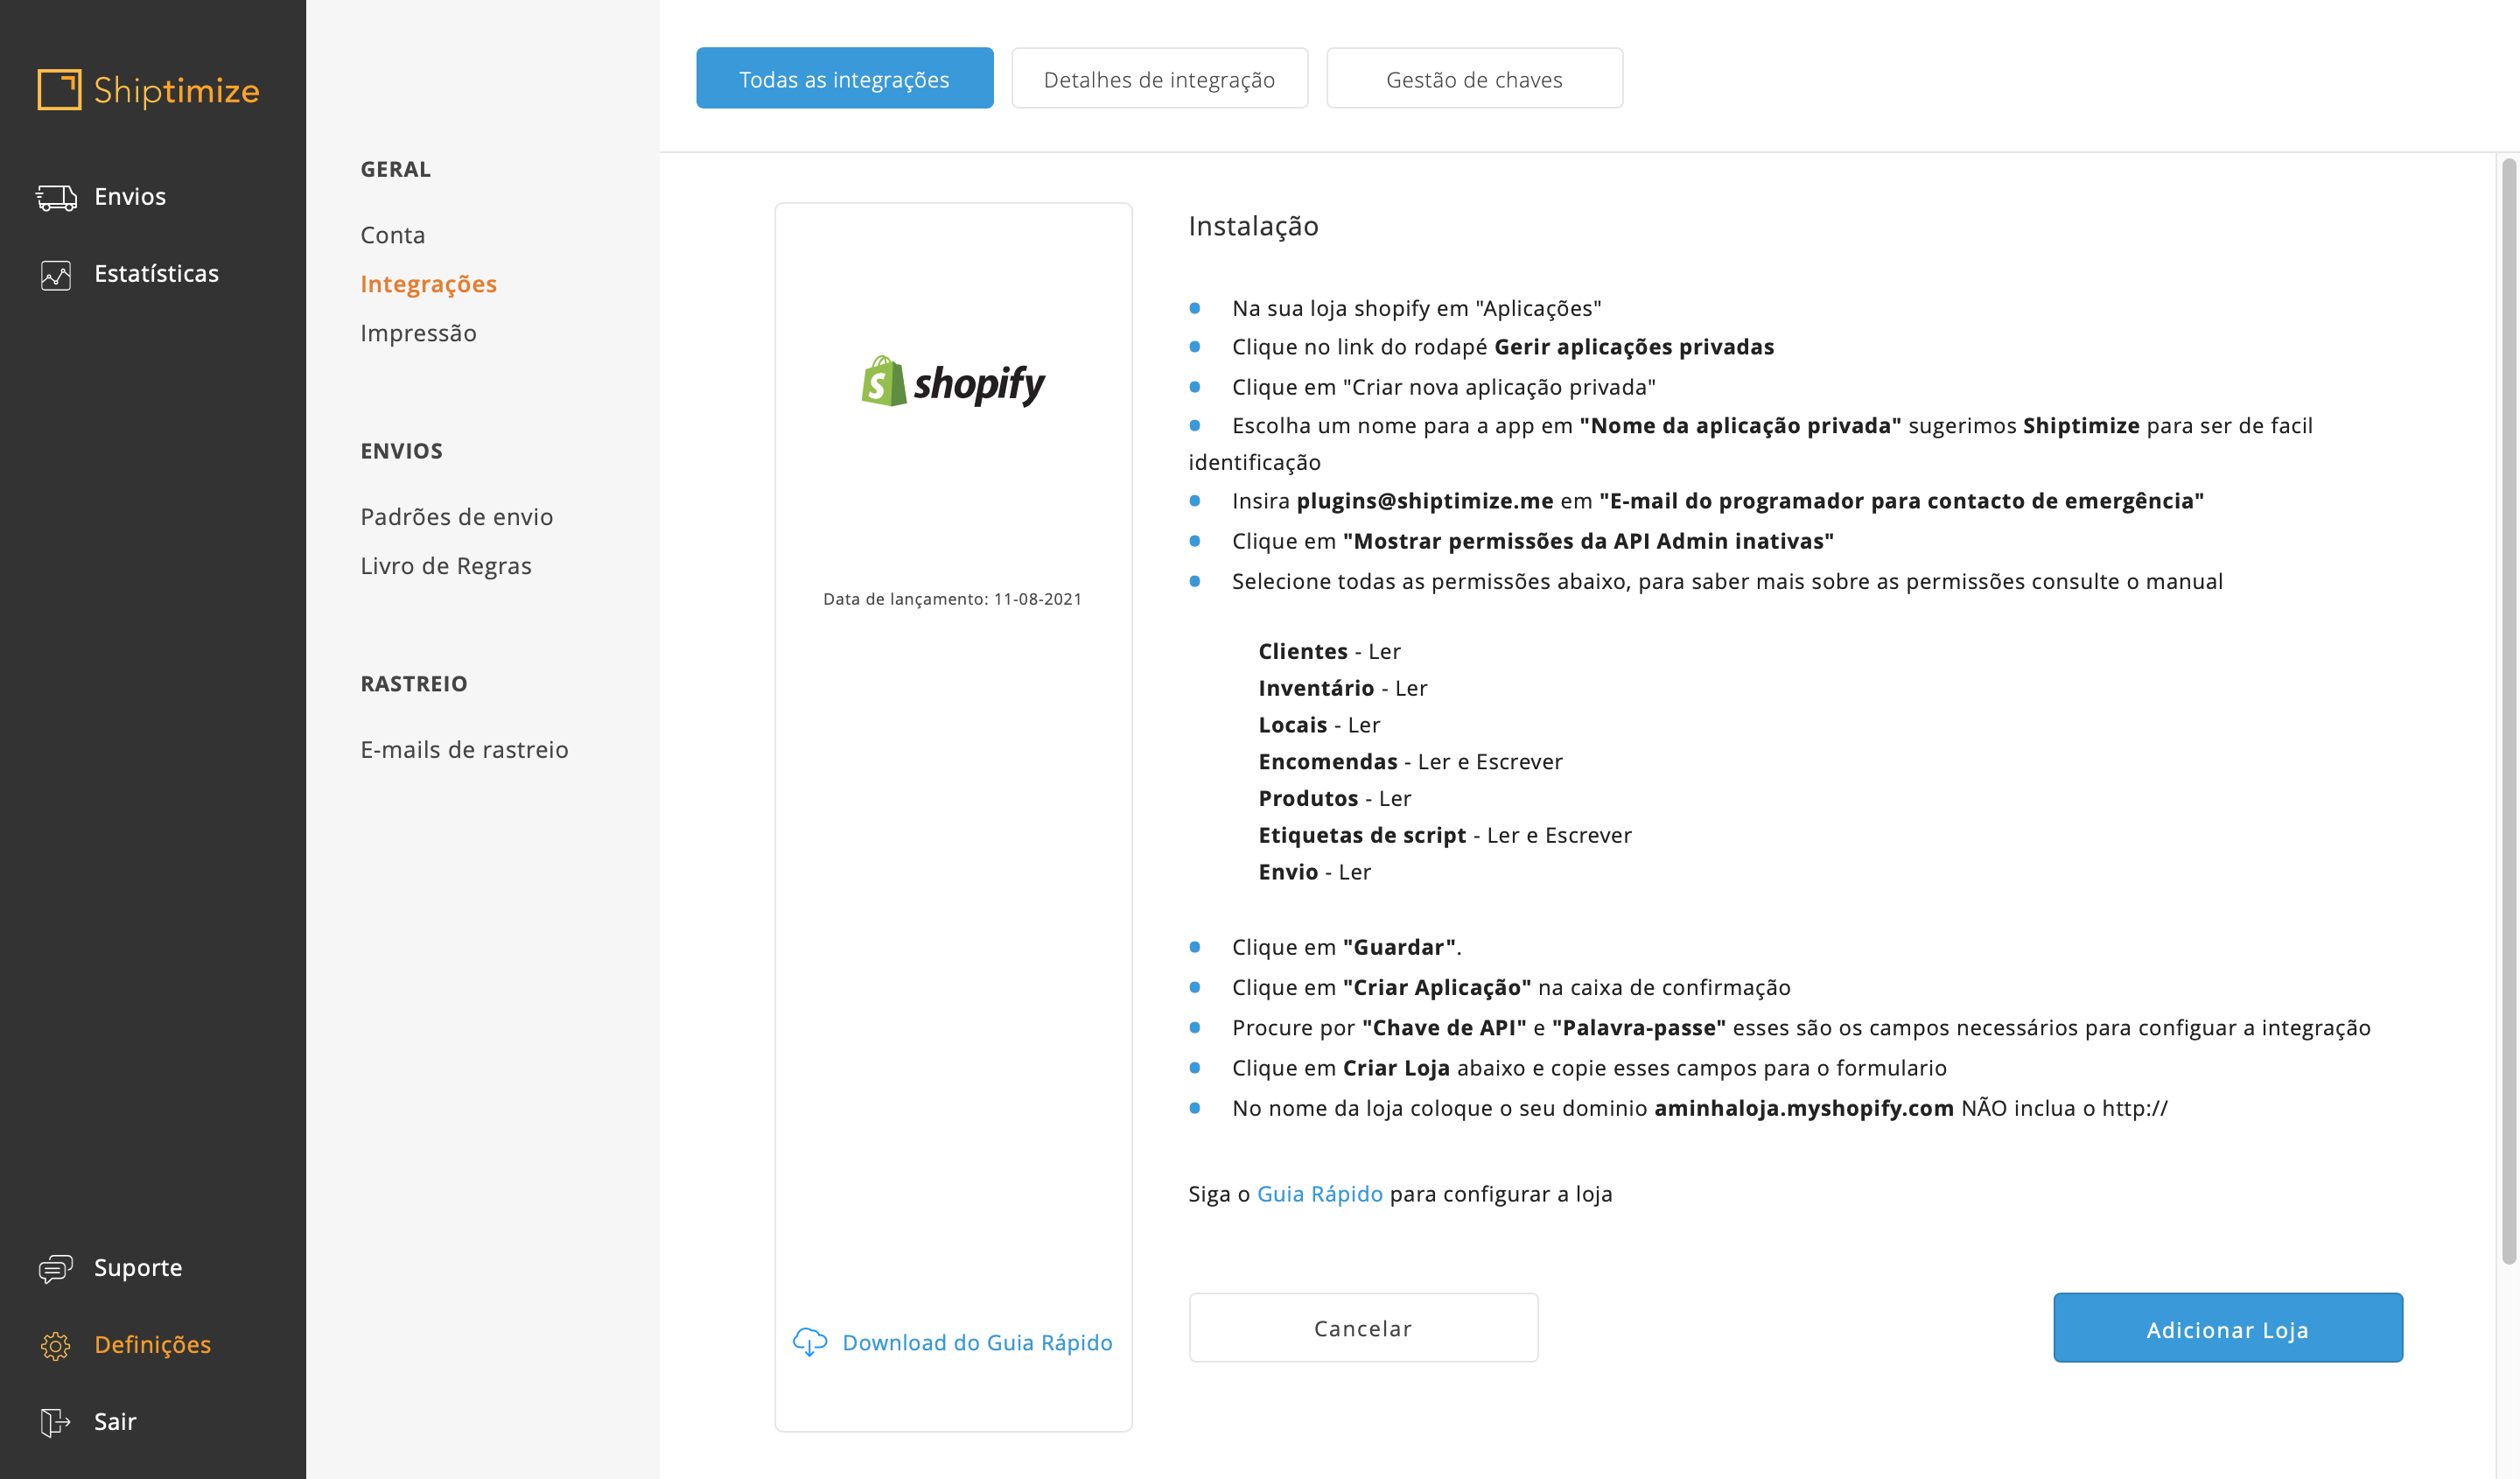
Installation
To proceed with the installation you must click on the “Settings” menu and then on “Applications and Channels”.
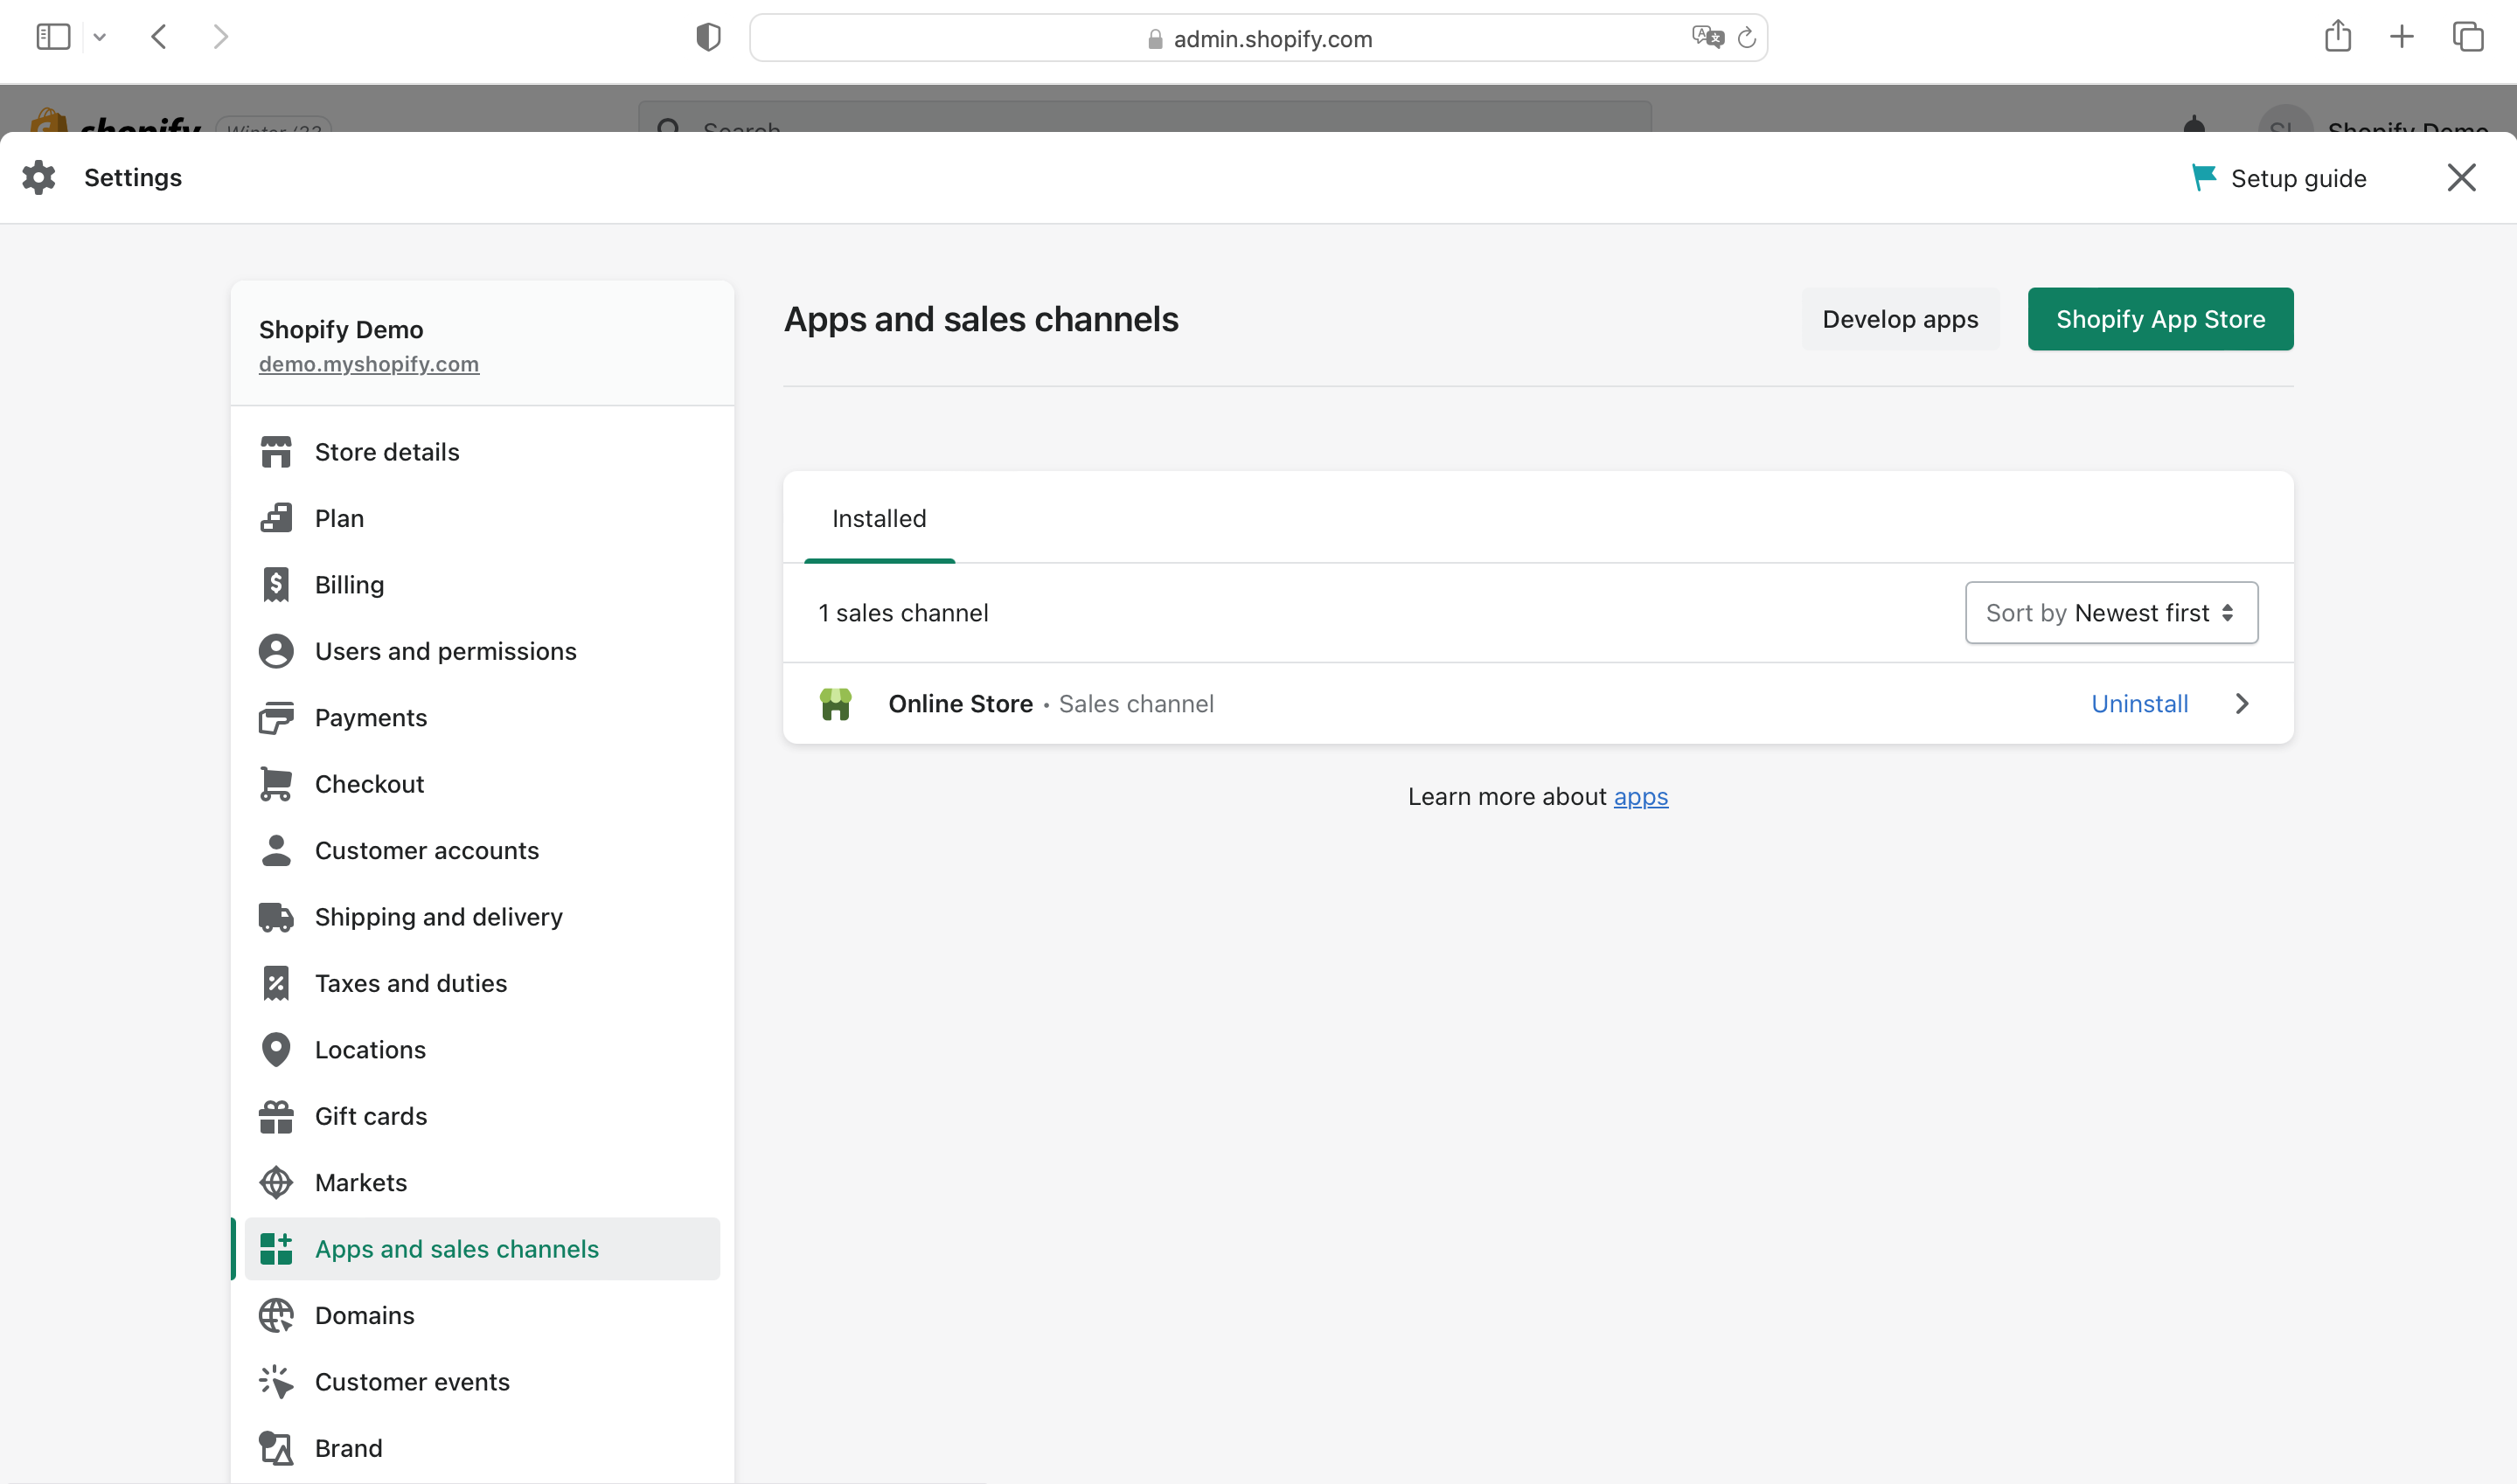
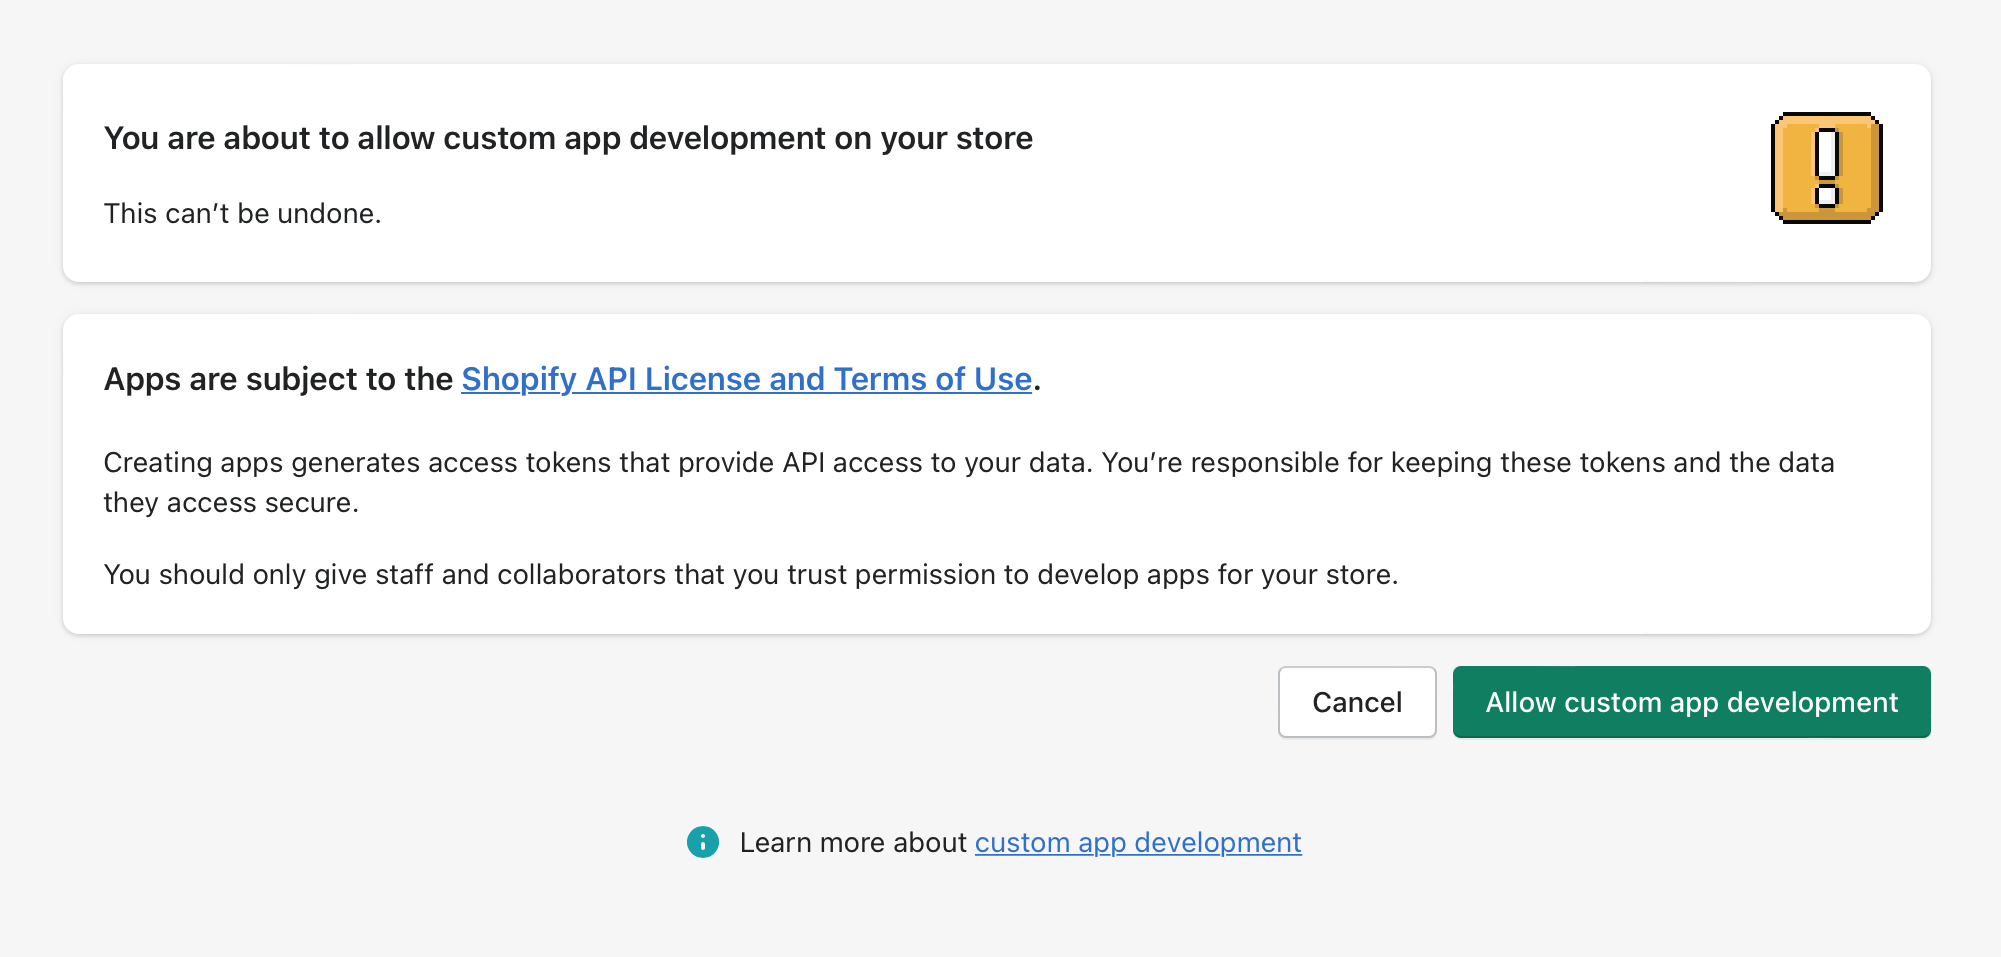
After clicking on the “Develop Apps for your Store” button, a screen will pop up with the question, allows the development of “Custom Apps”, where you should click on the button “Allow custom app development”.
This screen will appear only once and you must click again on “Allow custom app development”.
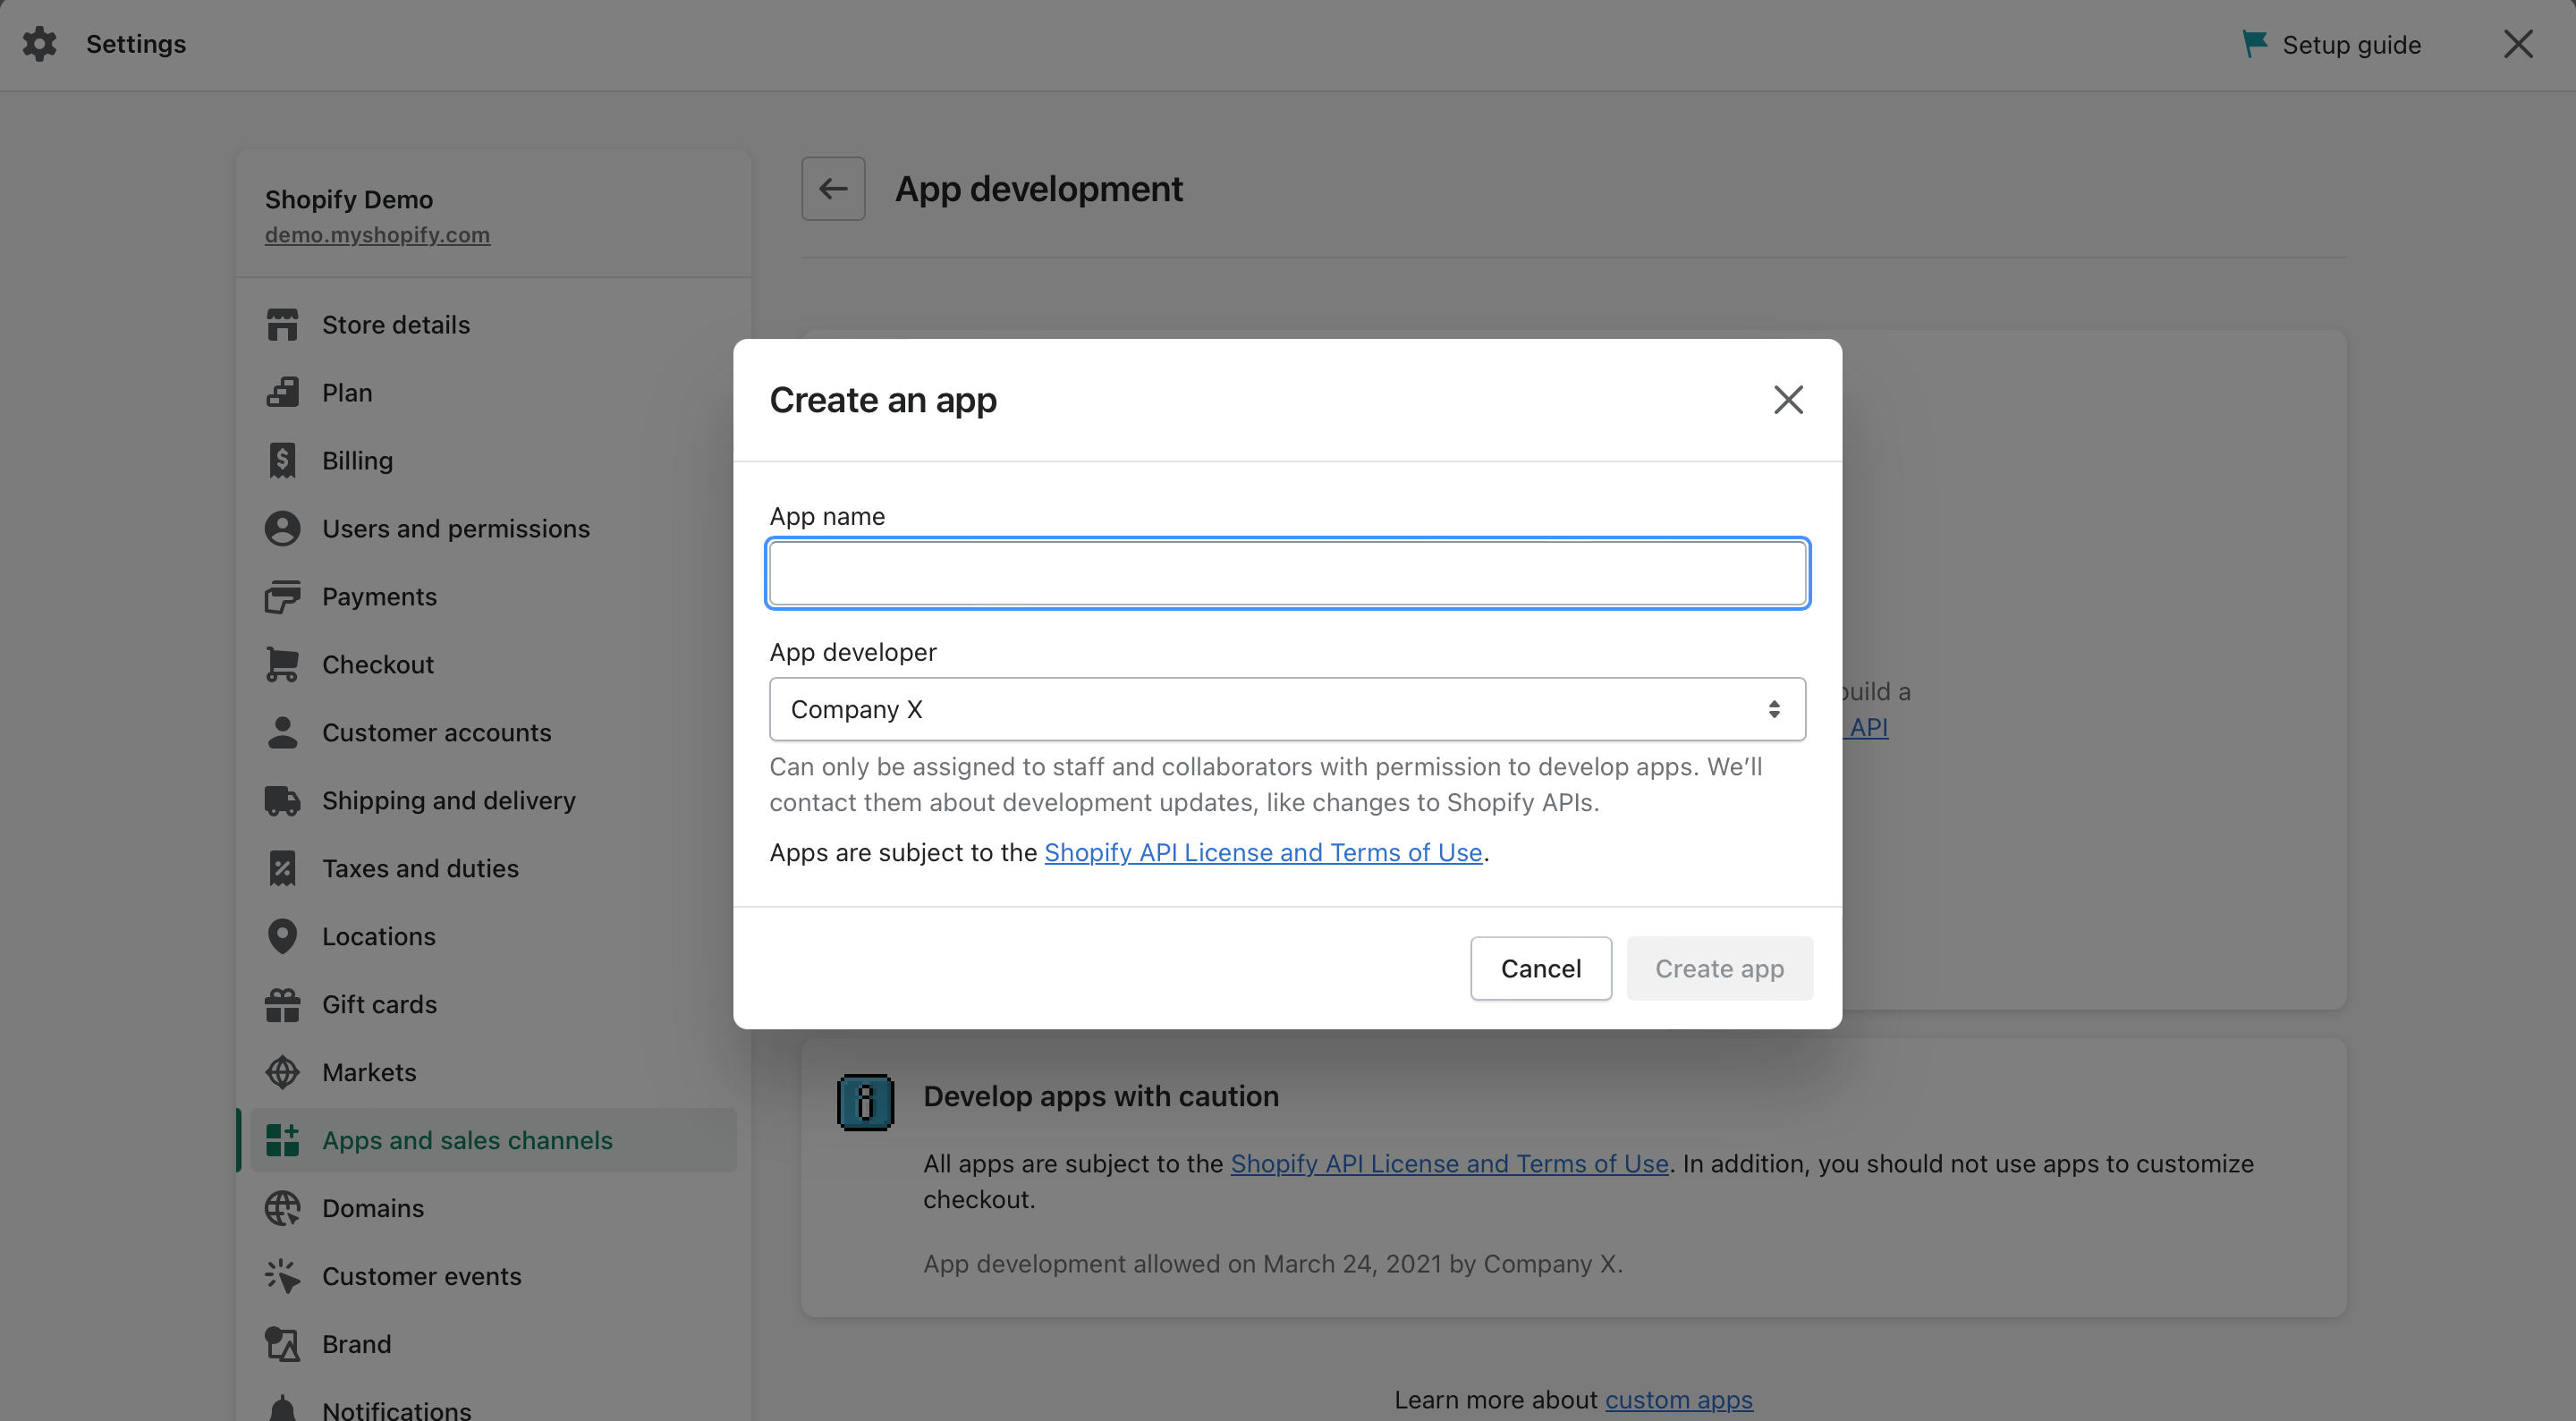
After the confirmation of creation, you should click on “Create an app”.
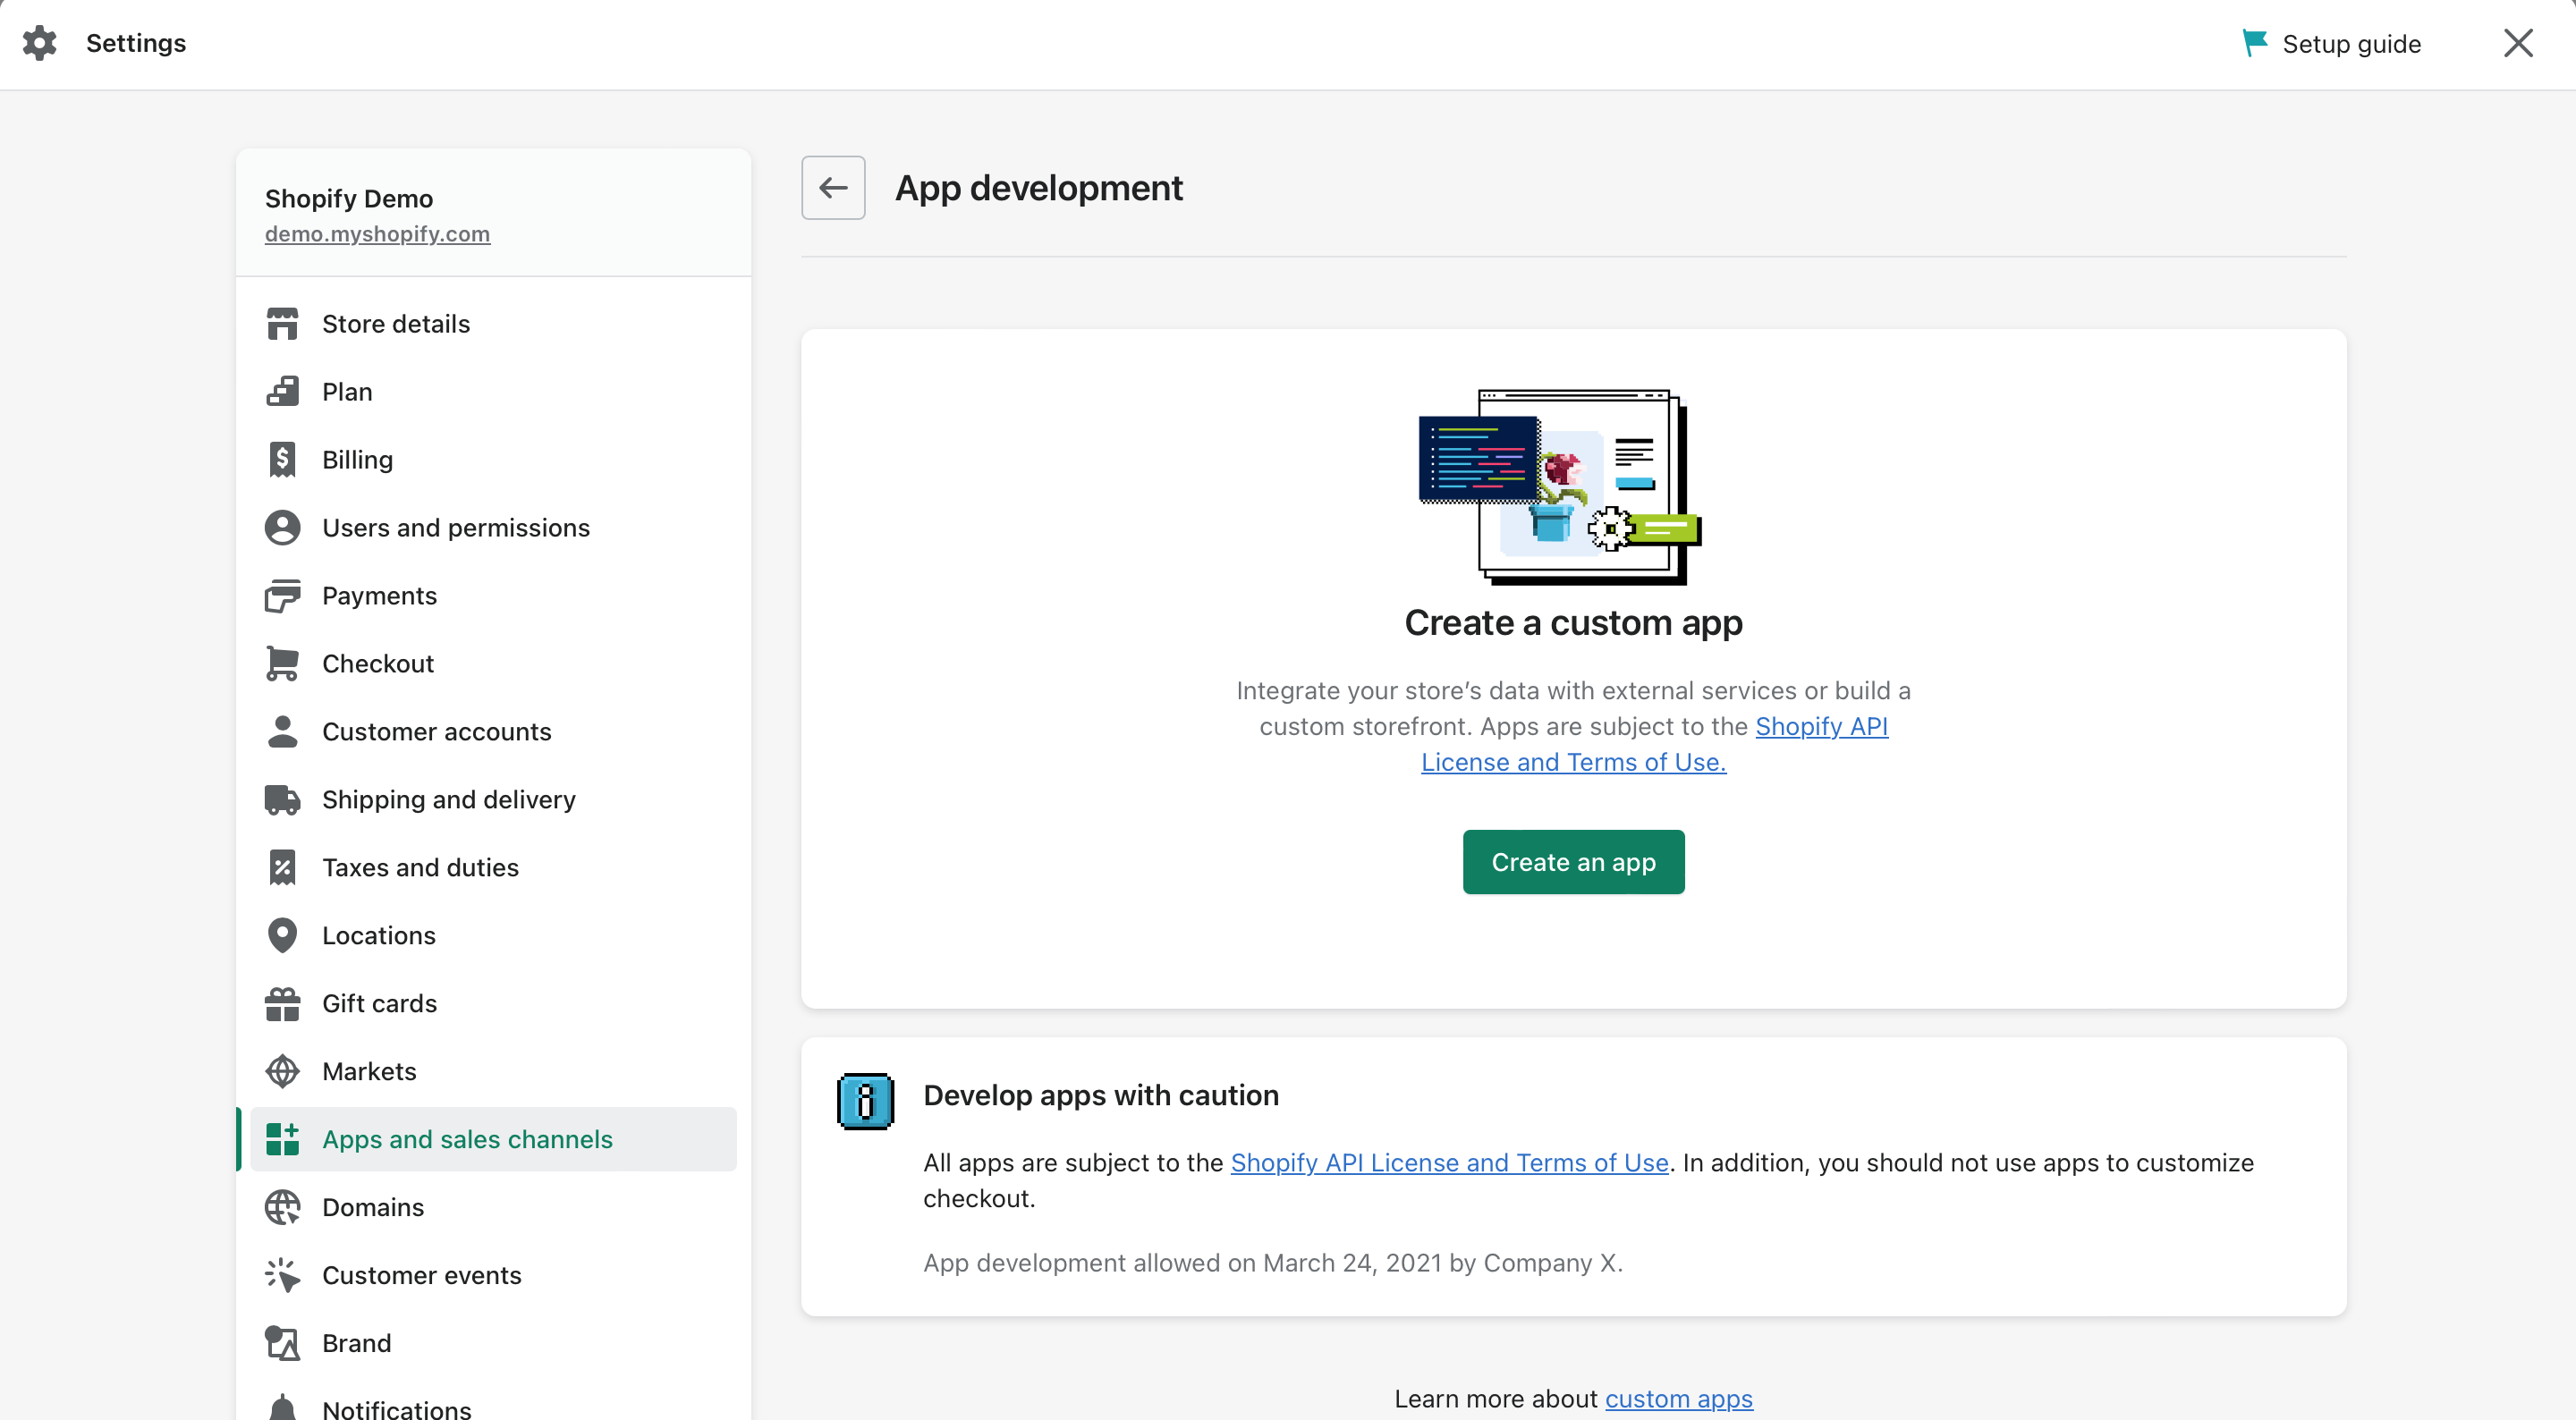
You must define the name of the application as “Shiptimize” and then in the “App developer” choose your user, or a shop administrator if you have one, and click on the “Create App” button
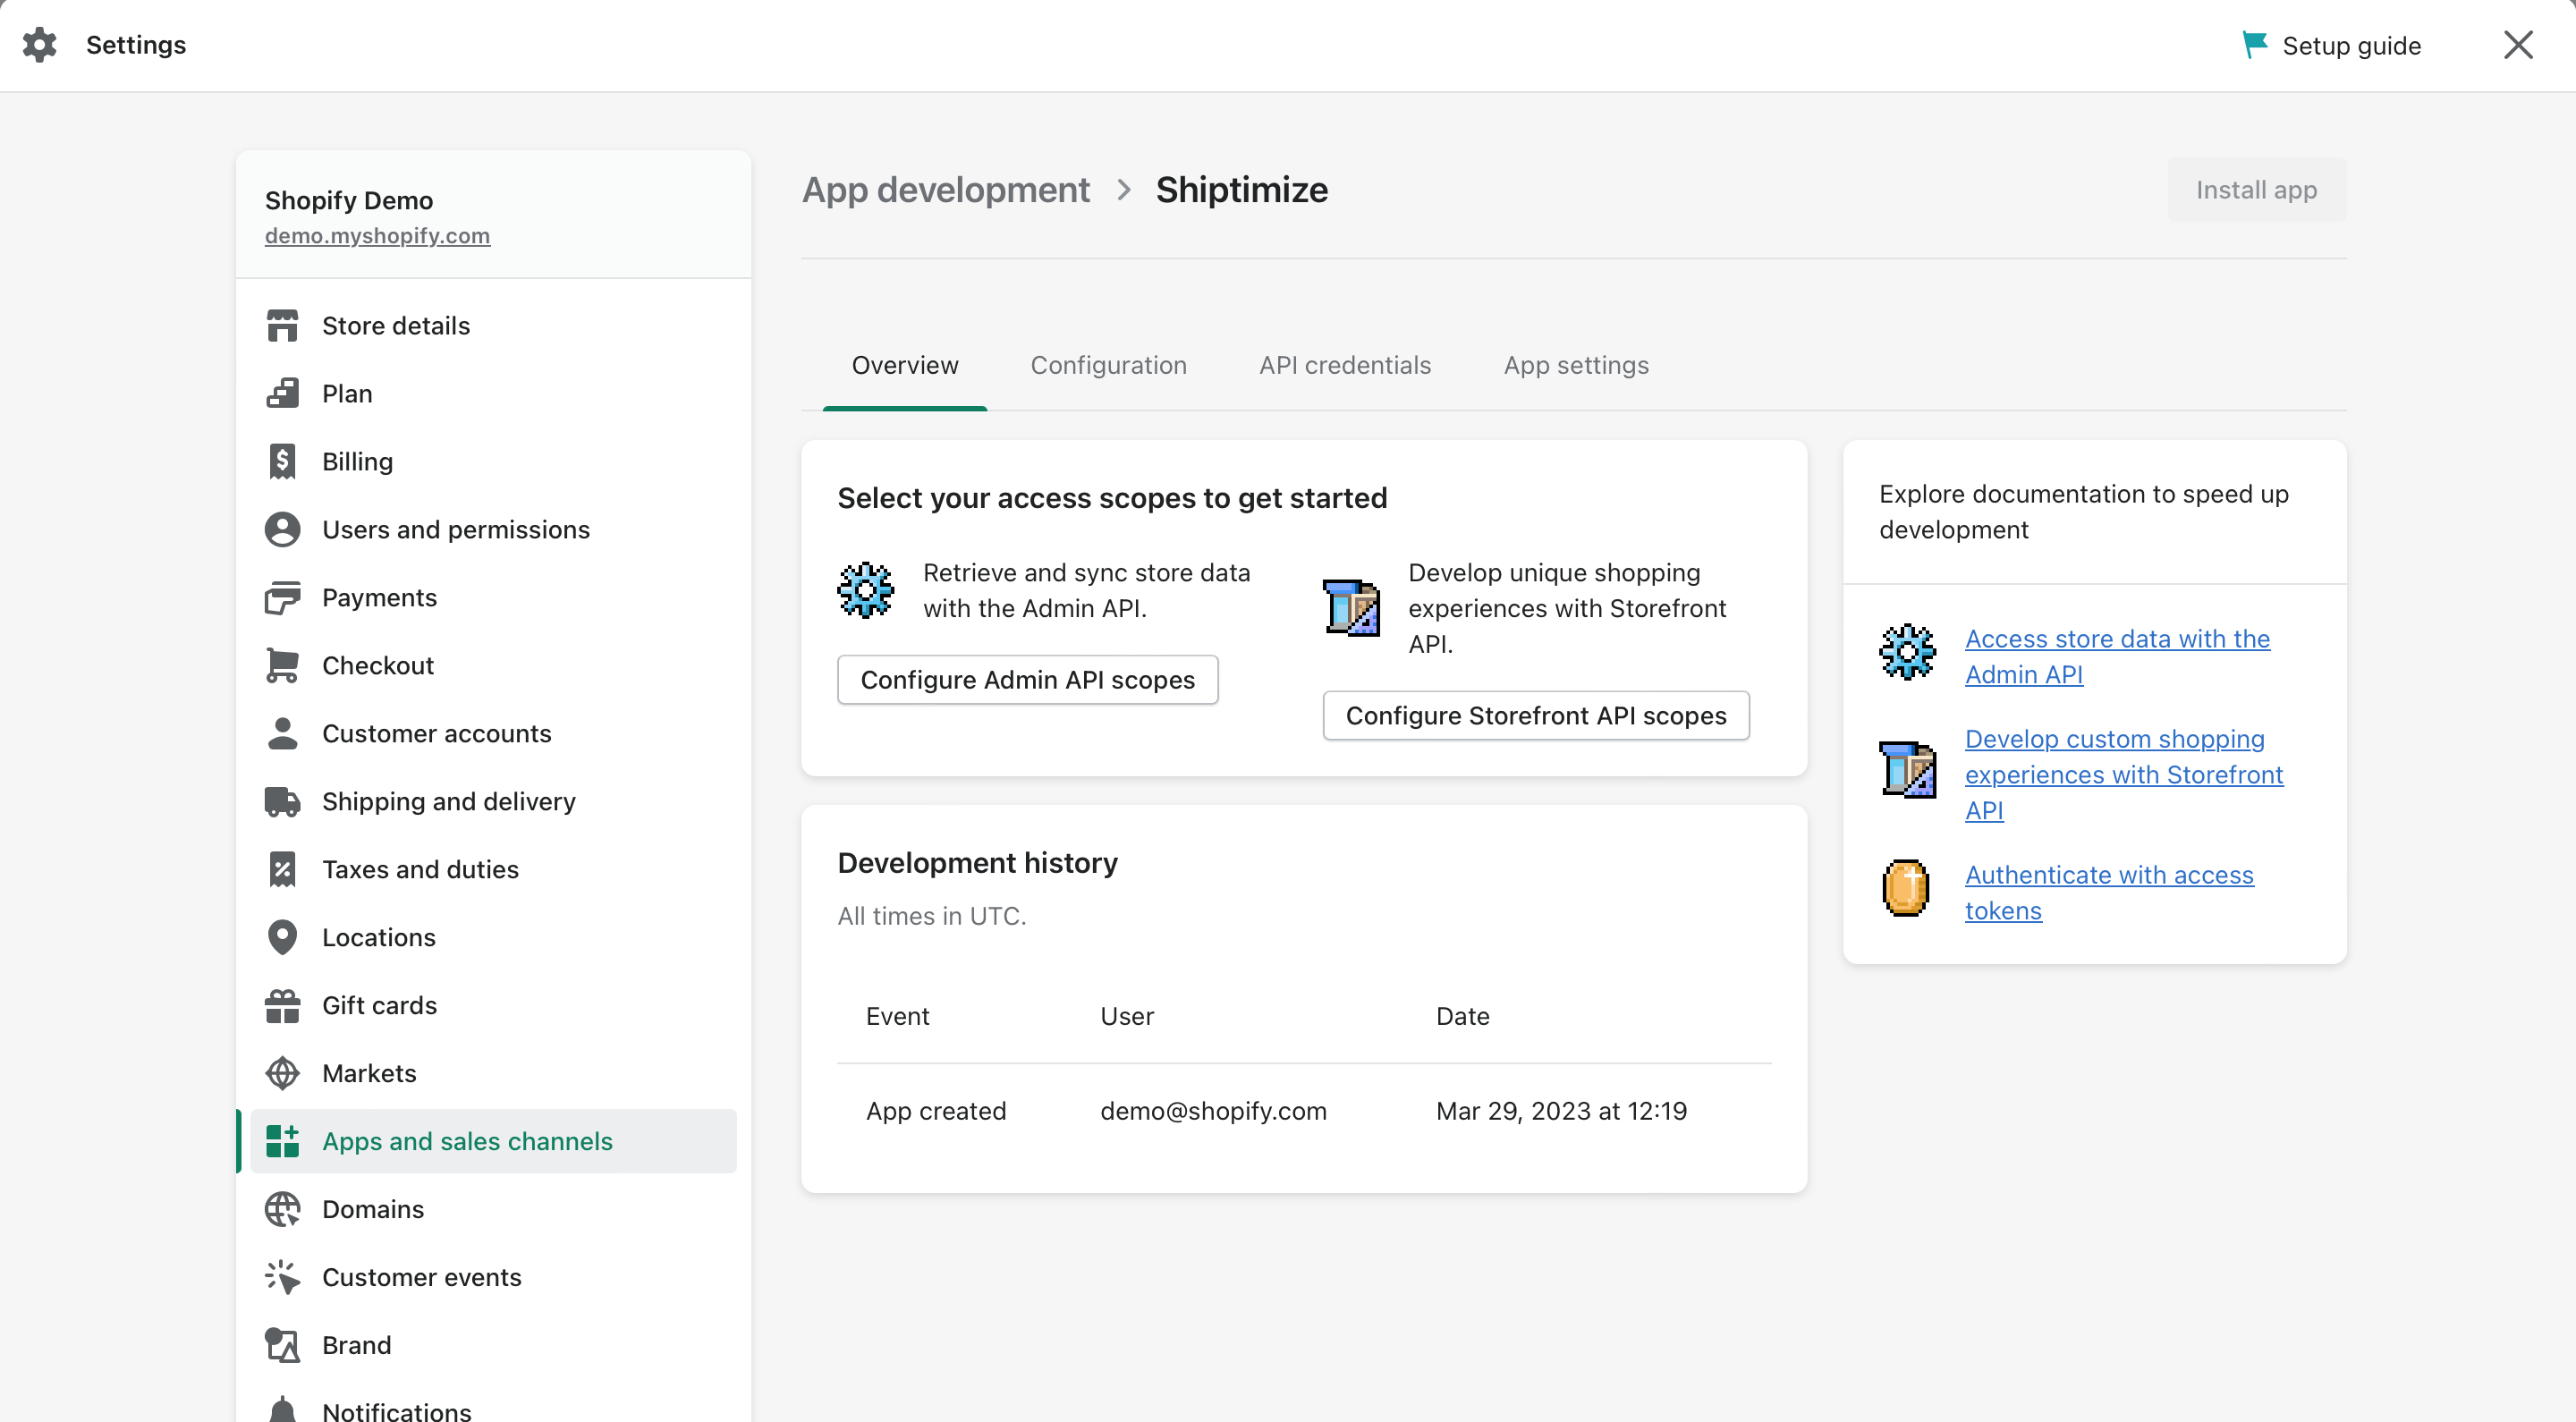
Next, you must set the permissions of the Plugin by clicking on “Configure Admin API Scopes”.
You will see the following screen where you should choose the following options and save them by clicking on the “Save” button
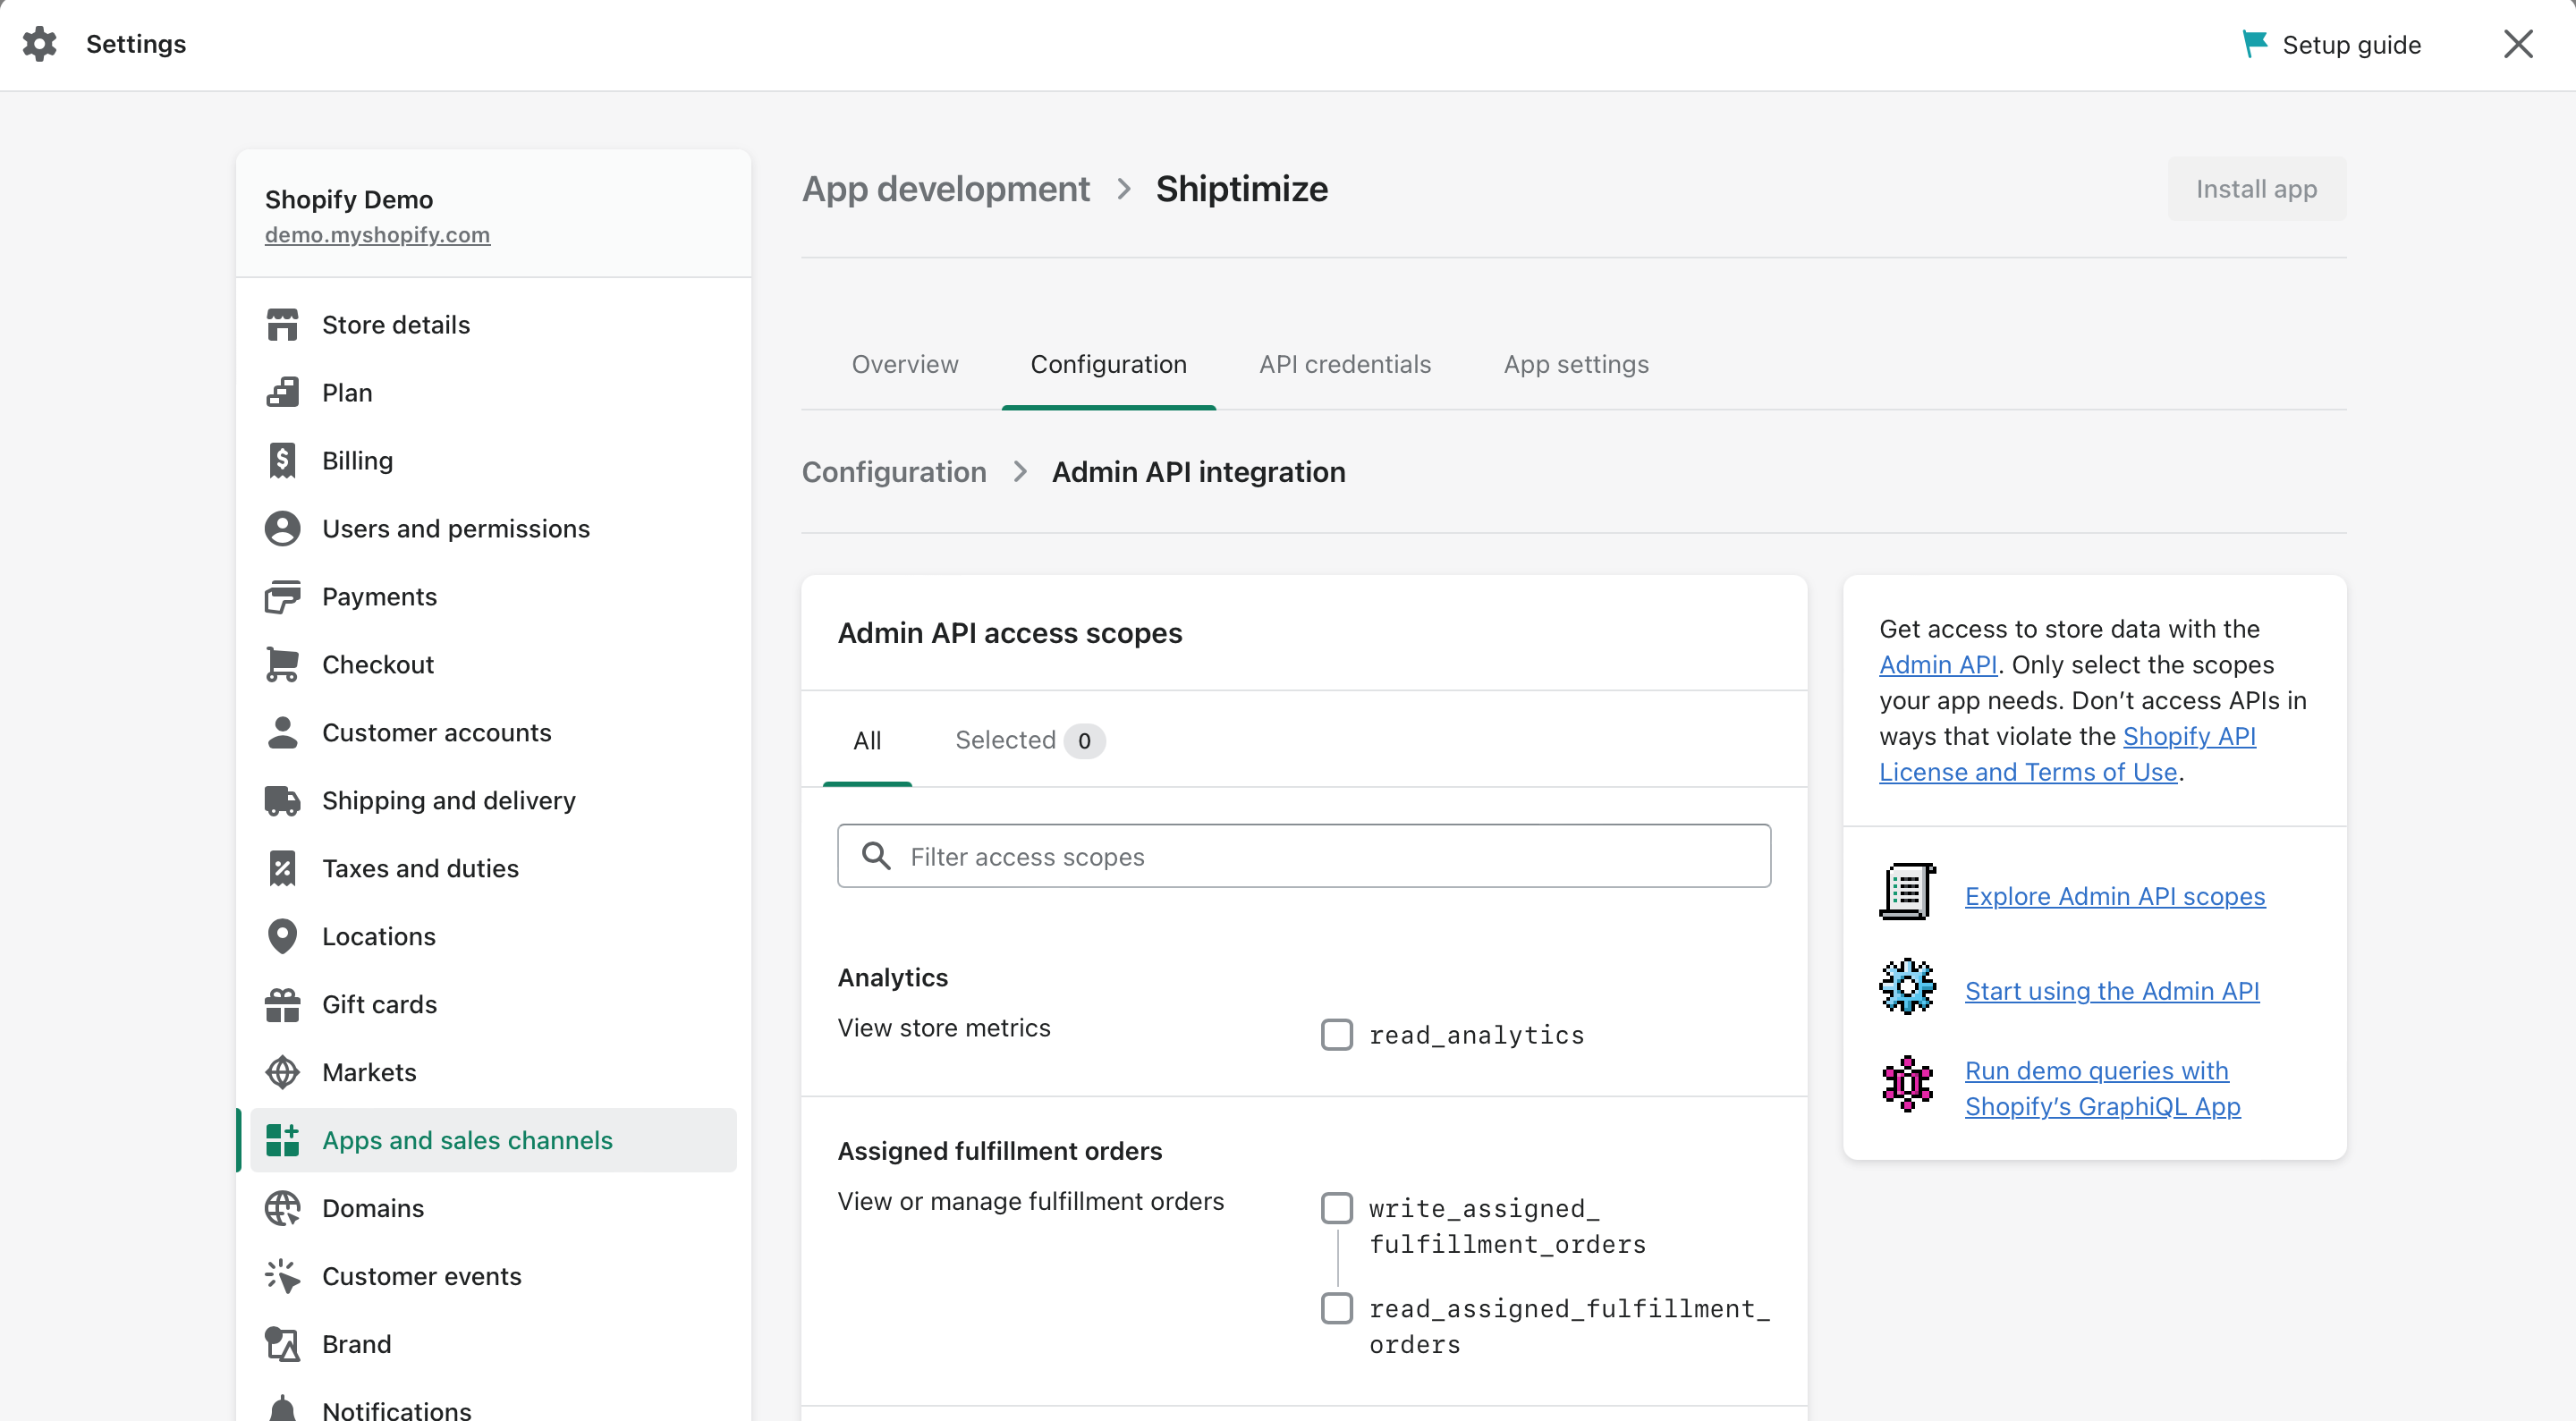
Clients – Read Access
This option allows our platform to access the client’s email.
Orders – Read and Write Access
This option allows Shiptimize to have access to other information needed to fill out the shipping labels, such as the recipient’s address
Merchant-managed fulfillment orders – Read and Write Access
This option allows Shiptimize to have access to other information necessary for the completion of the shipping labels such as, for example, creating the processing associated with the order.
Products – Read Access
This will allow Shiptimize to read items from the order needed for, for example, filling customs forms.
Stock – Read access
This way, if an HSCode has been defined, we can have access to it.
Script Tags – Read and Write Access
This option allows Shiptimize to add scripts to the checkout, thus being able to display options such as pick-up at a pick-up point
Locations – Read Access
This option is required so that Shiptimize can access the warehouse ID and can update the tracking codes.
Shipping – Read access
This way you can choose which carrier to combine with which shipping methods.
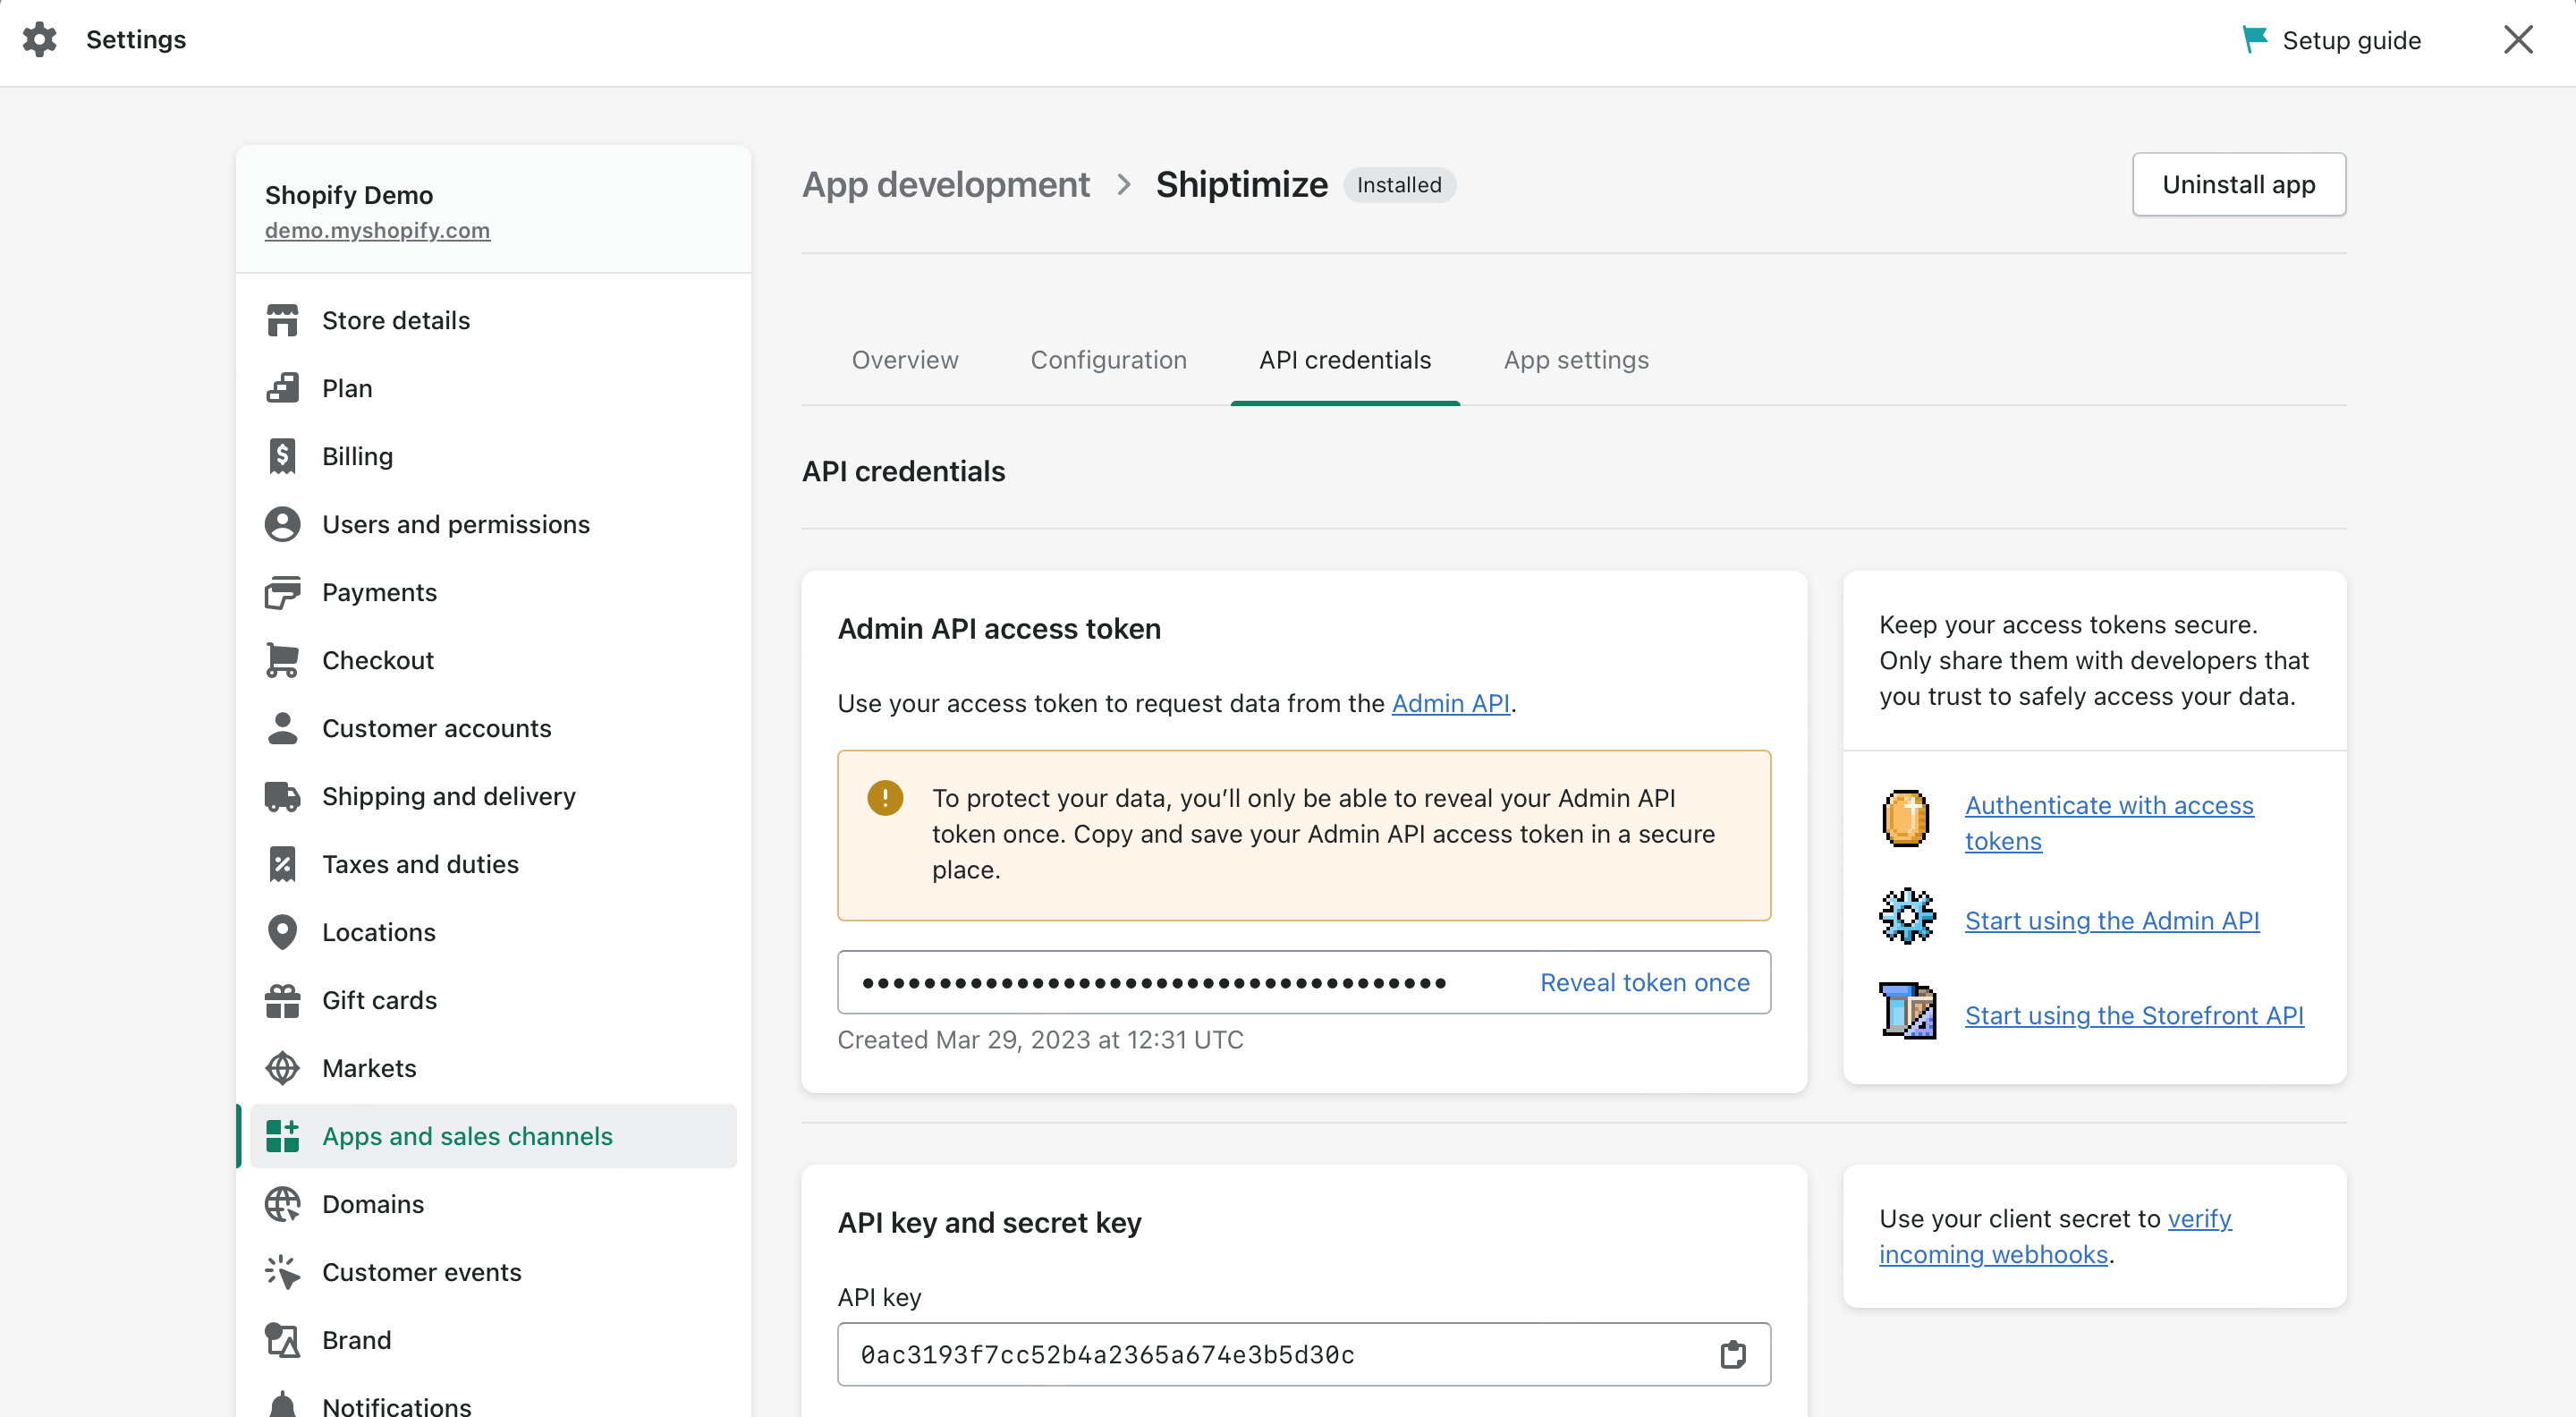
Upon saving the permissions associated with the Plugin, you will be redirected to the “API Credentials” tab where the keys and Access Token are located. You must click on the “Install App” button to access the token.
Note: The token can only be viewed once, you should copy and save it in a safe place of your choice. If you lose the token, you must uninstall the app on Shopify and install it again, and copy the new token to the platform.
By clicking on the “Install App” button a popup will show up where you should authorise the creation of the App by clicking on “Install”.
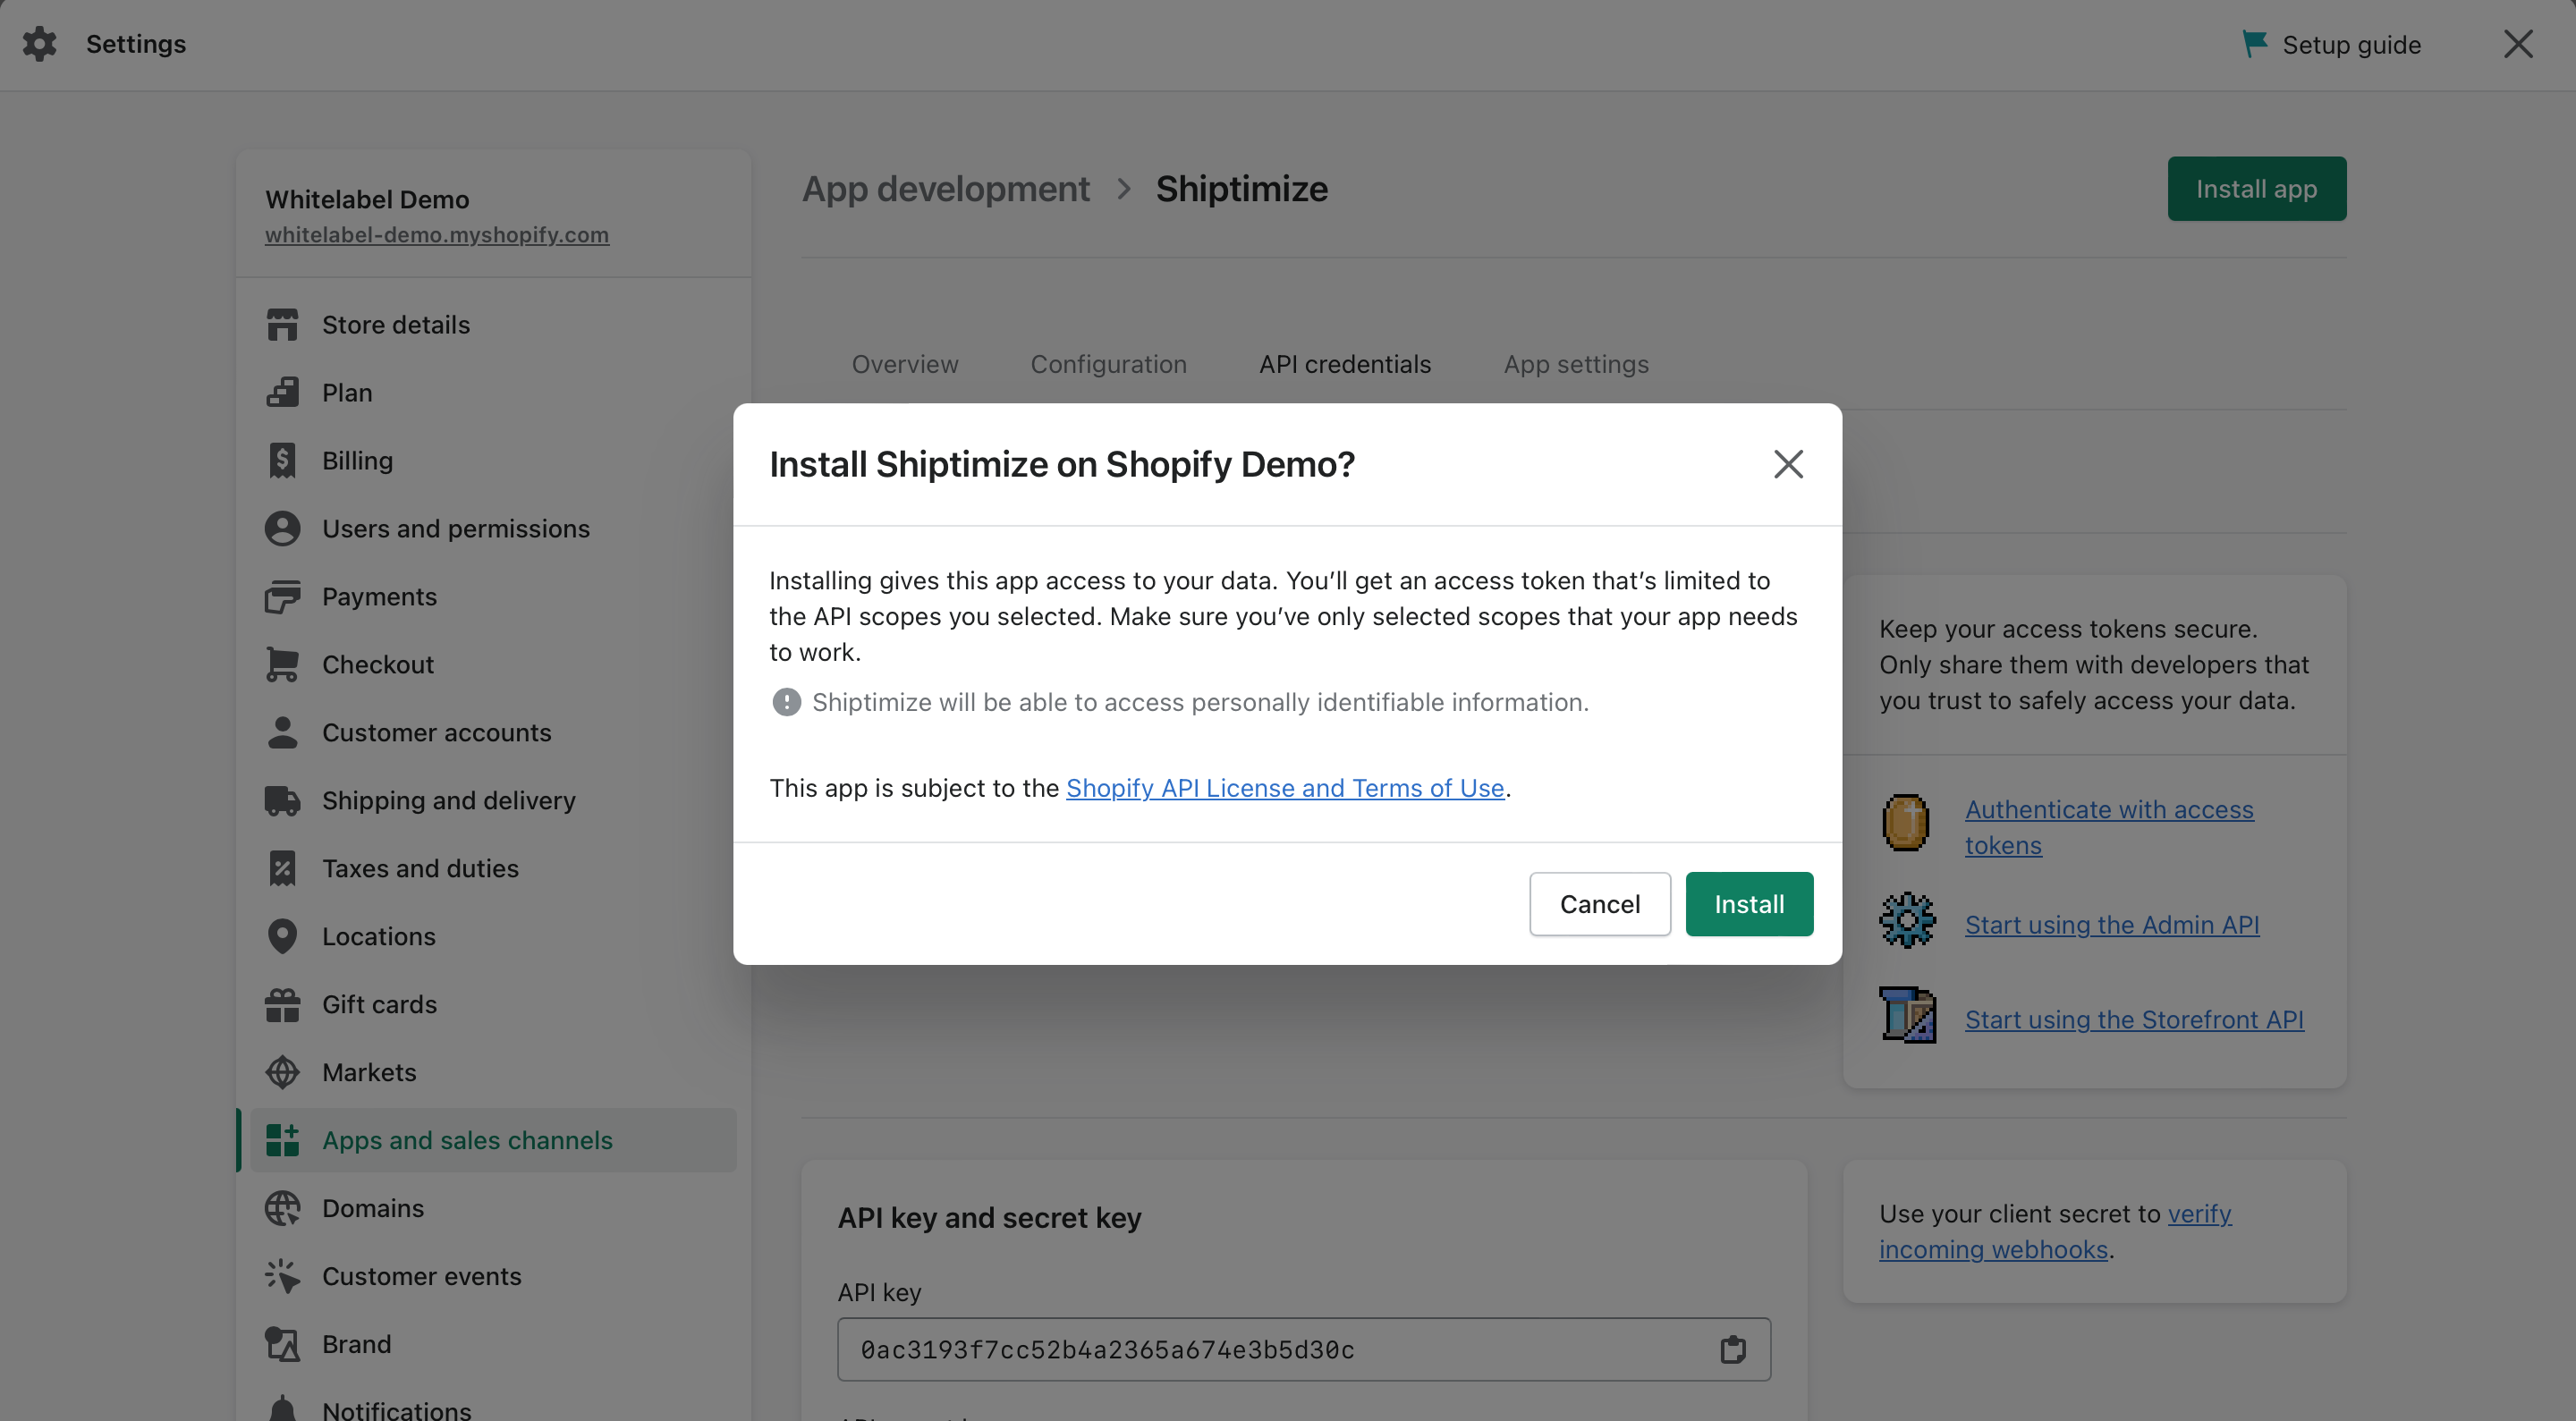
On completion of the installation, you will have access to the API* access token, the API key and the API secret key, which you will need to copy and paste into the fields on the Shiptimize platform indicated on the following page.
* Note: The token can only be viewed once, you should copy and save it in a safe place of your choice. If you lose the token, you must uninstall the app on Shopify and install it again, and copy the new token to the platform.
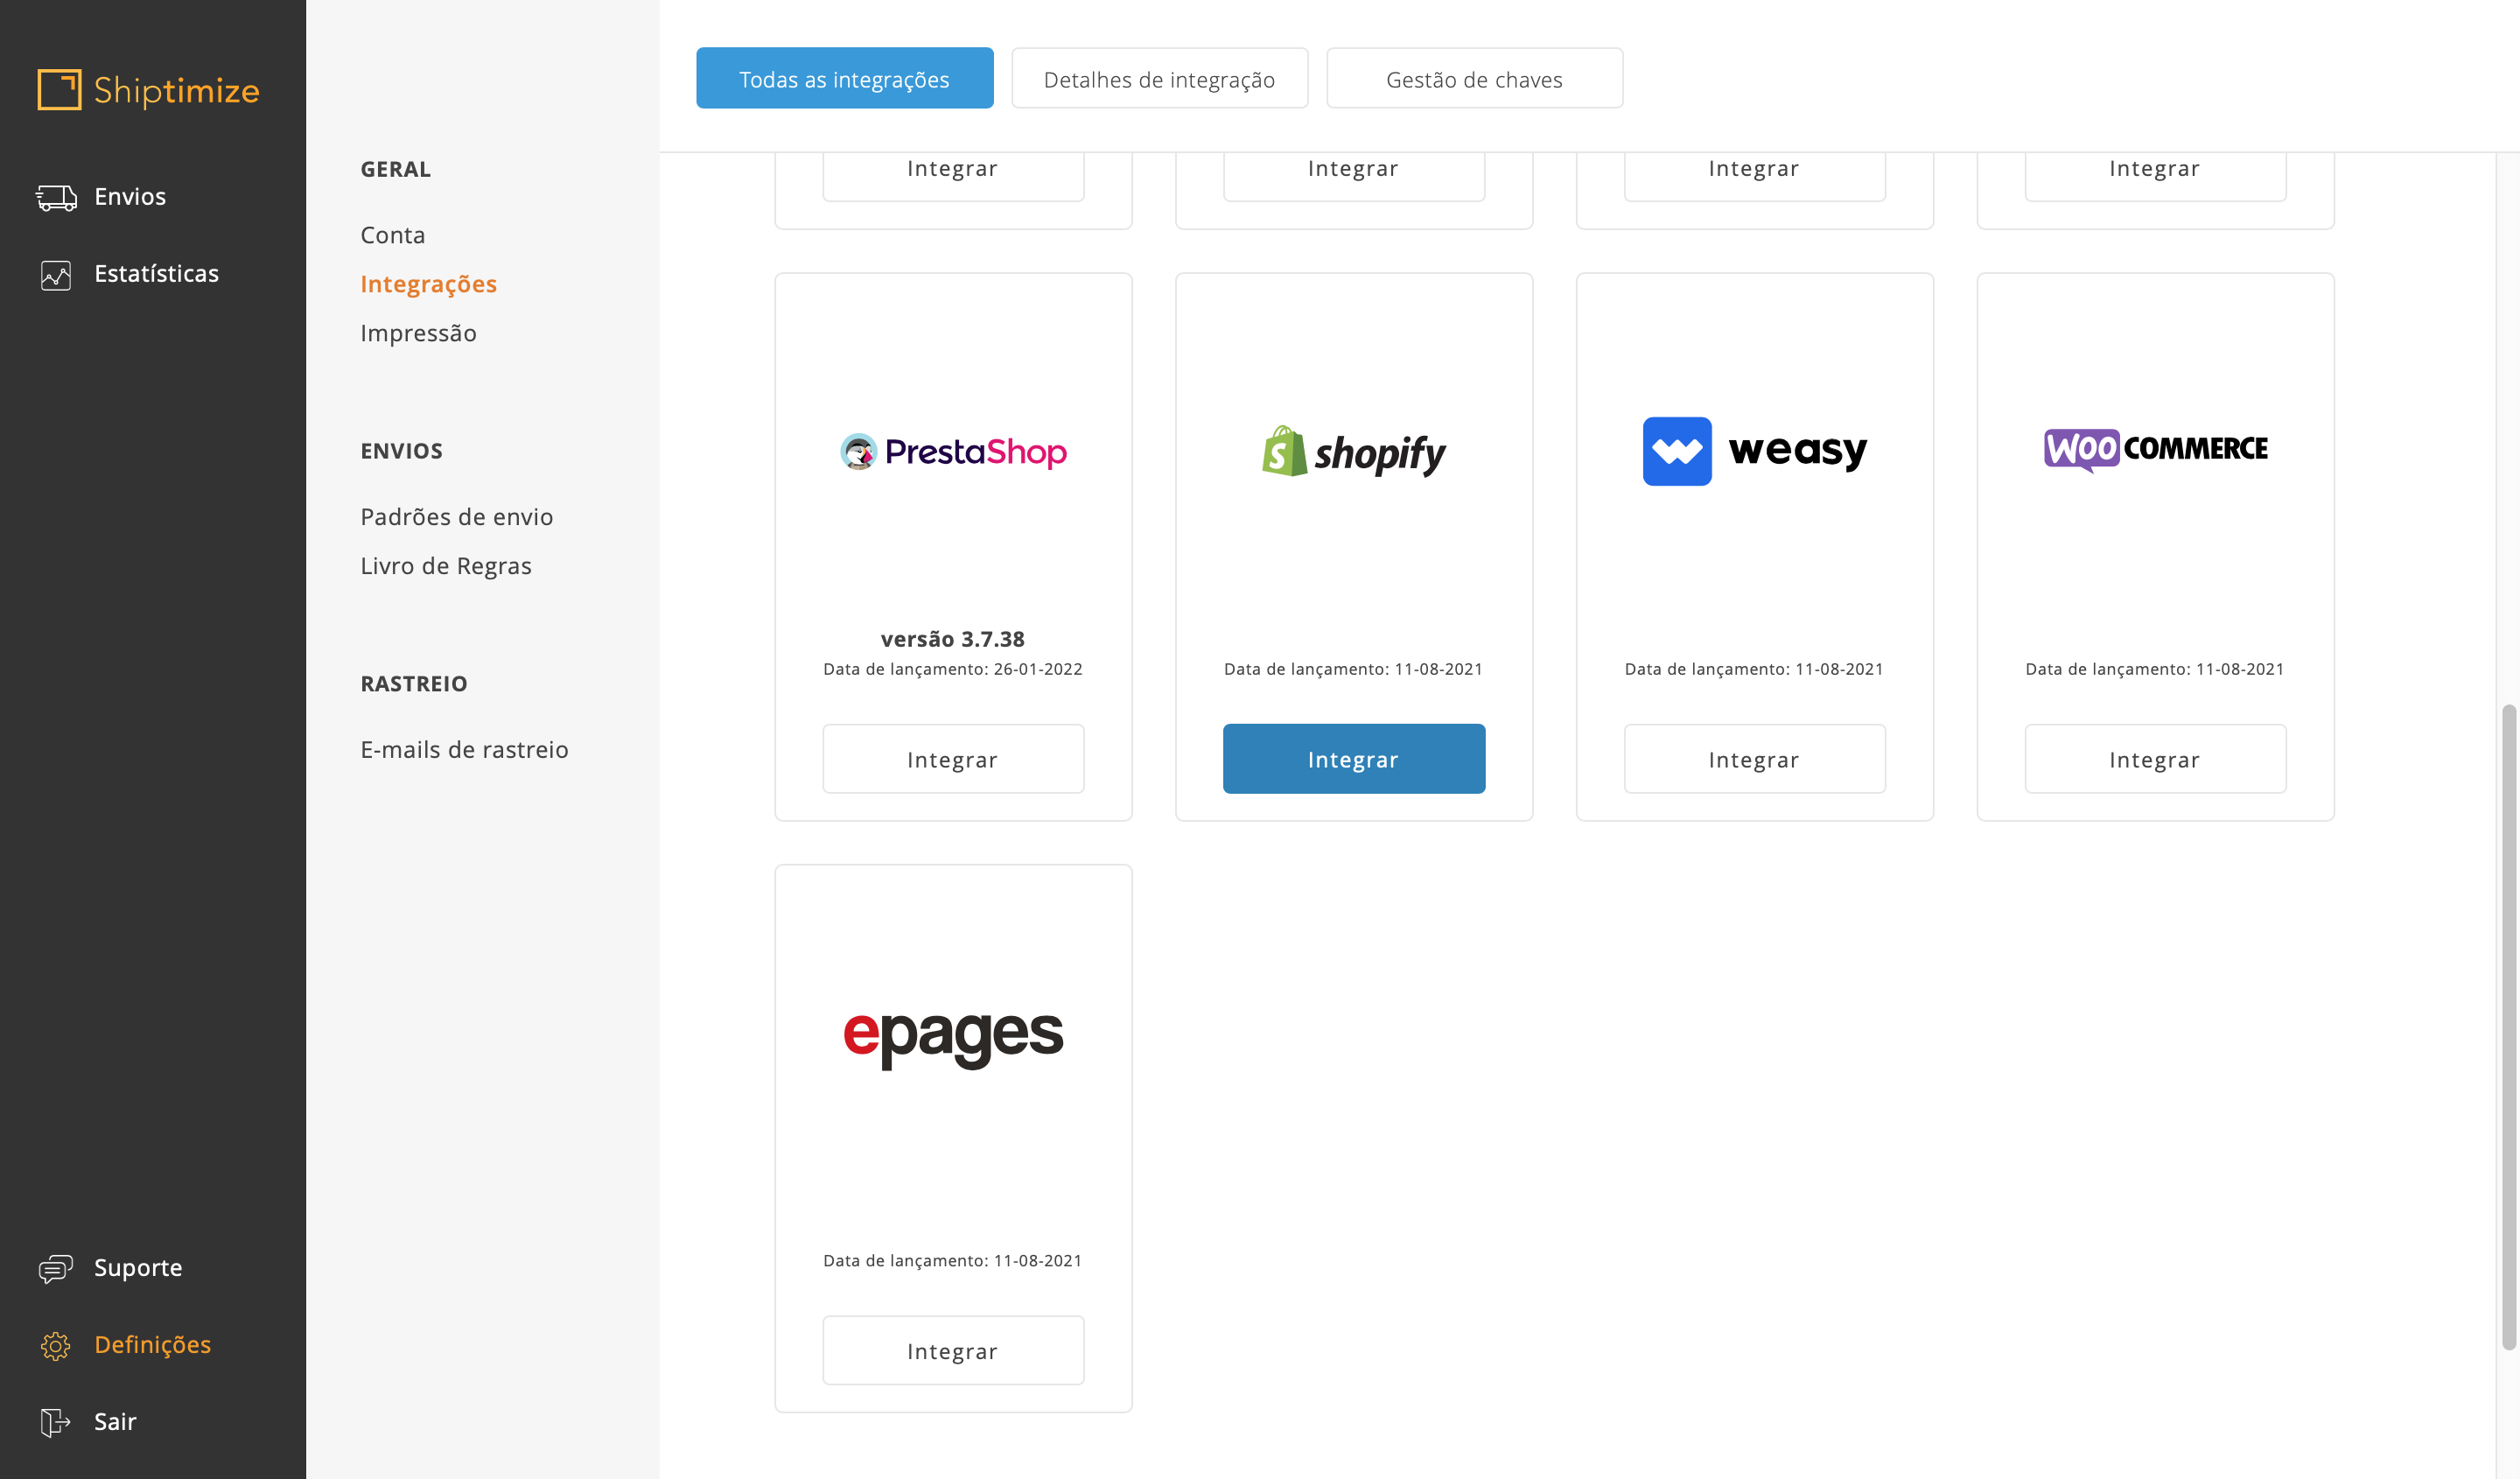
In a new tab of your browser, go to the Shiptimize platform and click “Settings”> “Integrations”> “All Integrations”. Select Shopify and click “Integrate”.
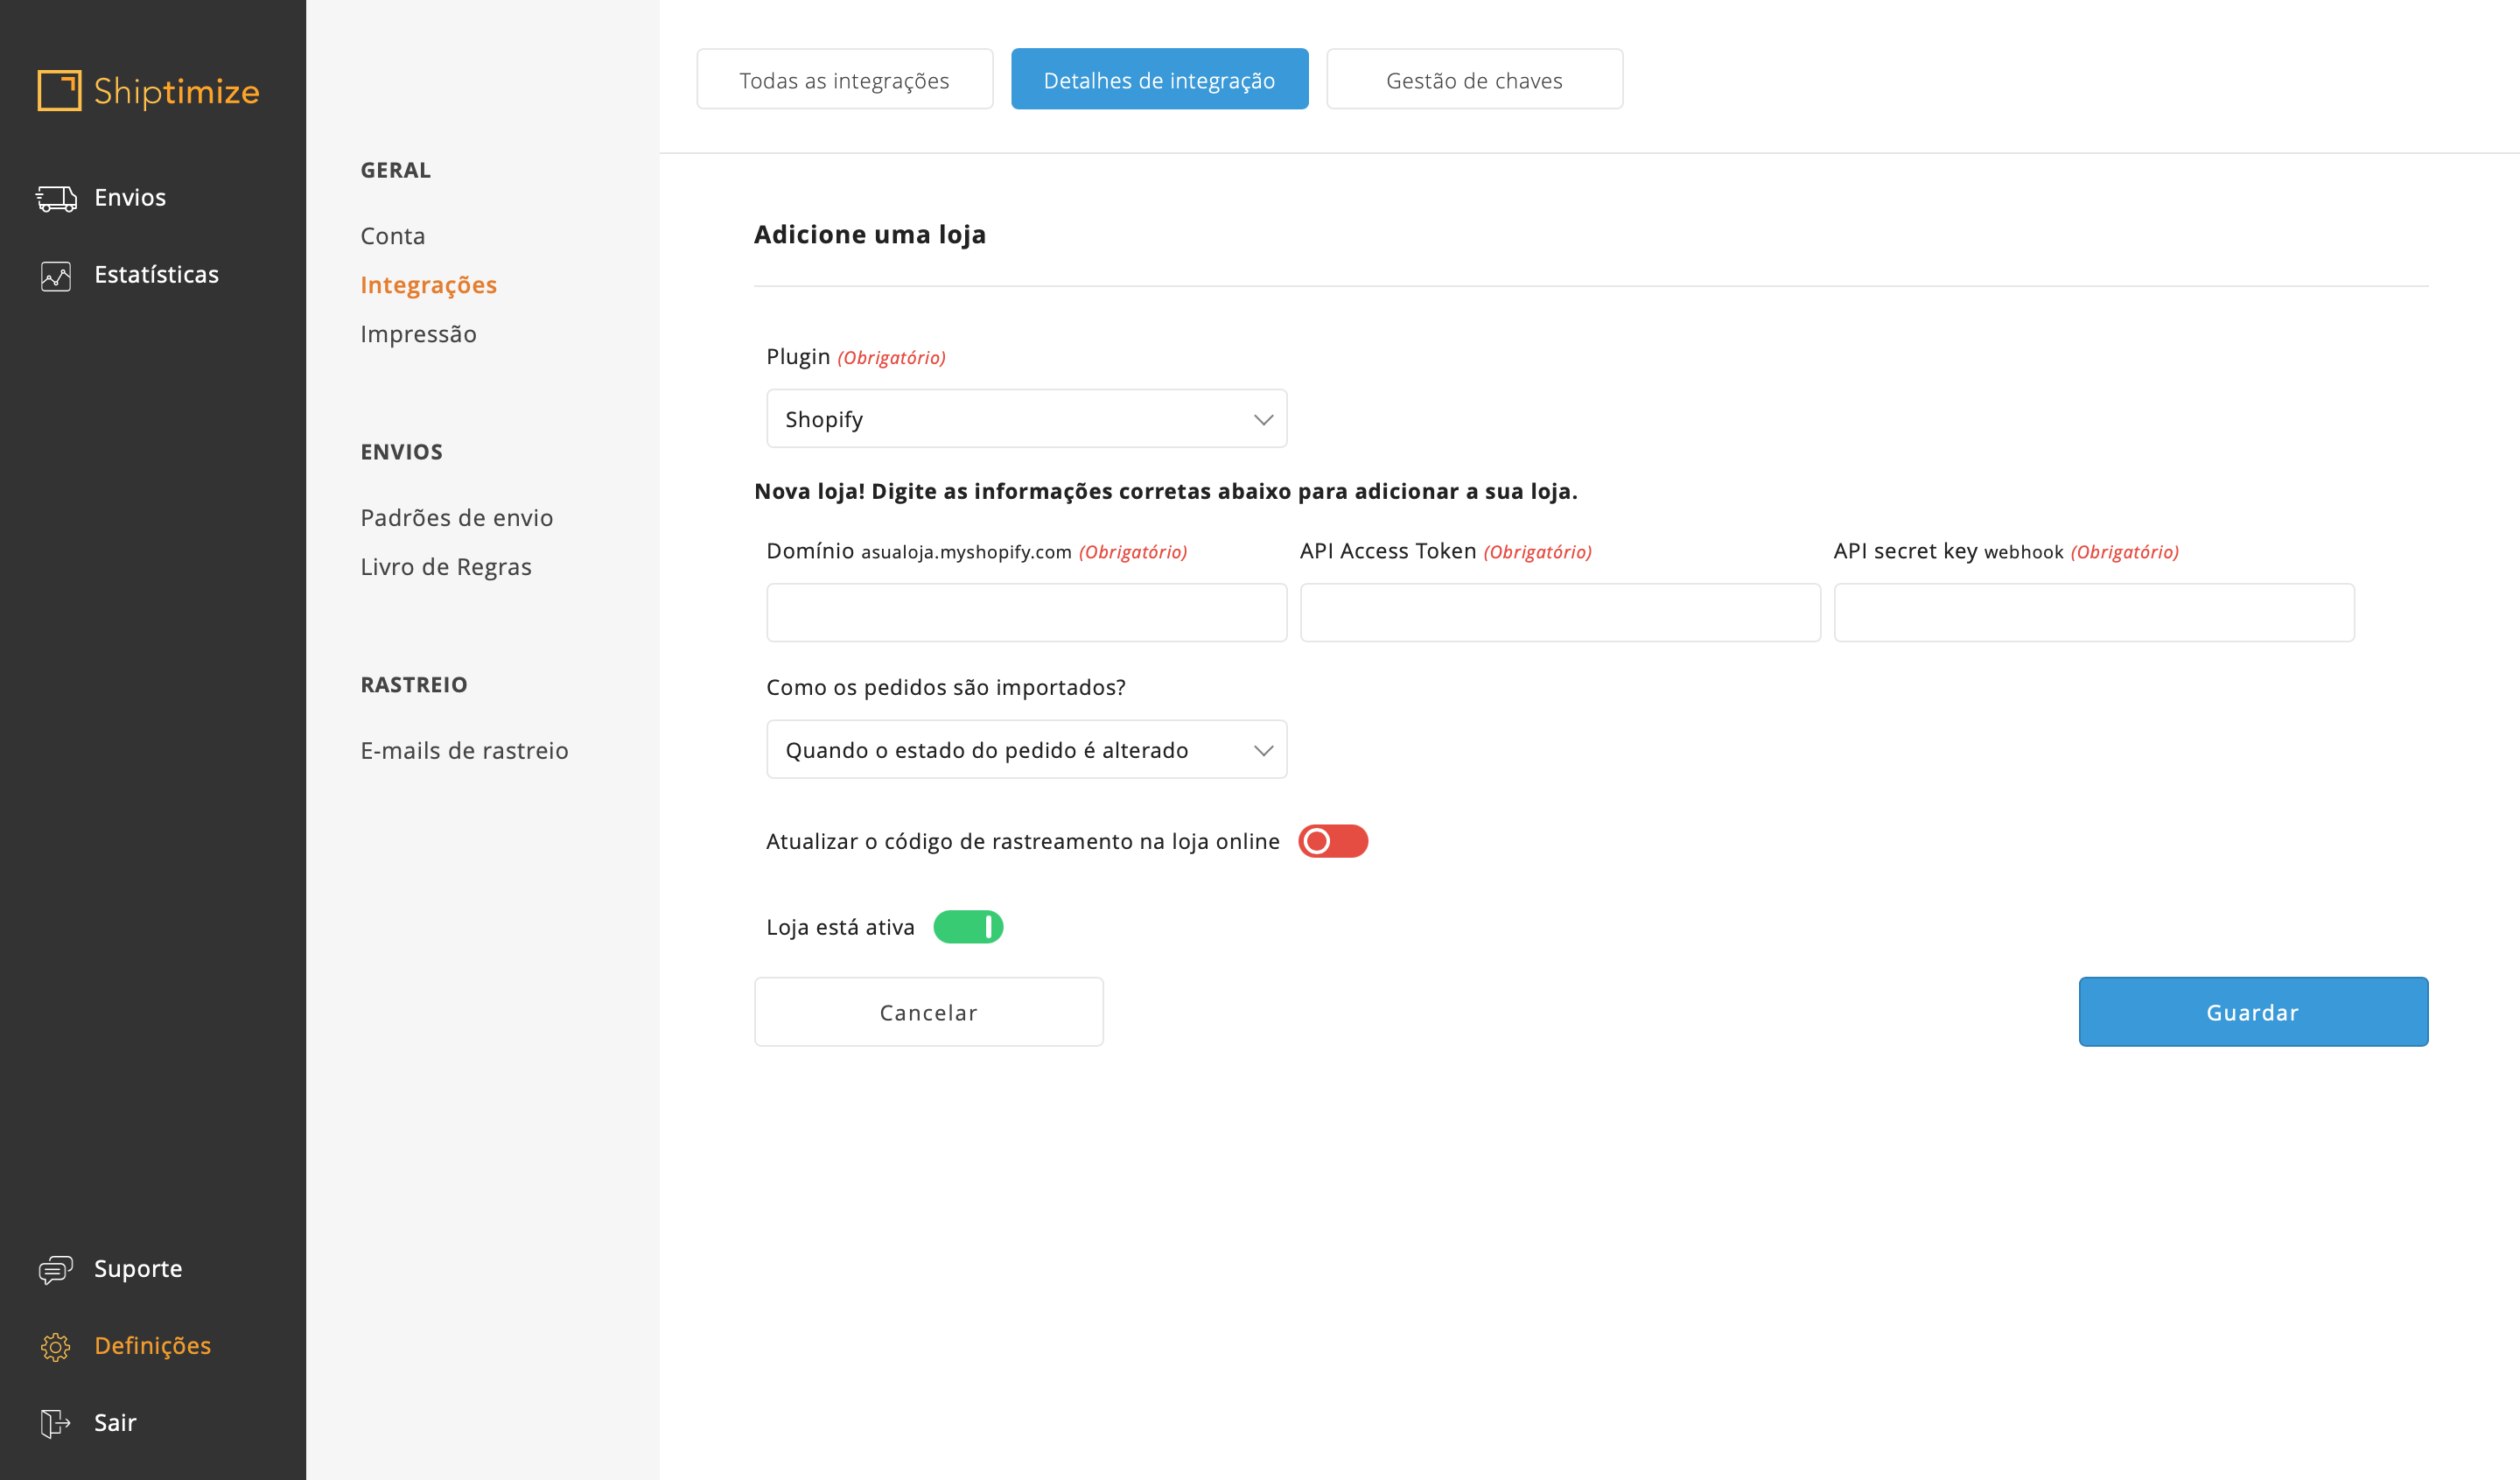
Click on “Add Store”.
- Add a shop of type “Shopify”.
- Make sure the Name (of the shop) matches your {store name}.myshopify.com, including myshopify.com
- Copy the API Secret Key and Token provided by Shopify and paste into the API Access Token and API Secret Key fields
- Click save
Configuration
After integrating the Shipimize app for Shopify, you must configure the following options in your account:
- Update the order status in your Shopify shop.
If you want to send updates regarding the status of orders to your shop via the tracking IDs generated on the Shiptimize platform, check the “Update the tracking code in the online shop” option.
- Carriers
Choose the Shiptimize partner carrier you would like to assign to each shipping method in your Shopify shop.
- Status
Choose from each category of order statuses, which types of statuses you’d like to import into Shiptimize
- Google Maps
By default, we display an OpenStreetMap when your customer chooses to pick up the product at a pickup point, if the carrier offers that option. If you prefer to use a Google map, enter your Google key in the “Google Maps Integration Key” field.
Order Import
- Go to ‘Shipping’ > ‘Import from shop‘ and select your Shopify shop
- Click ‘Start Importing’.
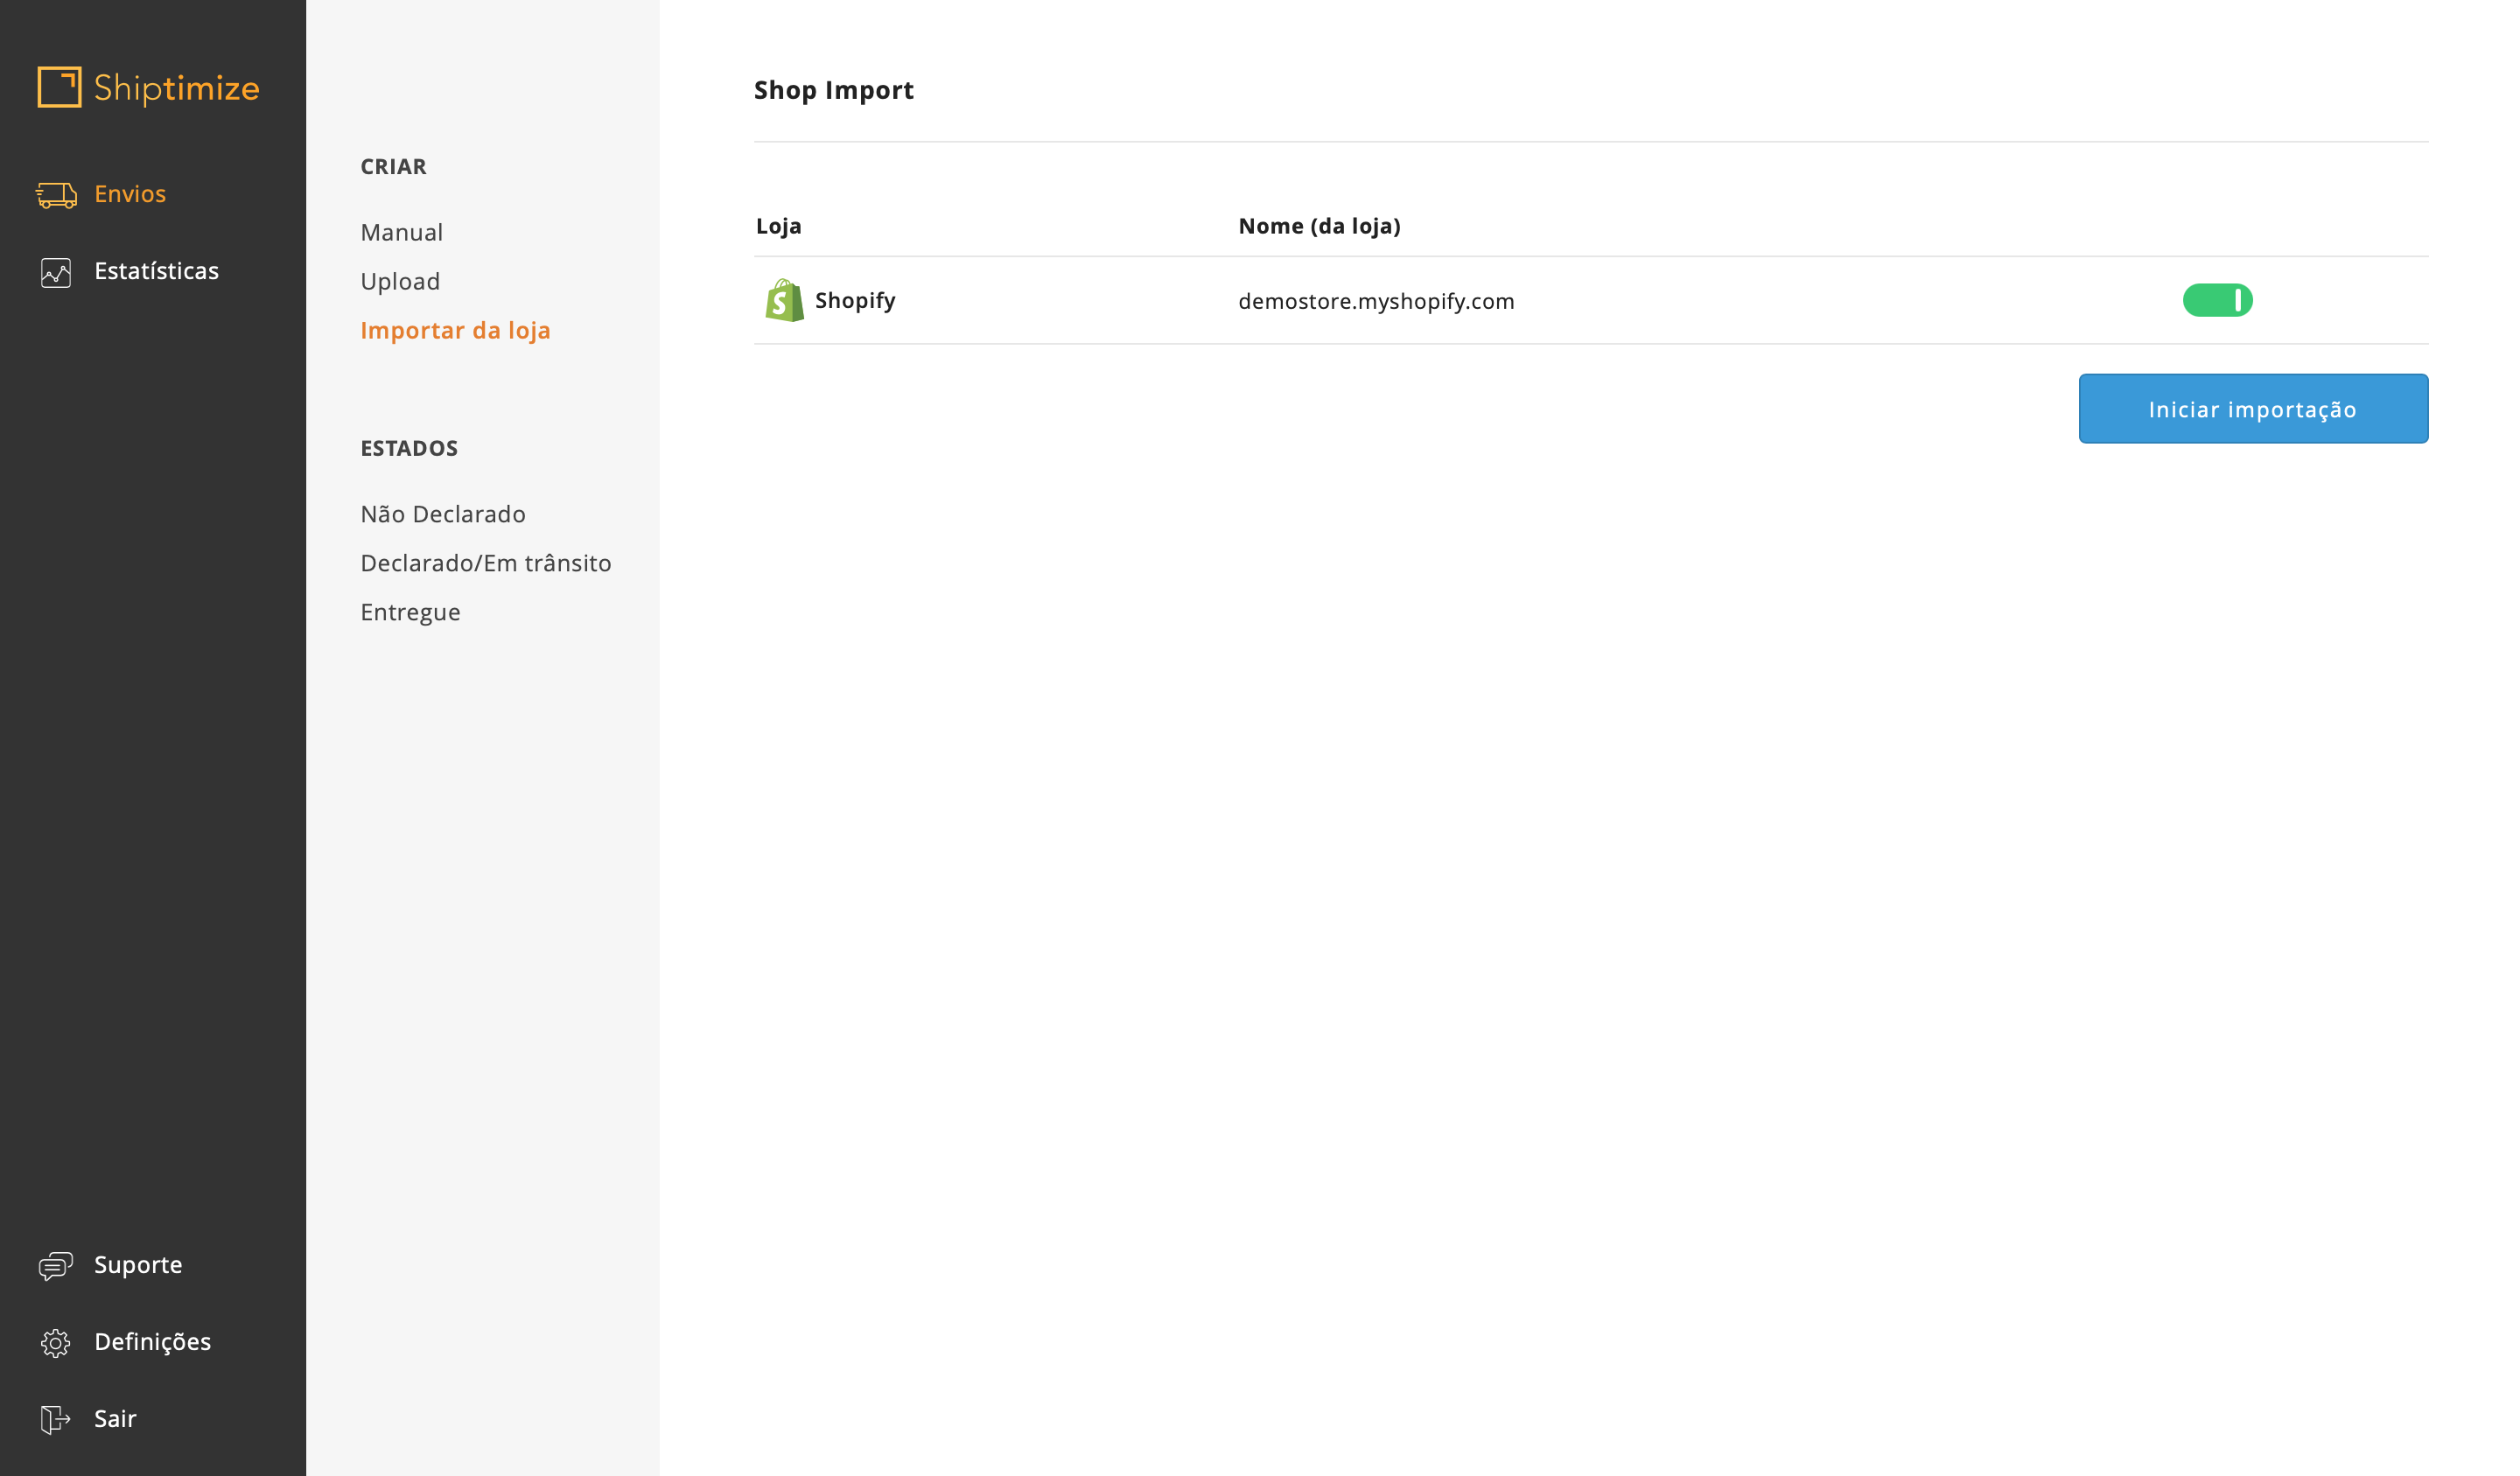
Your orders will be imported and available under “Shipments” > “Status” > “Entered”.
You can also use automatic import by changing the status of “When are orders imported?” under Settings > Integrations >Integrations Details.
We recommend that you choose “When the order changes”. If it is set, when the address changes on the Shopify platform, it will also change in the app as long as no labels have been created for that order.
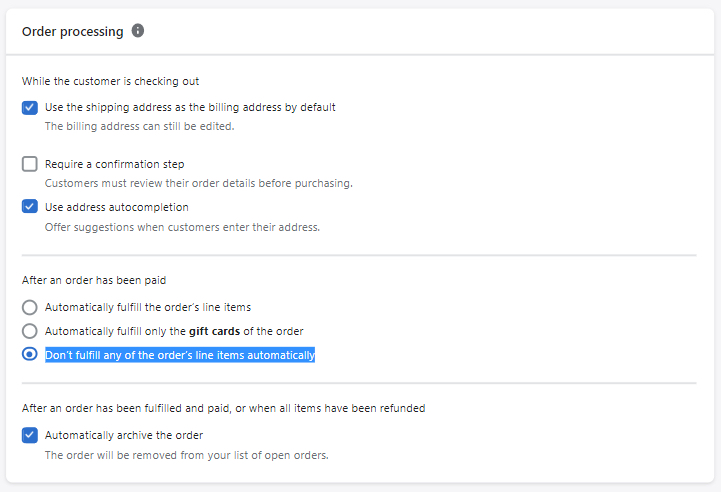
Warning: In order to import from the store and be able to update the tracking code you cannot set the order status to Automatic fulfillment when shipping is paid. You must choose the option “Do not automatically fulfill any of the items in the order” as per the example below.
This option can be found under Settings > Checkout > Order Processing
Please note: in case you’d like to offer delivery to Servicepoints you should in any case select “When the order changes”. For any other import option we won’t be able to update the order with the selected Servicepoint location”
Automatic updates between Shiptimize and Shopify
If you have selected the “Update the tracking code in the online shop” option in the settings, as soon as you create a shipping label, we send the associated tracking number to Shopify.
Also, in your Shiptimize account (Settings> Integrations> Integration Details) you can define at what point(s) the order status should be updated in your Shopify shop backend.
You can choose to update when (1) an order is imported into the shipping dashboard, (2) a shipping label is printed, (3) the shipment is delivered.
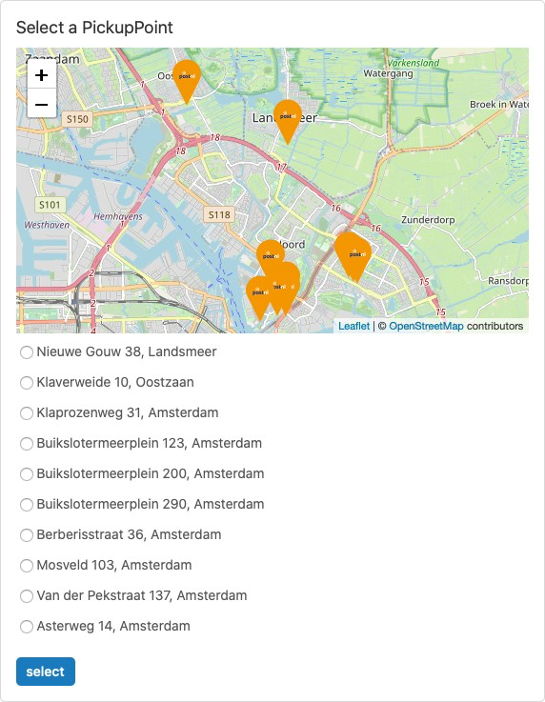
Customer checkout, including pick-up locations
After installation and configuration, if a carrier provides a service to make the delivery directly to a pickup point, or Pickup location, a map will be added, allowing the user to select the location at which they prefer to make the pickup.