Configuration of zones and shipping methods
The integration of your online shop with our platform begins with the installation of the respective plugin on your Webshop, followed by its configuration. In addition to this initial configuration, to enjoy all the benefits that Shiptimize brings you, you also need to configure the shipping zones where it will act as well as the shipping methods that you can provide for each of these zones and the shipping rules corresponding to each shipping method.
The configuration of the shipping zones and shipping methods takes place in your online shop and only the shipping rules are configured on the Shiptimize platform.
Configuration steps:
- Creating shipping zones
Creation of zones in which you want to act
- Configuration of delivery methods
Create the shipping methods and shipping rates that will be presented to your clients per shipping zone
- Configuration of shipping rules
Assigns each of the methods created the carrier and service levels you want.
Configuration of shipping zones
The first considerations you should have when starting to set up your shipping zones are:
- In which zones you will act (you should consider if you want to make sales only at national, European or worldwide level or if you want to exclude specific destinations)
- Need to separate these zones (If you want your shipping costs to be free there is no need to separate the various zones but only to select the countries where you will act, however, if you want to apply different shipping rates for each country or zone you must create these zones separately).
On the Shopify platform to set the shipping zones you should go to Settings > Shipping and Delivery
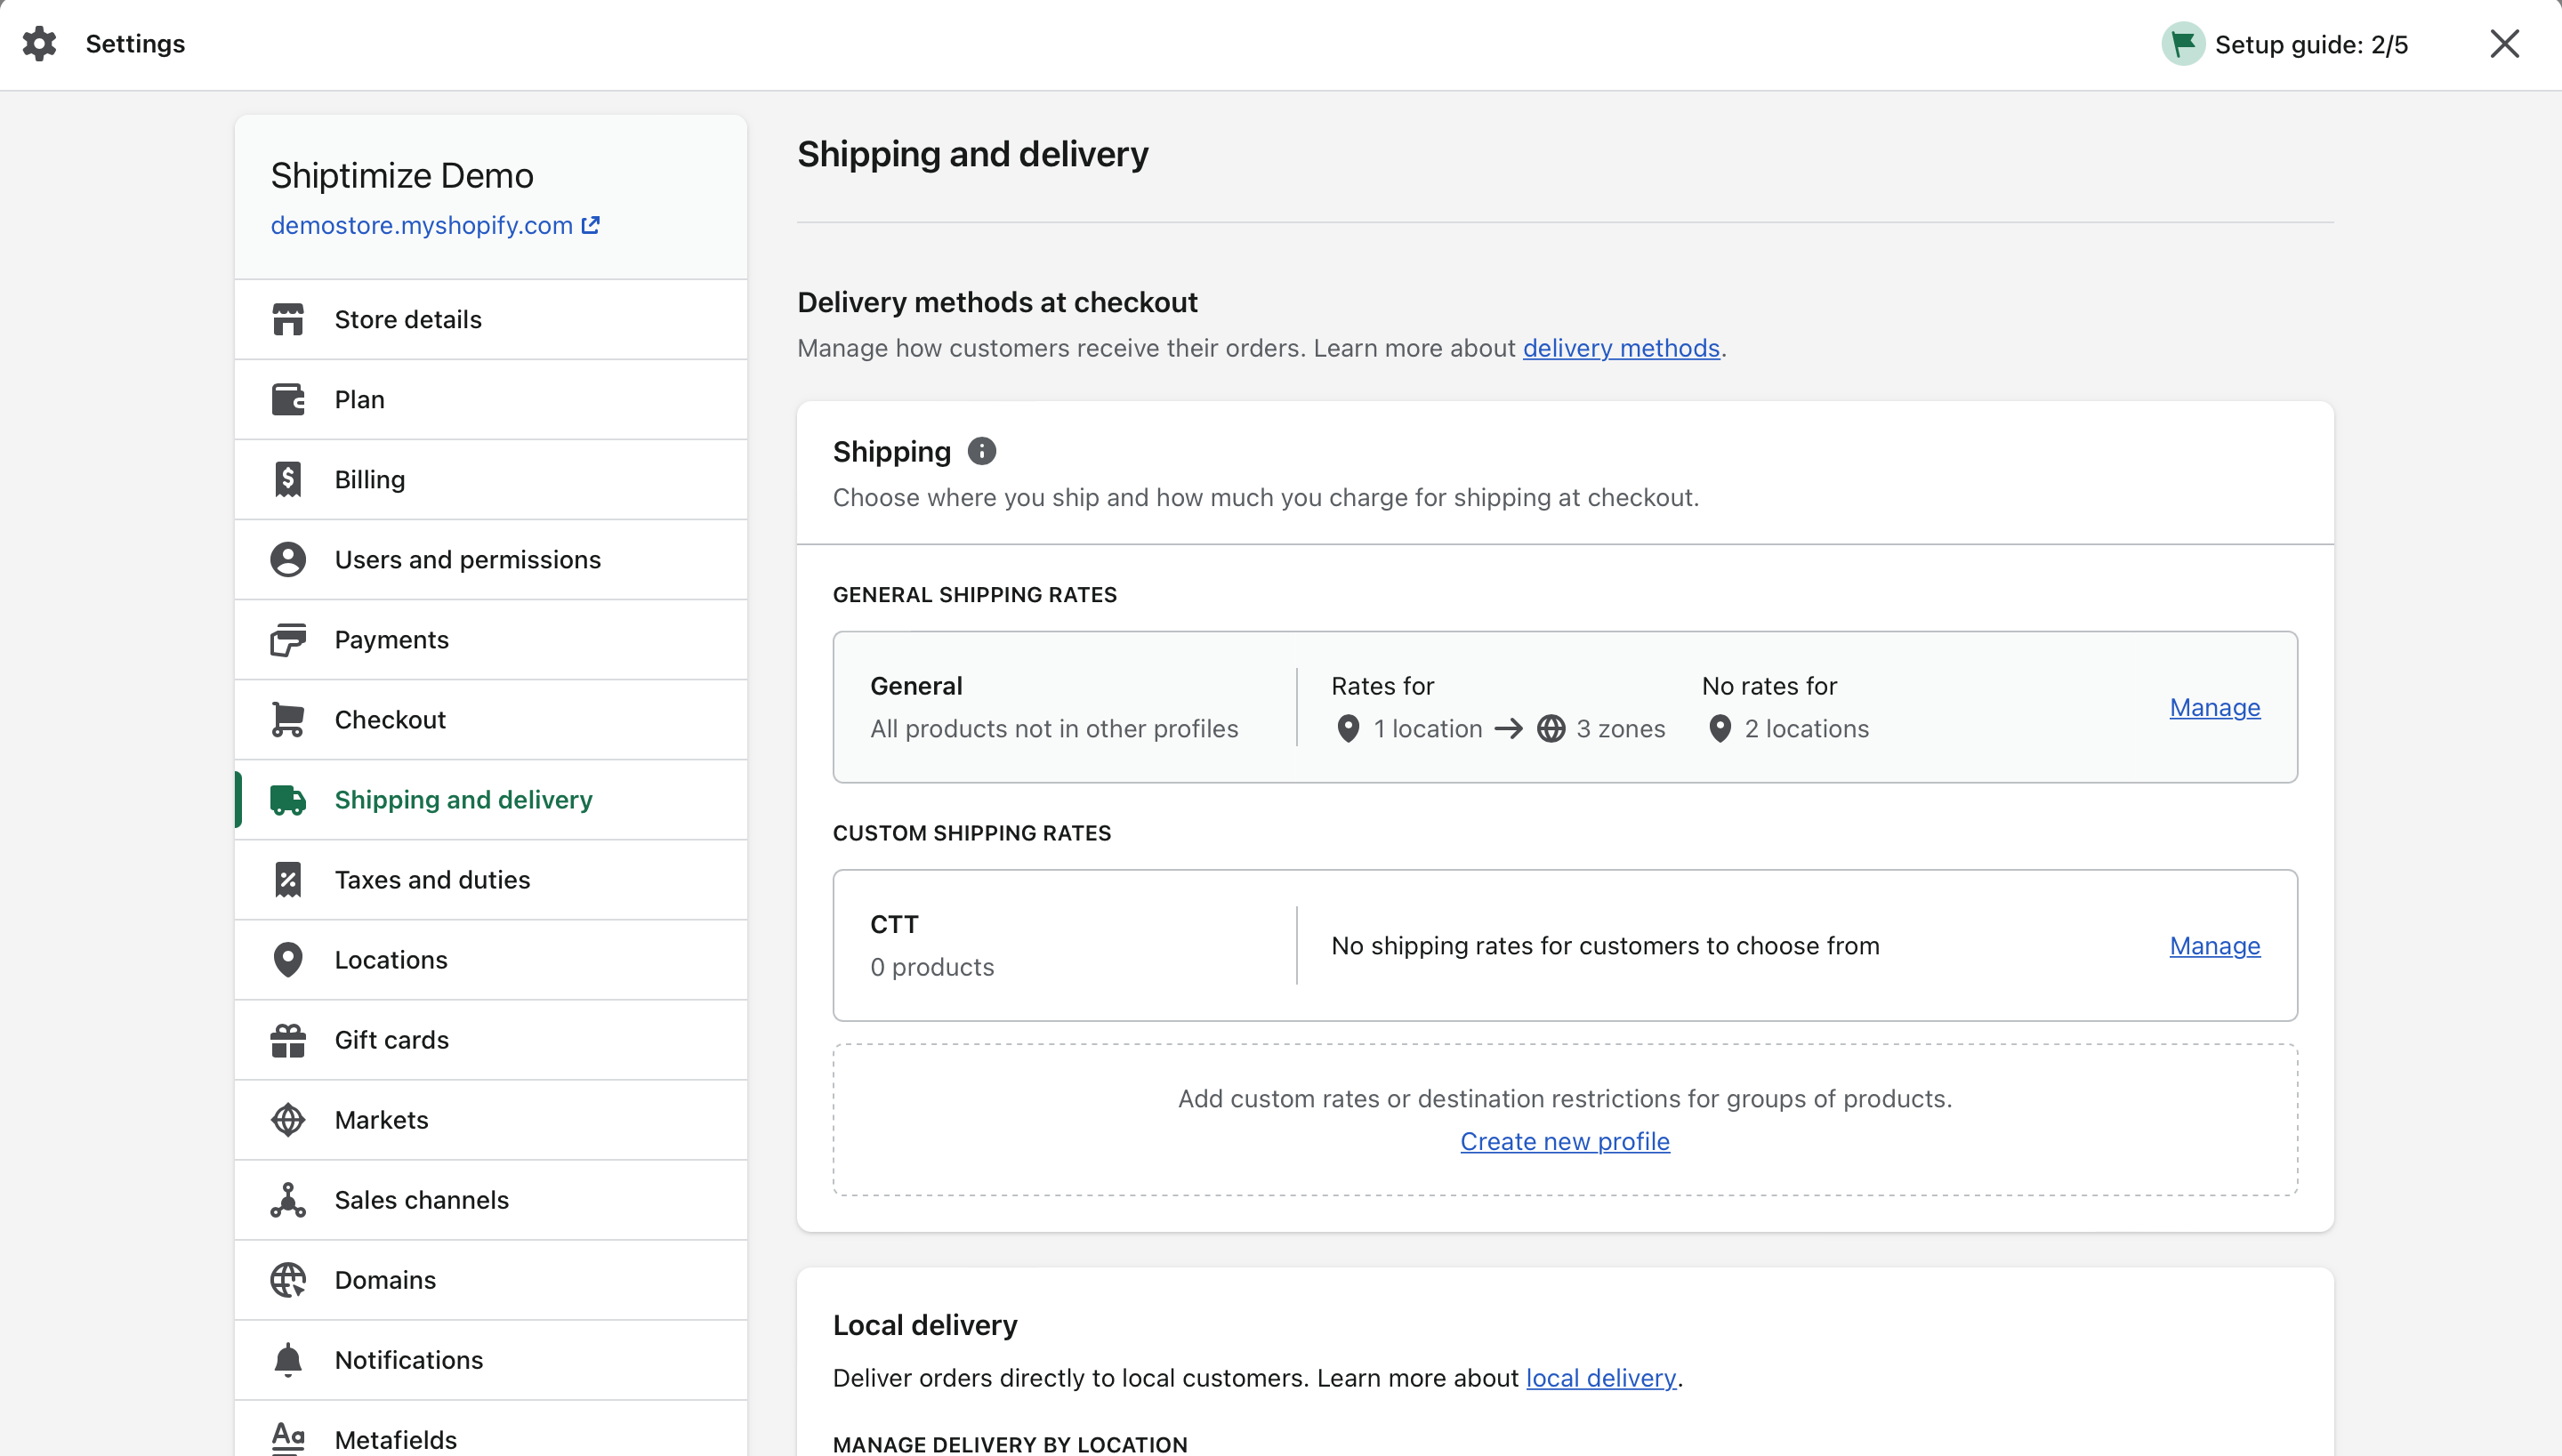
In this menu you have the possibility to define 3 types of deliveries: Store pickup; Local or own delivery and Delivery by carrier. We will only focus on the configuration of shipments by carrier.
To edit the shipping by carrier click on General Shipping Rates > “Manage”.

In this section you should click on “Create Shipping Zone” to add a shipping zone.
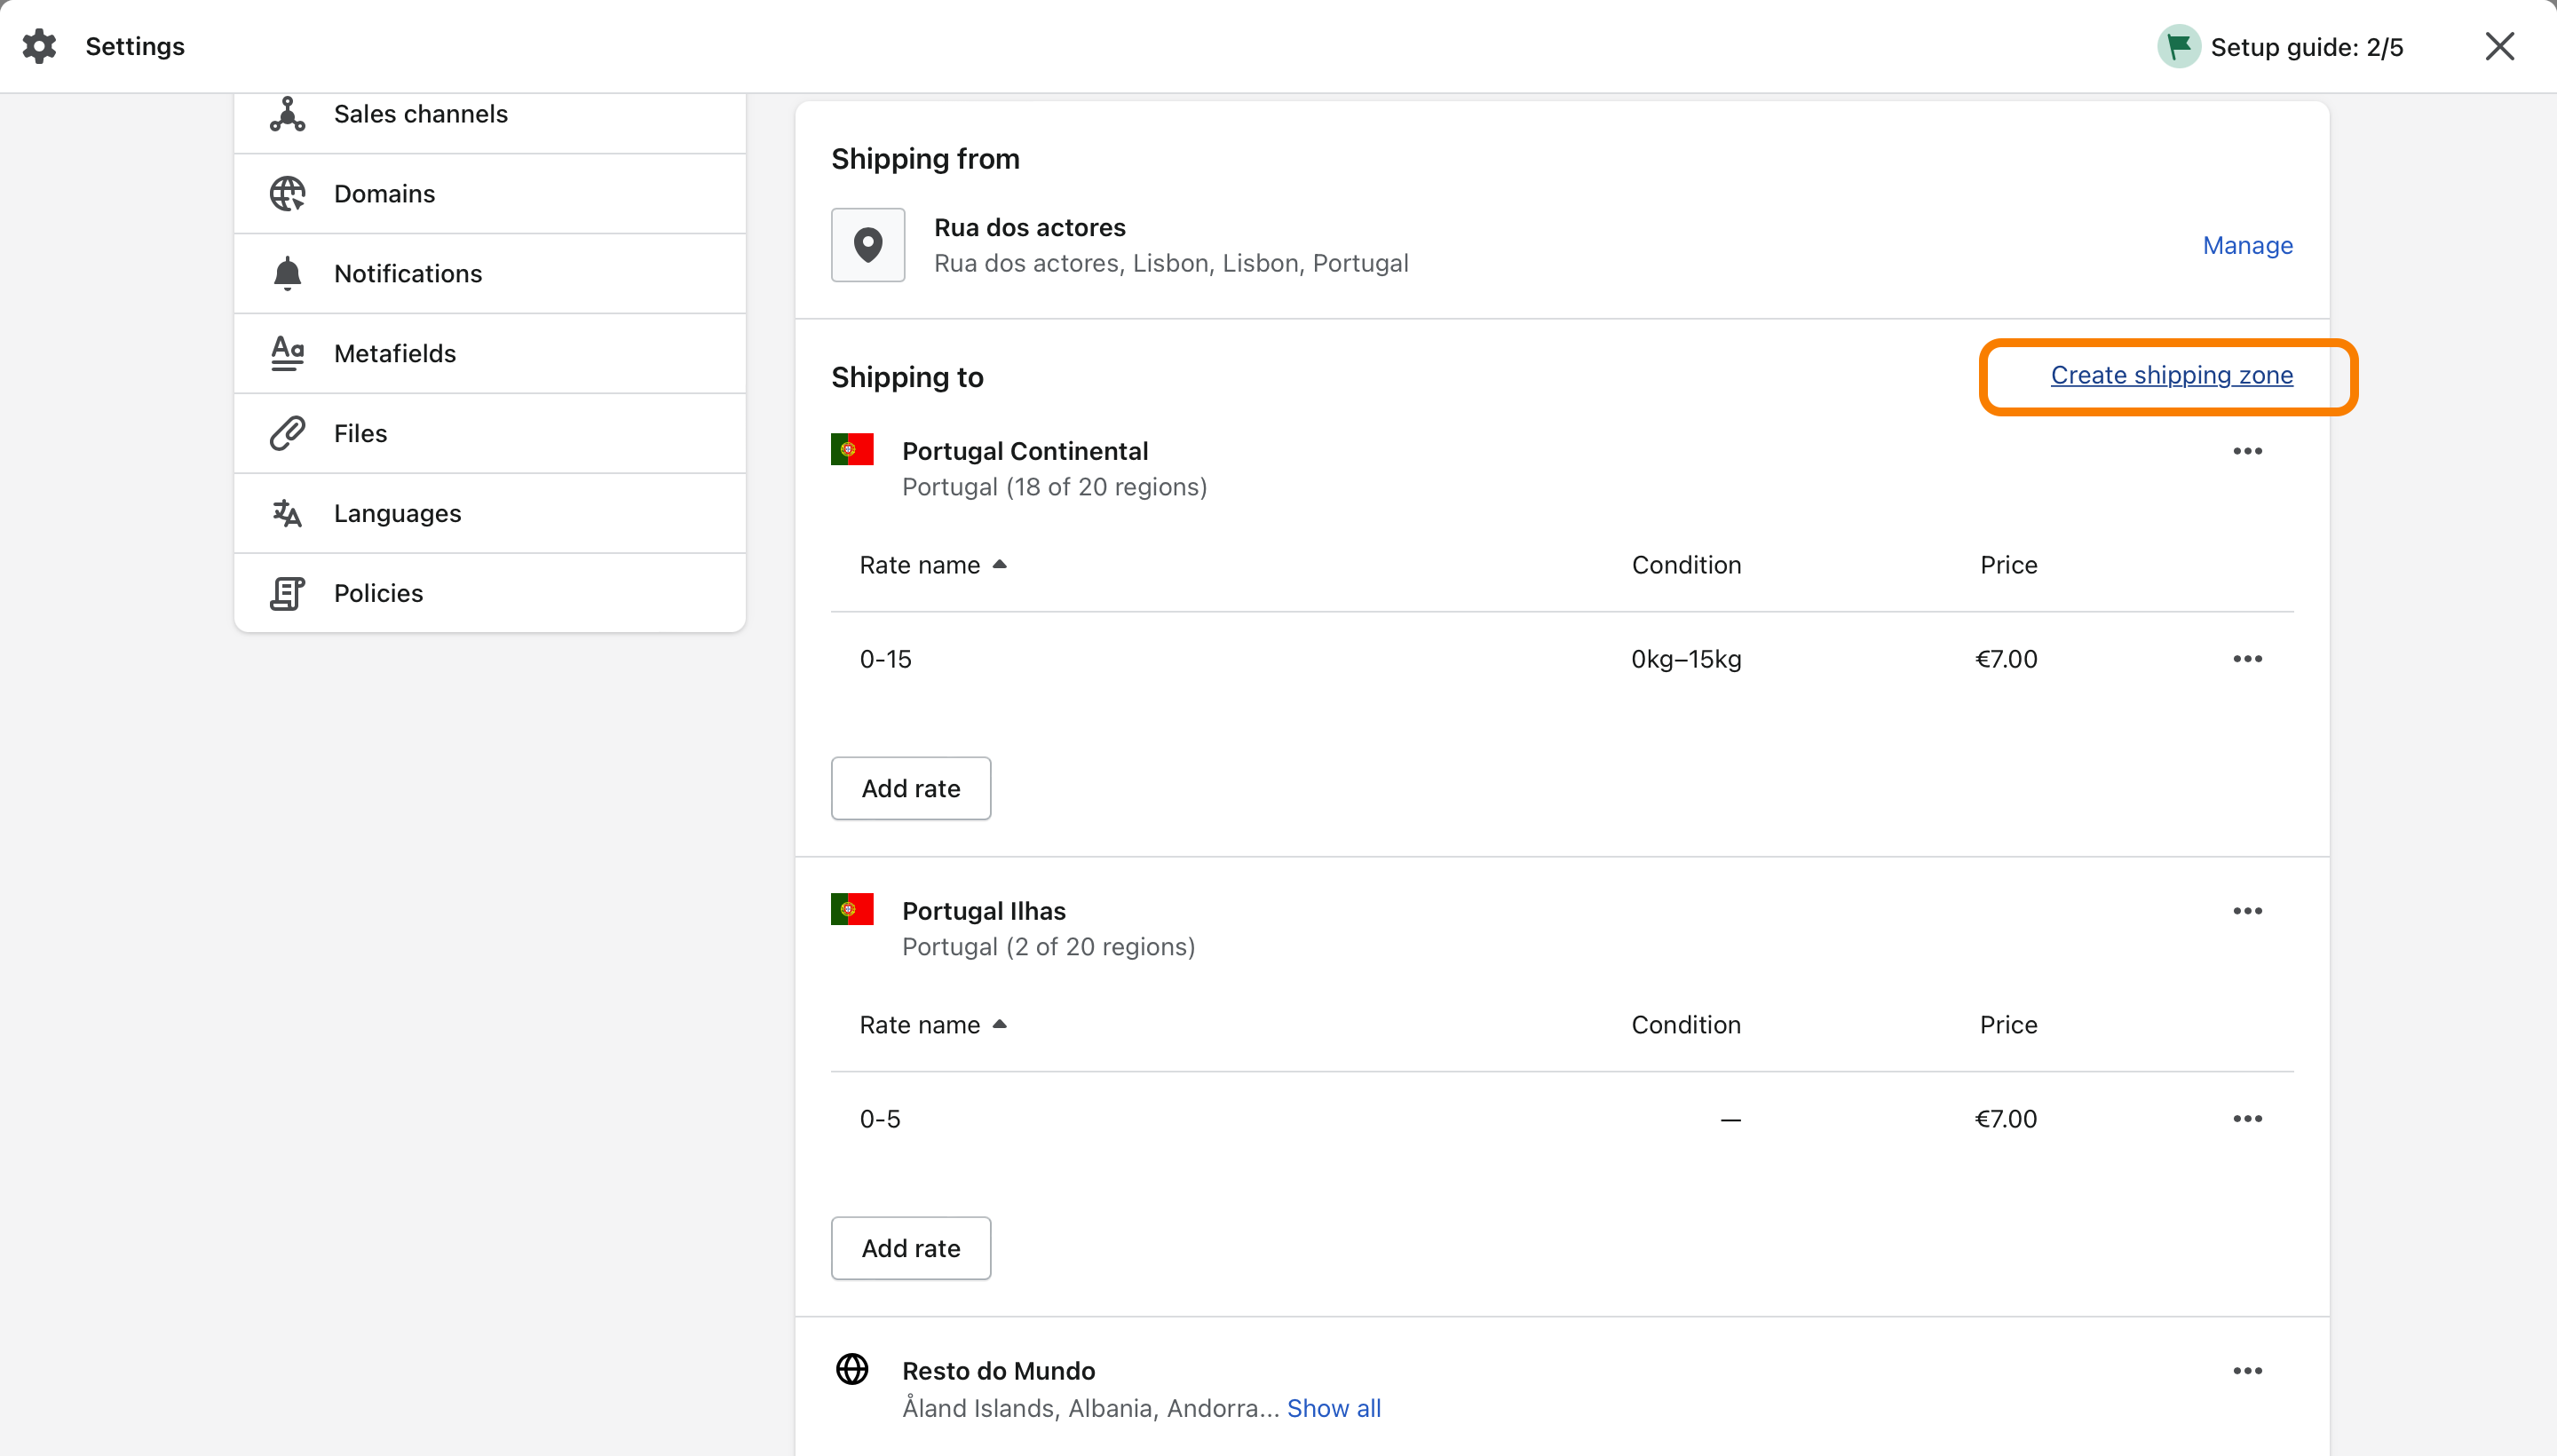
On Shopify you can create shipping zones where multiple countries are included, by country or by states/districts of a country. You should start by adding the name of the zone you want to create (in this example we will create the zones Portugal Mainland, Portugal Islands and Rest of the World)
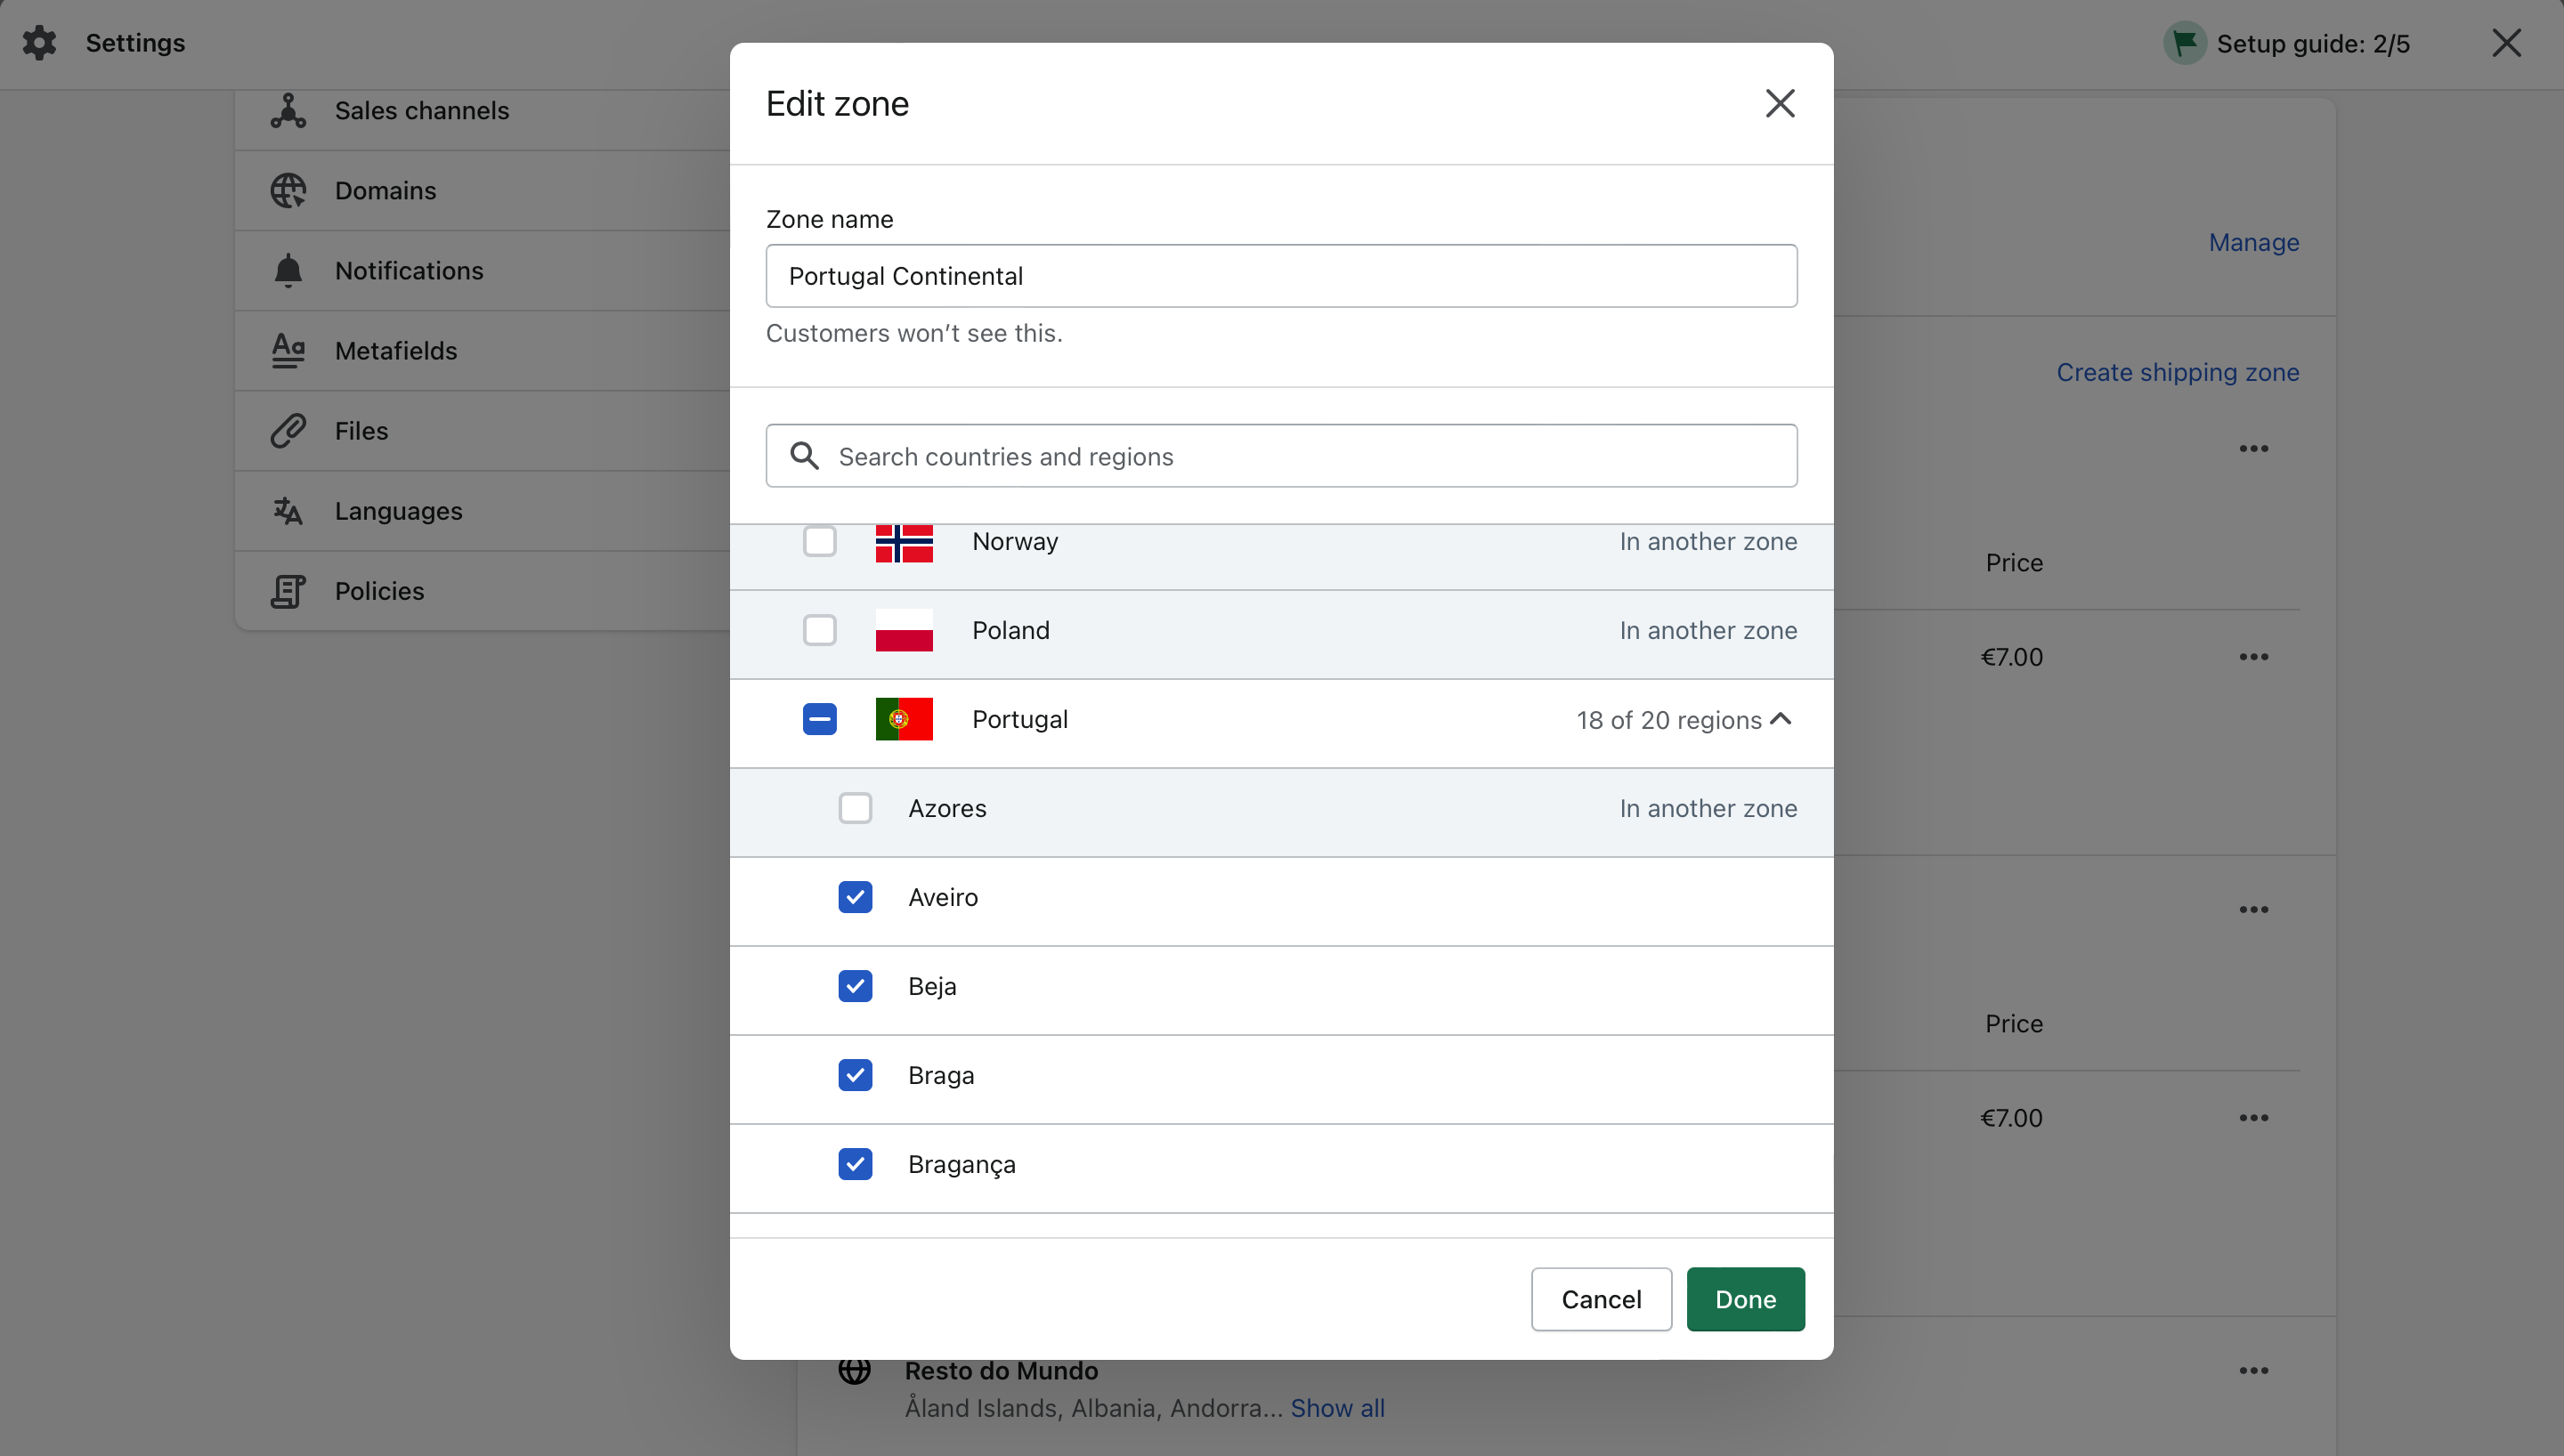
Afterwards you should select the country or countries you want and if you only want a certain zone inside the country you should click on the arrow next to the regions.
You can select the regions you want to configure inside a certain country. In this example for mainland Portugal we select the districts which belong to mainland Portugal. To save the selection you should click “Done”.
To add a new zone just click again on Create Shipping Zone and repeat the same process.
After creating all the zones you should click on Save to save them.
Configuration of shipping methods per zone
Once you have created the shipping zones, as in the past, you should consider whether to use one or several carriers and one or several shipping methods per carrier as well as how much freedom of choice you want to give your customers:
As an example you could provide only the type of shipping (ground service versus air service), speed of delivery (Delivery in 24 hours/Express versus delivery in 48 hours/Standard) or you could display the name and service of the carrier right away (CTT Service 13 hours versus GLS Service 72 hours).
Once you’ve defined how you’ll show shipping options to your customers at checkout, you should consider what levels of shipping values are required. This will depend on the type of product you are selling (single weight versus widely varying weights between items), the likelihood of a customer buying multiple items at the same time as well as the actual amount you want to charge your customers (you may only want to apply a flat rate, provide free delivery or an average rate that is the same for all customers).
After these decisions are made it’s time to configure the shipping options properly in the back office of your sales platform:
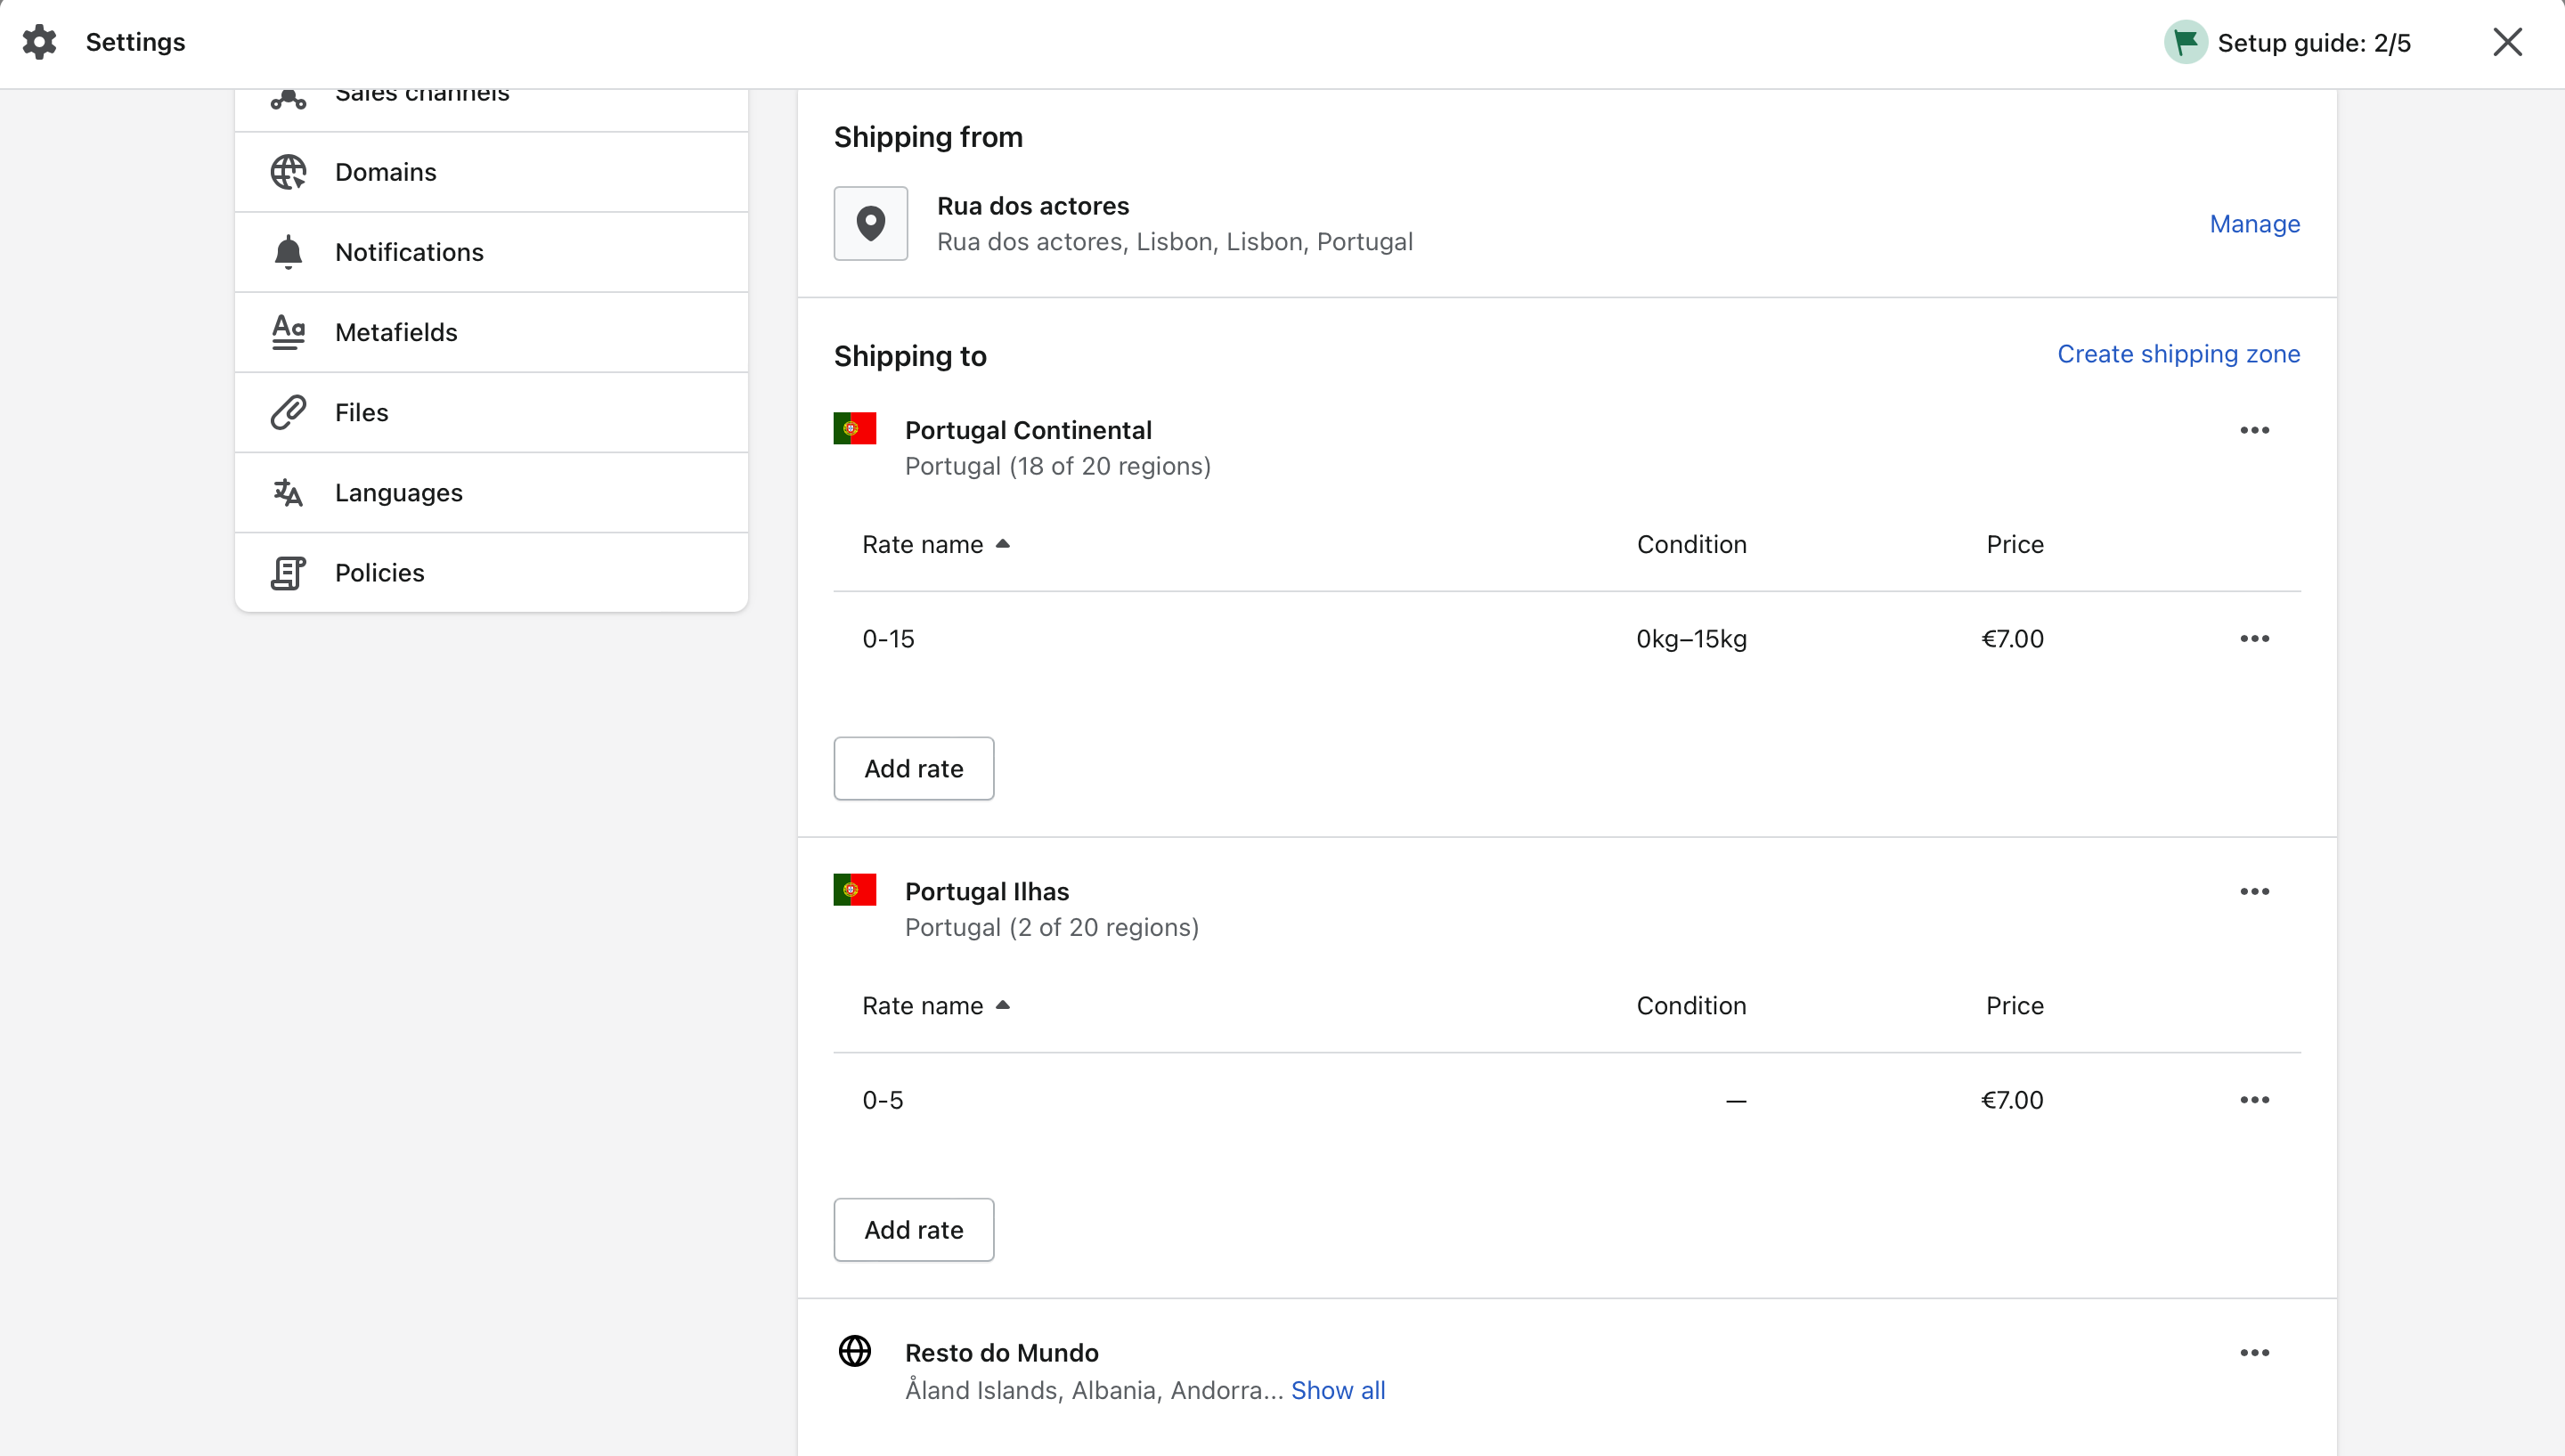
To add shipping methods you should go to “Settings” and then “Shipping and Delivery”. Then in “shipments by carrier” you must click on “Manage”.
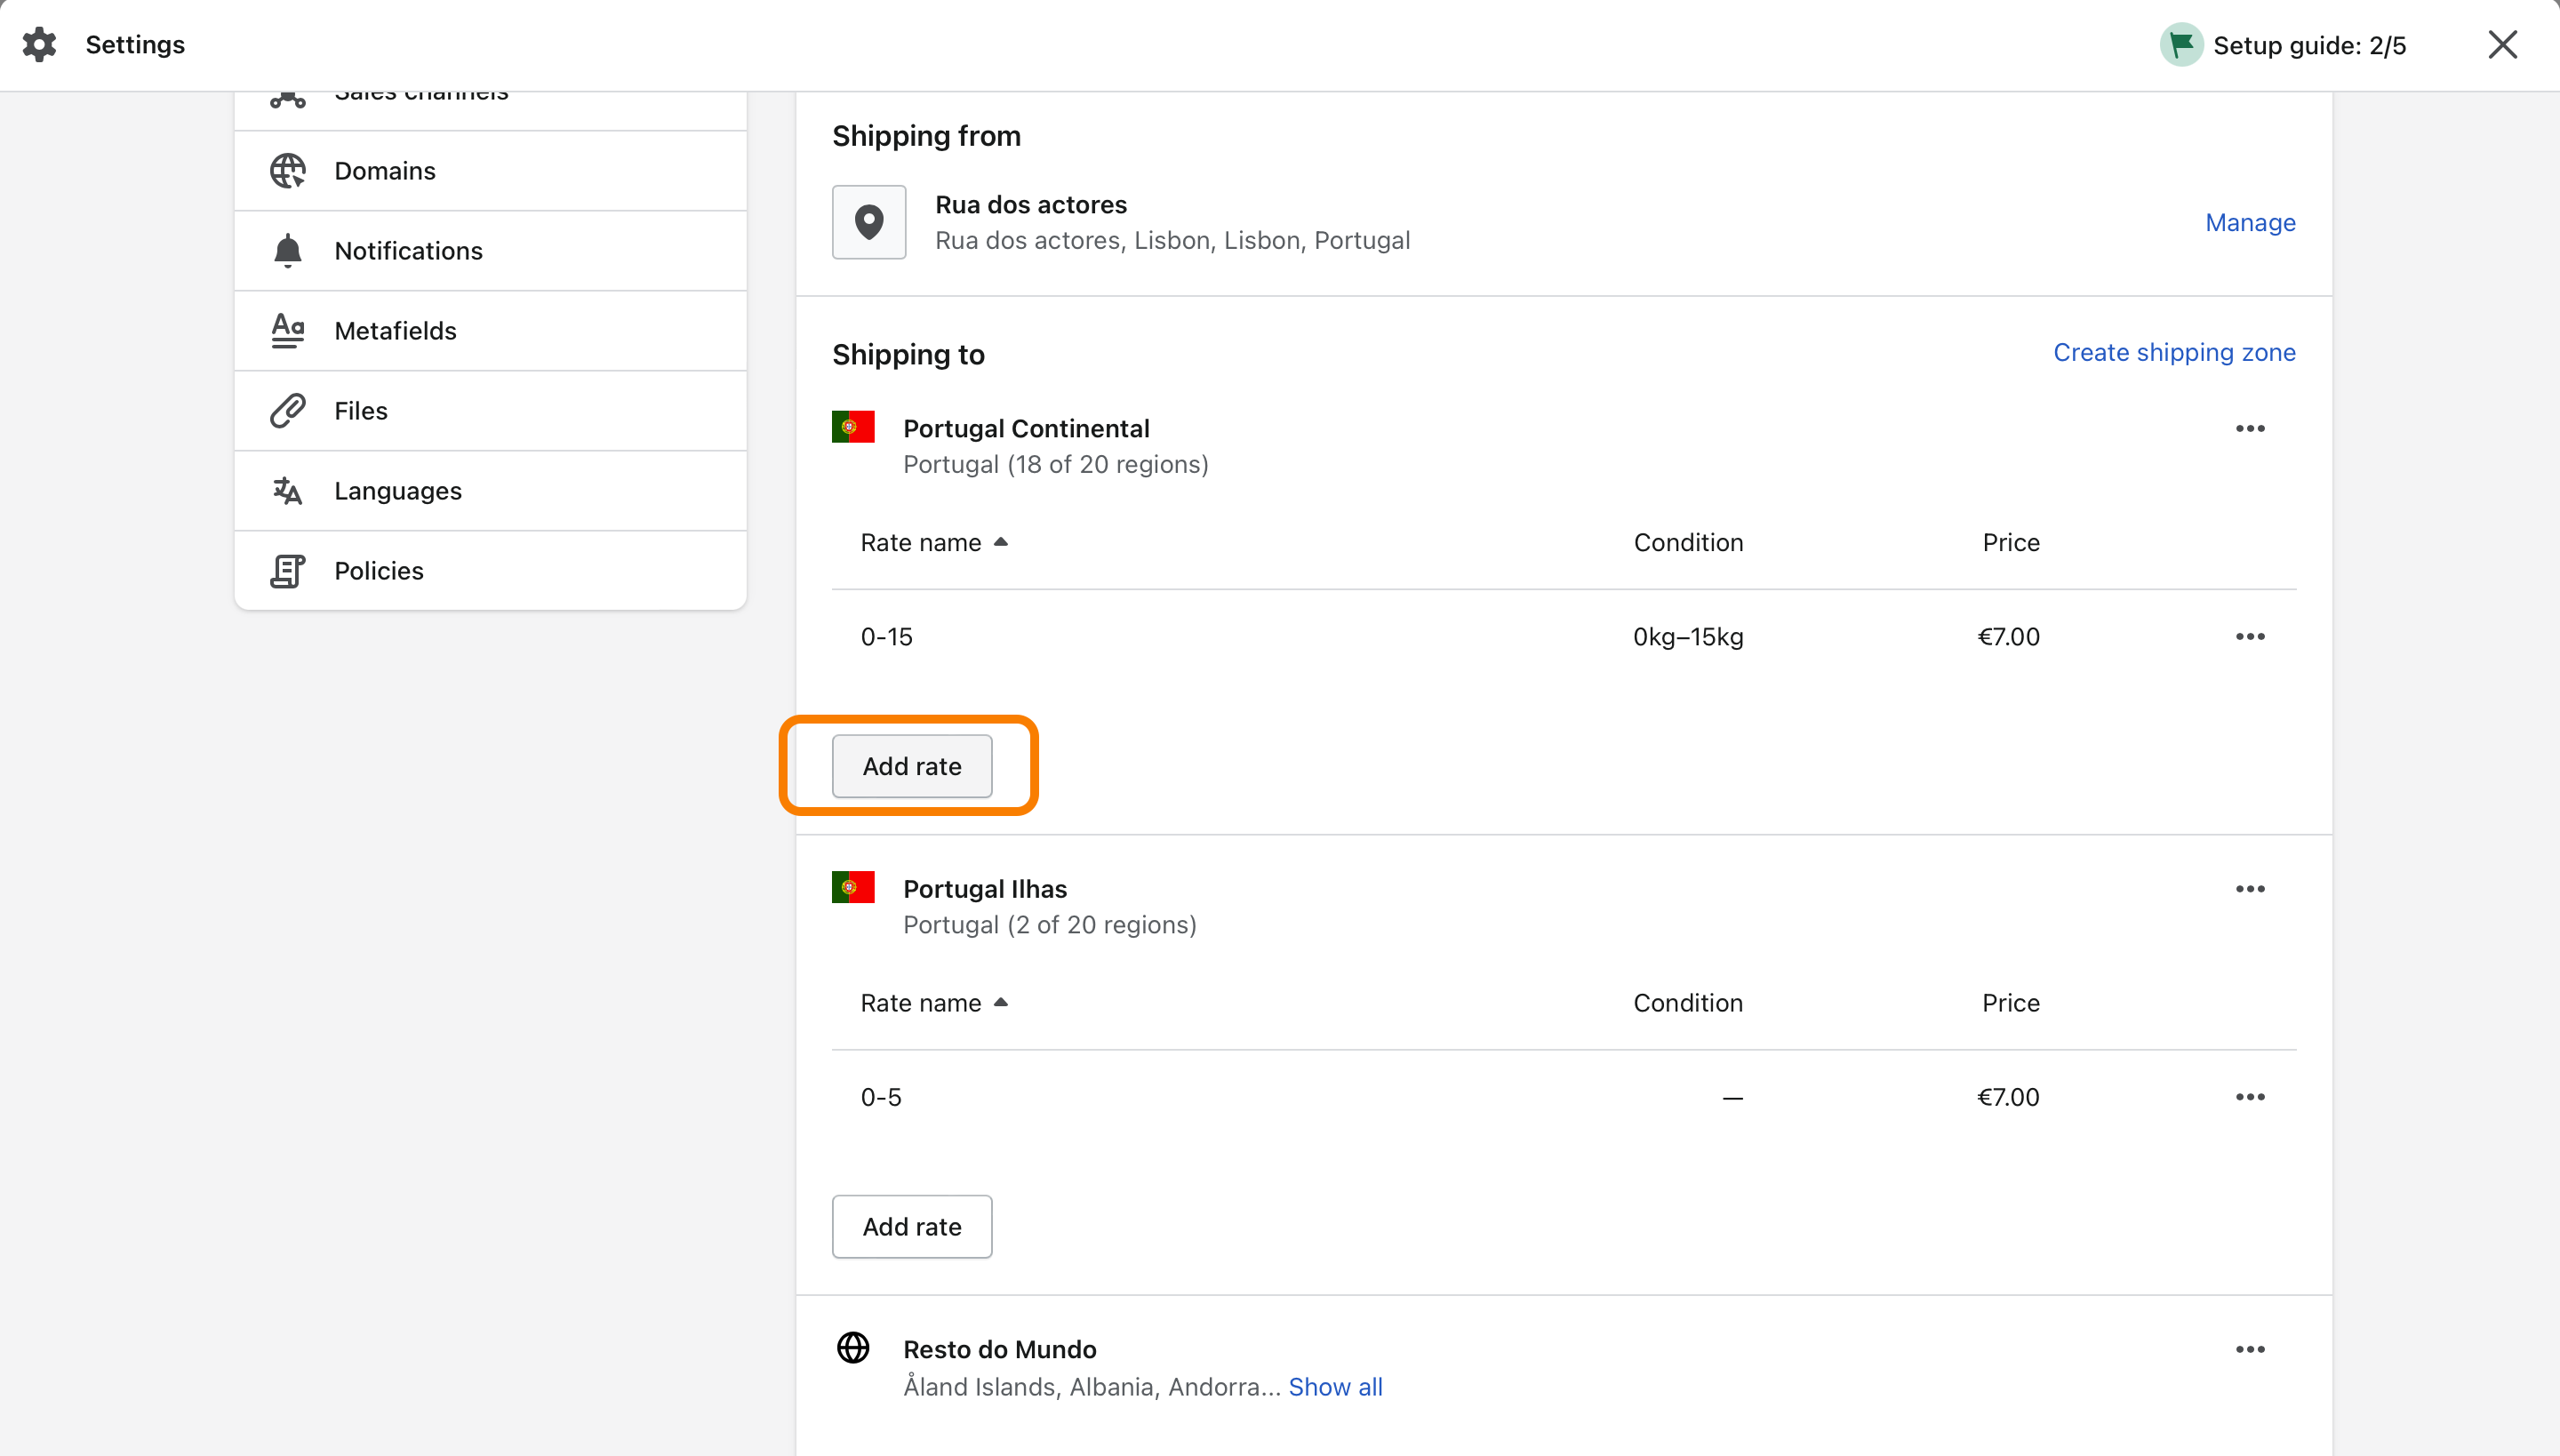
In the menu that will appear where you will find the various shipping zones previously created you must click “Add Rate” within each zone to add the respective shipping rules for that zone.
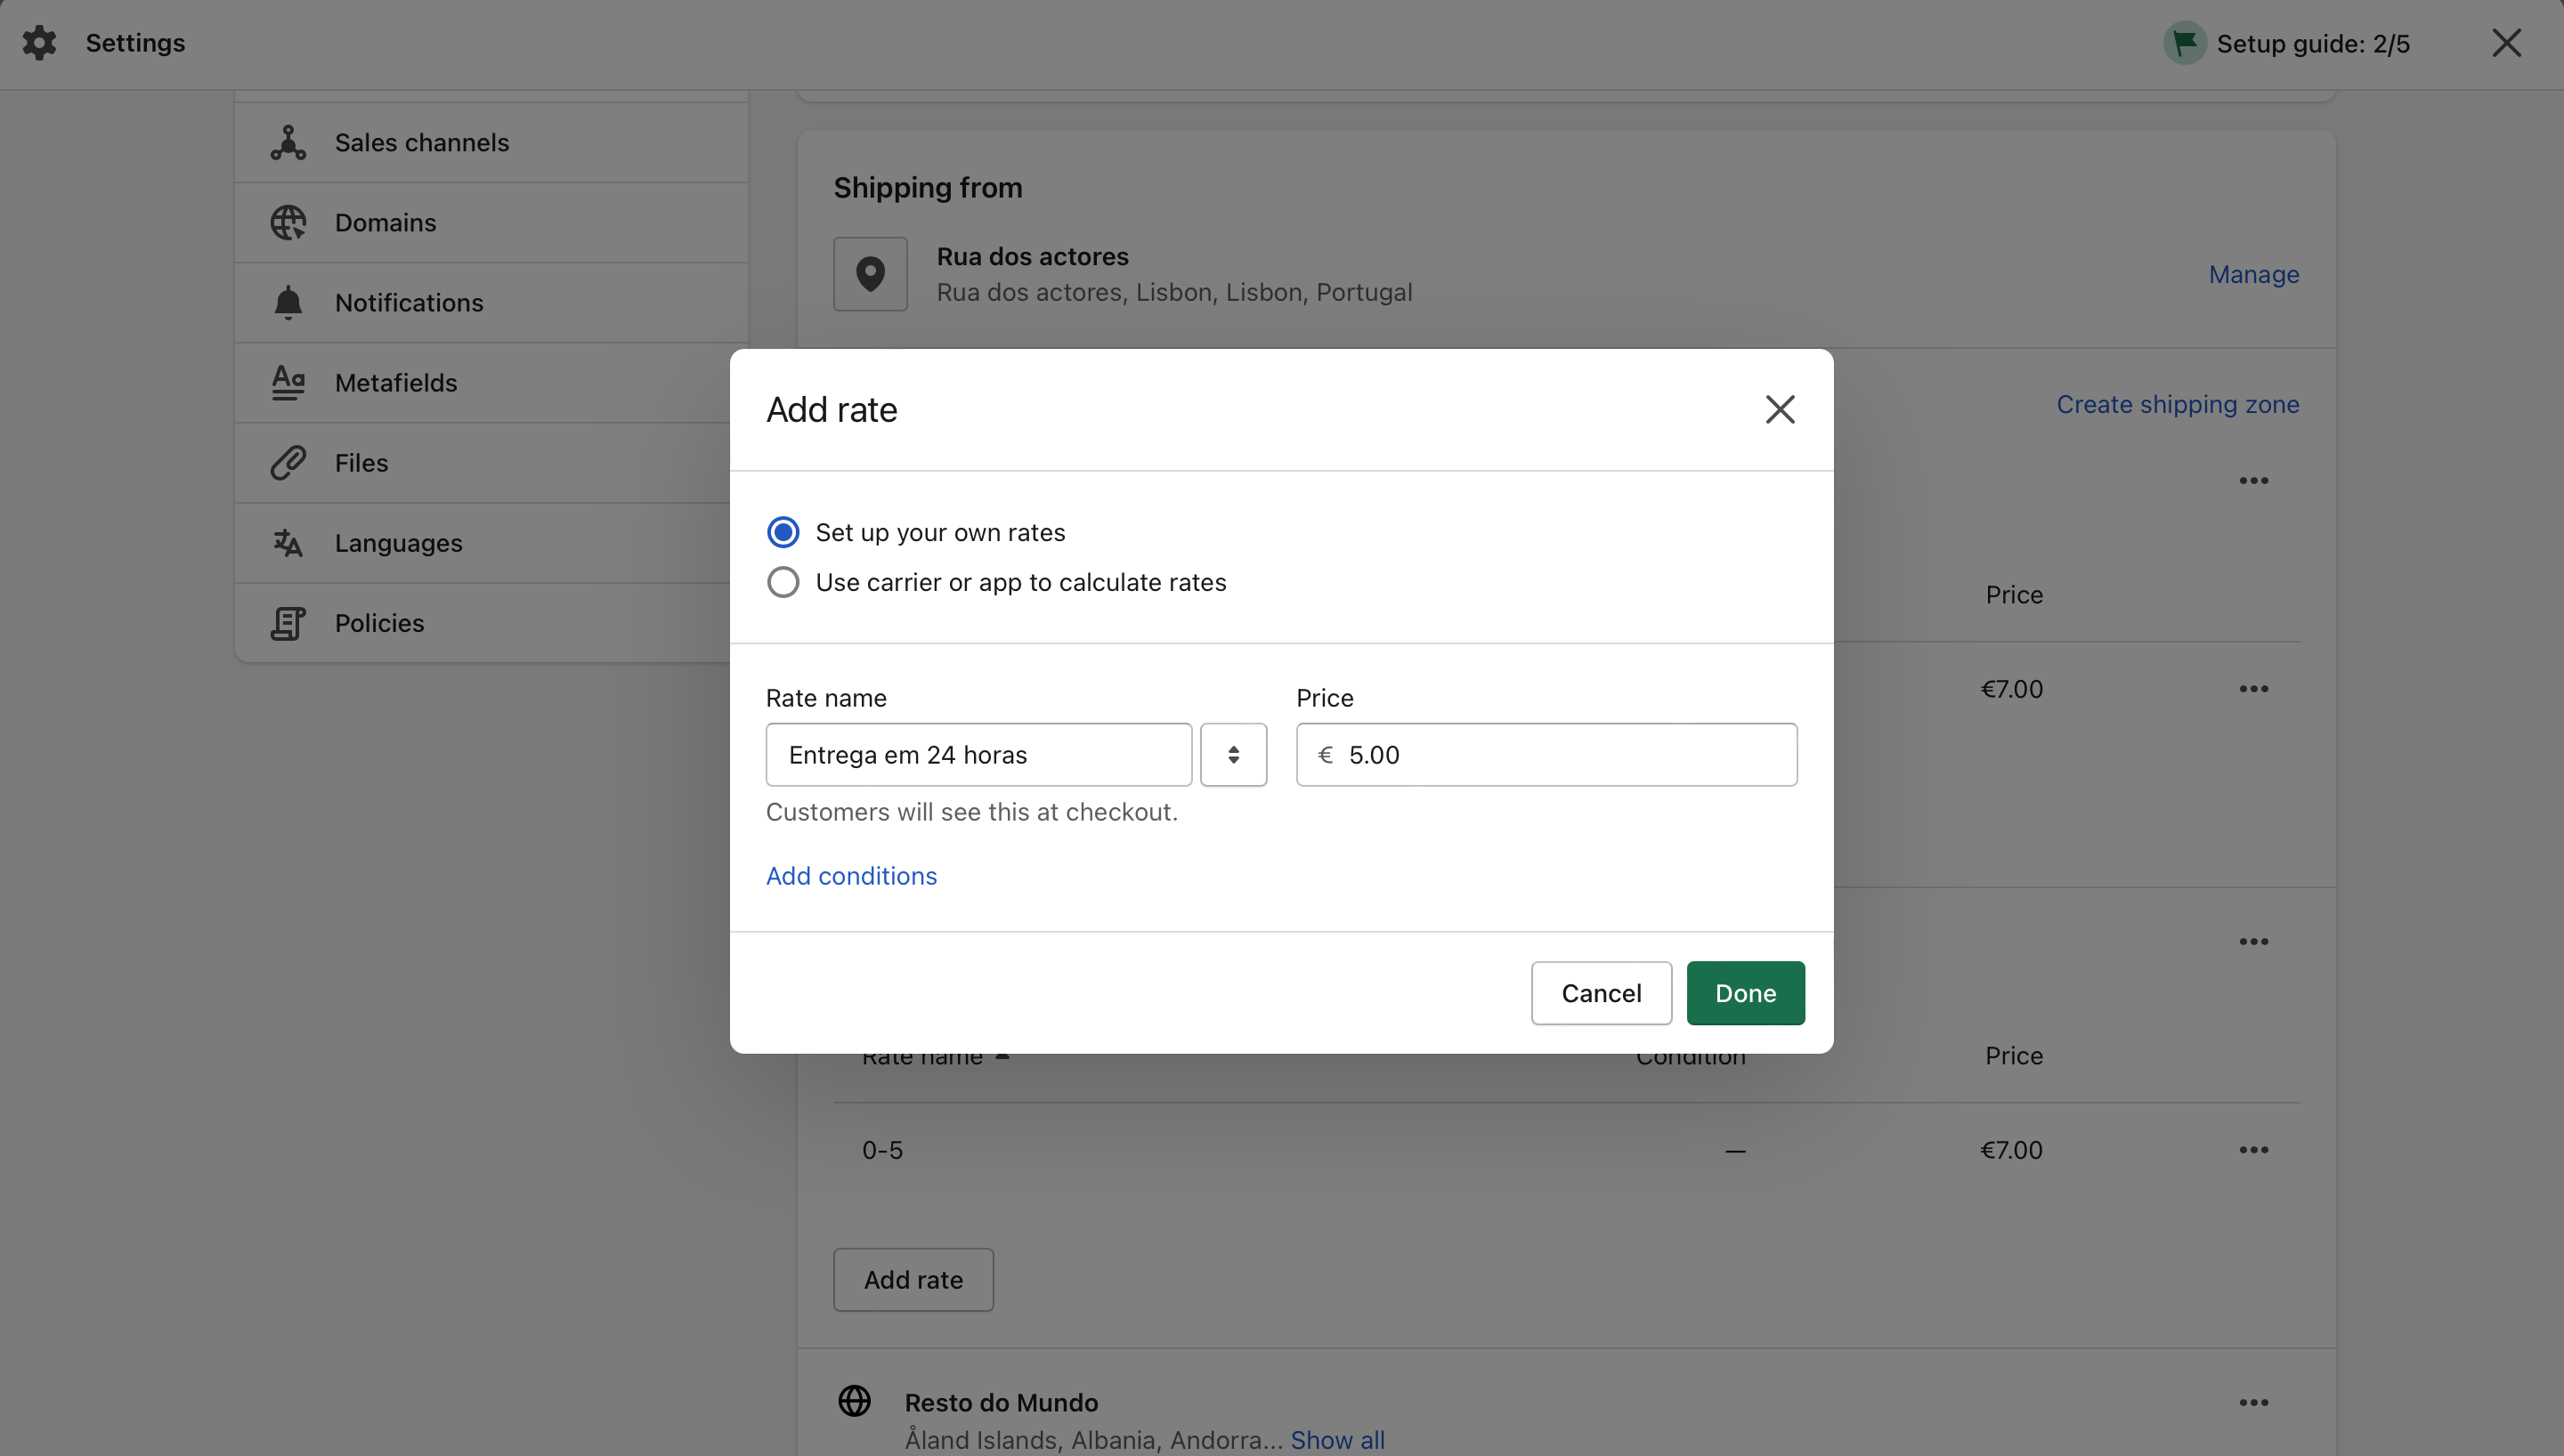
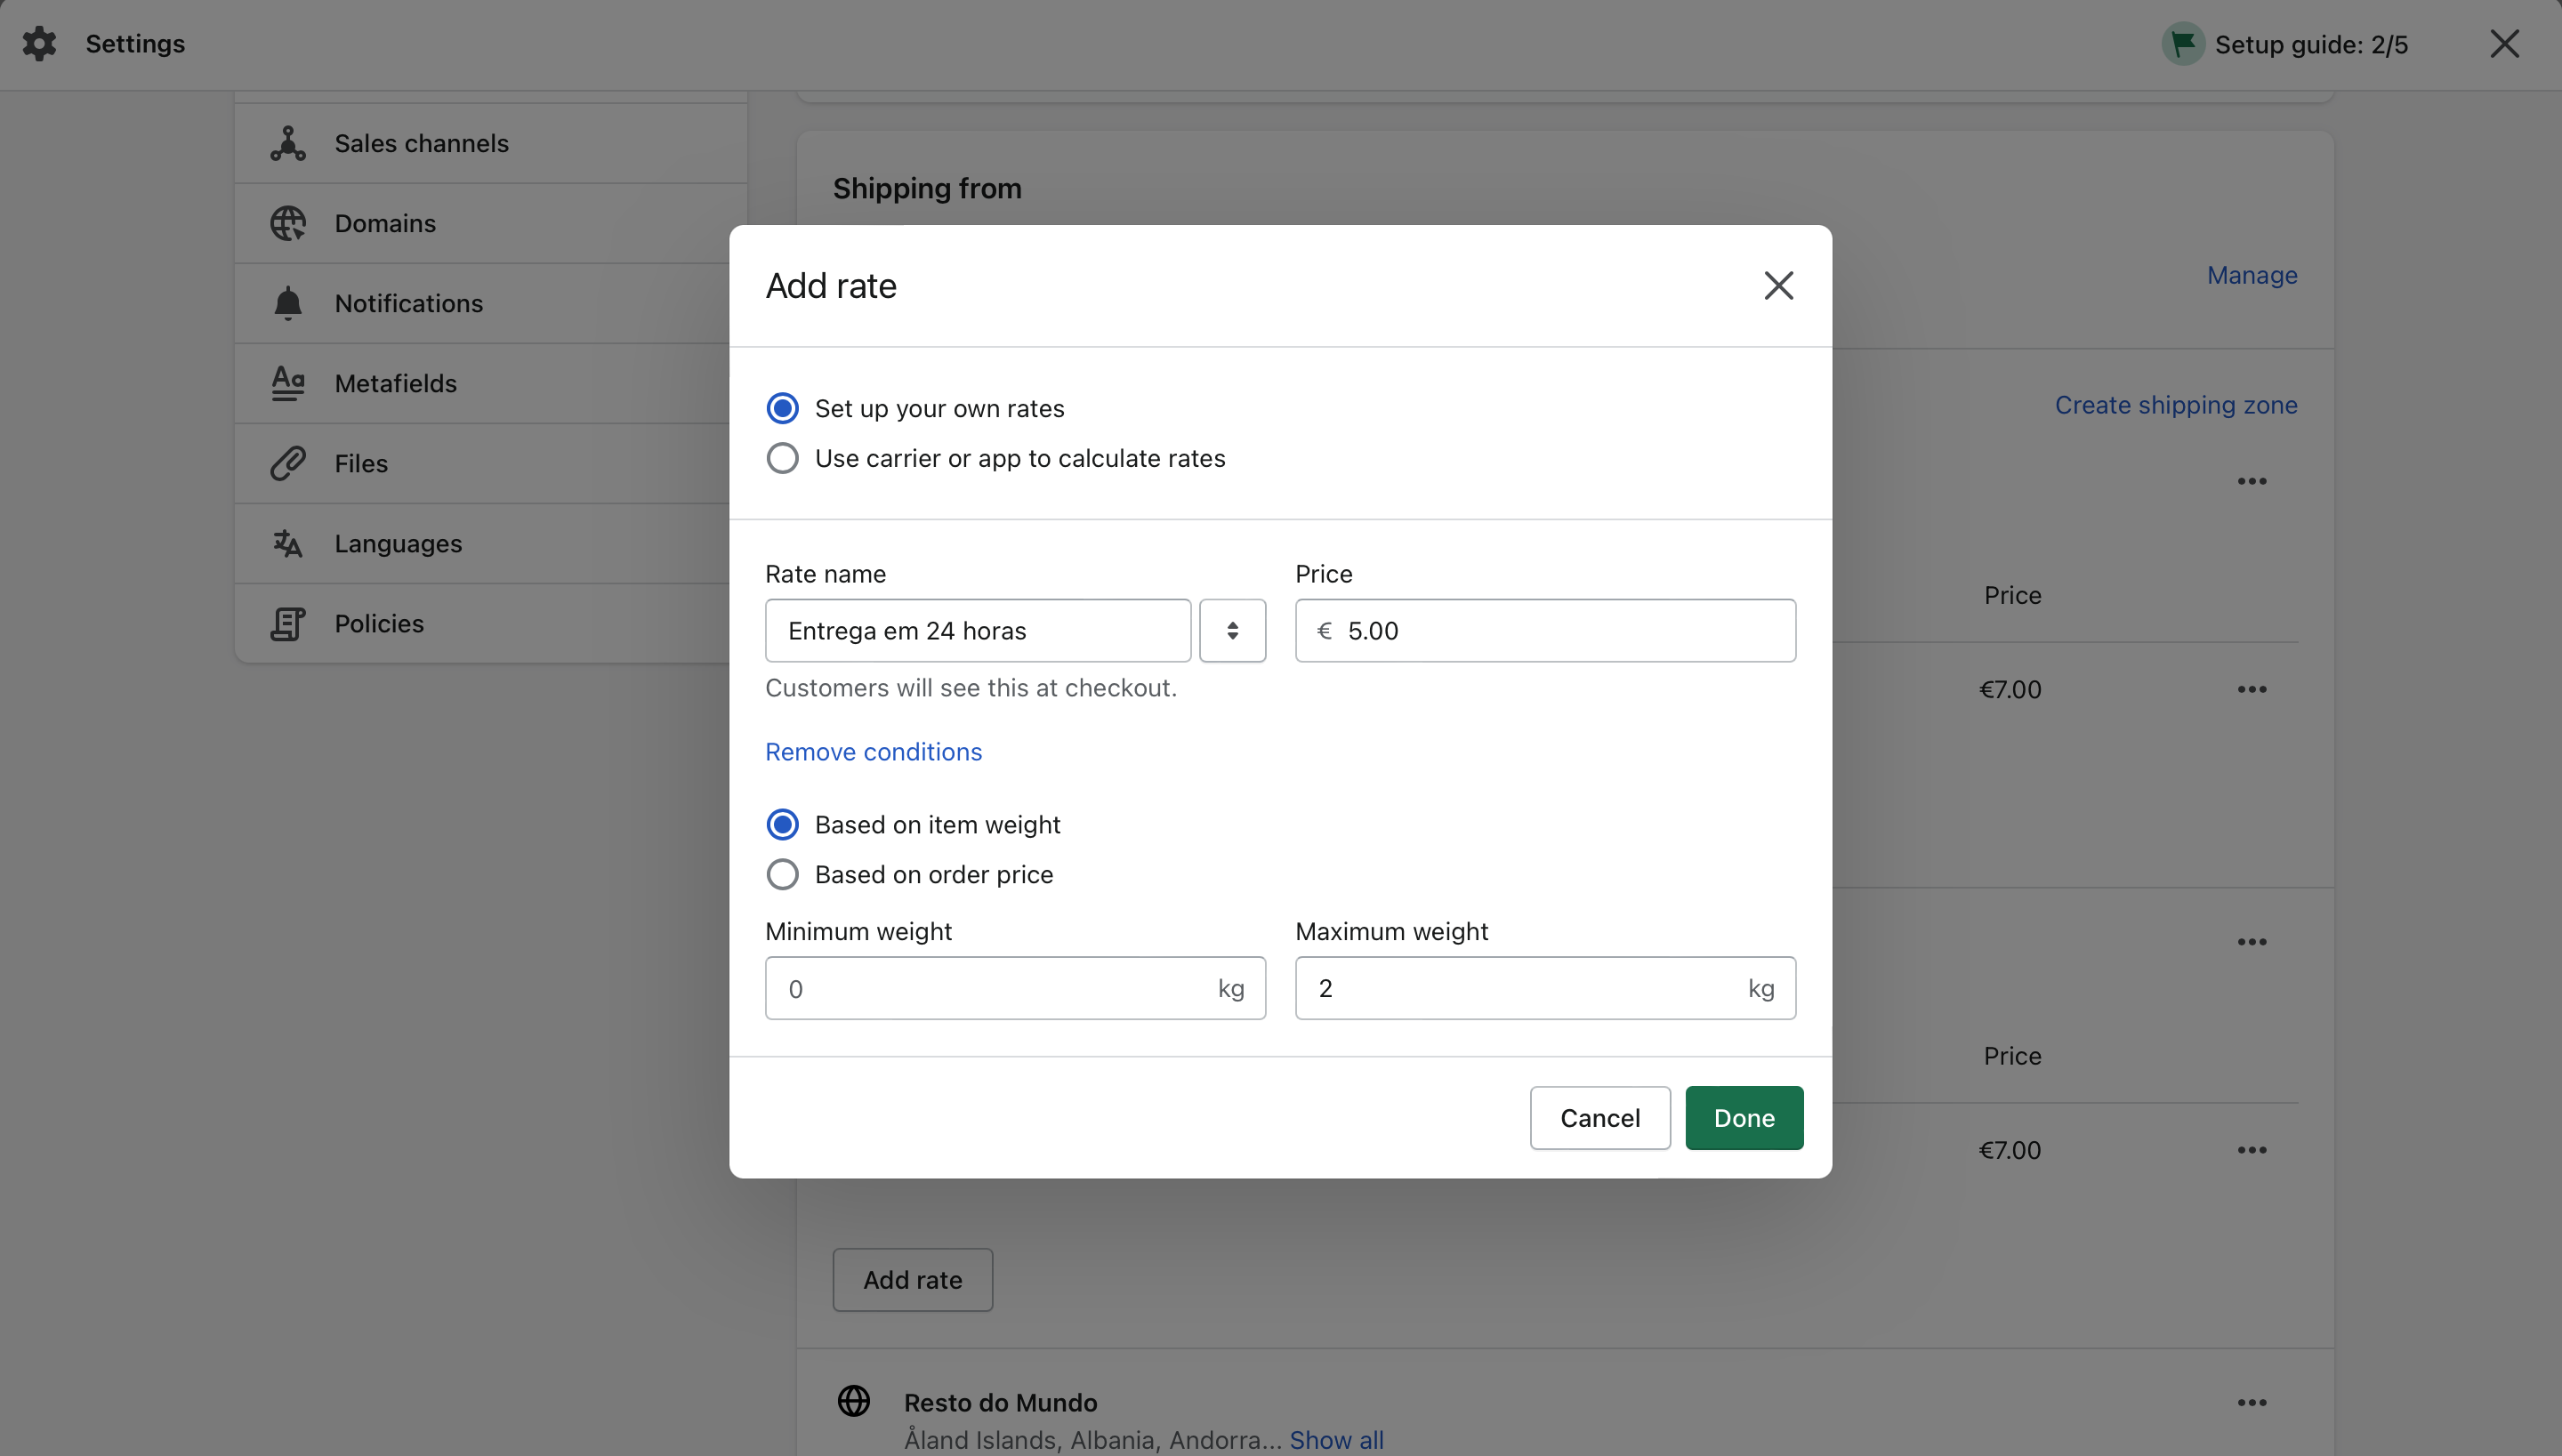
You can create the name of this shipping method that will appear to your customers at Checkout (in this example we created a delivery method with the name of Delivery in 24 hours).
The name assigned to each method must allow you to identify them (for example if you want to send shipments to Portugal with 24h delivery by CTT and to Spain with 24h delivery by GLS you should avoid giving the name “24h delivery” because later it will be more difficult to distinguish them.
In this example it would be preferable if the shipping methods were called Portugal 24hour delivery or CTT 24hour delivery and Spain 24hour delivery or GLS 24hour delivery respectively).
Here you also set the amount to charge for this shipping method (in this example we set the amount to 5 euros). You can only set one value per shipping method or you can split this shipping method according to the weight or value of the shopping cart. To do this fractioning just click on “Add Conditions”.
In this new menu you can choose whether you want to split the order by weight (based on item weight) or by value (based on order price). In this example we have chosen to split the shopping cart by weight.
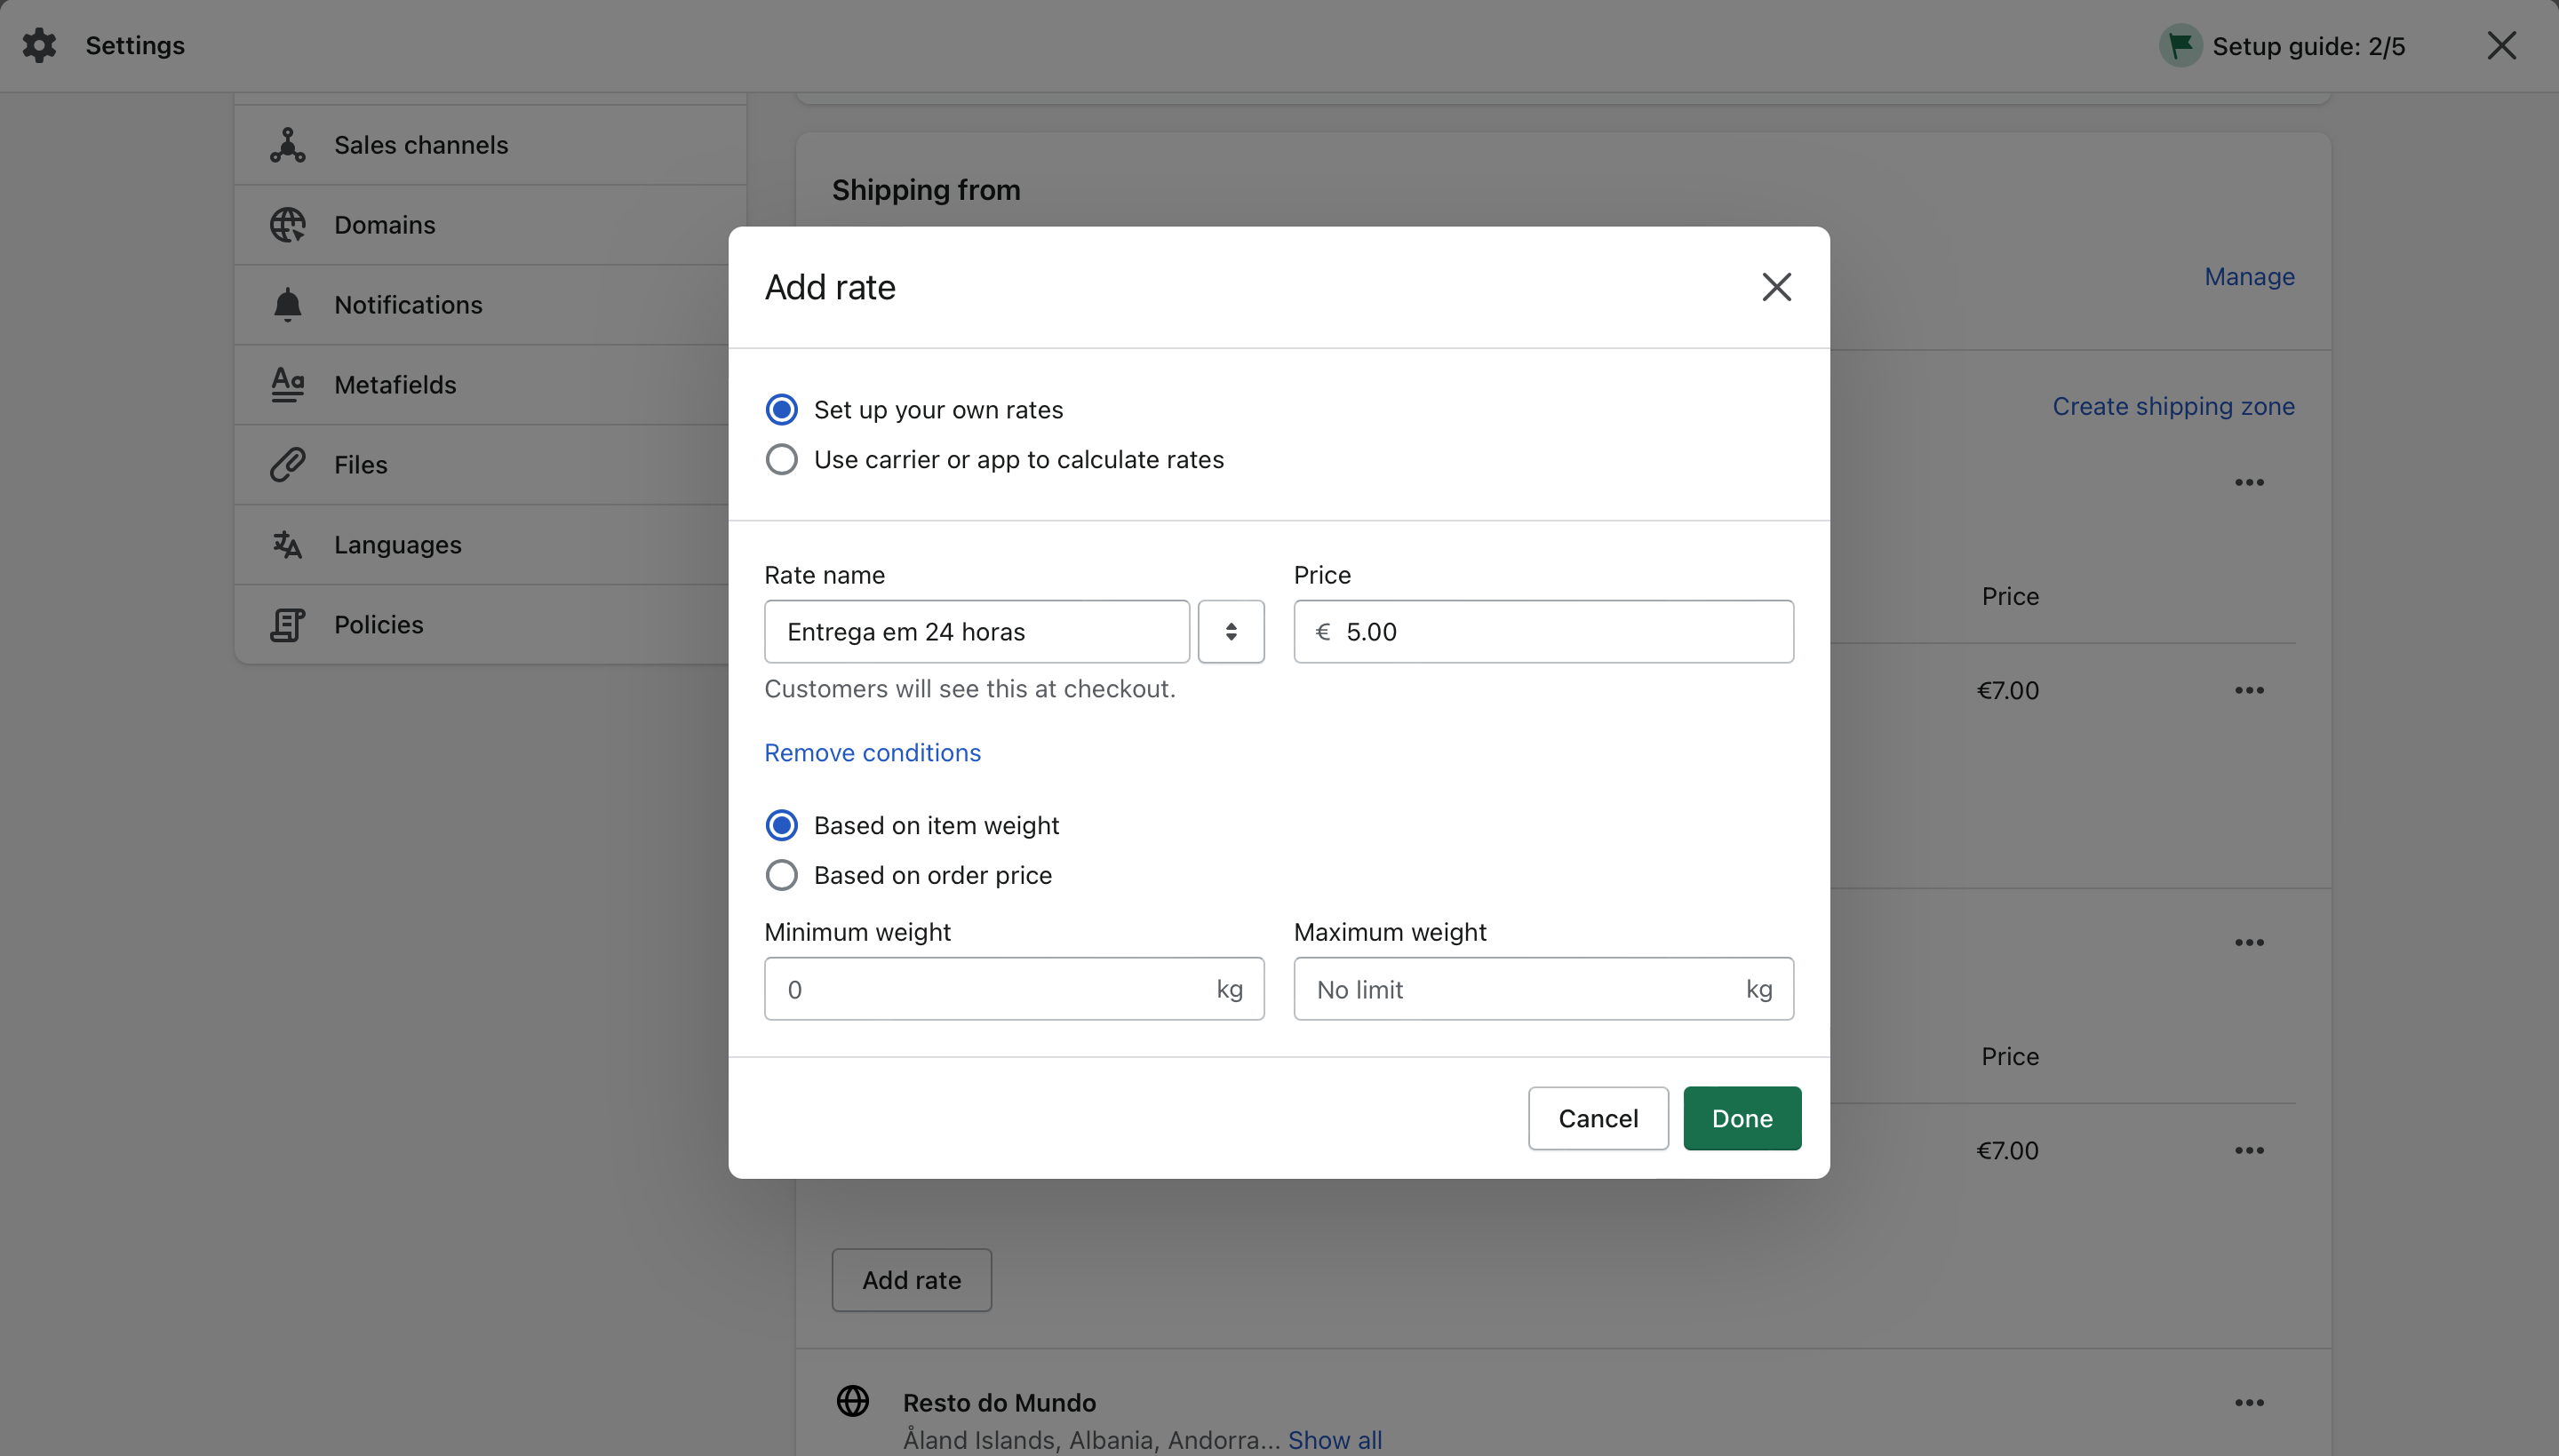
Afterwards you must define the limits of that range as you wish (in this example we chose a range of 0 to 2kg). To save these settings click Done.
You must repeat this same process for the various ranges you wish to make available for each type of delivery.
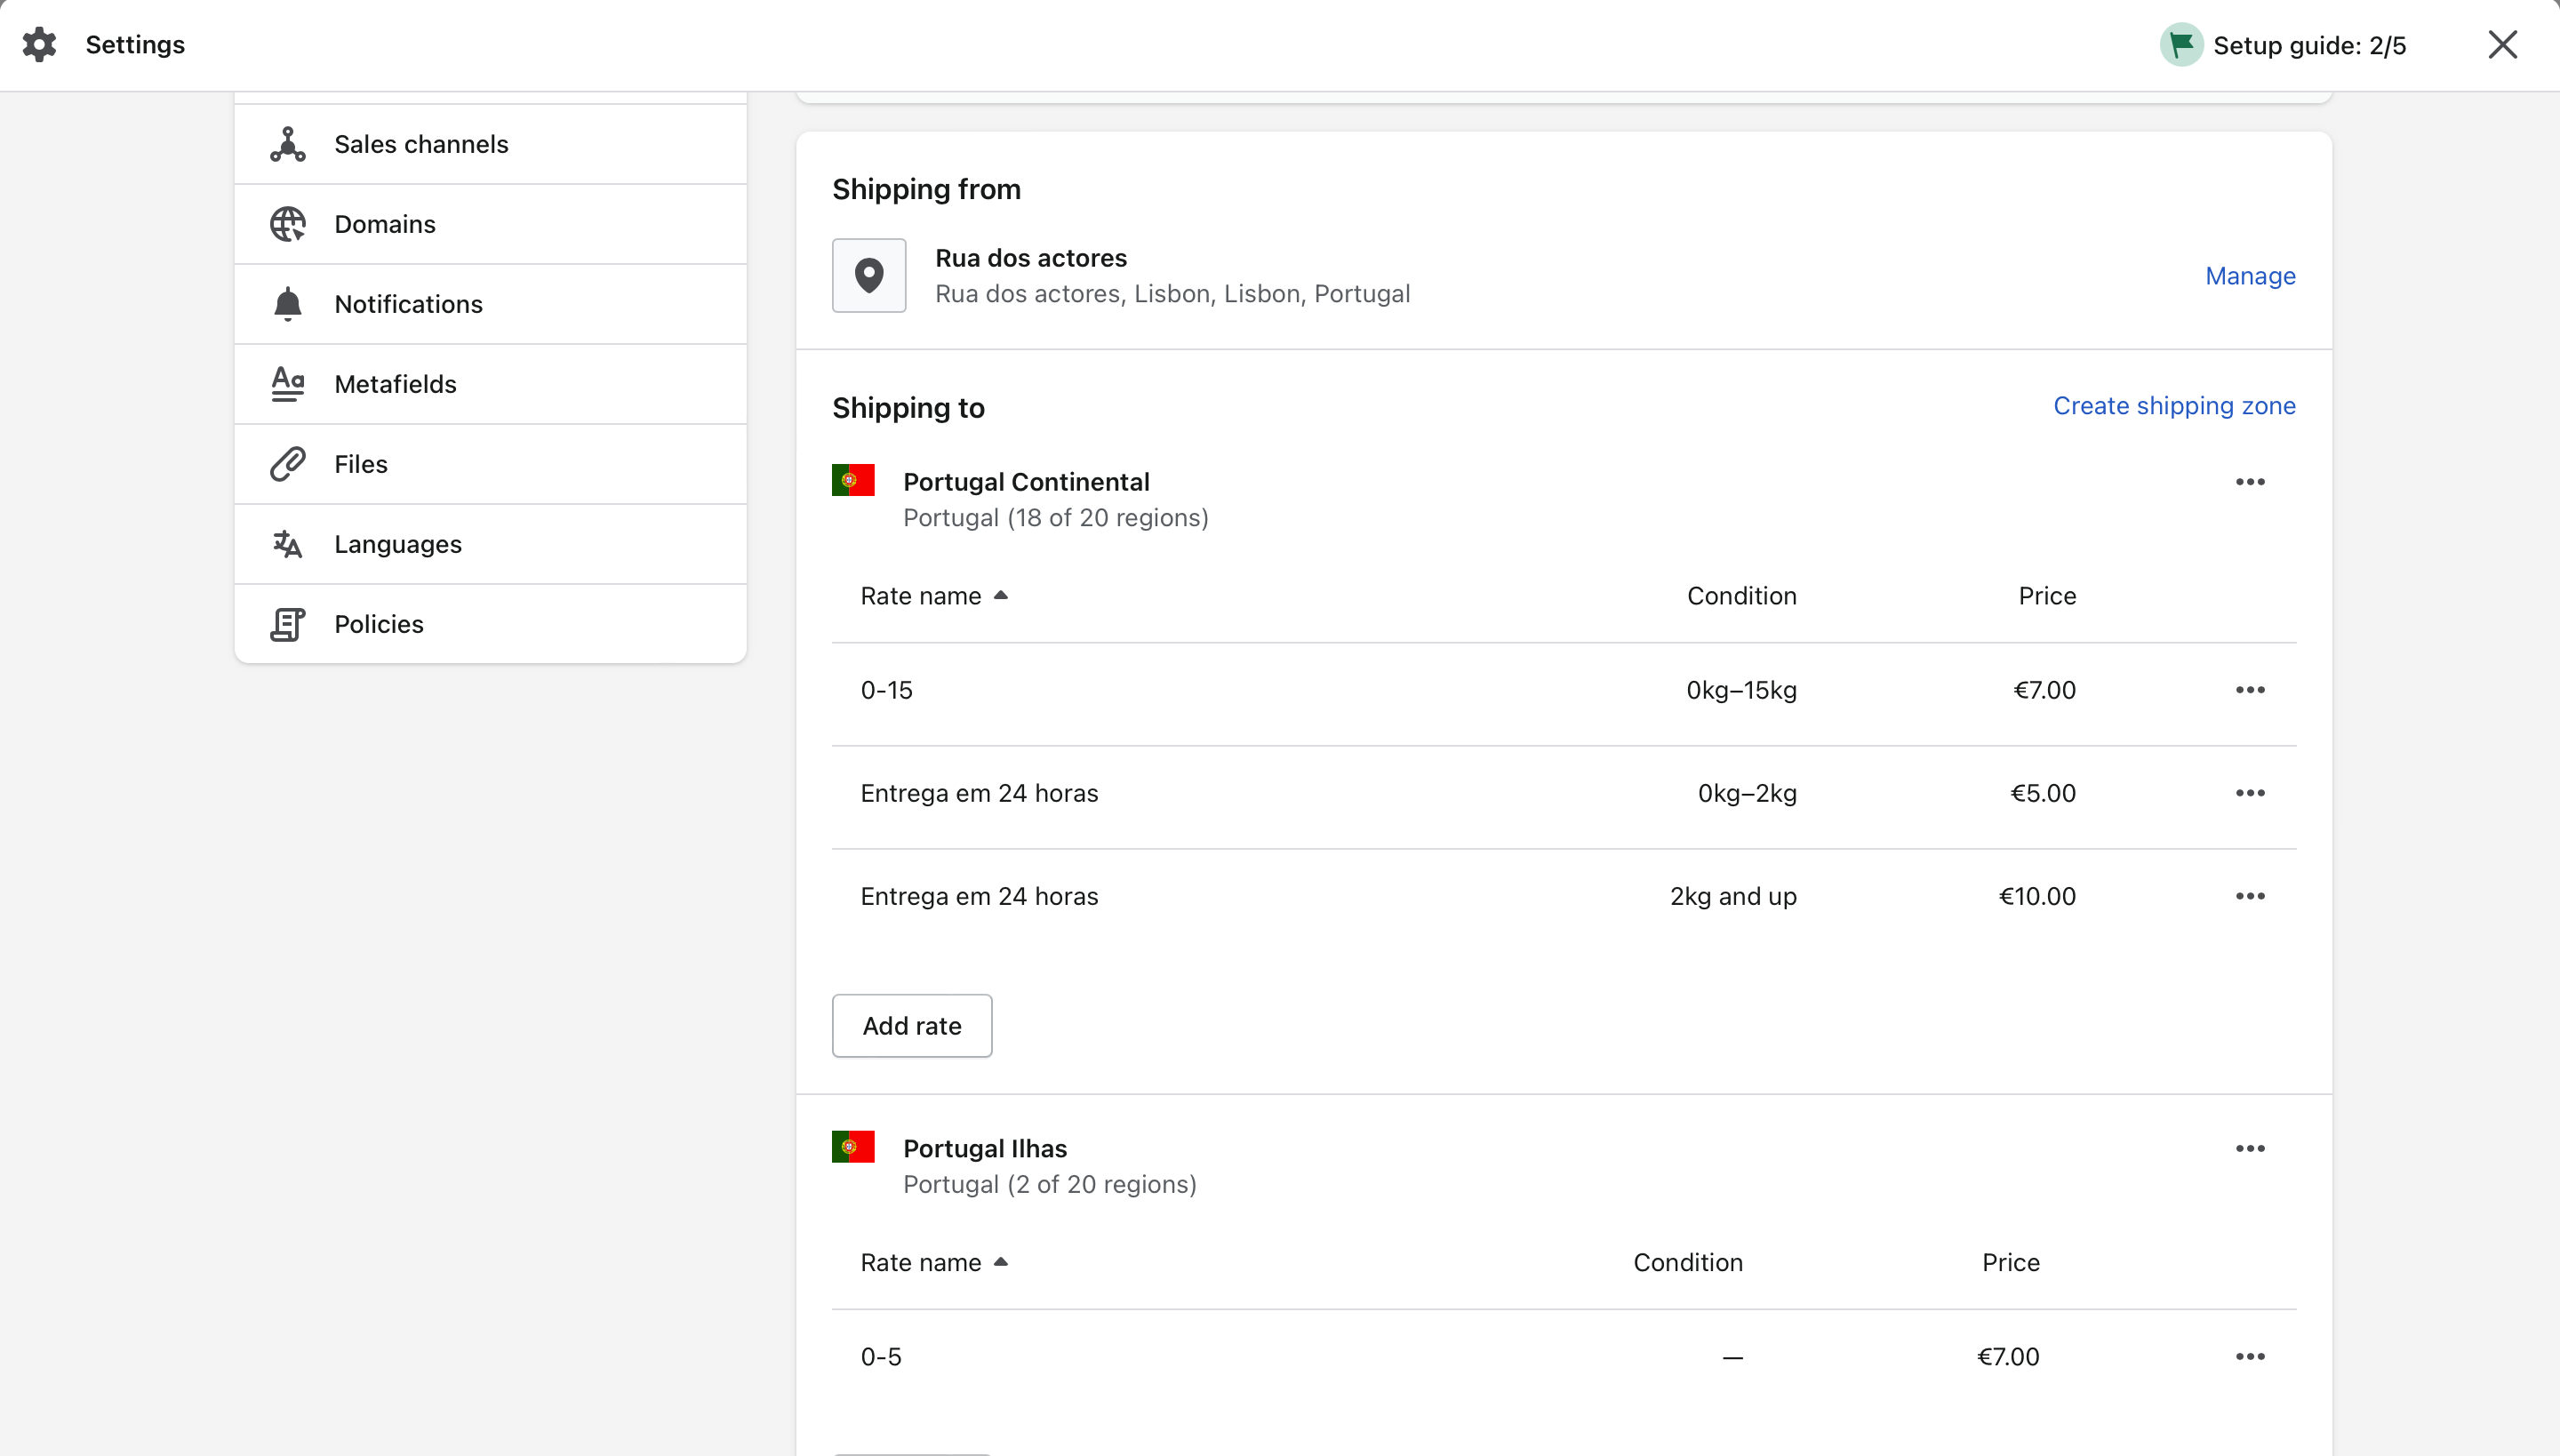
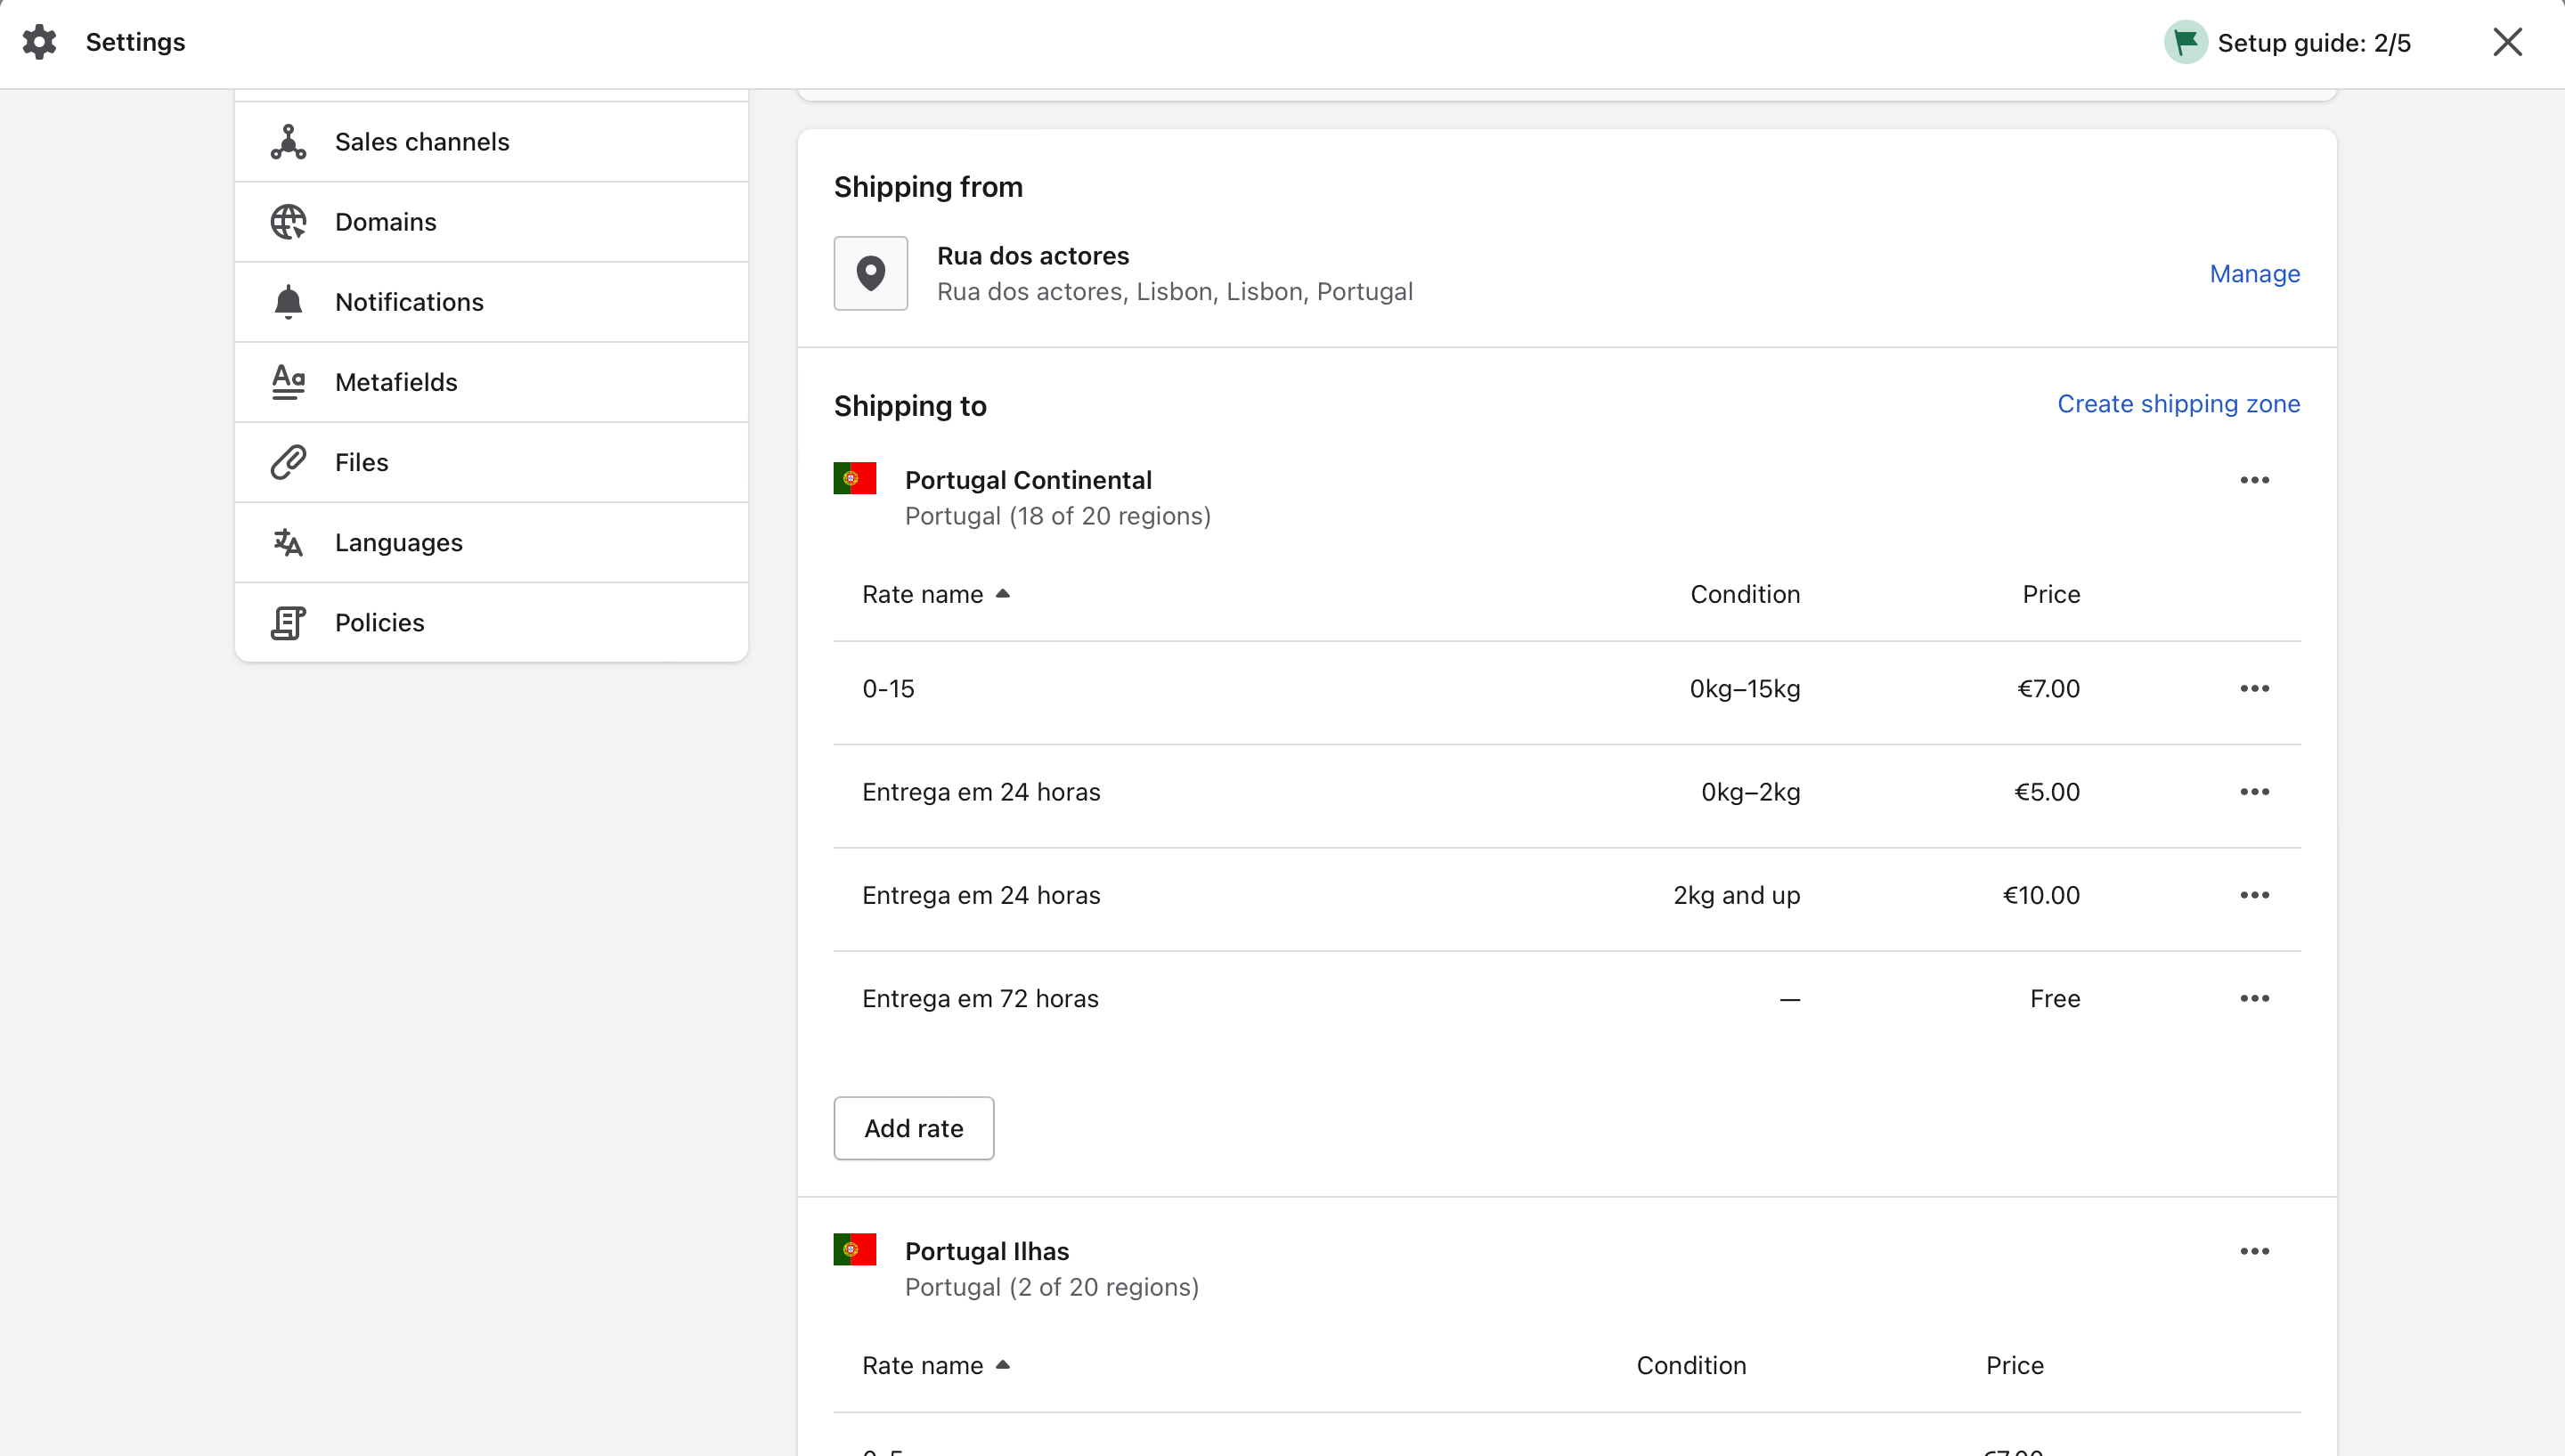
At the same time, you can also create several shipping methods for the same zone by clicking on Add rate. In this case, it is important that the shipping method name is different.
In this example, the second shipping method was named Delivery in 72 hours and was defined as free.
After configuring all the shipping methods desired for the various zones, you must click on Save to save the new configurations.
Configuration of shipping rules
The configuration of shipping rules occurs on the Shiptimize platform in your customer area.
If you use only one carrier and service level for all your shipments you only need to use the Default Configuration, if you use more than one carrier or service level you can configure the rules in the Rule Book.
Default shipping setting
Going to Settings > Shipping Defaults > Default Shipping Method, you can select the carrier you want to use.
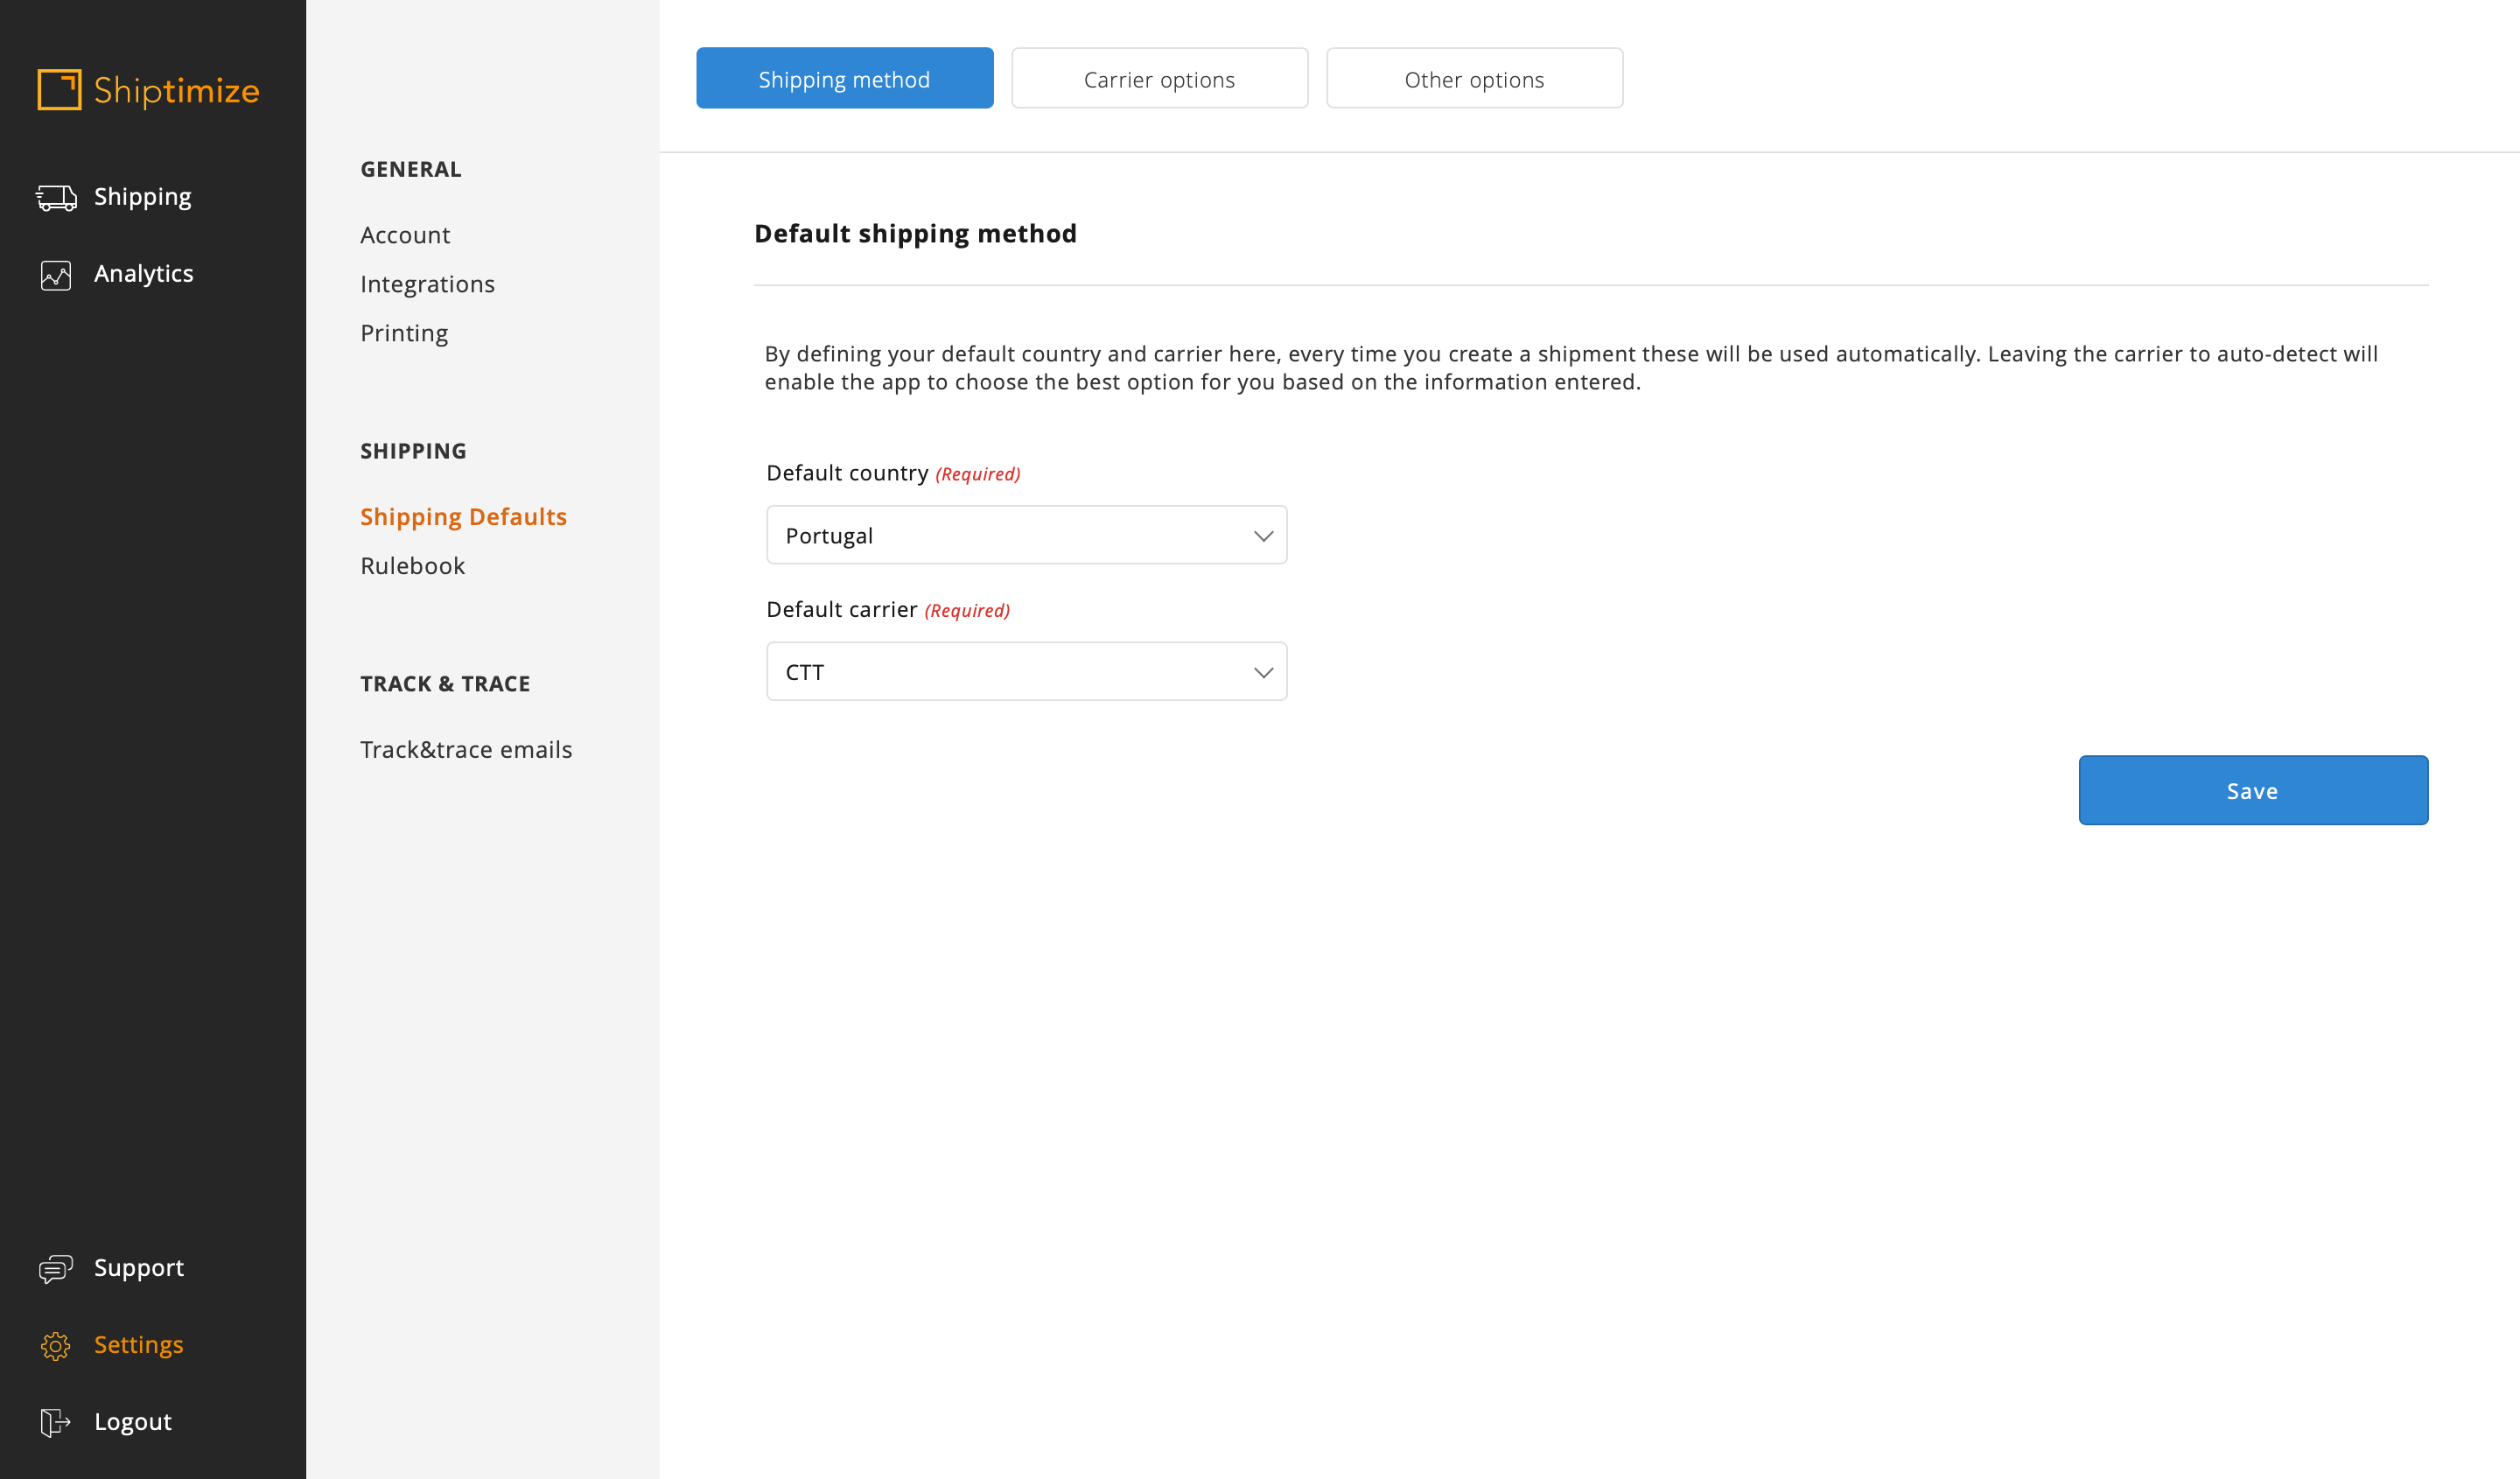
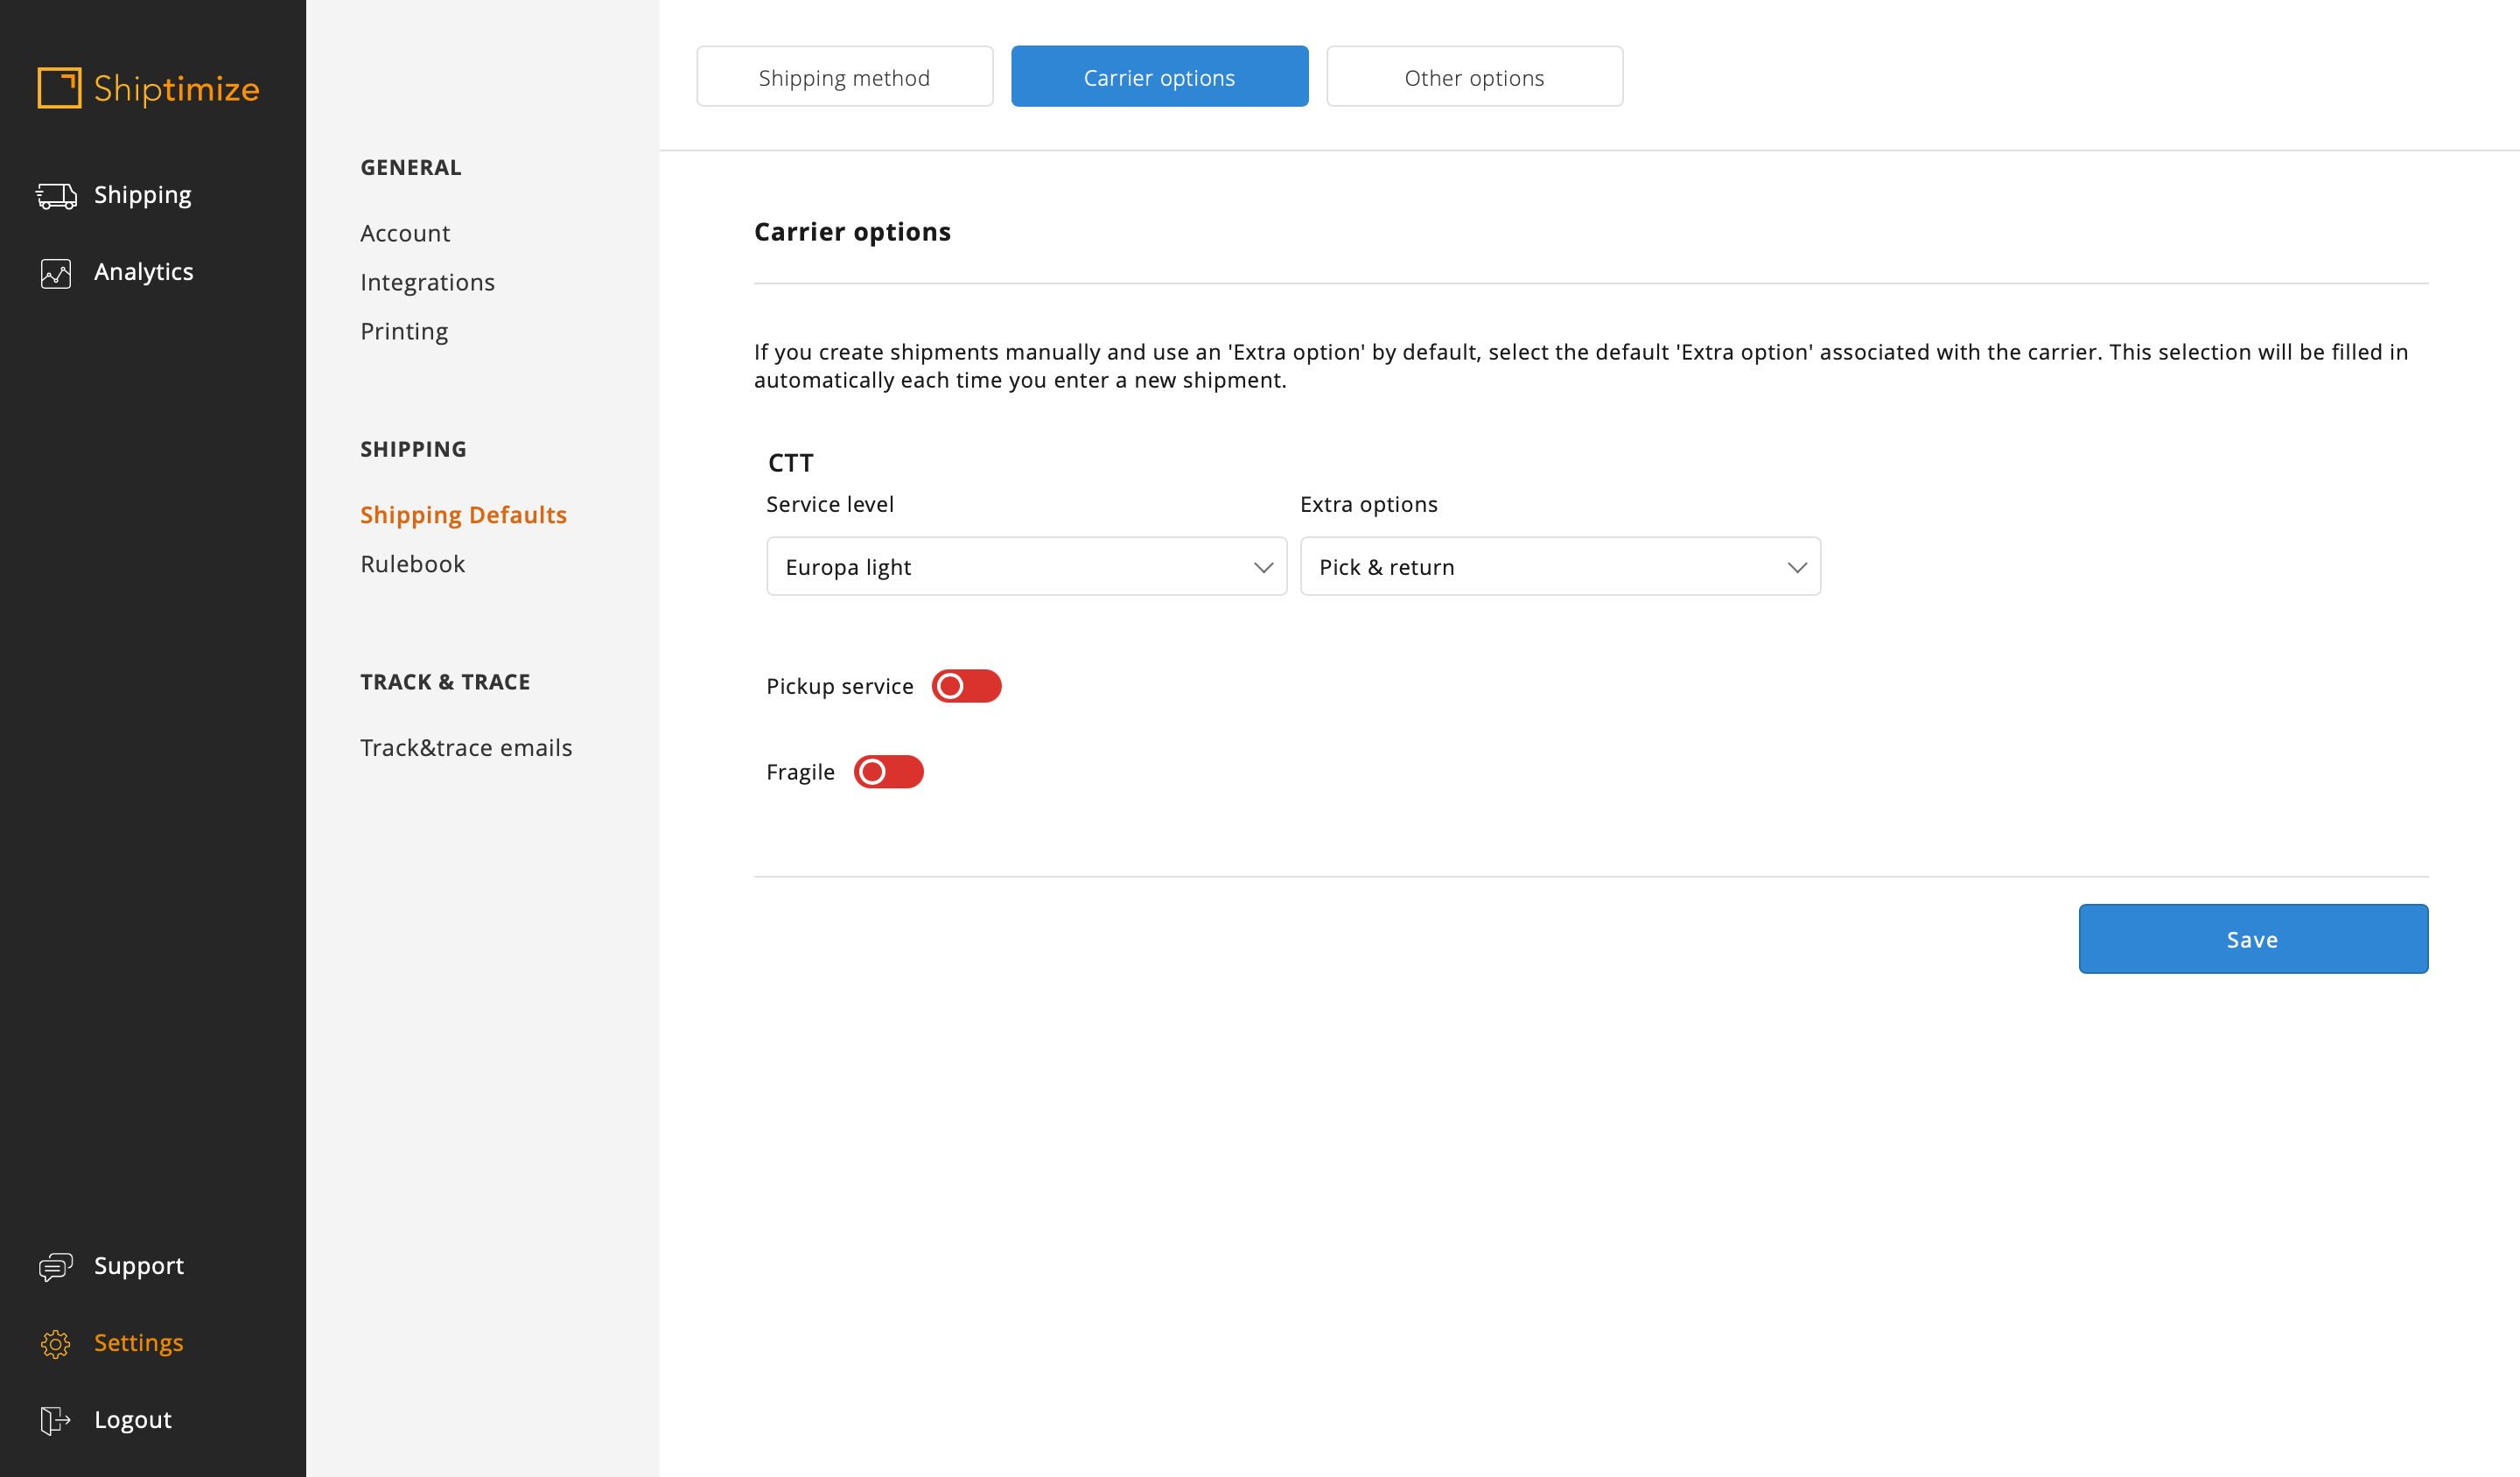
Or if you want to specify the level of service and extra options like “Add return label”. You should click on the top menu “Carrier Options”. You can also select the pick-up option so that a pick-up is always marked when you create your dispatches.
Rule book
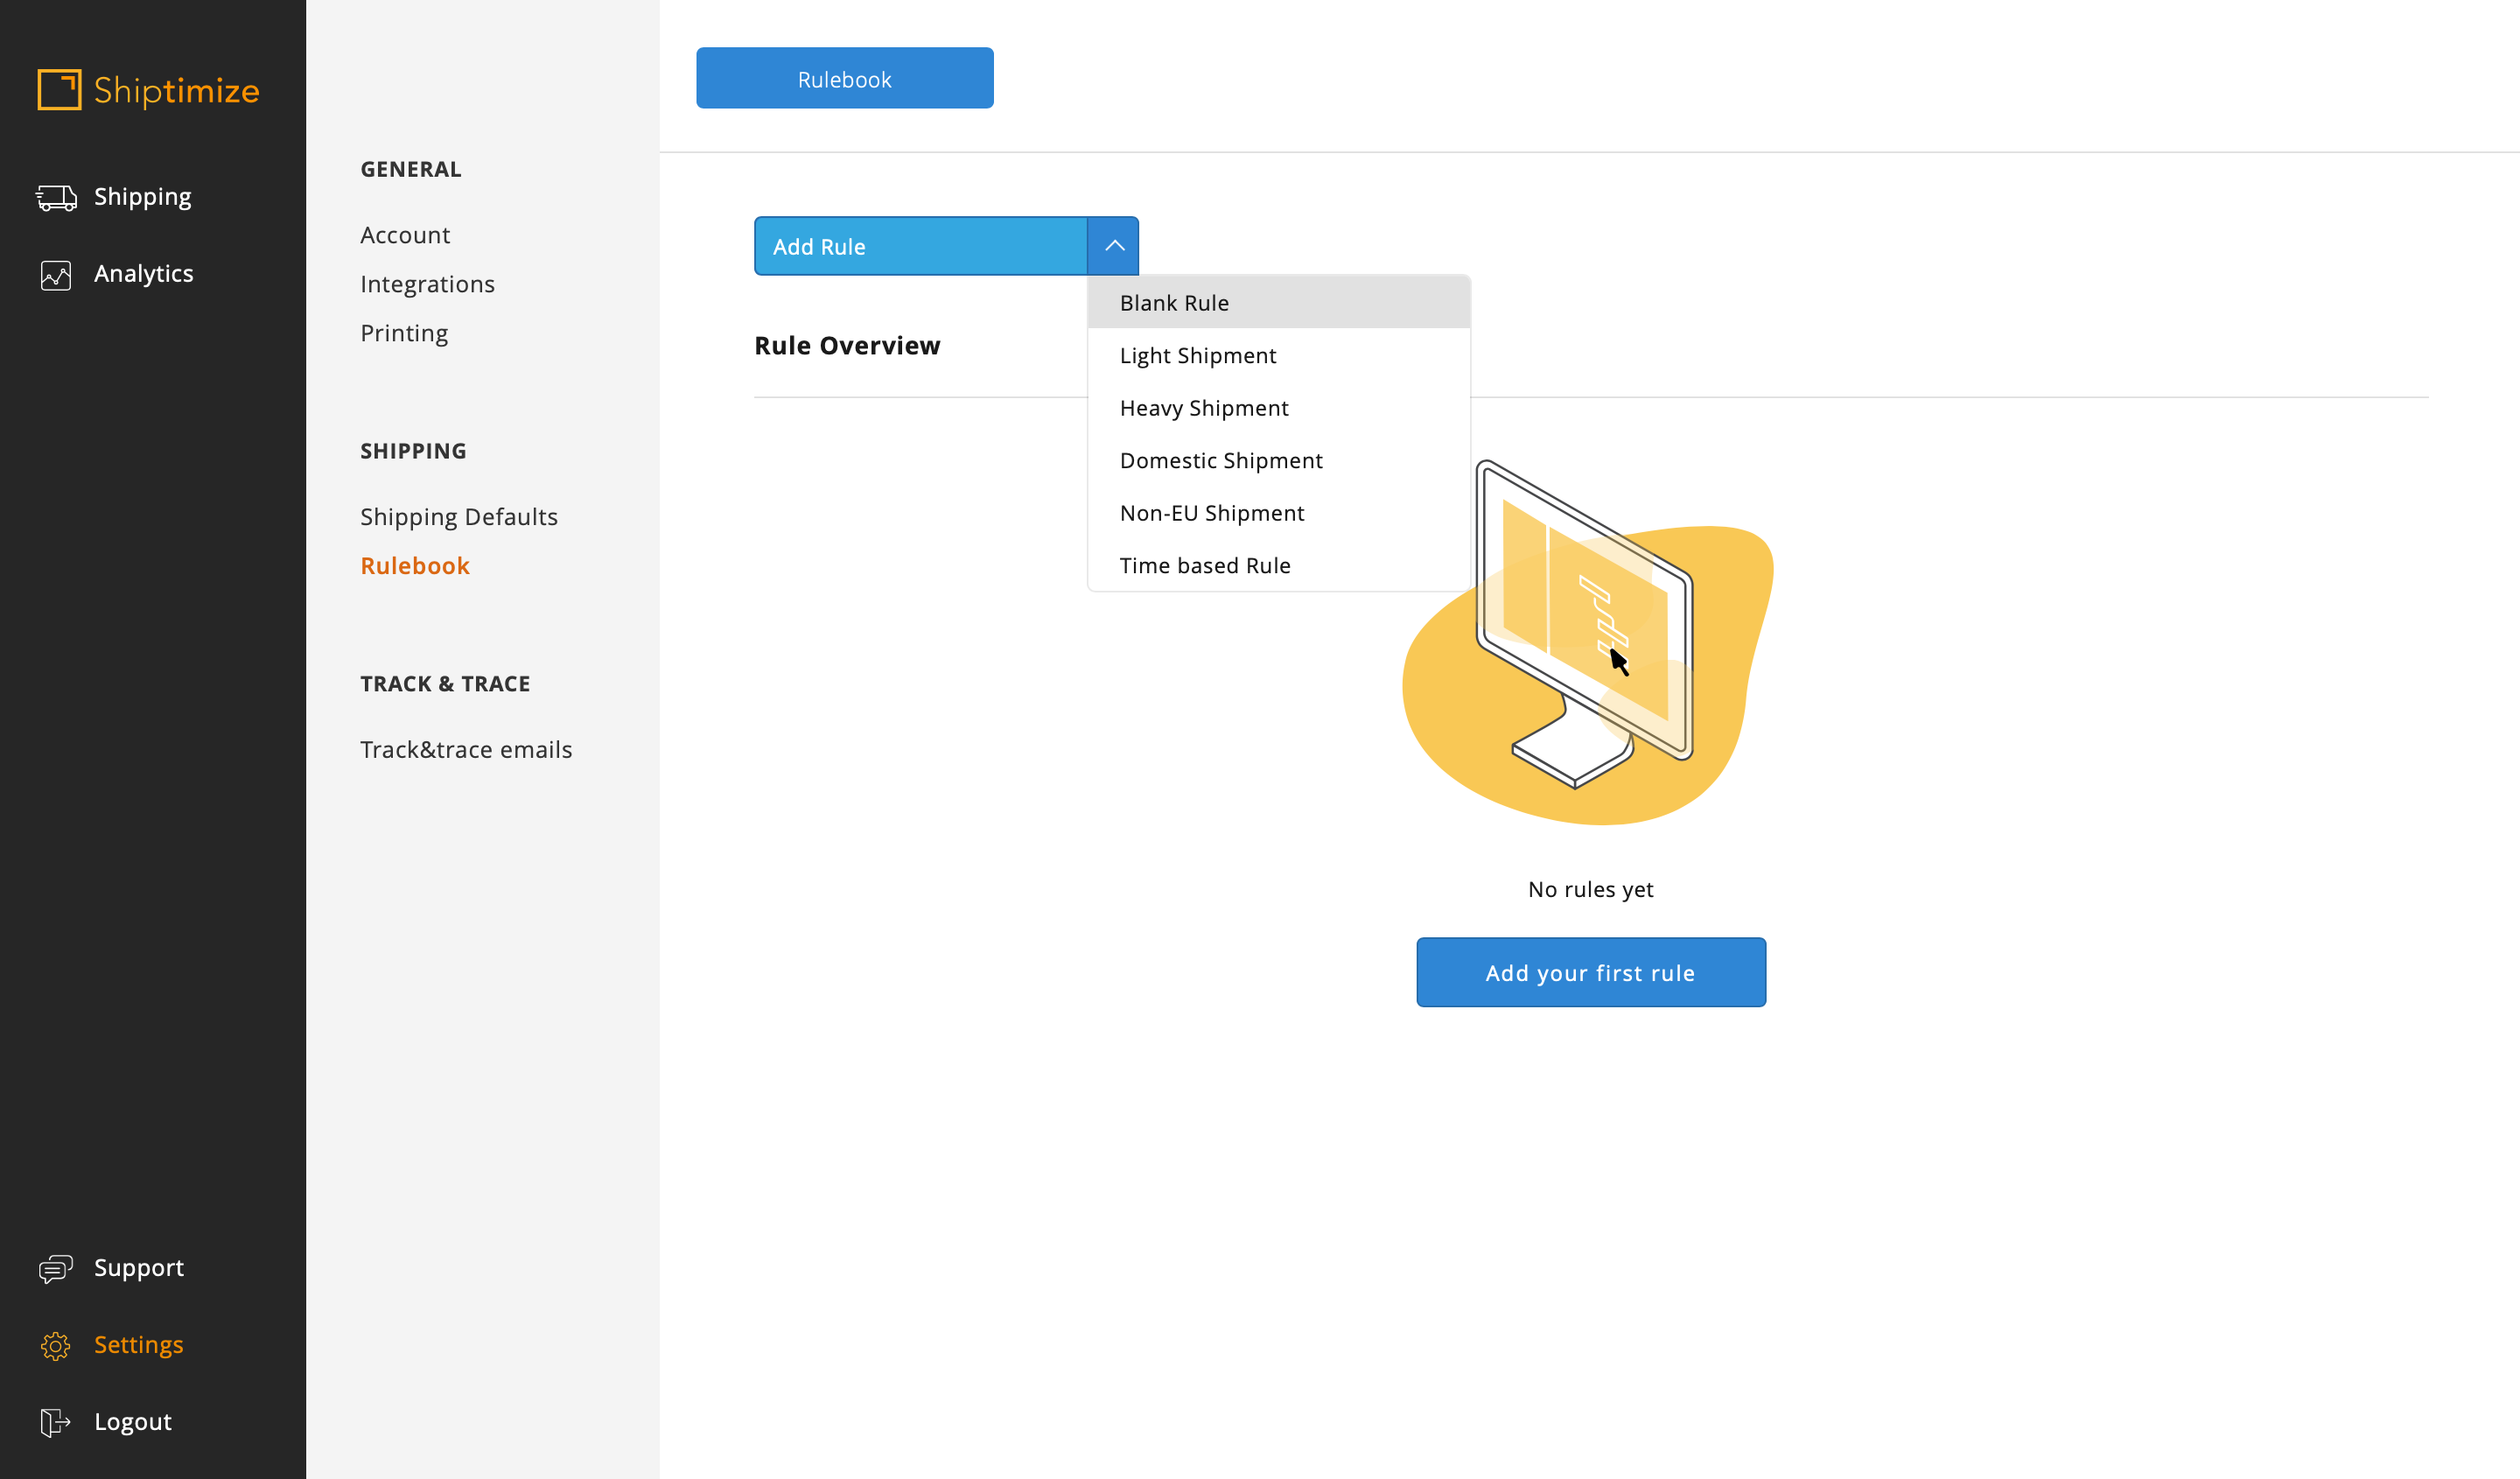
In this case you should create a simple rule in which you assign a carrier and service level/option extra for all your shipments. To do this go to Settings > Rule Books.
Next you should click Add Rule and then Blank rule
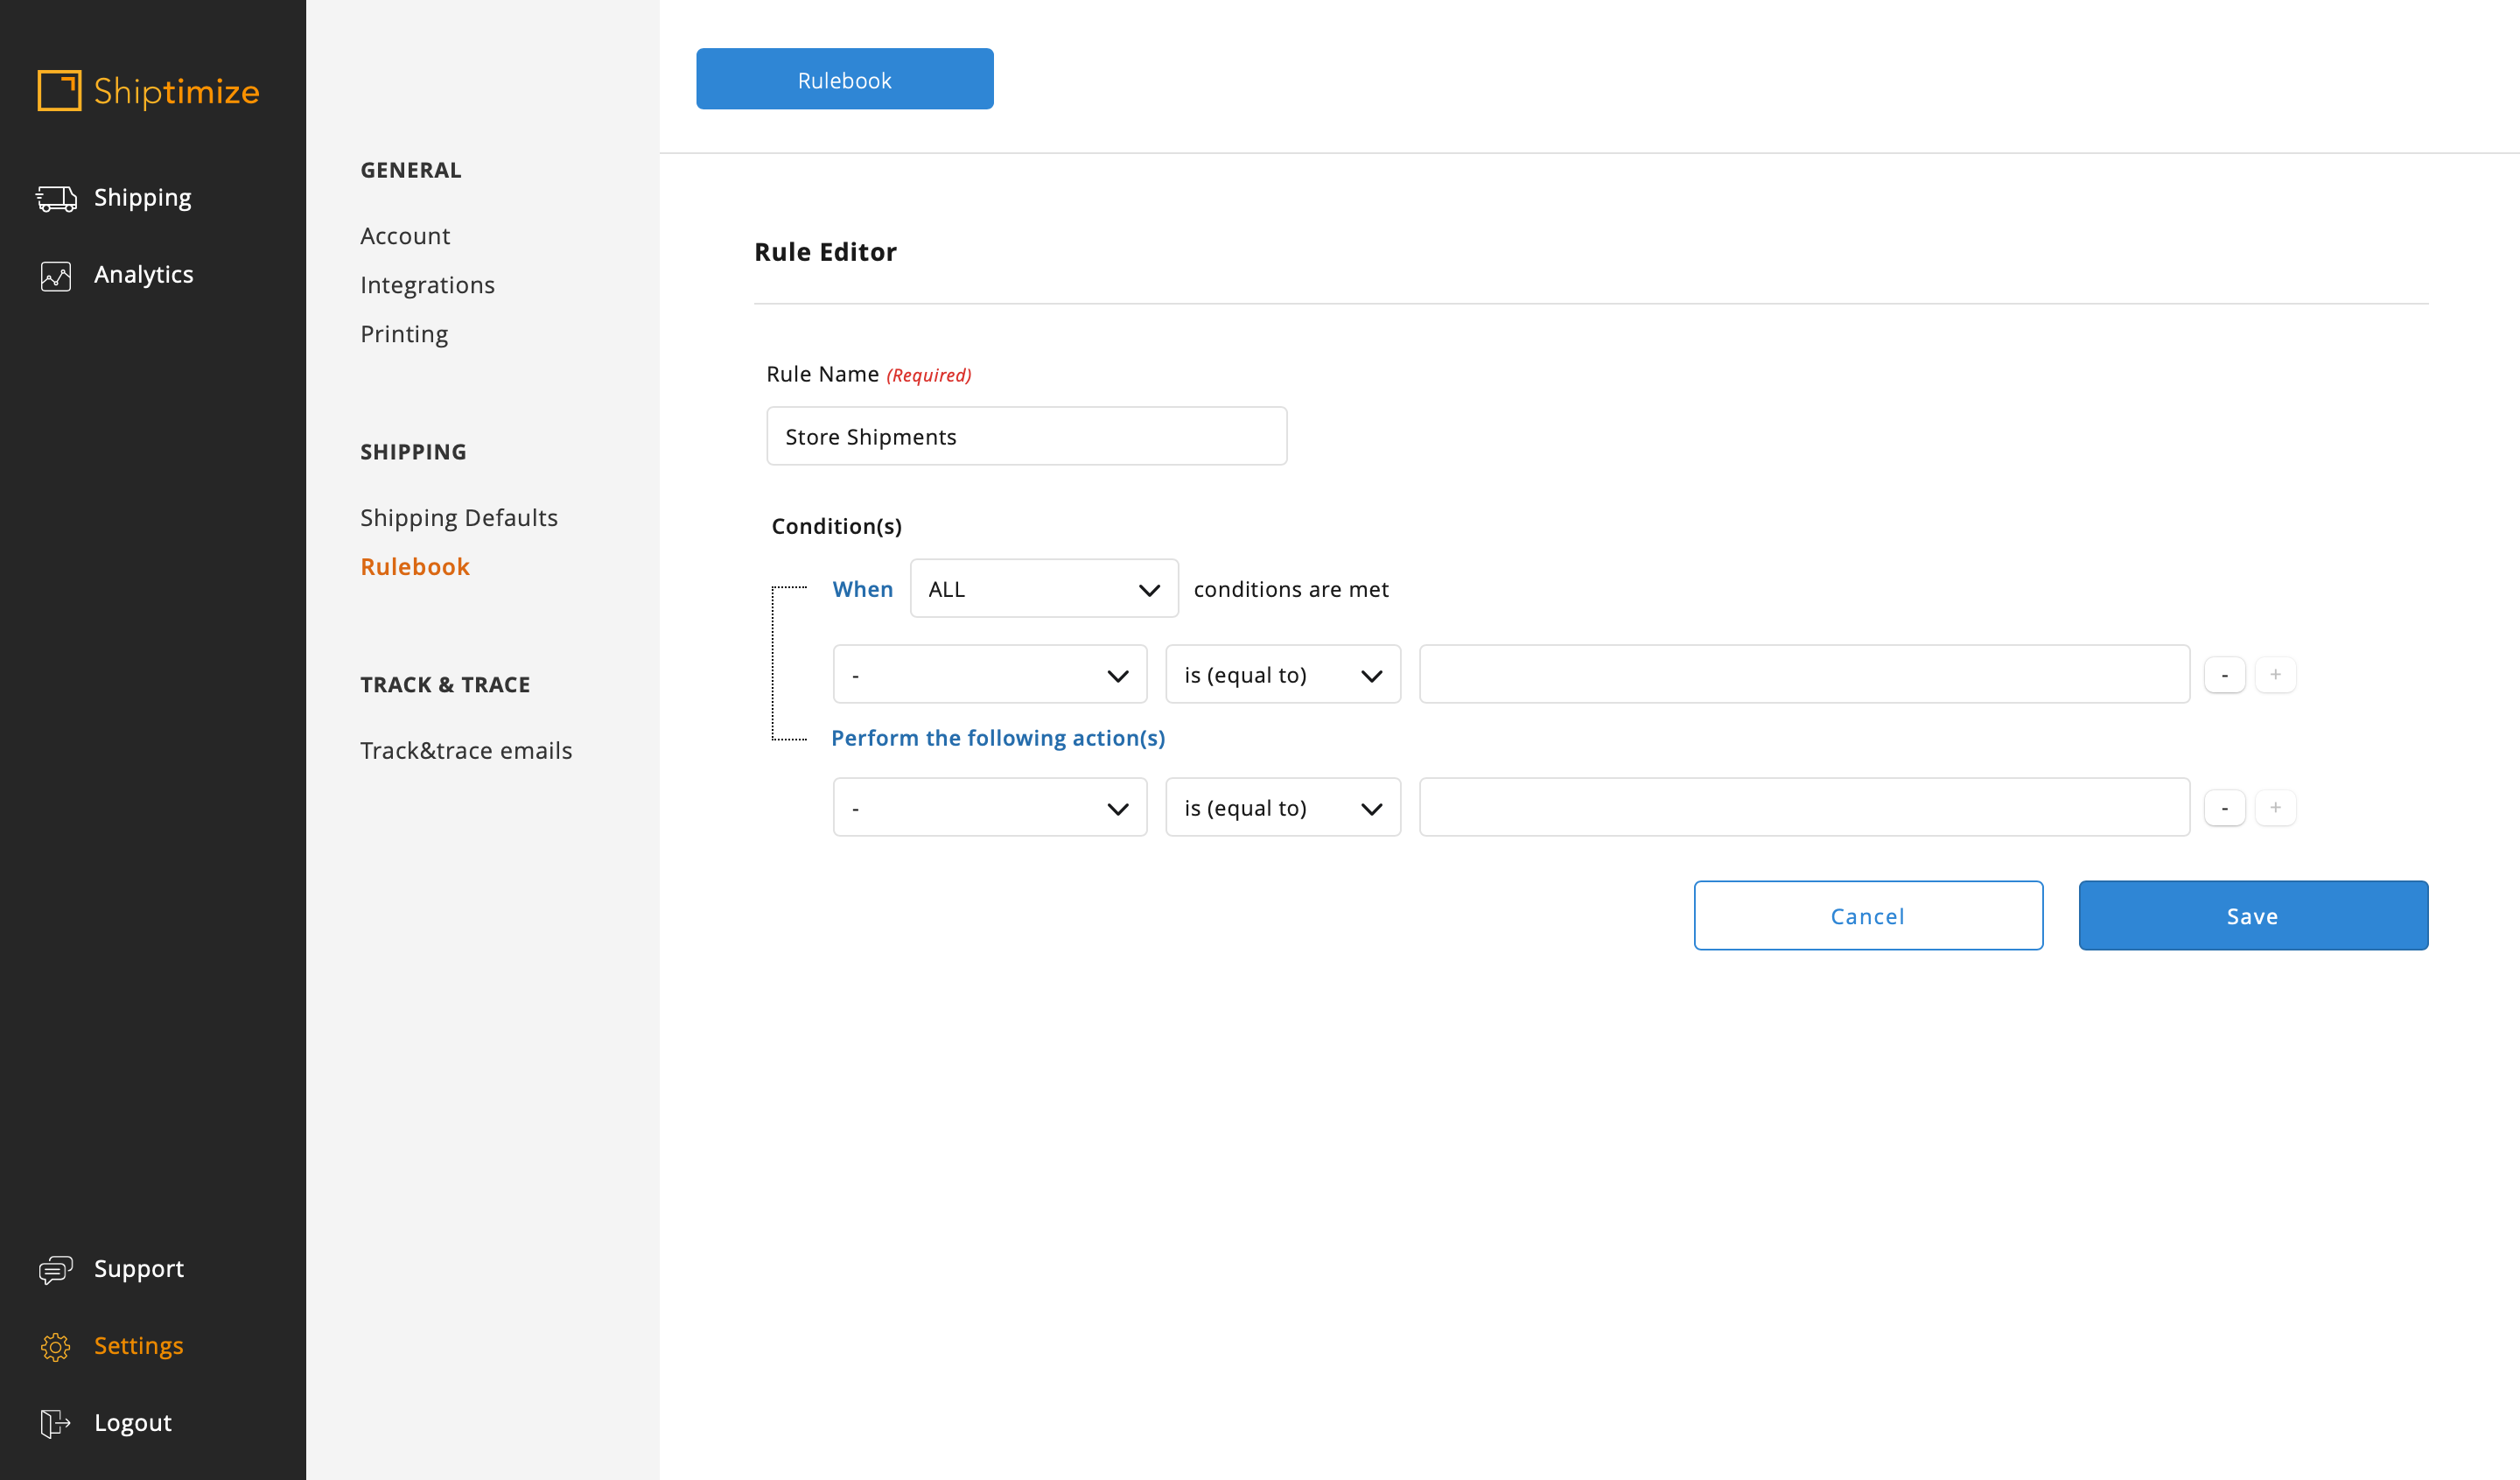
In the Rule Name field you must indicate the name you want to distinguish this rule. In the example we put the name “Store Shipments”.
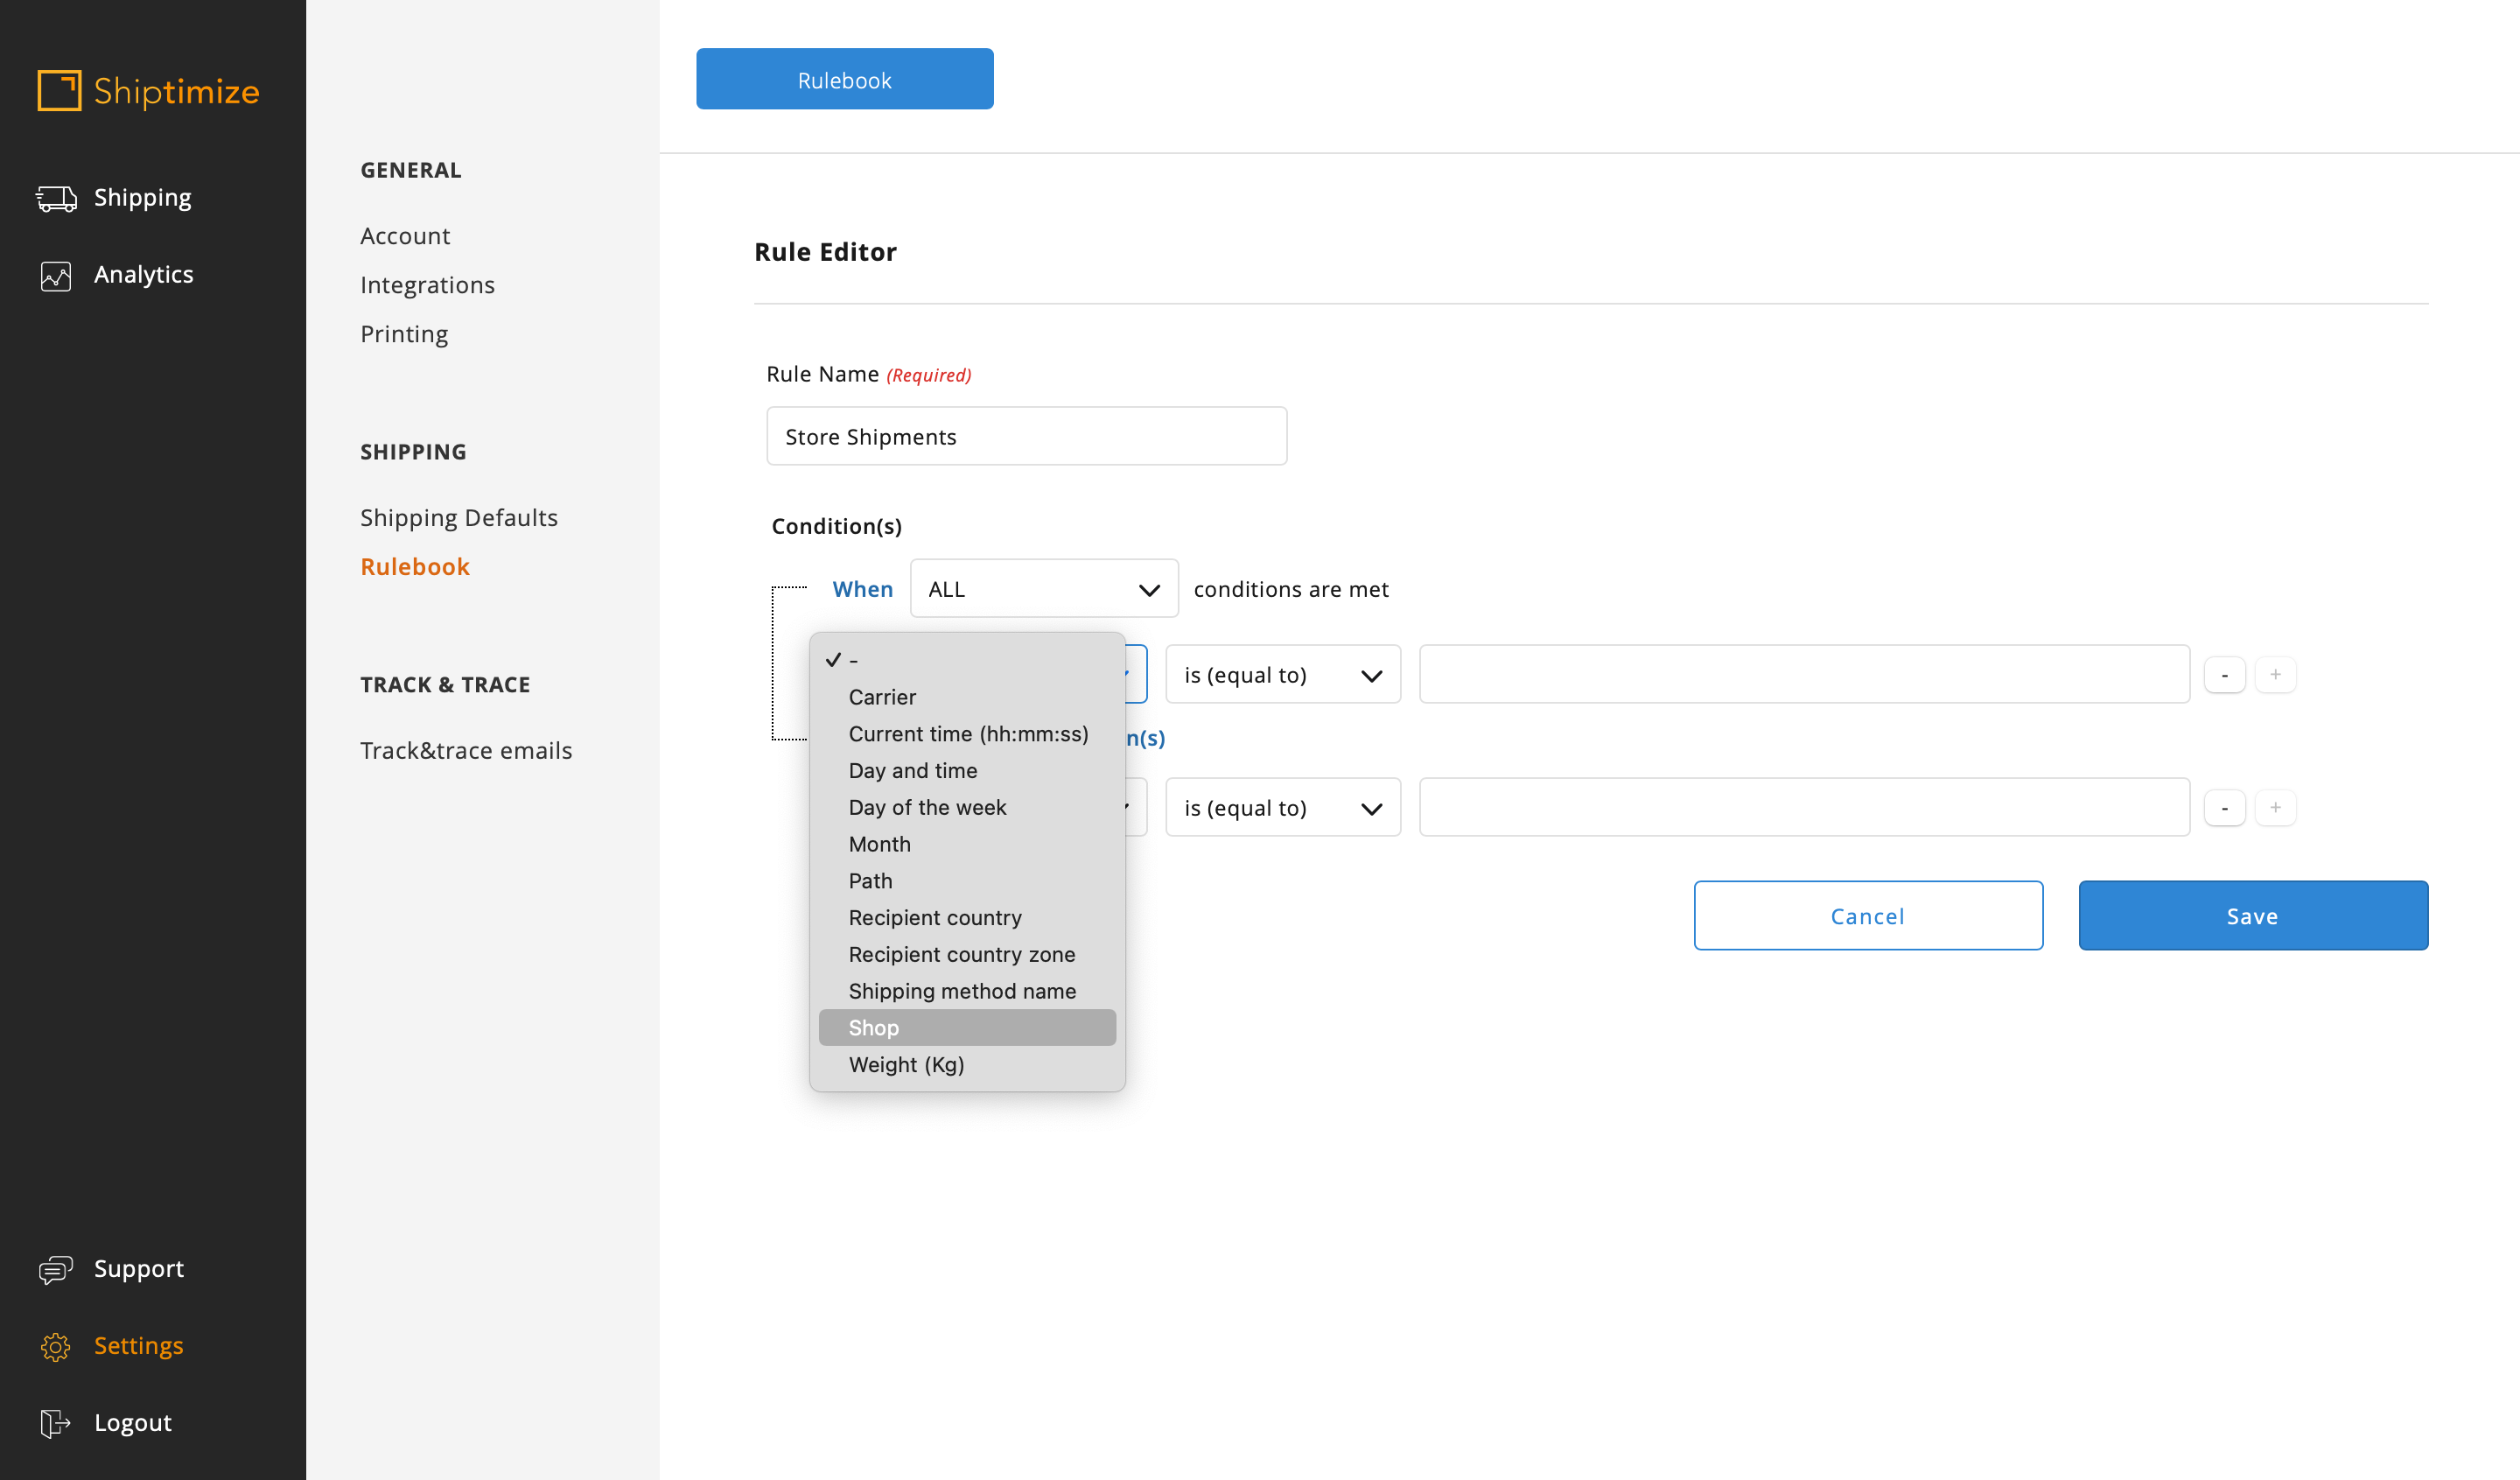
In the conditions you should select the option All and in the shipping characteristics you should choose Shop
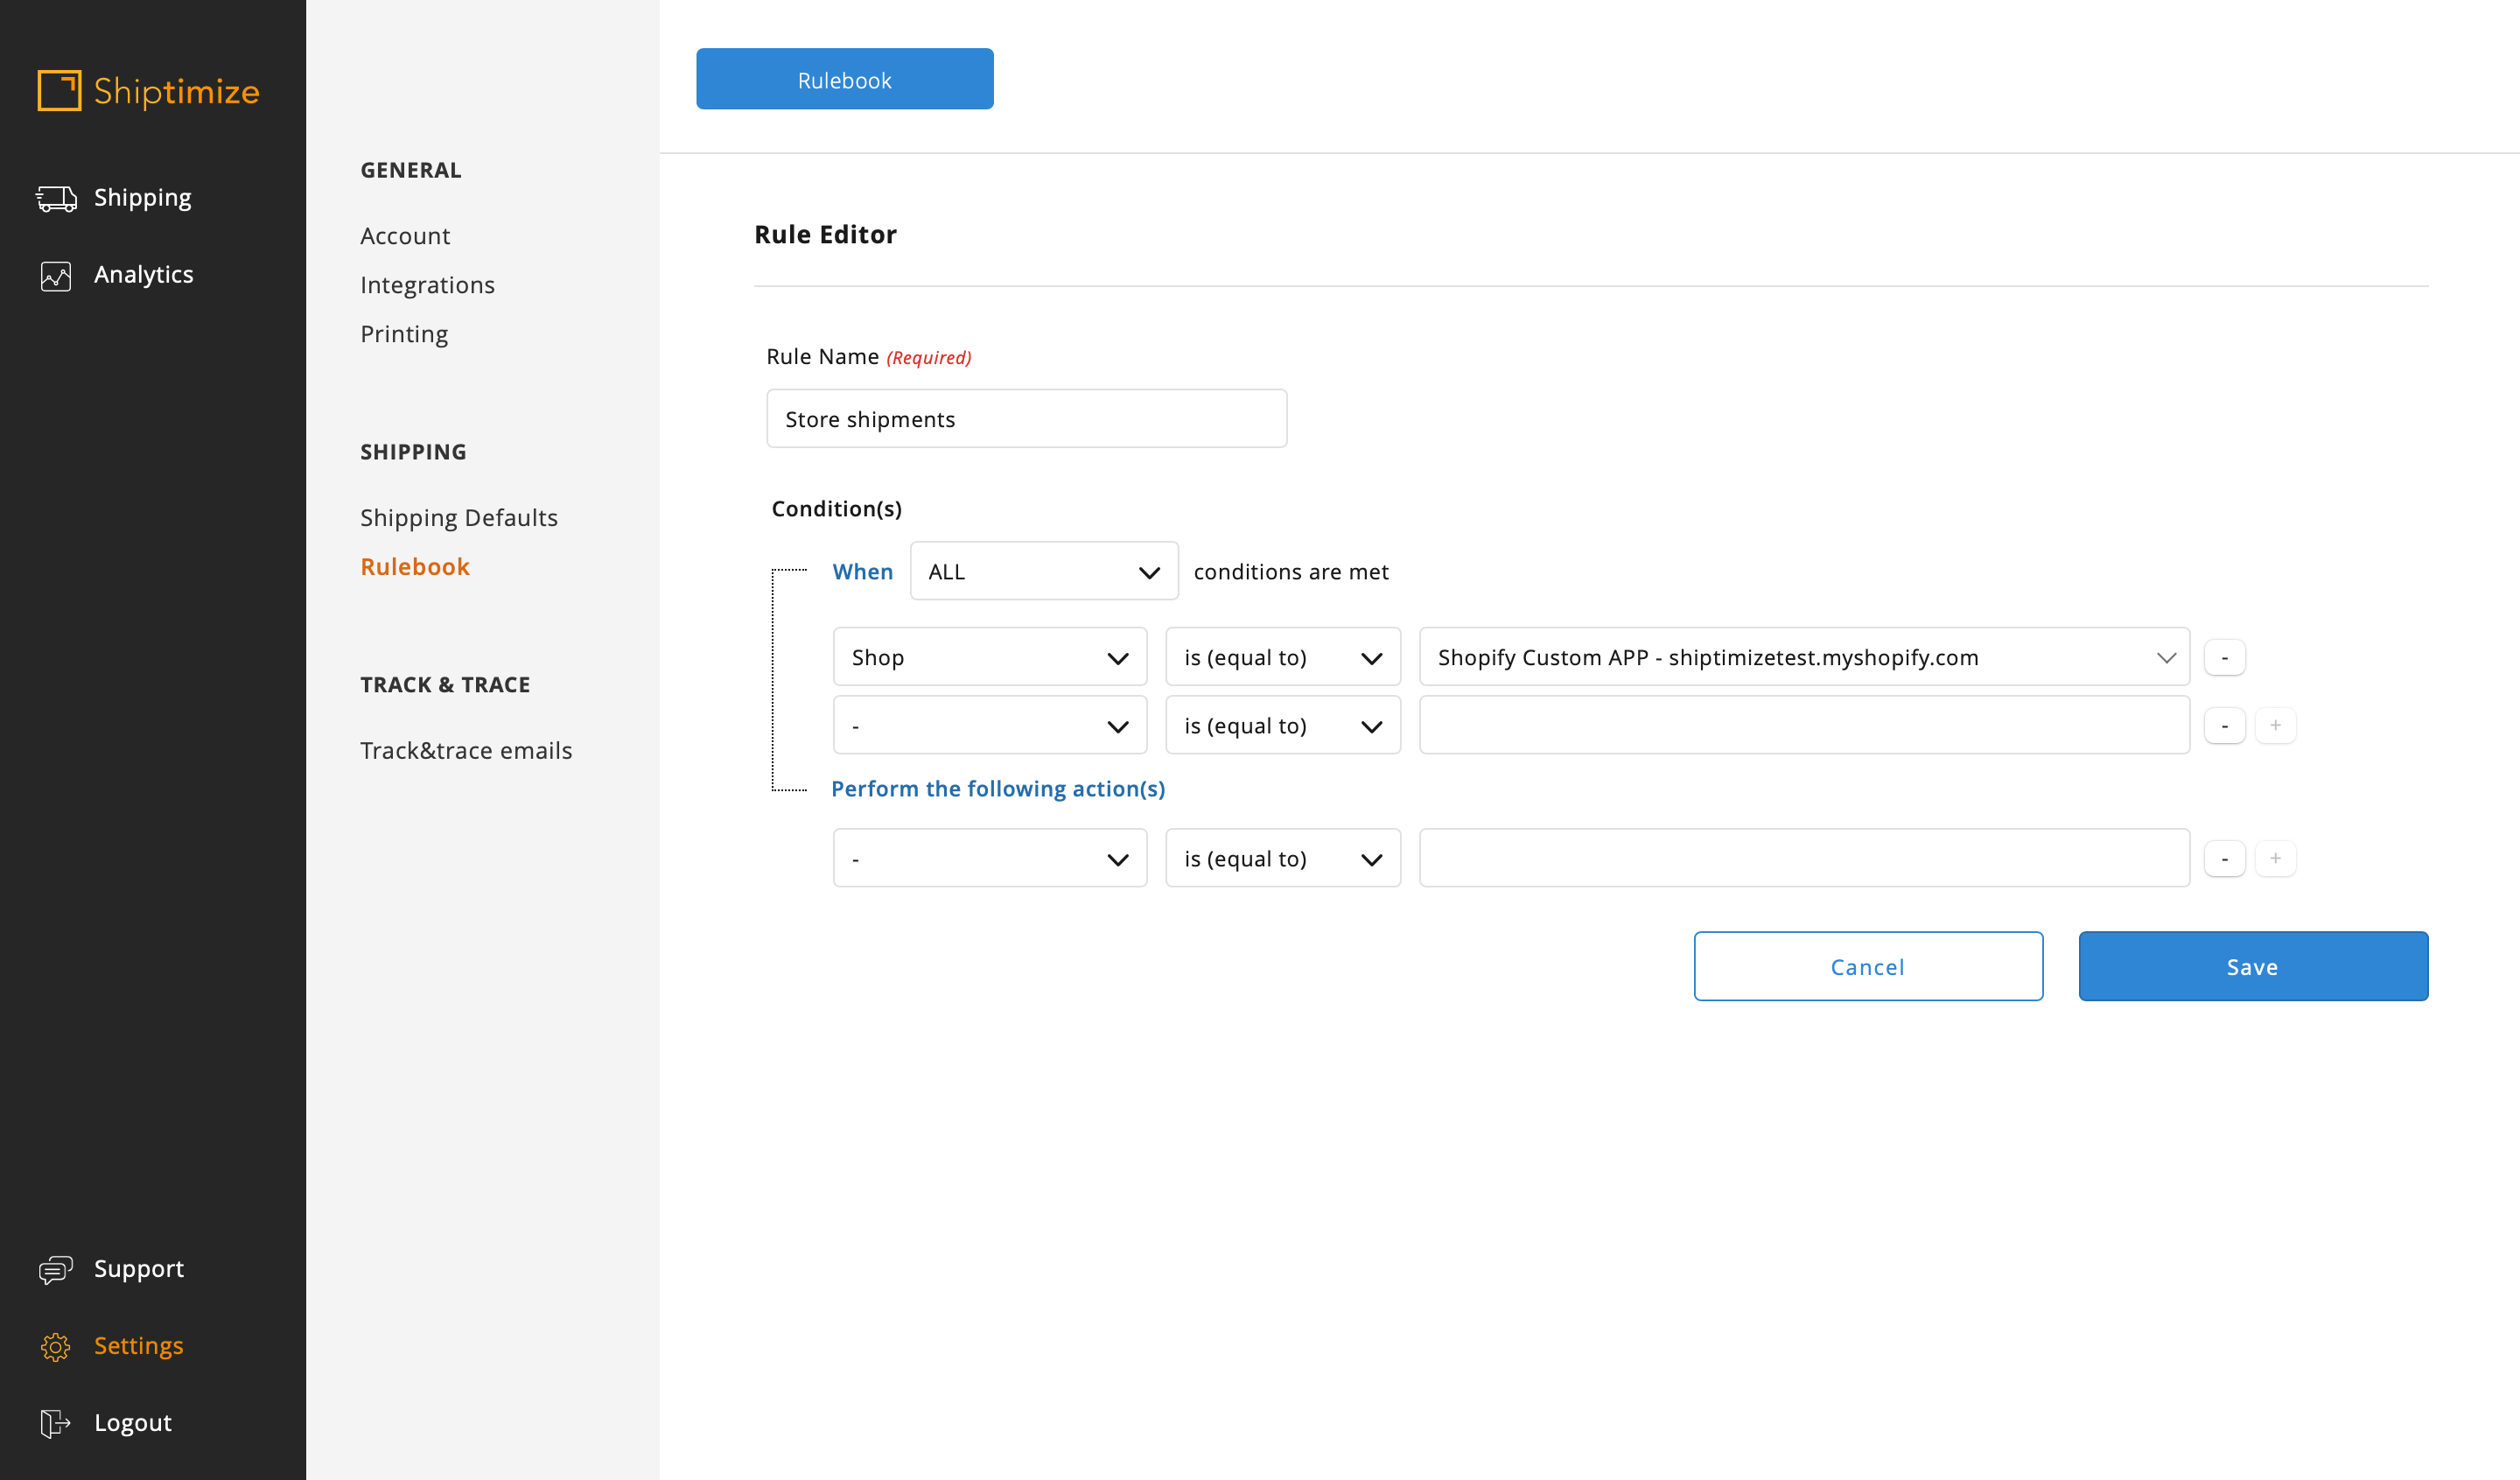
In the options to apply you must select Carrier and then choose the desired Service level if necessary.
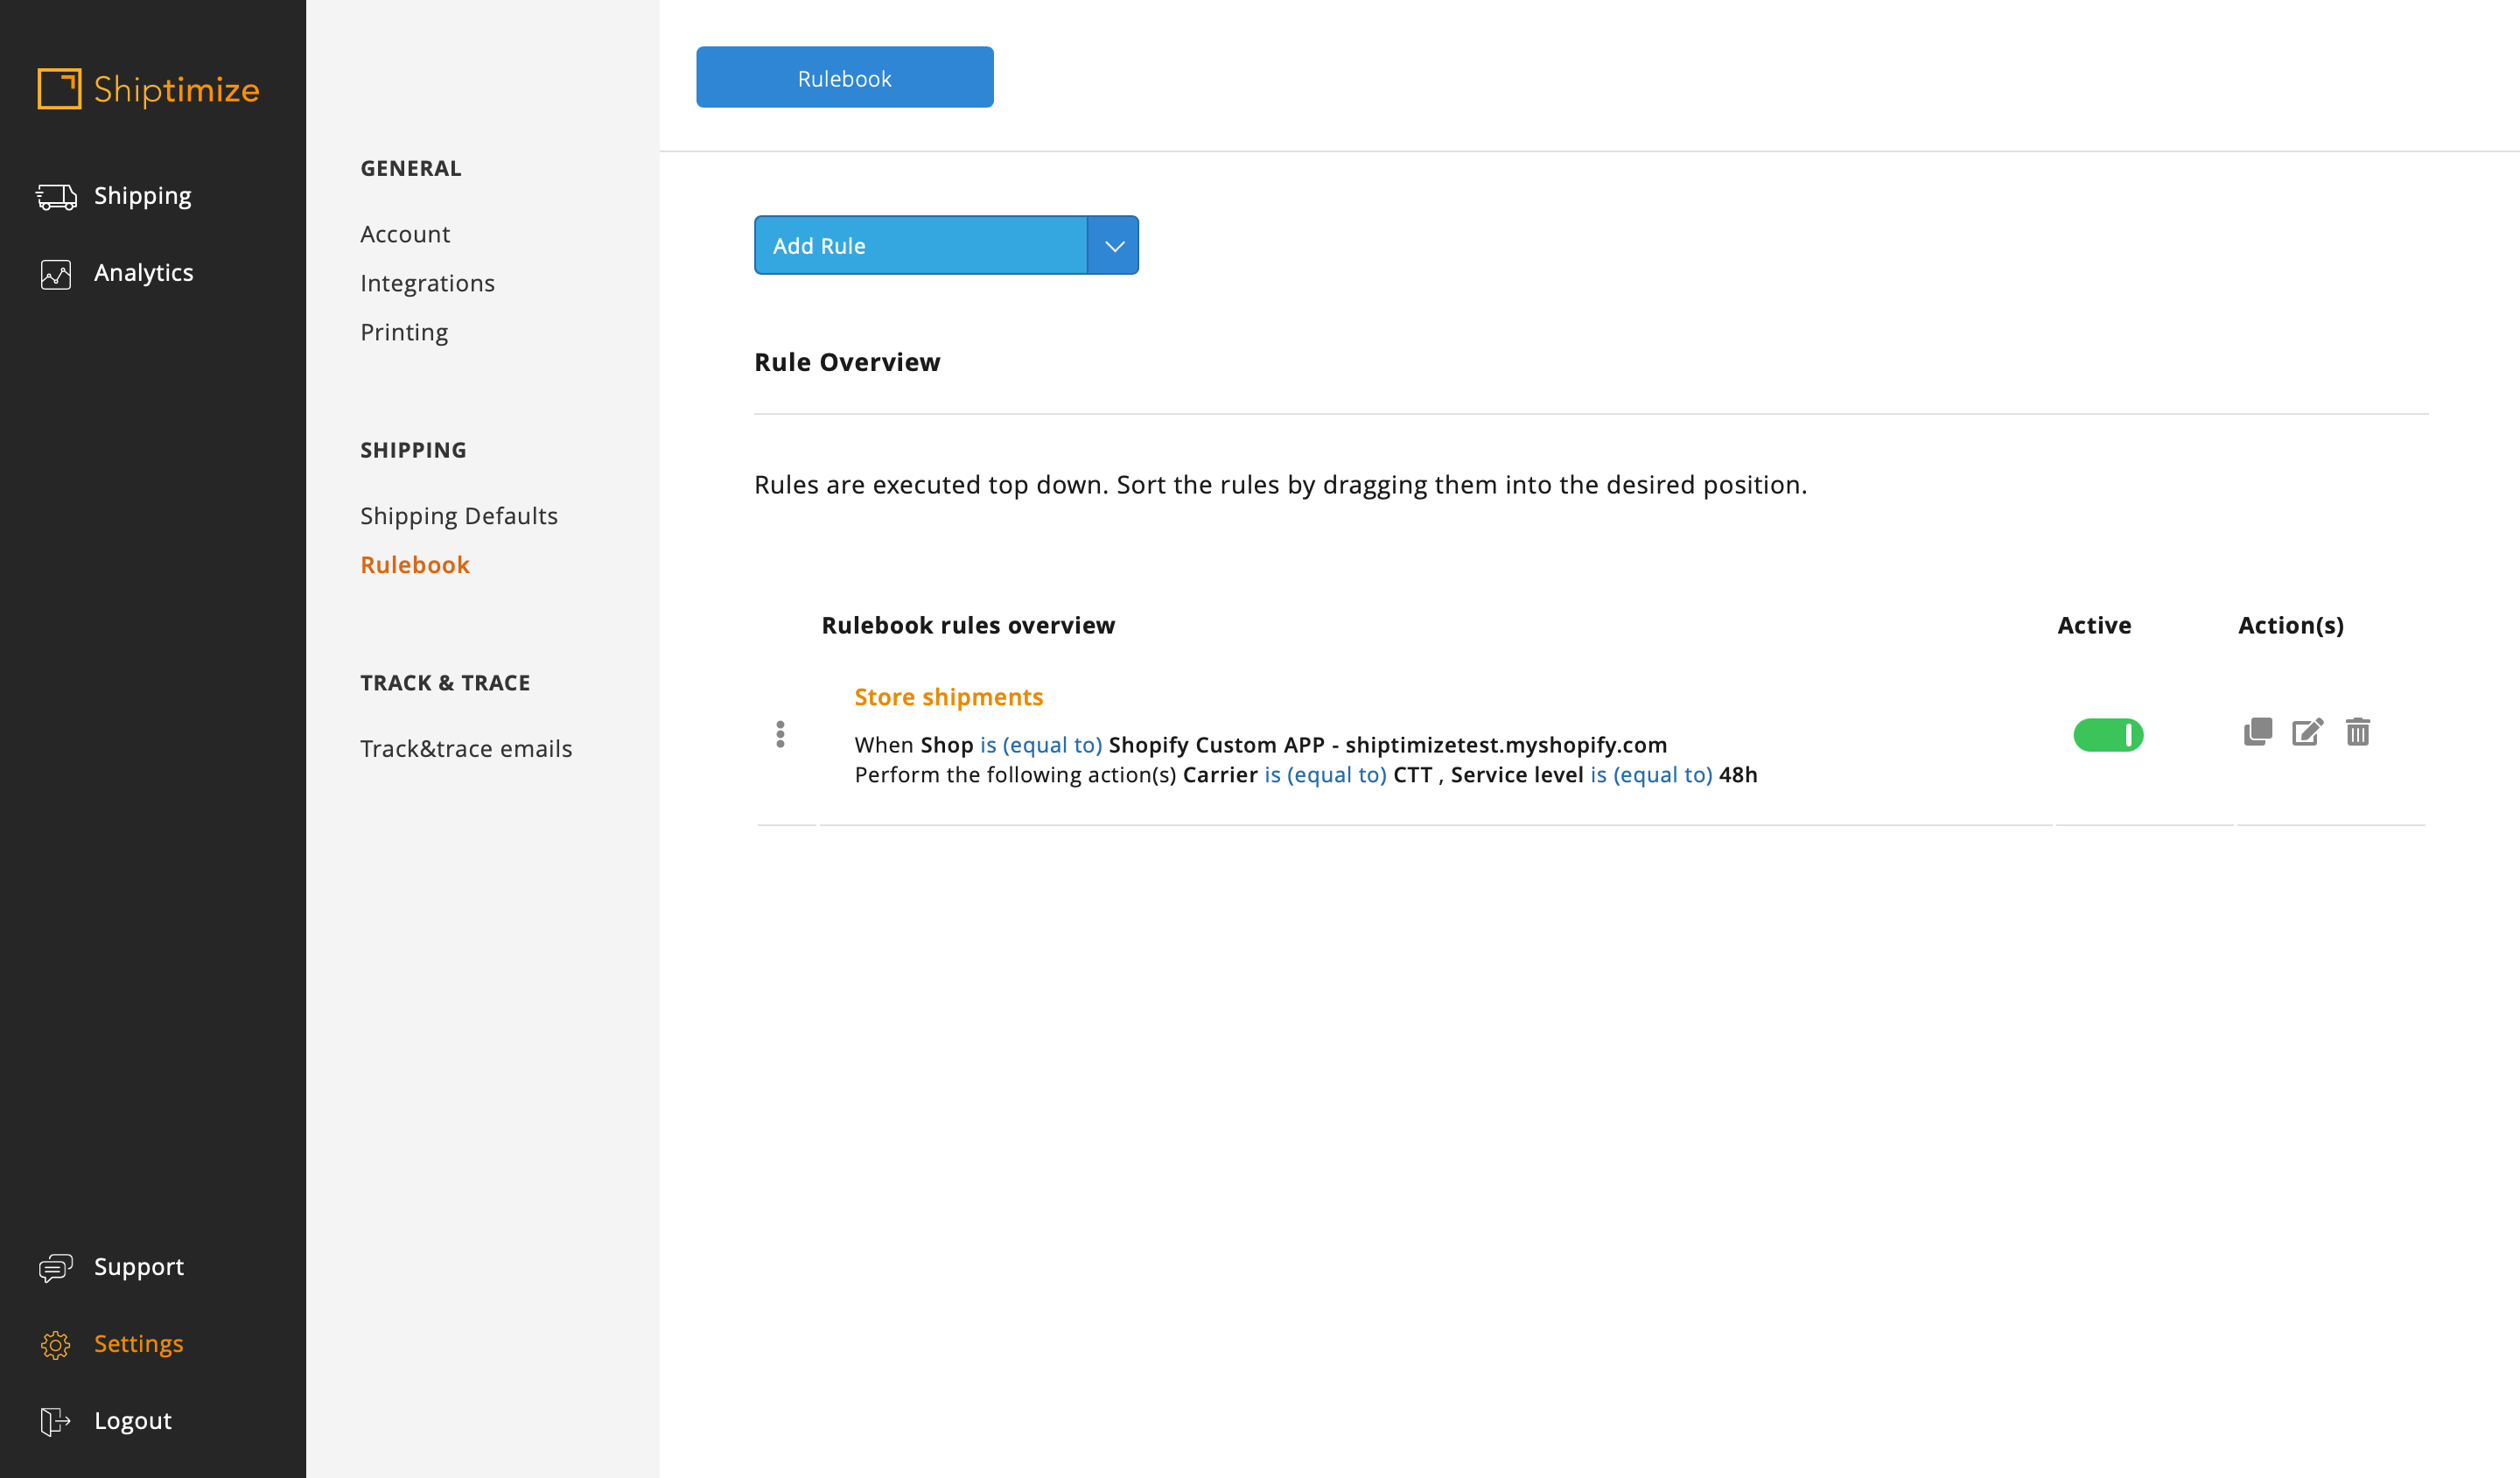
In this example, since the shop will only sell to Portugal and Spain we will only use the CTT carrier and the Level of service 48H

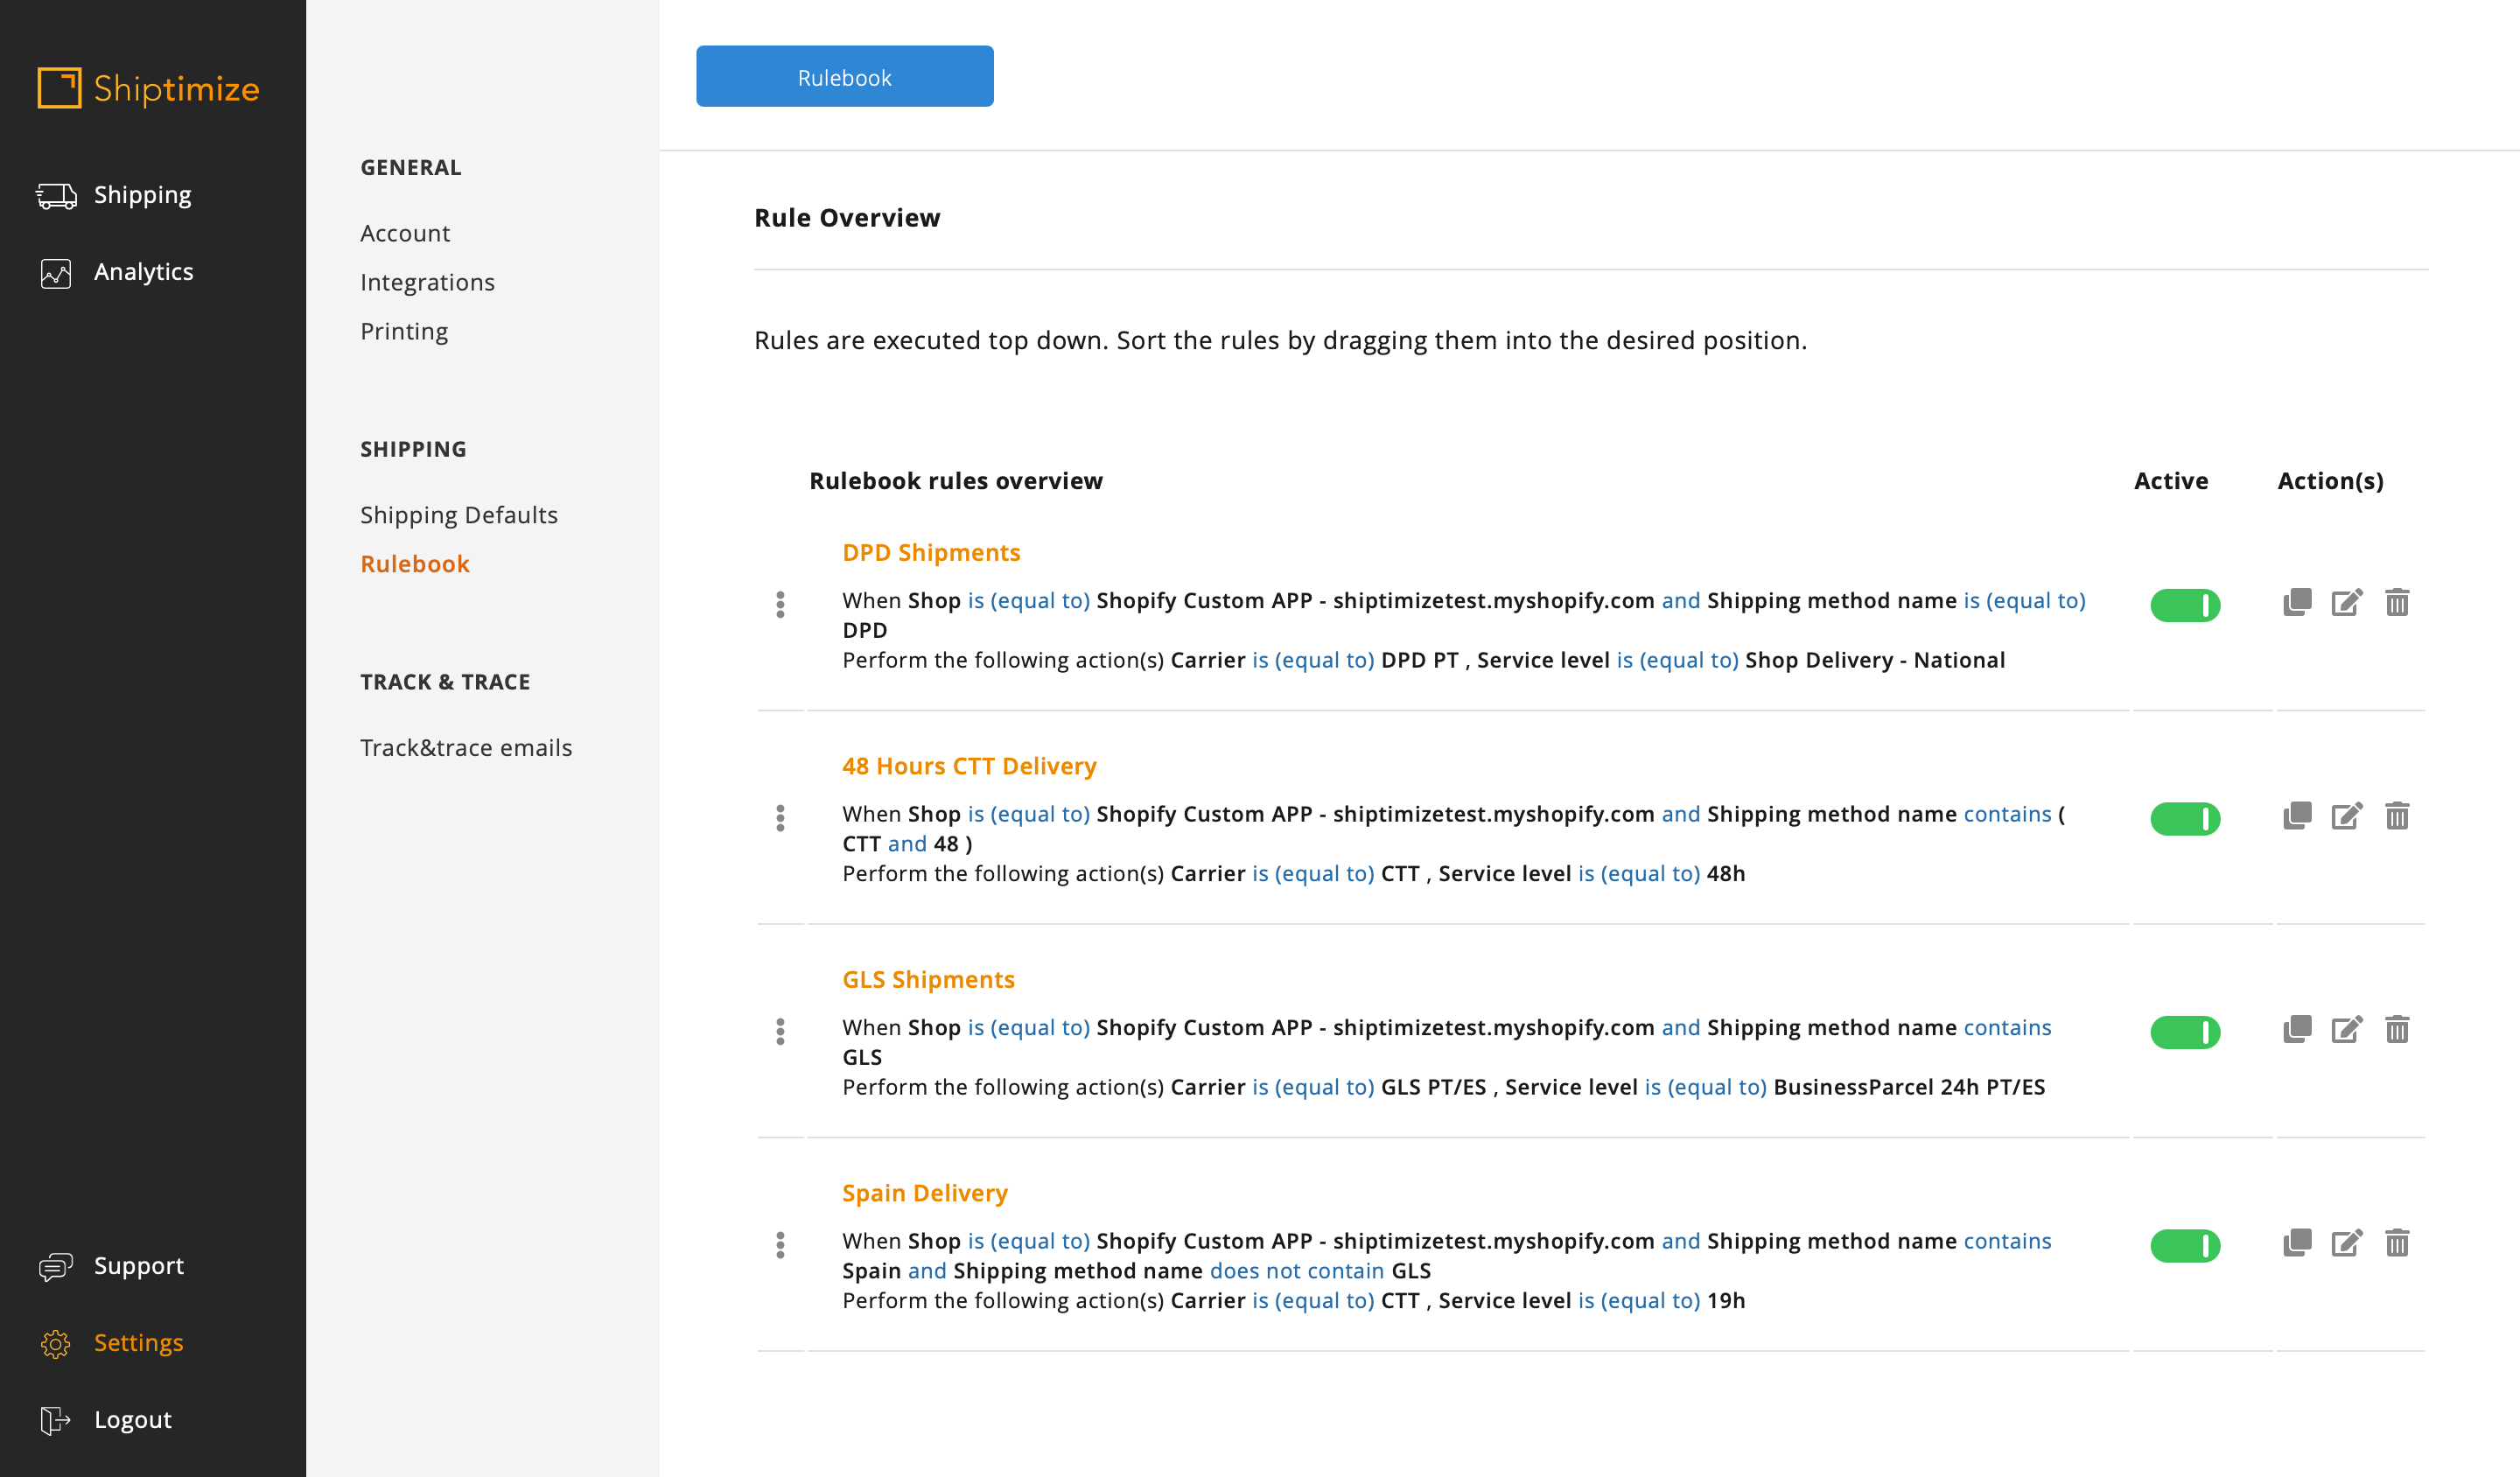
To save the created rule just click on Save and you will be automatically redirected to the Rules Overview
If you want to use more than one carrier and/or Service Level to make your shipments and there are also several shipping methods created you must create the necessary rules for this.
You can create for each shipping method created in your shop a rule associating a carrier and/or service level, but the simplest way to do this is through the name of the shipping method if they are informative.
To create the various rules you must follow the same steps indicated above, only indicating more characteristics that allow you to identify the various shipping methods, and you must create at least as many rules as there are carriers and shipping methods to use.
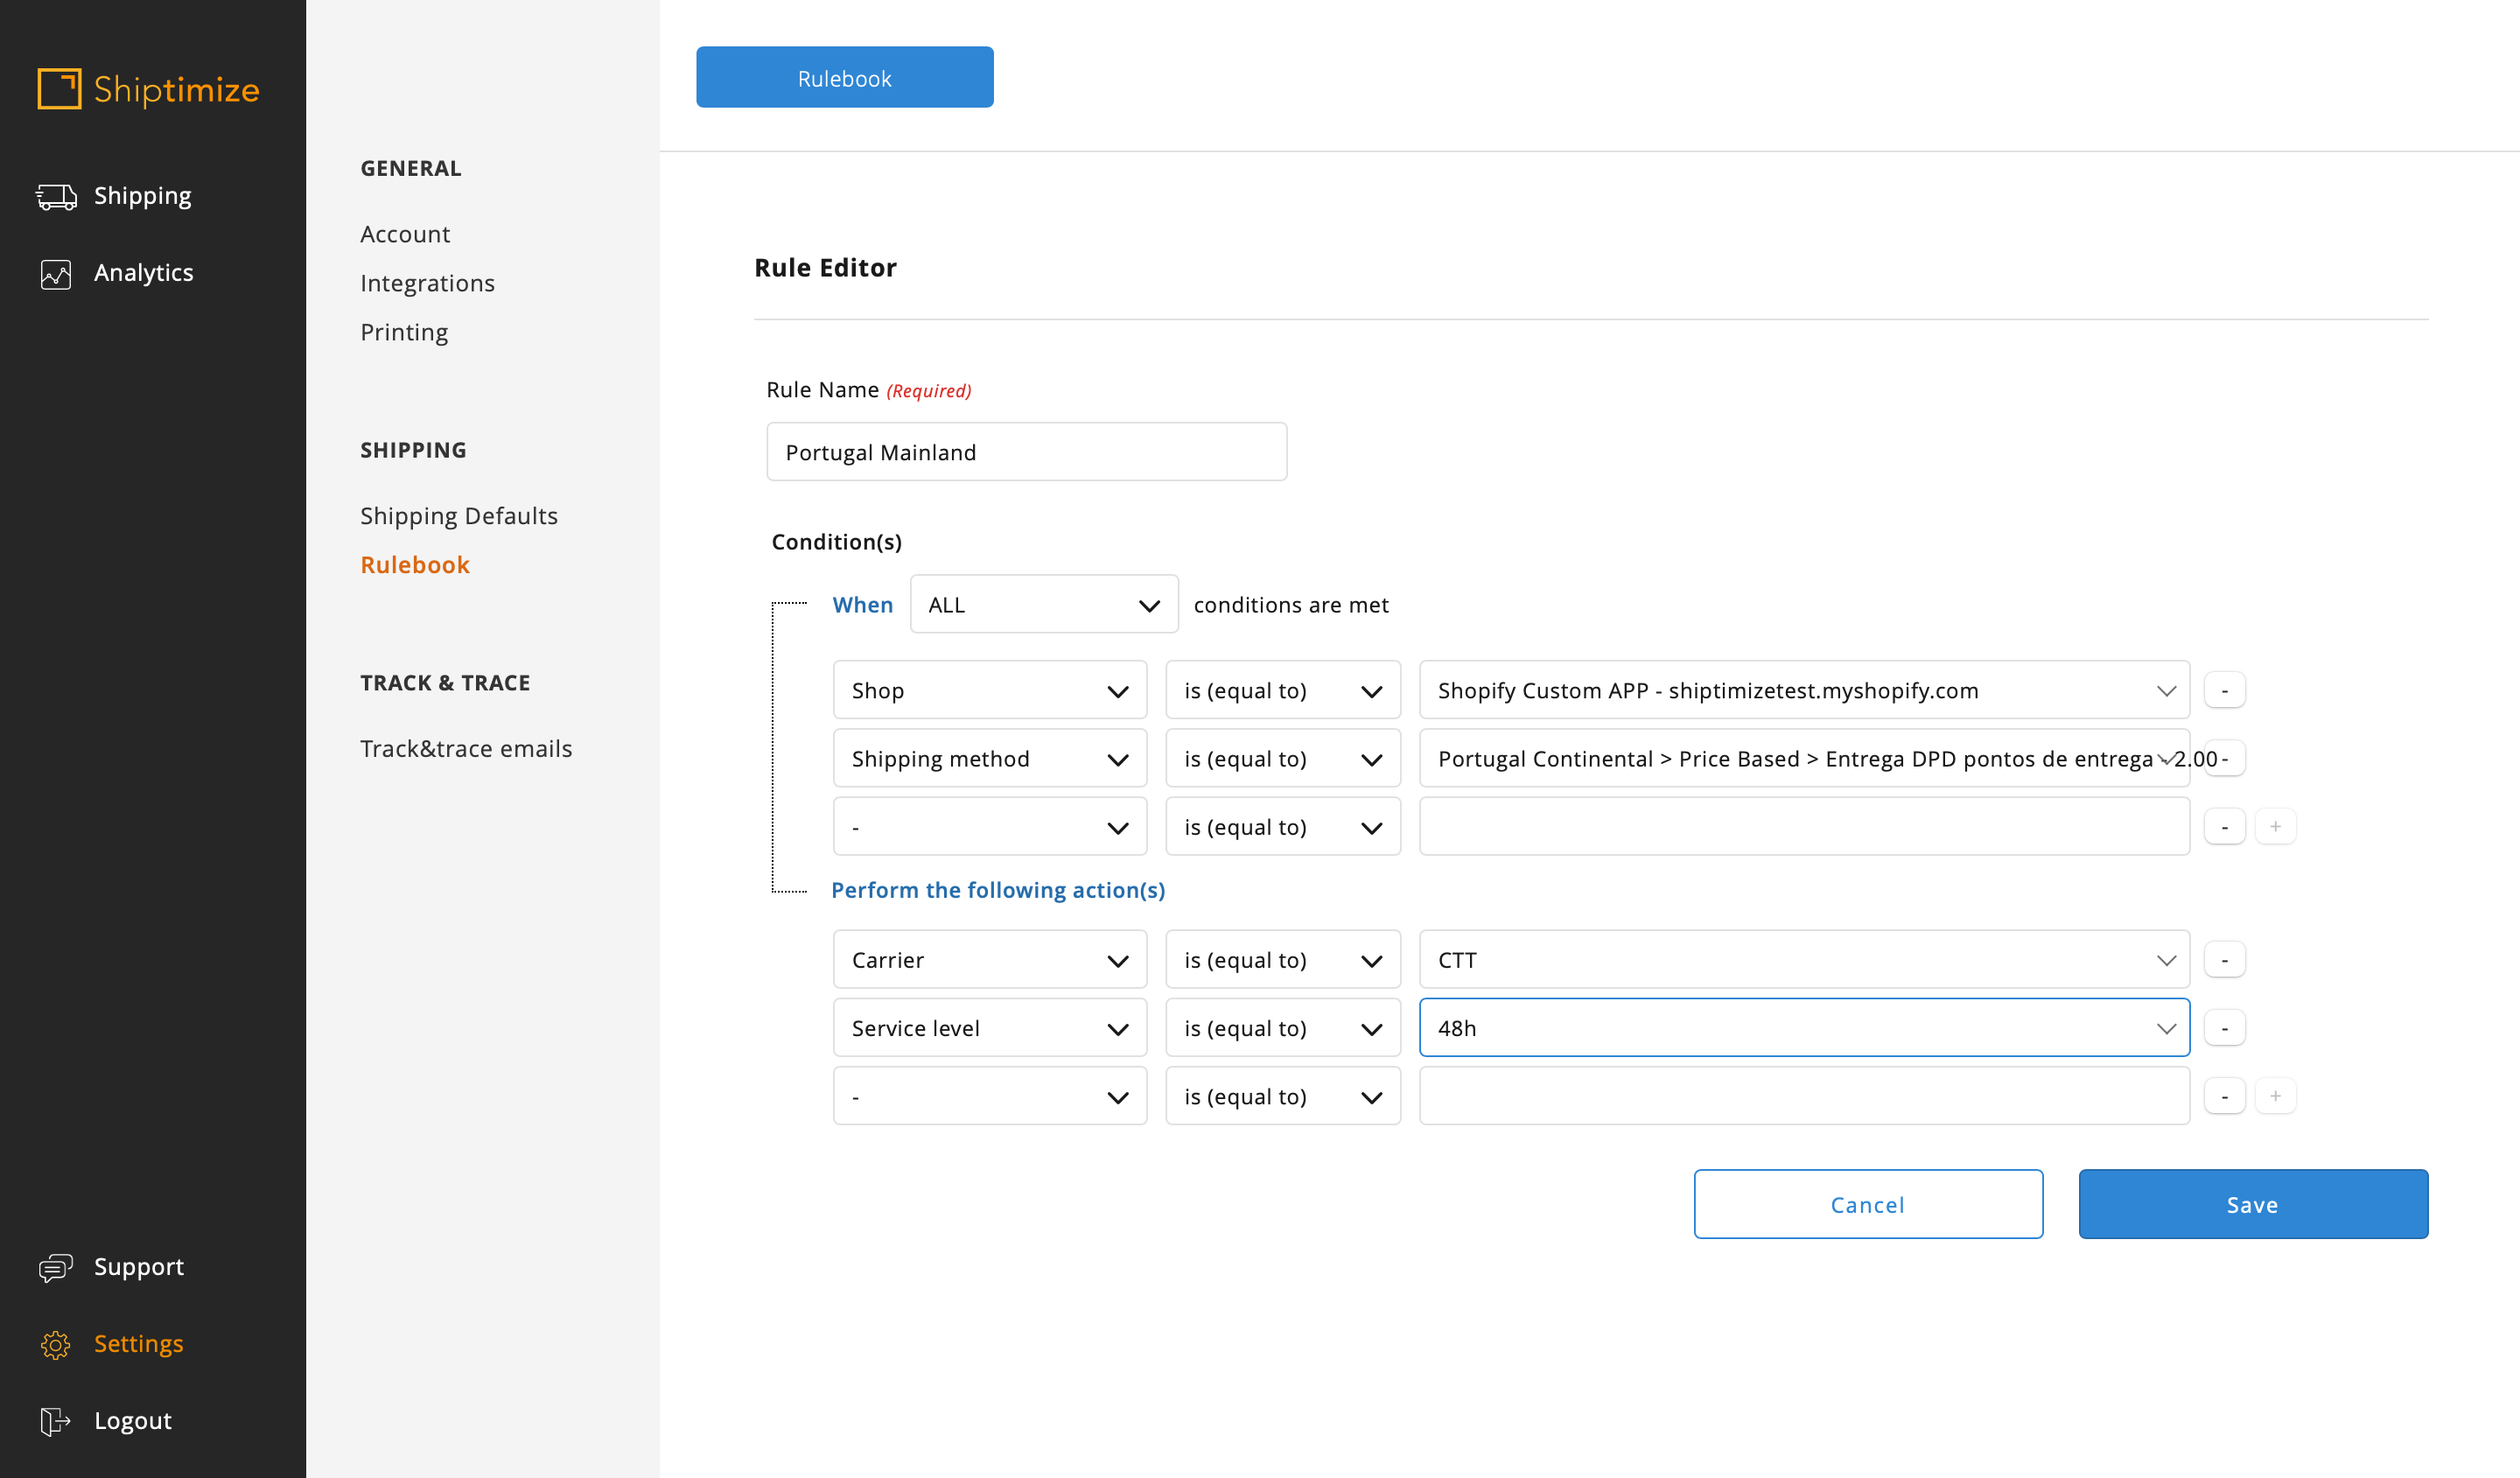
01. In the situation where we create a rule per shipping method
In this case we will create rules in which the characteristic is the shipping method. When we select this option we will be shown a list of all the shipping methods that exist in the shop so that you can choose.

You must then select the Carrier and service level you wish to use for that method
02. In the situation where you use the method name to create rules you can associate several shipping methods in the same rule and thus facilitate the process
Following the previous example, where we created the following shipping methods in the online shop, we will now create the following rules that correspond to the methods created:
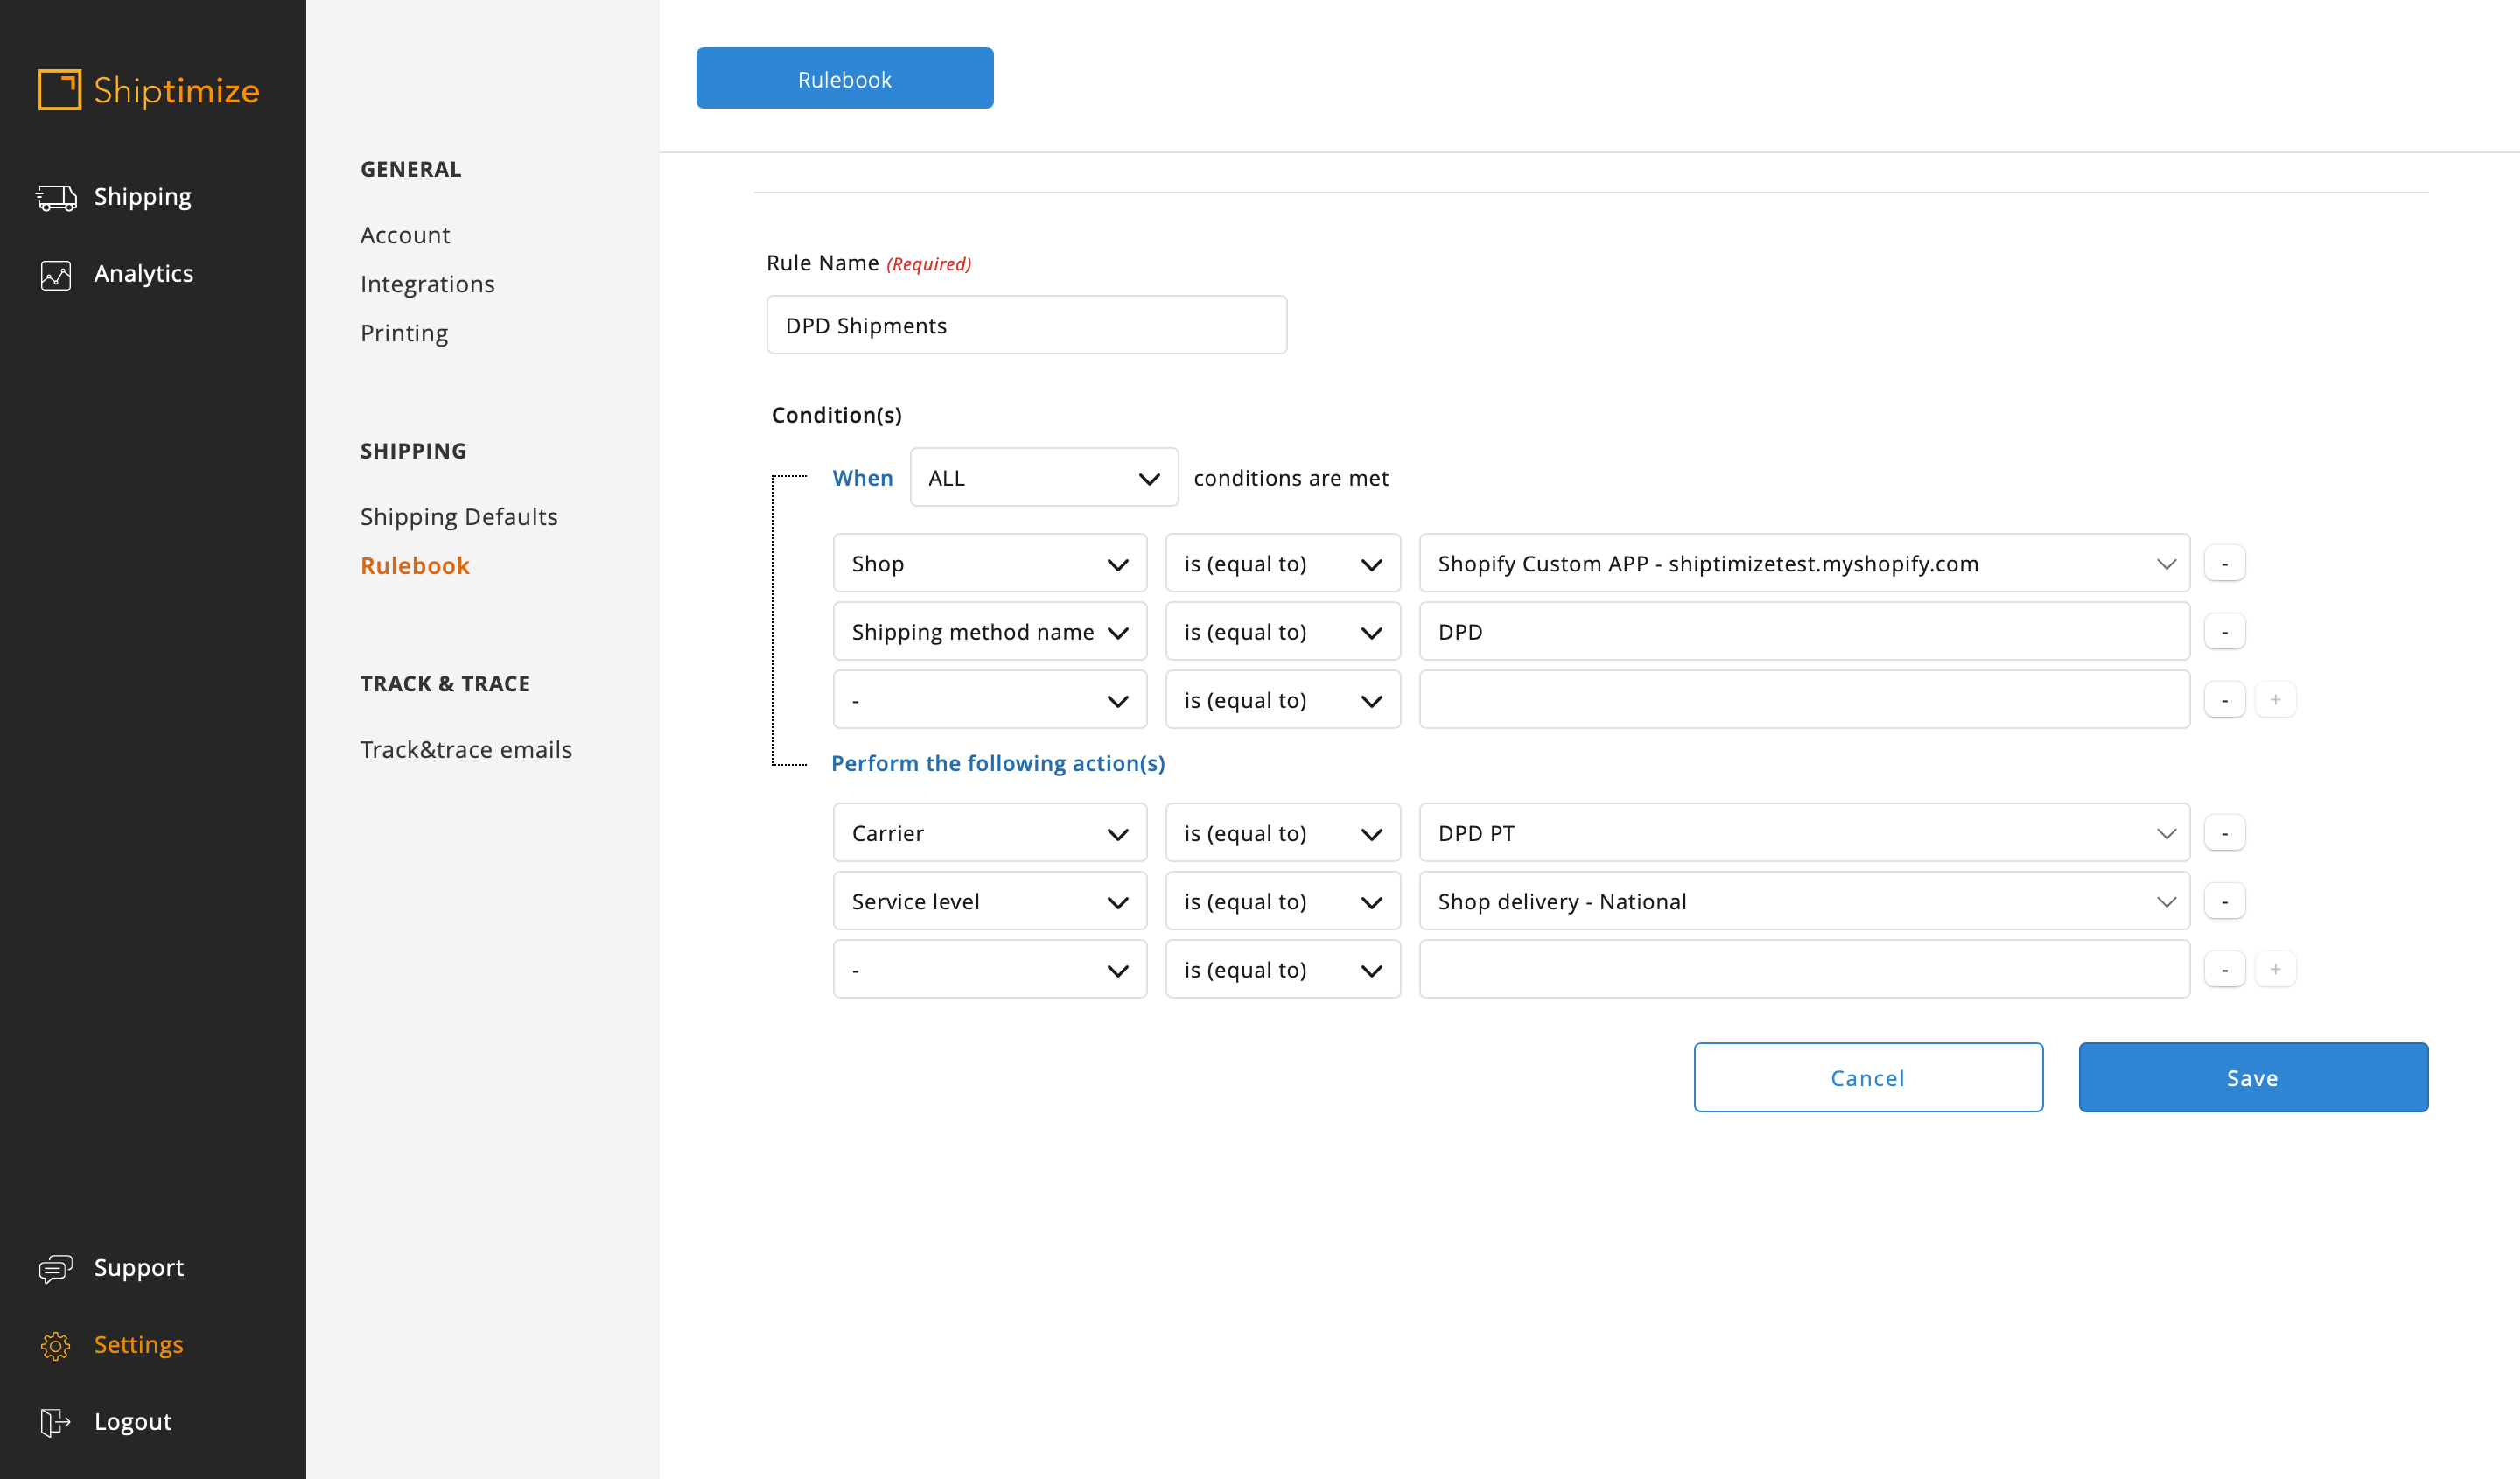
DPD 24 Hour Delivery
In this case we want to use the DPD carrier and the Shop Delivery service level. Since the name DPD present in the rule is different from the other rules, you only need to choose the feature Name of the shipping method equal to DPD and choose the carrier DPD PT and the level of service Shop Delivery – National.
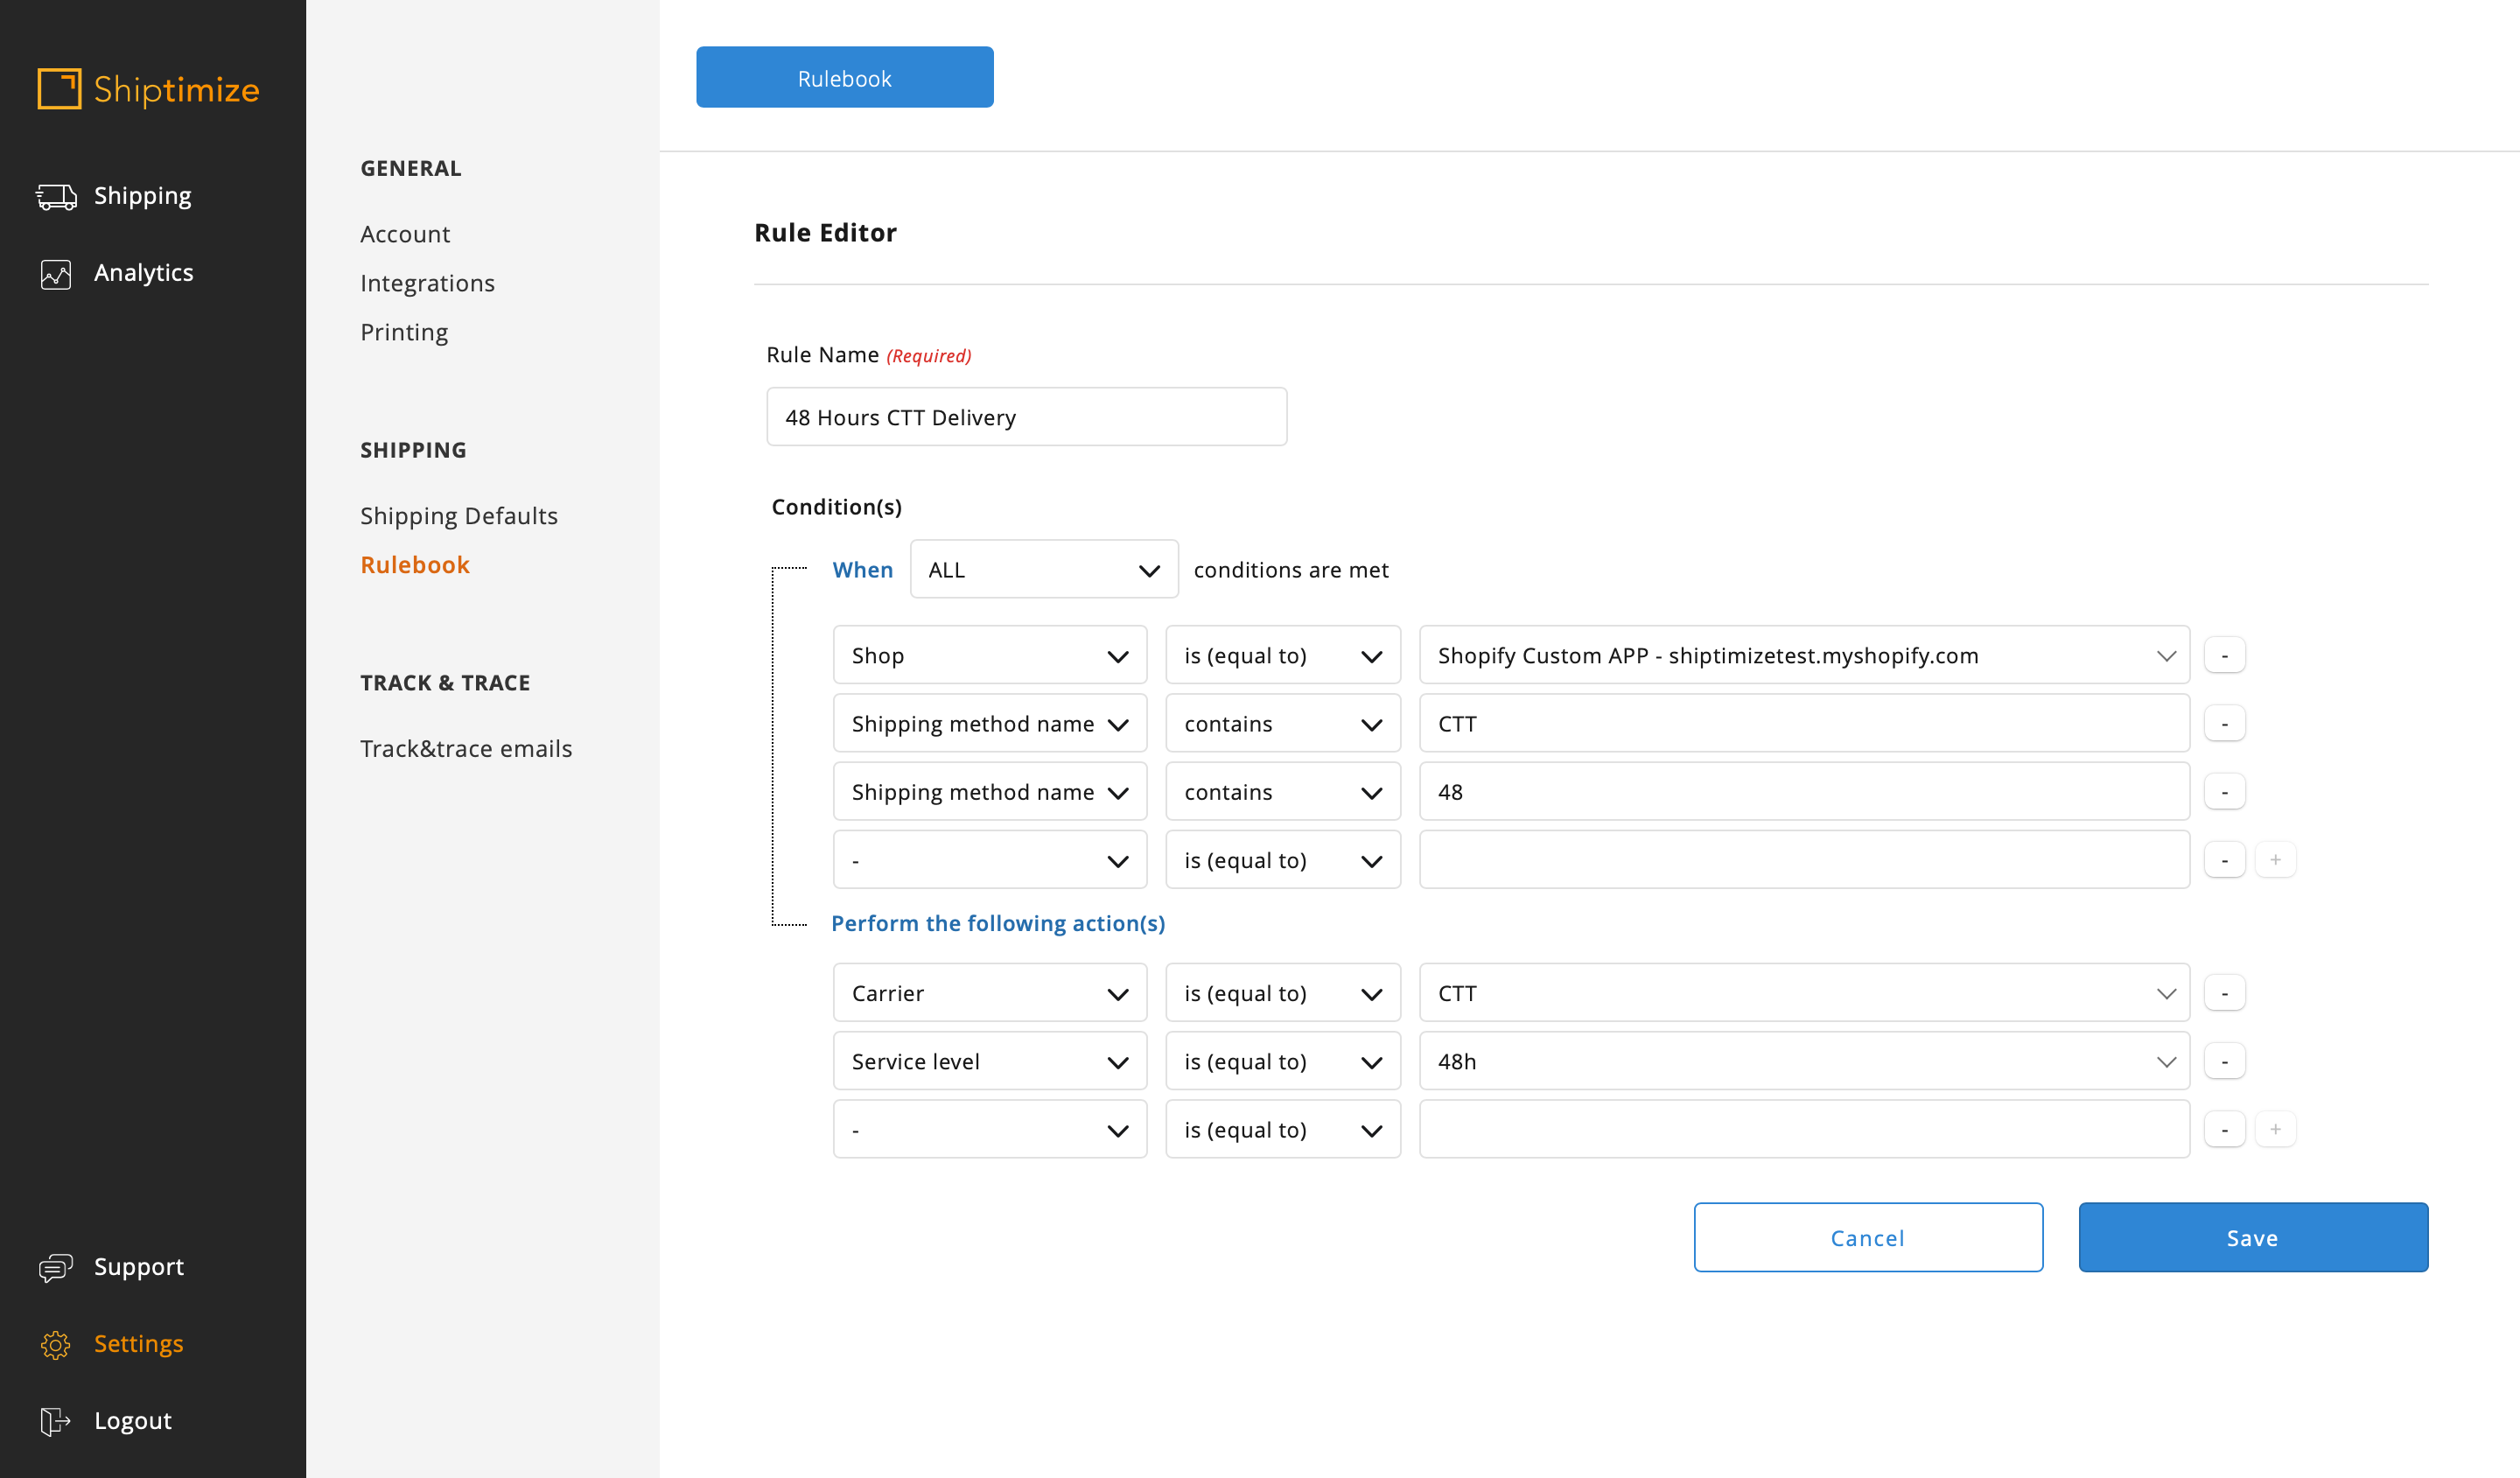
48 Hours CTT Delivery
In this case we intend to use the CTT services with the 48 hours service level. Since there is more than one shipping method whose name contains CTT it is necessary to add another feature that allows the distinction of this shipping method from the others.
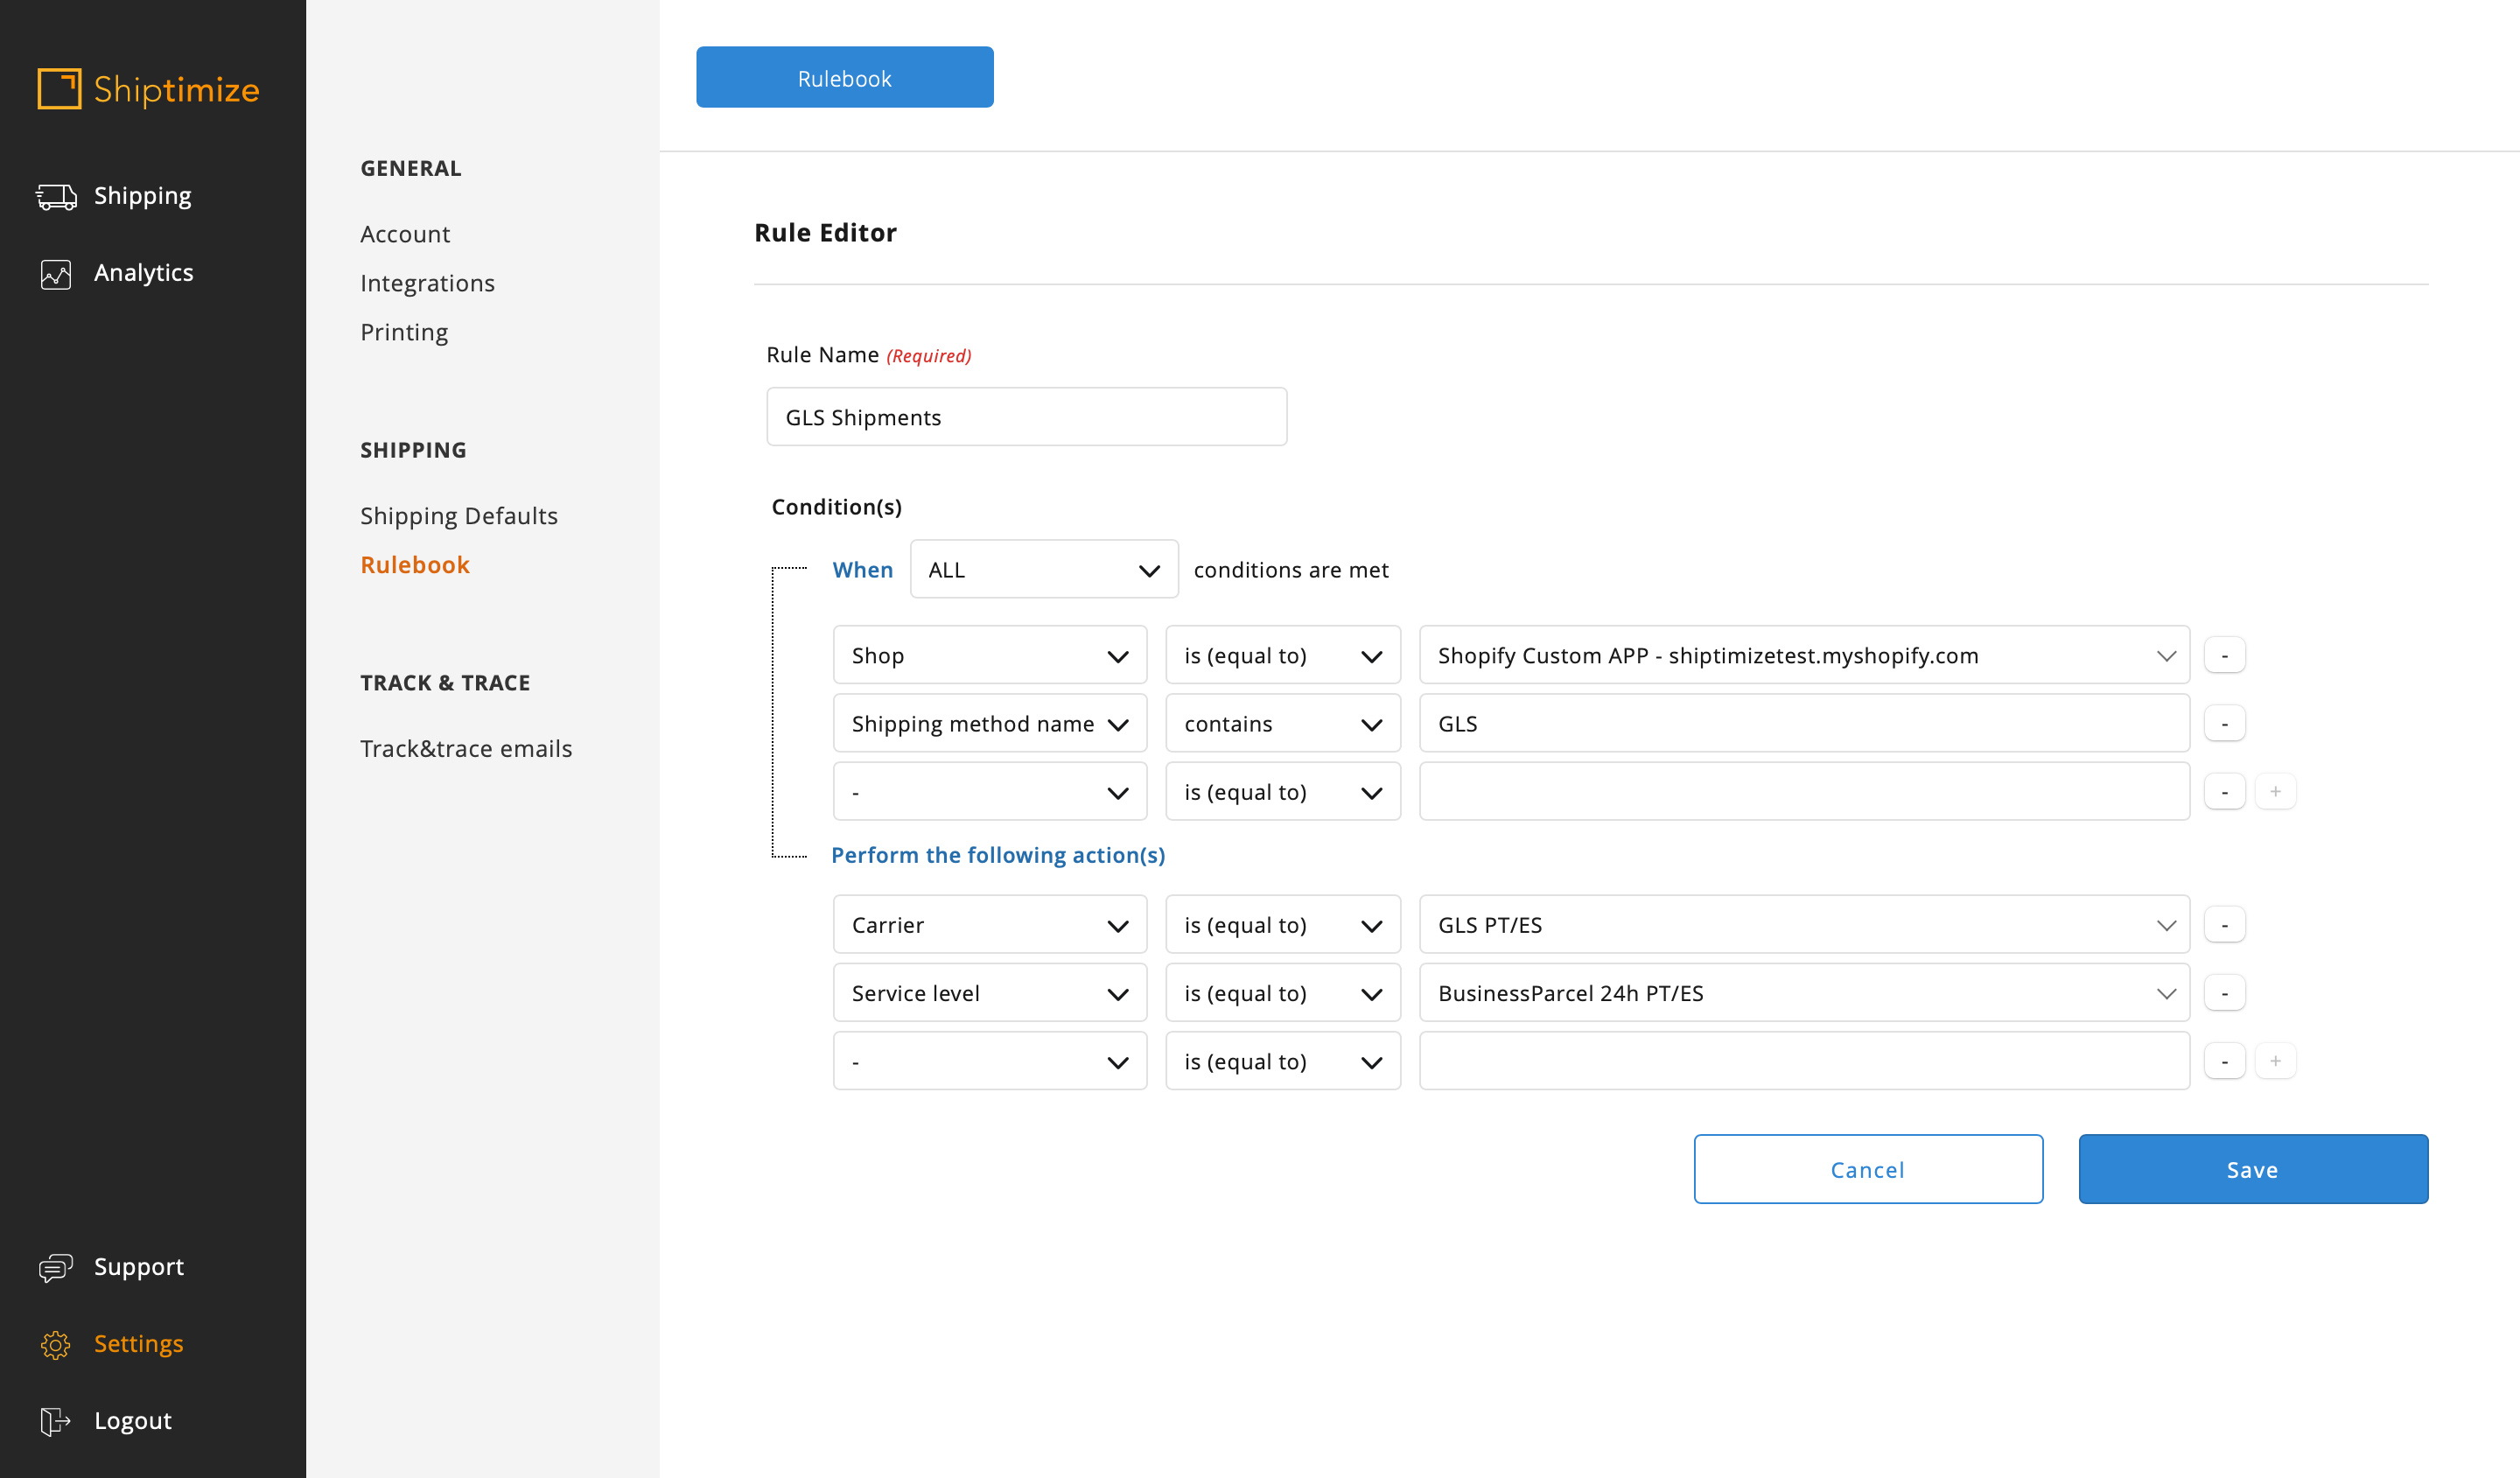
GLS delivery Portugal/Spain 48 hours
In this case we intend to use the GLS carrier and the same service level for both delivery methods. Since both have a common and unique feature between them, it is enough to create a rule with the feature GLS and choosing the carrier GLS PT and the service level BusinessParcel 24h PT/ES.
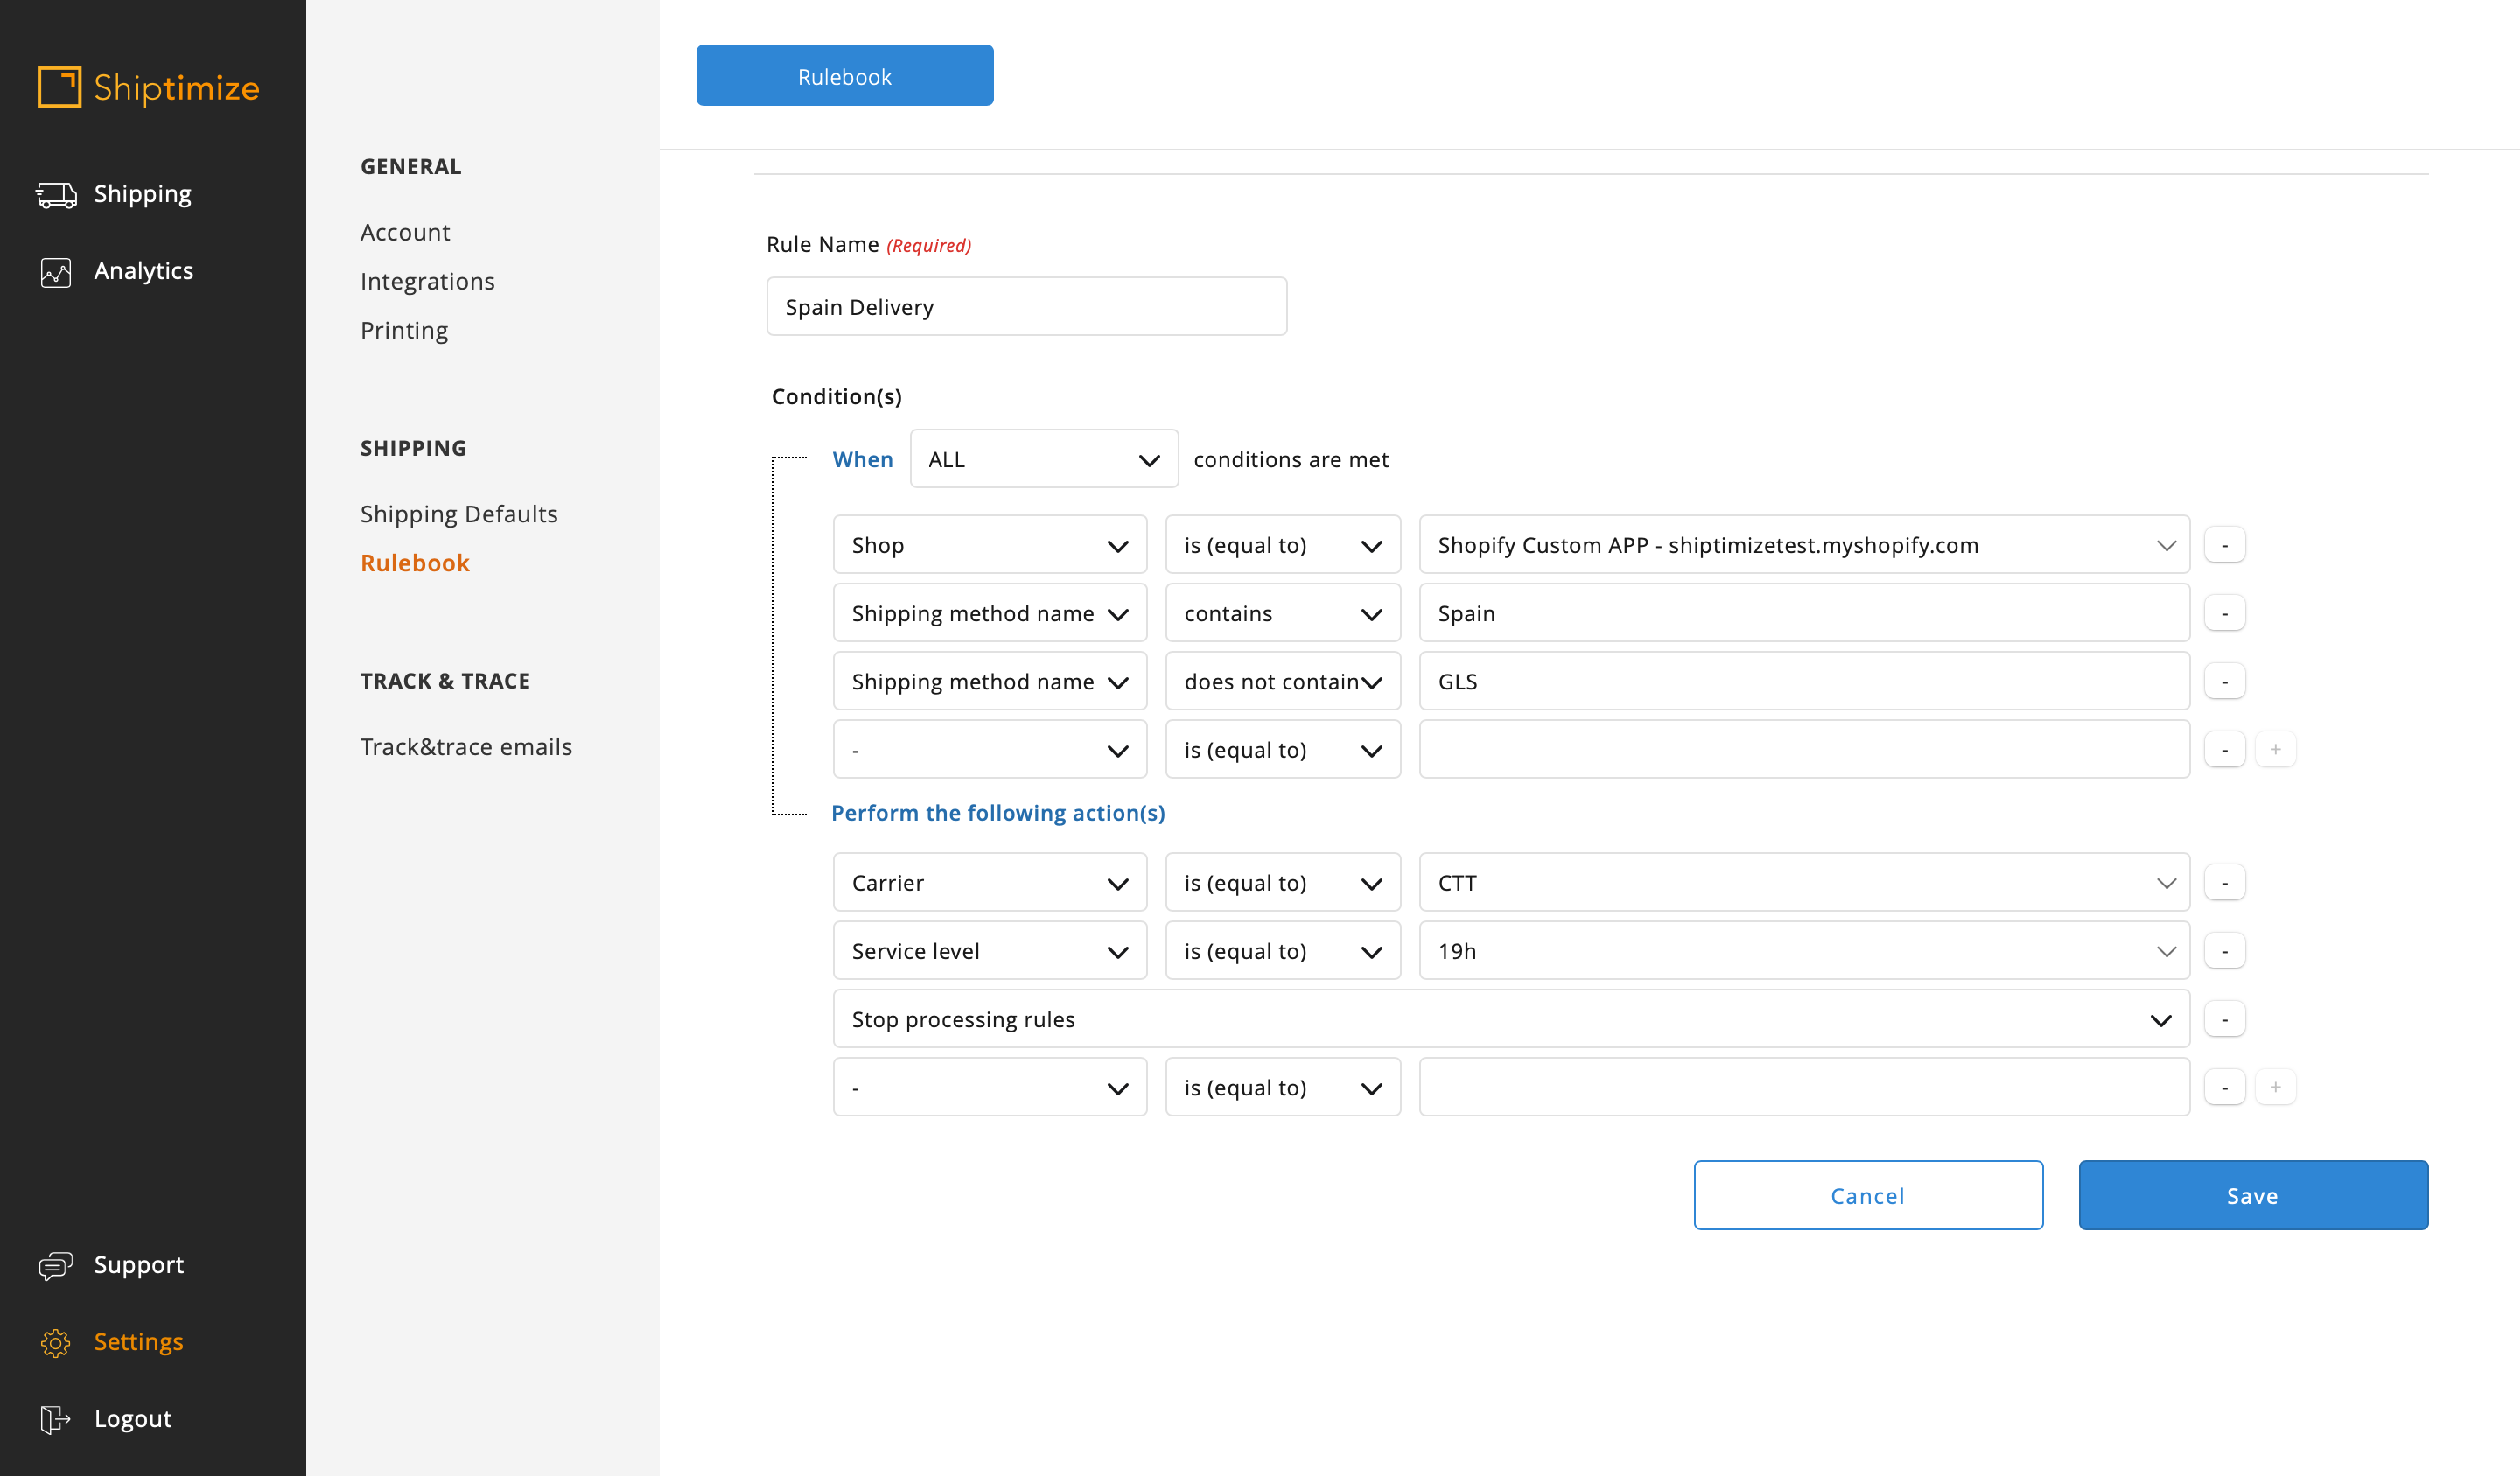
Spain Delivery
In this case we want to use CTT carrier with delivery in 24 hours. Since there is no distinguishing feature between this shipping method and the previous one (GLS Spain 48 hours delivery) we need to create a rule with negative characteristics (does not contain). Thus we add the characteristic Name of the shipping method contains Spain and the characteristic does not contain GLS and choose the carrier equal to CTT and service level equal to 19H.

Since this rule and the previous rule are conflicting it is imperative that this second rule be placed second to the first so that it is not nullified.
Or the process stop condition should be added.
If you want to use several carriers and service levels, but only created one shipping method in your shop (for example free shipping) you should create your rules in order to use other shipping characteristics that allow distinguishing the various carriers.
This method is substantially more limited than the previous one. In this case for example you can create rules taking into account other characteristics of the items such as the country of destination, weight, among others.
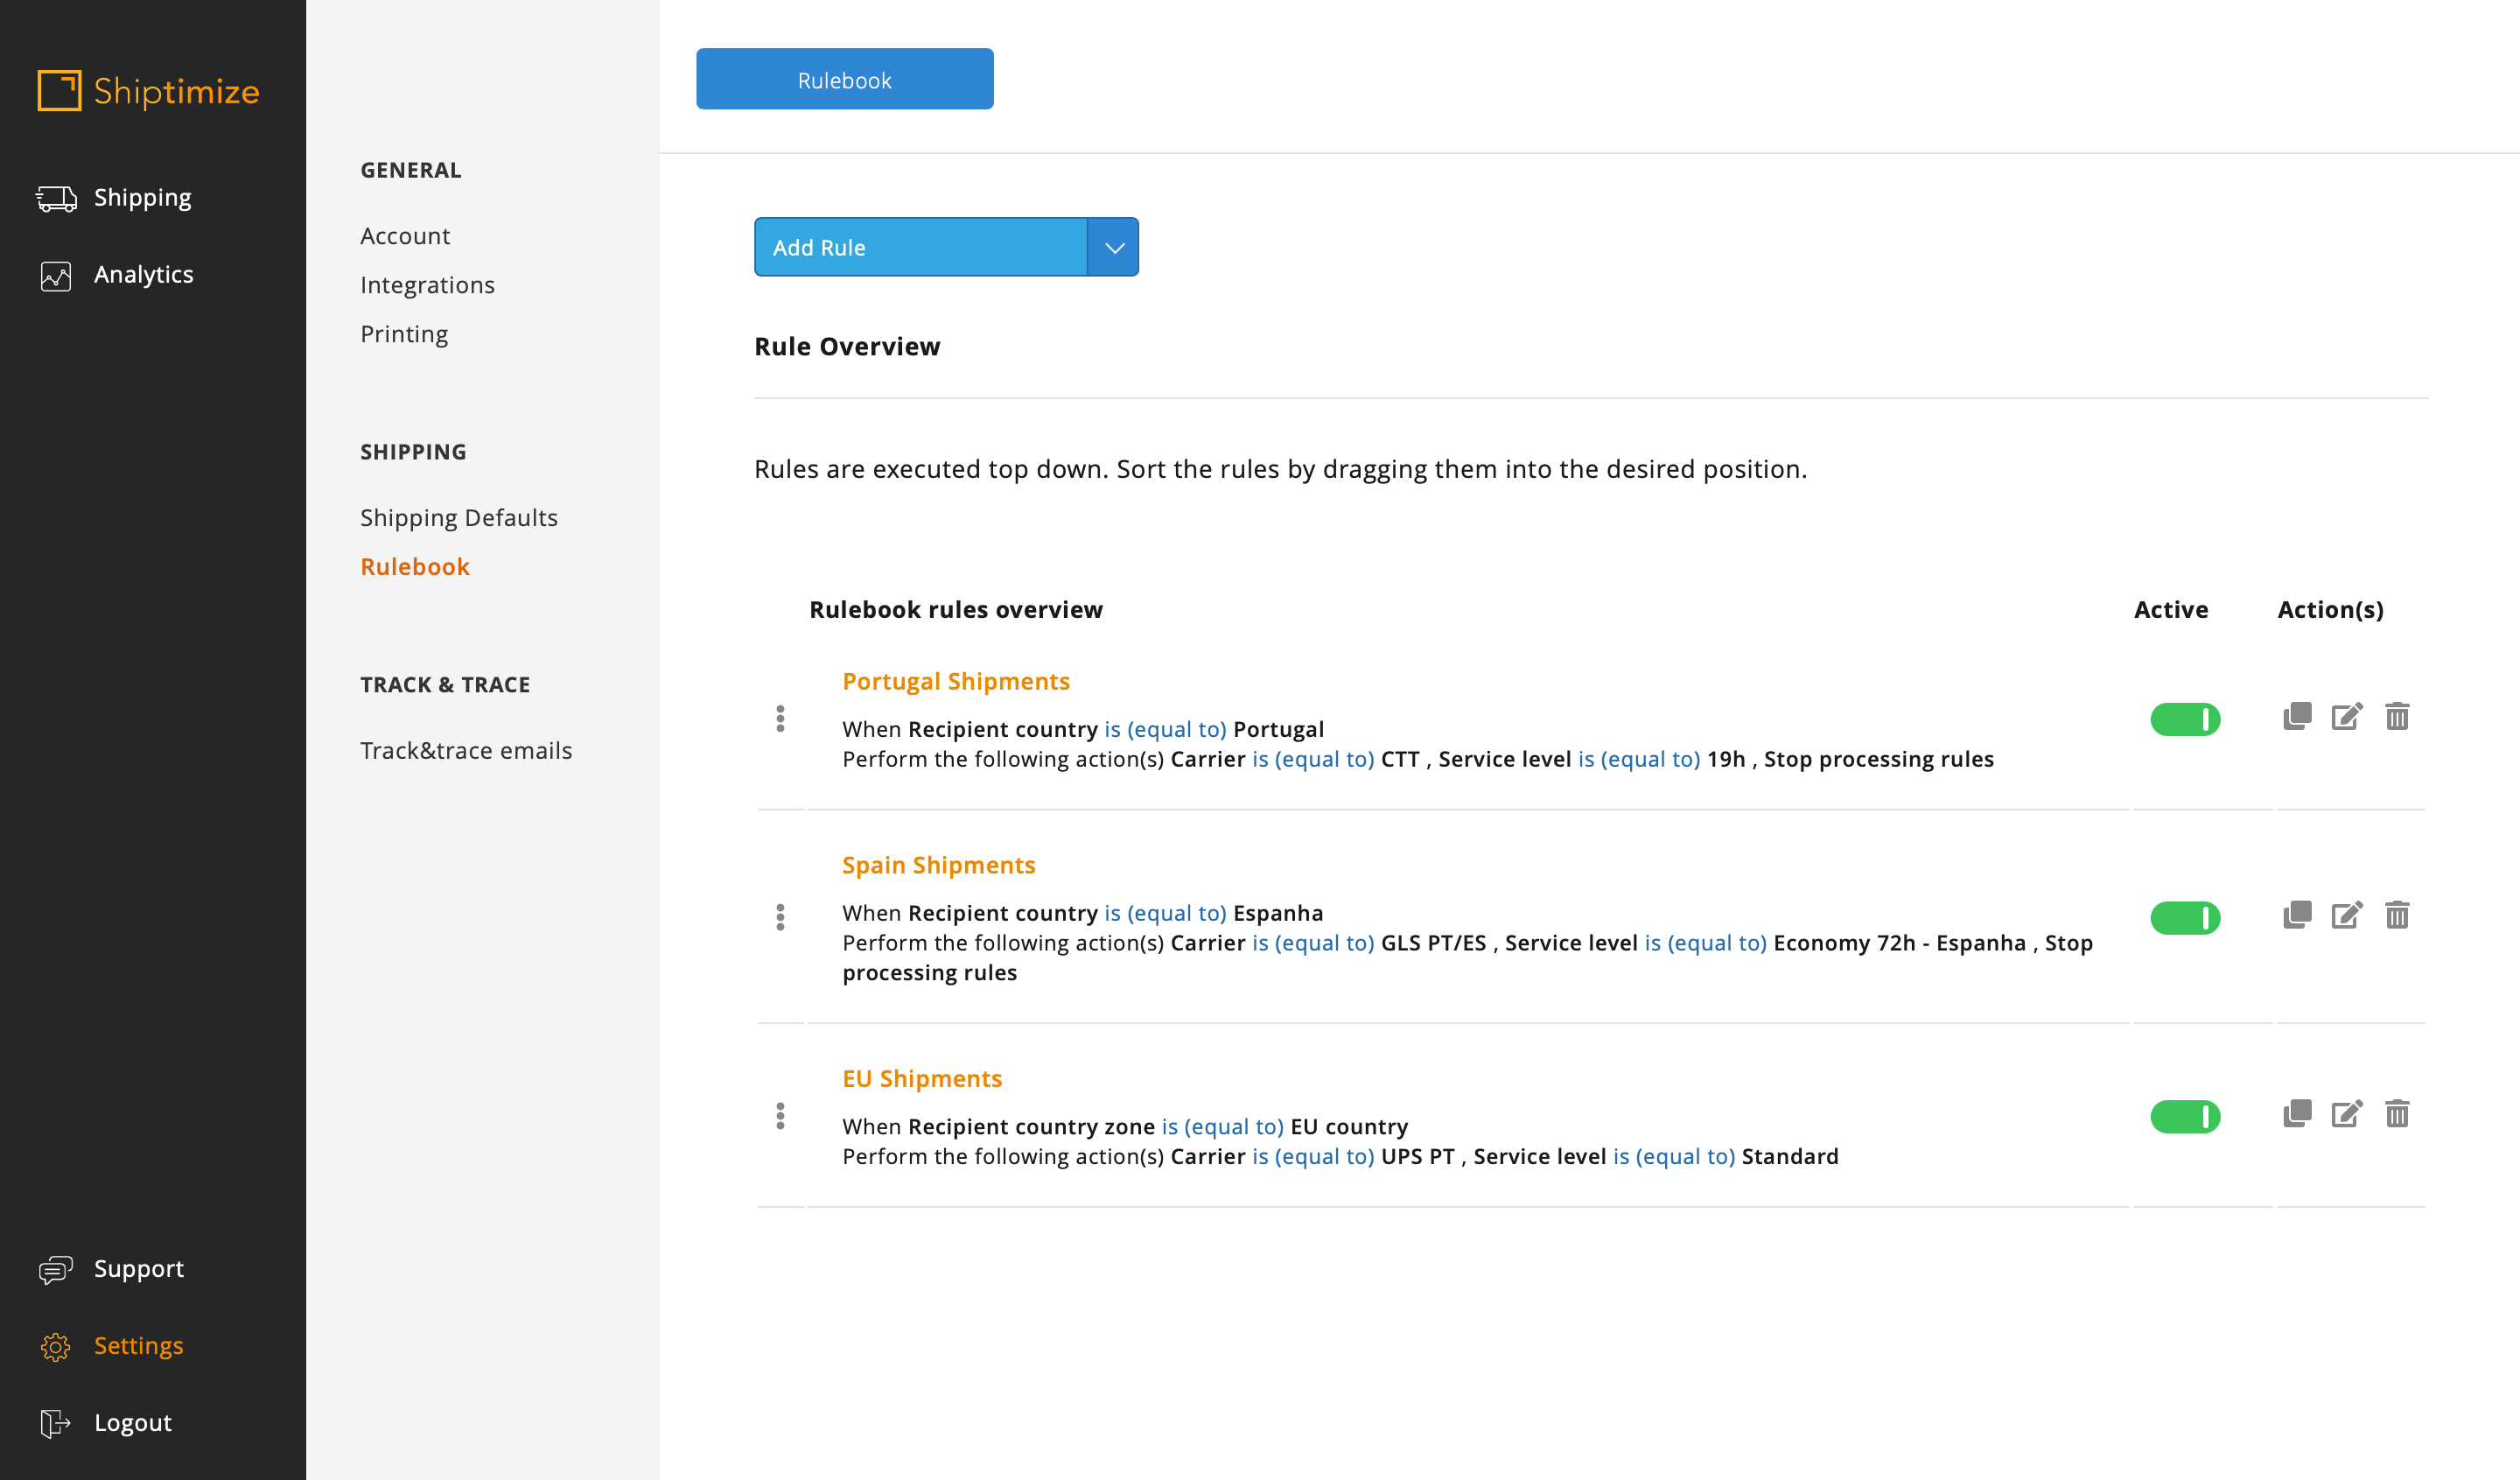
We present the most common example which is by destination country or zone and in this example we want to use CTT for Portugal, GLS for Spain and UPS for the EU.
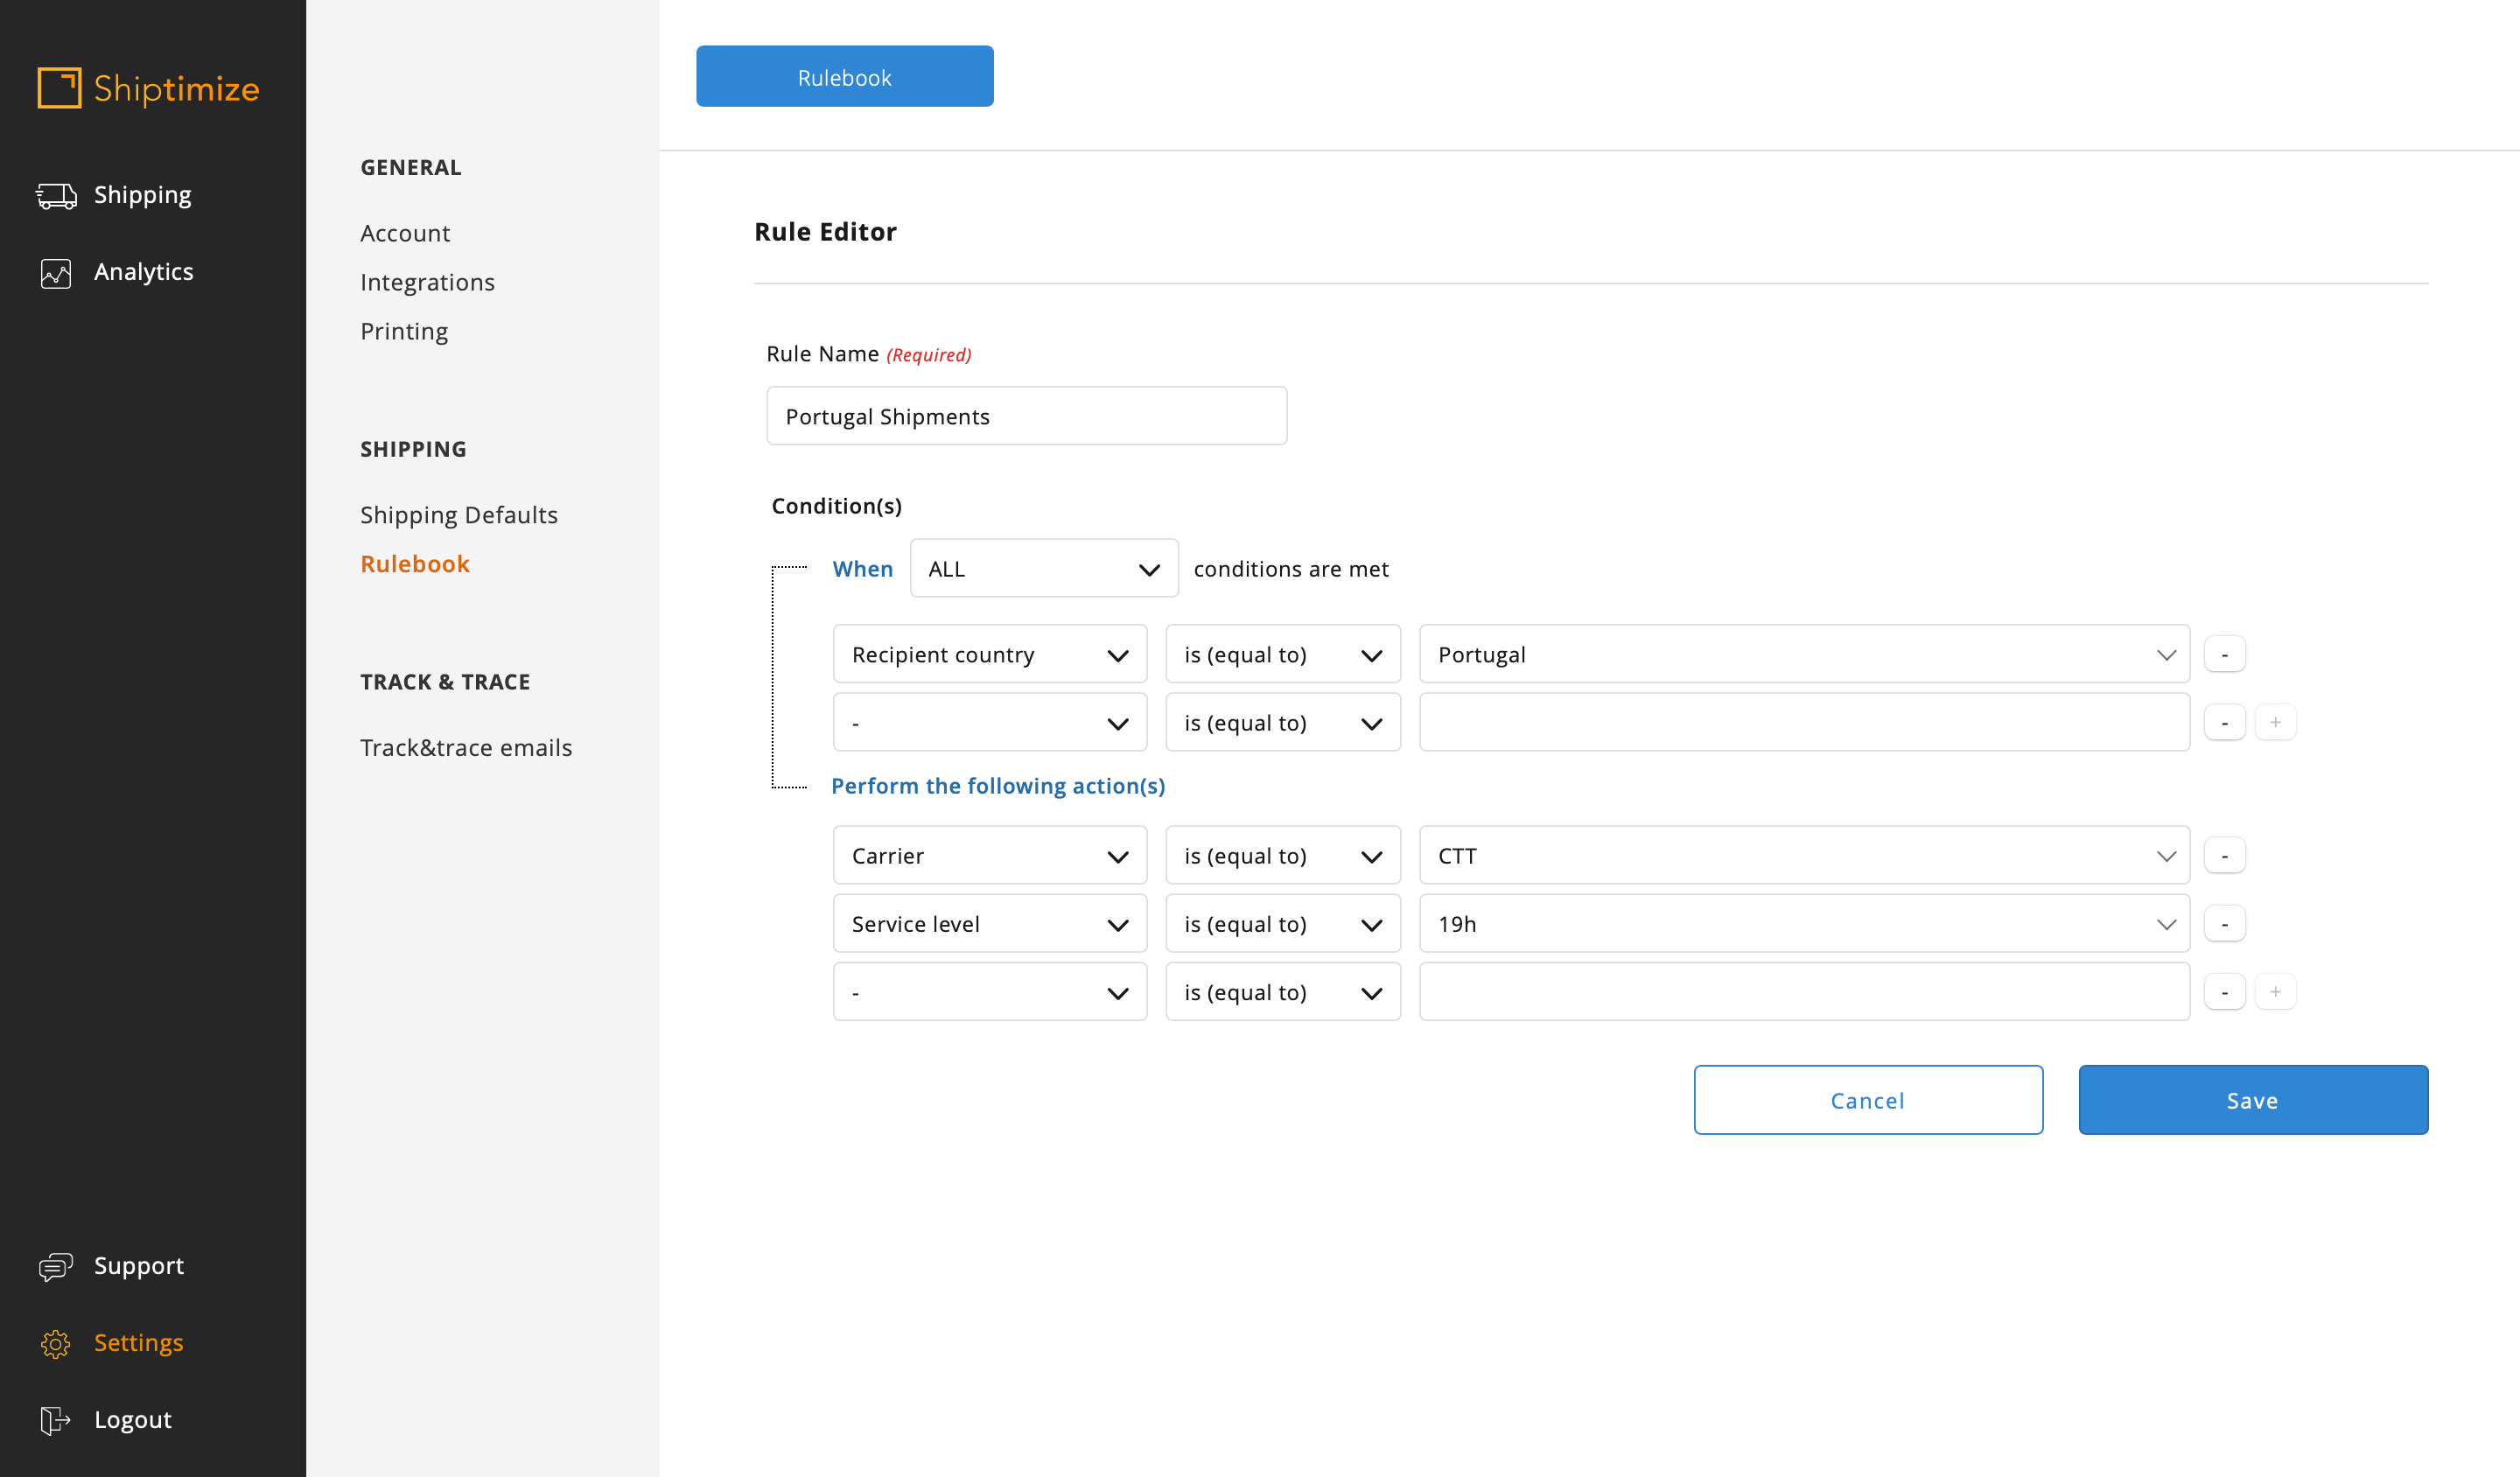
So we create a rule for shipments to Portugal.
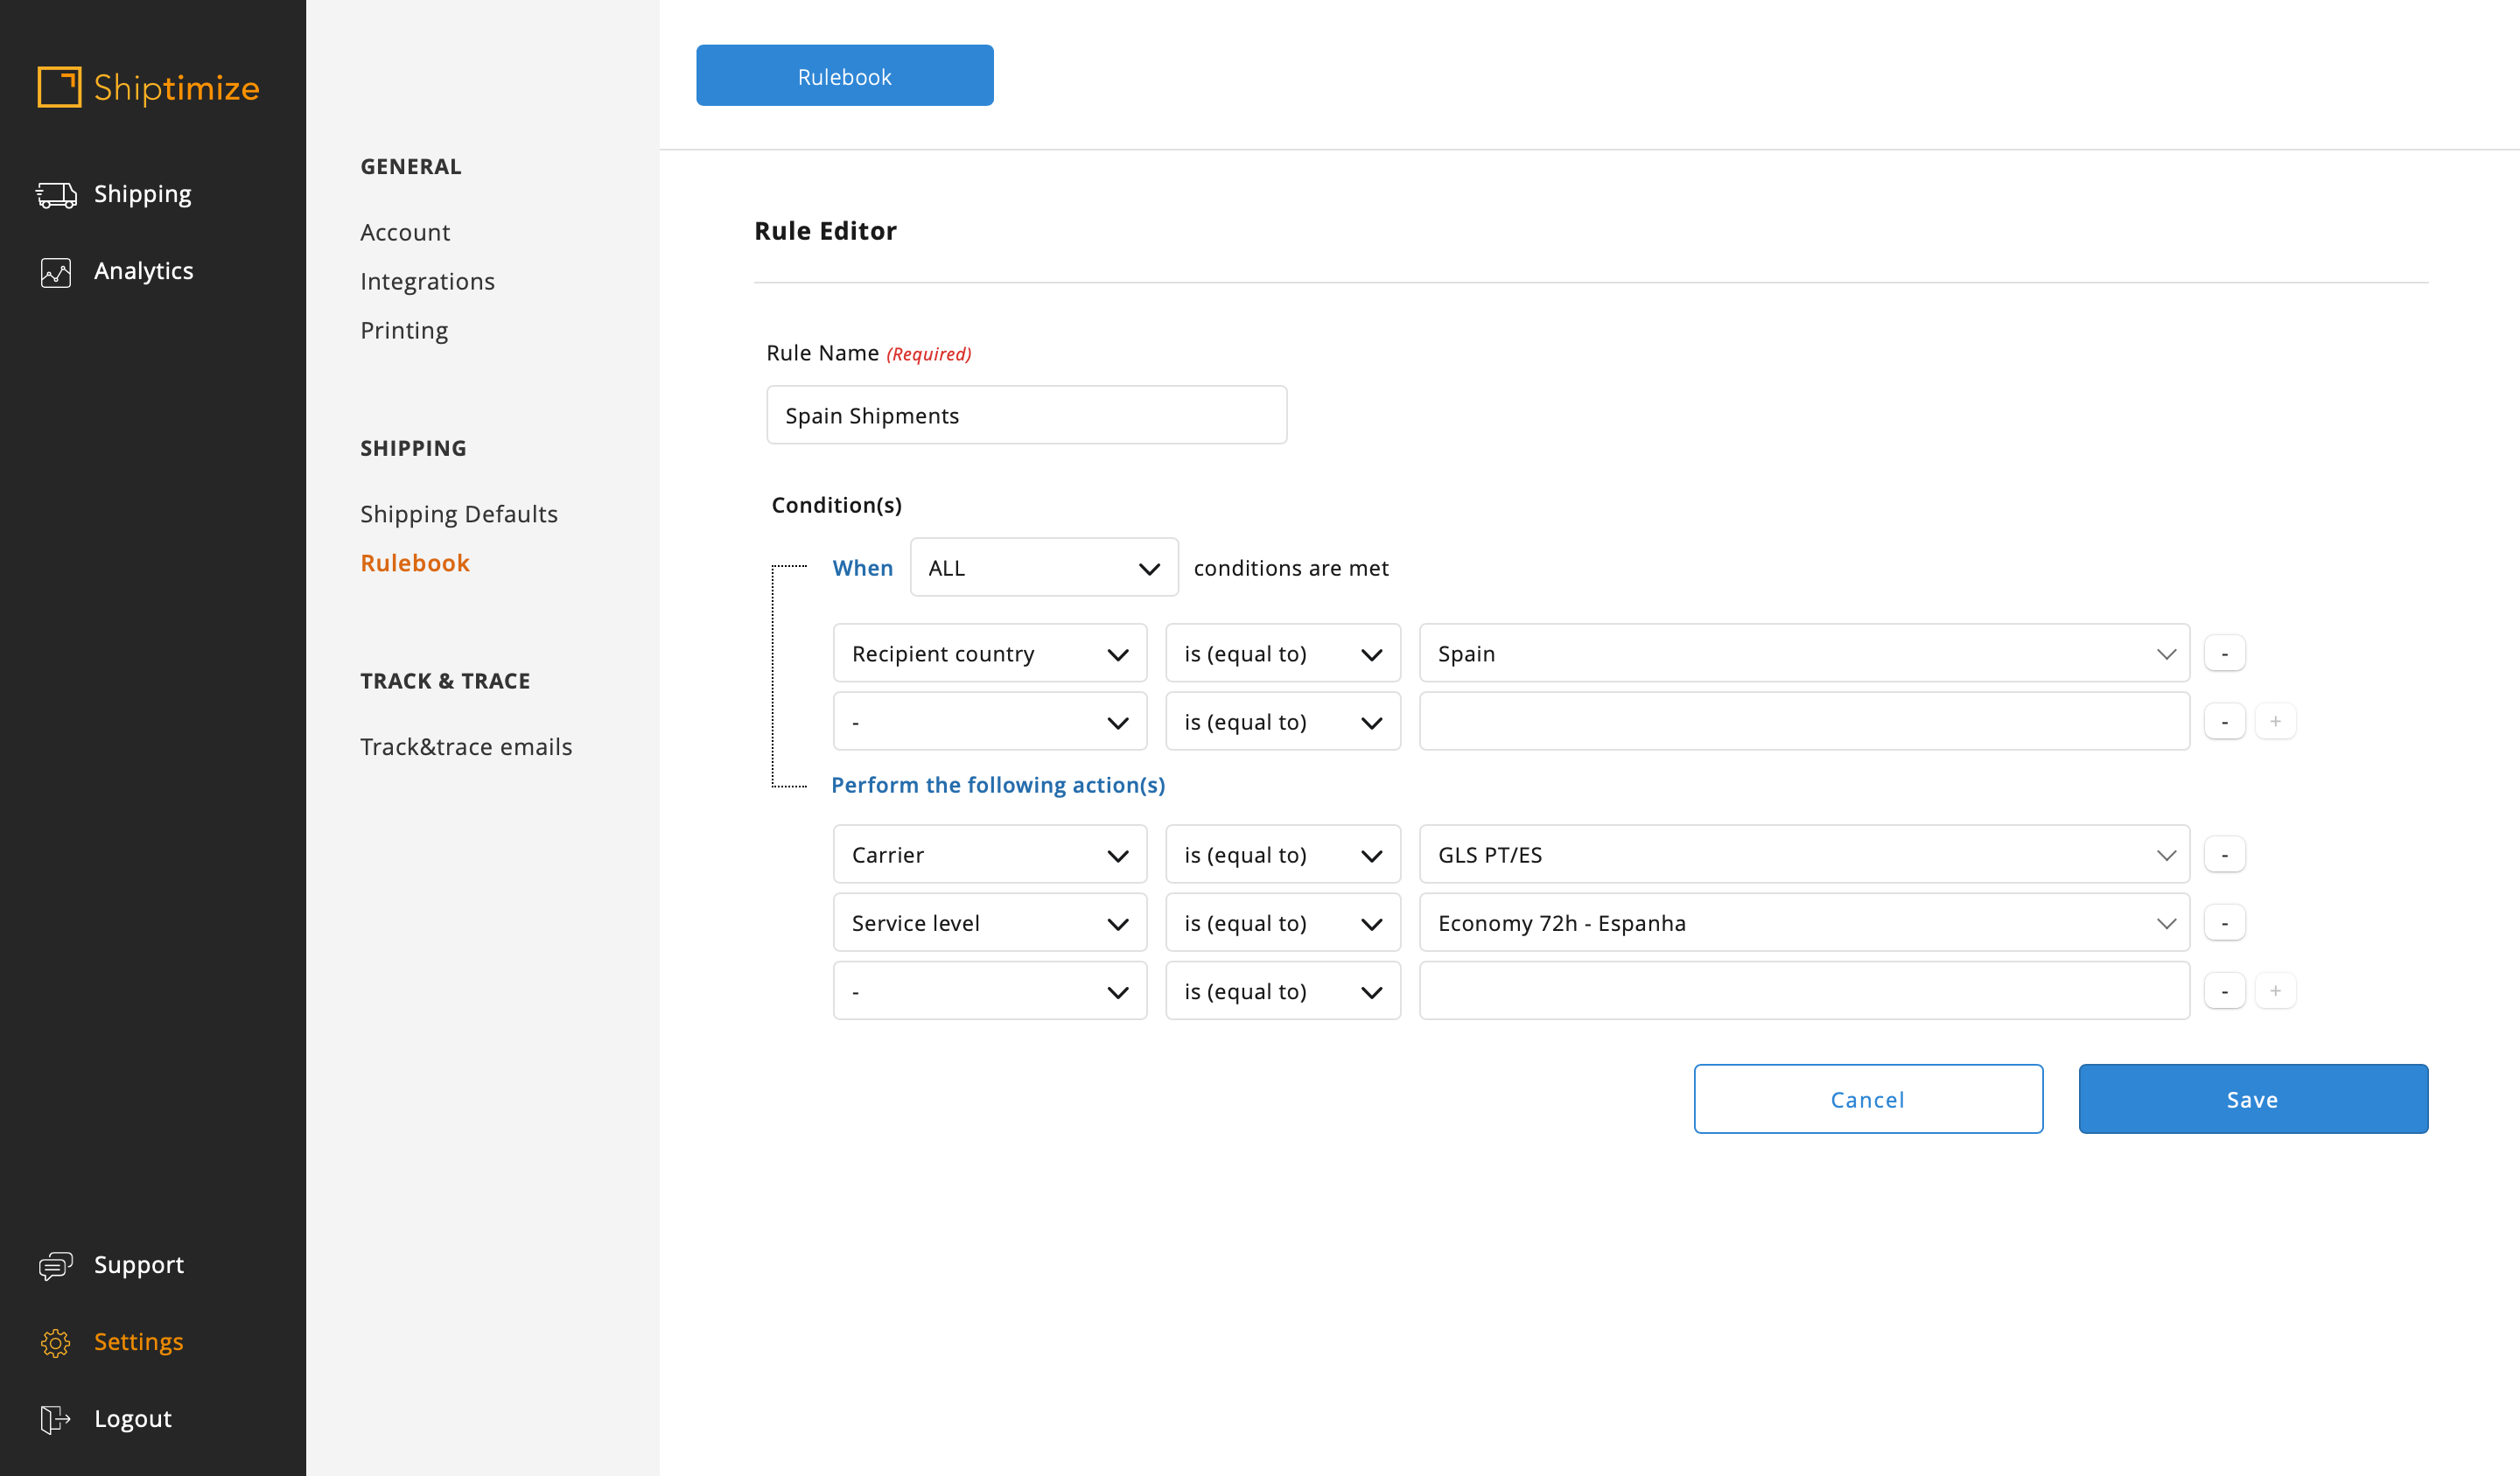
For Spain
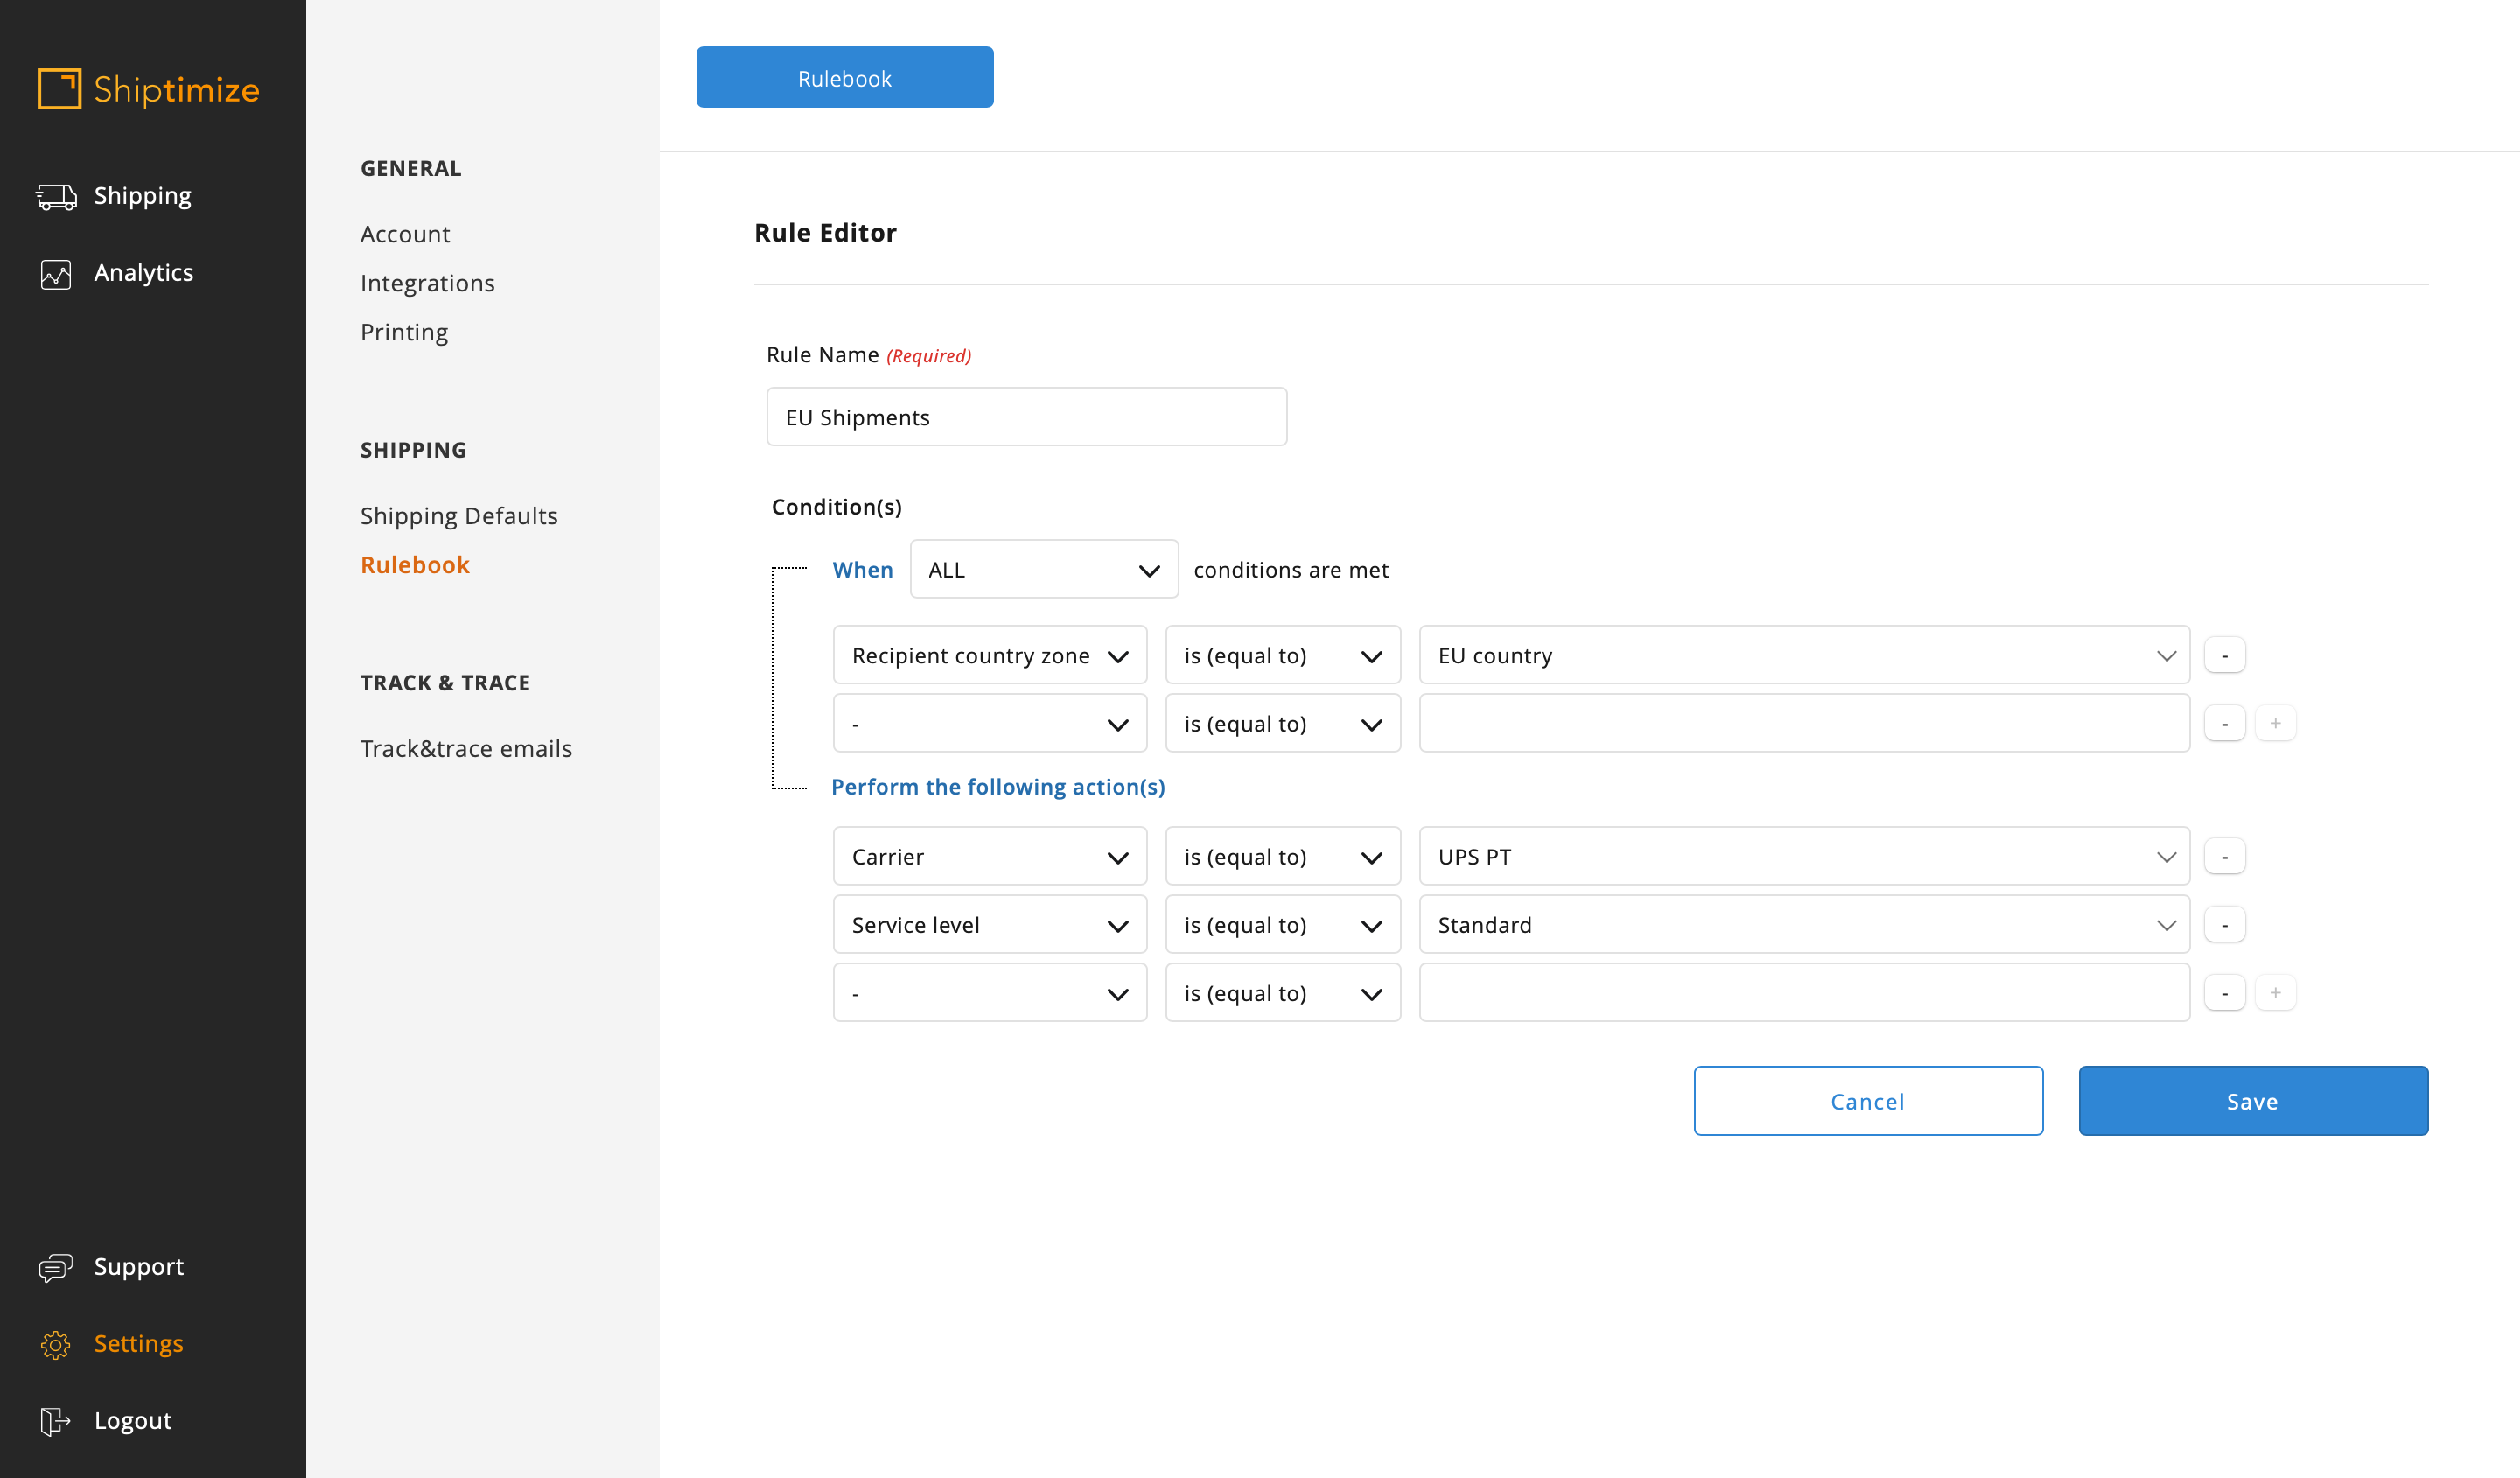
And for the rest of Europe. In this case it should be noted that the rule could be created in 3 ways:
1 – Create a simple rule with the characteristic zone of the destination country EU and be placed at the beginning of the list of rules because it conflicts with the others
2 – Creating a rule with characteristic recipient country zone equal to EU and characteristic Recipient country is not equal to Portugal and characteristic Recipient country is not equal to Spain
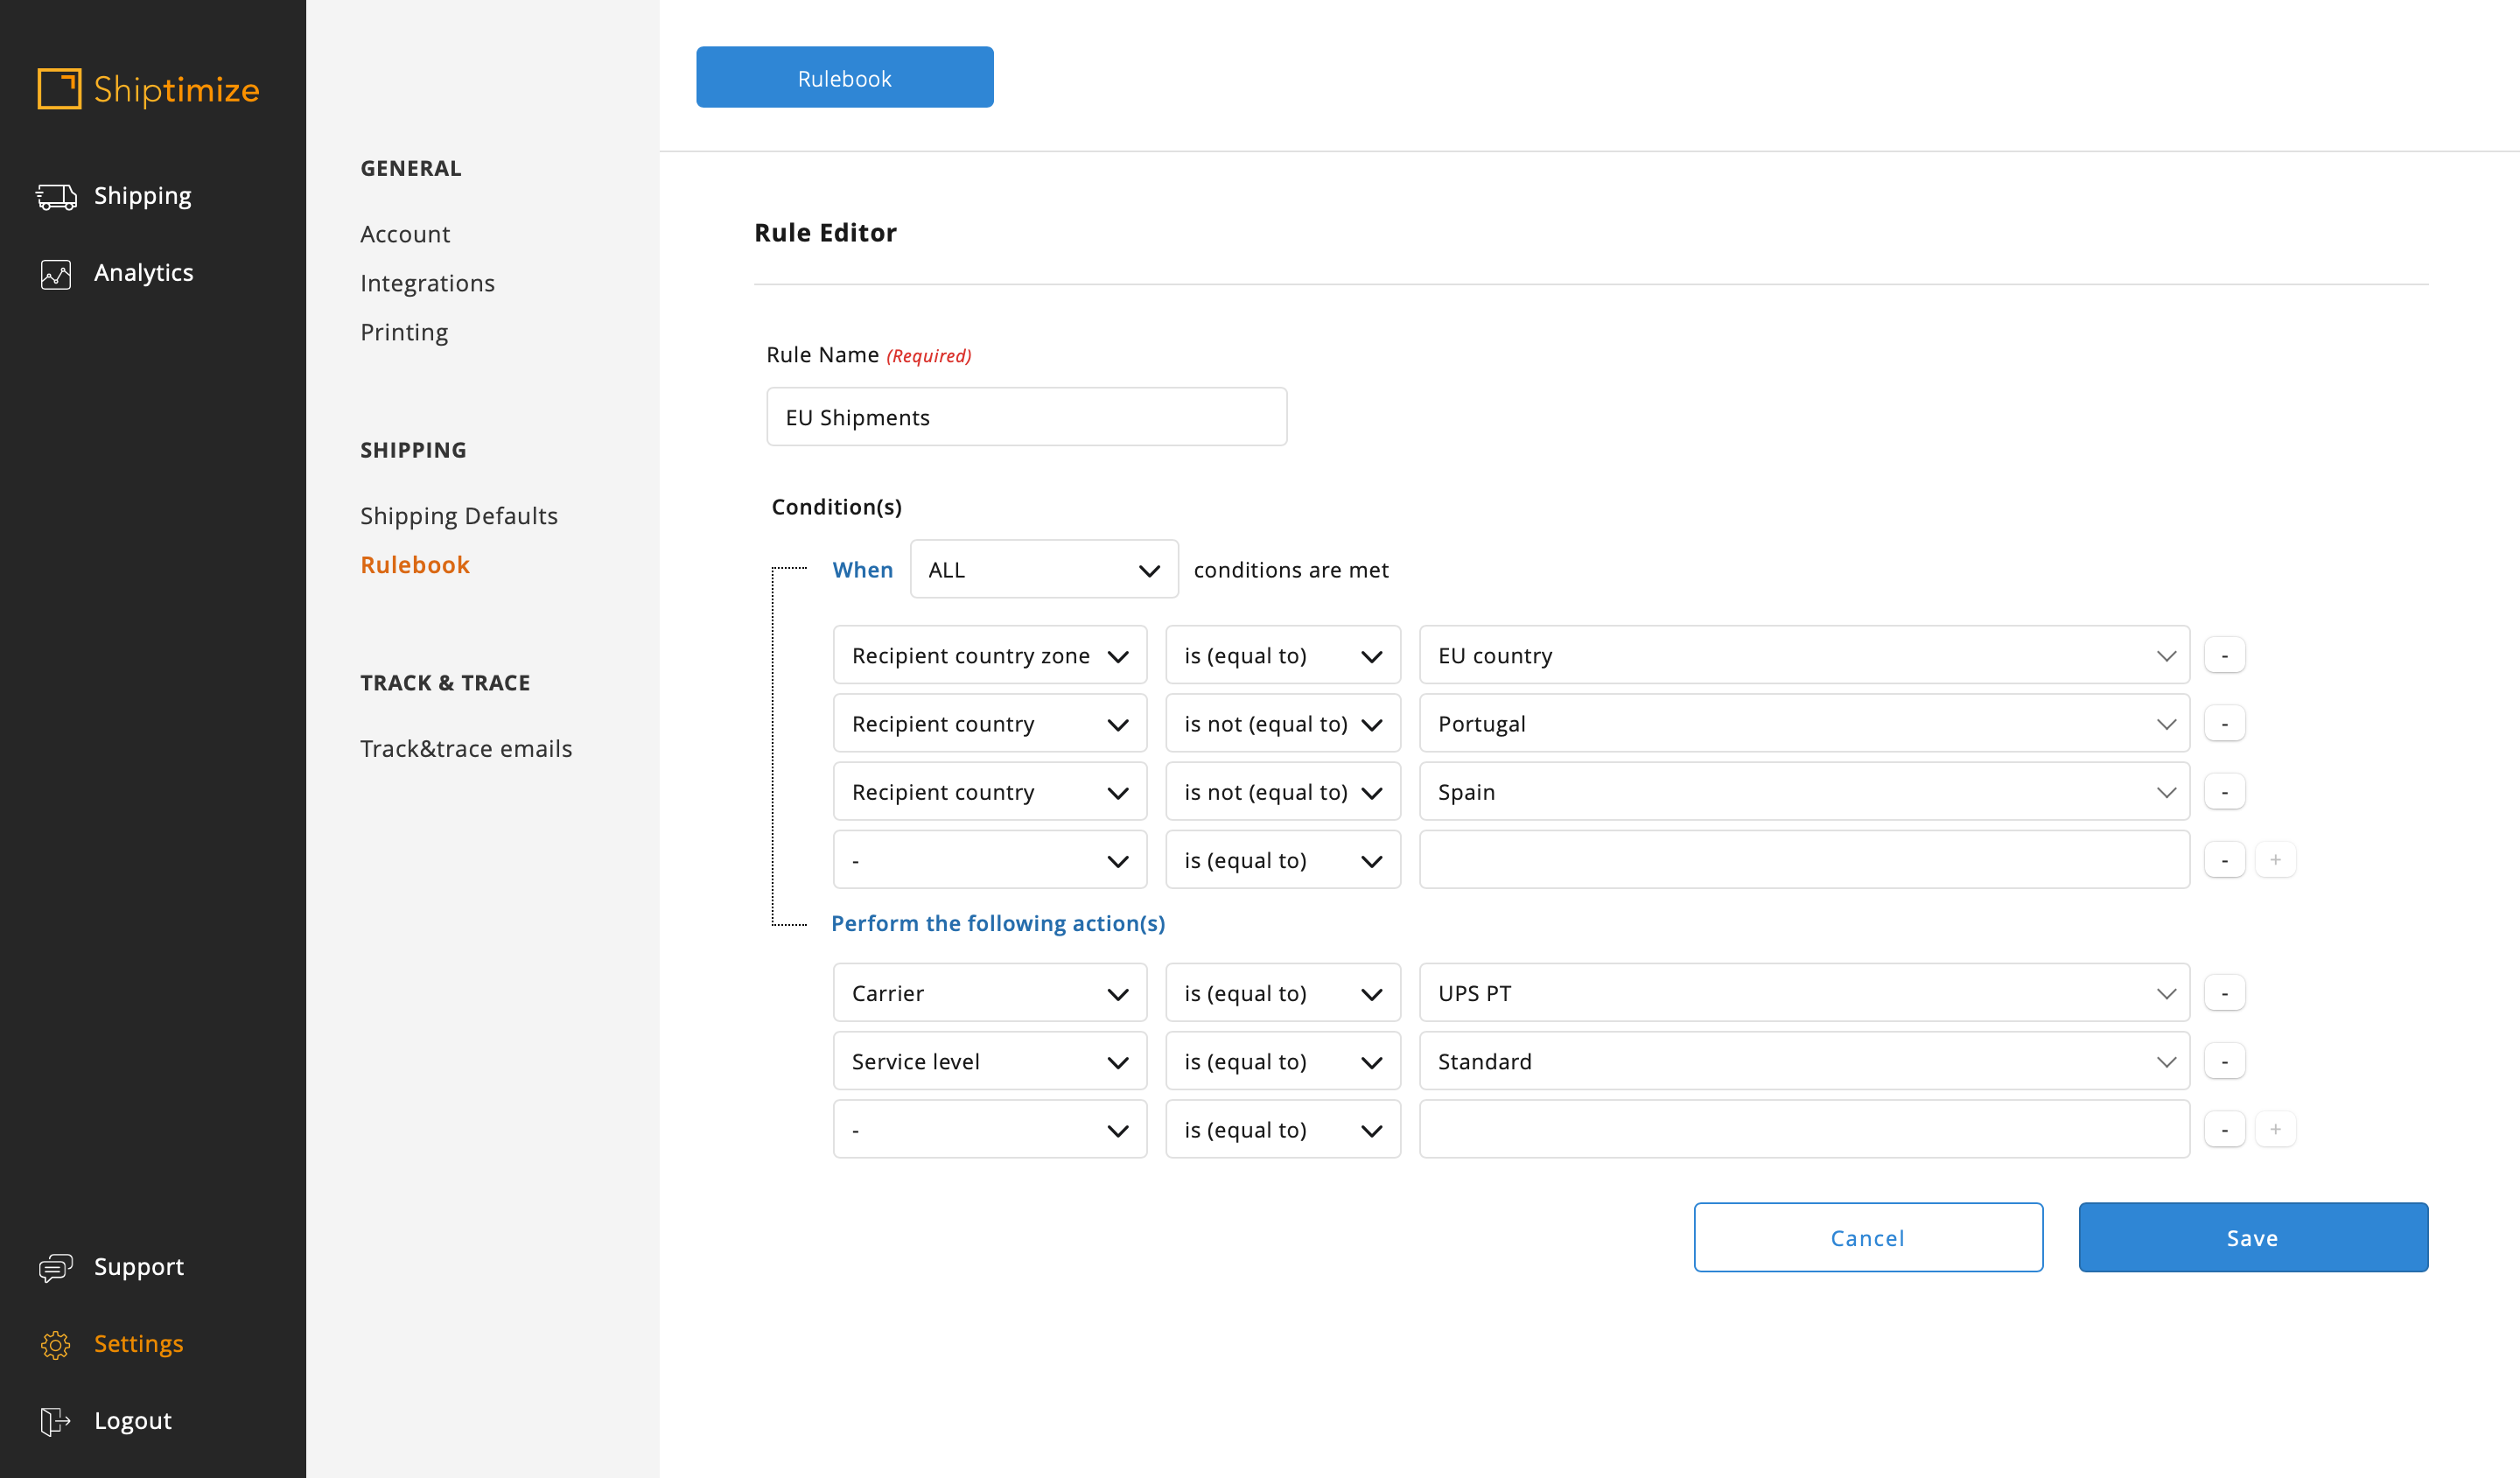
3 – Create a simple rule with the characteristic zone of the destination country EU and be placed at the beginning of the list of rules because it is conflicting with the others with the addition of stop processing in the two rules for Portugal and Spain
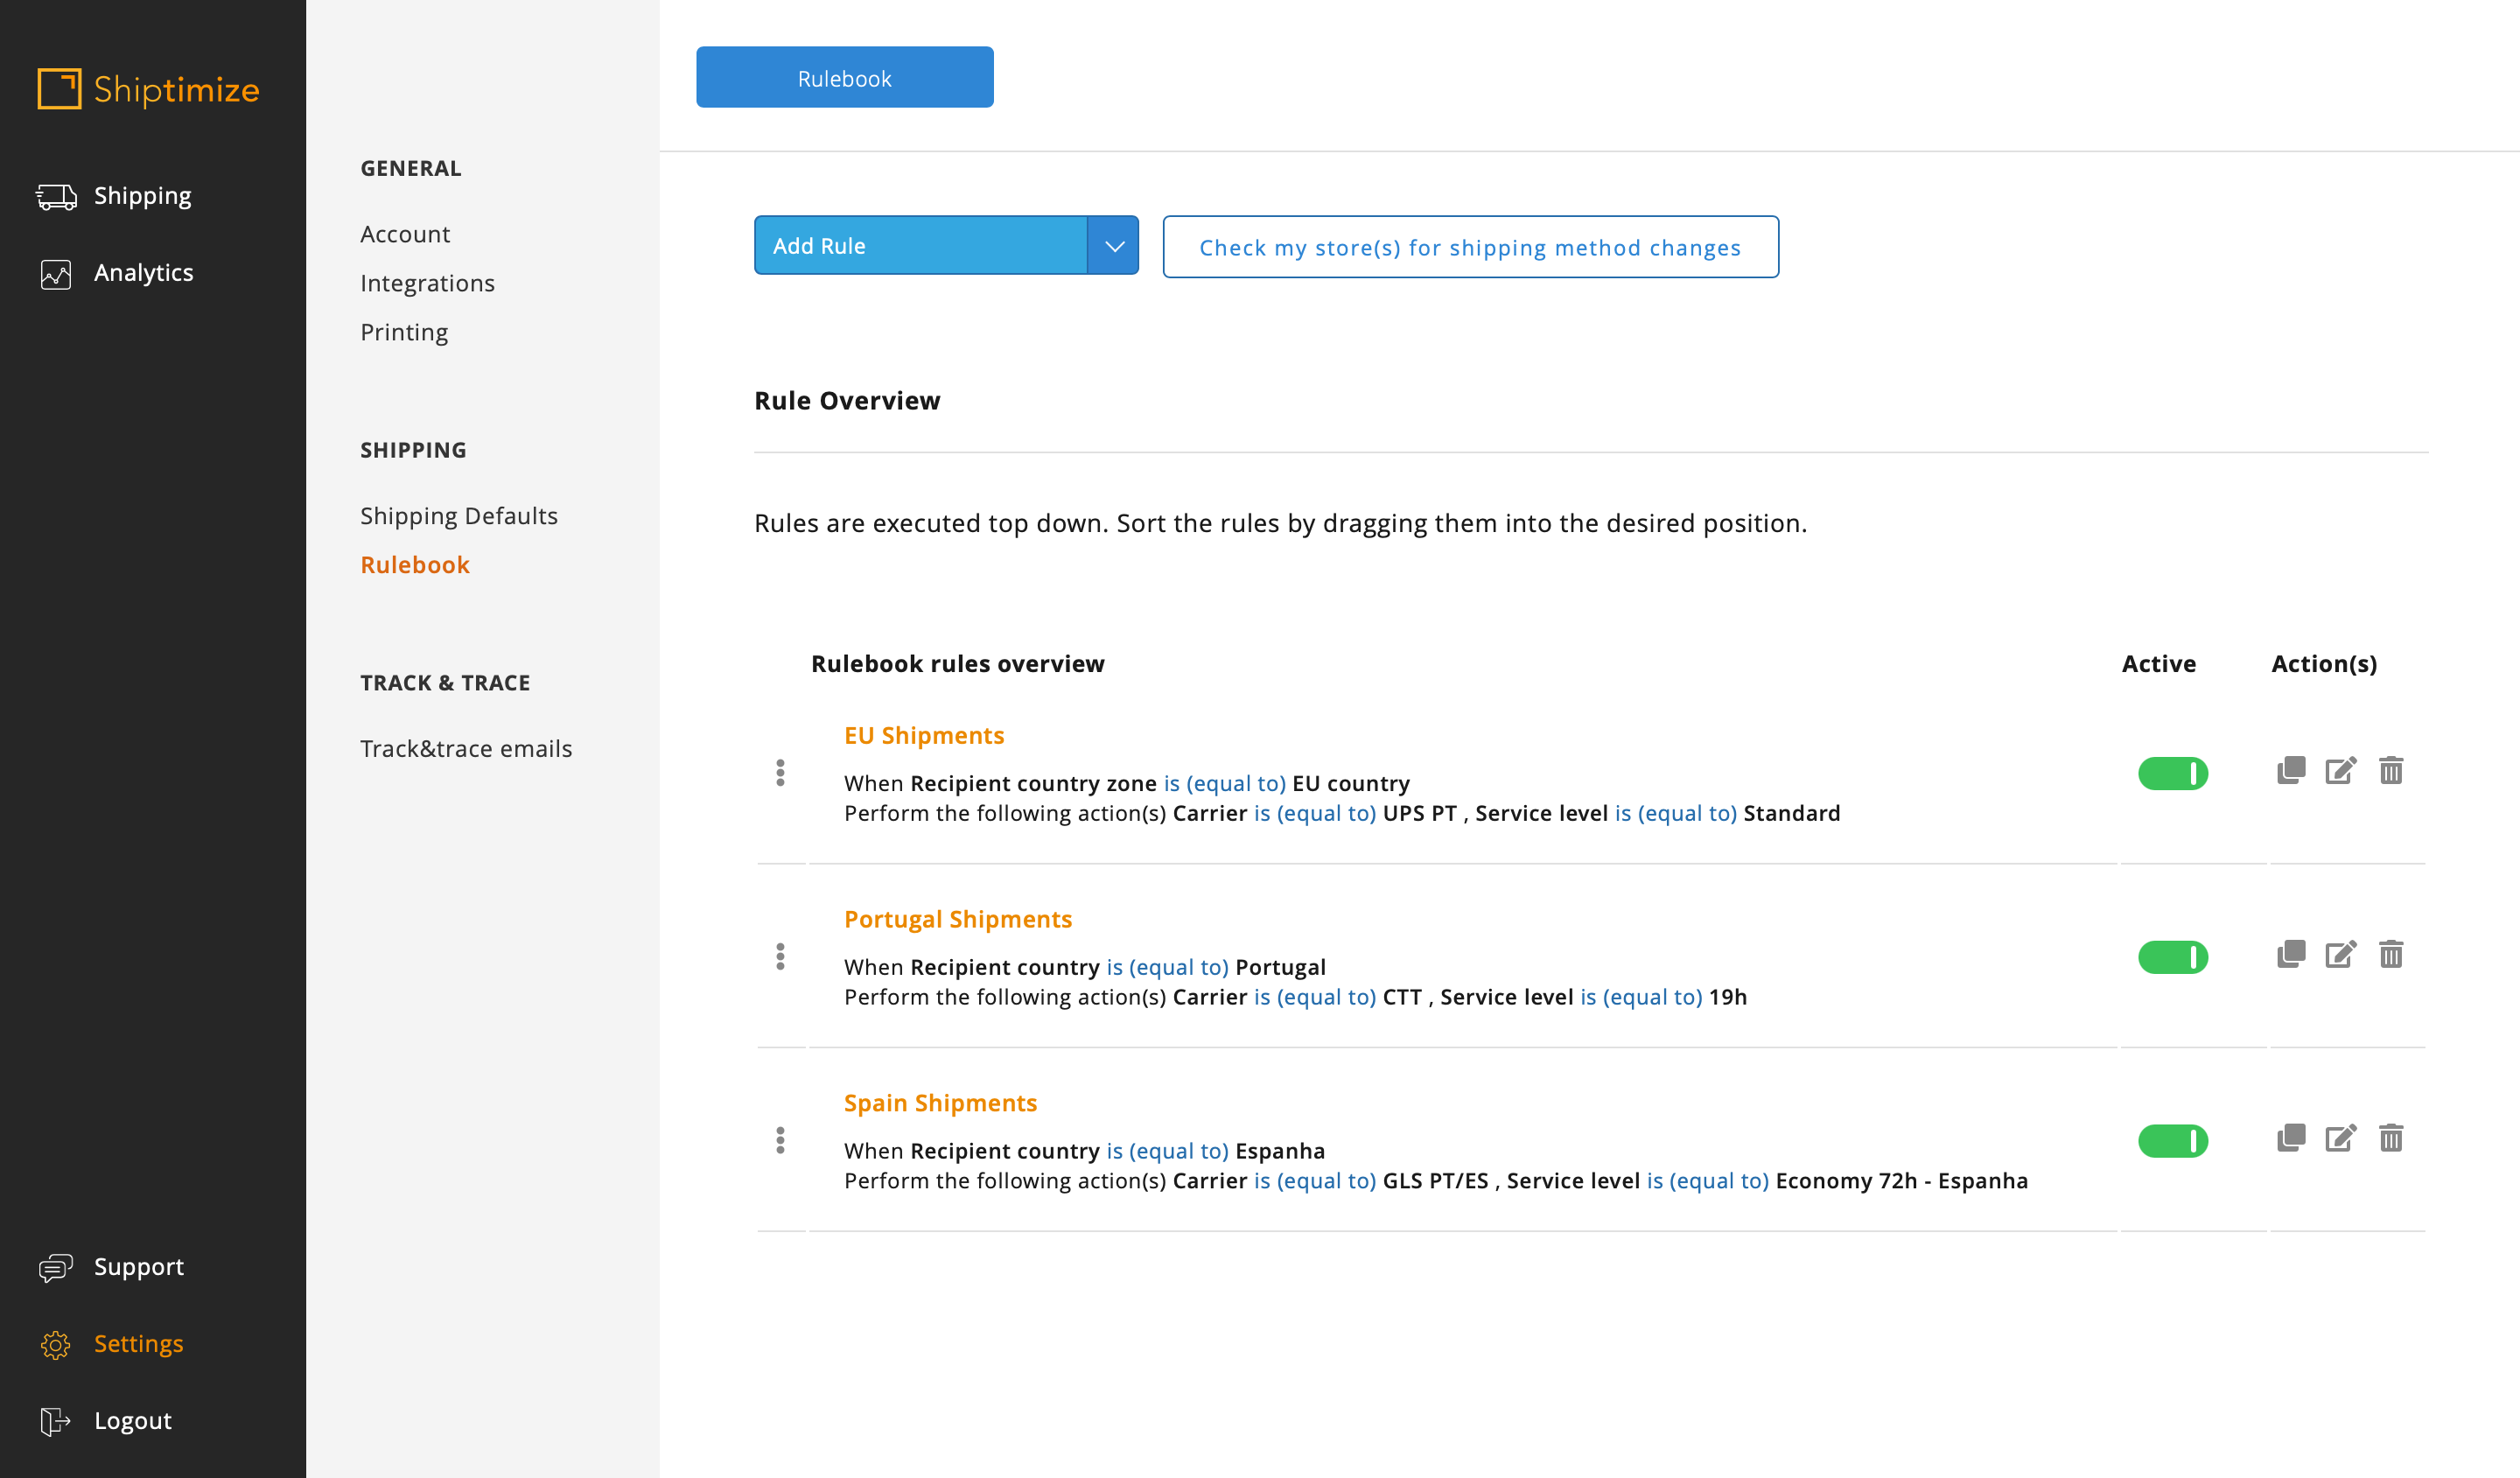
Before you finish creating your rules you should check if all the shipping methods and carriers you want are covered in the various rules you have created and if there are no conflicting rules without taking the necessary precautions to make them work properly.
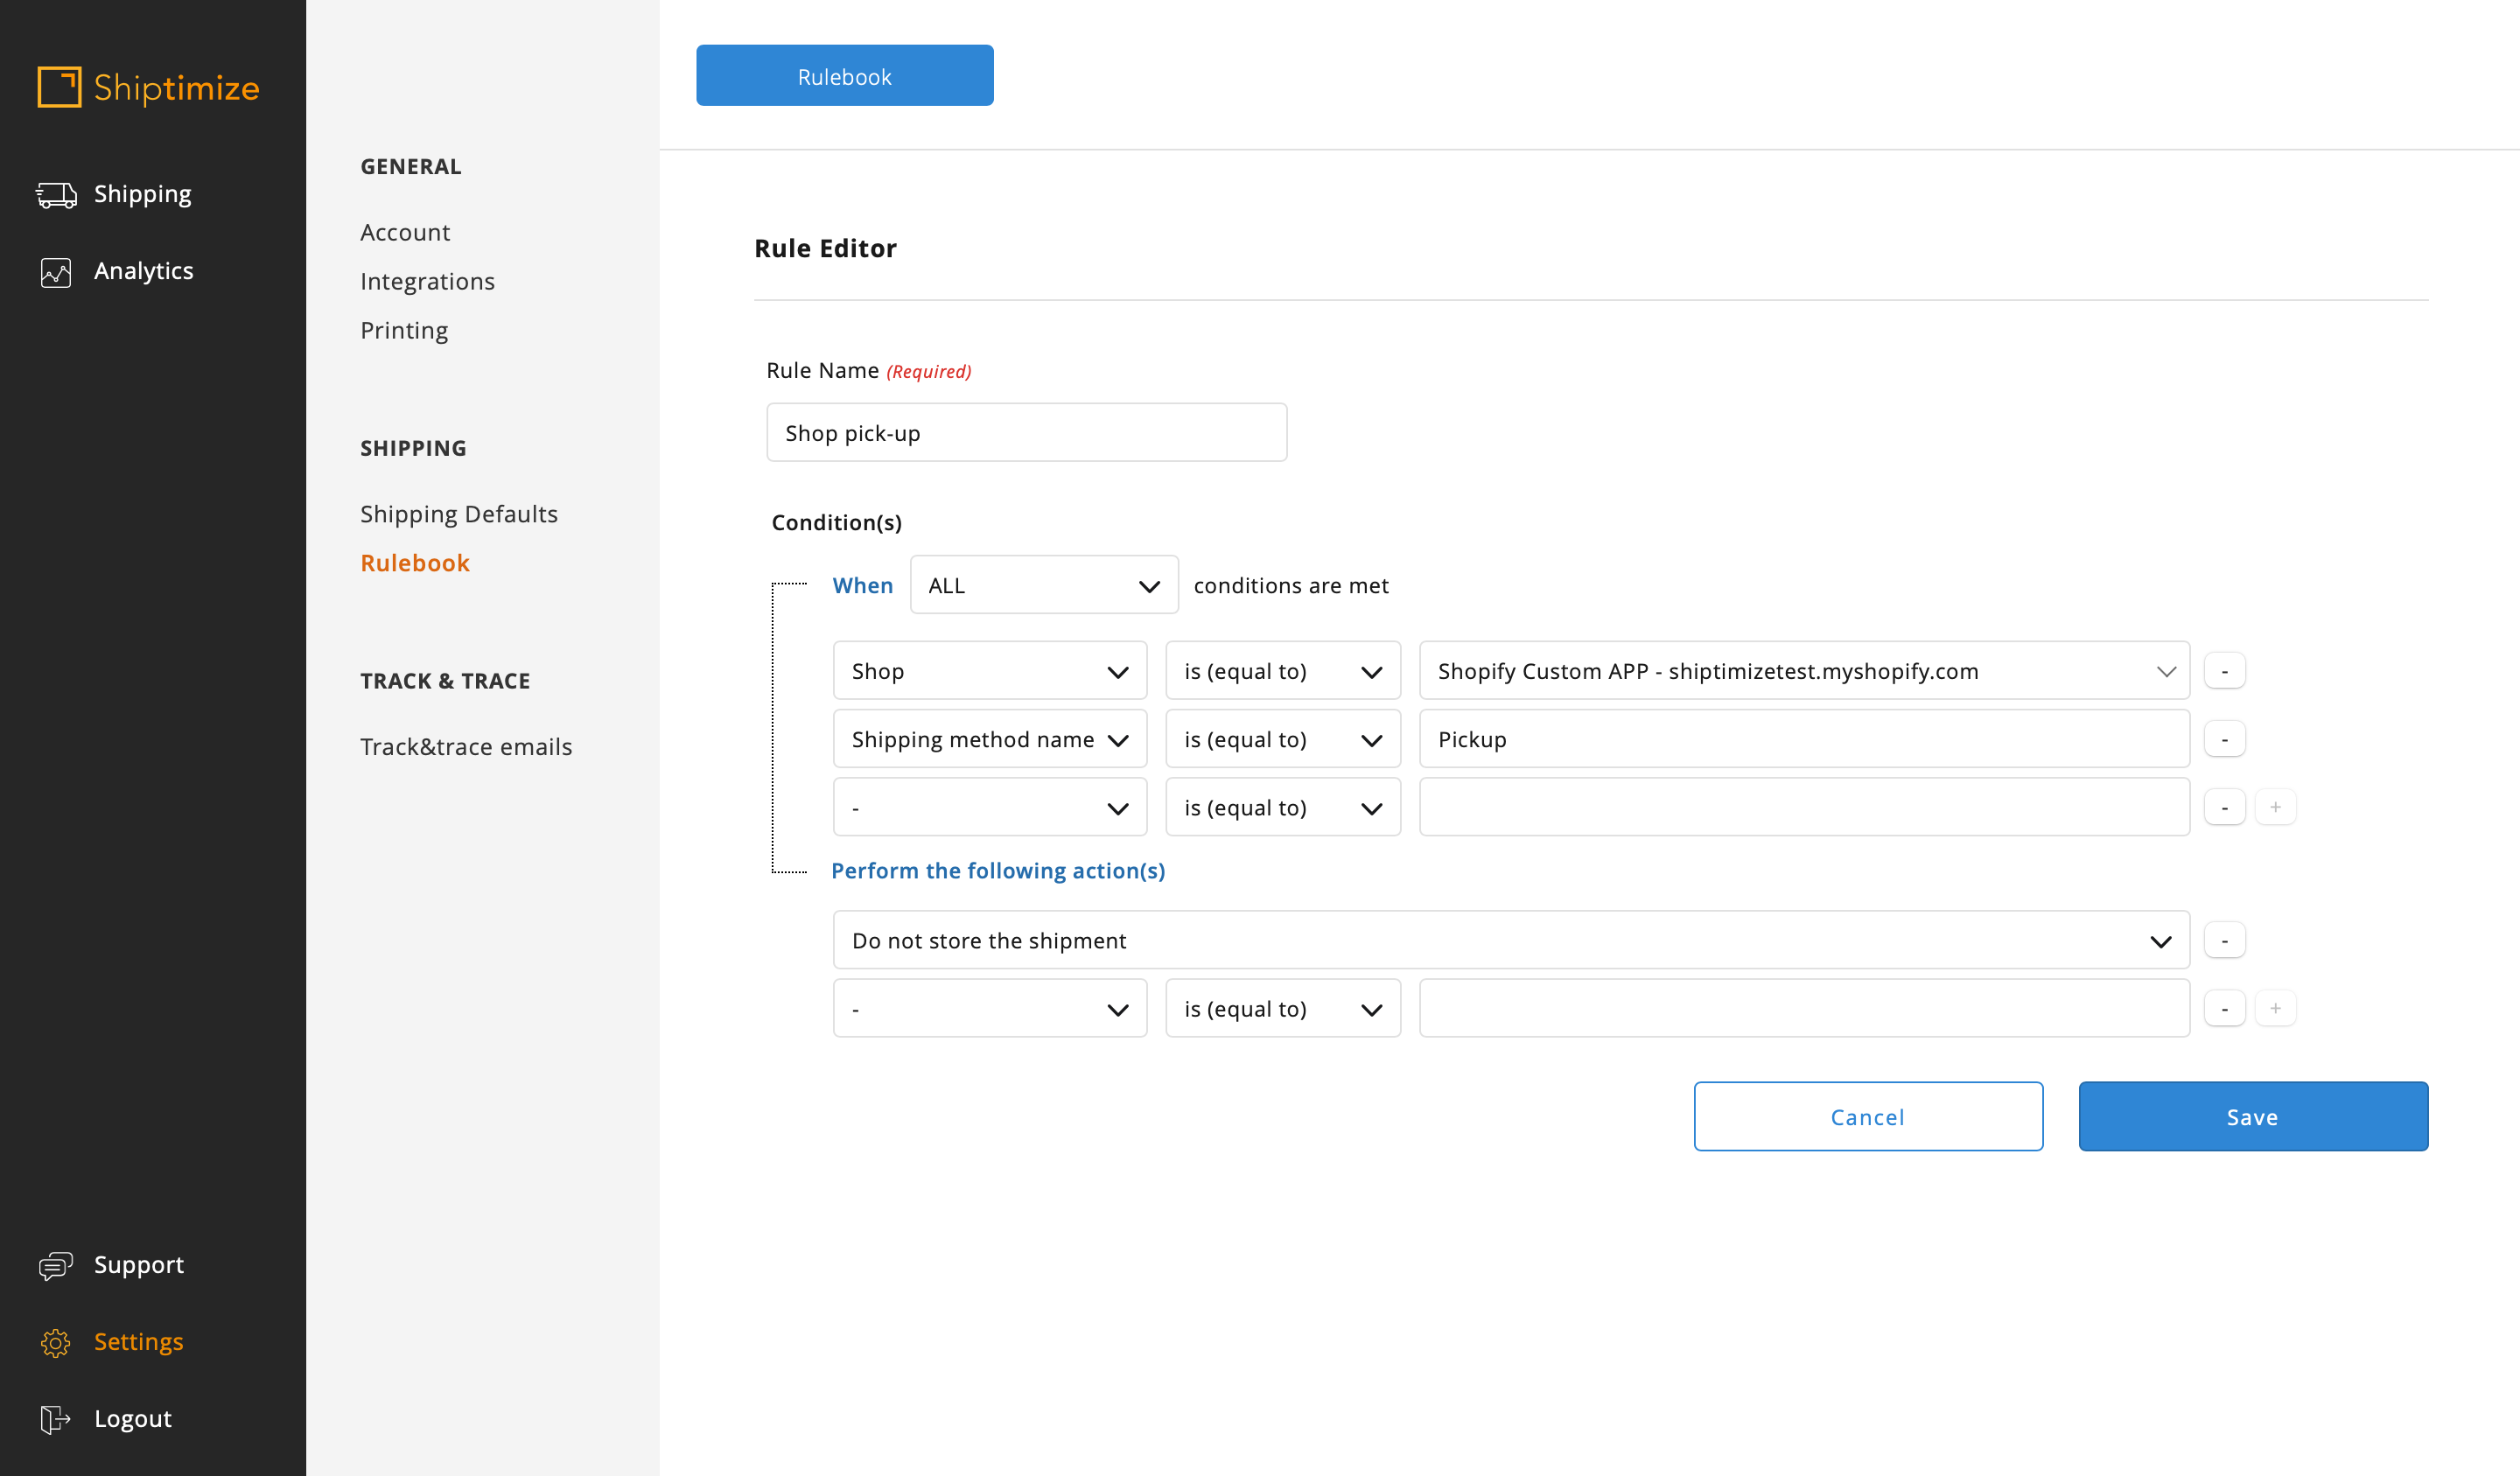
Another important aspect to consider at this stage is the existence of shipping methods that do not correspond to a Shiptimize carrier such as local delivery or shop pickup.
In this example we have considered the Store Pickup shipping method. So we create a rule like the others where we select the characteristic Name of the shipping method contains Pickup and select the condition Do not store the shipment.
Delivery Points Configuration
The delivery points are available for several carriers and depending on the carrier for certain service levels (in the case of DPD corresponds only to the Shop Delivery service level) or zones (in the case of CTT there are only delivery points in Portugal). Thus, you must allow the choice of delivery points only to shipping methods configured for carriers, service levels or zones where they are allowed.
If you wish to provide the delivery option in Delivery Points at Check out of your shop, you must configure this option for each shipping method created in which you wish to show this option.
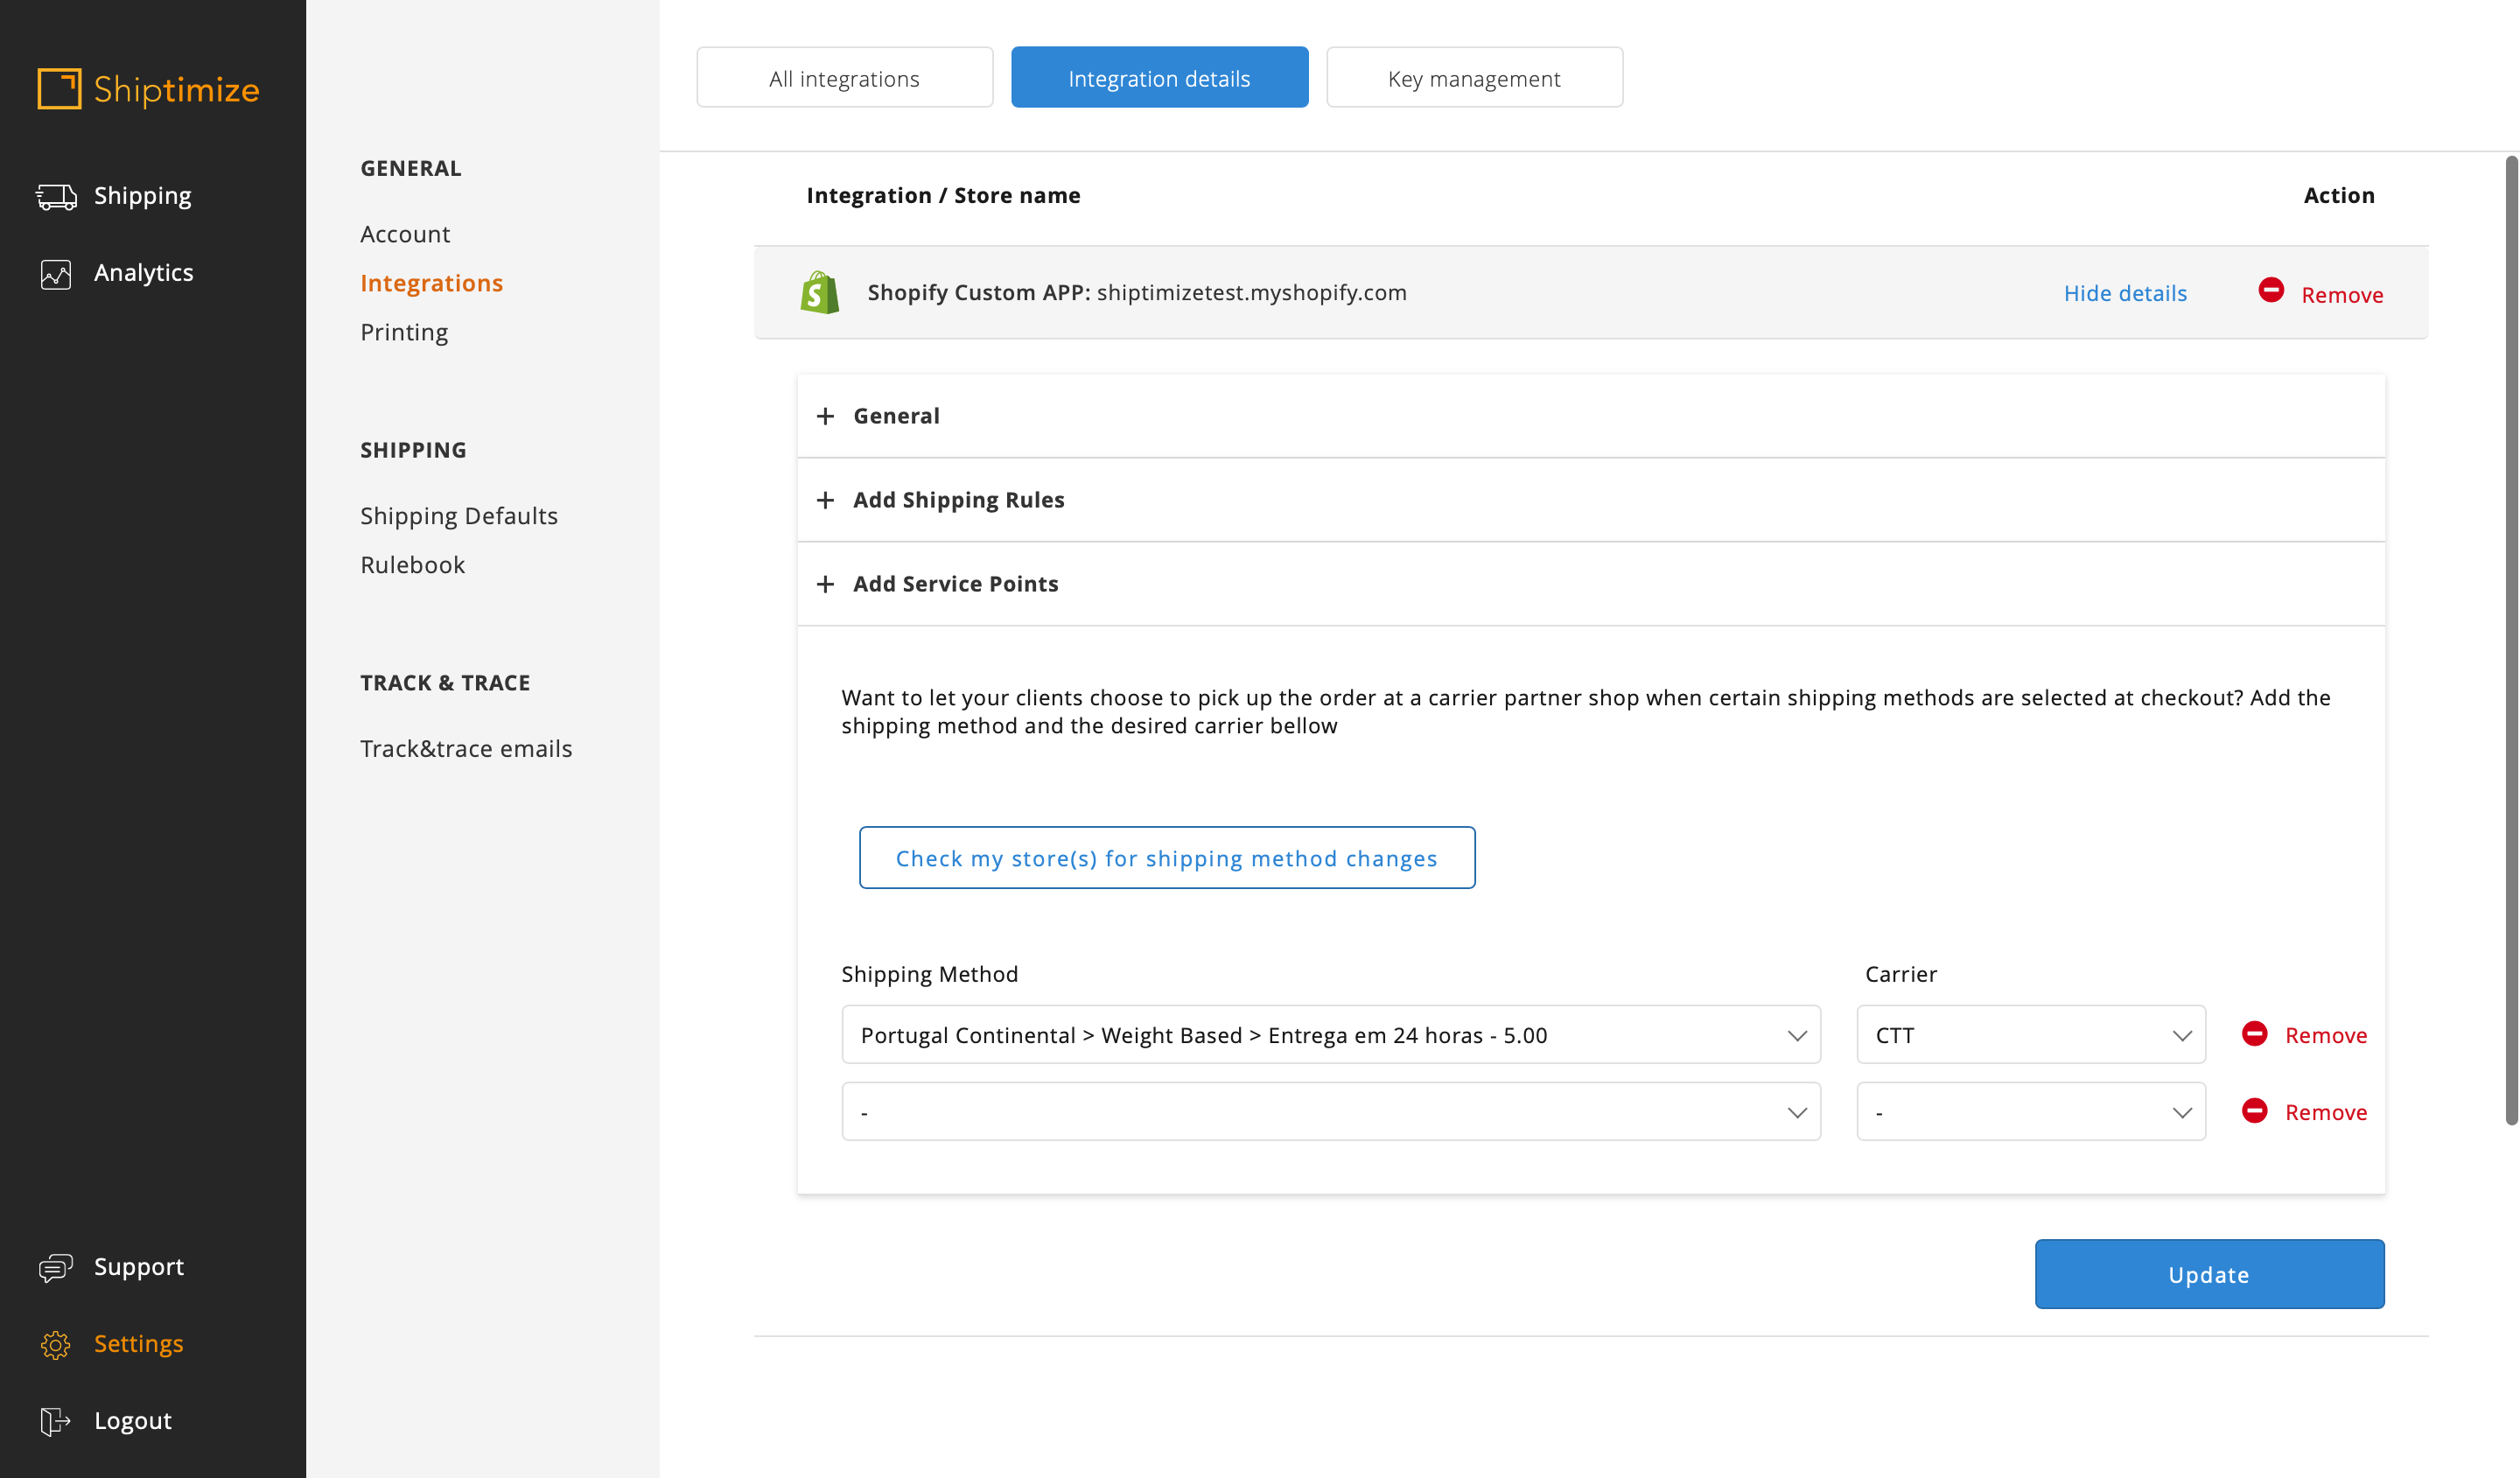
For this configuration go to Settings > Integrations > Integration Details.
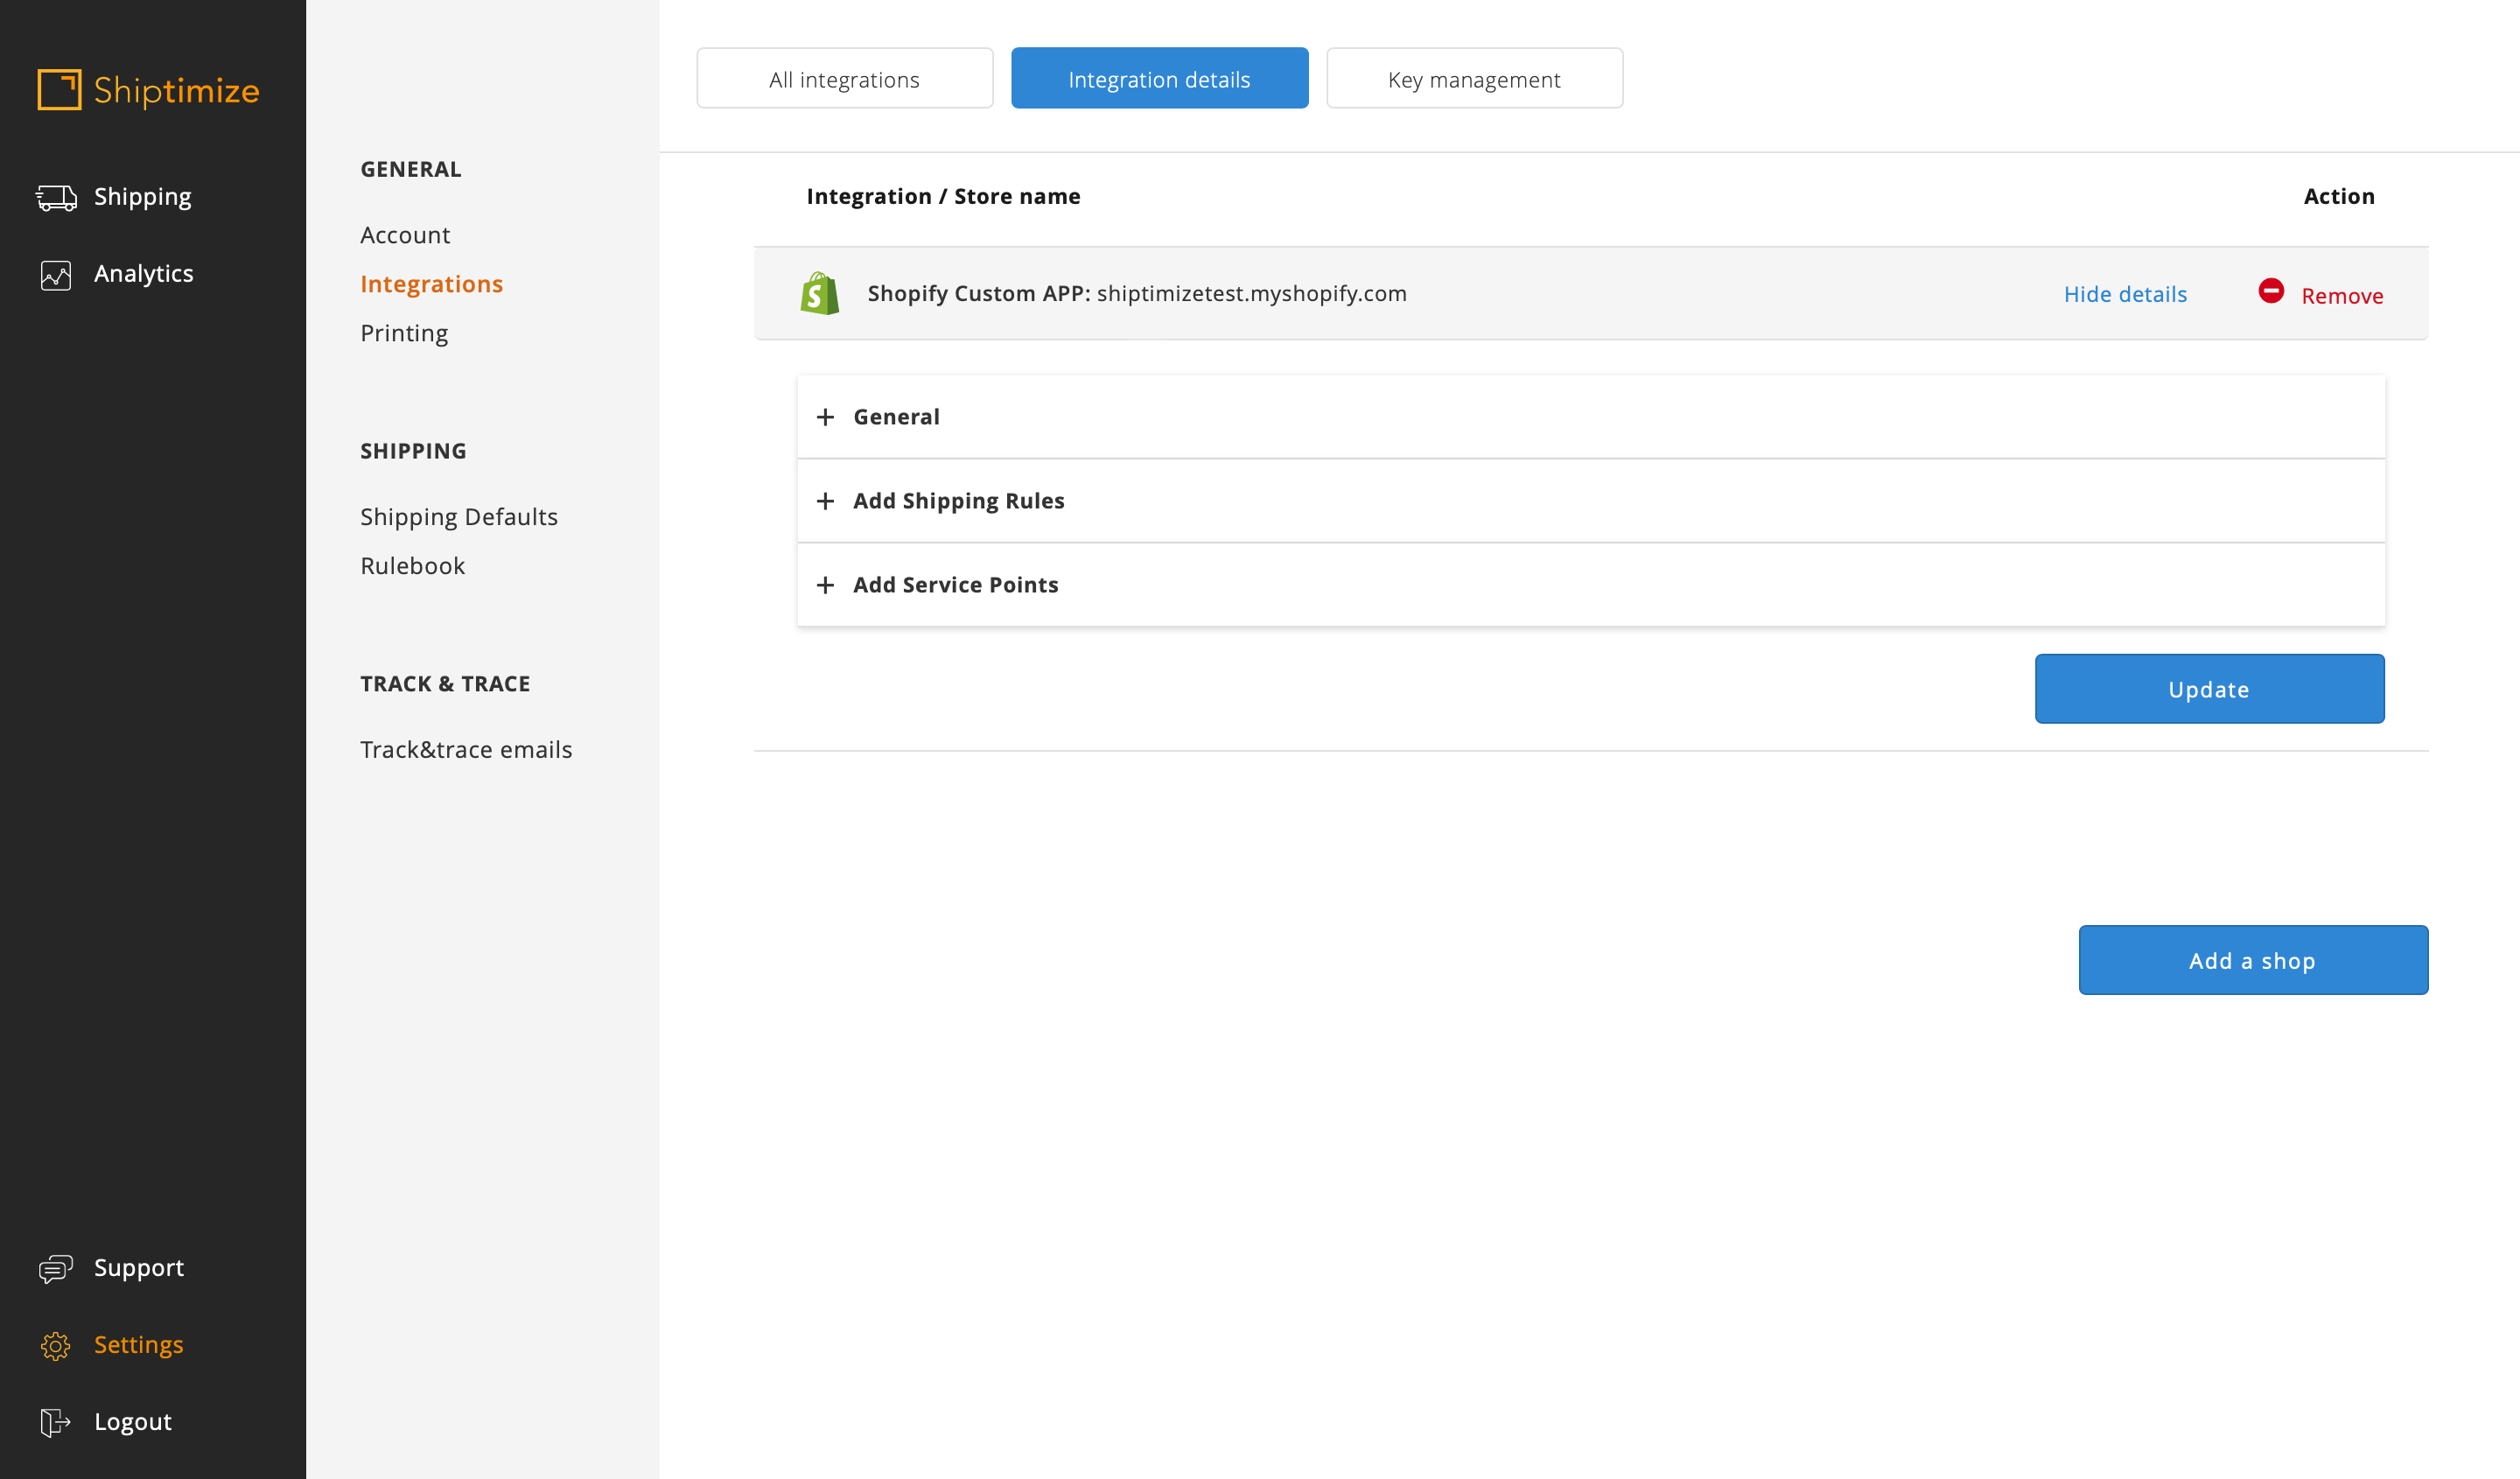
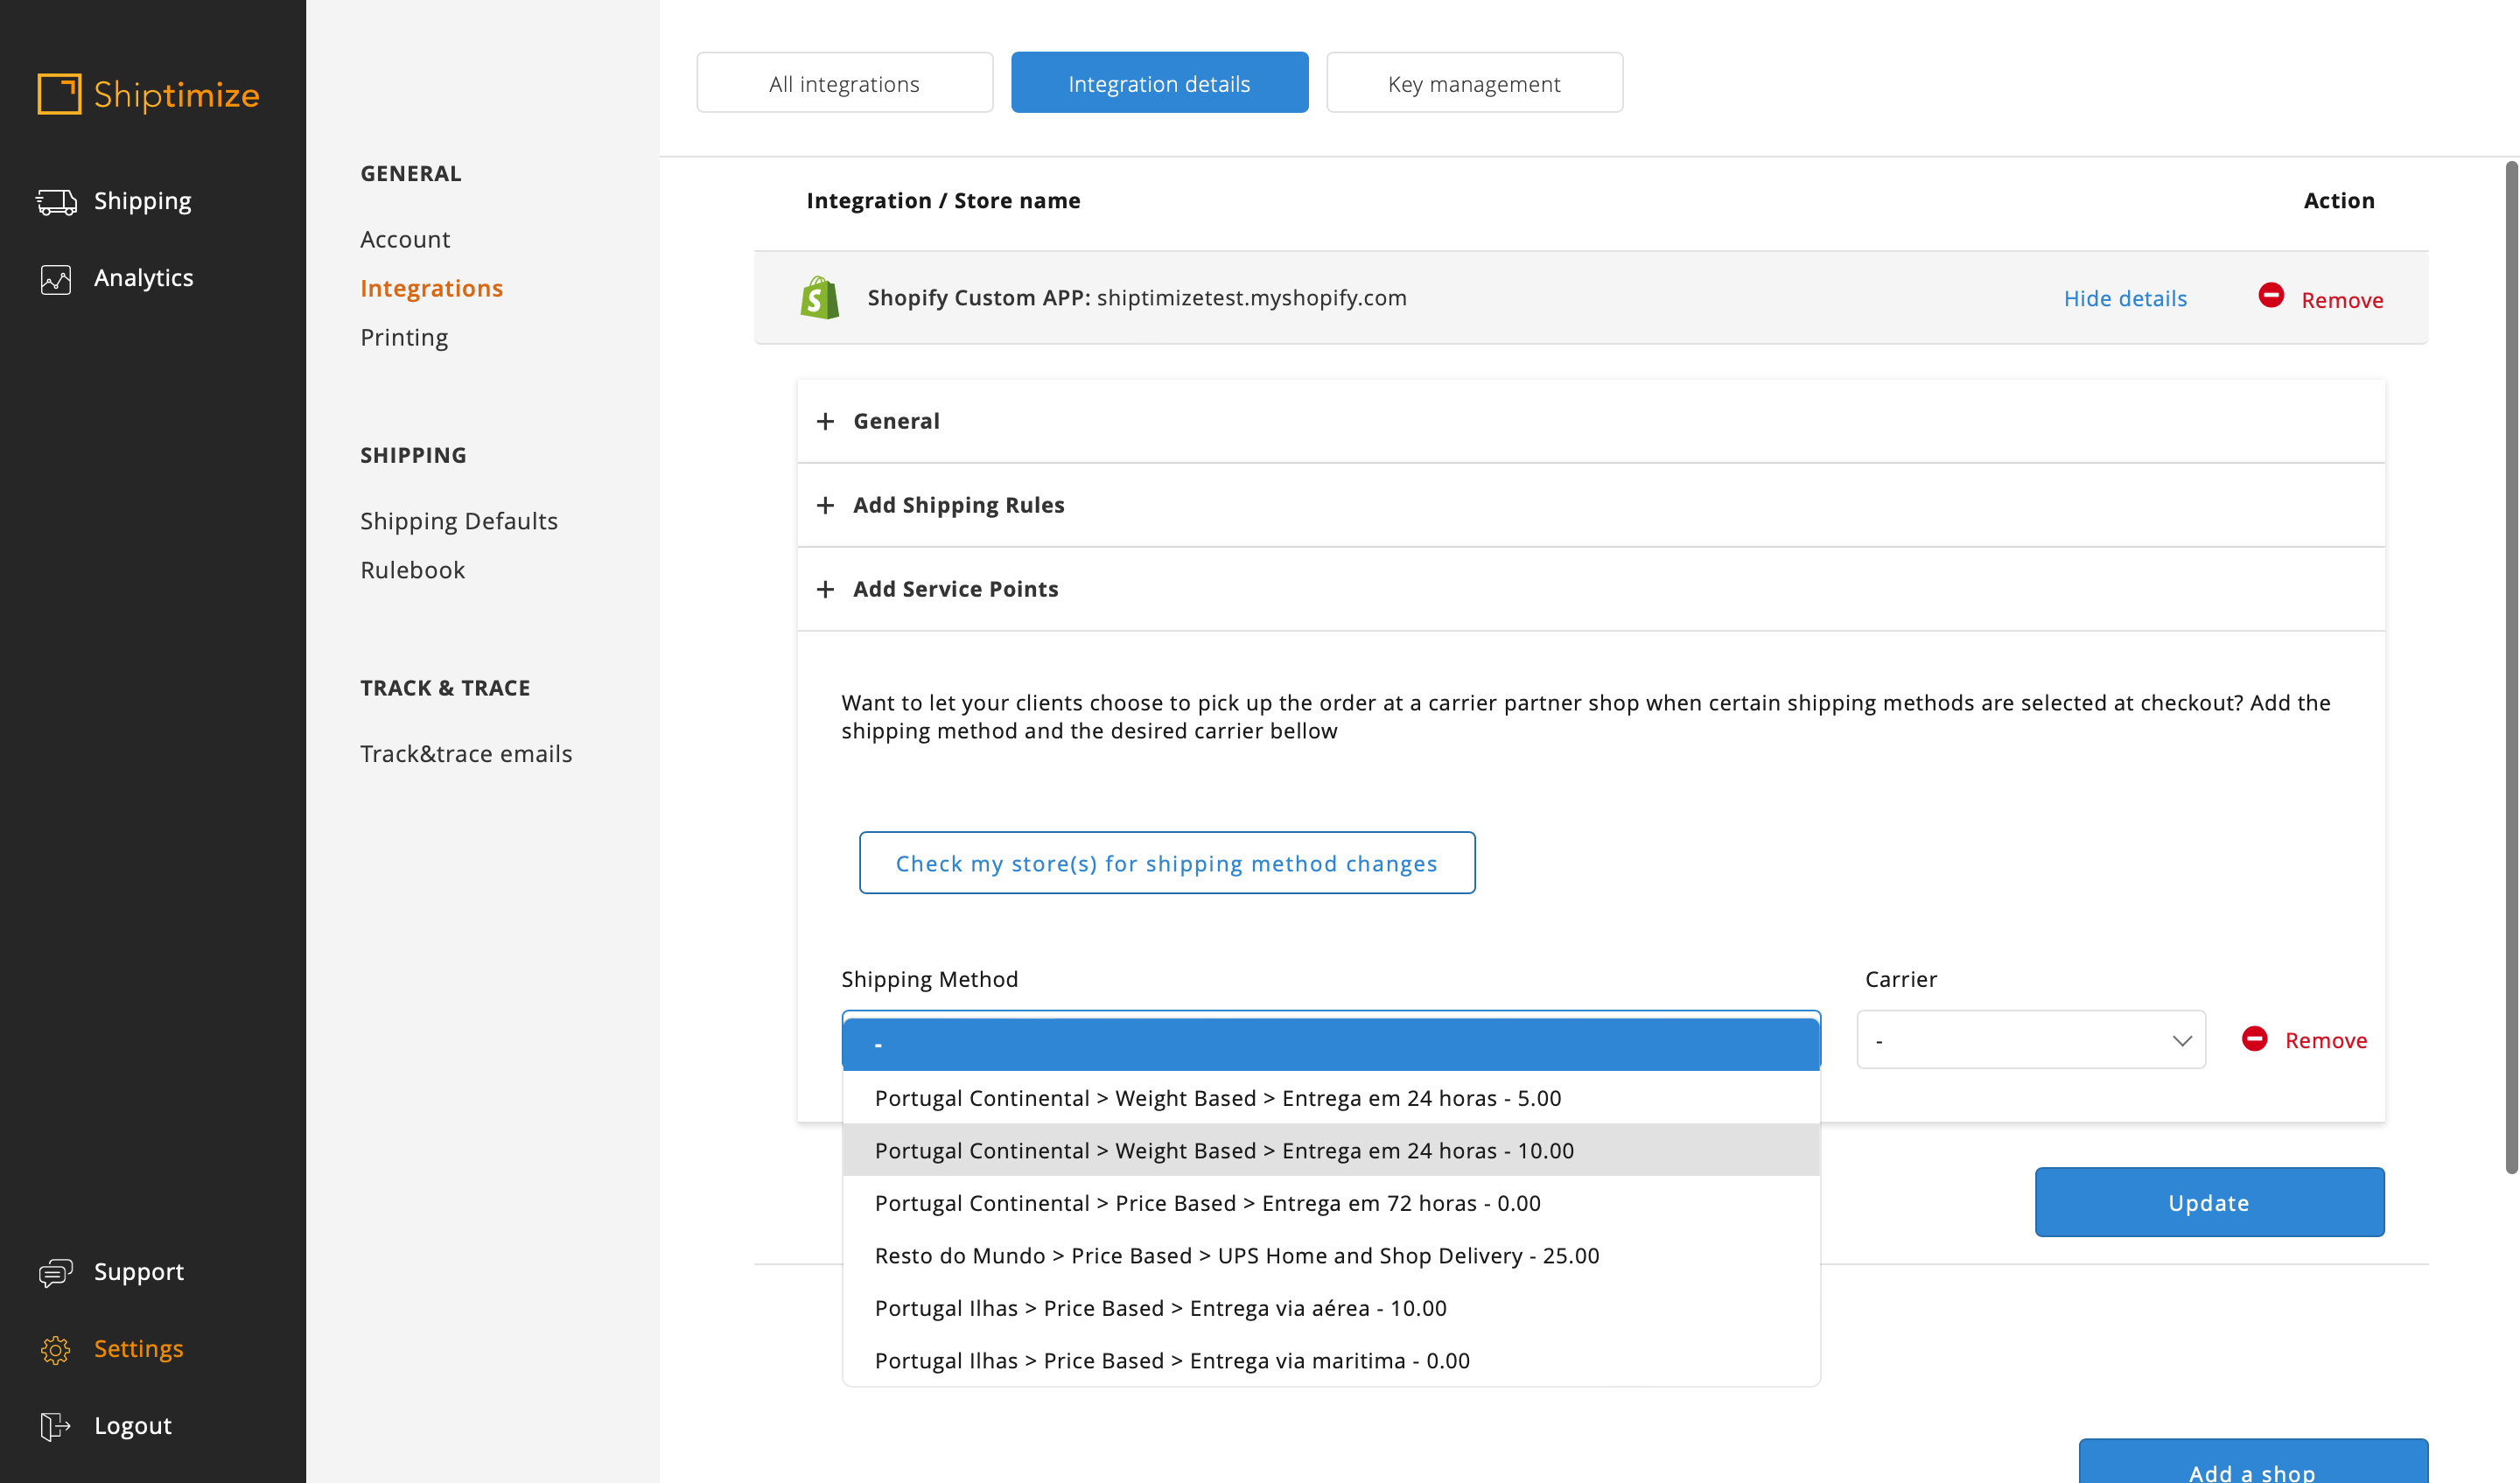
You should click on Add Service Points to expand the menu
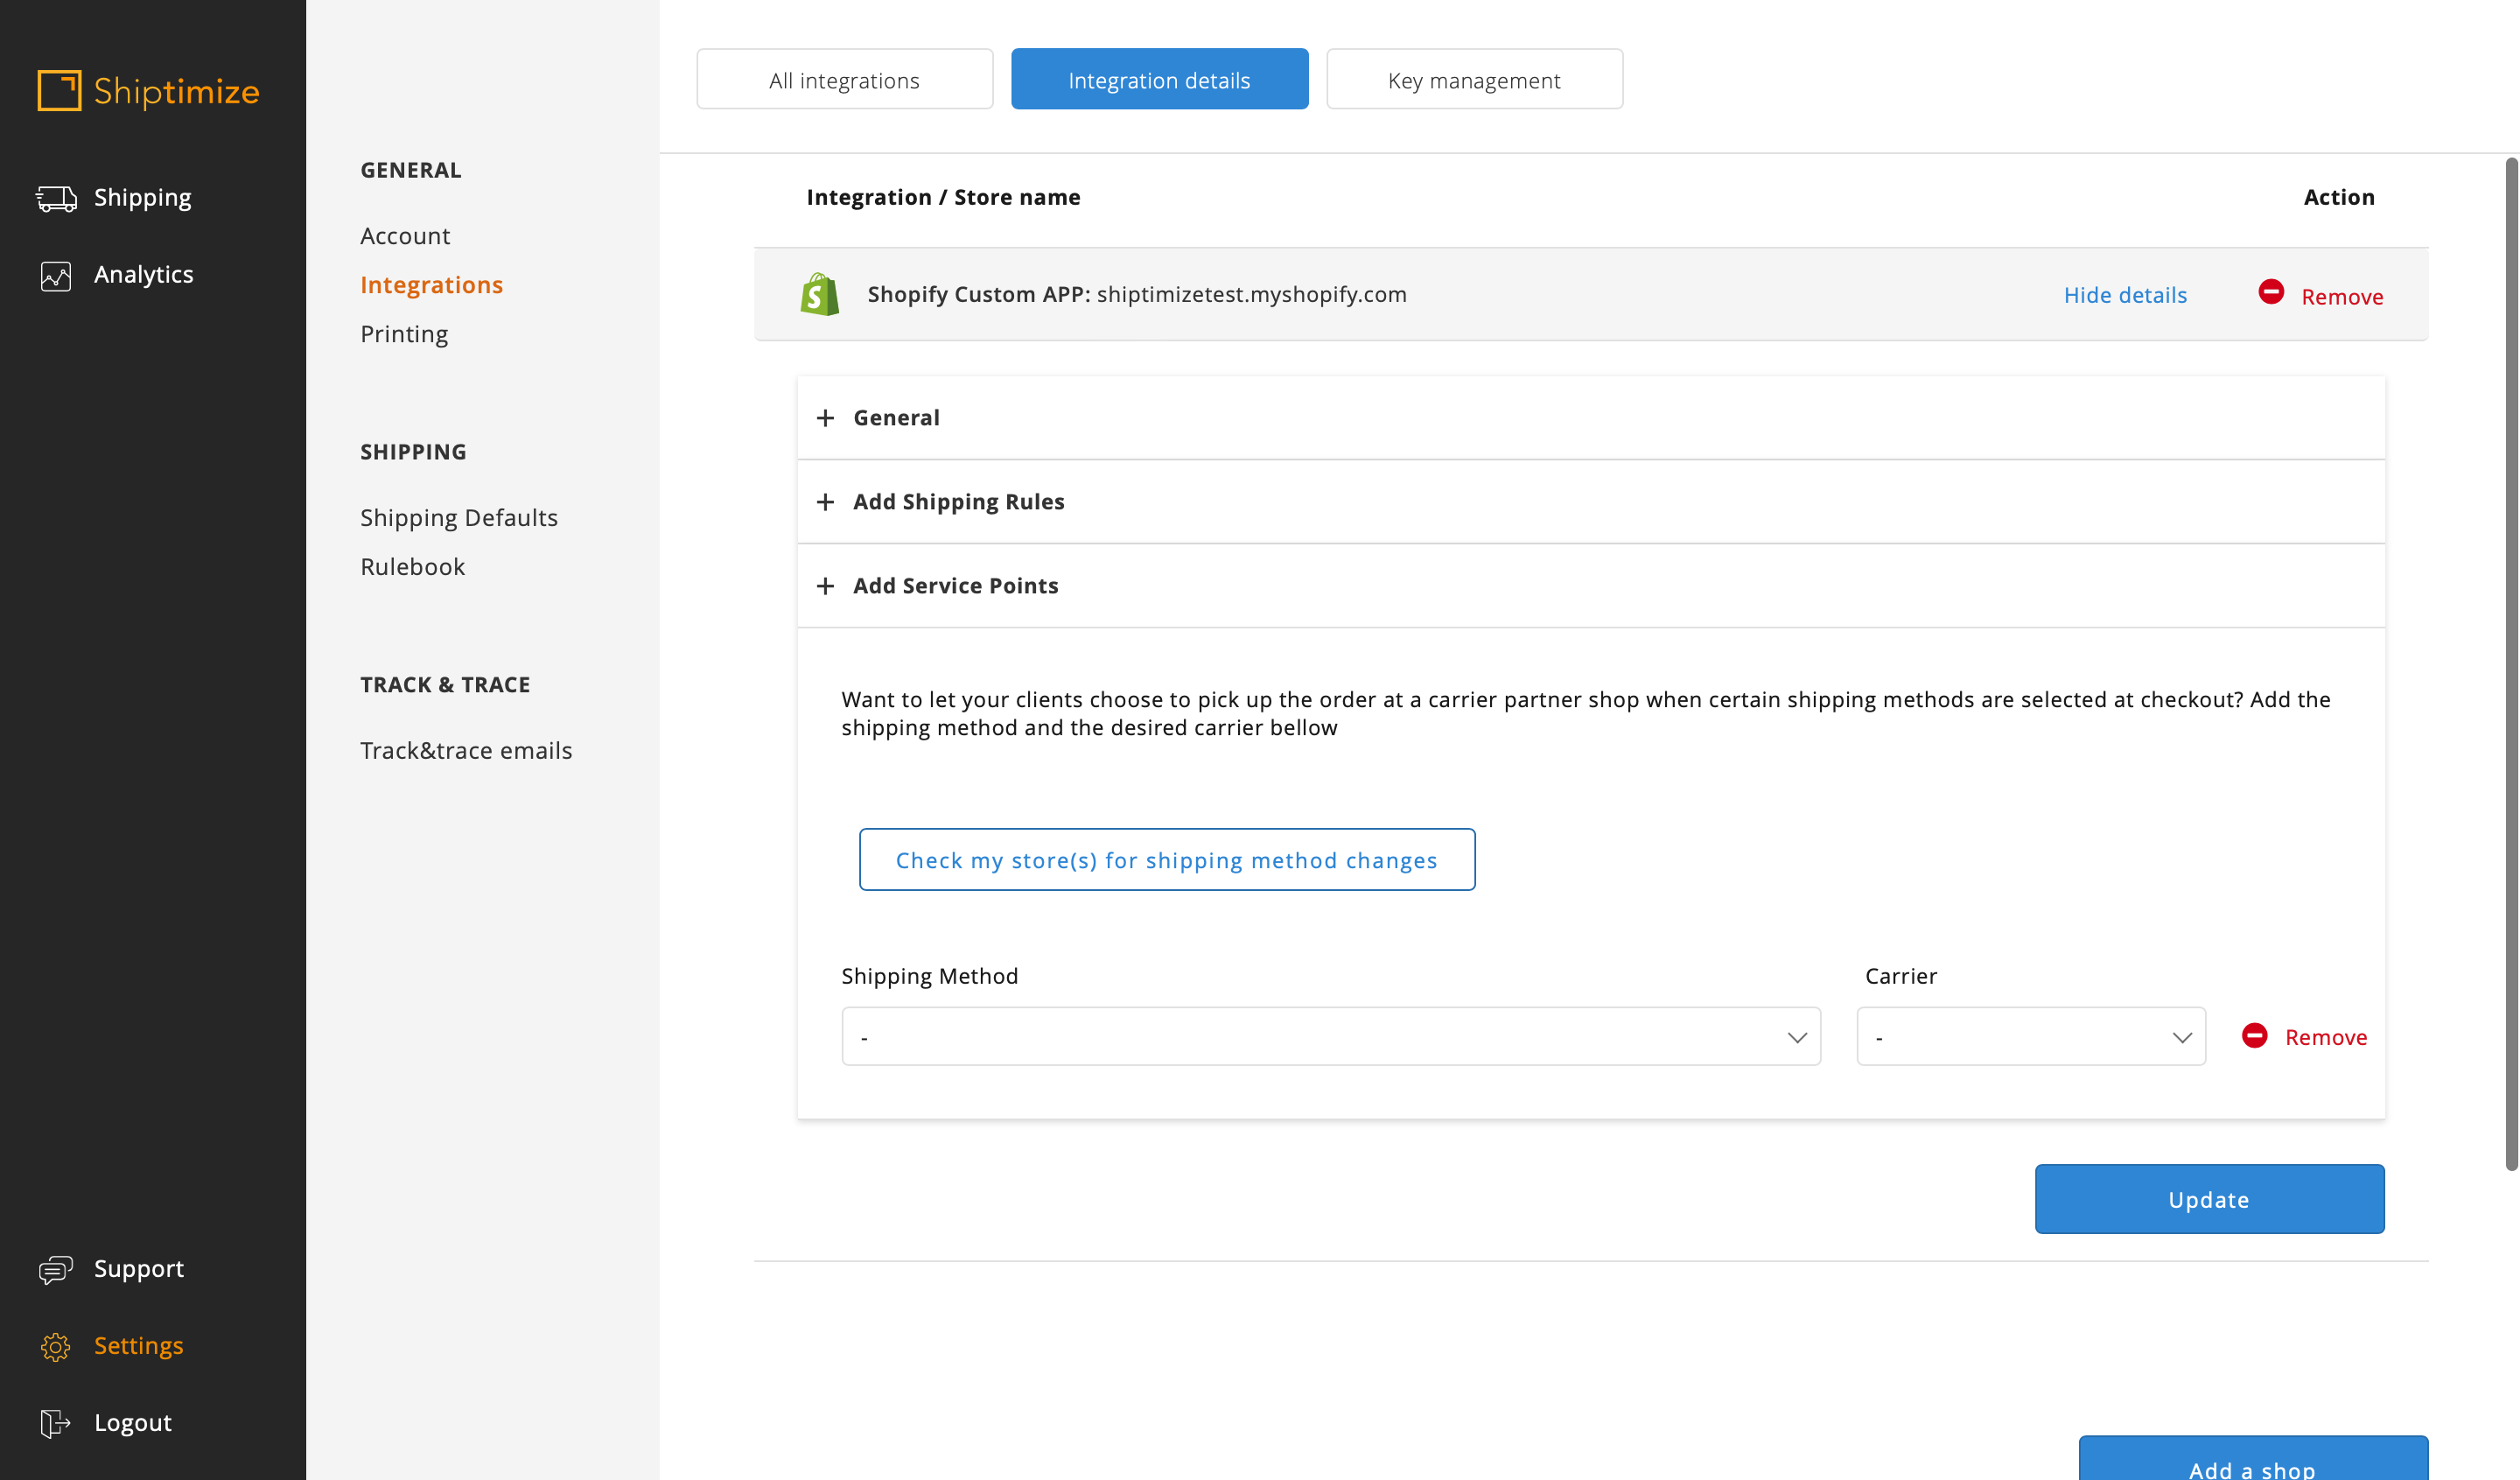
You must select the shipping method where you want to add the delivery point and select the carrier which corresponds to that shipping method. In this example we want to add Delivery Points for the shipping methods corresponding to the carrier CTT mainland Portugal only so we select the corresponding shipping method.
and select the CTT carrier from the list of carriers that provide delivery points