Magento 2 quick guide
Installation
Via Files
- Unzip the downloaded file in a folder on your hard disk.
- Unzip the plugin file
- Copy the folders into your ftp to app/code/Shiptimize/Shipping
- Using a shell from the root of your magento install
- run
php bin/magento module:enable Shiptimize_Shipping
-
php bin/magento setup:upgrade
Via Composer
For the following commands make sure your user has permissions on the folder, if not you may use sudo -u {yourWebUser} before the command example:
sudo -u www-data composer require shiptimize/module-shipping
-
-
- Login to your server and navigate to the Magento root
- Require the Shiptimize Module
composer require shiptimize/module-shipping
- Enable the module
php bin/magento module:enable Shiptimize_Shipping
- Upgrade
php bin/magento setup:upgrade
Configuration
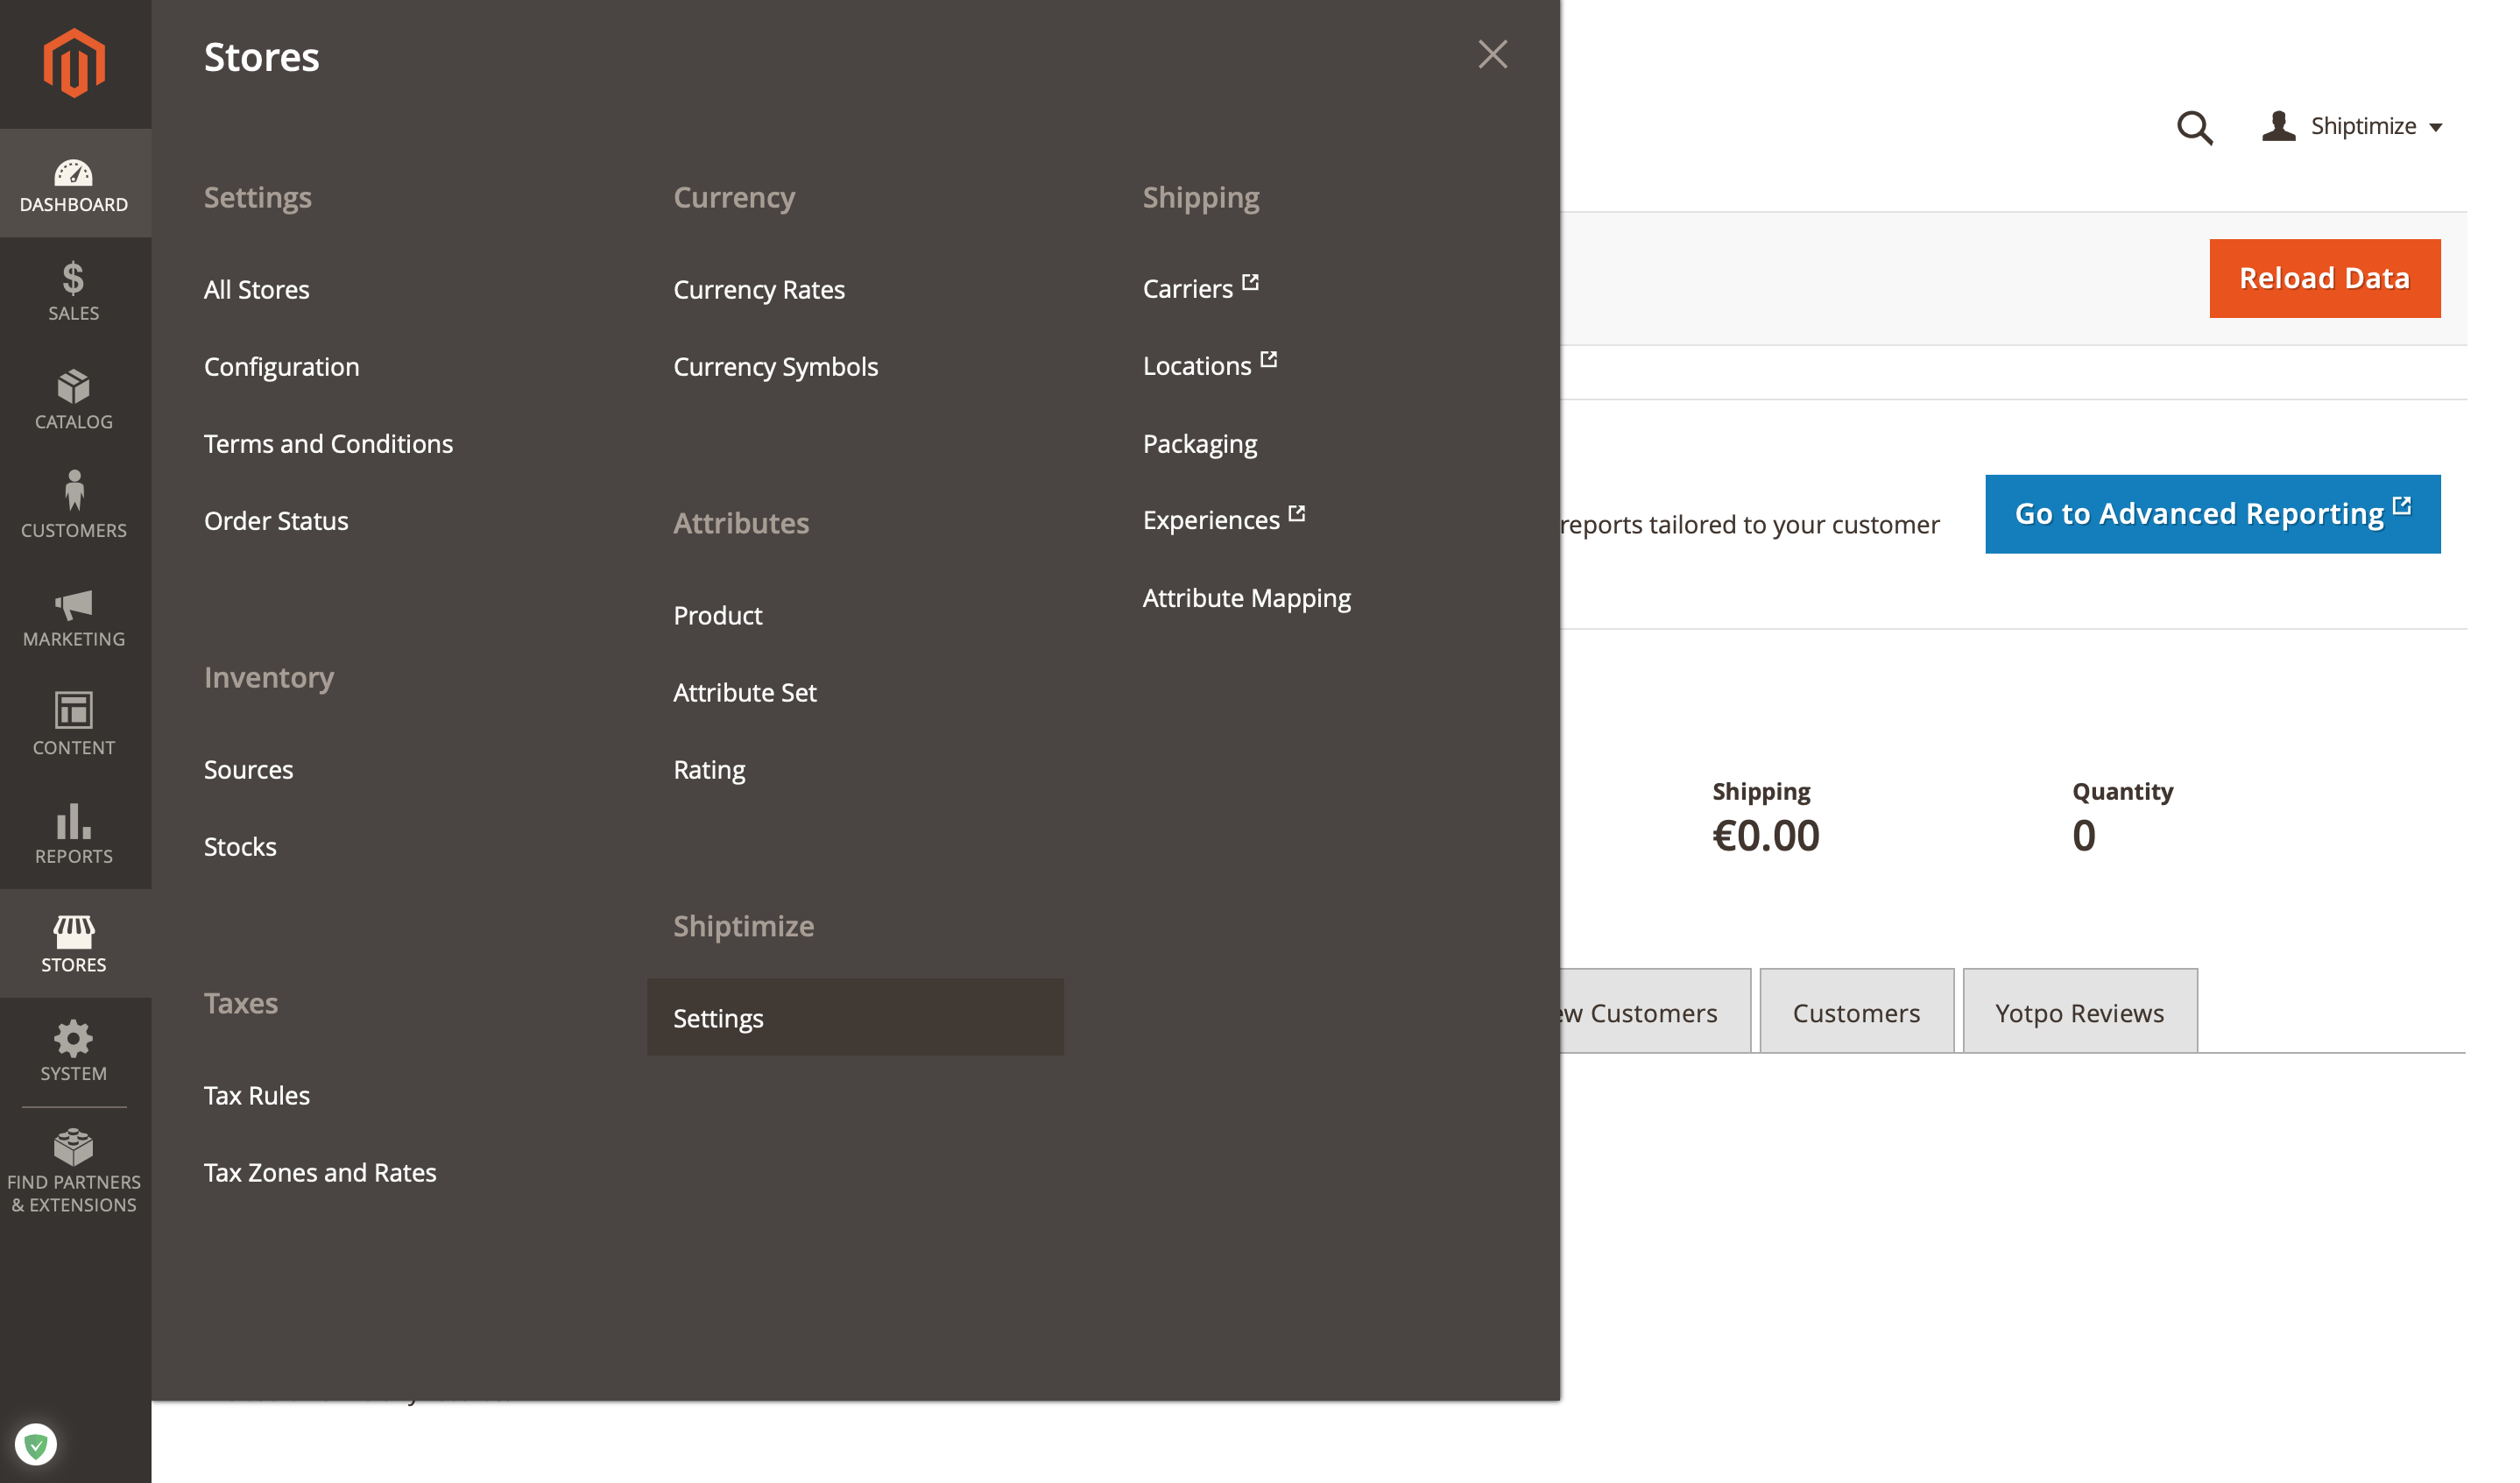
Go to “Stores” > “Sales” > “Shipping Settings”, or click on “Shiptimize“ > “Settings”
In a second tab, open the Shiptimize platform and go to “Settings” > “Integrations” > “Key management”. Click on “Create new keys.”

Copy the generated Public and Secret keys and paste them into the corresponding fields in the Shiptimize plugin configuration screen.
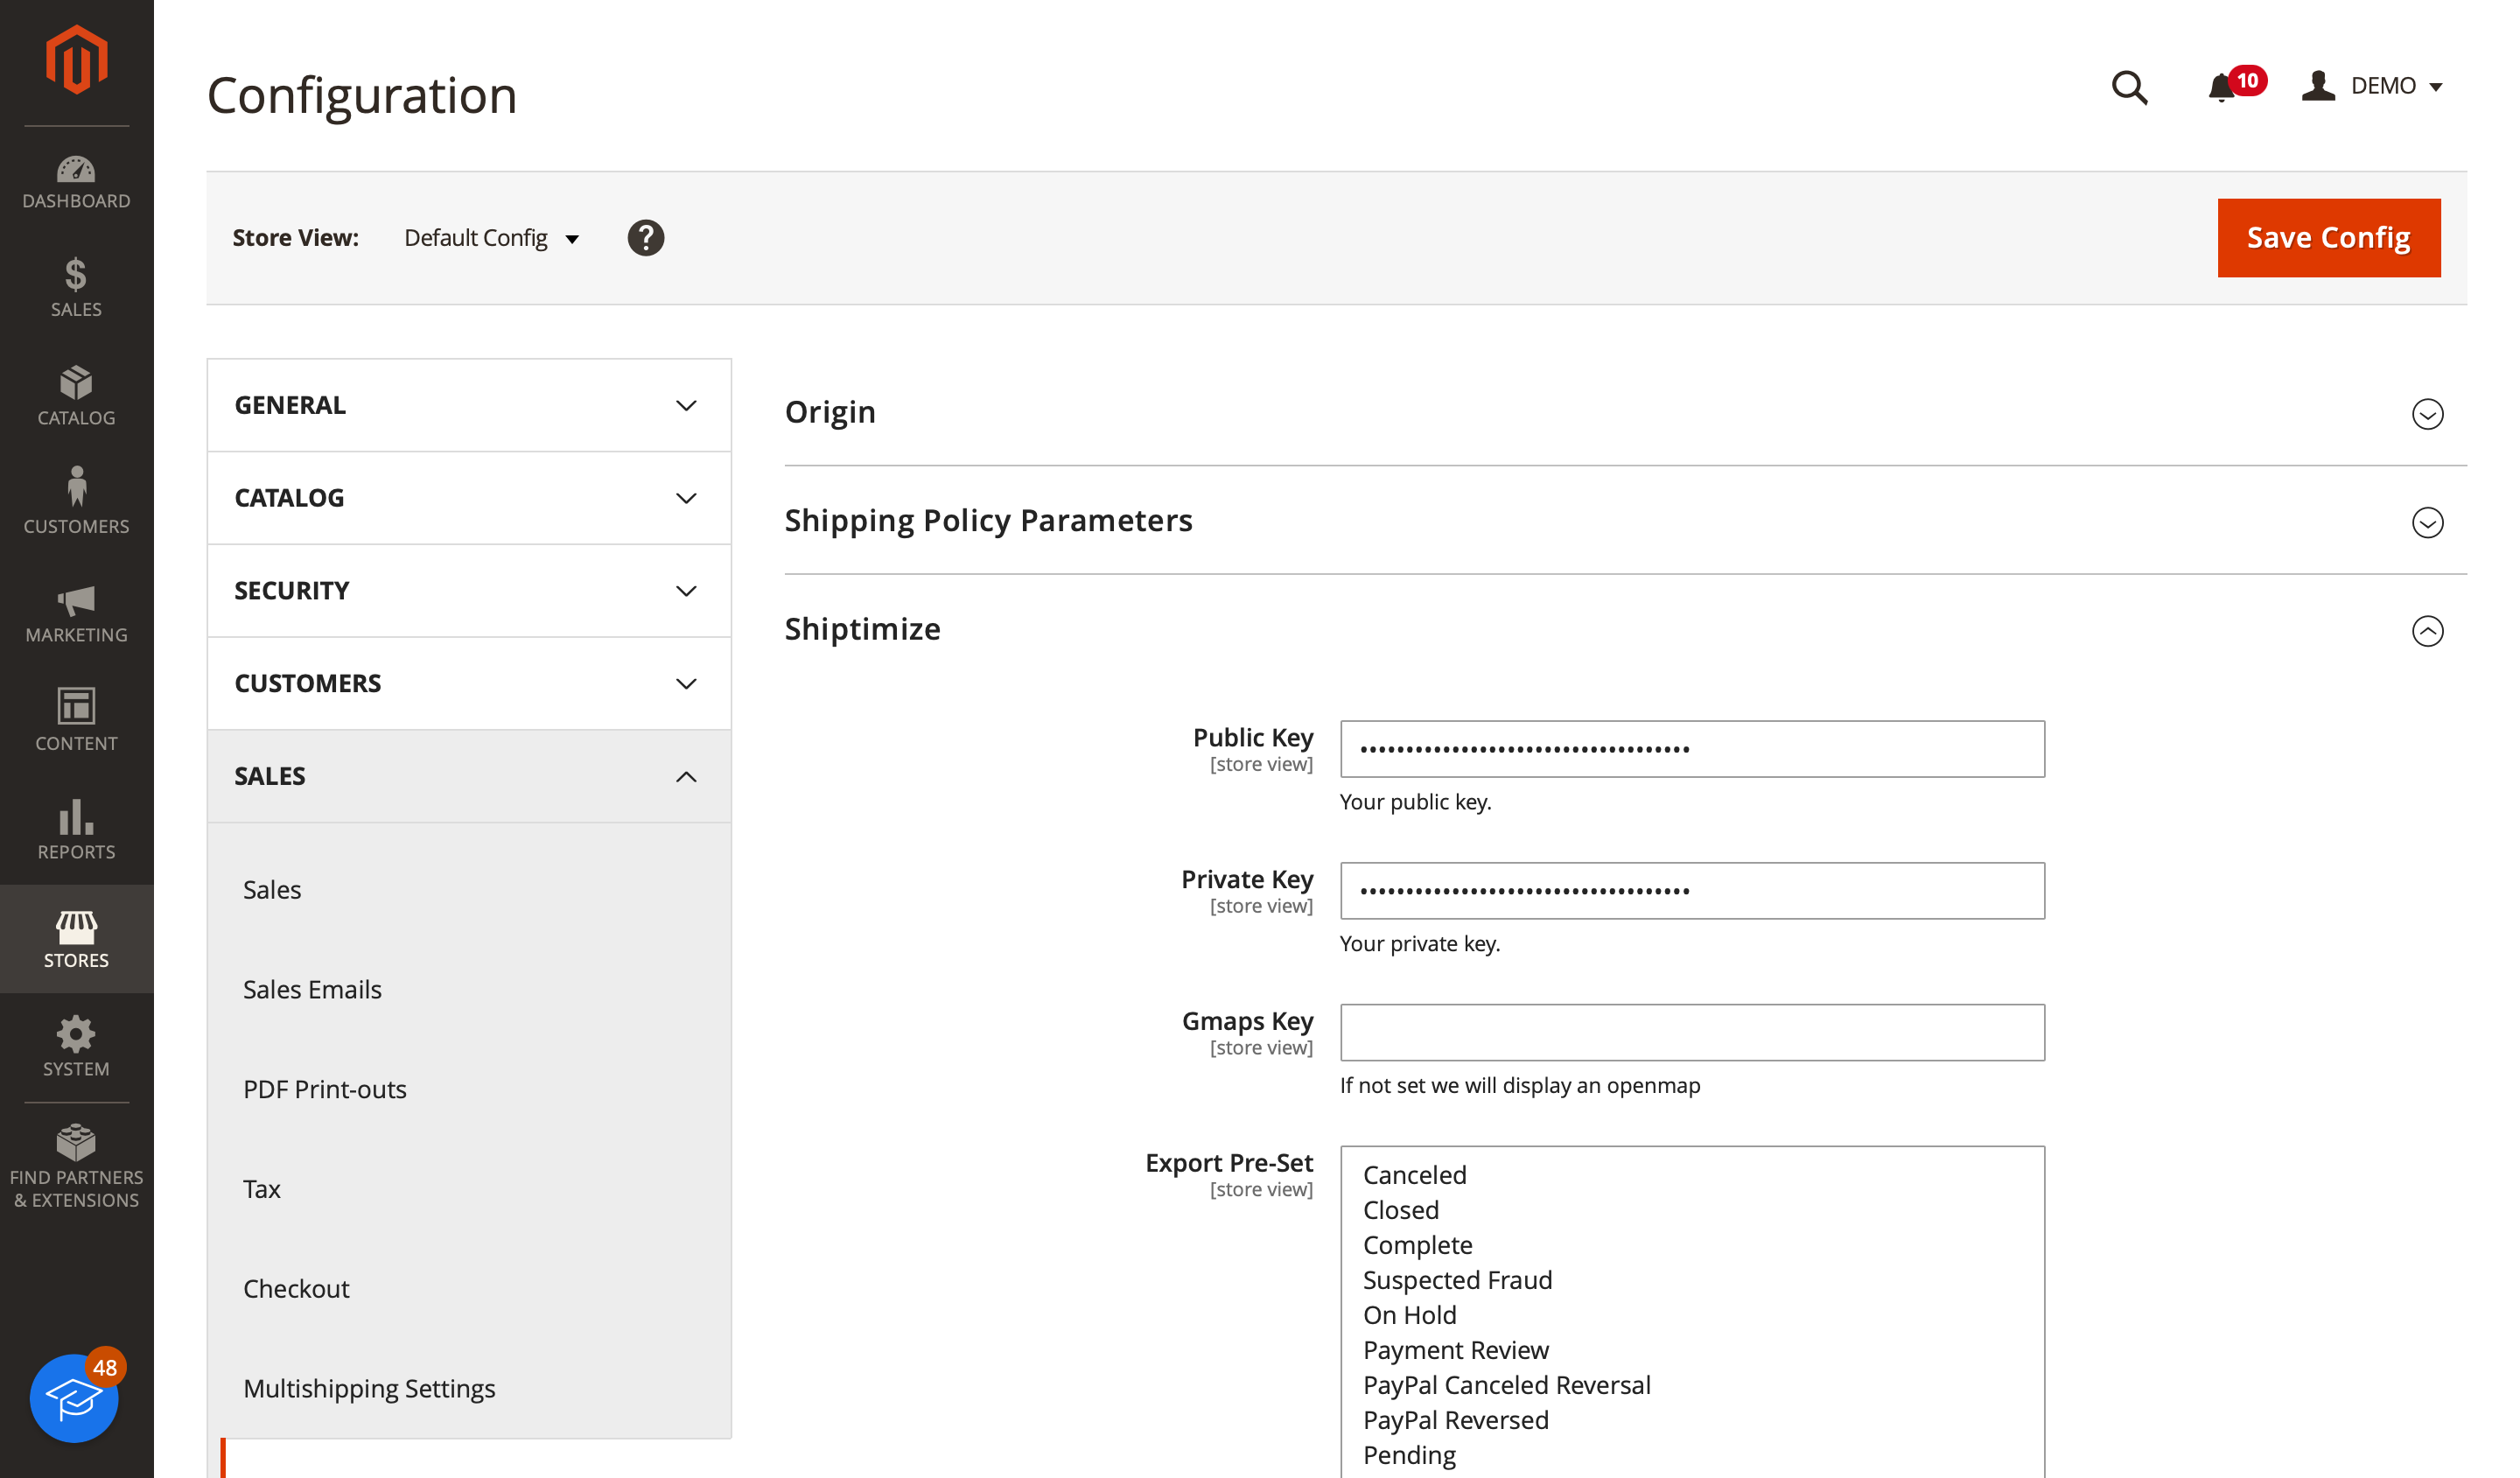
Optional configuration
Additionally, the following optional options can be configured:
- Gmaps Key – if set displays a Google Maps map instead of OpenStreetMap
- Export Pre-Set – these options are used to decide which orders to export when
- Clicking on “export preset” in the order grid
- You enabled “Automatic Export” and an order is inserted or changed.
- Enable Checkout – see section “Pickup Points” below
- Automatic Export – if enabled on status change if the order status matches a status selected in “Export Pre-Set”, it will be sent to the Shiptimize platform
Shipping methods
After the plugin settings have been configured, it is possible to (re)configure Delivery Methods. To do so, go to “Stores” > “Sales” > “Delivery Methods”.
The plugin creates a Shipping method for each Carrier in your account when you save the plugin settings.
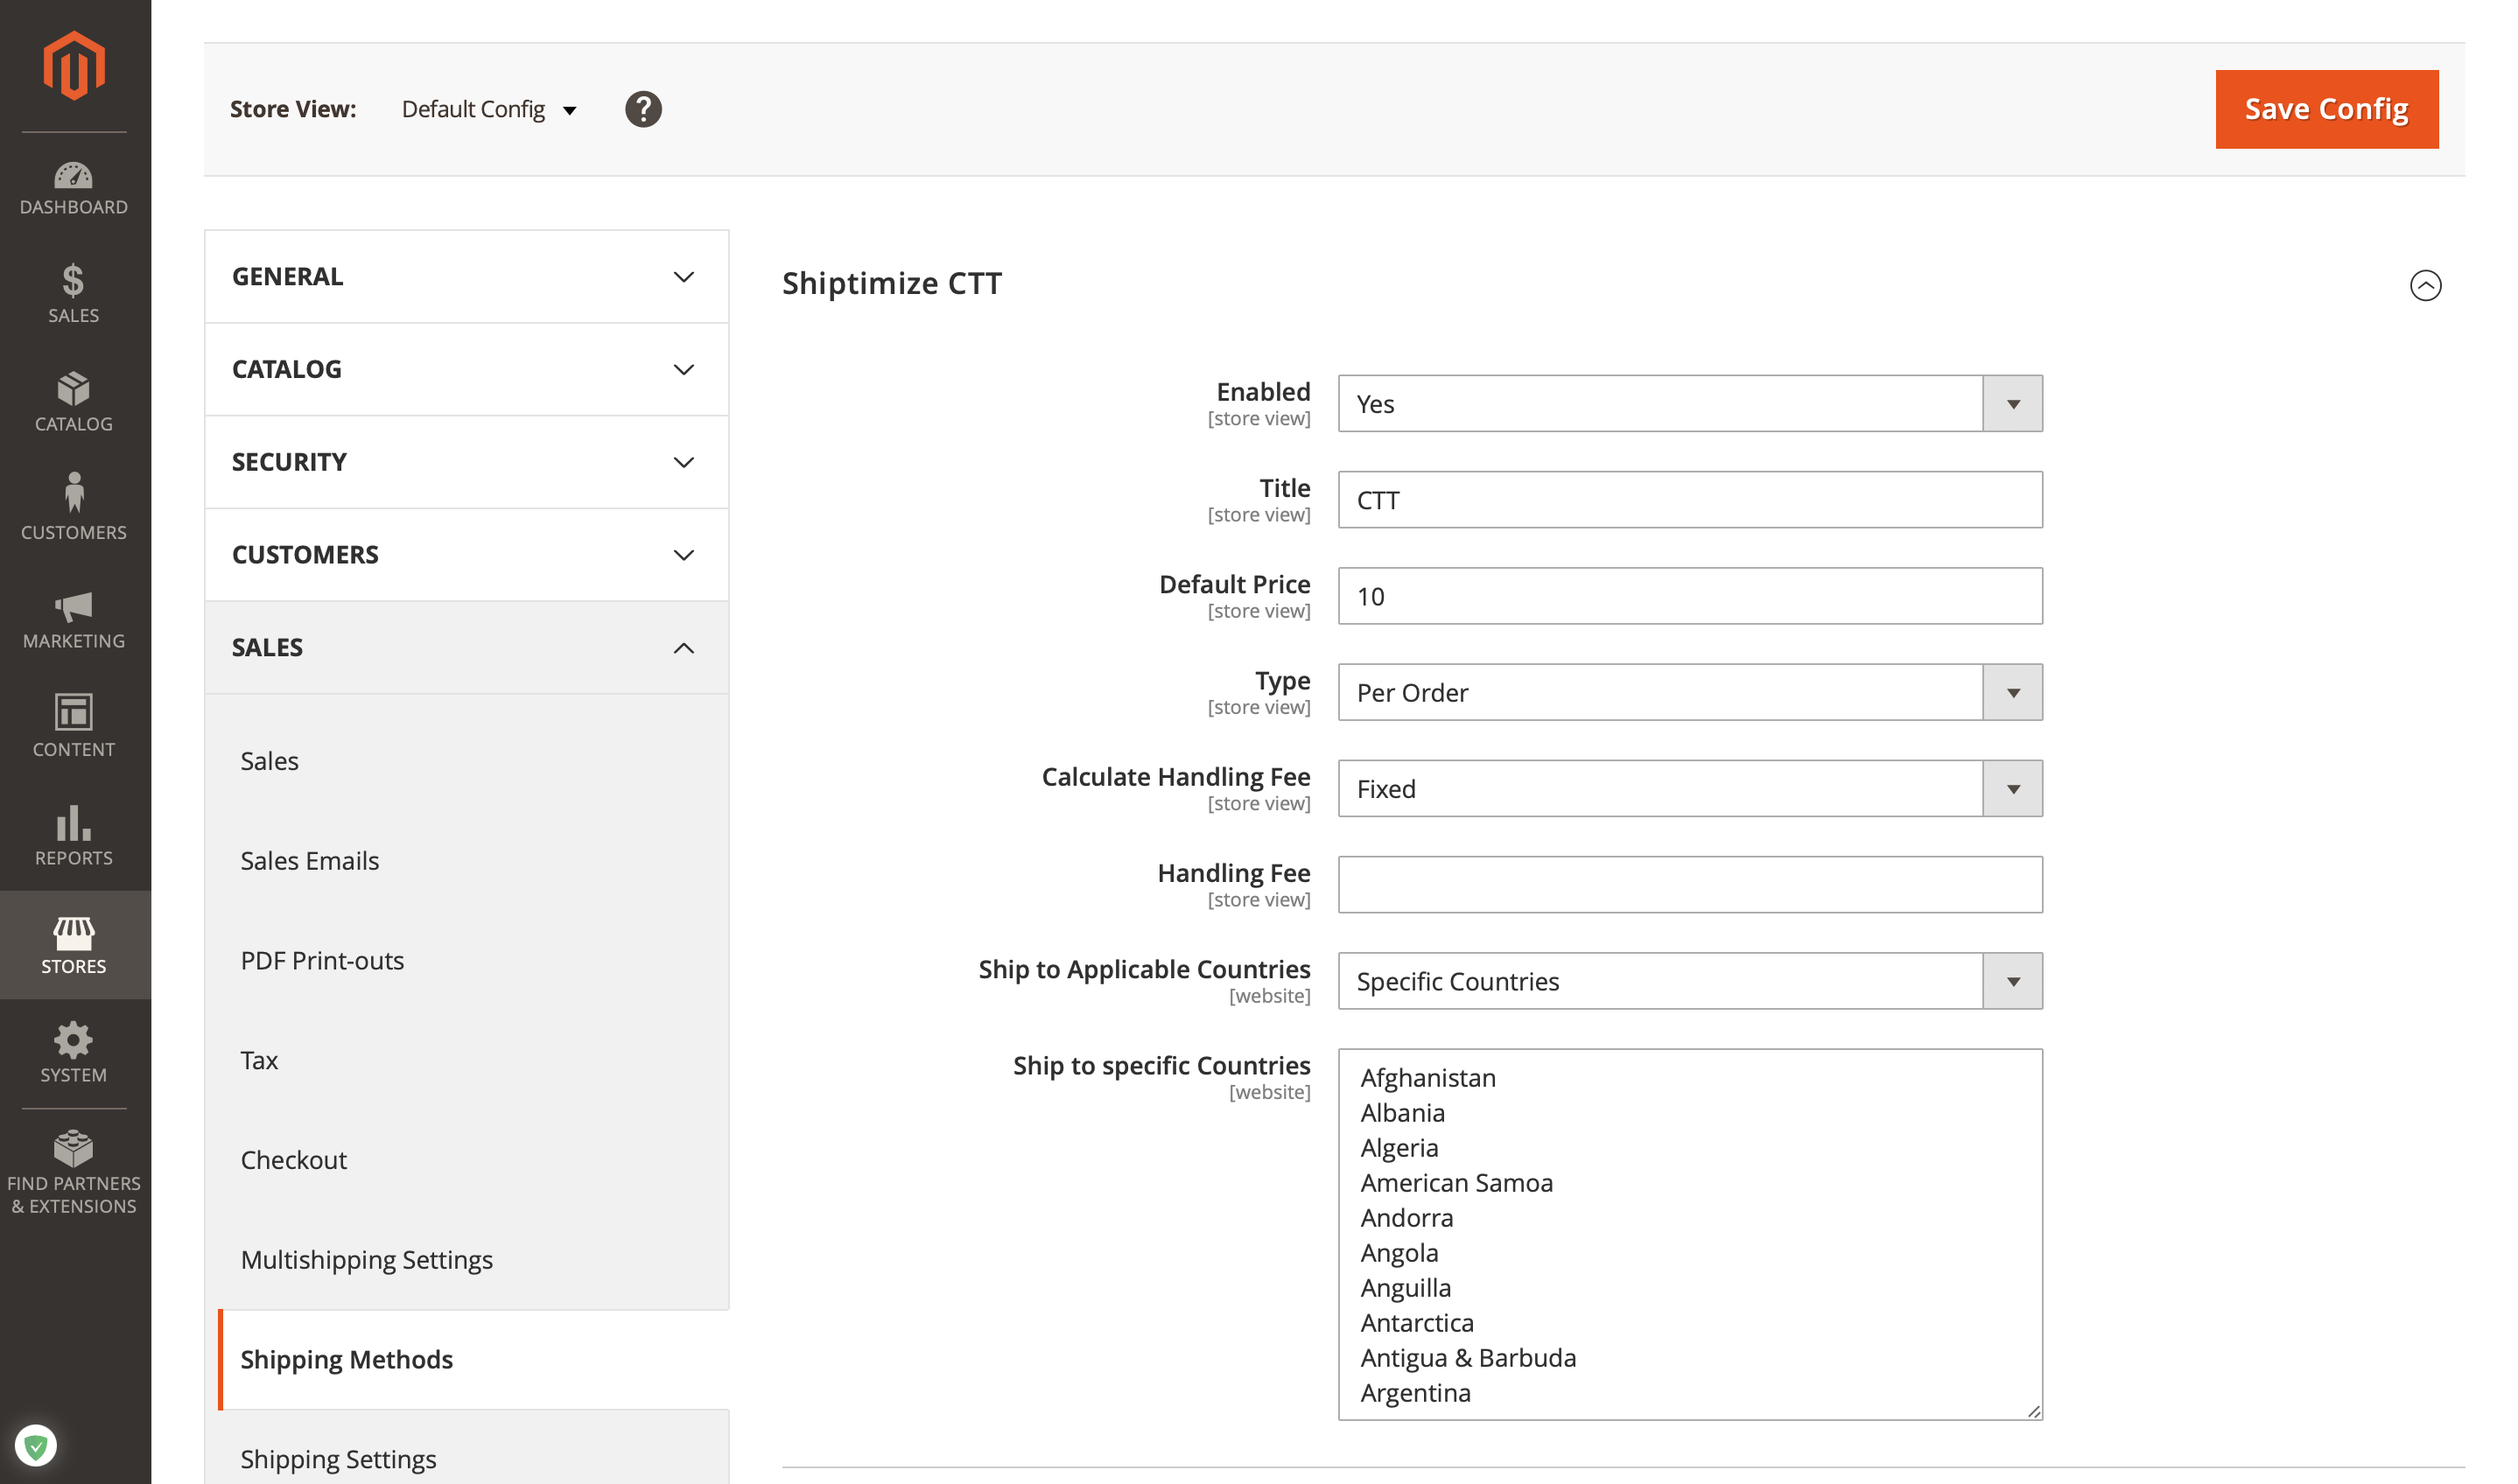
Enabled – if the shipping method should be enabled
Title – The name shown to your customers
Default Price – How much you want to charge your customers by default for this method.
Type – Choose whether to charge “per order” or “per item
Calculate Handling Fee – Choose whether the handling fee should be “flat” or as a “percentage” of the Price
Handling Fee – An additional fee
Ship to Applicable Countries – Choose “Specific Countries” if you want to make this method available only in certain countries
Ship to Specific Countries – Choose the countries where this method can be used to ship
Rates Table
This carrier allows you to define rules by country, region, postal code, minimum weight, minimum price, a minimum number of items. For each rule, you can assign a price and optionally a Shiptimize carrier id and a carrier option.
The rules are sorted by weight, price and number of items, the matching is determined by the highest rule which still matches the order. The order prices defined here are without tax.
For the correct configuration of the Table Rates shipping method, here’s some tips:
- Go to the Shiptimize Table Rate shipping method and click on “Export” to retrieve a CSV file which can be filled in.
-
All location fields, that is 1) Country 2) Region and 3) PostalCode, should be exact matches. No ranges can be specified here.
-
In the column Carrier it is important to enter numerical values. This can be verified in the plugin configuration screen including the description of the option which can be added in the Options column.
-
Display name is a free to fill in field in which a choice can be made in which way the shipping method will be mentioned in the check-out.
-
Here is an example of how to fill in a Table Rate. The match is determined by the highest line that still meets the order.

In this example we have a distribution of variables for Dutch shipments.
Two price classes (0 > 200 and 200 > (ex VAT), two weight classes (0 > 31.5 and 31.5 >), two delivery types (parcel delivery via GLS Parcel and pallet delivery via GLS Freight) and finally two delivery methods (home delivery and delivery at GLS Pakketshop). Based on these variables, different costs are shown in the Cost column.
- Save the CSV file and upload it via “Import” in the Shiptimize Table Rate shipping method.
Note: To use the Flat rate you must configure the options for the carriers you want. If you only want to use the table rate option, you should keep the options for the various carriers inactive and only activate the Table rate option. If you keep the Flat rate carrier option active, both options will appear at checkout.
Behaviour
If “display name” is empty, the name shown to your customers is <carrier title>-<option>.
If you want to define a specific carrier when exporting an order assigned to that rate to Shiptimize, copy the carrier ID to the “carrier” column…
To define an option (ServicePoint, AvondLevering) for a rate, copy the option name to the “Options” column. When loading new rules, old ones are overwritten, this means that if you export old order default values will be used for carrier and options.
Rates Table And The Rulebook
Should you prefer to assign a carrier and carrier options via the rulebook you can do so using the condition “Shipping Method Name” and the value you set in your csv file under “Display Name”.
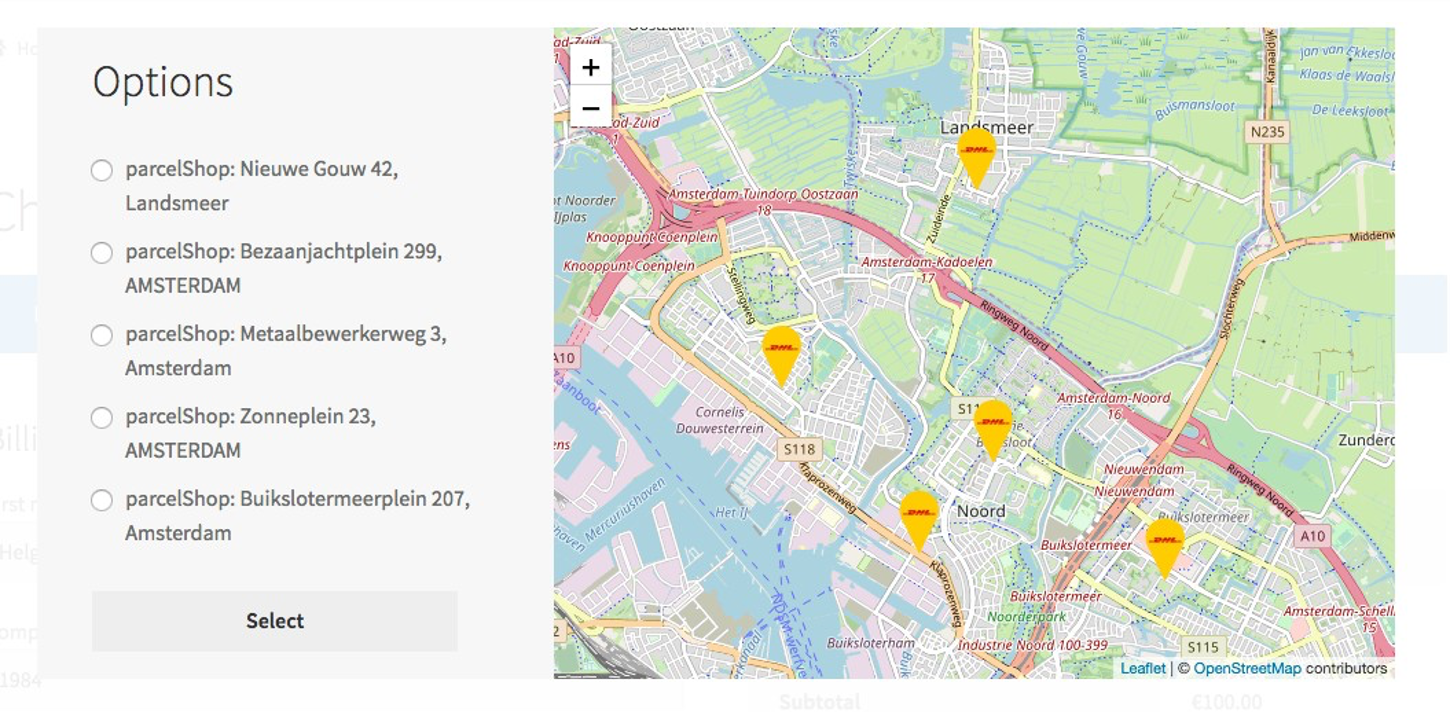
Pick-up points
If the carrier provides a “Pickup Service”, we will attach a button to the box that allows the user to select their preferred location.

If you supply a google maps key, we will show you a google map
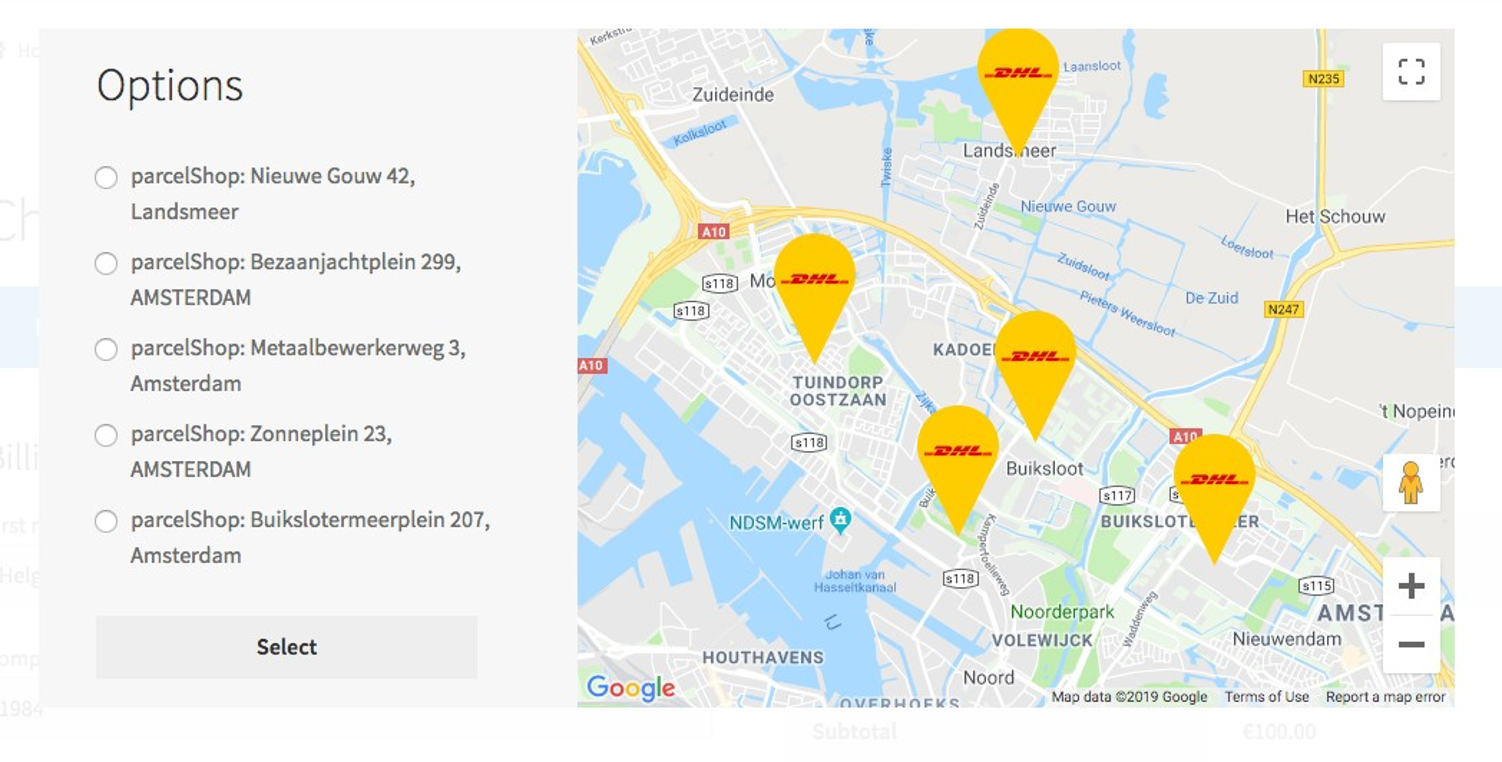
If a google maps key is not set, we will display an OpenStreetMap
Order Export
You have two export options:
Export Preset orders – Will export only orders that have not been exported before and have one of the statuses you have configured in “Export all” in the configuration.
Export selected orders – Will send to the application any selected order, regardless of status. This allows orders to be re-exported if you delete them in the application.
If you try to re-export an order that is already in the application:
- If the order was pre-alerted, it will be rejected
- If the order was not pre-alerted, it will be patched. This is useful if you change the address in Magento but have already exported the order.
Print Label – Various Options
With the Magento 2 plugin it is possible to (automatically) export shipments to the Shiptimize Platform. From within the app you can easily create your shipping labels. Also, it is possible generate shipping labels directly from within your Magento 2 backoffice.
Print from Magento 2 Backoffice
If you don’t want to leave your Magento 2 Backoffice to create your shipping labels you can do so directly from within the Backoffice. There are two options to do so which are 1) from the Order overview and 2) from the Shipments overview.
- Print Label – The order is shipped once with a single tracking ID
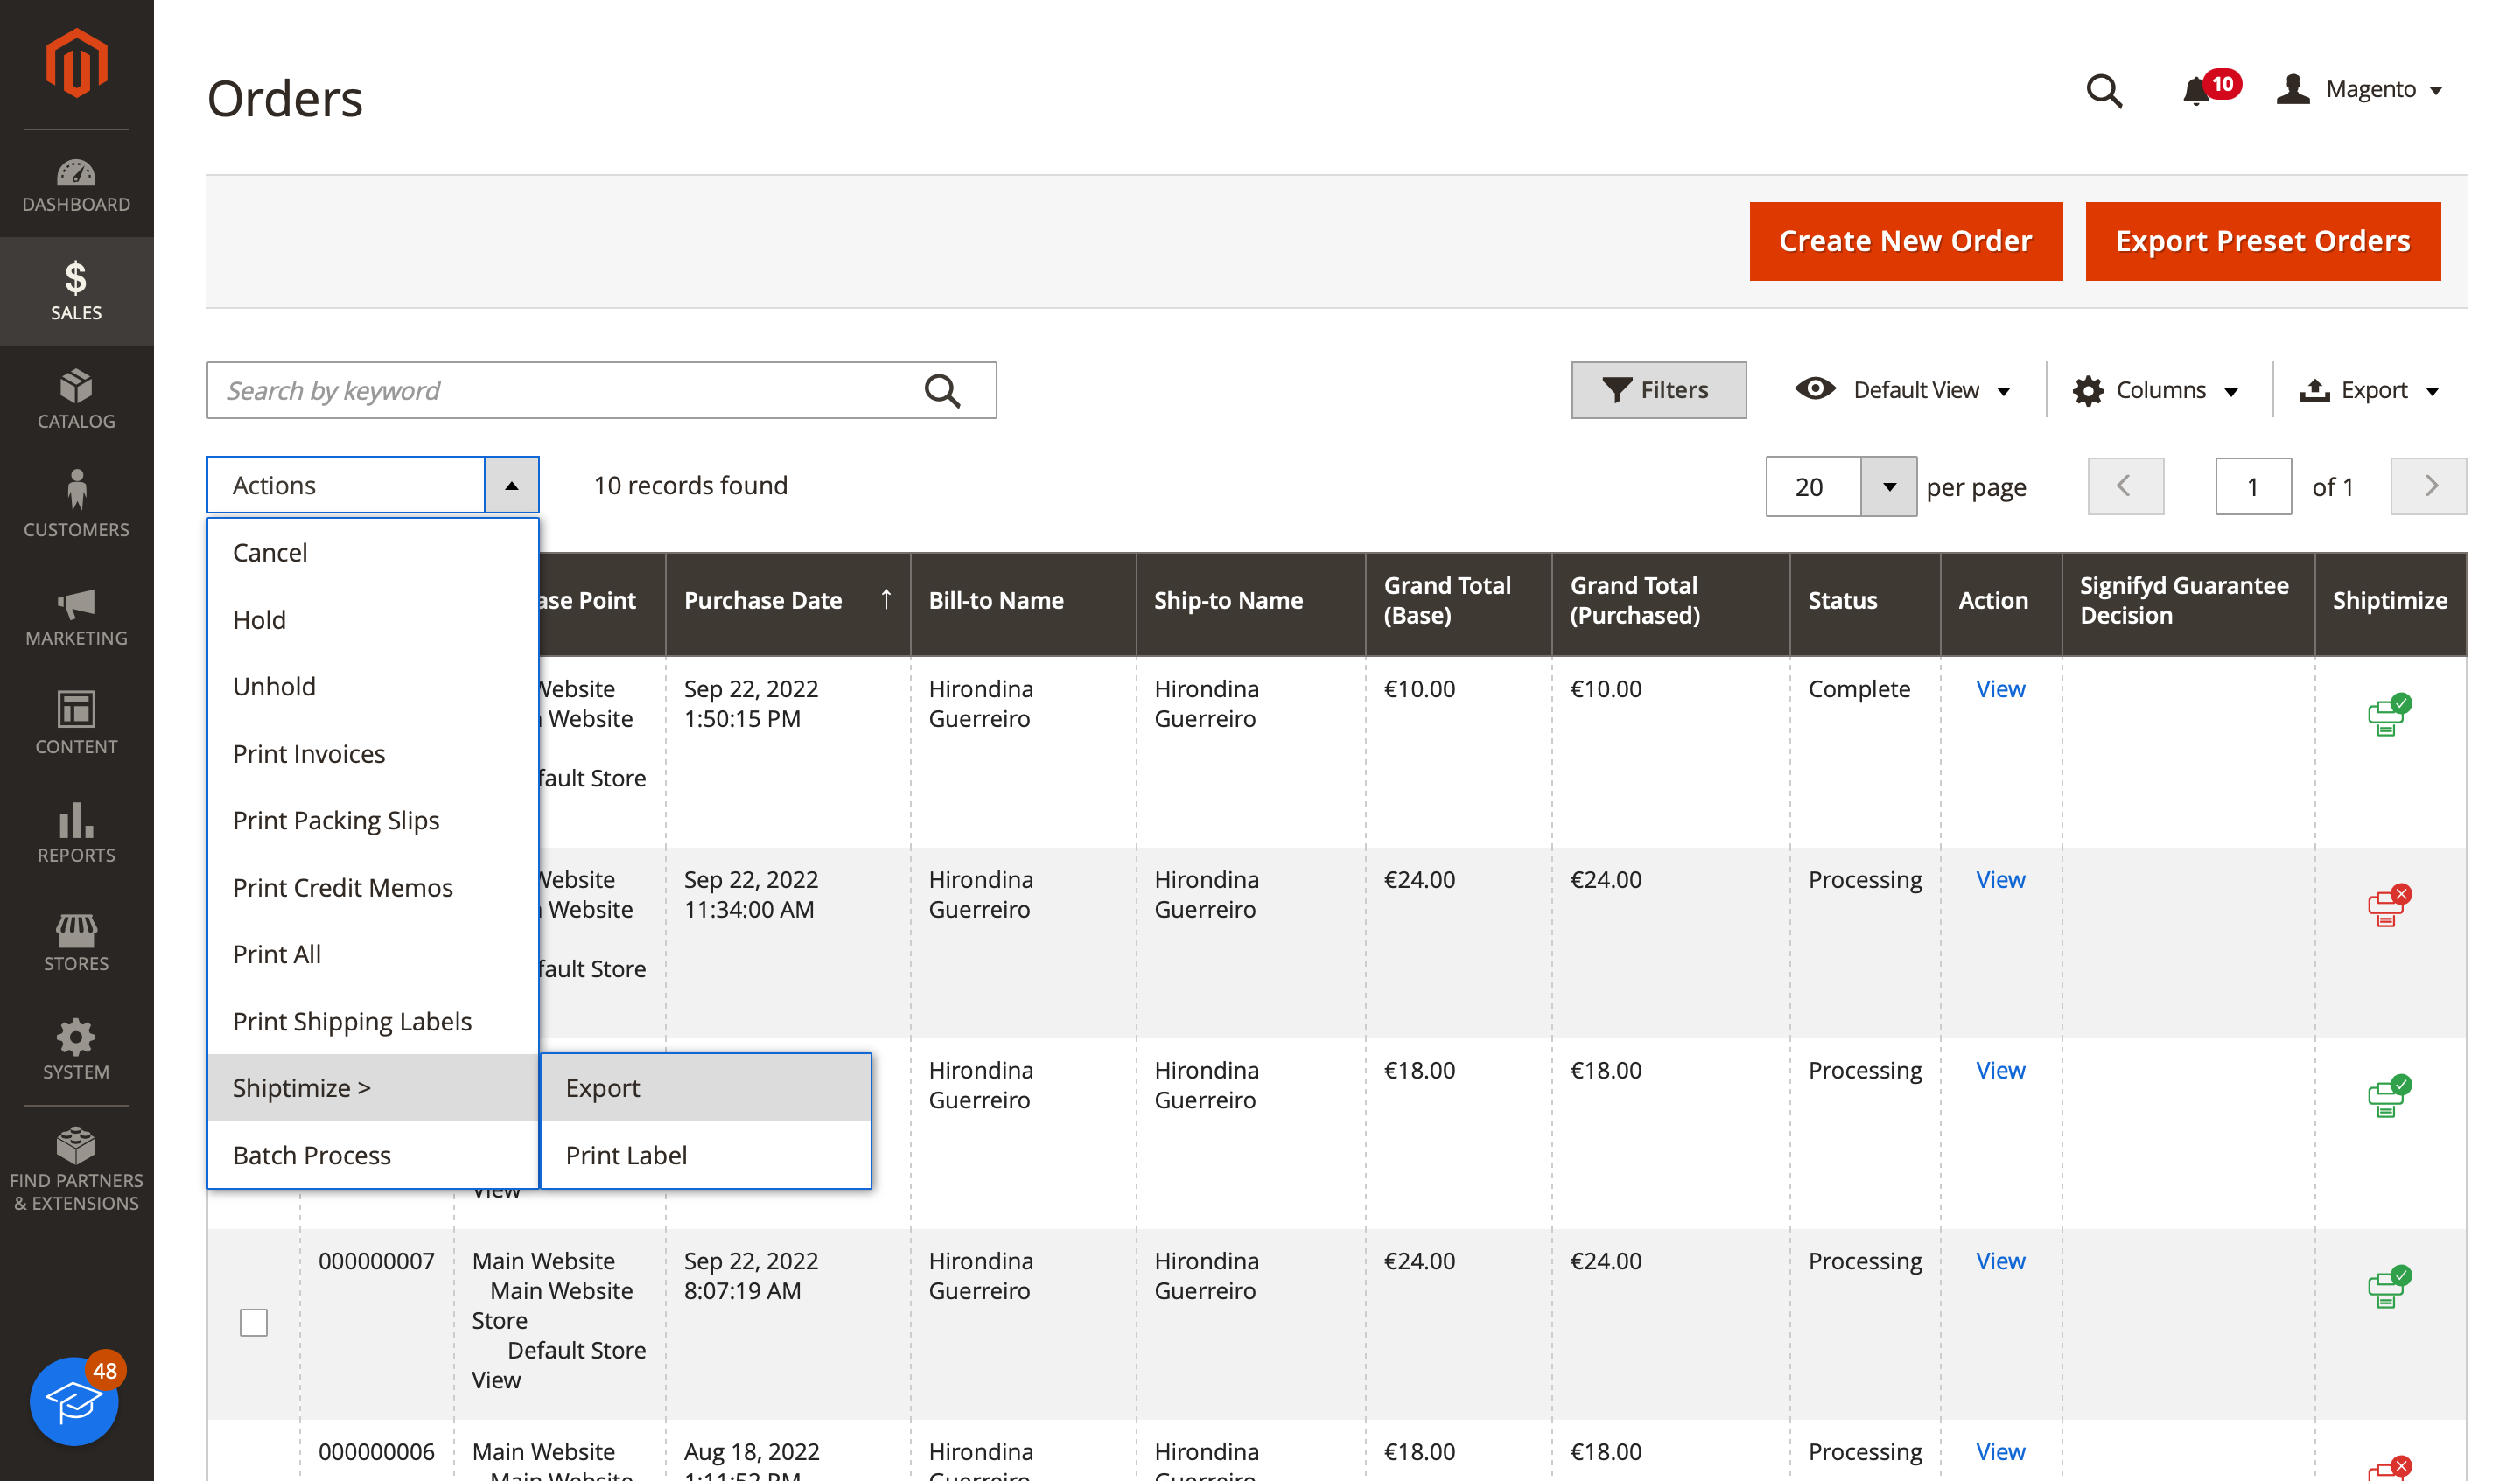
You can request labels from the order grid by selecting the orders you want to print labels for. Simply go to ‘Orders’ and select the orders you want to print labels for. Click on ‘Actions’ > ‘Shiptimize’ > ‘Print Label’.
All items in the order will be fulfilled.
As soon as you click the ‘Print Label’ button the following happens:
- The order is being exported to the Shiptimize platform from where a label request is being done. If the submission is successful a shipping label is send back to Magento 2.
b. In case the order cannot be exported an error message with additional information as to why the export was unsuccessful is returned. The message can be checked by moving your mouse to the red error icon.
- In case the order was previously exported, but not label is associated with it, the order data is resent. Any changes to the address are updated.
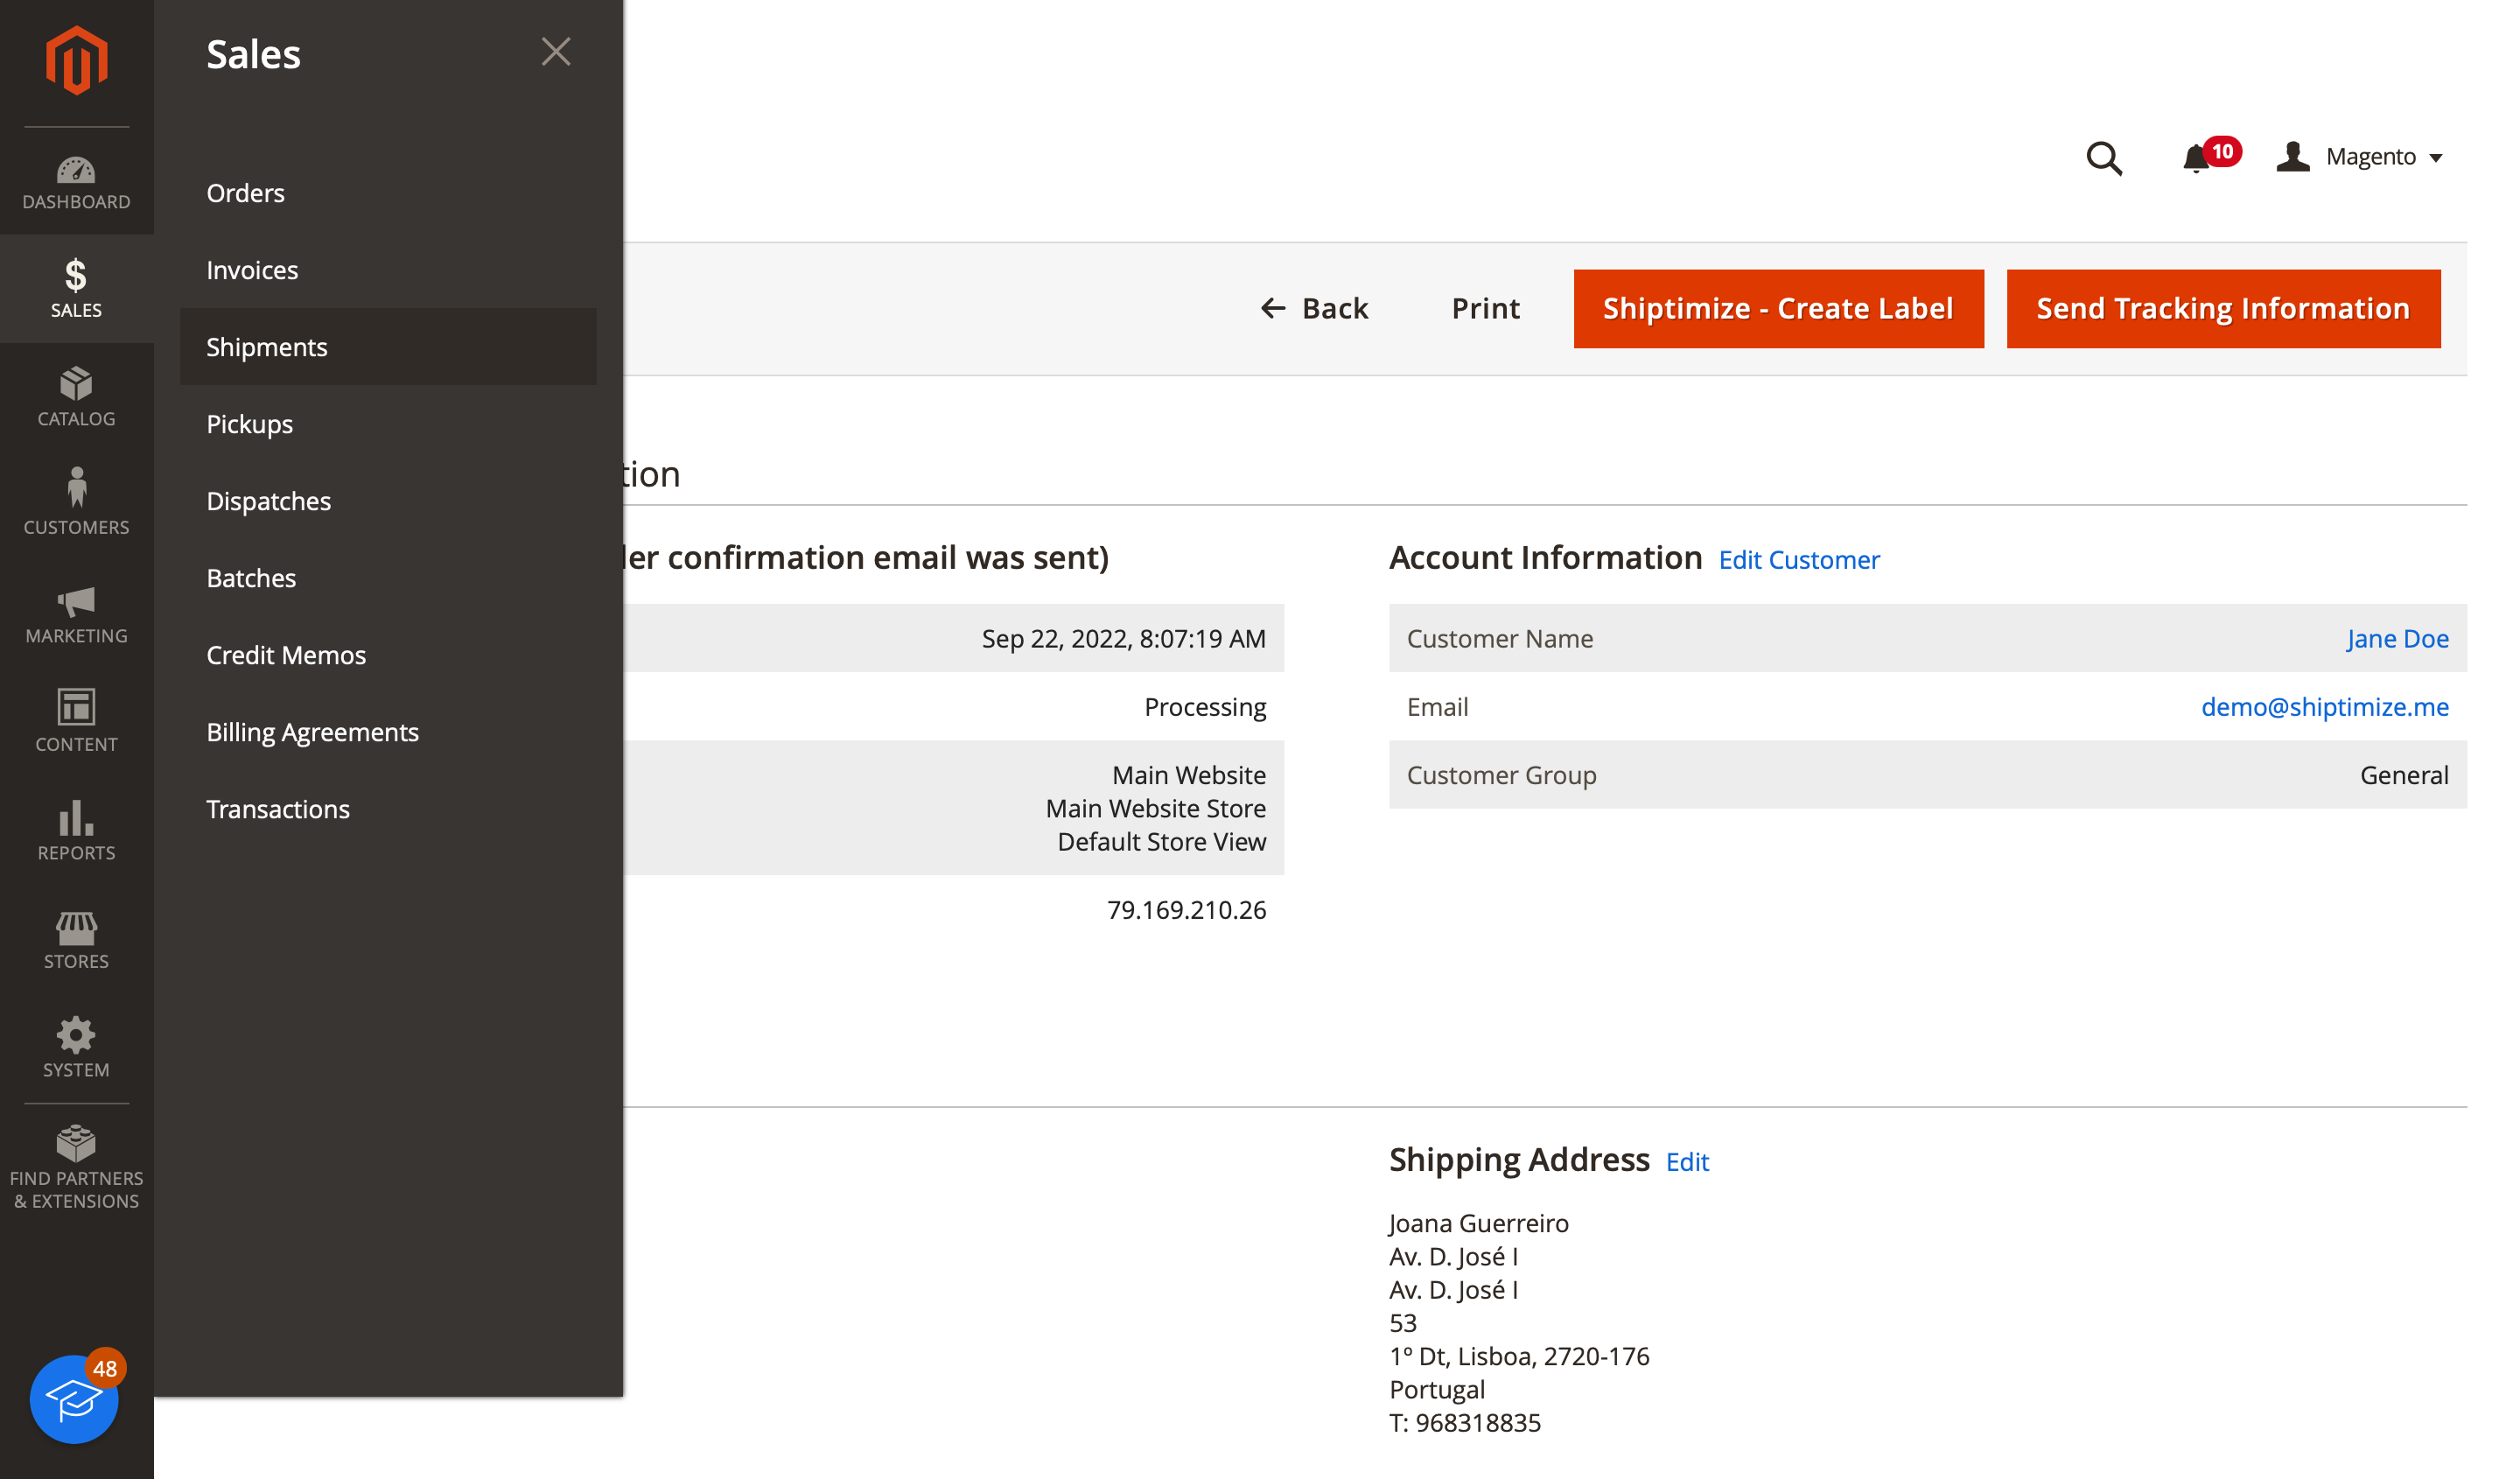
- Print Label – The order is shipped not equal to one shipment.
If you need to ship order items at separate times you can create a shipment in Magento with the items you want to ship. From the specific Shipment detail page you can click ‘Shiptimize – Create Label’ to get a label fulfilling only the items in the shipment.
This shipment will display in the Shiptimize platform with ordern number {{MagentoOrderNumber}}-{{MagentoShipmentId}}
Carriers Update
If at any time you add more carriers to your contract. Ask your contact in Shiptimize to inform you when they are active in the app. Then go to configuration and save the settings. Every time you do this, the plugin will ask the app what information is there and update the plugin cache.
Automatic updates
When a tracking id is available, the plugin will check if there are any shipments associated with the order.
If there are shipments, we will insert the trackingId in the first shipment. If there are no shipments the plugin will create a shipment, associate it with the order and insert the trackingId in that shipment. You can also configure automatic status updates when specific events occur, for this you should go to Shiptimize’s platform, under: Settings > Integrations > Integration Details.
You can set a specific status for:
- After import
- After the carrier accepts
- After delivery
