Prestashop quick guide
Installation
- Go to the “Modules & Services” section and click on “Upload a module”
- Choose the zip file of the module you have downloaded from the Shiptimize platform.
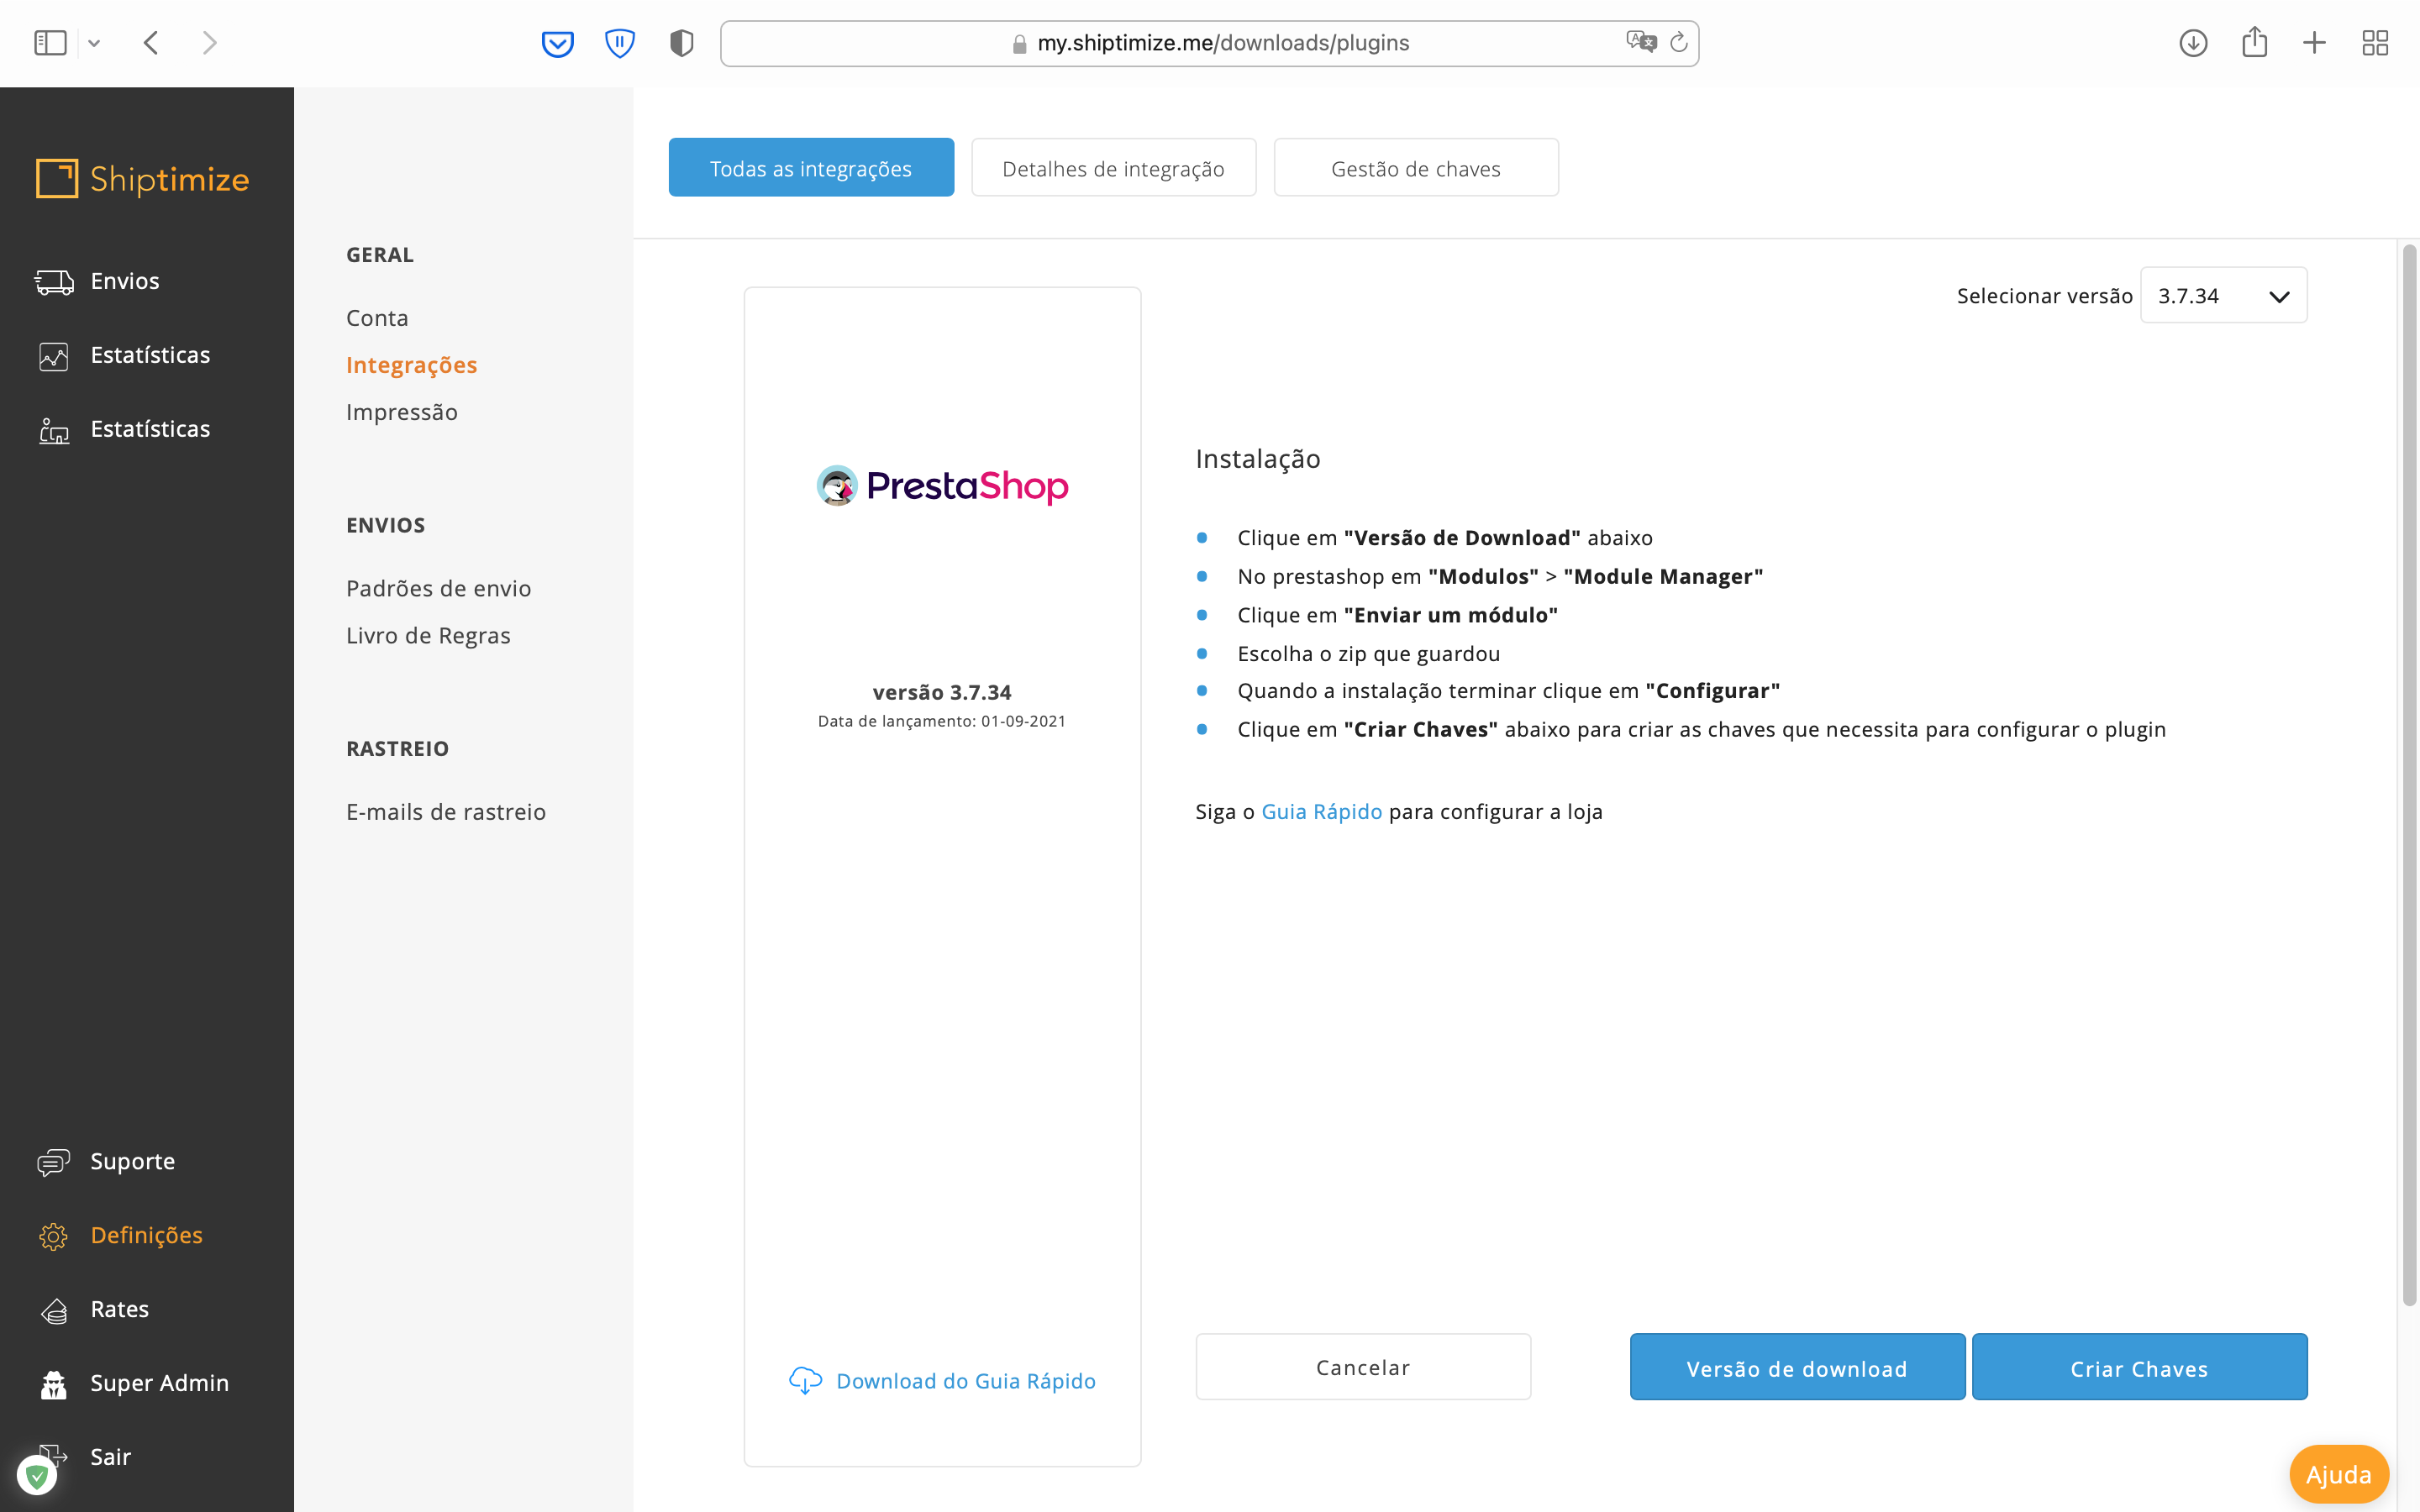
- Once the installation is complete, click on “Configure”.
Note: If you are upgrading from a version earlier than 3.0, please restart the old module manager plugin.
Configuration
Note: If you do not have a Shiptimize account, click request an account. Fill in your details and our team will contact you.
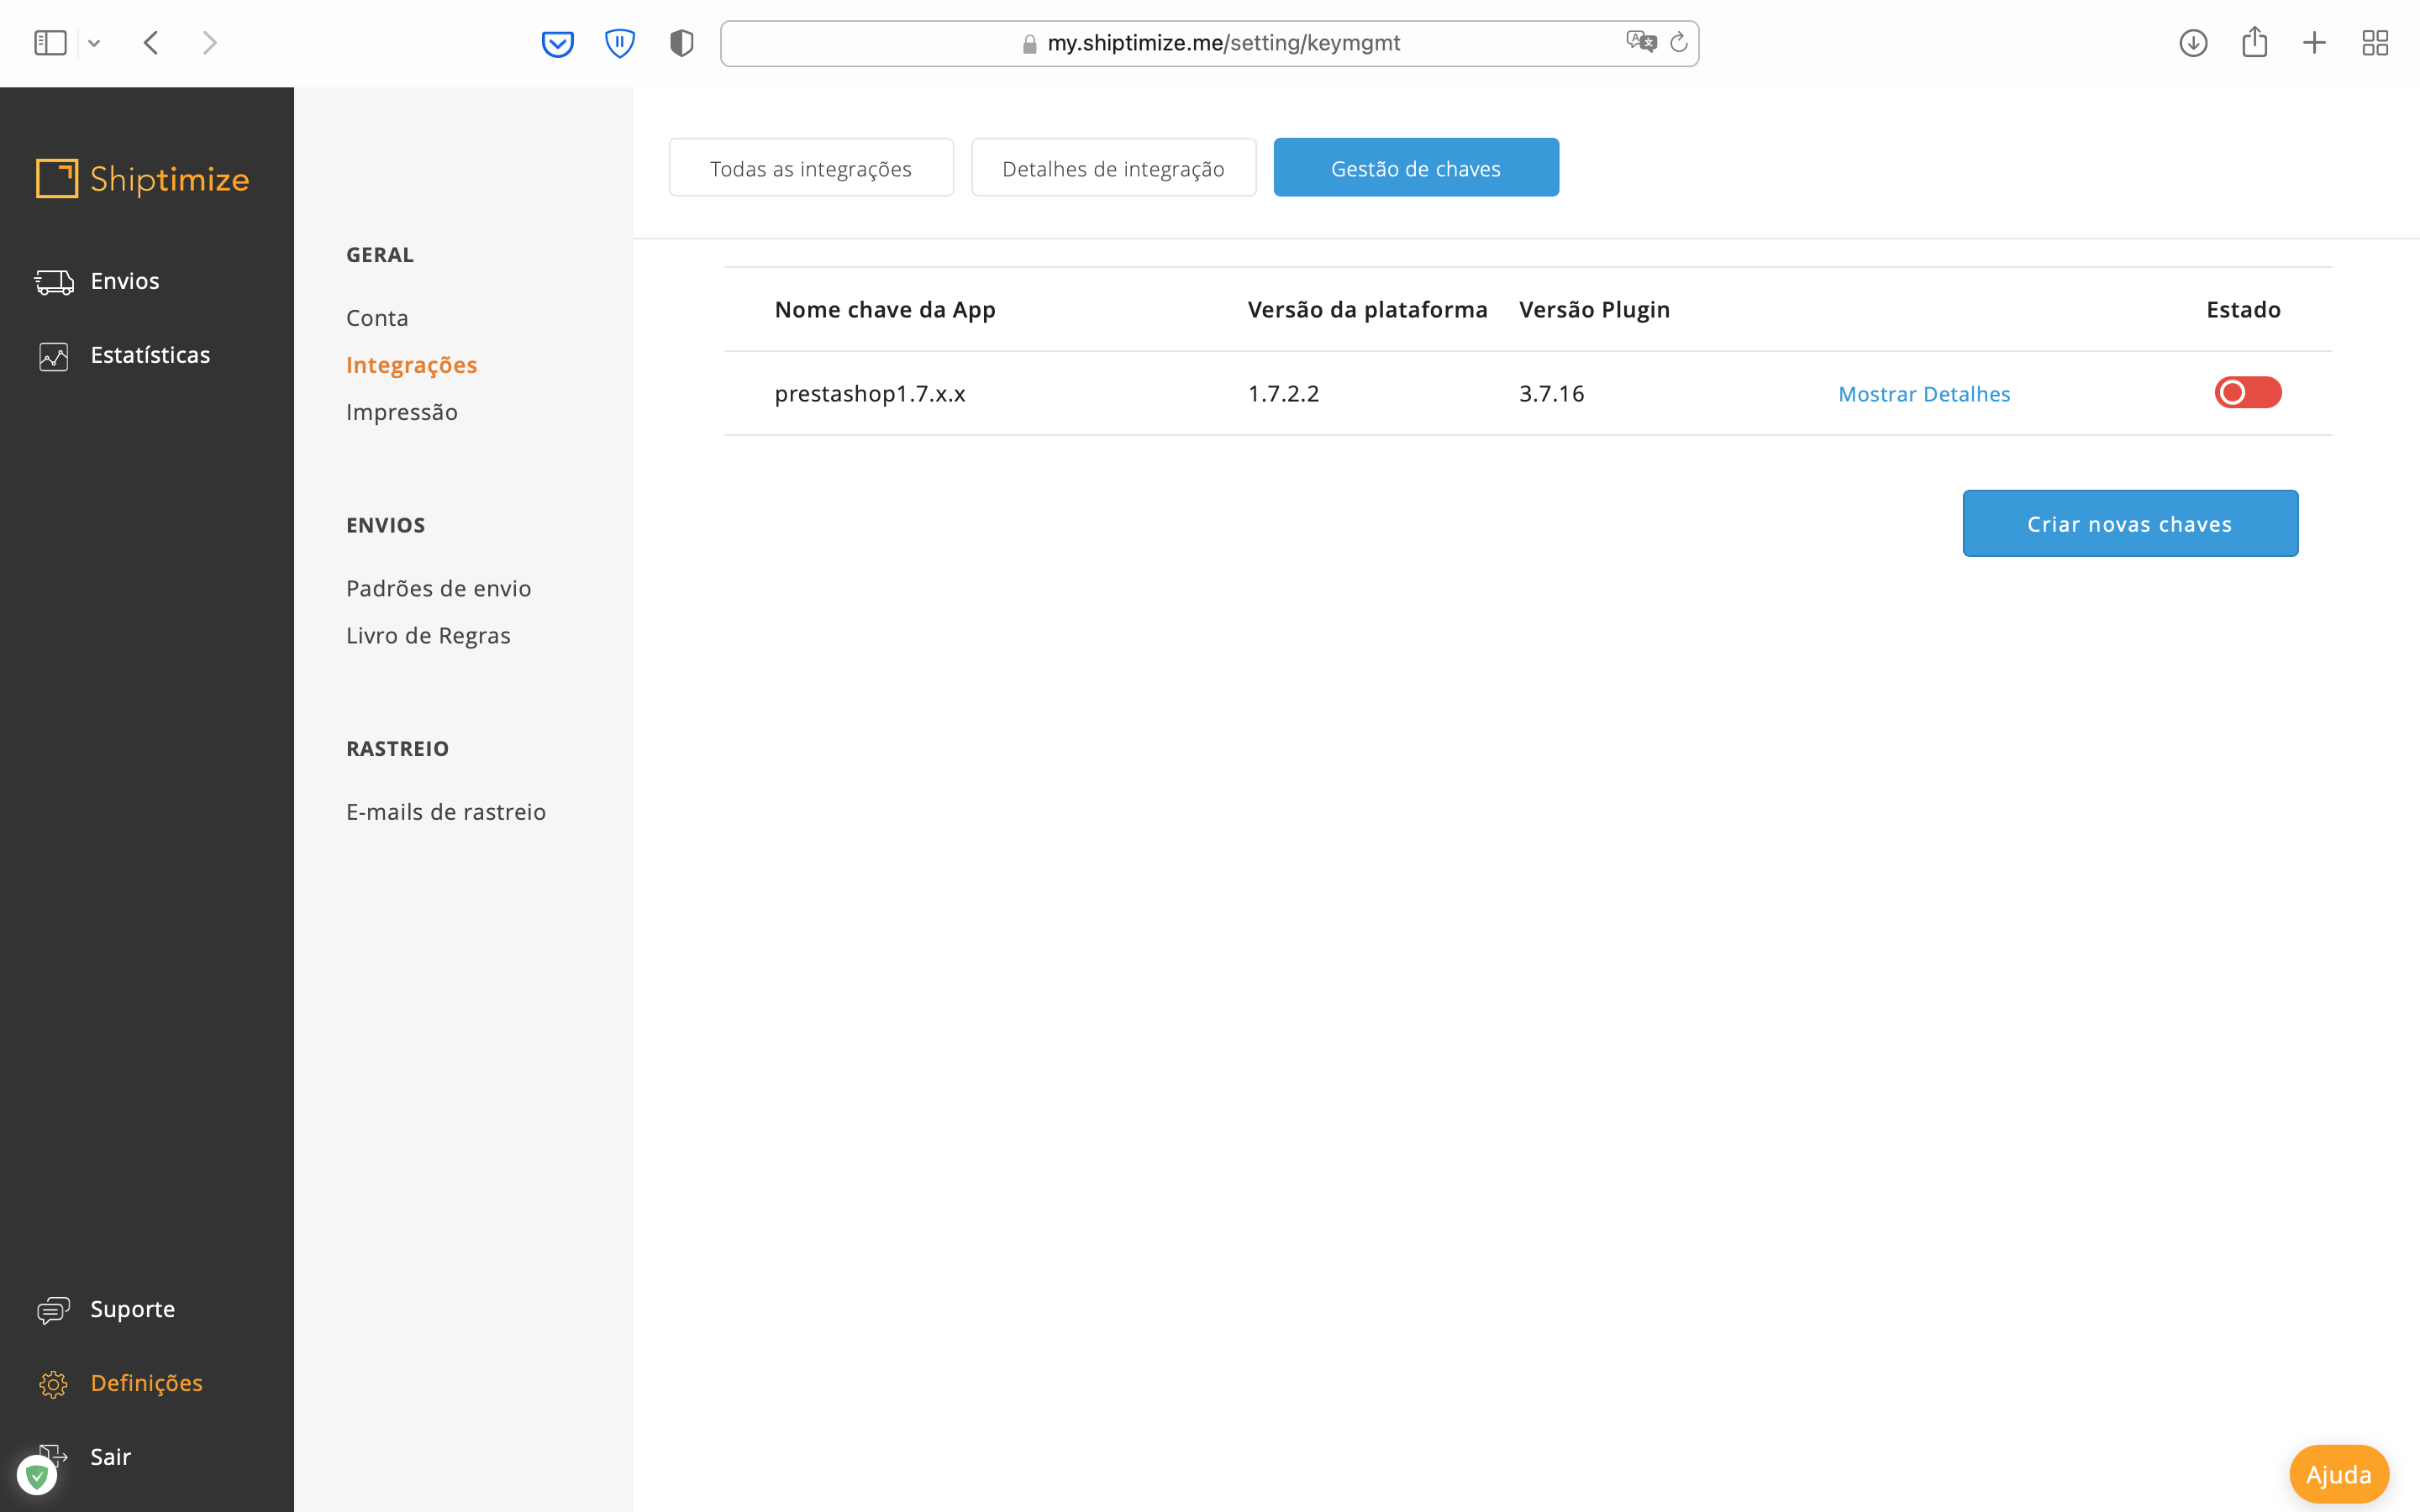
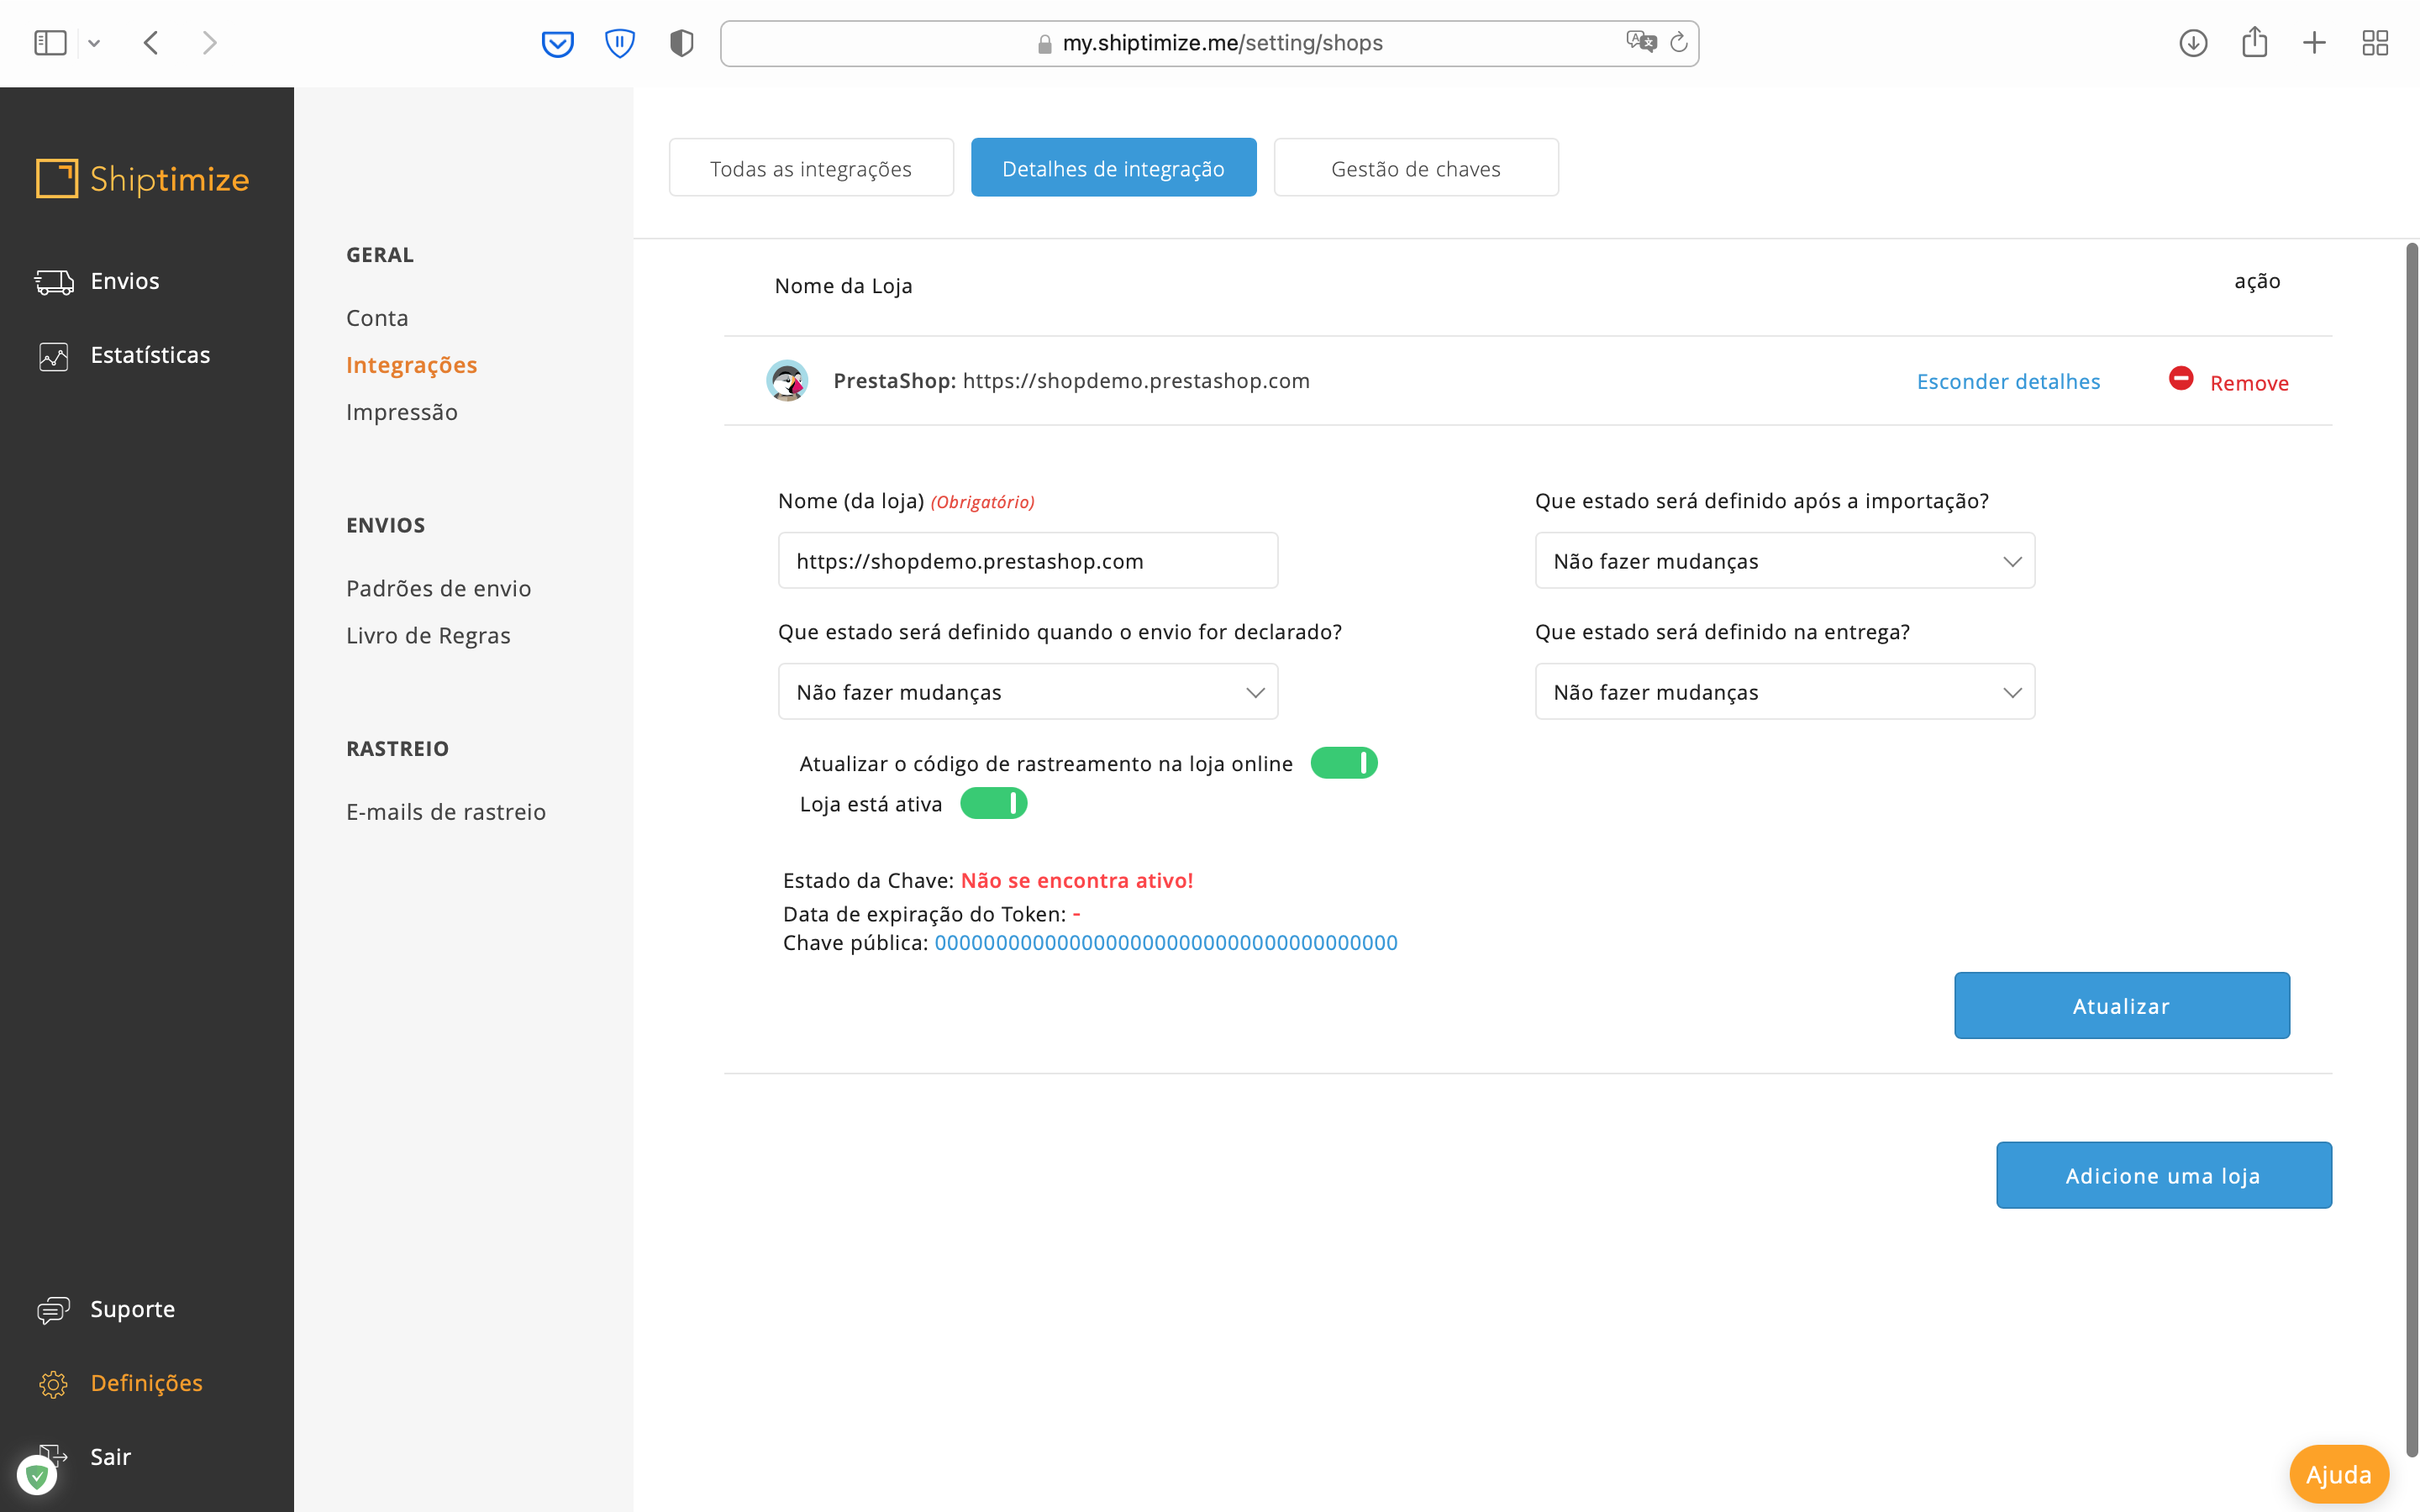
Log into your Shiptimize account and create a public and private key in: Settings > Integrations > Key Management
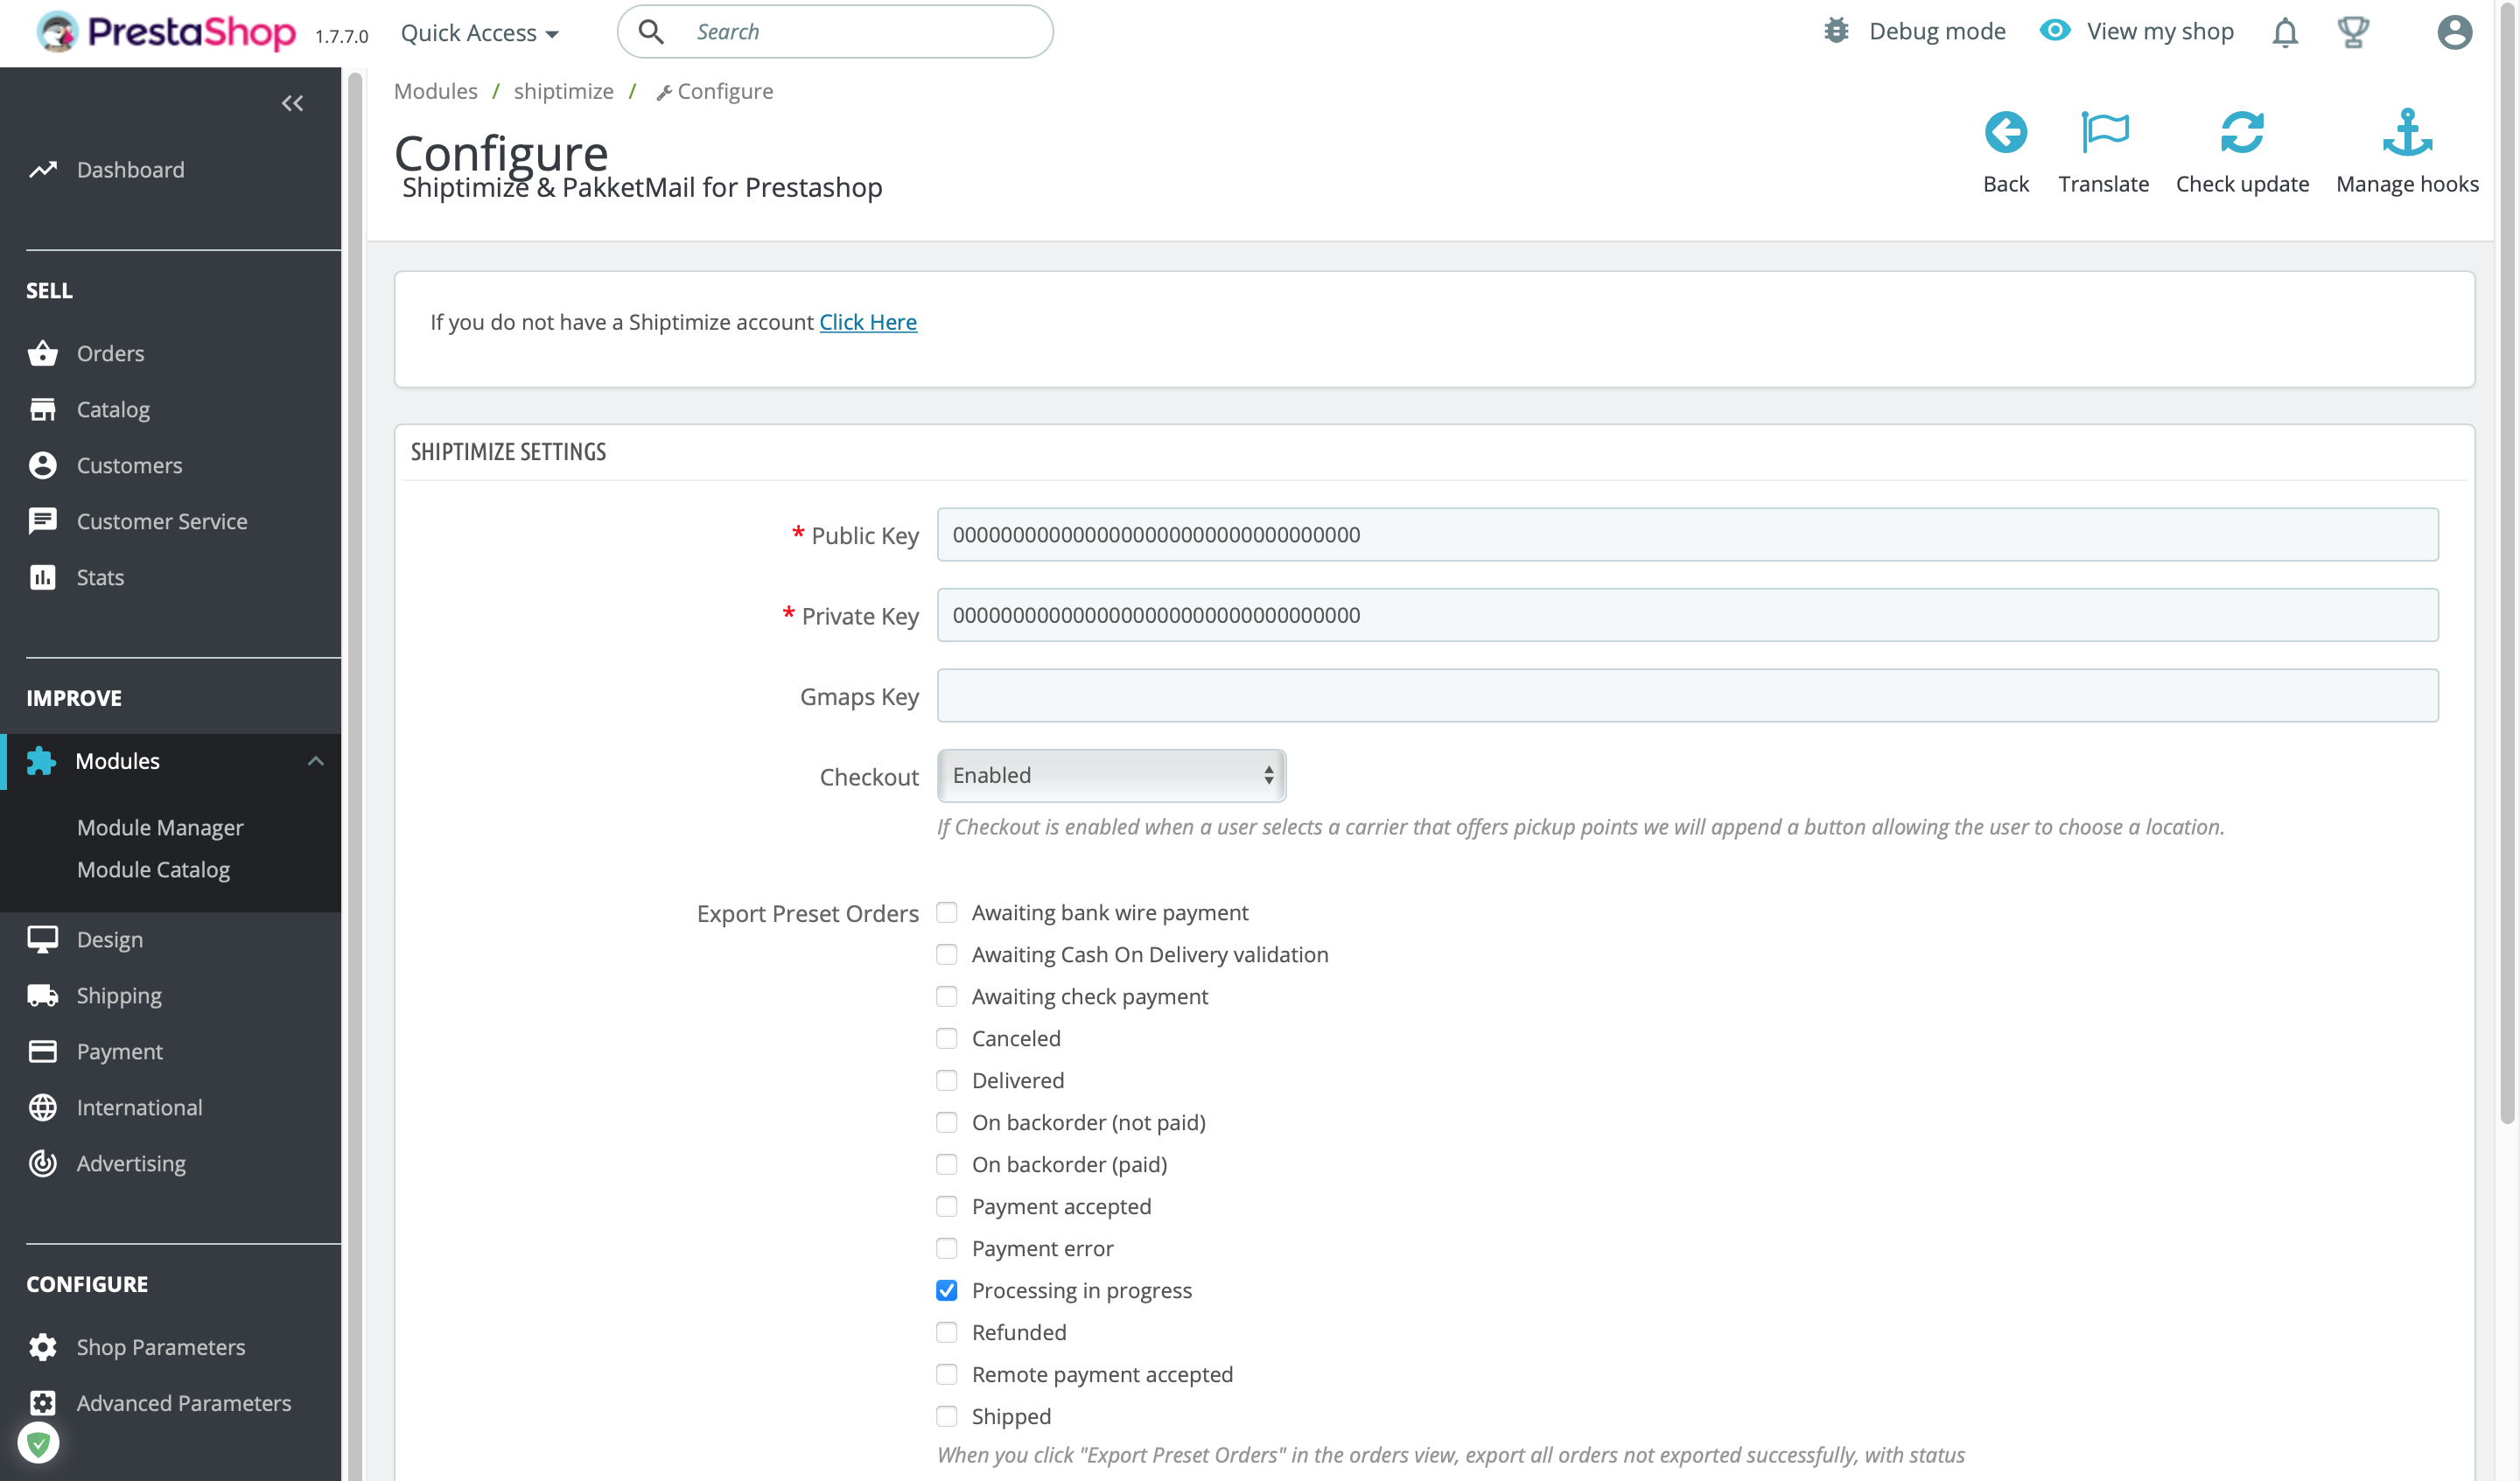
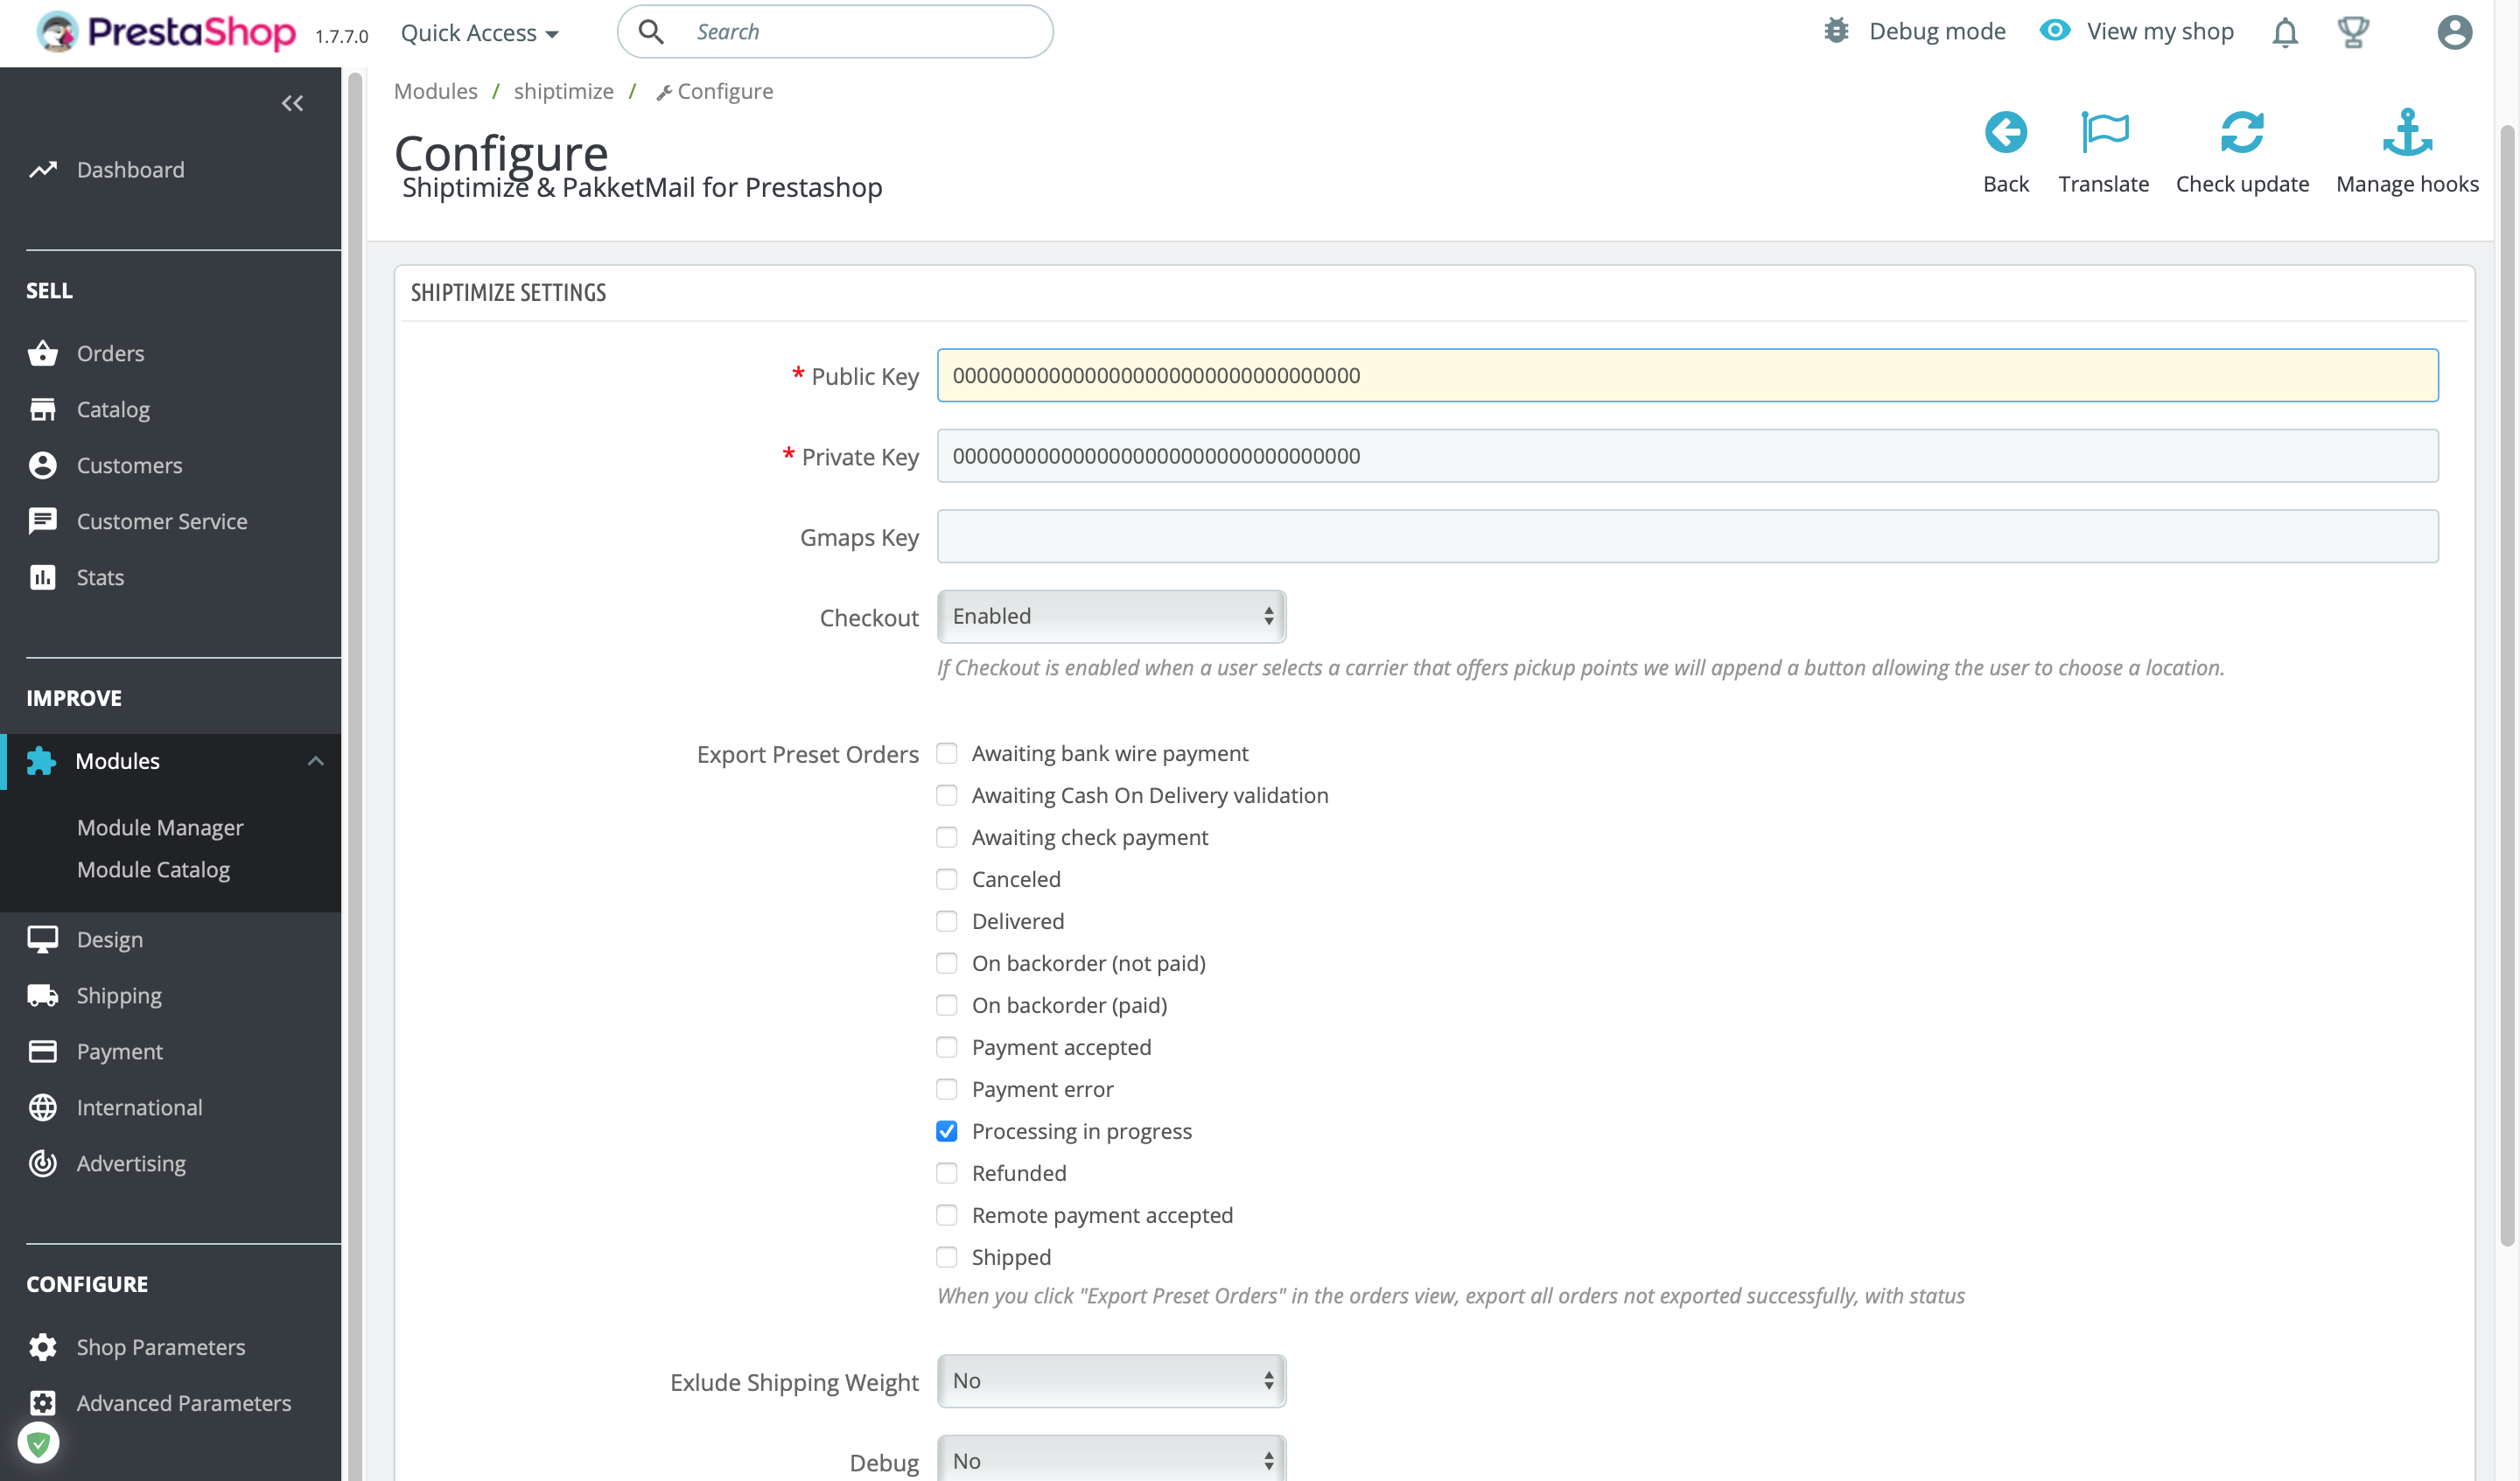
Copy the public and private keys generated in Shiptimize to the Plugin settings in PrestaShop
Select in “Export Preset Orders” which type of statuses are used for the orders that are ready to be shipped.
Then click “Save”. By entering valid keys, the plugin will create the new shipping methods for each carrier available in your Shiptimize account in PrestaShop.
Note: Each installation must have one set of keys. If you have more than one shop, please create keys for each shop.
If you have active caching or combine styles or scripts, clear the cache in “Advanced Parameters” > “Performance”
Optional settings:
- Checkout – if you don’t want to show pickup locations to your customers choose “disabled”.
- Exclude Shipping weight – if you haven’t set a weight on your products, or if you’re using different units on those products, choose “no” and we won’t ship the weight of the order when you export
- Debug – if active show a table listing shipping companies Shiptimize.
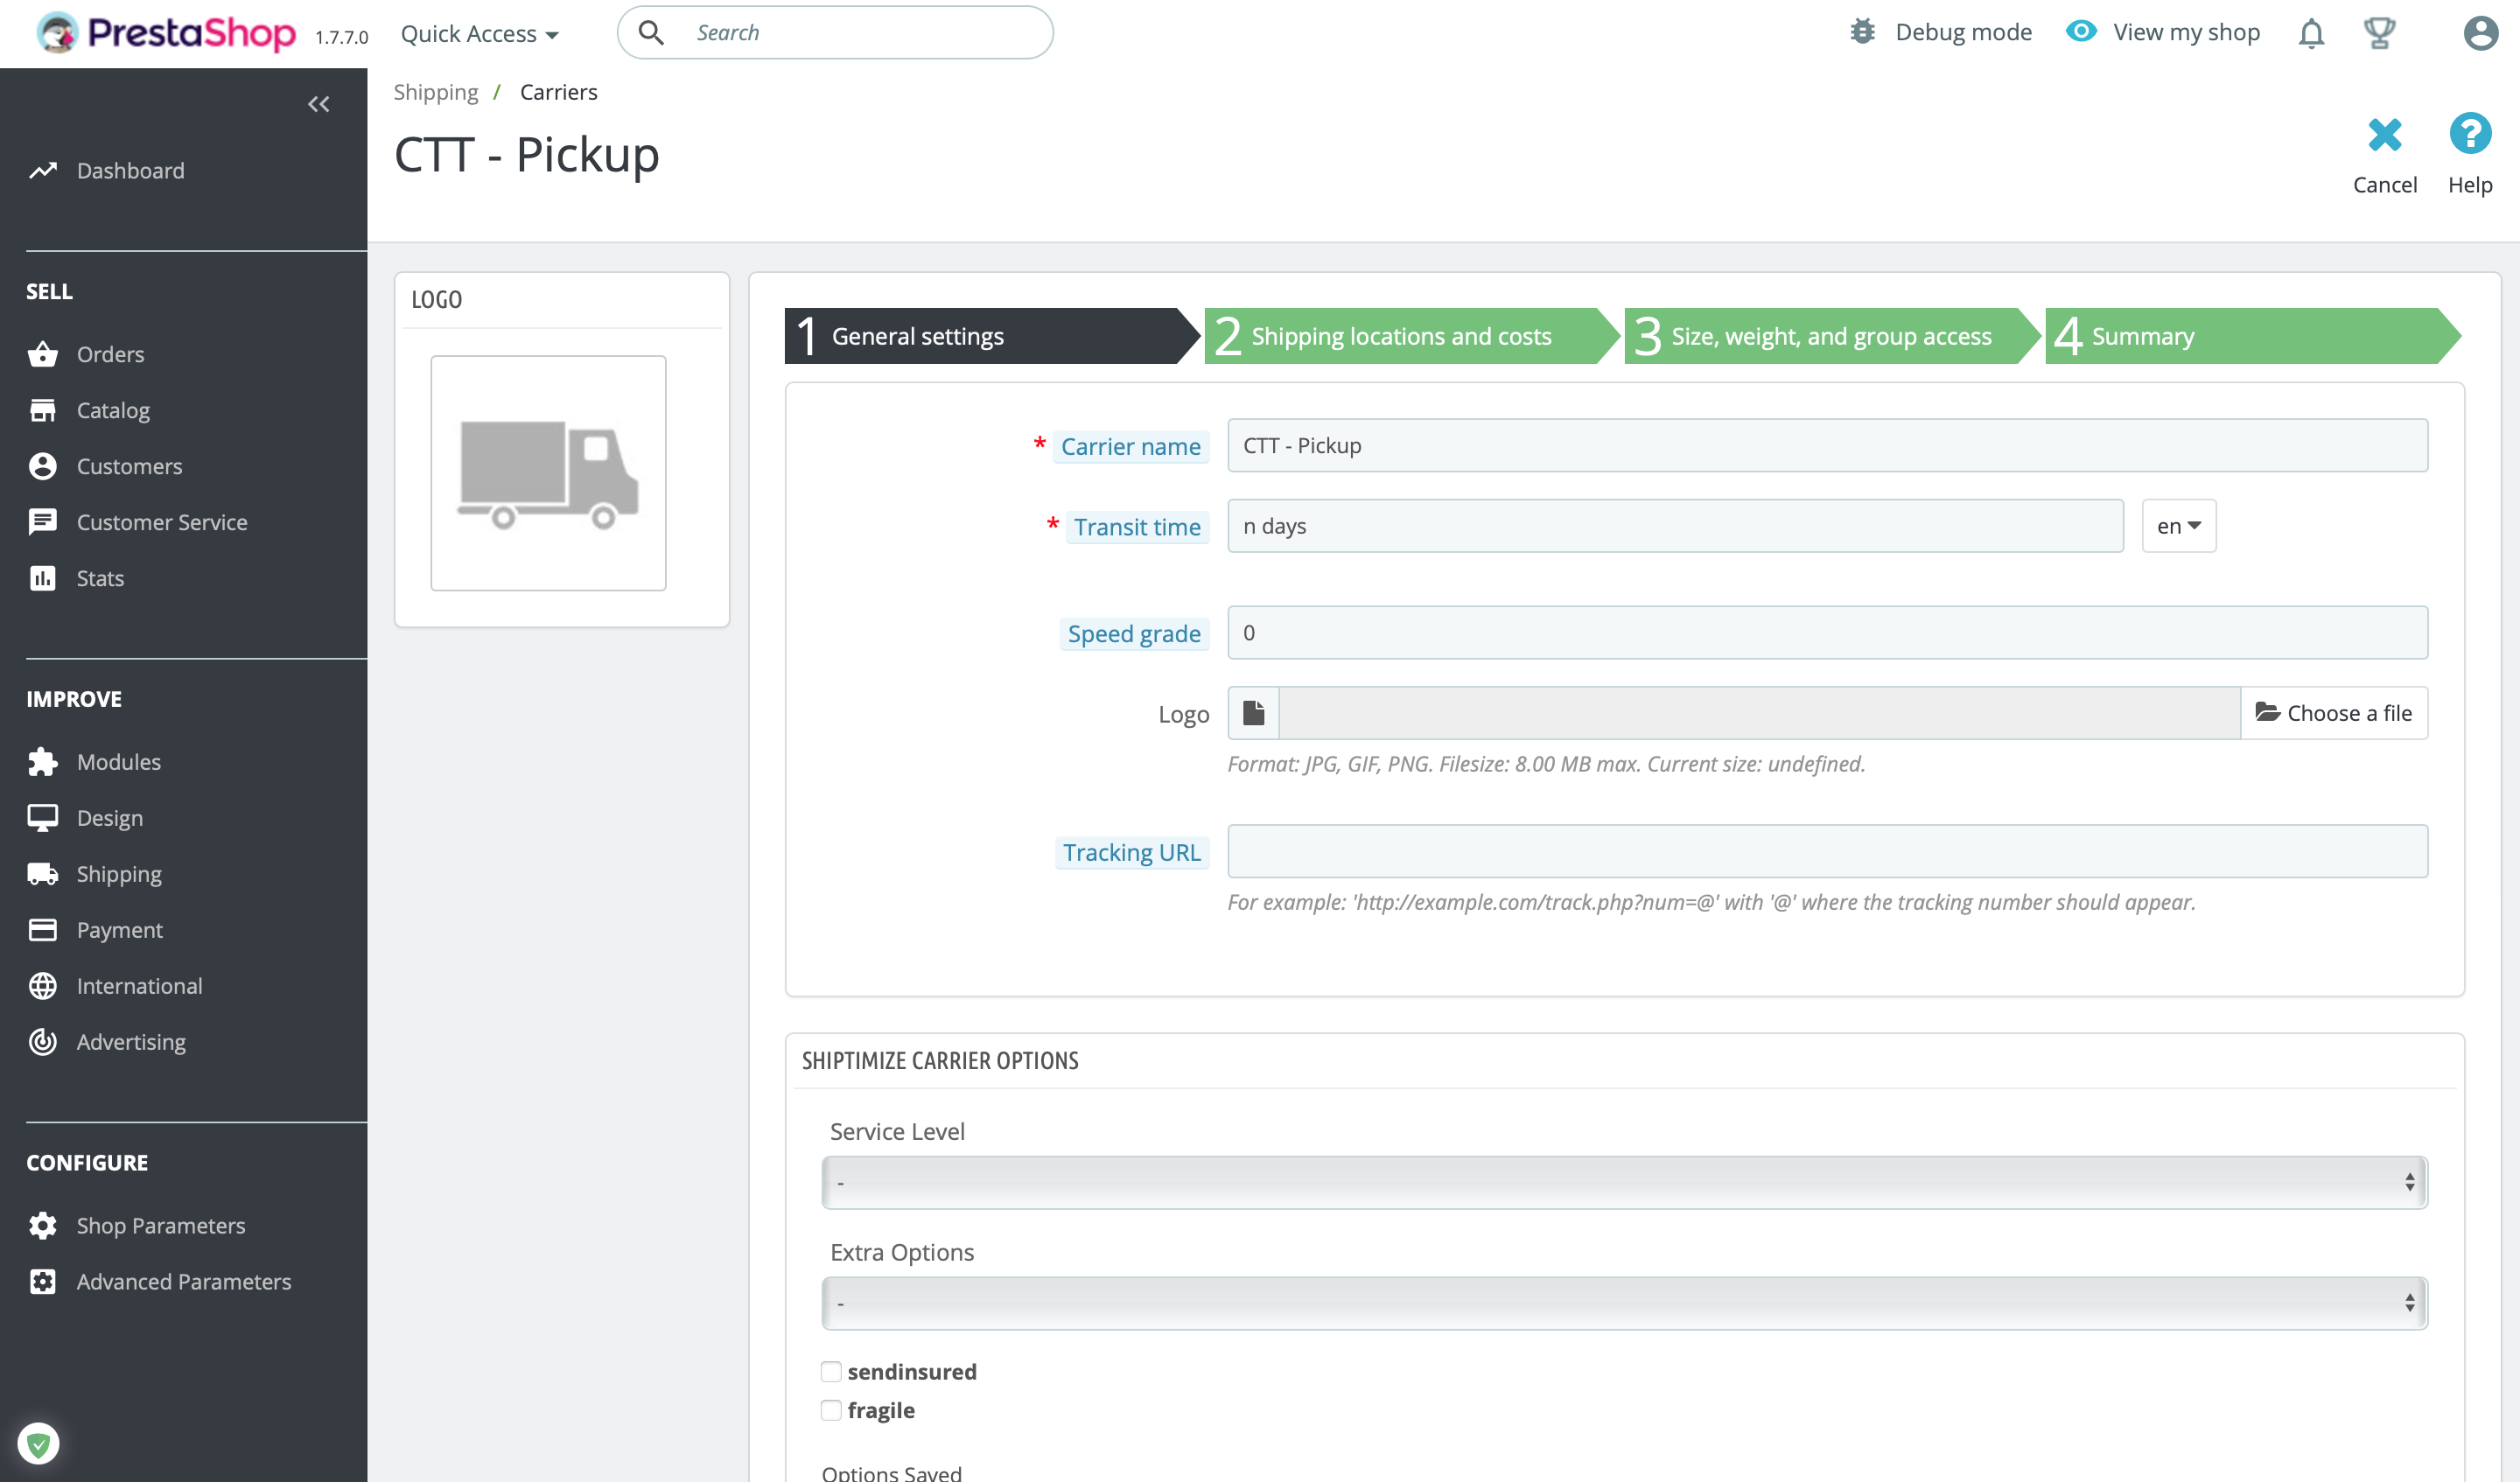
Carrier Configuration
Go to “Shipping ” > “Carriers” to activate and configure the carriers you wish to make available in your shop. Click on “Edit” to change the settings.
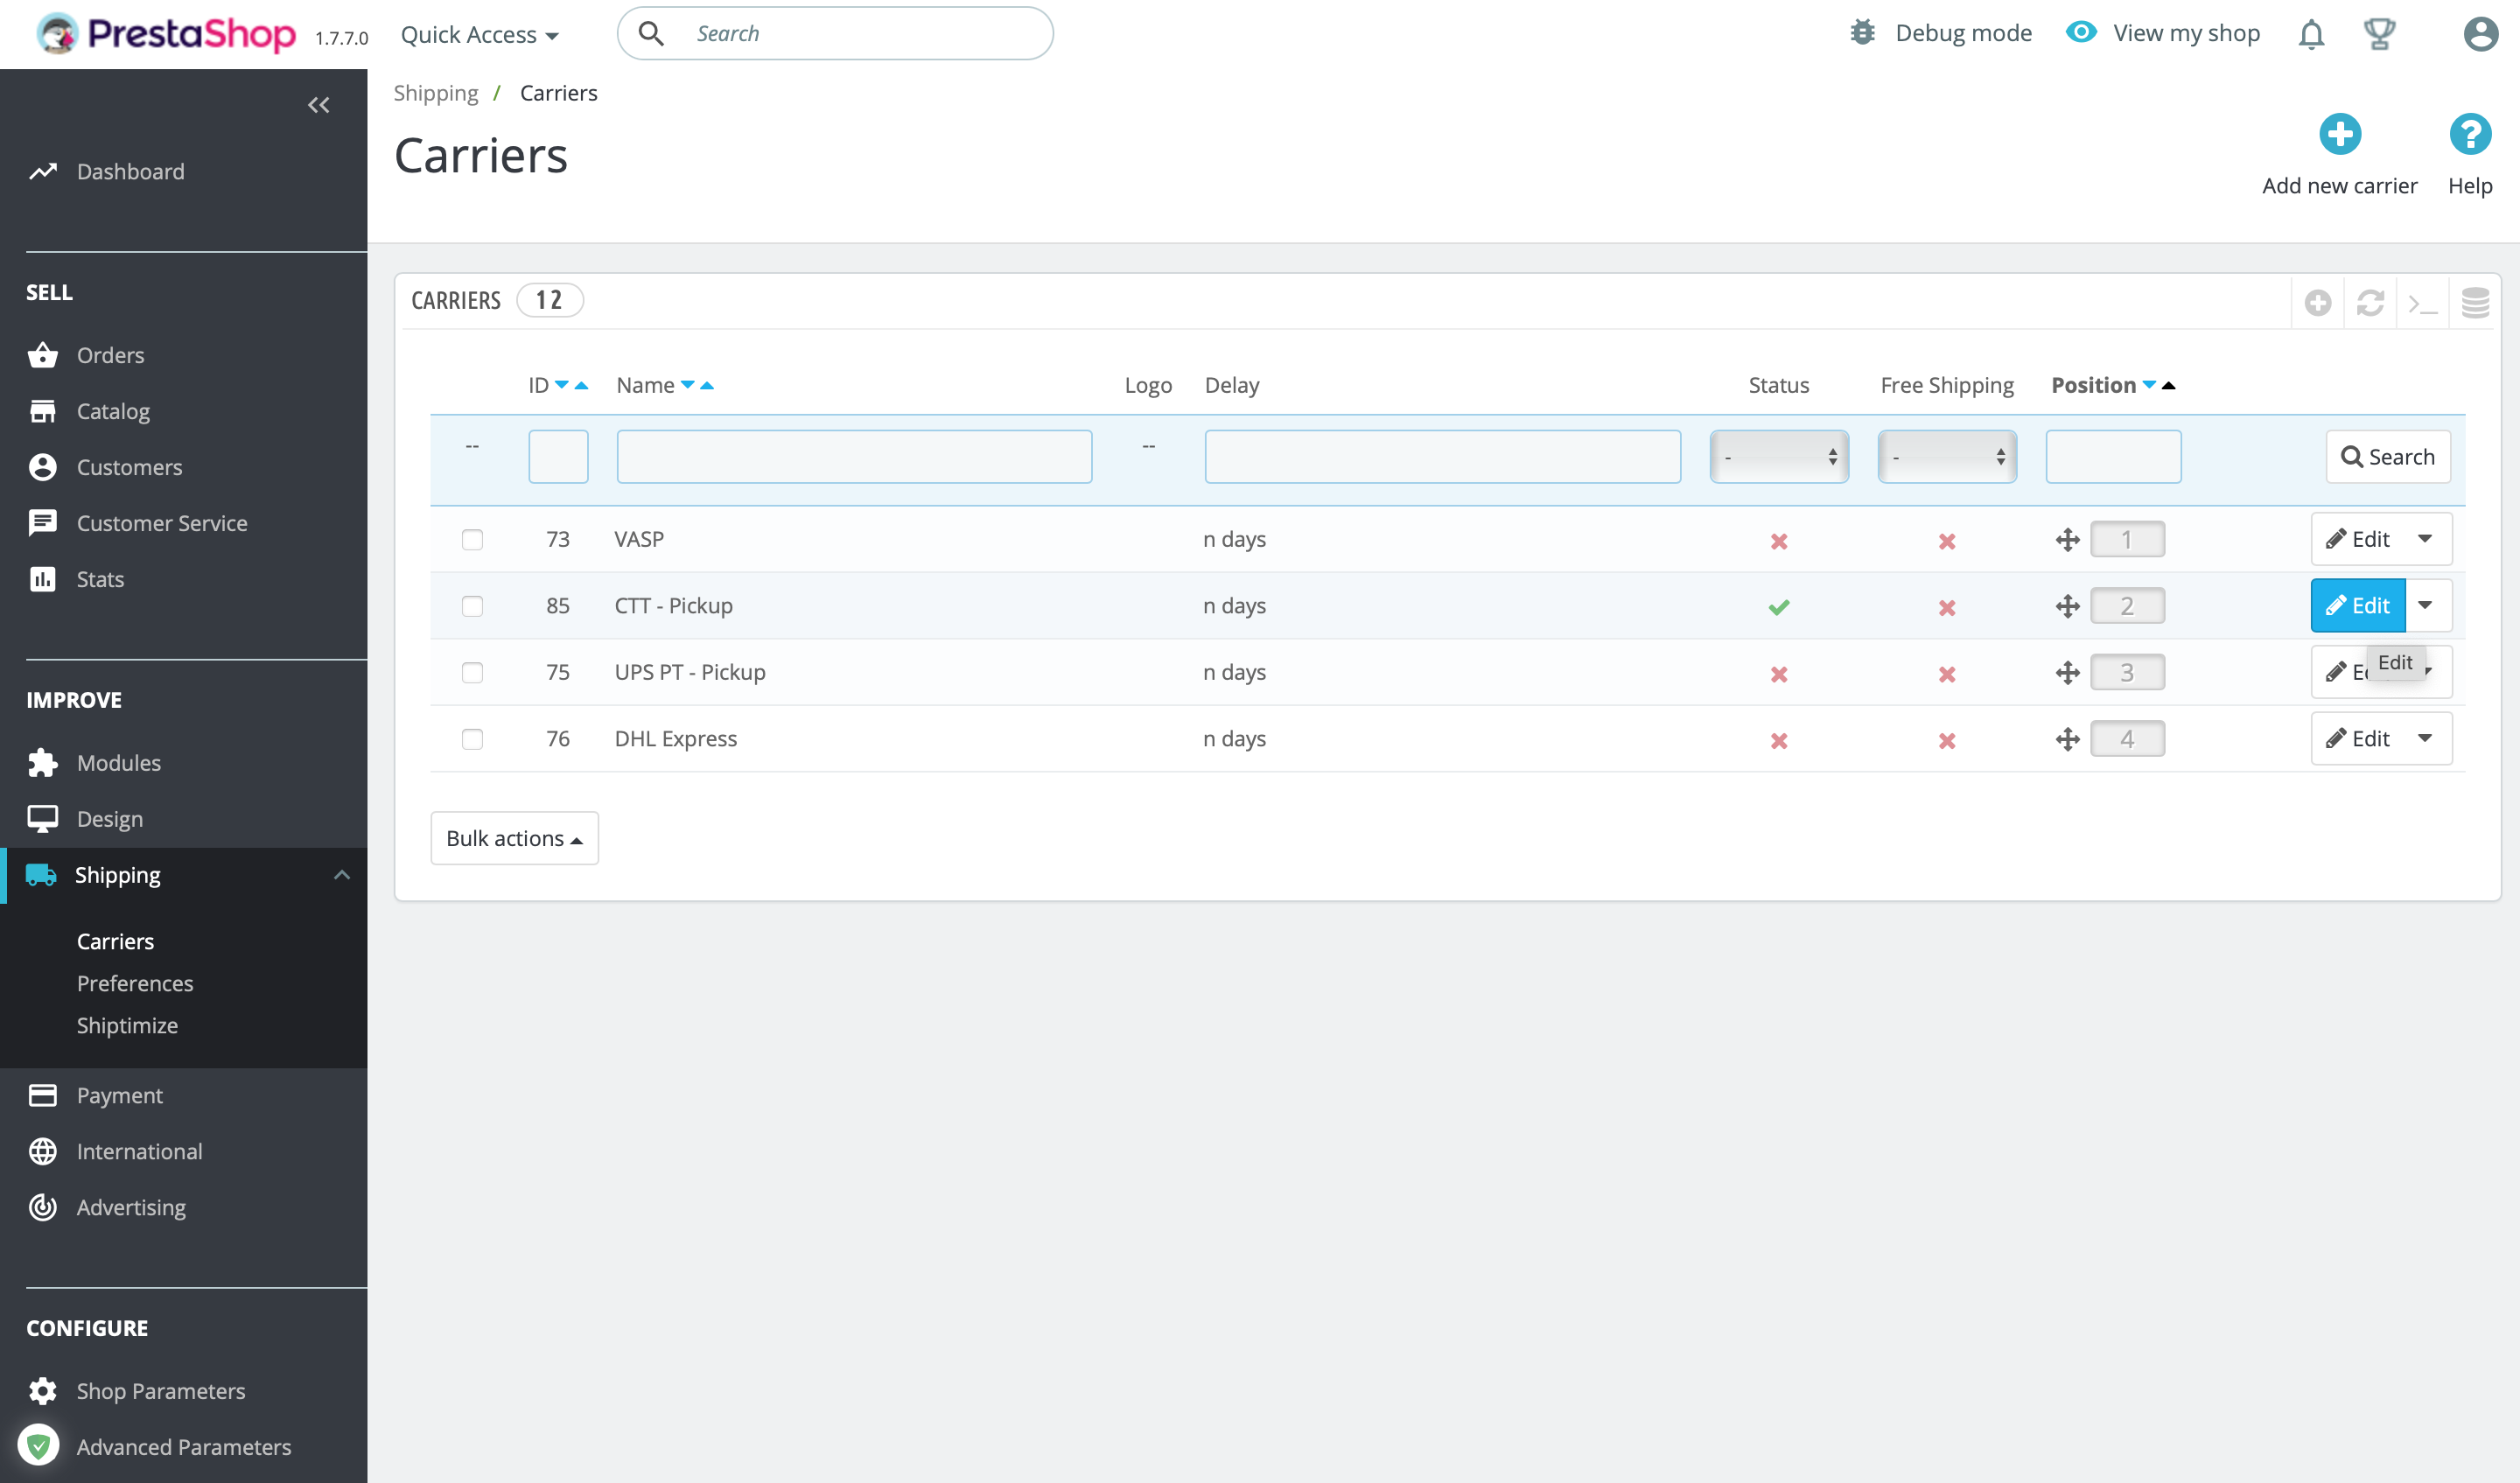
Editing Carriers
Carrier name: The name that will be shown to your customer
Transit Time: A textual description of how long, on average, it takes for a delivery to arrive at its destination. E.g. 3 working days
Speed Grade: Optional – Choose a number from 0-9 where 0 is the slowest and 9 is the fastest to indicate how quickly each carrier makes an average delivery.
Logo: Optional – If there is a logo, it will be displayed to the customer.
Tracking URL: Optional – A prefix for tracking. If set, it will be included in the tracking information of the order. Be sure to include an “@” where the trackingID should be included. Example: http://{carrierurl}/?&{shipment_id}=@
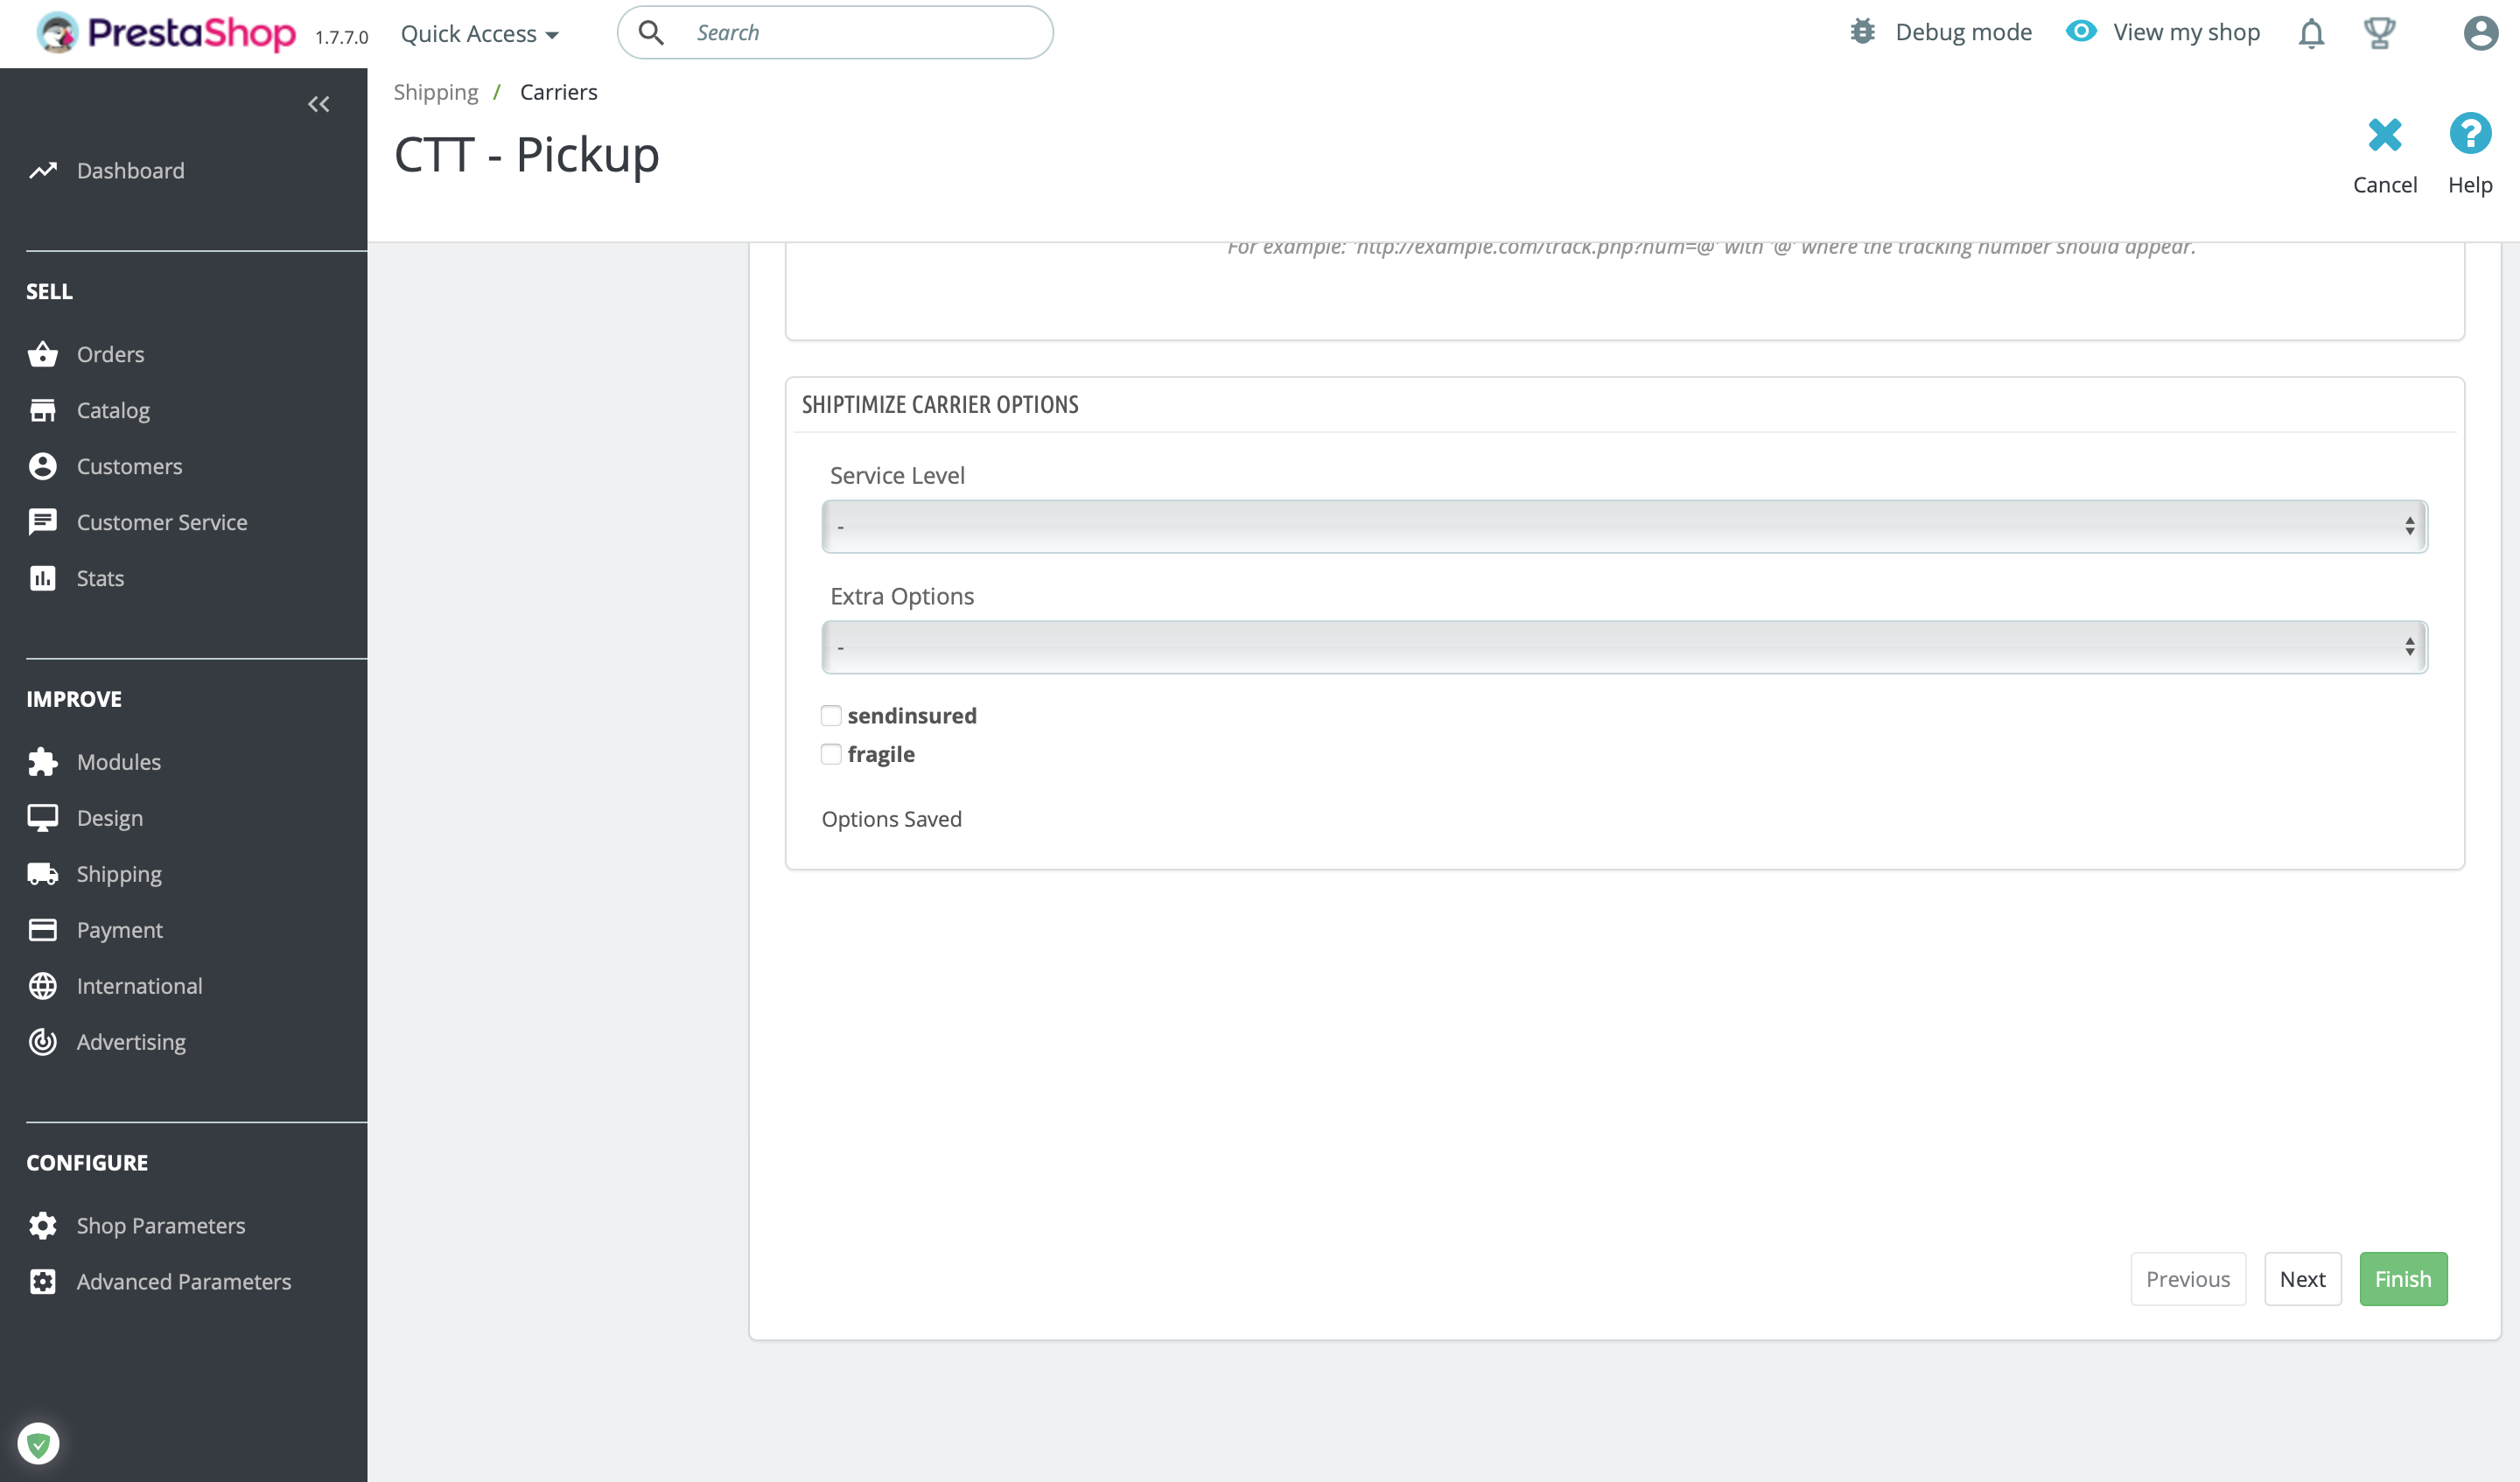
Carrier Options
The shipping options are available when editing a carrier in the “Shiptimize Carrier options” tab. All orders shipped with this carrier will have the options assigned to it here.
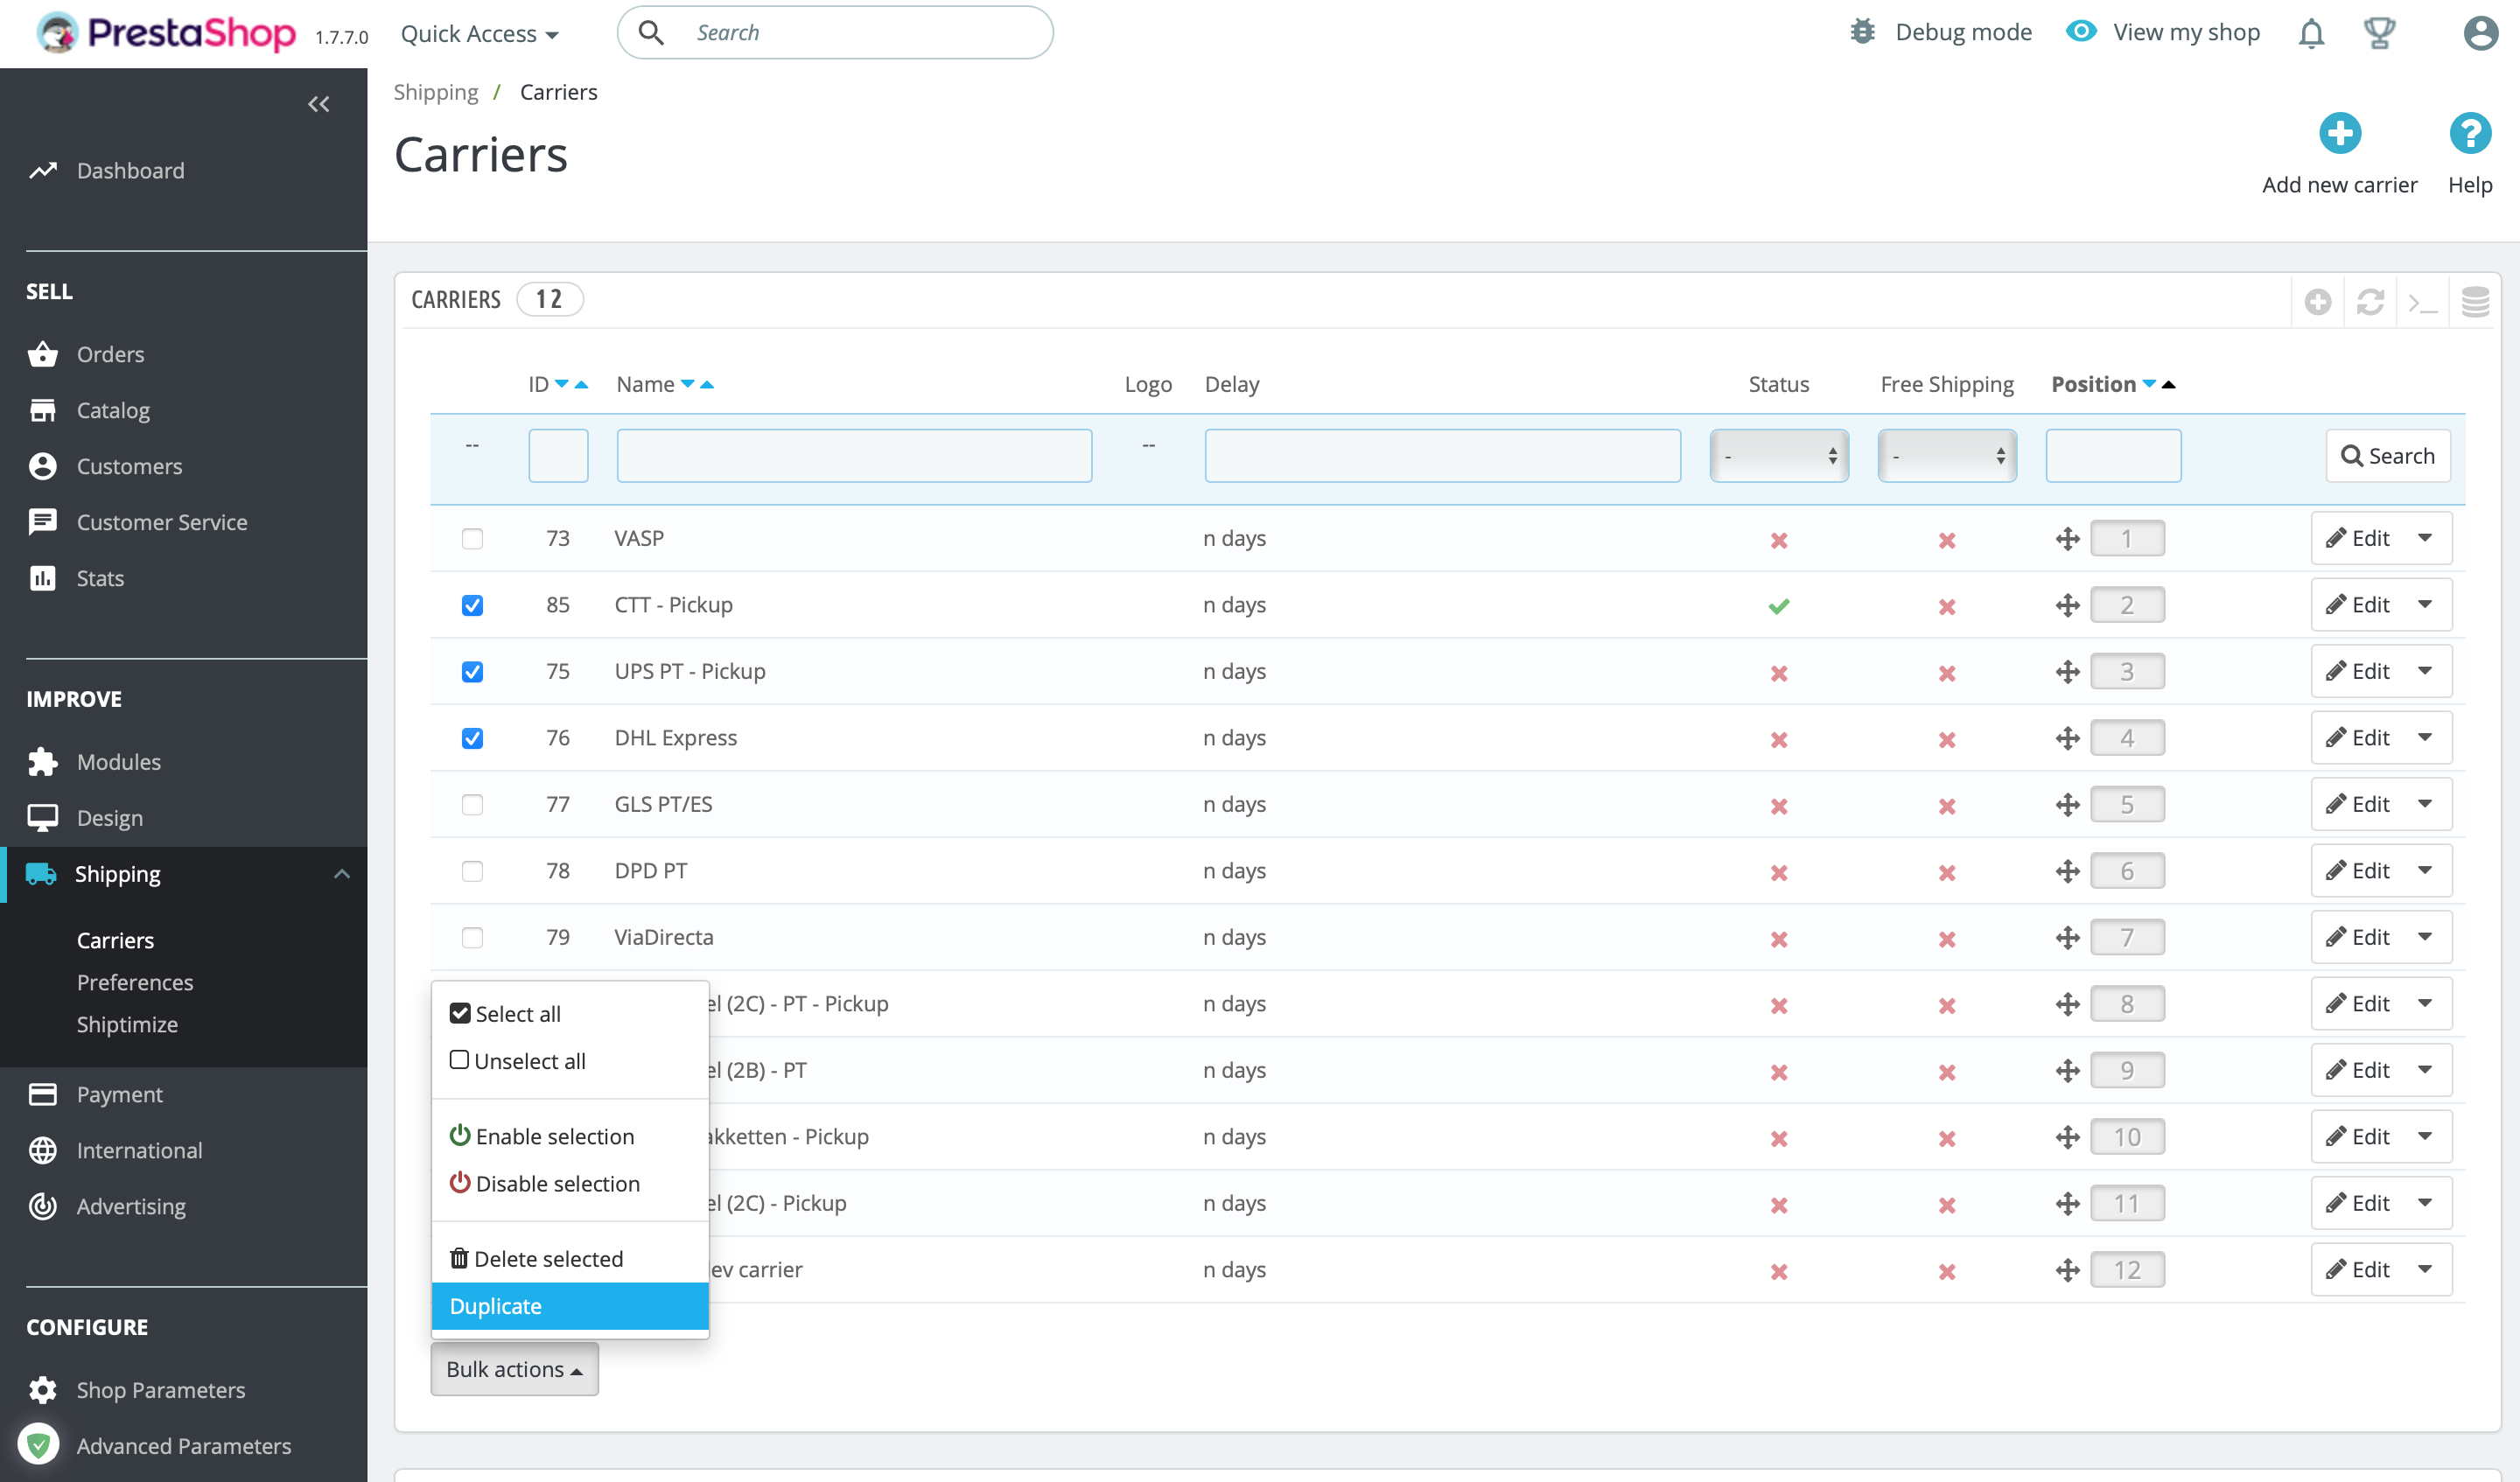
If you want to offer different combinations of options, in the list of carriers (Shipping > Carriers) select the carrier, then choose: “Bulk Actions” > “Duplicate”. Edit the new carrier and set a new combination of options.
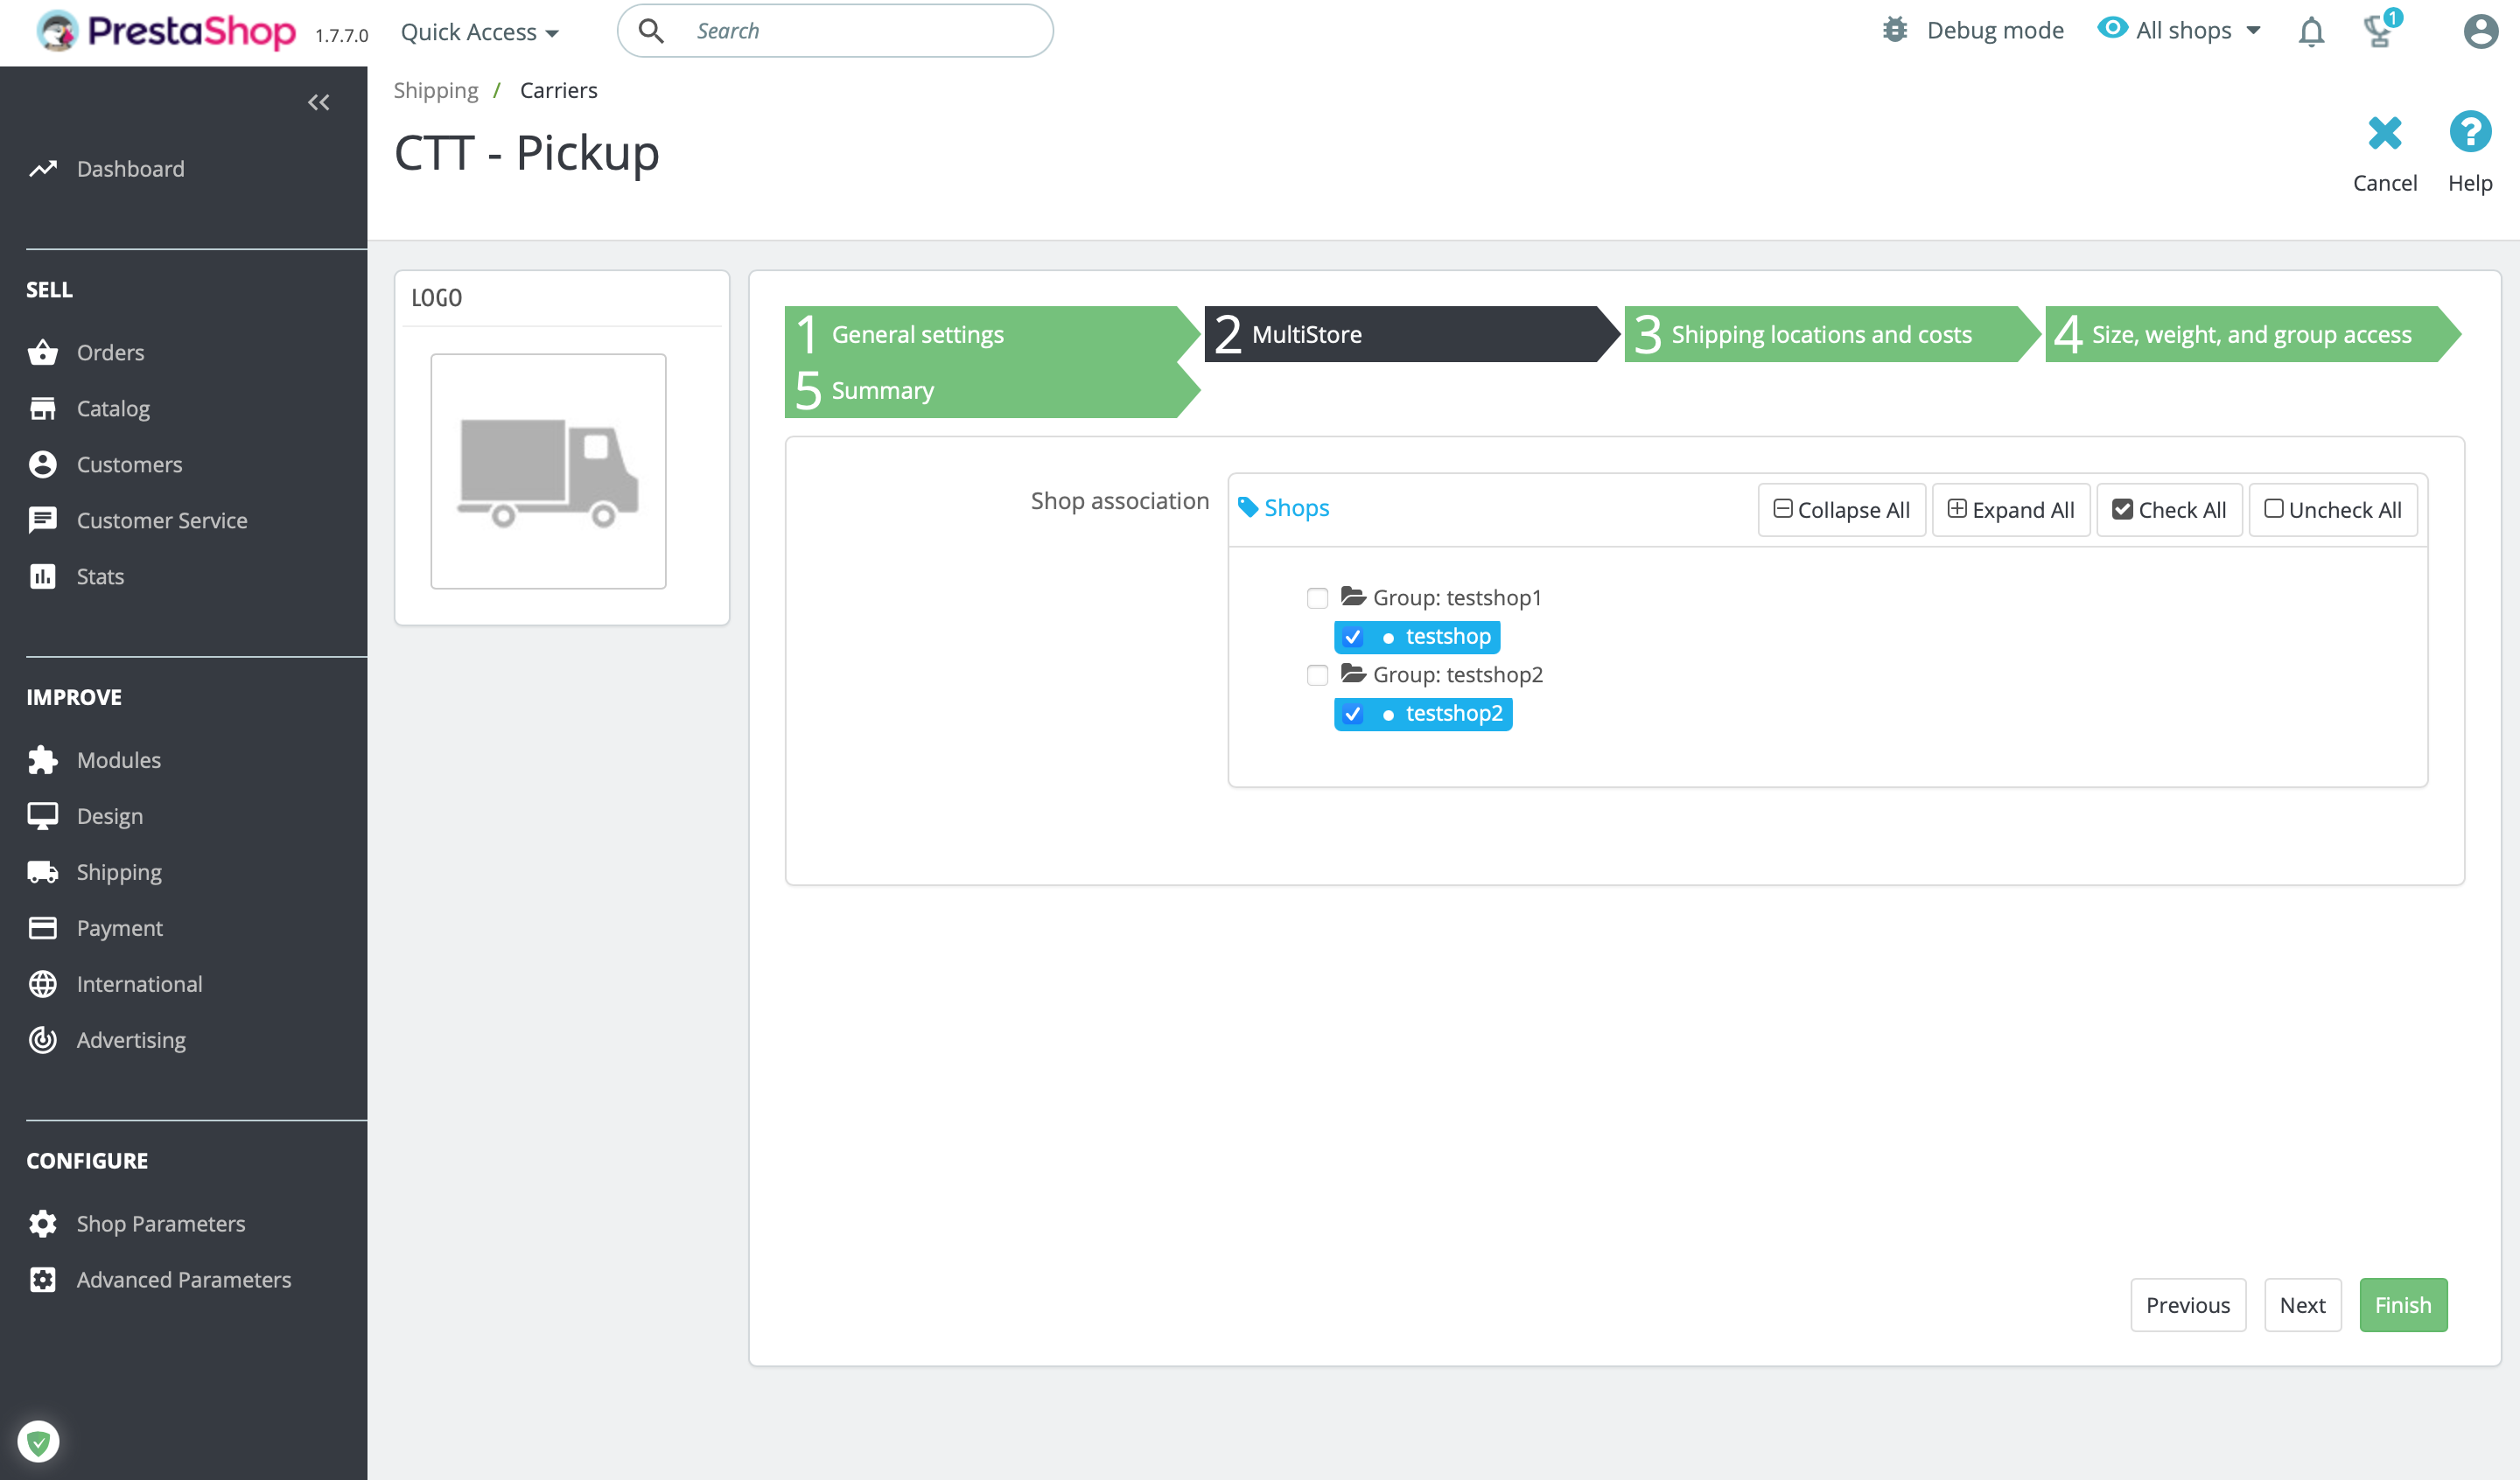
Multiple shops
In case you have a multi-store configuration, step 2 in this configuration shows “MultiStore” where you can define in which shops this carrier should be made available.
Shipping locations and costs
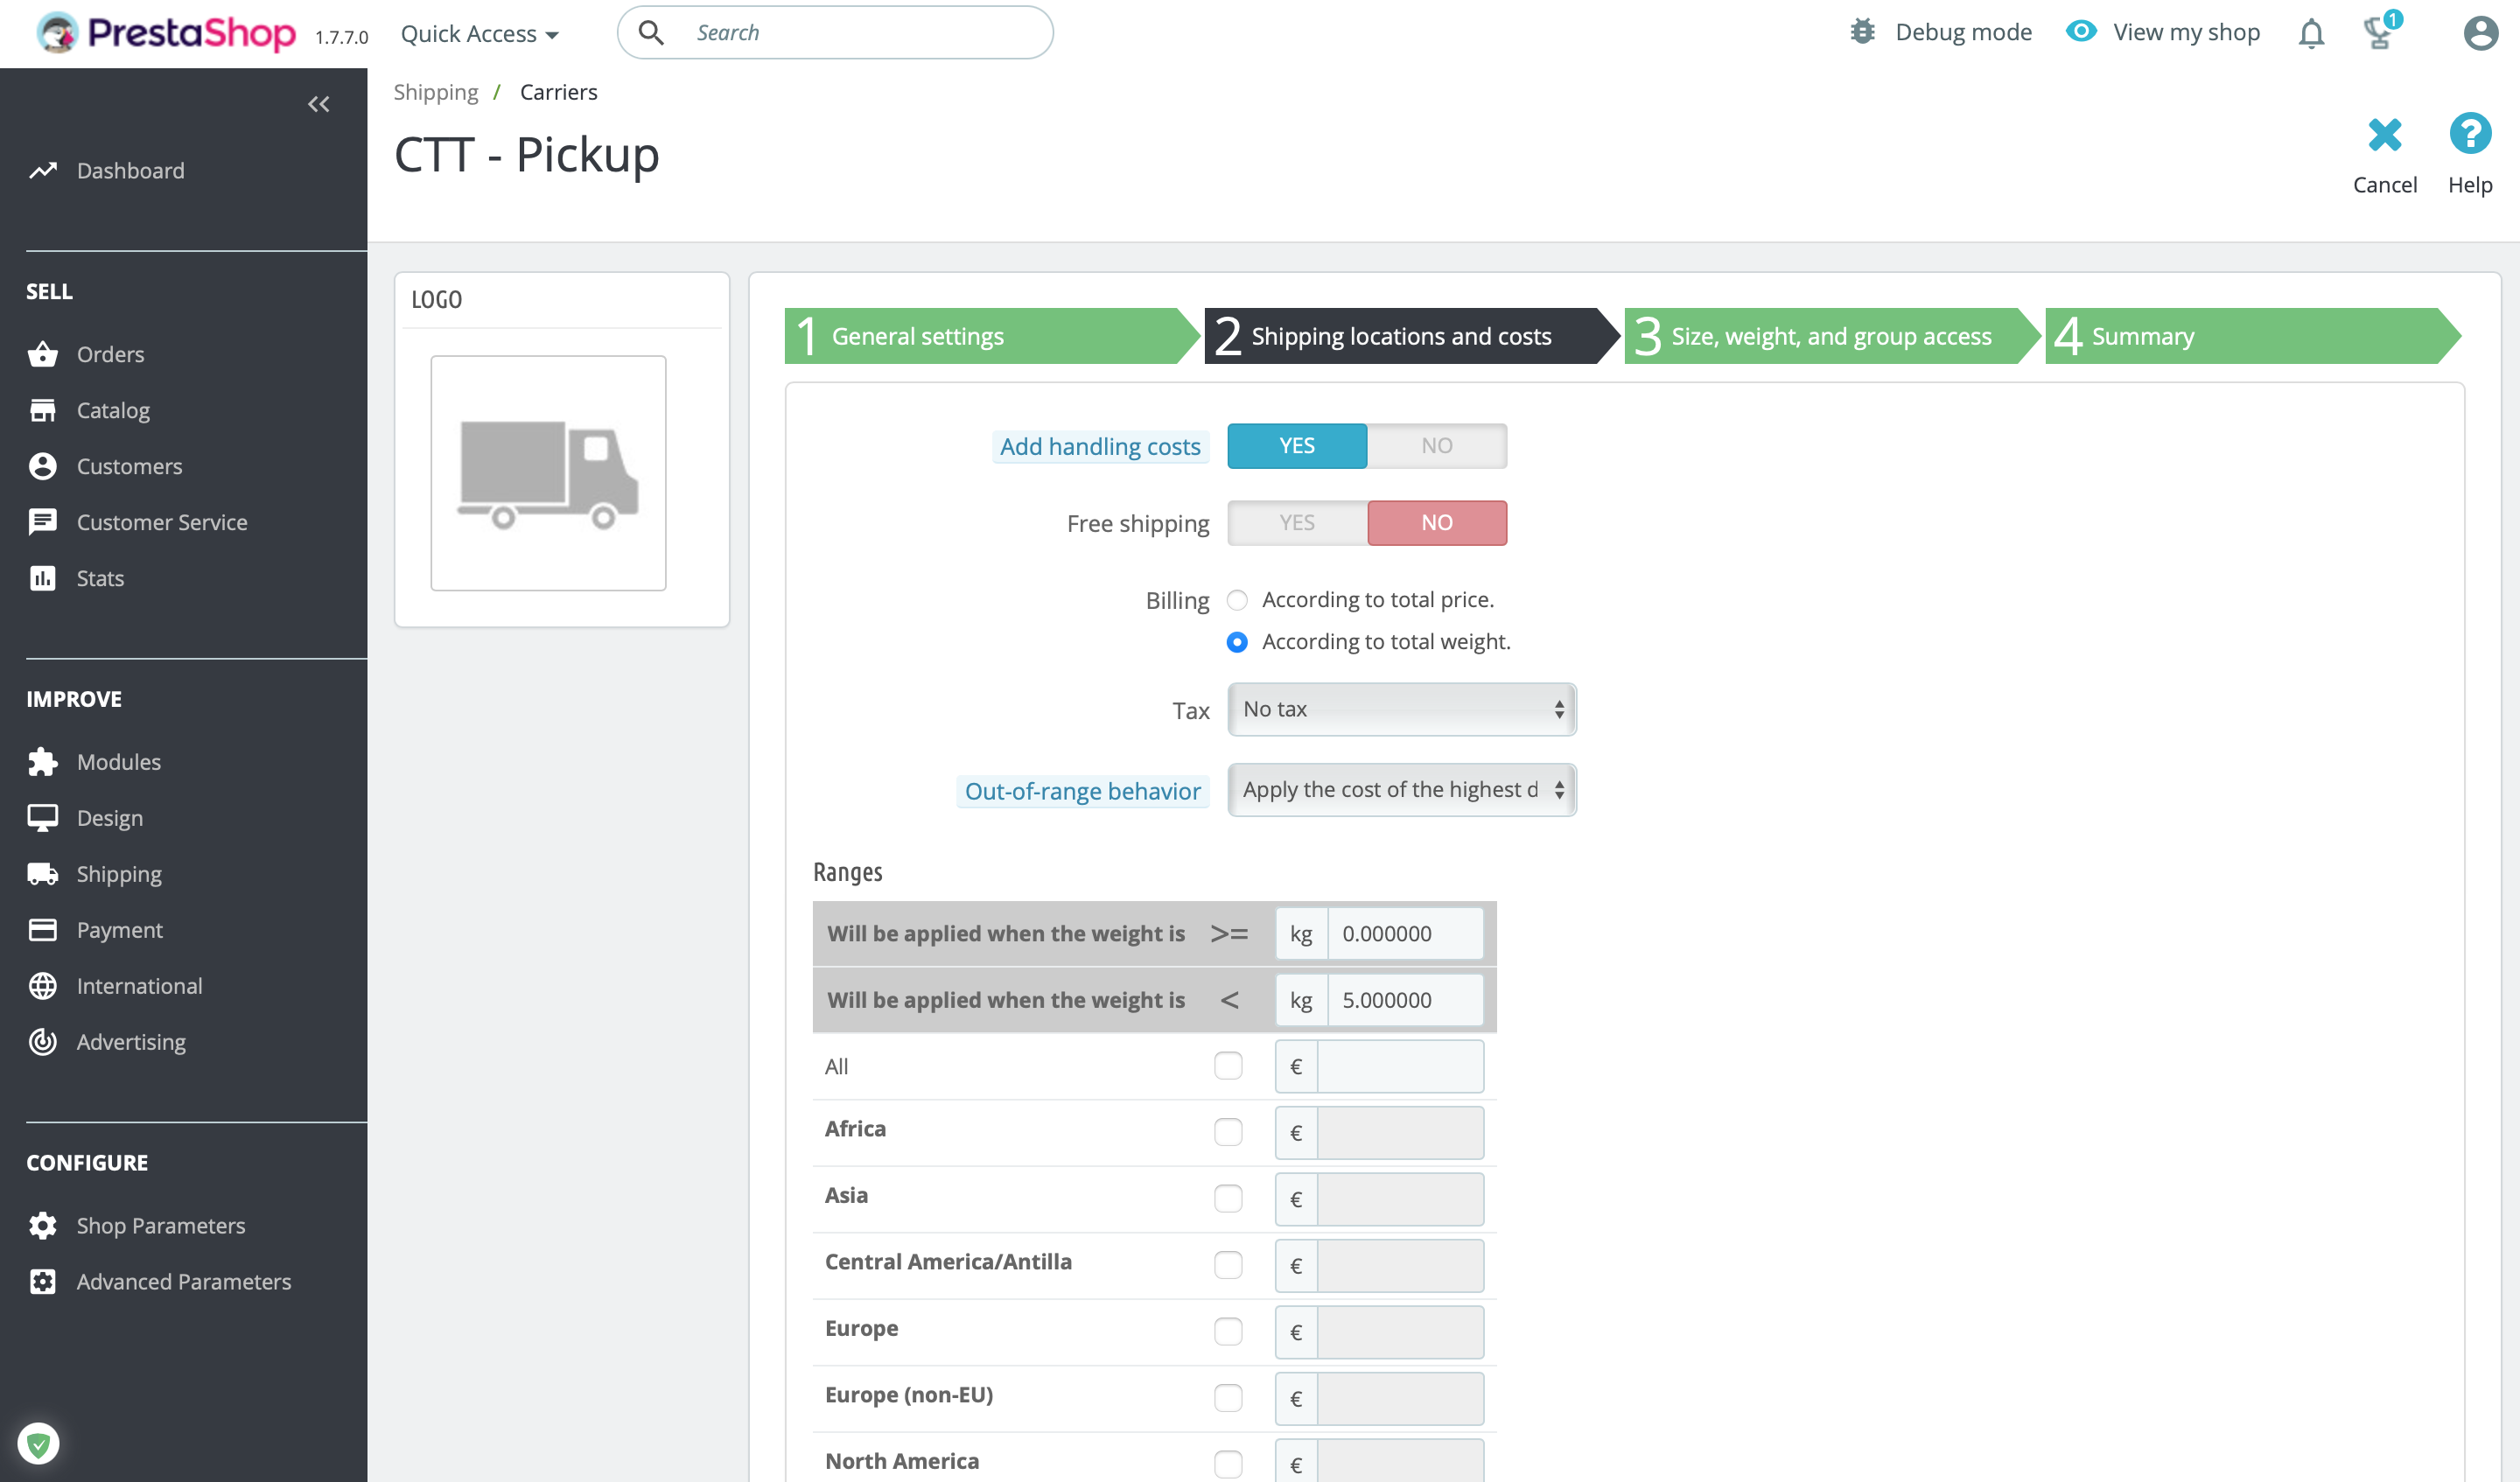
Add Handling costs: If the answer is yes, then the handling costs will be added to the base cost. You can set how much to charge under “Shipping” > “Preferences” > “Handling”.
Free Shipping: If active, then this method is free of charge
Billing: Choose if you want to set rules by weight or price
Tax: The tax to apply to the base cost.
Ranges: This is where you define a price for each zone and range. If you want to activate a zone, you must tick the box next to it.
Size, weight and group access
Fill in the fields for dimensions and weight and define which groups you would like to make this method available.

Summary
Confirm that all settings are correct. Then click “Finish” to activate the carrier.
Automatic updates between Shiptimize and Prestashop
As soon as a shipping label is created from your order menu, a tracking number is automatically generated. This tracking number is automatically updated in your PrestaShop shop and associated with the correct order.
Additionally, from your Shiptimize account under Settings > Integrations > Integration Details you can define at what point(s) the order statuses in your PrestaShop backend should be updated.
You can select the update when:
- An order is imported;
- A shipping label is printed;
- The shipment has been delivered;
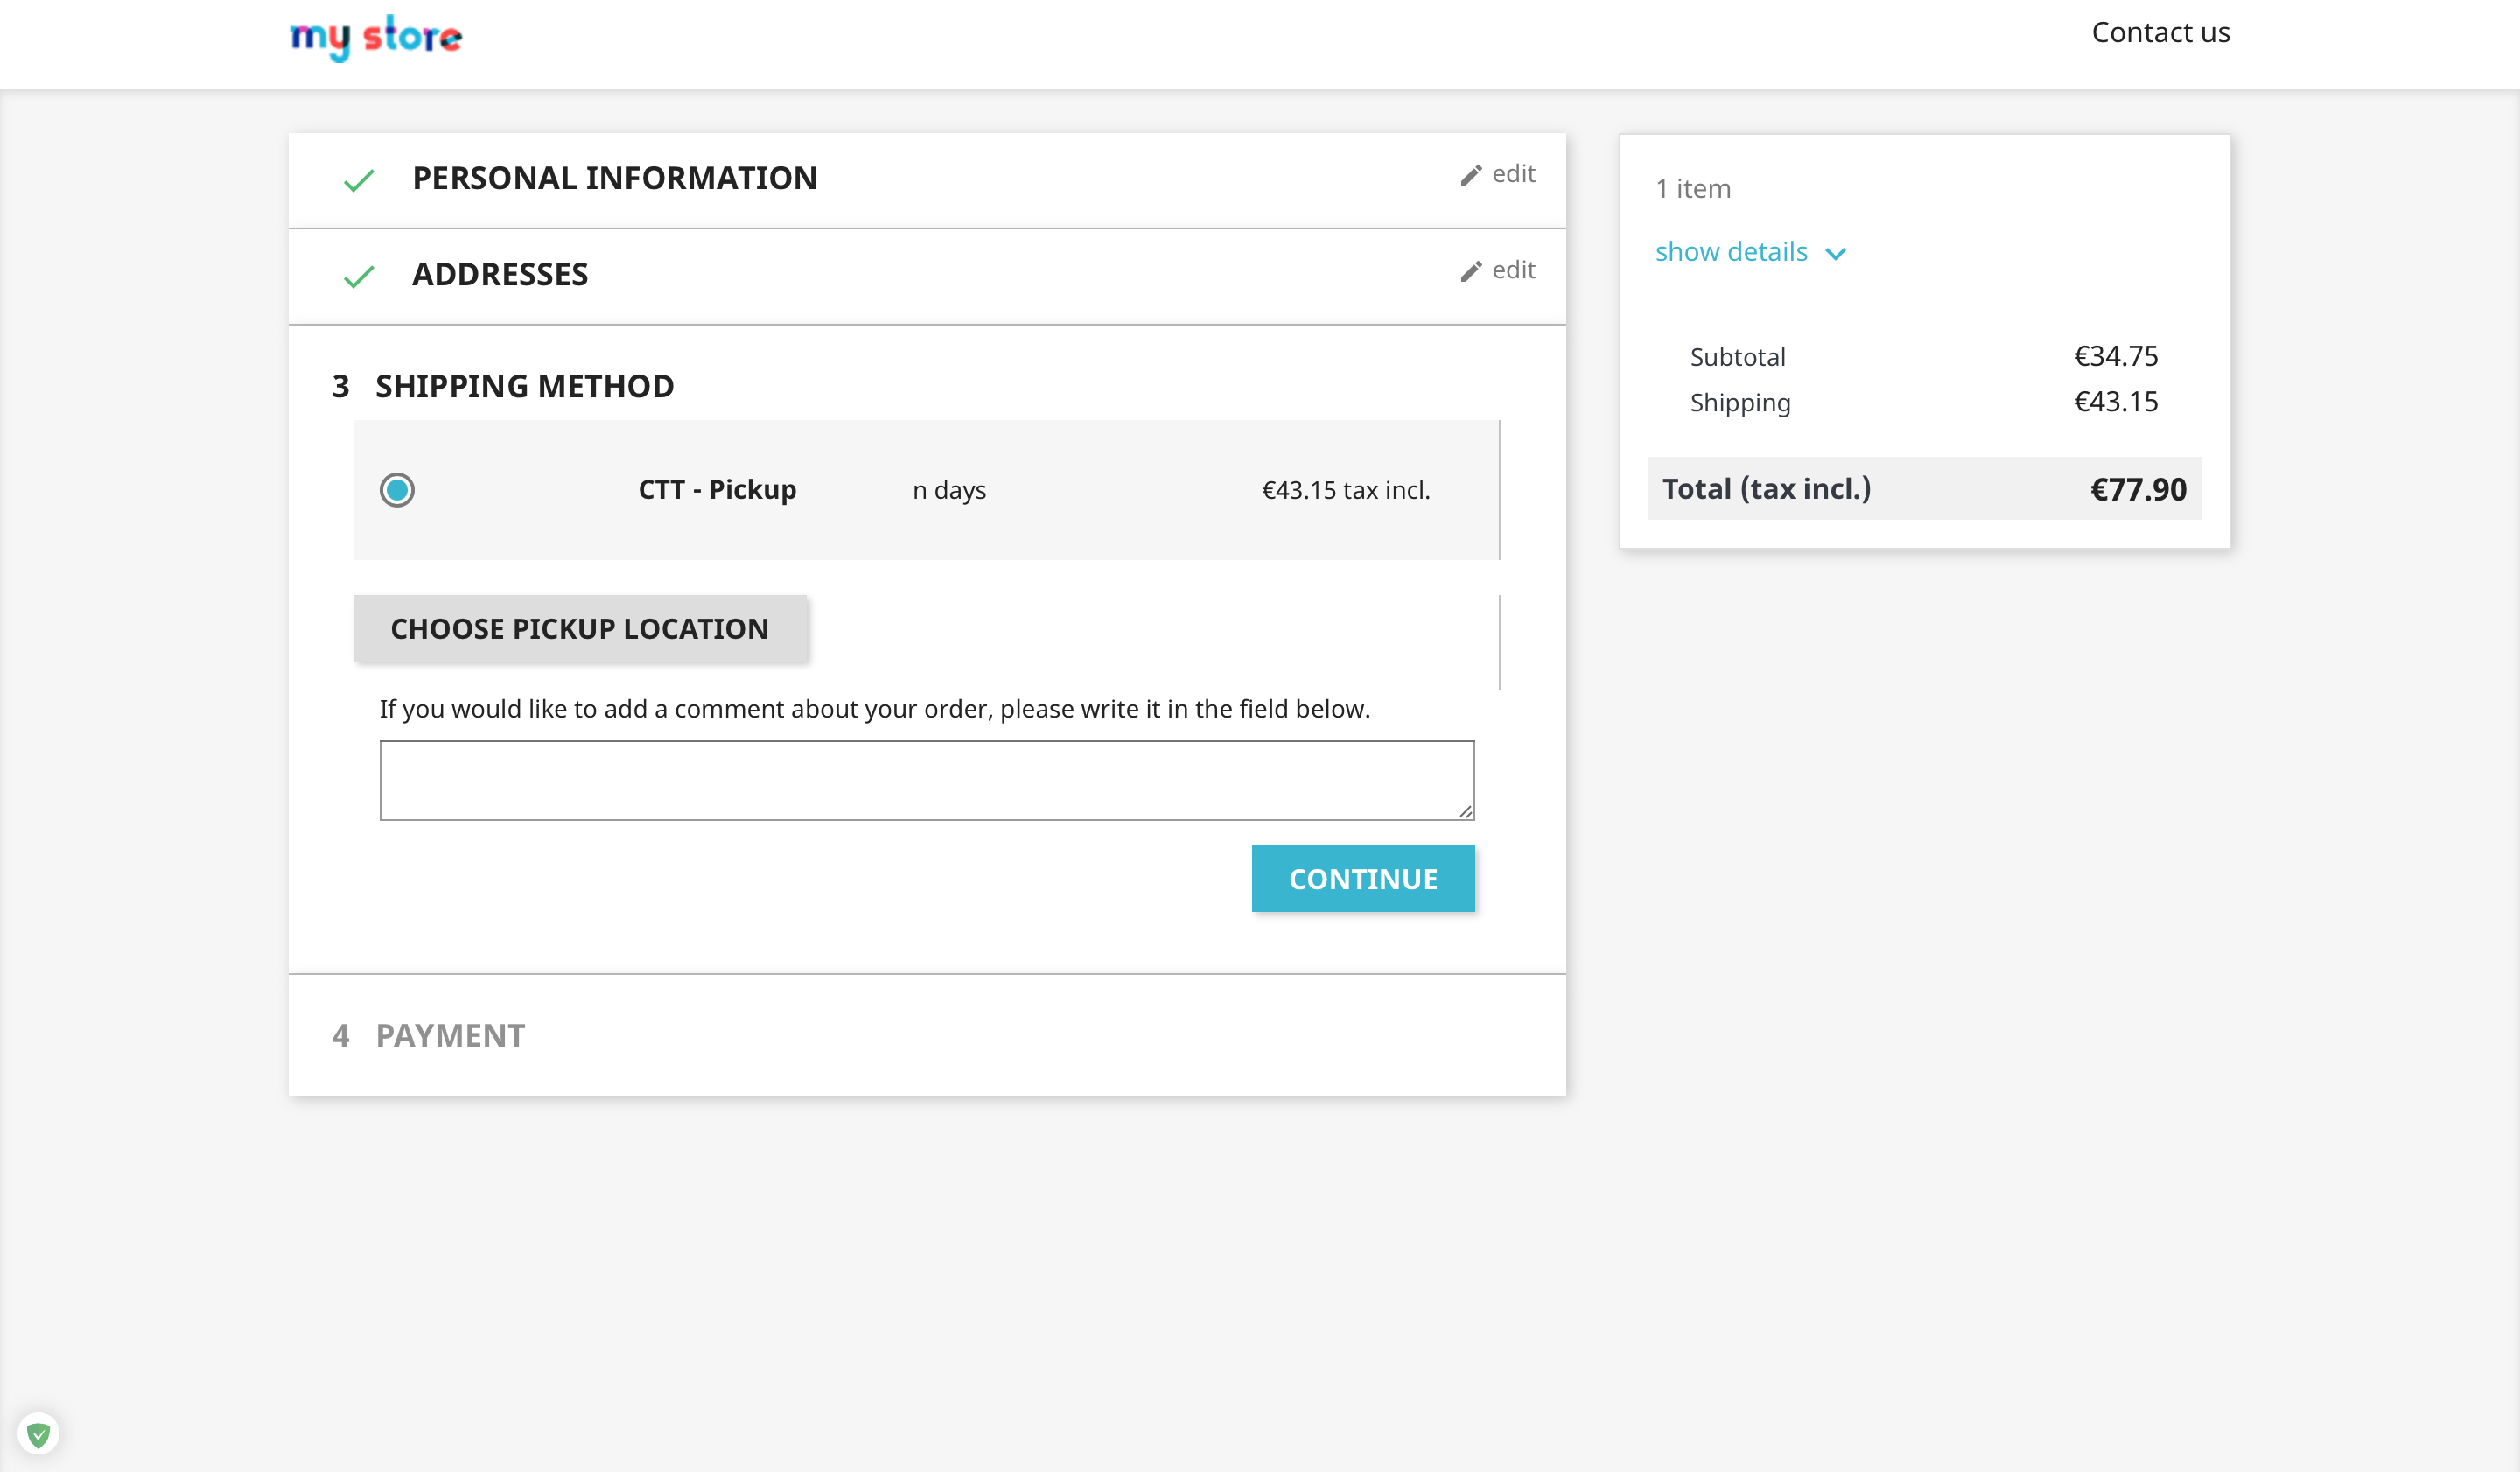
Customer checkout including pick-up points
After installation and configuration according to the steps provided above, all enabled carriers are offered as shipping options to your customer at checkout.
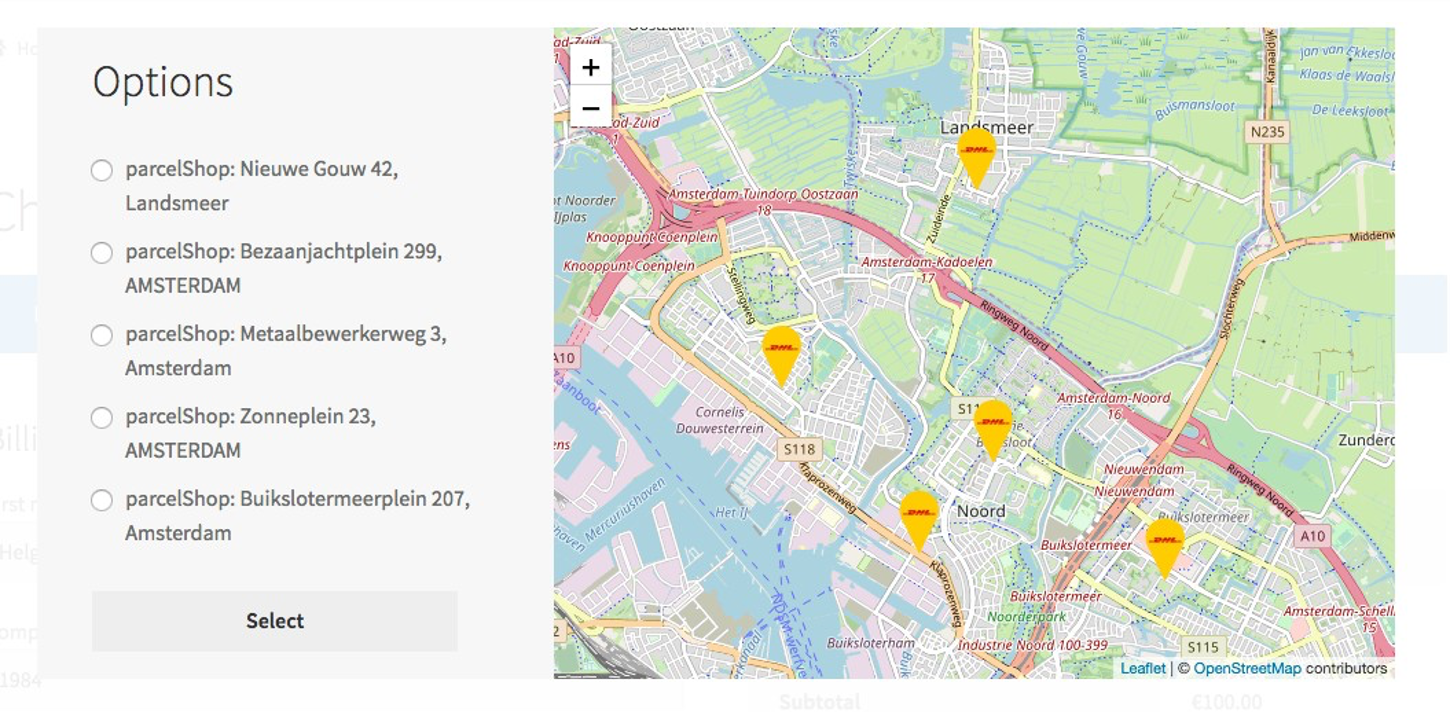
If a carrier provides delivery service to a pickup point, a button will be added, allowing the user to select their preferred location.
Once your customer clicks on “Choose pickup location”, we will show a map (Google Maps in case you have entered a Google Maps key in the plugin configuration)
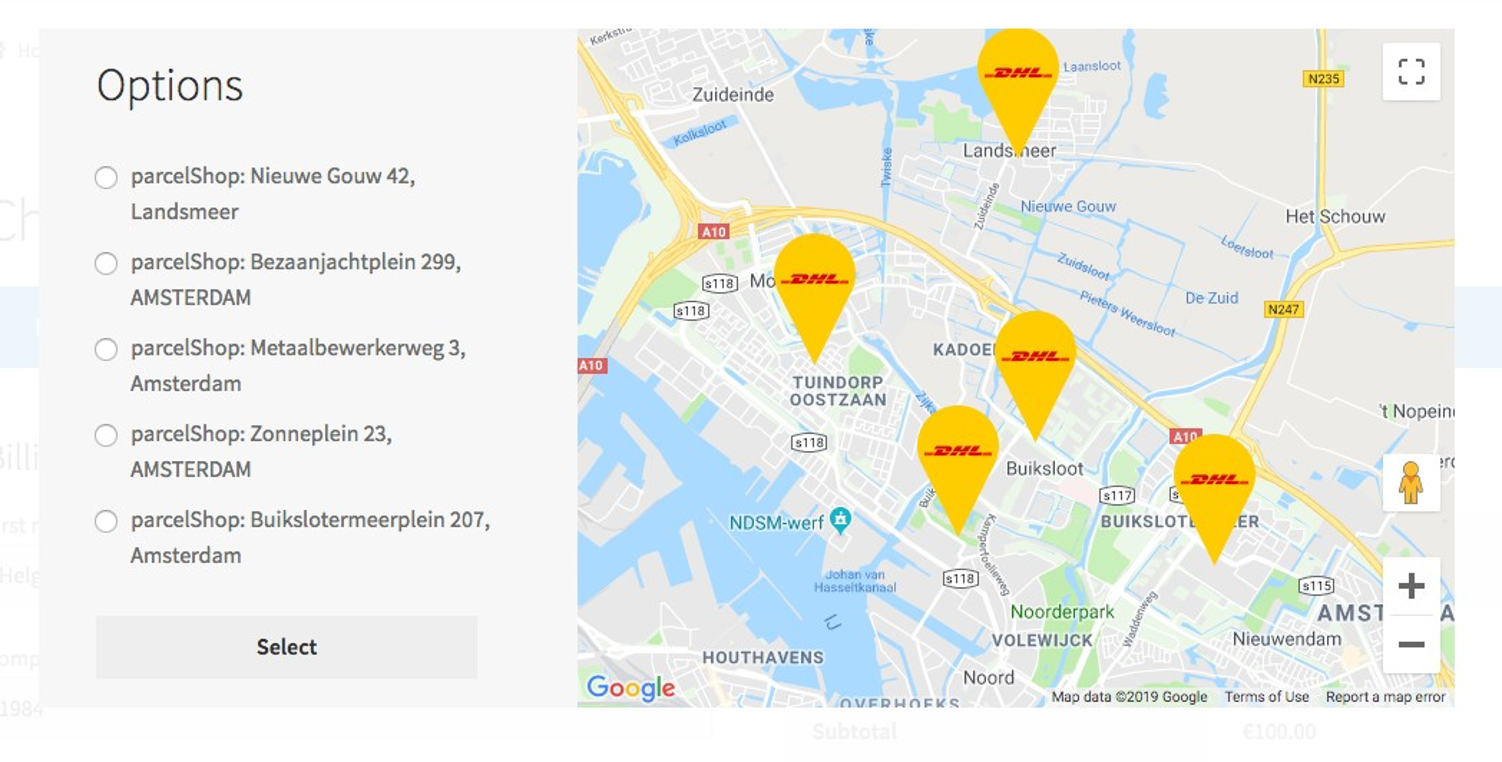
Otherwise, we will show an OpenStreetMap including the nearest survey locations.
Print Label – Various Options
With the Prestashop plugin it is possible to (automatically) export shipments to the Shiptimize platform. From within Shiptimize platform you can easily create your shipping labels.
Also, it is possible to generate shipping labels directly from within your Prestashop backoffice.
Order Exports
Besides the automatic export, there are two ways to manually export Prestashop orders to Shiptimize.
- Export Preset Orders: Export all orders that correspond to the preset statuses in the plugin configuration with one click.
- Export to Shiptimize: Export the selected orders regardless of order status.
Print from Prestashop Backoffice
If you don’t want to leave your Prestashop Backoffice to create your shipping labels you can do so directly from within the Backoffice. There are two options to do so which are 1) from the Order overview and 2) from the Order detail.
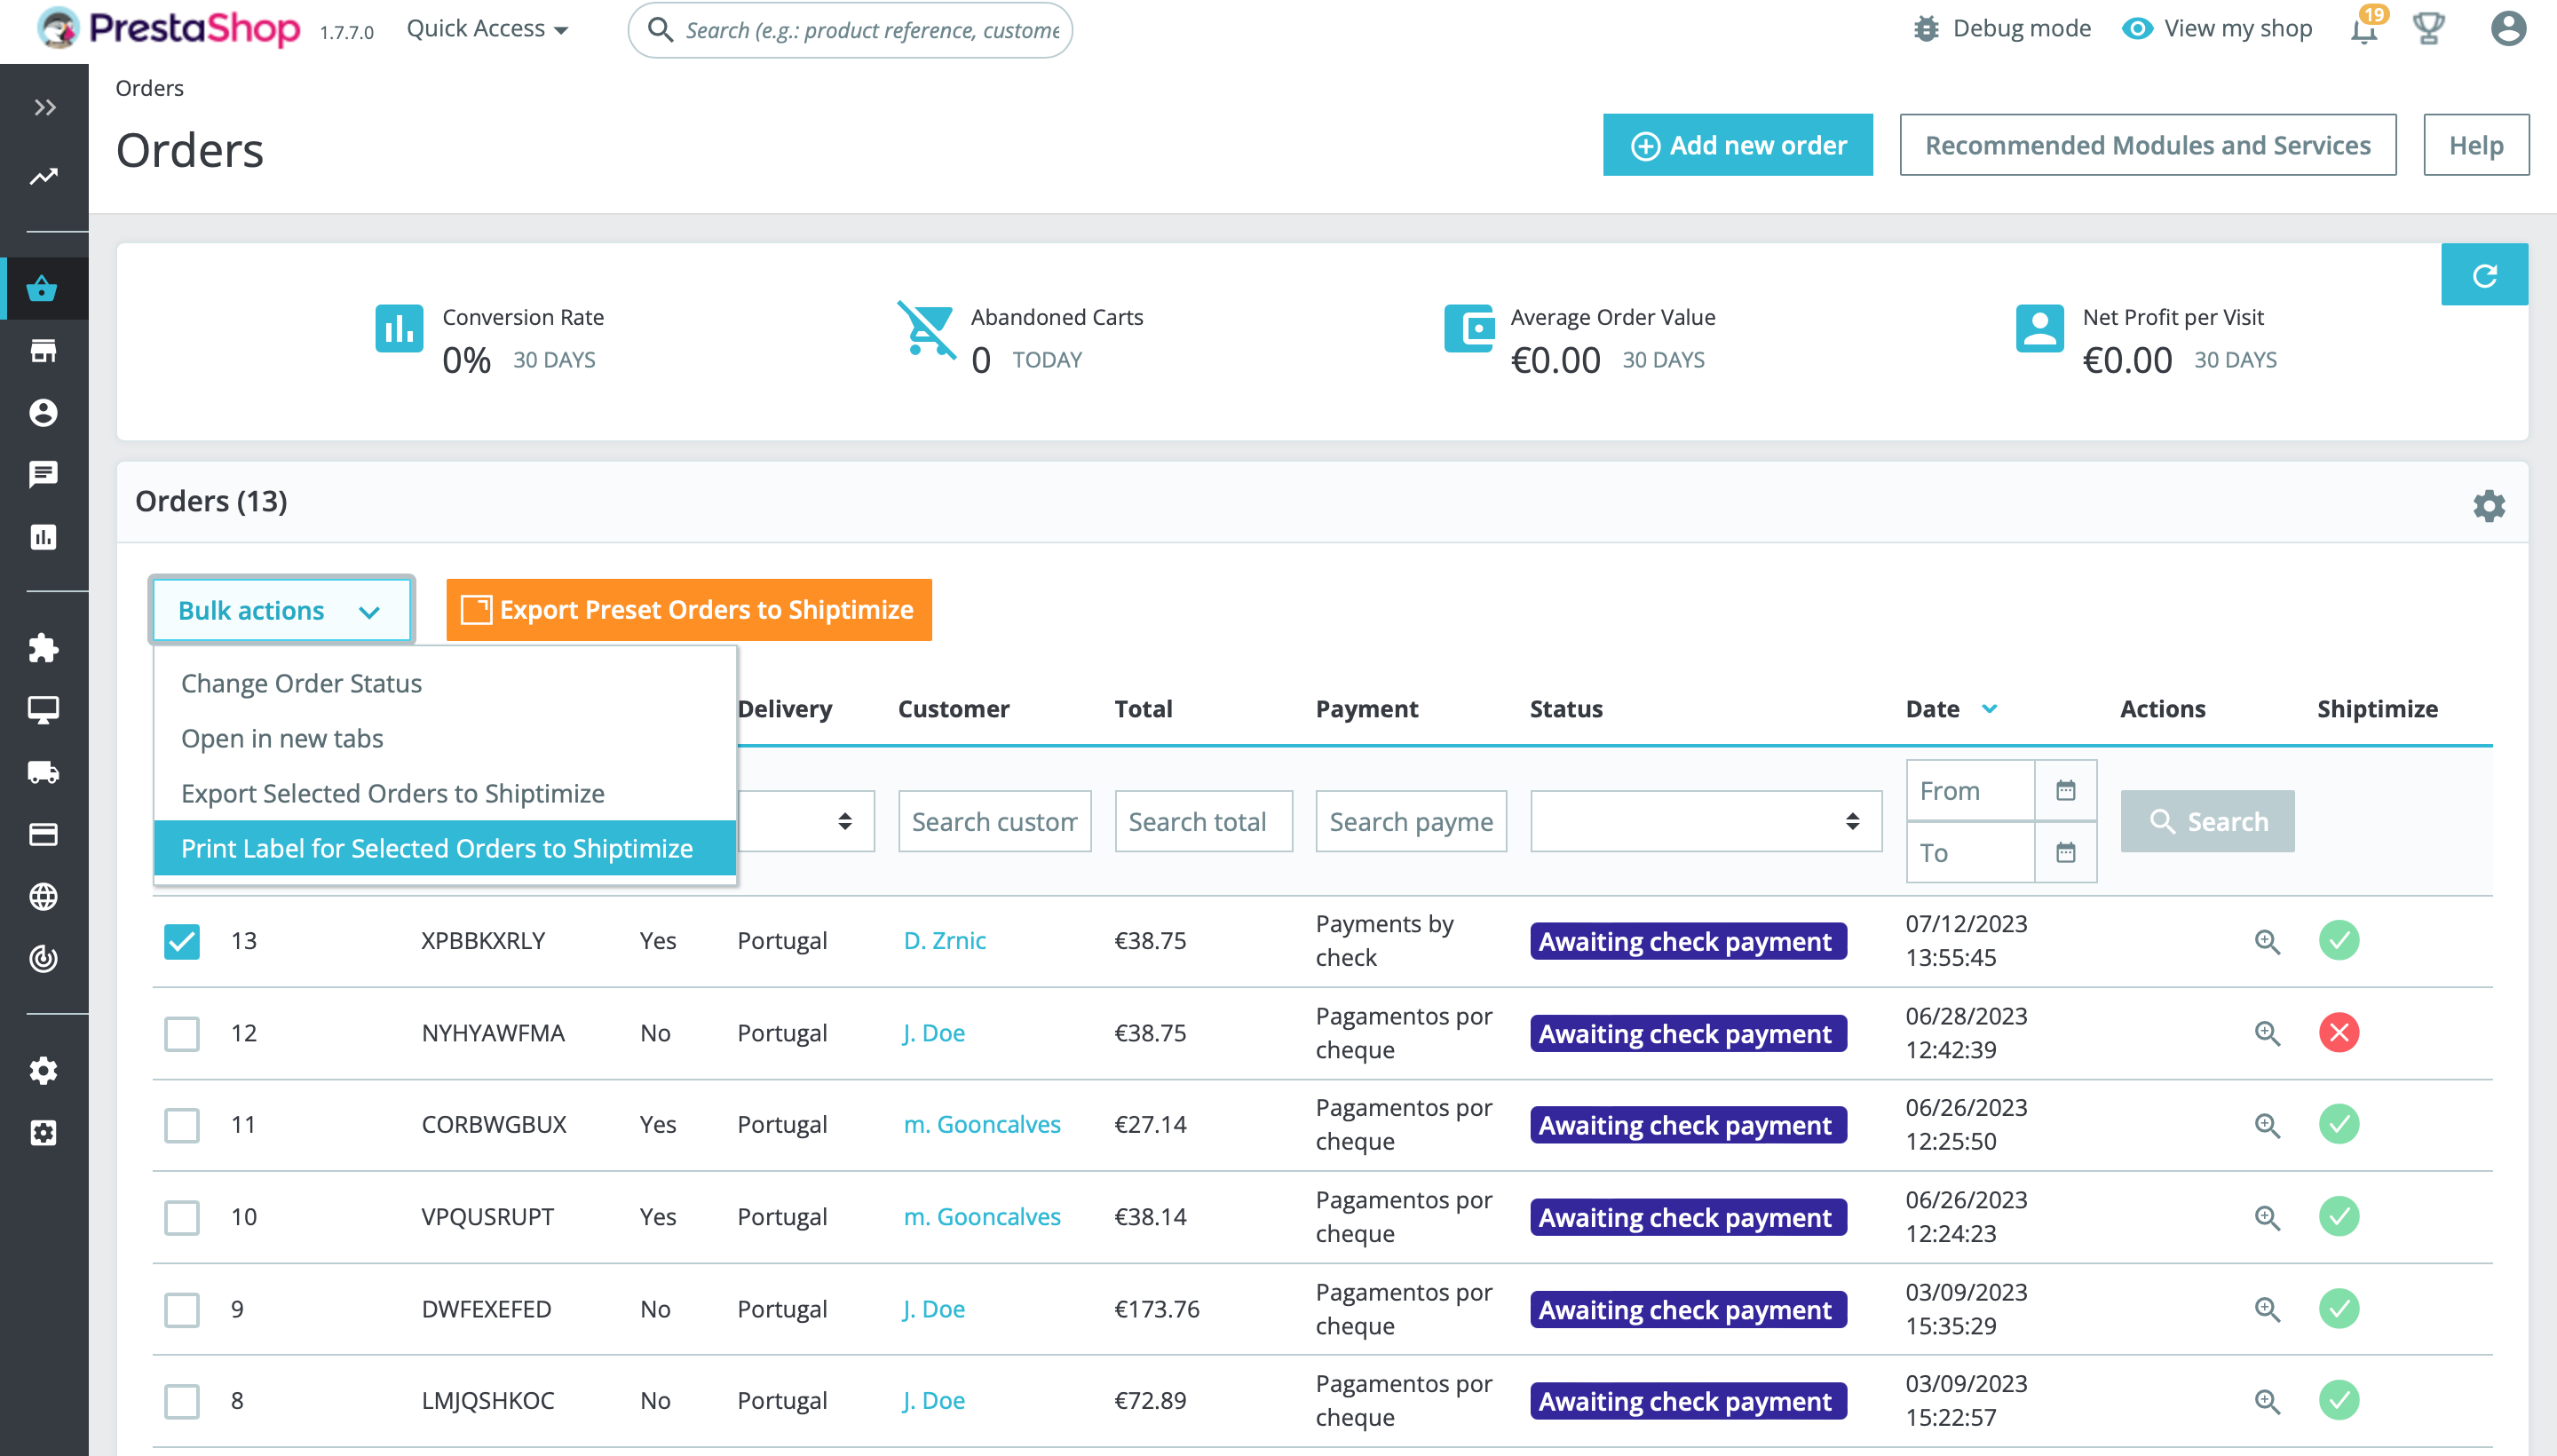
- Print Label via Order overview
You can request labels from the order grid by selecting the orders you want to print labels for. Simply go to ‘Orders’ and select the orders you want to print labels for. Click on ‘Bulk Actions > ‘Print Label for select orders to Shiptimize’.
All items in the order will be fulfilled.
As soon as you click the ‘Print Label’ button the following happens:
- The order is being exported to the Shiptimize Platform from where a label request is being done. If the submission is successful a shipping label is send back to Prestashop.
b. In case the order cannot be exported an error message with additional information as to why the export was unsuccessful is returned. The message can be checked by moving your mouse to the red error icon.
- In case the order was previously exported, but not label is associated with it, the order data is resent. Any changes to the address are updated.
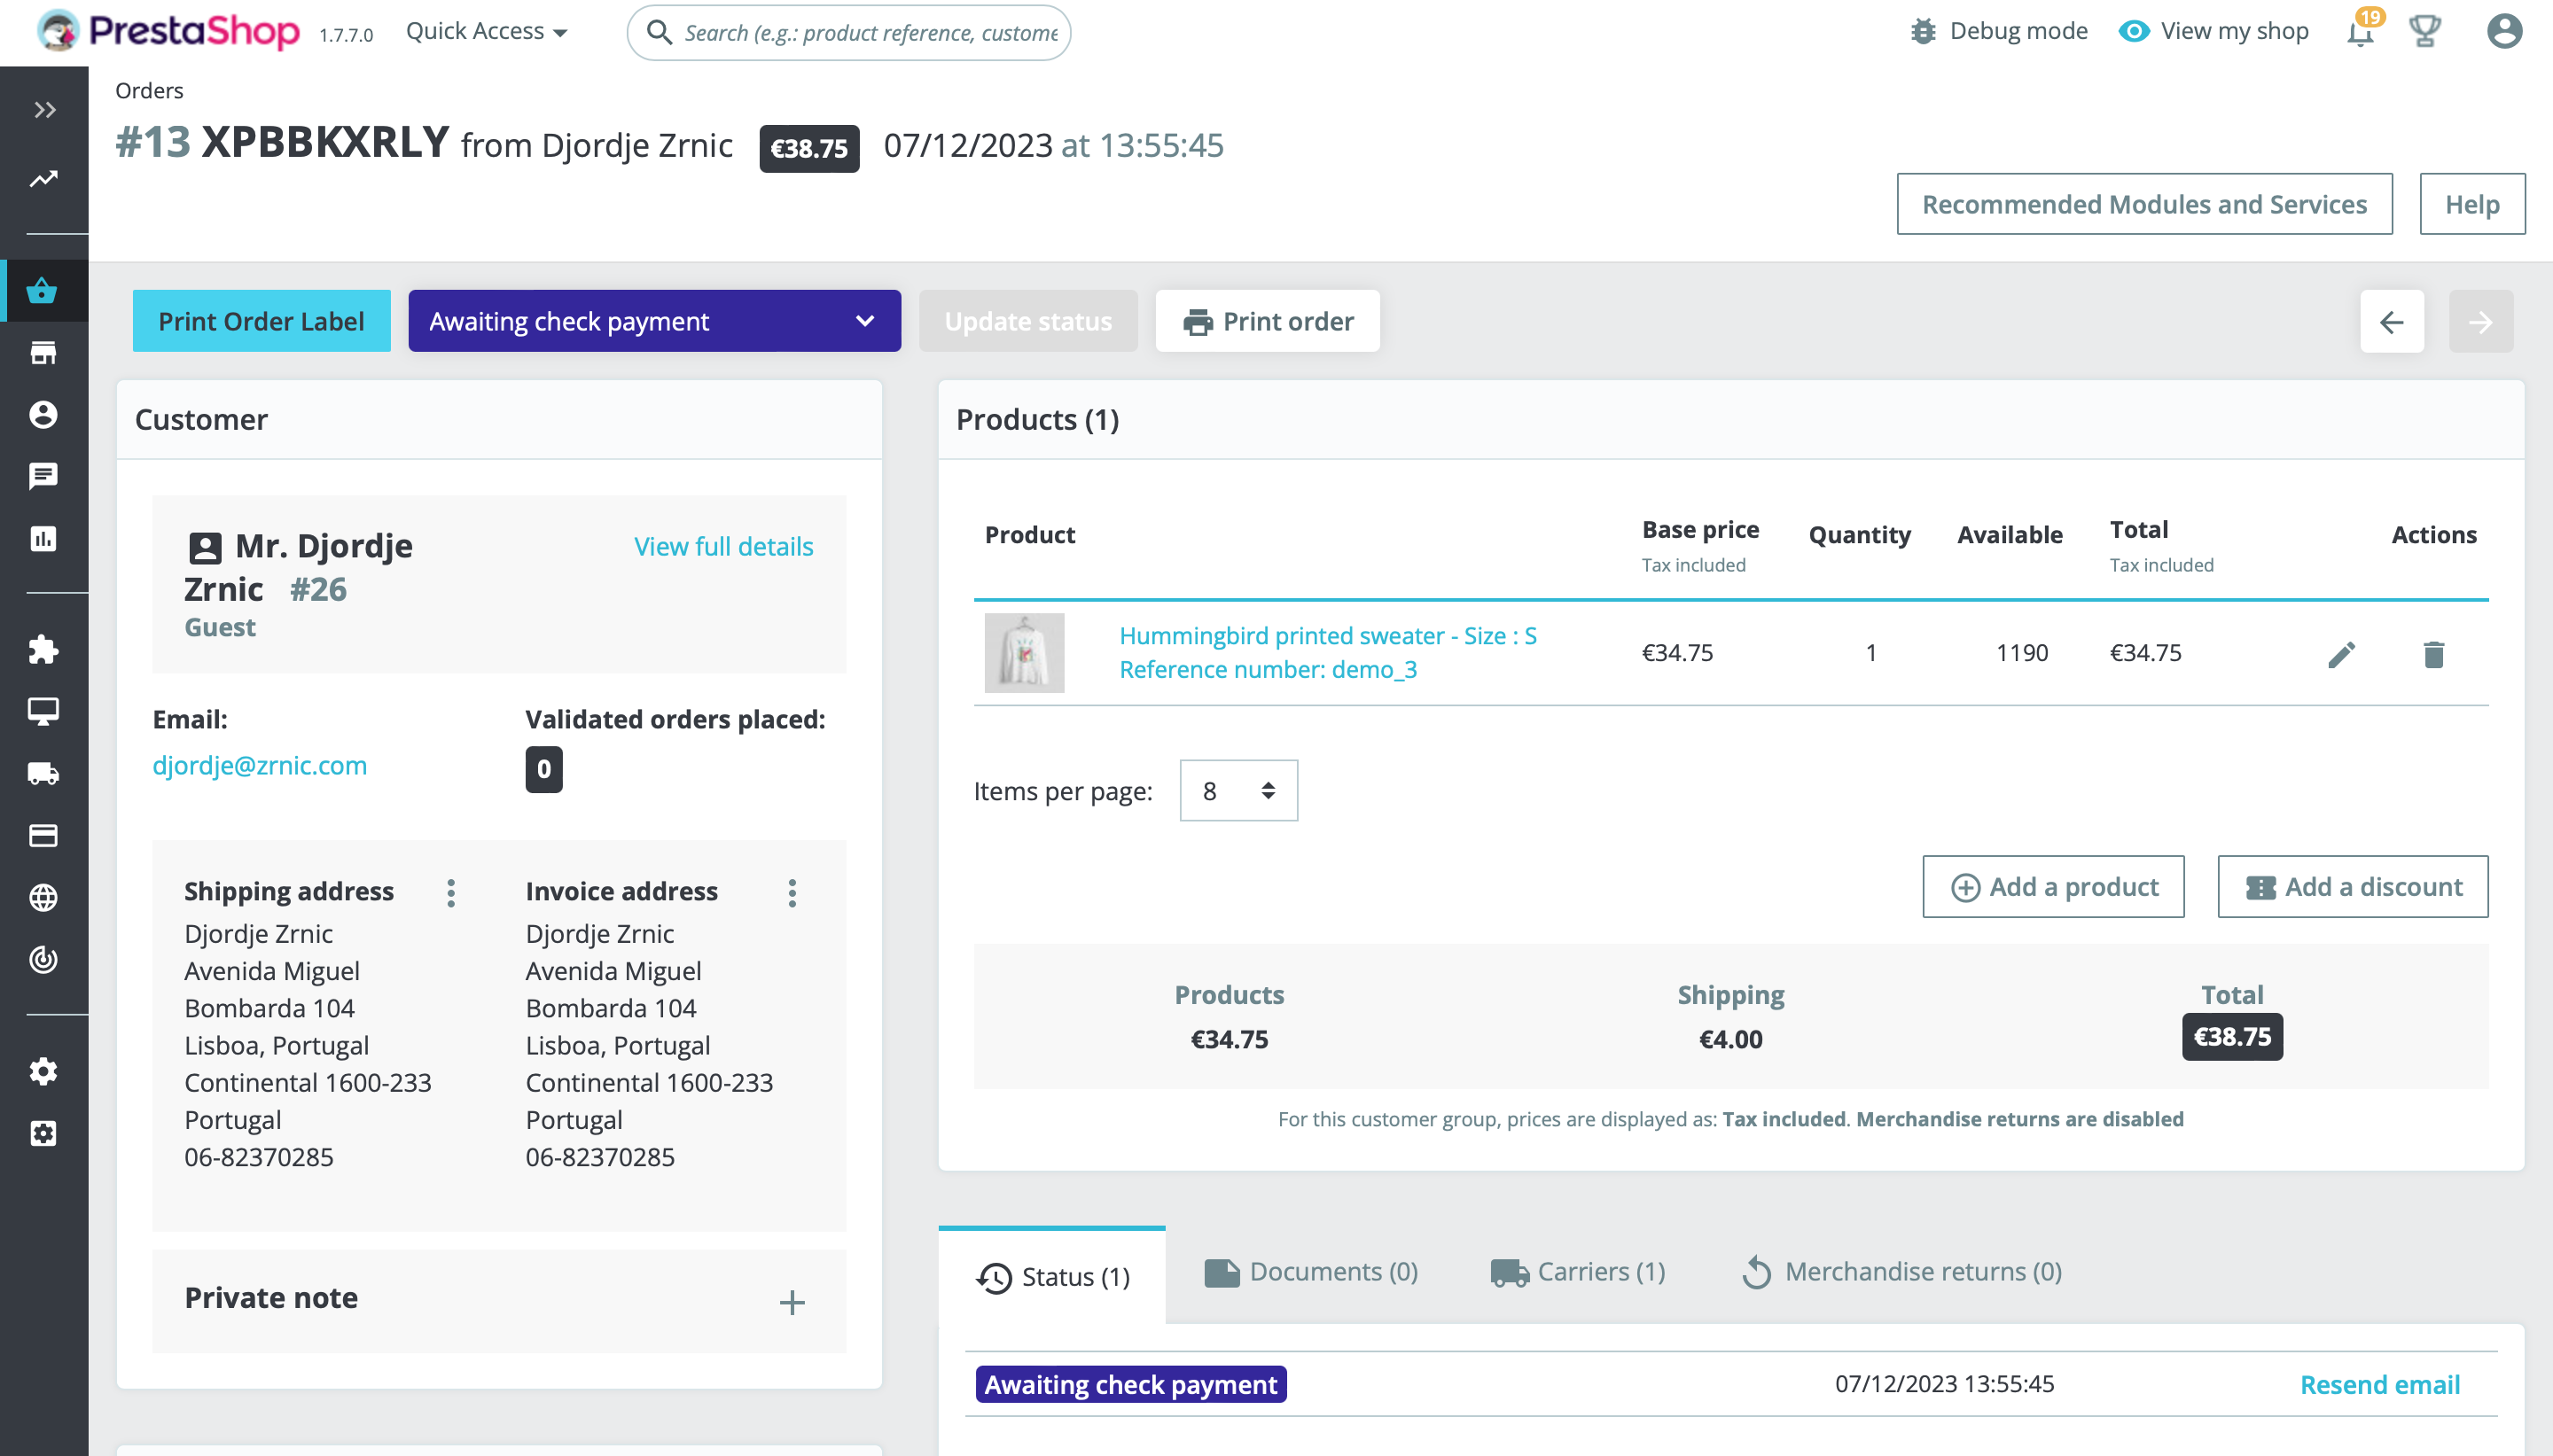
- Print Label – via Order detail.
From the specific order detail page you can click ‘Print Order label’ to get a label fulfilling only the items in the shipment.
This shipment will display in the Shiptimize platform with order reference number.
Carriers update in Prestashop
In case new carriers are activated after you have installed and configured your PrestaShop shop, and if you want to add these new carriers to your PrestaShop shop, you must go to Shipping > Shiptimize and click save.
Every time you do so, the plugin will ask the application which carriers are active and update the plugin settings.