Oscommerce quick guide
Installation
Go to Oscommerce Marketplace and search for “Shiptimize” click download to get the installation file.

Next you should unzip the file “Shiptimize.zip” and copy the files to your server using FTP.
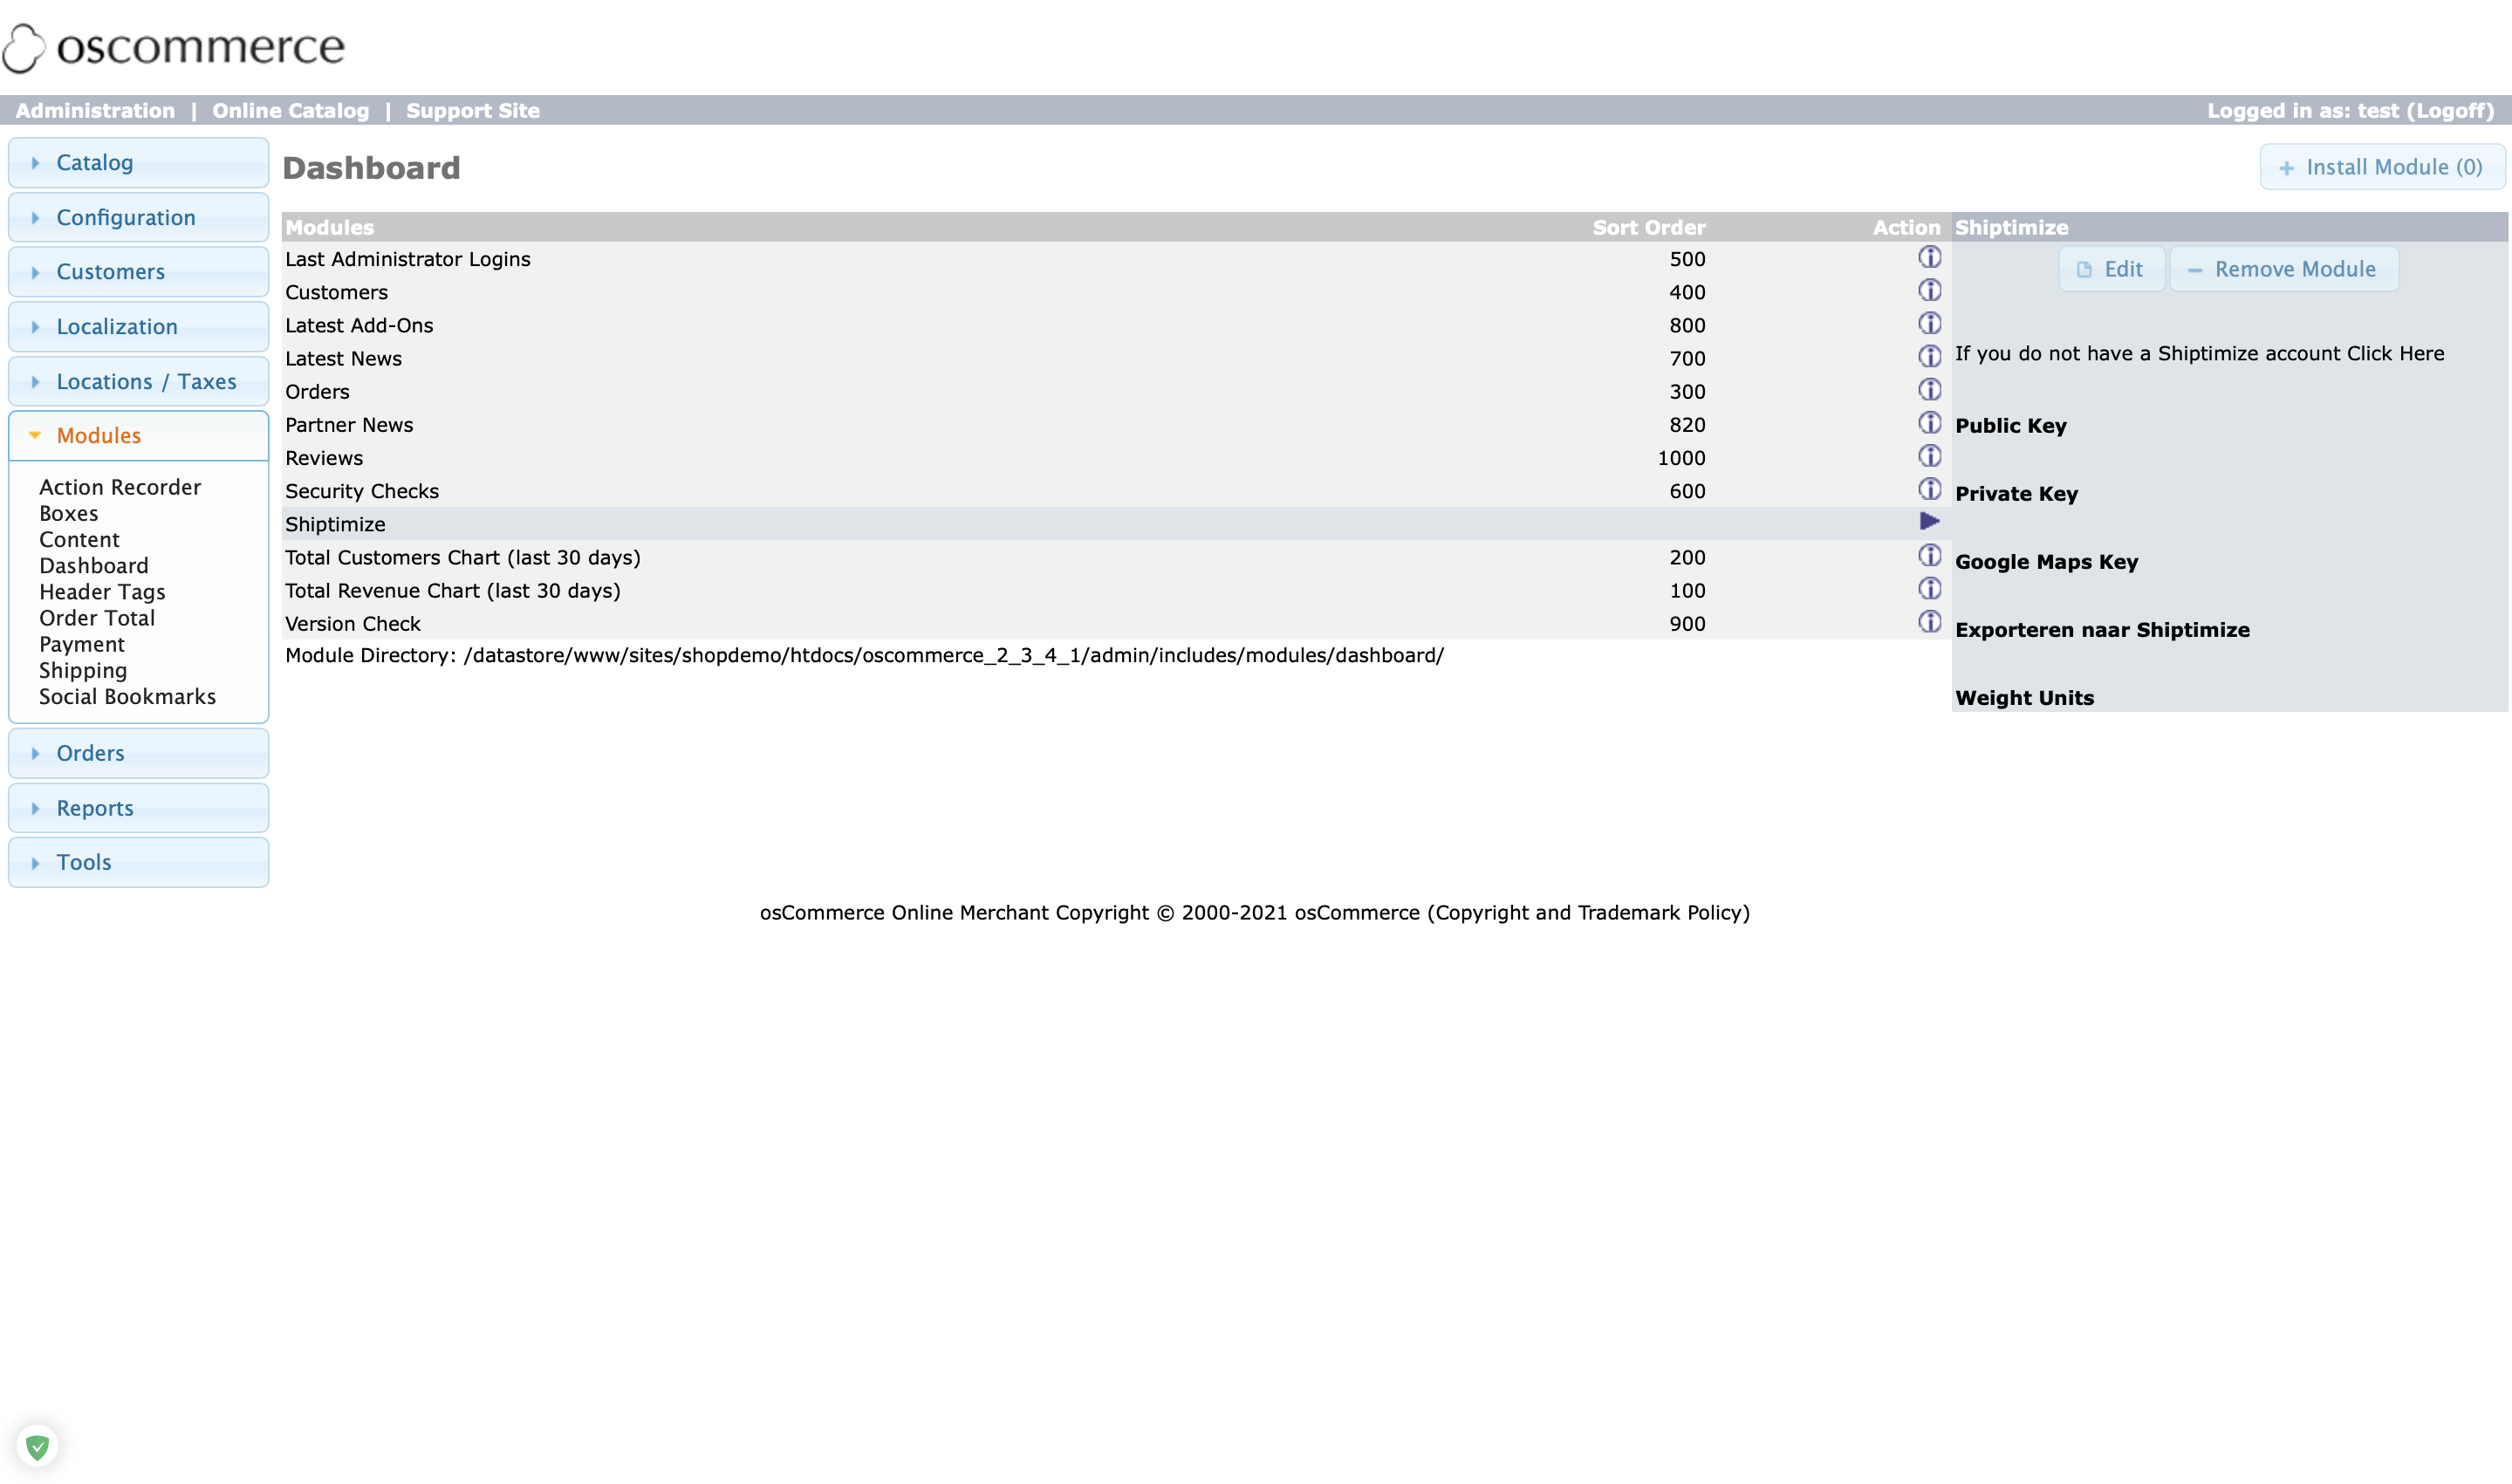
After uploading the files go to Modules > Dashboard > Shiptimize Module and install the respective module.
Configuration
If you do not have a Shiptimize account, click to request an account. Fill in your details and our team will contact you.
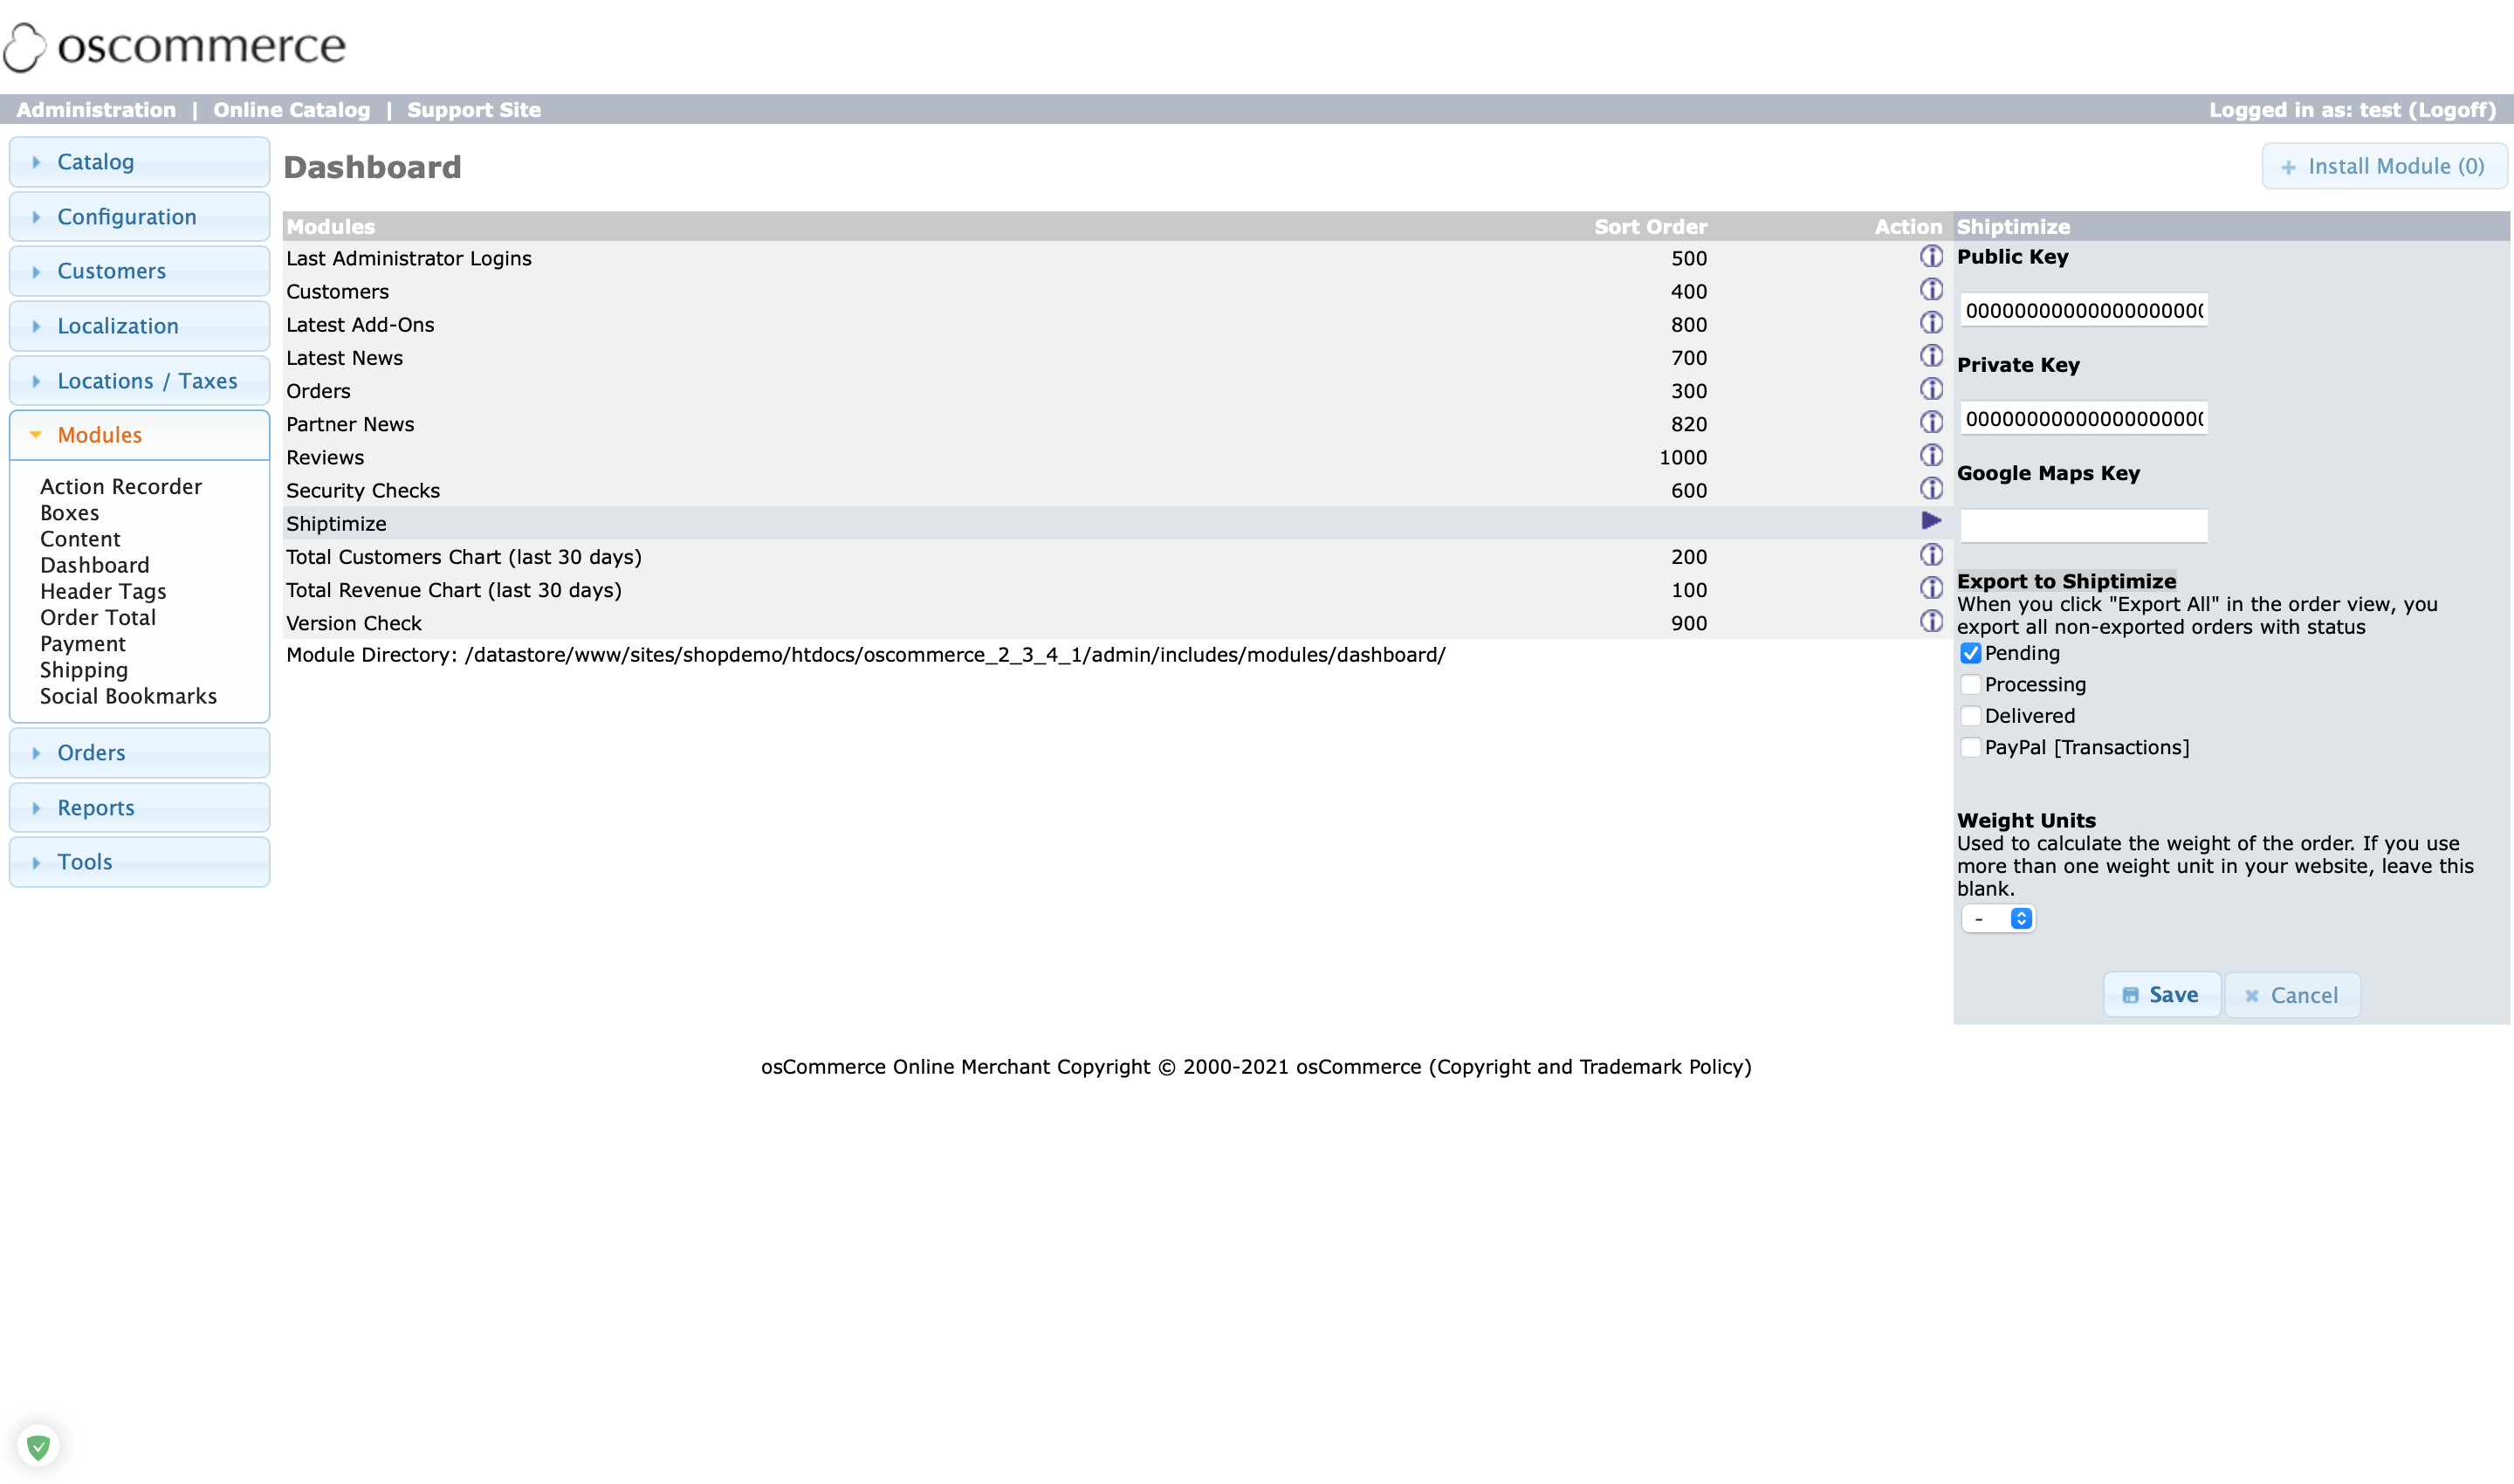
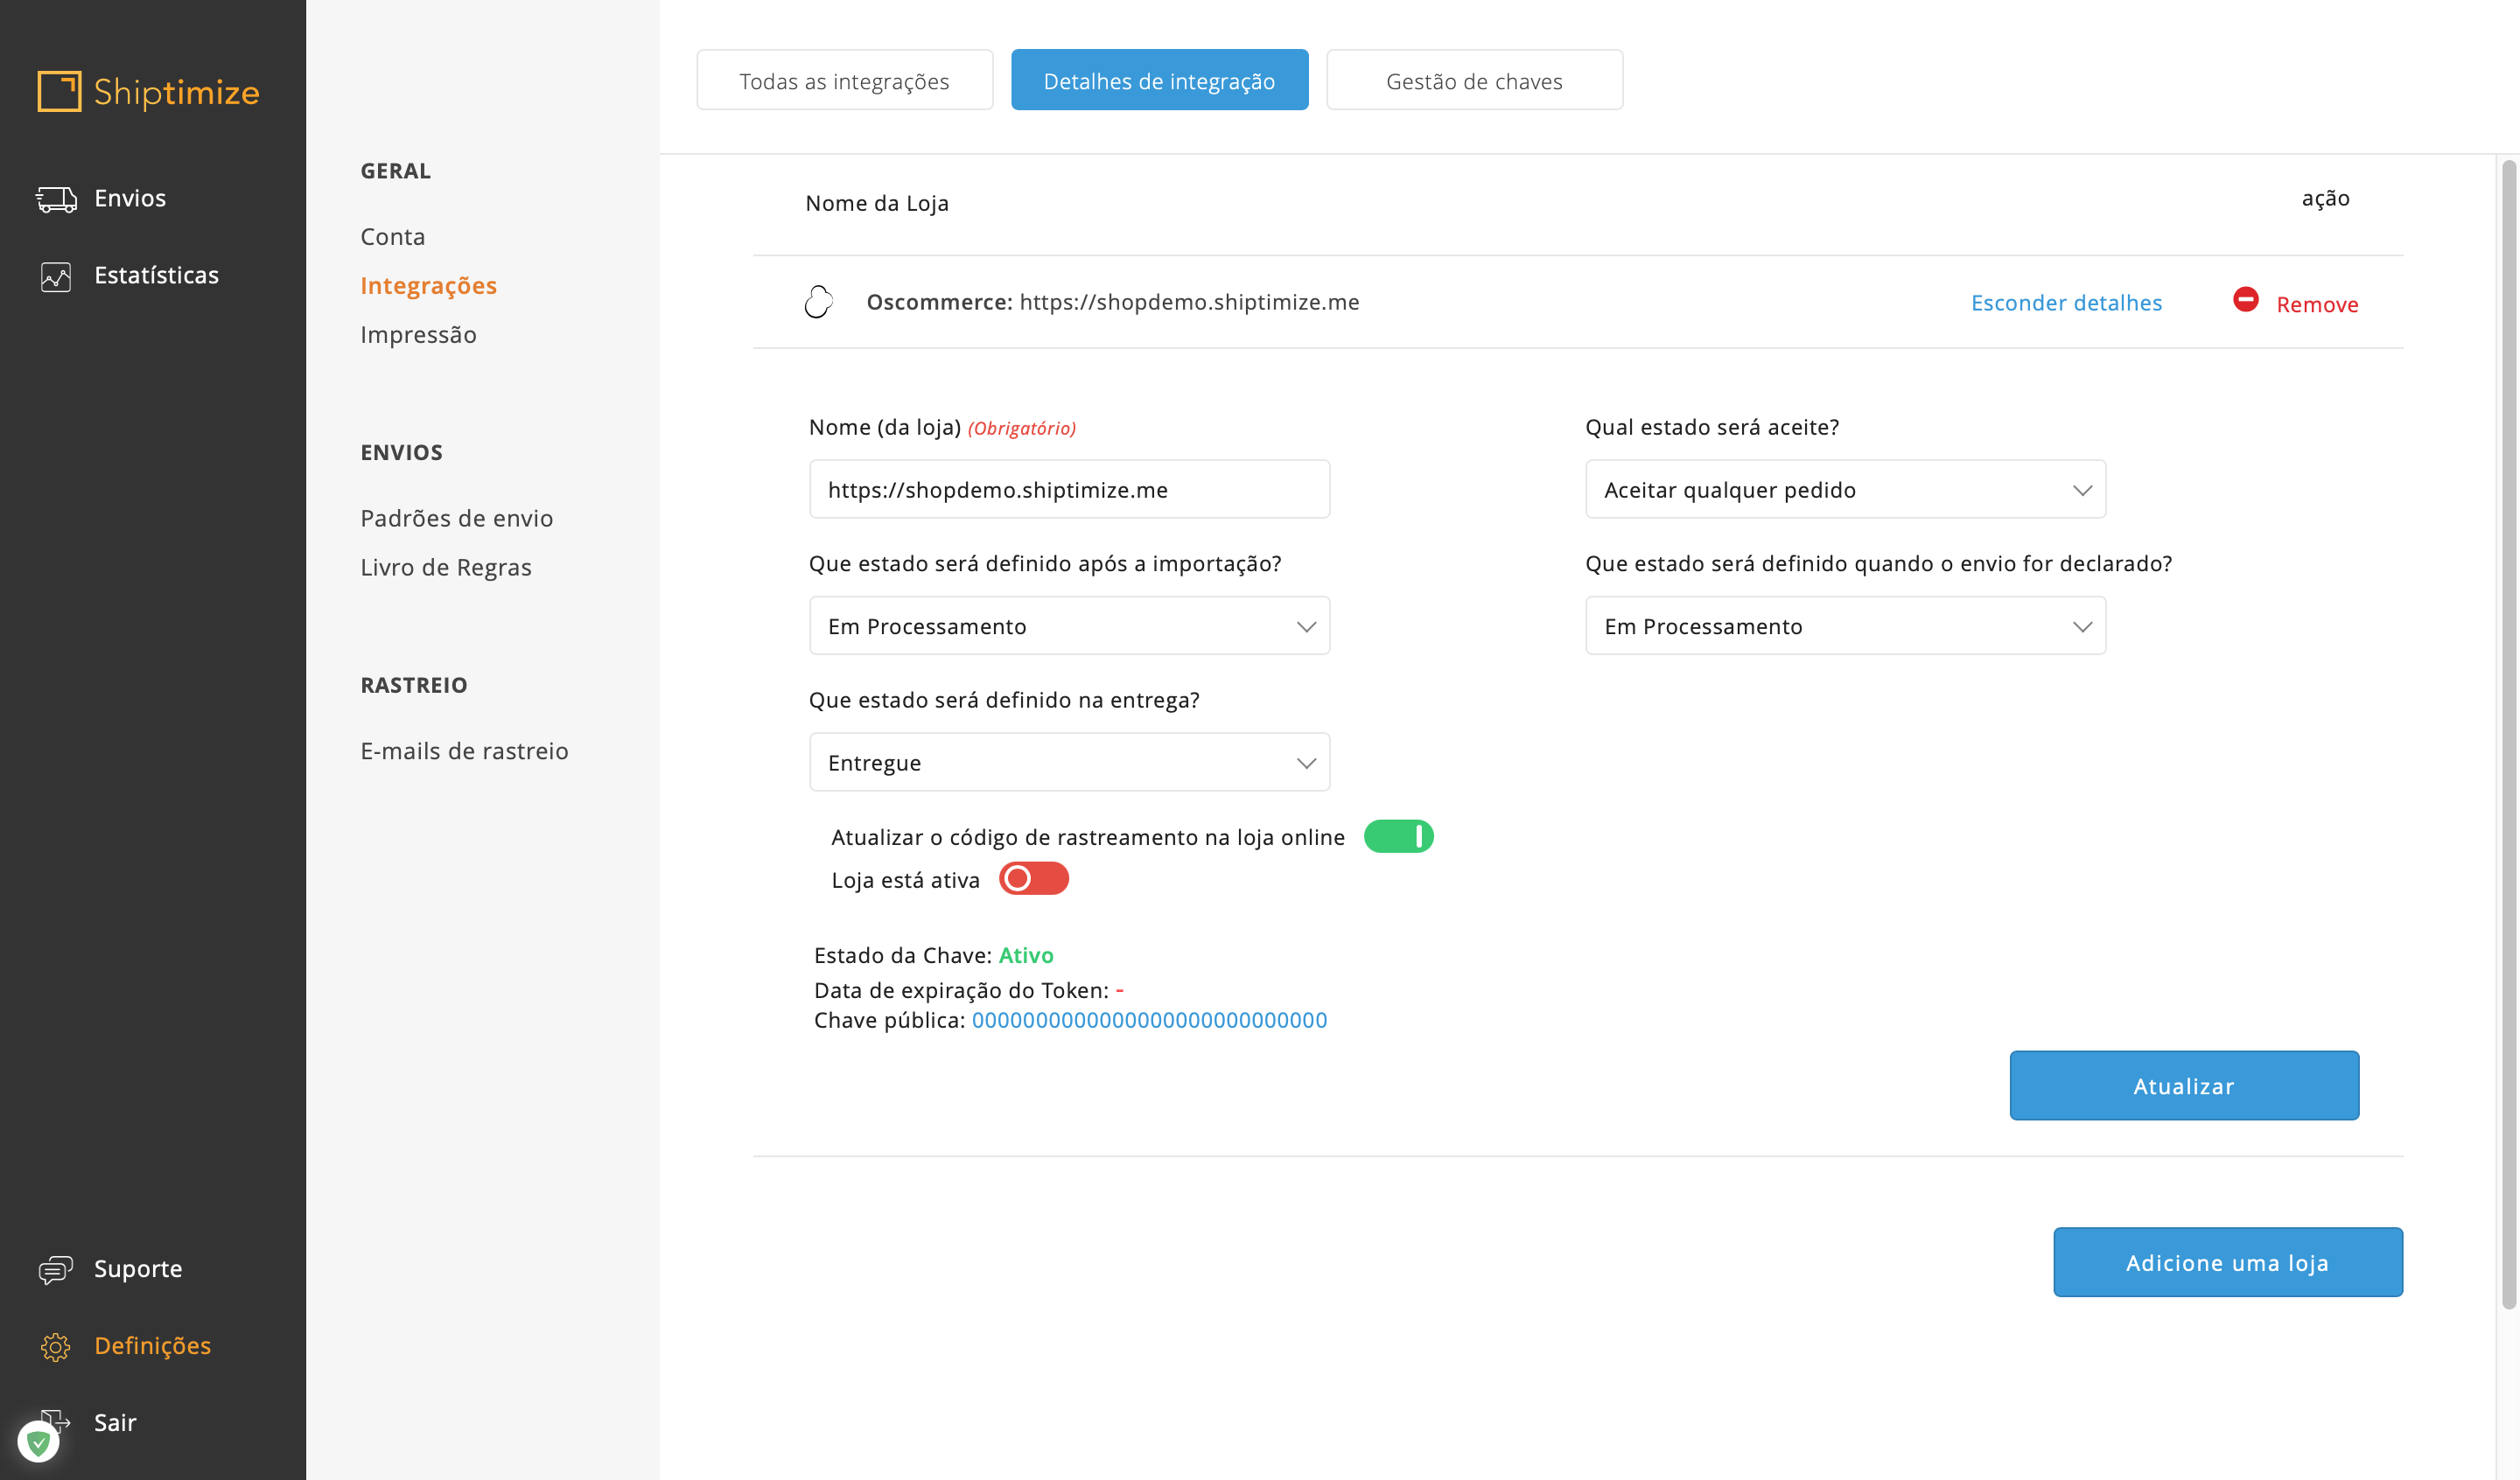
Log in to your Shiptimize account and create a public and private key in Settings > Integrations > Key Management, after creation you should copy the public and private keys in the Plugin settings in Oscommerce.
Select under “Export” which order status types are used for shipments that are ready to be shipped.
Click on “Save”. By entering valid keys, the plugin will create new shipping methods for each carrier available in your Shiptimize account.
Note: Each installation must have one set of keys. If you have more than one shop, please generate a key pair for each shop.
Carrier Configuration
To configure the carriers you must go to Modules > Shipping and select the method you want, after finding the shipping method, you can install or edit it.
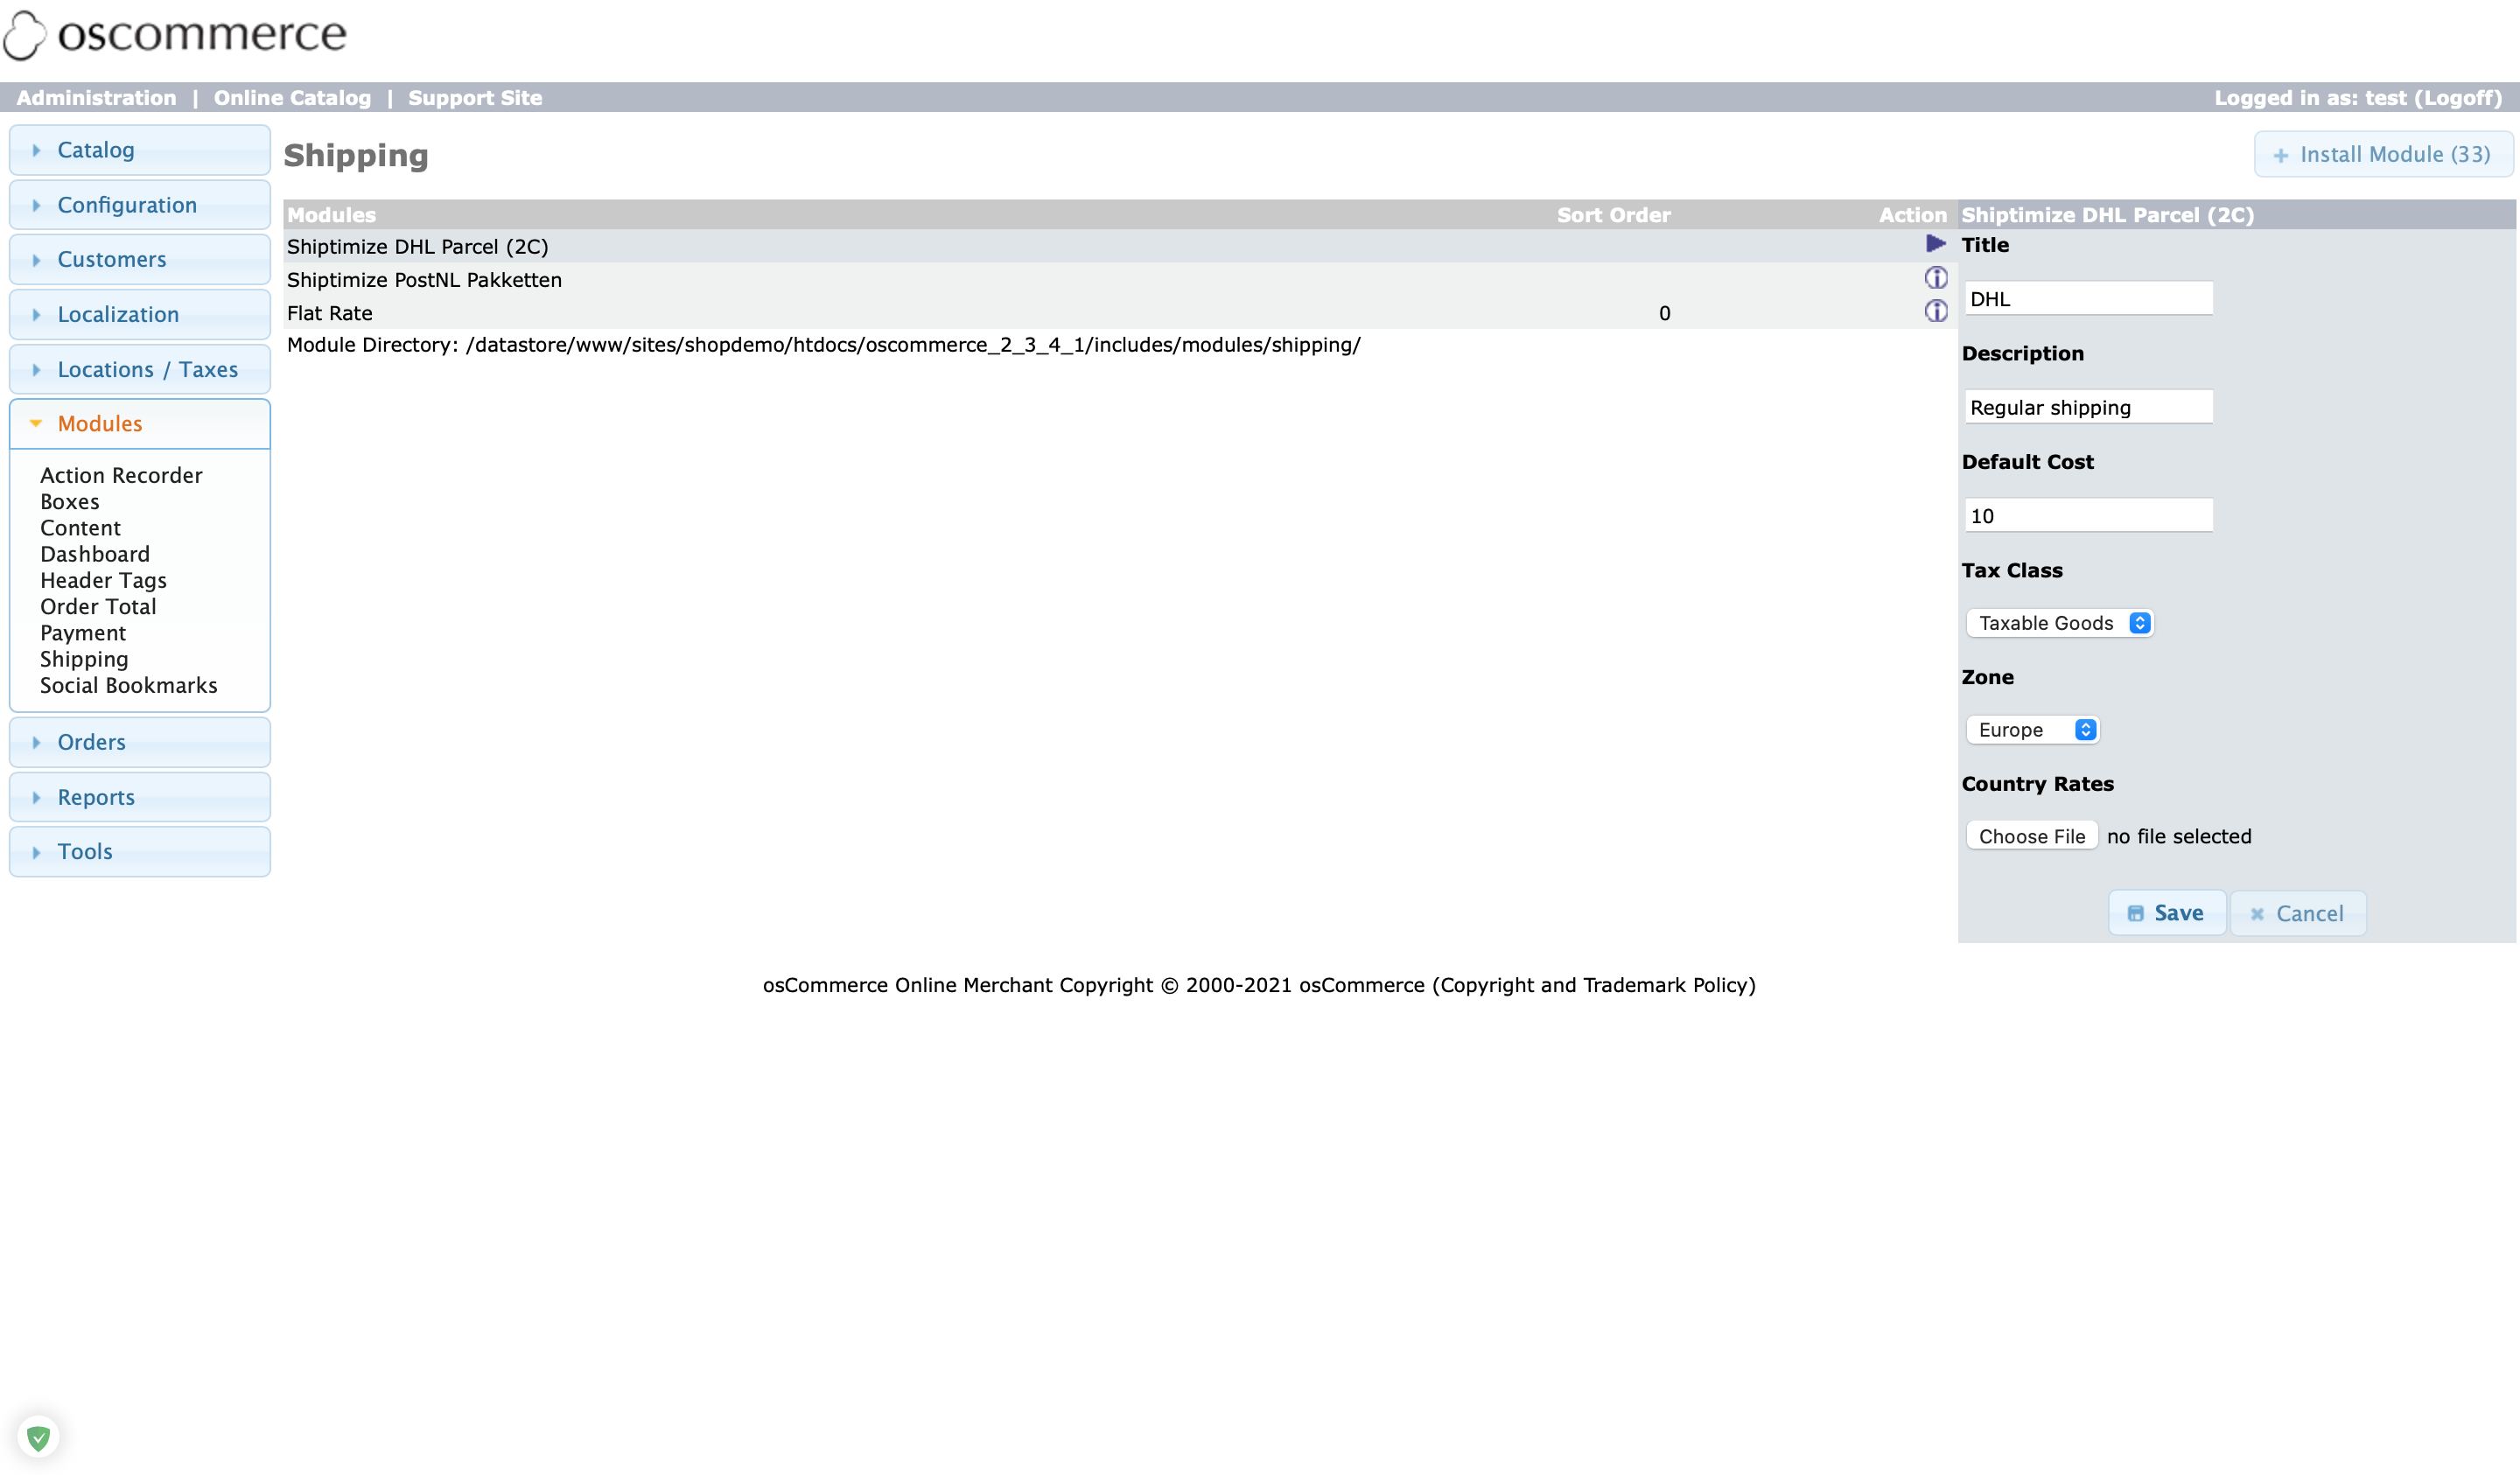
You should configure which value will be shown at checkout to your customers as well as other settings such as:
Title: The name that will be shown to your customer
Description: The description that will be shown to your customer
Default Cost: A number, how much you want to charge your customer for this method by default
Tax Class: If this method is taxable
Zone: In which geographical zones should this method be available
Country Rates: If you want to charge different rates for different countries where you can upload a csv.
The first column should contain the country in ISO2 or ISO3 format and the second column should contain the price you want to charge your customer for shipping to that country. The first row of the file is meant to contain the column names and is therefore ignored.
Automatic updates between Shiptimize and Oscommerce
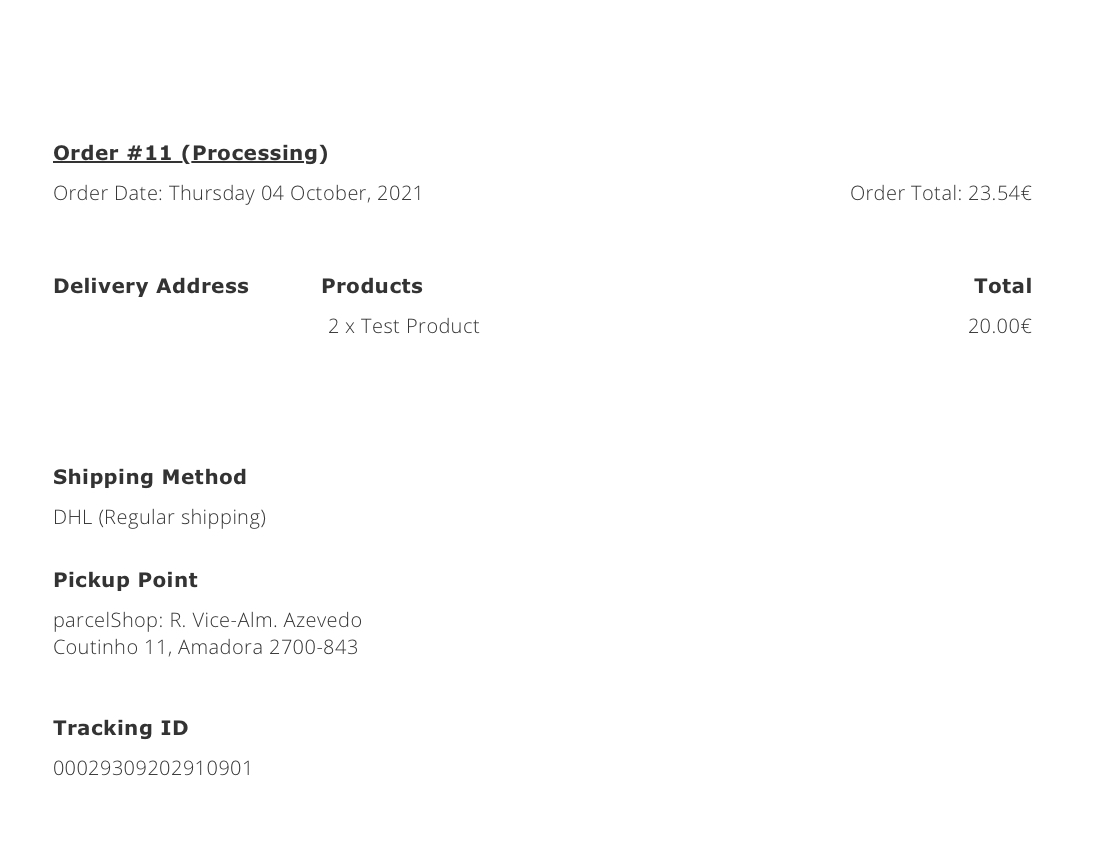
As soon as a shipping label is created, a tracking number is automatically generated. This tracking number is automatically updated in your Oscommerce shop and associated with the correct order.
Additionally, from your Shiptimize account under Settings > Integrations > Integration Details you can set at what time(s) the order statuses in your OsCommerce backend should be updated.
You can select to update when:
- An order is imported;
- A shipping label was printed;
- The Shipment has been delivered;
Checkout for customers including pick-up points
After installation and configuration according to the steps provided above, all enabled carriers are offered as shipping options to your customer at checkout. If a carrier provides a delivery service to a delivery point, a button will be added to the checkout, allowing the user to select their preferred location.
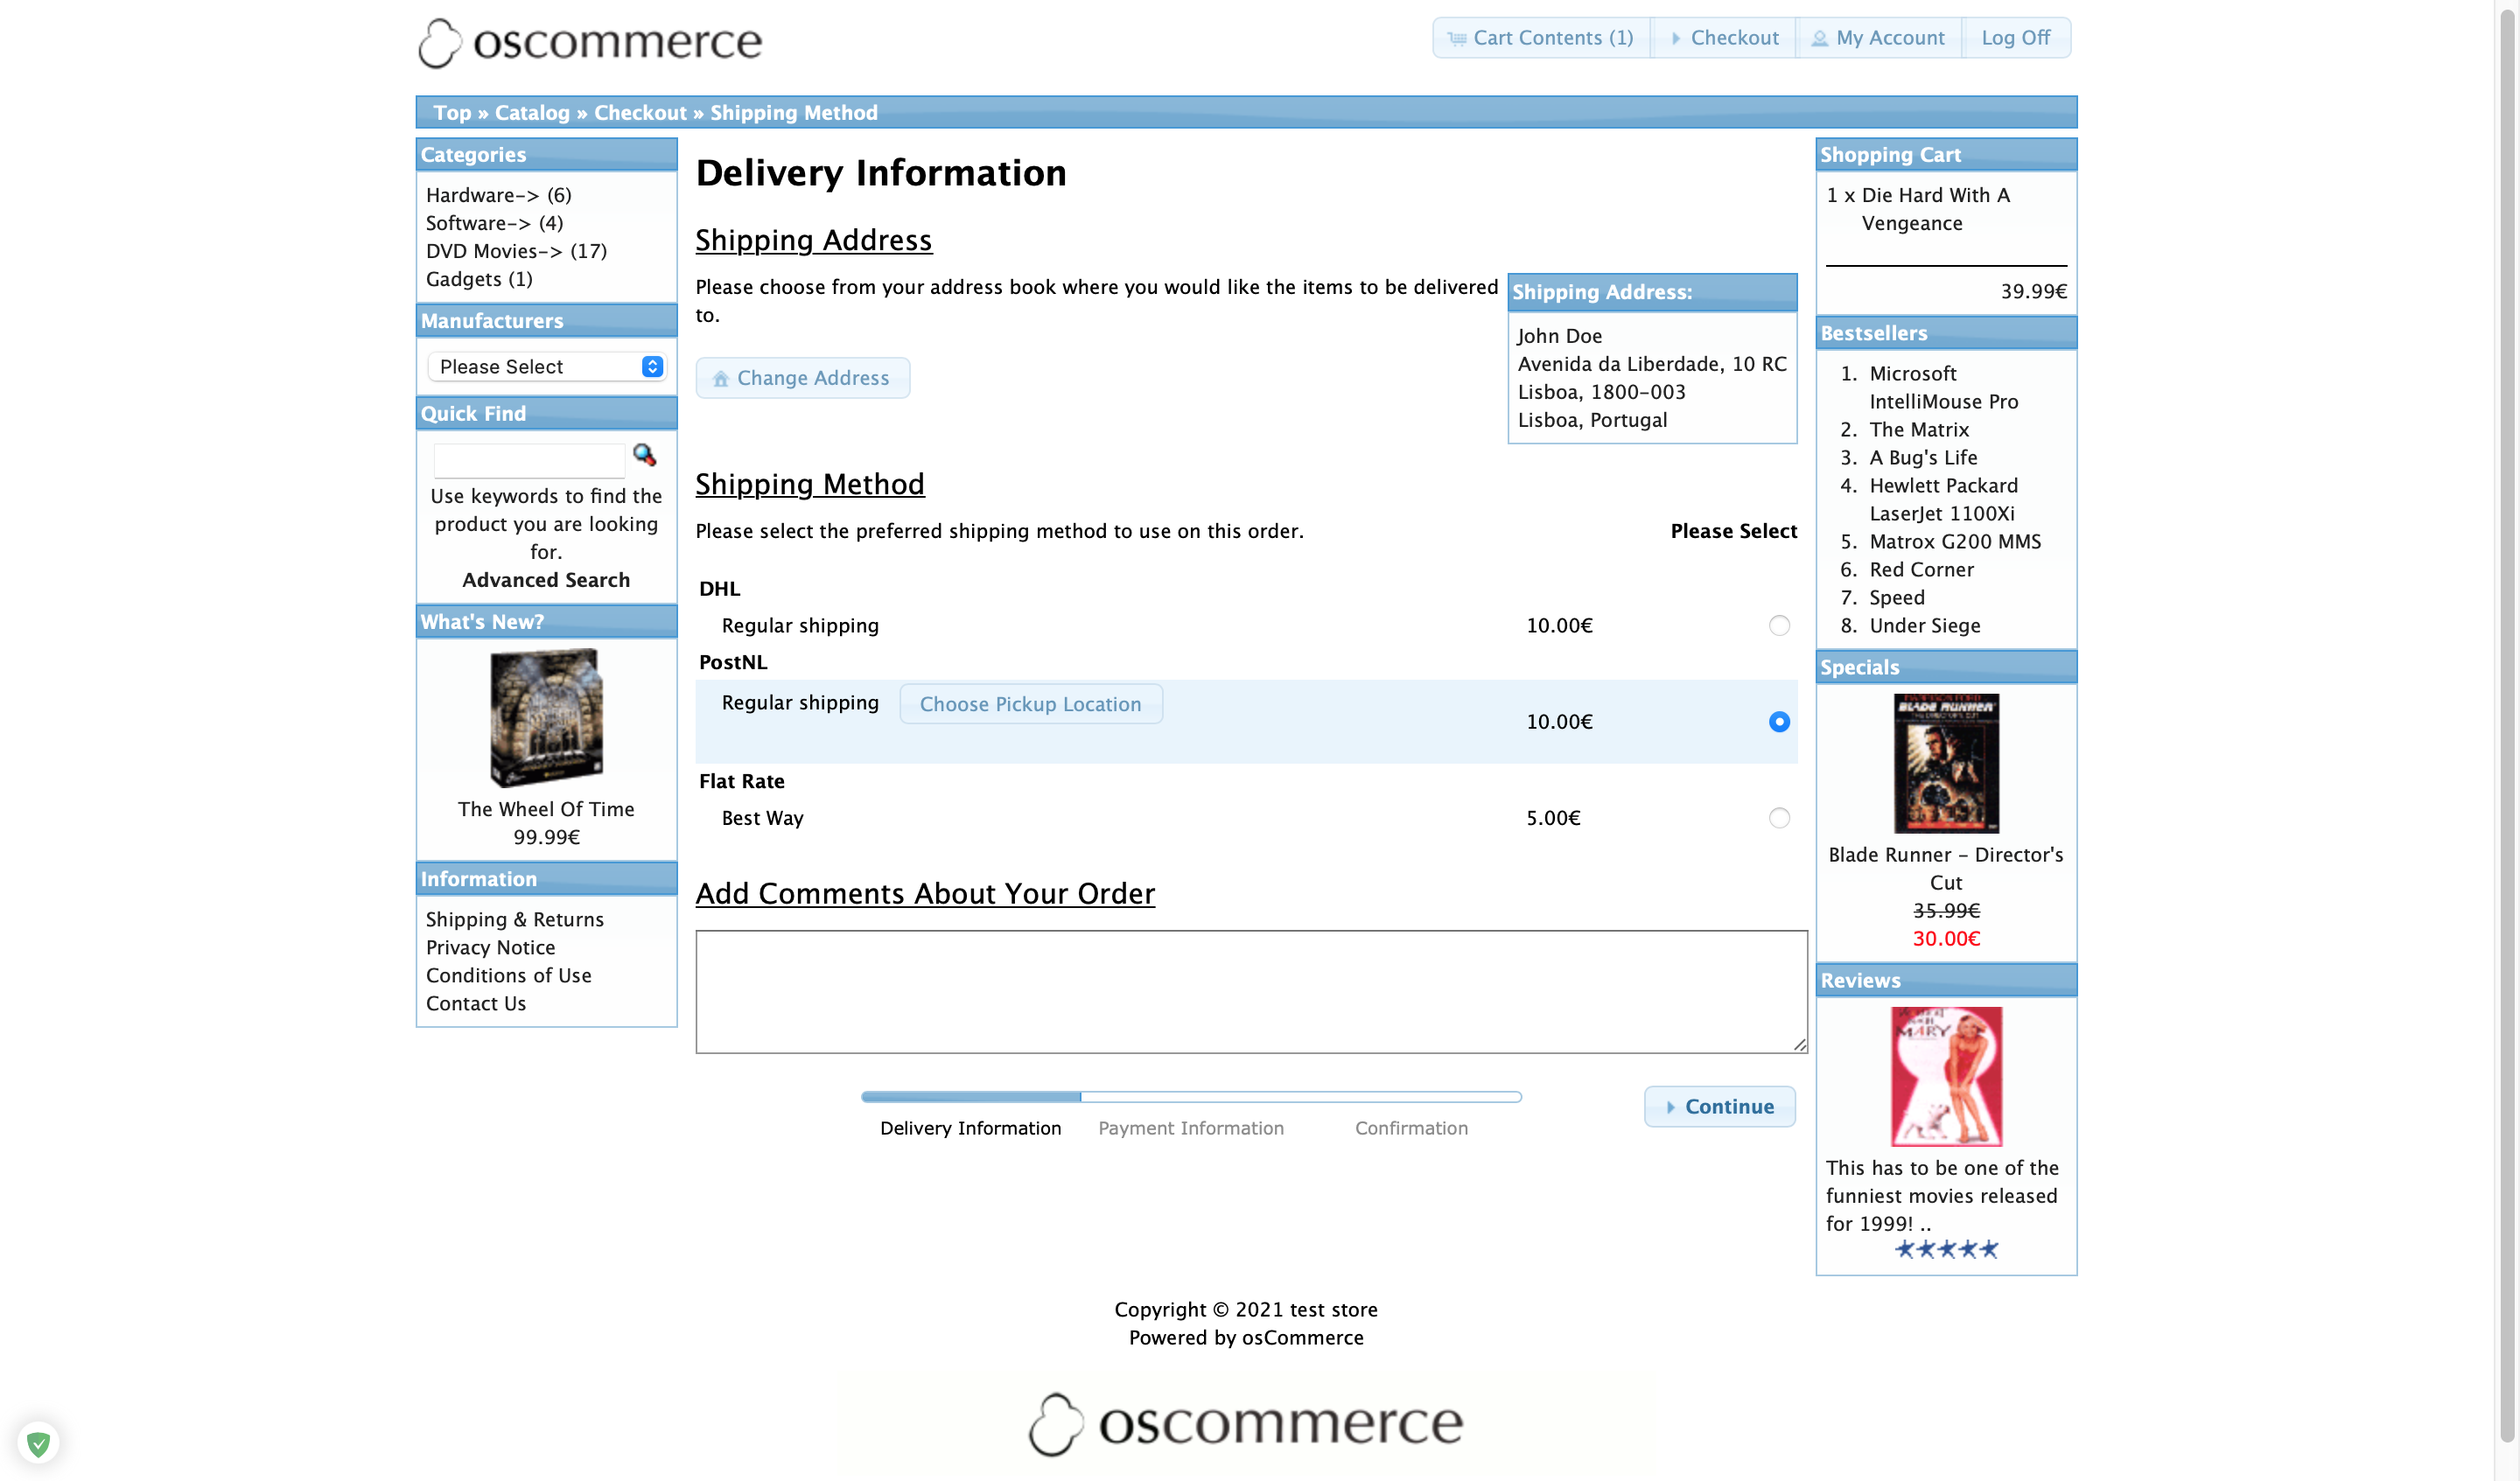
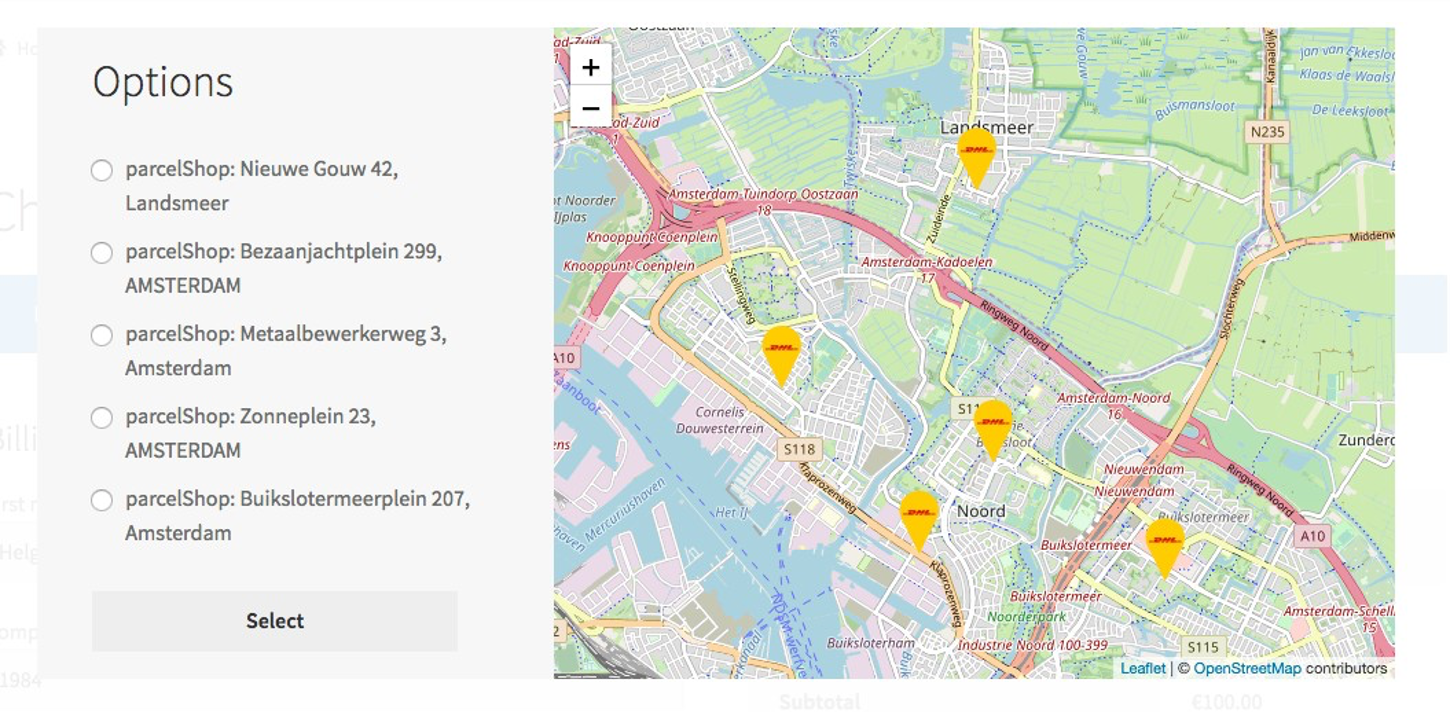
Once your customer clicks on “Choose Pickup location”, we will show a Google Maps map in case you have entered a Google Maps key in the plugin configuration.
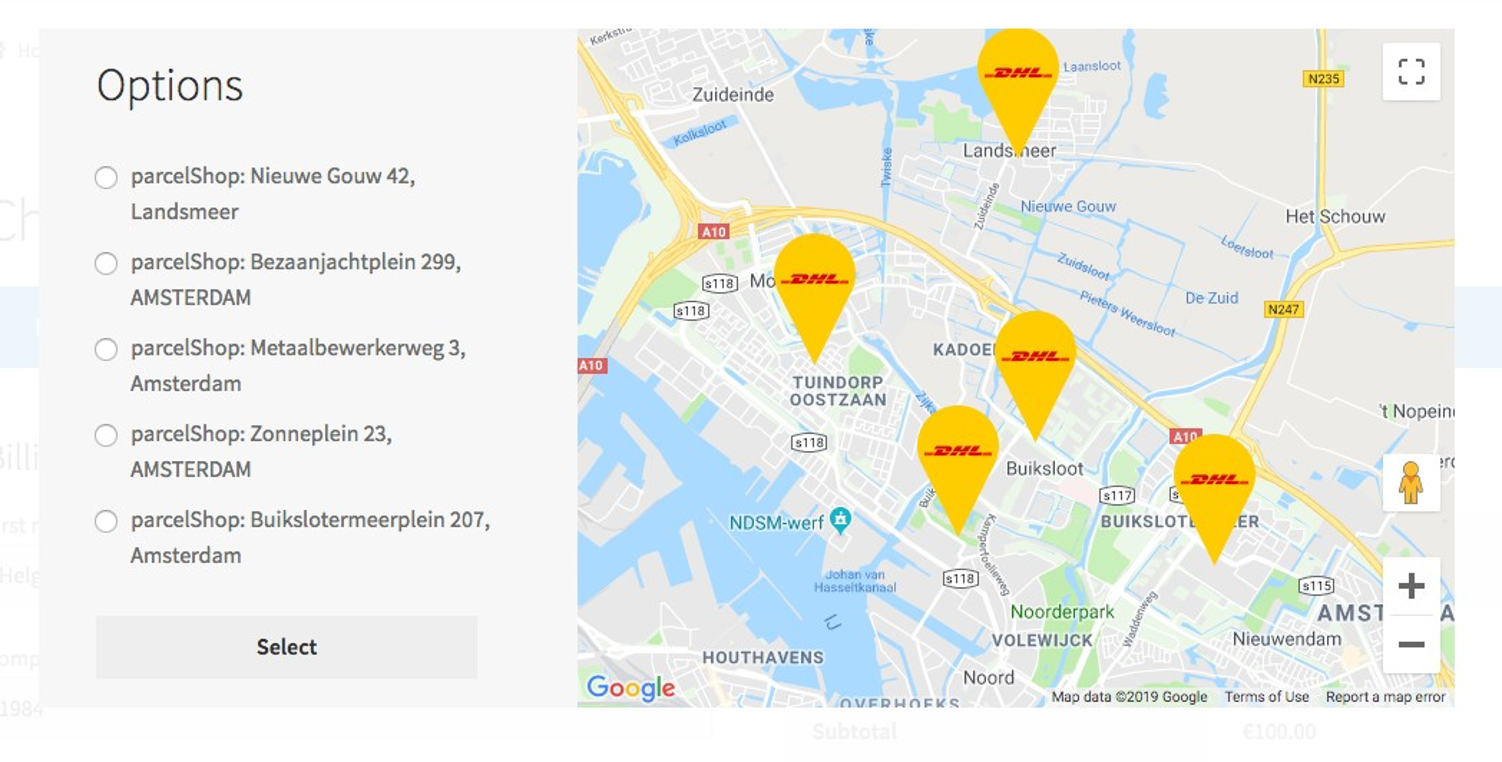
If not, an OpenStreetMap will be made available including the nearest pick-up points.
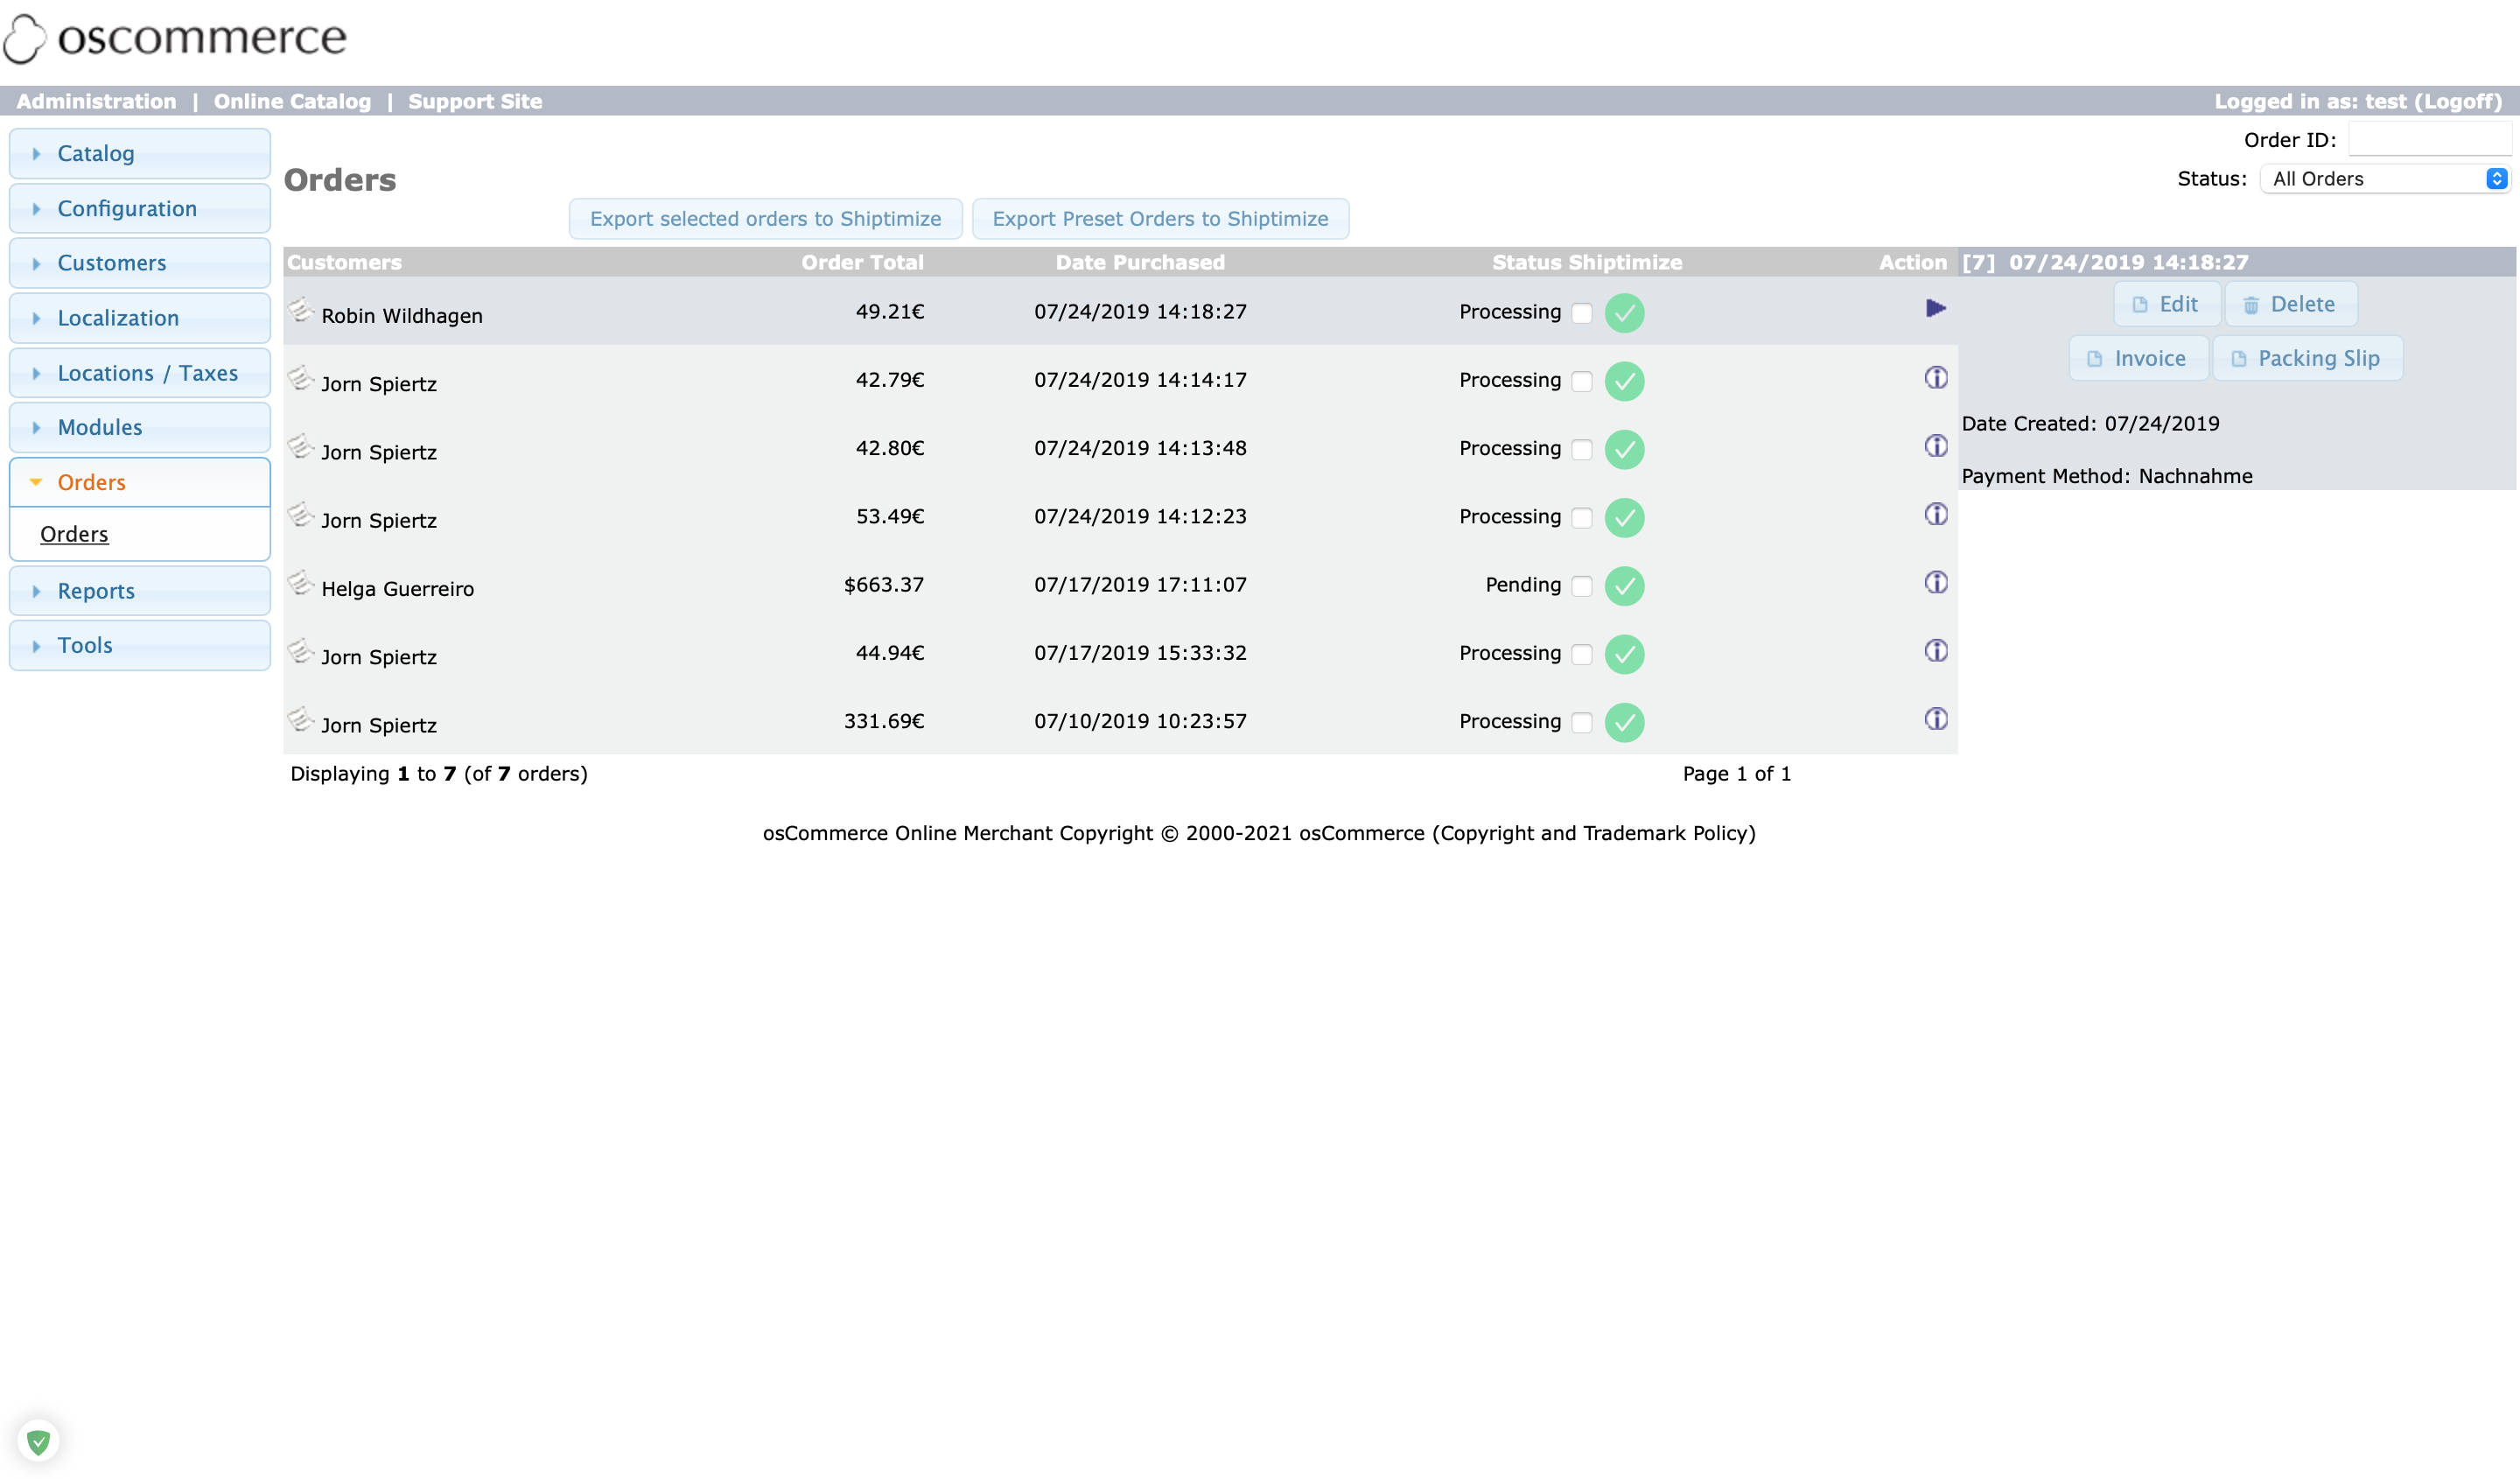
Order export
In case you want to export orders to create shipping labels, we offer two options to do so:
Export preset order statuses: Click this option to export all orders that have not been exported before and have an order status that you have configured in your Plugin settings after “Export all”;
Export selected orders: Click this option to send any selected order, regardless of status, to your shipping dashboard. This allows you to re-export orders if you delete them in the platform. If you try to re-export an order already on the platform, it will be rejected based on an existing order number.
Carriers update in the plugin
If at any time you want to add more carriers to your contract. Ask your contact in Shiptimize or through Support to let you know when they are active in the app.
Then go to configuration and save the settings. Every time you do this, the plugin will ask the app what information is there and update the plugin cache.